Home>Garden Essentials>How Deep To Plant Cauliflower Seeds
Garden Essentials
How Deep To Plant Cauliflower Seeds
Modified: August 20, 2024
Learn the proper planting depth for cauliflower seeds in your garden for successful growth and harvest.
(Many of the links in this article redirect to a specific reviewed product. Your purchase of these products through affiliate links helps to generate commission for Storables.com, at no extra cost. Learn more)
Introduction
When it comes to planting cauliflower seeds, knowing the proper planting depth is crucial for successful growth and development. Planting seeds at the right depth ensures that they receive the necessary nutrients, moisture, and protection needed for germination and healthy plant establishment. Understanding the factors that influence planting depth and following the recommended guidelines can greatly increase the chances of a bountiful cauliflower harvest.
In this article, we will explore the factors to consider before planting cauliflower seeds and delve into the recommended planting depth for optimal results. We will also provide a step-by-step guide to help you properly plant your cauliflower seeds and offer some additional tips to ensure success. Let’s dive in!
Key Takeaways:
- Planting cauliflower seeds at the right depth, approximately ¼ to ½ inch, ensures they get enough moisture and nutrients for healthy growth. Precision is key for successful germination and sturdy seedlings.
- Factors like climate, soil, and spacing are crucial for successful cauliflower growth. Following recommended planting depth and providing proper care can lead to a bountiful harvest of delicious cauliflower.
Read more: How Deep To Plant Coneflower Seeds
Factors to Consider Before Planting Cauliflower Seeds
Before you start planting cauliflower seeds, it’s essential to consider several factors that can significantly impact your plants’ growth and overall success. By taking these factors into account, you can make informed decisions regarding planting depth and create ideal growing conditions for your cauliflower crop. Here are some key factors to consider:
- Climate and Season: Cauliflower is a cool-season crop that thrives in temperatures between 50°F (10°C) and 75°F (24°C). It’s important to choose the right time to plant your seeds based on your climate and the specific variety you’re growing. Start seeds indoors 4-6 weeks before the last frost date for your area or sow them directly in the garden when the soil temperature reaches around 50°F (10°C).
- Soil Conditions: Cauliflower prefers well-draining soil with a pH level between 6.0 and 7.0. Prior to planting, test your soil to ensure it meets these requirements. Amend the soil with organic matter such as compost or aged manure to improve its structure and fertility. This helps provide a favorable environment for seed germination and root development.
- Sunlight: Cauliflower requires at least 6 hours of direct sunlight daily for healthy growth. Ensure that the planting location provides adequate sunlight, as insufficient light can lead to weak and elongated plants.
- Spacing: Proper spacing is crucial for cauliflower plants. Each plant requires enough room to grow and spread its leaves without crowding neighboring plants. It’s recommended to space cauliflower plants approximately 18-24 inches apart in rows that are spaced 24-36 inches apart.
- Companion Planting: Consider planting cauliflower alongside companion plants that can provide benefits such as pest control or shading. Suitable companion plants for cauliflower include celery, onions, peas, and dill. Avoid planting cauliflower near strawberries or other brassicas, as they can interfere with each other’s growth.
By taking these factors into account, you can create an ideal growing environment for your cauliflower plants. Next, let’s explore the recommended planting depth for cauliflower seeds to ensure optimal growth and yield.
Recommended Planting Depth for Cauliflower Seeds
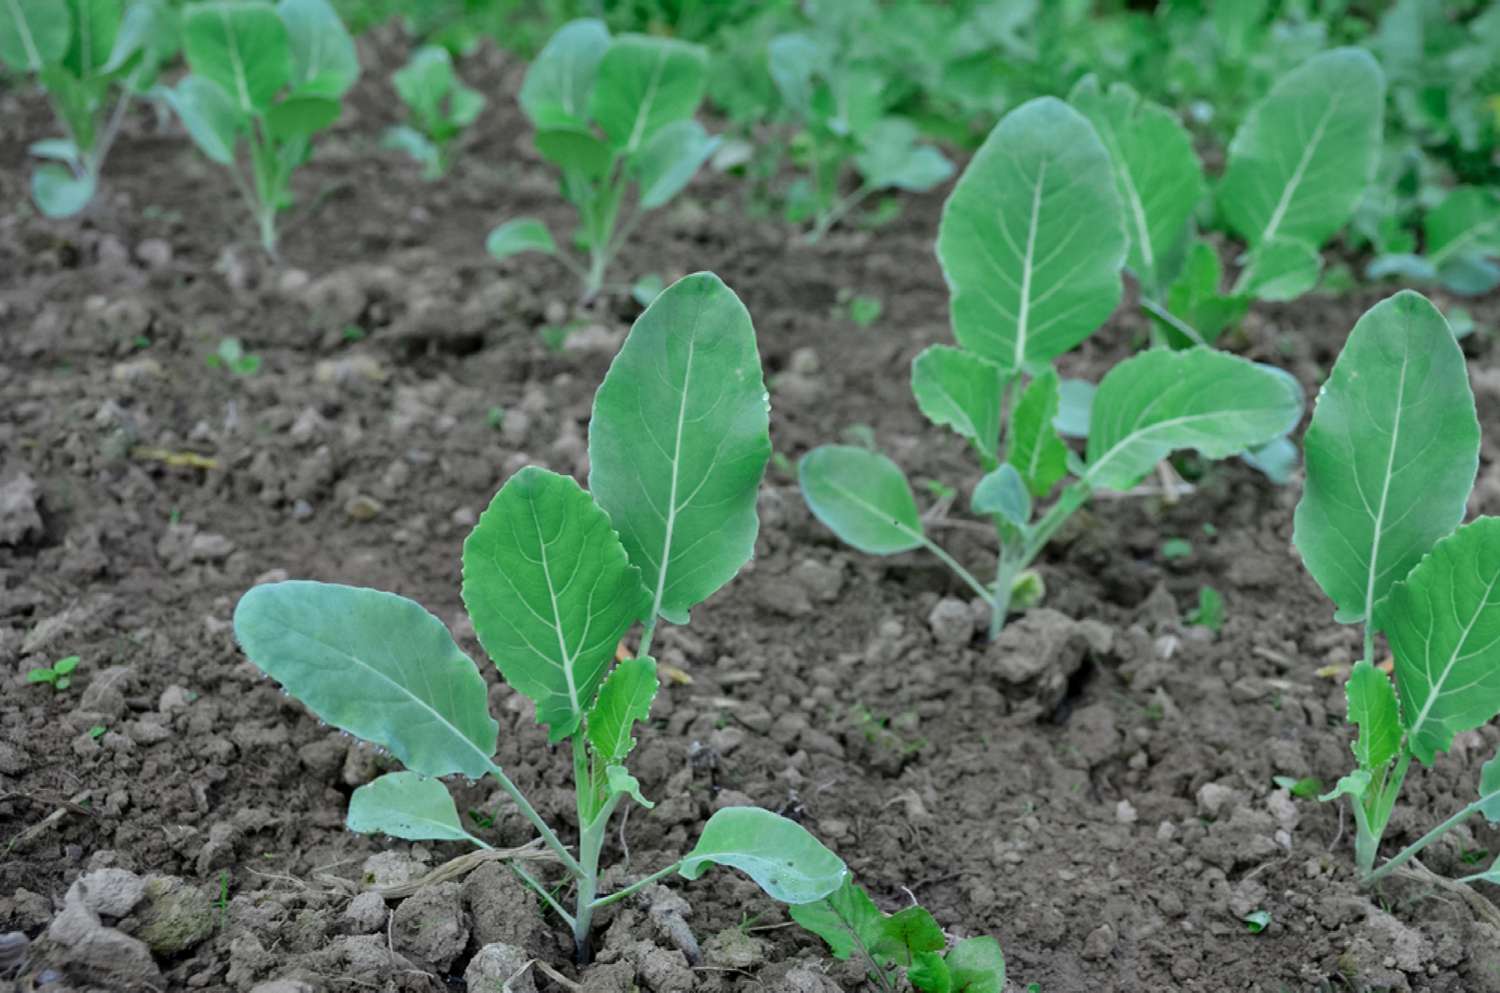
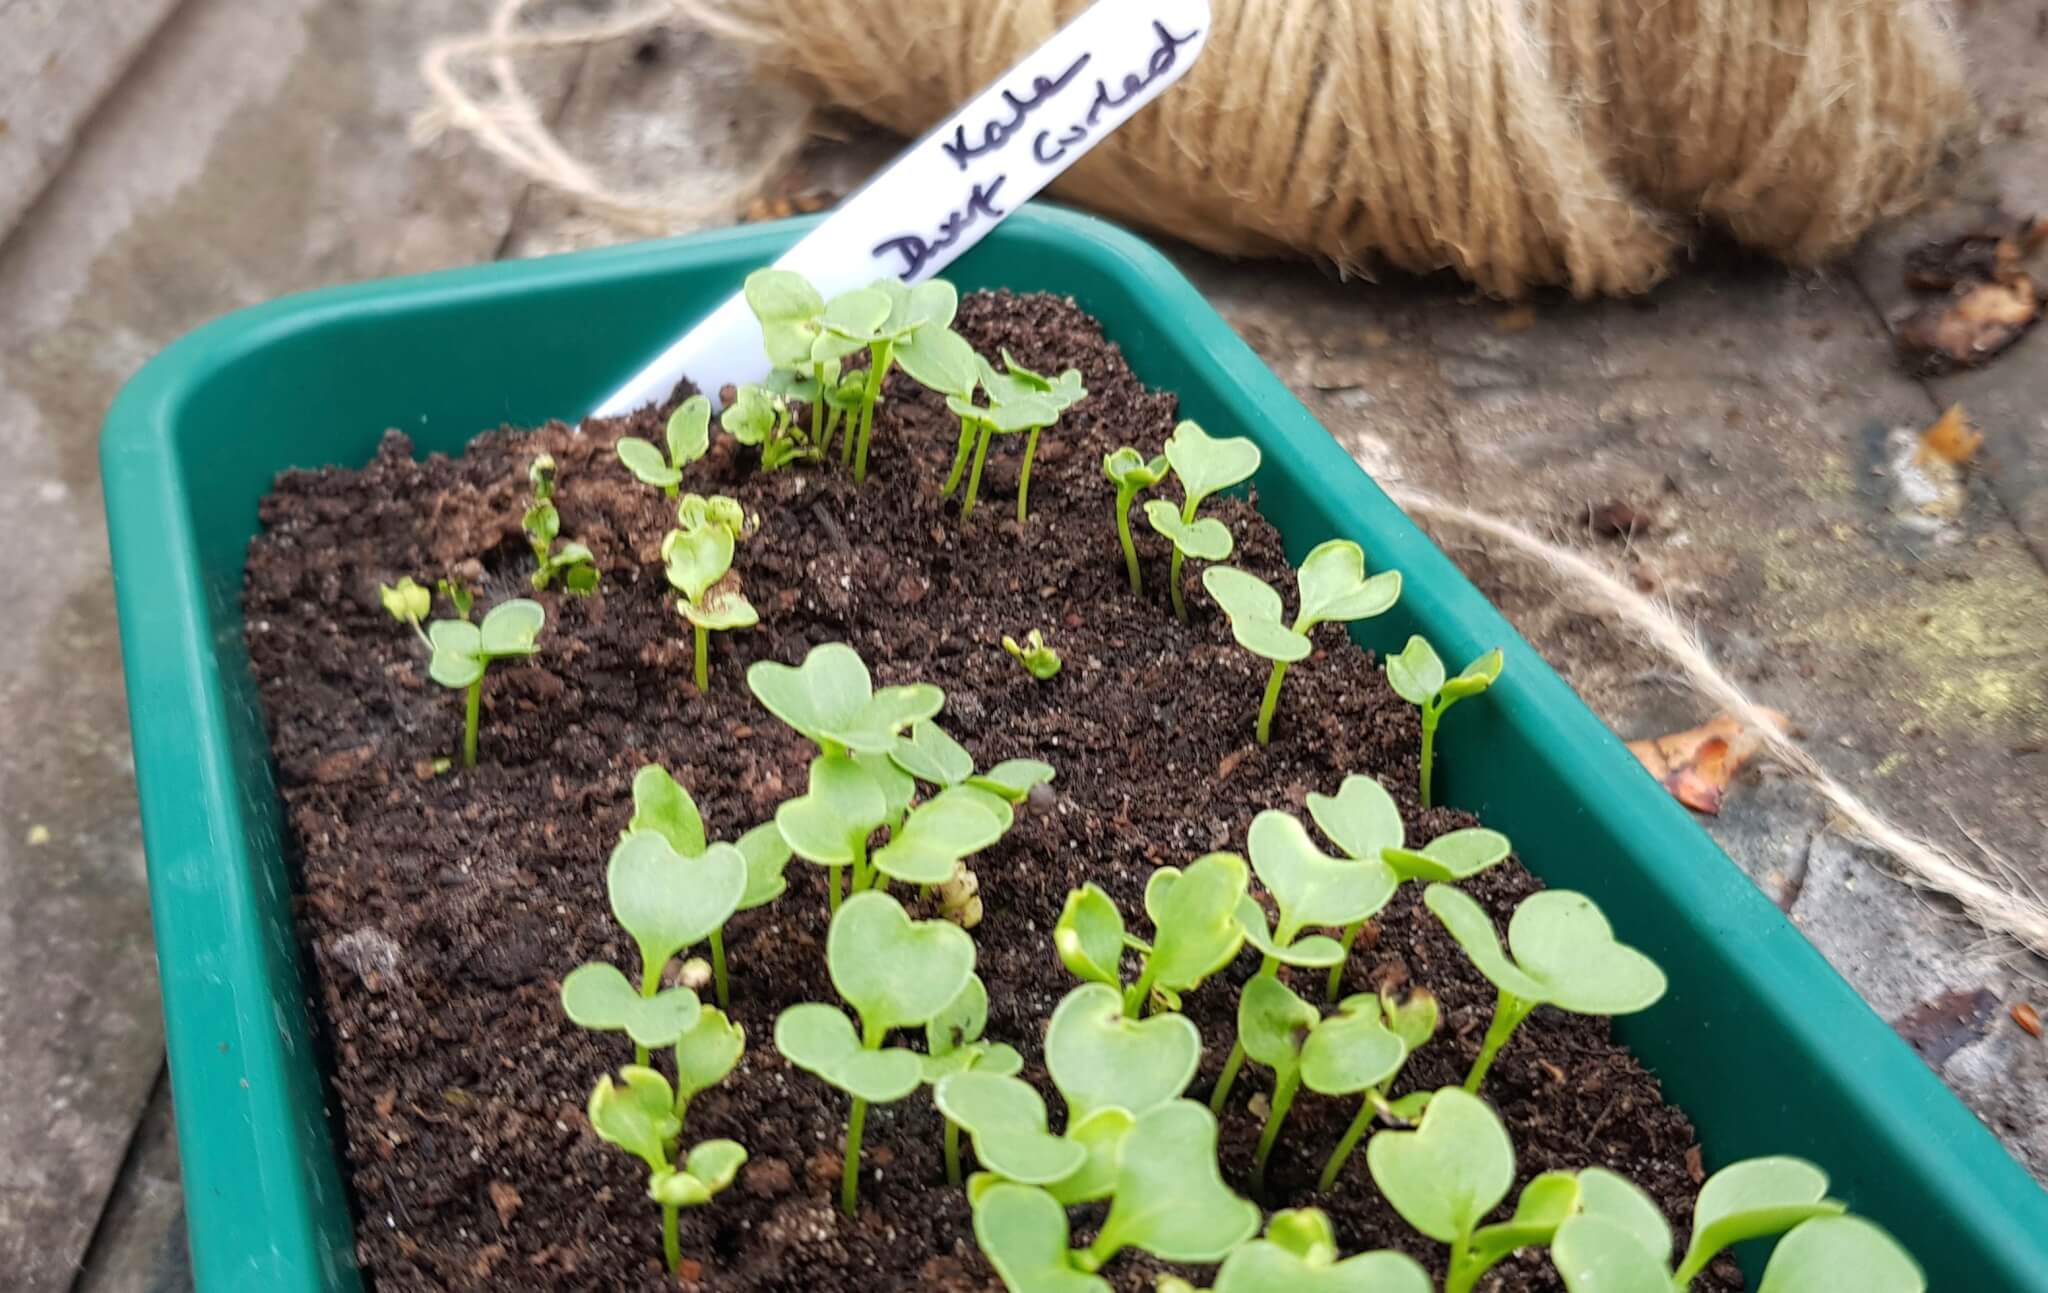
Planting cauliflower seeds at the correct depth is crucial for successful germination and healthy plant development. The recommended planting depth for cauliflower seeds is approximately ¼ to ½ inch (0.6 to 1.3 cm) deep. This depth allows the seeds to establish contact with the soil while still receiving adequate moisture and nutrients.
It’s important to note that cauliflower seeds are relatively small, so precision is necessary when sowing them. Planting seeds too shallowly can result in them drying out, while planting them too deeply can hinder germination. By following the recommended planting depth, you provide the seeds with the optimal conditions they need to sprout and develop into sturdy seedlings.
When planting cauliflower seeds directly in the garden, it’s helpful to create shallow trenches or furrows. Use a garden trowel or your finger to make small indentations in the soil, ensuring they are evenly spaced according to the recommended plant spacing. Place the cauliflower seeds in the furrows, spacing them approximately 1-2 inches apart, and cover them with a thin layer of soil. Gently firm the soil over the seeds to ensure good seed-to-soil contact.
If you’re starting your cauliflower seeds indoors, fill seed trays or small containers with a well-draining seed-starting mix. Plant the cauliflower seeds at the recommended depth by creating small holes in the soil with a pencil or your fingertip. Place one seed in each hole and lightly cover it with soil. Mist the soil surface with water to ensure moisture, and then cover the trays with plastic wrap to create a greenhouse-like environment. Remove the plastic wrap once the seedlings start to emerge.
By following these guidelines and paying attention to the recommended planting depth, you set the foundation for successful cauliflower seed germination and healthy growth. Proper planting depth ensures that the seeds have adequate access to moisture, warmth, and nutrients, setting them up for a strong start in their journey to becoming mature cauliflower plants.
Importance of Correct Planting Depth
The correct planting depth plays a crucial role in the successful growth and development of cauliflower plants. Here are some reasons why planting seeds at the proper depth is essential:
- Optimal Soil Moisture: Planting seeds at the recommended depth ensures that they are in contact with enough moisture to initiate the germination process. Seeds that are planted too shallowly may not receive adequate moisture and can dry out, leading to poor germination rates or seedling failure. On the other hand, planting seeds too deeply can result in excessive moisture retention and hinder germination.
- Access to Nutrients: Planting cauliflower seeds at the right depth allows the emerging roots to easily access the nutrients available in the soil. The seedlings can establish a strong root system and absorb the necessary nutrients for healthy growth. If seeds are planted too shallowly, the young roots may struggle to reach the nutrients, causing stunted growth and nutrient deficiencies.
- Protection from Extreme Conditions: Planting seeds at the proper depth provides a level of protection against extreme weather conditions such as heavy rainfall or extreme heat. Seeds that are planted too shallowly may be washed away by heavy rains or become exposed and vulnerable to drying out. On the other hand, seeds that are planted too deeply may face difficulties in breaking through the surface and reaching sunlight.
- Uniform Emergence: Planting seeds at the correct depth promotes uniform emergence, resulting in consistent plant growth and development. When seeds are planted at a uniform depth, they will break the soil surface at relatively the same time, ensuring that the plants receive equal access to sunlight and resources. This helps avoid competition between plants and ensures a more even crop.
- Efficient Space Utilization: By planting cauliflower seeds at the recommended depth, you can optimize space utilization in the garden. Proper spacing of seeds allows for adequate air circulation between plants, minimizing the risk of diseases and promoting healthier plants.
Overall, planting cauliflower seeds at the correct depth is essential for providing the best growing conditions for your plants. It ensures optimal soil moisture, access to nutrients, protection from extreme conditions, uniform emergence, and efficient space utilization. By paying attention to the recommended planting depth, you increase your chances of achieving a successful cauliflower harvest and enjoying the delicious and nutritious benefits of homegrown cauliflower.
Plant cauliflower seeds 1/4 inch deep in well-drained soil. Firm the soil over the seeds to ensure good seed-to-soil contact. Keep the soil consistently moist for best germination.
Step-by-Step Guide to Planting Cauliflower Seeds
Planting cauliflower seeds is an exciting and rewarding process that requires attention to detail and a few simple steps. Follow this step-by-step guide to ensure successful seed planting:
- Prepare the Soil: Start by preparing the soil in your garden bed or container. Remove any weeds or debris and loosen the soil to a depth of about 8-10 inches. Amend the soil with organic matter such as compost or aged manure to improve its fertility and drainage.
- Determine Plant Spacing: Determine the spacing requirements for the specific cauliflower variety you are planting. This information can usually be found on the seed packet or in the variety’s growing instructions. Mark the desired spacing with stakes or strings to guide your planting.
- Sow the Seeds: If you’re planting directly in the garden, create shallow furrows or trenches according to the desired spacing. Plant the cauliflower seeds approximately 1-2 inches apart and cover them with a thin layer of soil. Press gently to ensure good seed-to-soil contact. If you’re starting seeds indoors, fill seed trays or containers with a well-draining seed-starting mix. Plant one seed per hole at the recommended planting depth and cover lightly with soil.
- Provide Water: After planting, water the soil gently but thoroughly to ensure proper moisture levels. Avoid overwatering, as excessive moisture can lead to seed rot or fungal diseases. Keep the soil consistently moist throughout the germination and growth stages.
- Monitor and Maintain: Keep a close eye on the germinating seeds and seedlings. Ensure adequate sunlight, providing at least 6 hours of direct sunlight per day. Monitor soil moisture levels and water as needed to keep the soil evenly moist but not overly saturated. Mulching around the base of the plants can help retain moisture and suppress weed growth.
- Thin and Transplant: Once the seedlings have grown a few inches tall and developed their first true leaves, thin them out if needed to achieve the desired spacing. This ensures that each plant has enough room to grow and thrive. If you started your seeds indoors, harden off the seedlings by gradually exposing them to outdoor conditions before transplanting them into the garden.
- Provide Care and Maintenance: As your cauliflower plants continue to grow, provide regular care and maintenance. Water deeply and regularly, especially during dry spells, and feed with a balanced fertilizer according to the package instructions. Monitor for pests and diseases and take appropriate measures, such as using organic insecticides or implementing pest control strategies.
By following these simple steps, you’ll be well on your way to growing healthy and thriving cauliflower plants. Remember to provide the necessary care, stay vigilant against common pests and diseases, and harvest your cauliflower once the heads are fully developed. Enjoy the satisfaction of seeing your hard work in the garden come to fruition with a delicious and nutritious harvest!
Read more: How Deep To Plant Papaya Seeds
Additional Tips for Successful Cauliflower Seed Planting
Planting cauliflower seeds can be a rewarding endeavor, and with a few additional tips, you can further increase your chances of success. Consider these tips to ensure a successful cauliflower seed planting experience:
- Start seeds indoors: If you live in a region with a short growing season, starting your cauliflower seeds indoors can give them a head start. This allows you to transplant more established seedlings into the garden when the weather is favorable.
- Practice crop rotation: To prevent diseases and soil nutrient depletion, it’s advisable to rotate your cauliflower crop with plants from other families each year. Avoid planting cauliflower in the same area of your garden for consecutive growing seasons.
- Use row covers: Protect young cauliflower seedlings from pests like cabbage worms and flea beetles by using row covers. Row covers create a physical barrier, preventing pests from reaching your plants while still allowing air and sunlight to penetrate.
- Maintain consistent soil moisture: Cauliflower plants thrive in consistently moist soil. Be sure to water regularly, especially during dry spells, to avoid stress and promote healthy growth. Mulching around the plants can help retain moisture, suppress weeds, and regulate soil temperature.
- Provide adequate nutrition: Fertilize your cauliflower plants with a balanced organic fertilizer to ensure they receive the necessary nutrients for optimal growth. Follow the fertilization recommendations on the product label and avoid overfertilizing, as it can lead to excessive leaf growth at the expense of head formation.
- Practice good weed management: Regularly remove weeds around your cauliflower plants, as they compete for nutrients and can attract pests. Mulching can help suppress weed growth, but be sure to avoid covering the plant base, as it can cause rotting.
- Monitor for pests and diseases: Keep a close eye on your cauliflower plants for signs of pests or diseases, such as chewed leaves, discoloration, or wilting. Early detection allows for prompt intervention, whether through organic pest control methods or disease management strategies.
- Time your harvest: Harvest cauliflower when the heads reach full maturity but before they start to loosen or separate. Timing is crucial, as waiting too long can result in yellowing and bitterness. Cut the head off just below the base and remove any leaves or debris before storing or using the cauliflower.
By implementing these additional tips and best practices, you can improve your chances of successfully growing cauliflower from seeds. With proper care and attention, you’ll soon be enjoying a bountiful harvest of delicious and nutritious cauliflower heads.
Common Mistakes to Avoid When Planting Cauliflower Seeds
Planting cauliflower seeds requires attention to detail and careful consideration. To maximize your chances of success and avoid potential setbacks, be mindful of these common mistakes that gardeners often make when planting cauliflower seeds:
- Planting seeds too deeply: Planting cauliflower seeds too deeply in the soil can hinder their germination and emergence. Ensure you follow the recommended planting depth of approximately ¼ to ½ inch (0.6 to 1.3 cm) for optimal results.
- Overwatering: While it’s important to keep the soil consistently moist, overwatering can lead to seed rot, fungal diseases, and poor seedling growth. Avoid excessive watering by allowing the soil to dry slightly between waterings and ensuring proper drainage.
- Crowded spacing: Planting cauliflower seeds too closely together can result in overcrowding and competition for nutrients, sunlight, and space. Follow the recommended spacing guidelines to give each plant sufficient room to grow and develop properly.
- Planting at the wrong time: Cauliflower is a cool-season crop and should be planted at the appropriate time for your climate. Planting too early in cold conditions or too late in hot weather can lead to poor growth, bolting, or premature flowering. Consult local gardening resources or seed packets for specific planting times in your area.
- Ignoring soil quality: Cauliflower thrives in well-draining soil with good fertility. Neglecting to prepare the soil properly or failing to amend it with organic matter can result in poor growth and nutrient deficiencies. Test your soil, improve its structure, and ensure a pH level within the recommended range for cauliflower.
- Neglecting pest management: Cauliflower is susceptible to various pests, including aphids, cabbage worms, and flea beetles. Ignoring pest management can lead to infestations and damage to your plants. Regularly inspect your plants for signs of pests and implement strategies such as companion planting, row covers, or organic insecticides to prevent and control pest problems.
- Skipping thinning or transplanting: Failing to thin seedlings or transplanting them too late can result in overcrowded and weak plants. Thinning seedlings to the recommended spacing or transplanting them into larger containers or the garden at the appropriate stage ensures proper development and optimal plant growth.
- Improper harvesting: Harvesting cauliflower at the wrong time can result in underdeveloped, bitter, or woody heads. Be patient and wait until the heads are fully formed but haven’t started to loosen or separate. Harvesting at the right time ensures the best flavor and texture.
Avoiding these common mistakes can save you time, effort, and disappointment when planting cauliflower seeds. By following best practices, providing proper care, and staying vigilant throughout the growth process, you’ll increase your chances of a successful harvest and enjoy the full potential of your cauliflower plants.
Conclusion
Planting cauliflower seeds and nurturing them into thriving plants is a fulfilling and rewarding endeavor. By considering essential factors such as climate, soil conditions, sunlight, and spacing, you can create an optimal environment for your cauliflower crop. Additionally, following the recommended planting depth ensures that the seeds receive adequate moisture, nutrients, and protection for successful germination and growth.
A step-by-step guide provides clear instructions to help you plant cauliflower seeds with confidence. Starting seeds indoors, practicing crop rotation, using row covers, maintaining consistent soil moisture, providing proper nutrition, managing pests and diseases, and timing your harvest are all important aspects to consider to maximize your chances of success.
To avoid pitfalls, it’s crucial to be aware of common mistakes such as planting seeds too deeply, overwatering, overcrowding, poor soil quality, ignoring pest management, neglecting thinning or transplanting, and improper harvesting. By avoiding these mistakes, you can set your cauliflower plants up for healthy growth and a successful harvest.
In conclusion, proper planning, attention to detail, and dedicated care are key to successfully planting cauliflower seeds. By understanding the factors that influence planting depth and following the recommended guidelines, you can create an ideal growing environment for your cauliflower crop. With patience, perseverance, and these insights in mind, you’ll be well on your way to enjoying a bountiful harvest of delicious and nutritious cauliflower from your own garden.
Frequently Asked Questions about How Deep To Plant Cauliflower Seeds
Was this page helpful?
At Storables.com, we guarantee accurate and reliable information. Our content, validated by Expert Board Contributors, is crafted following stringent Editorial Policies. We're committed to providing you with well-researched, expert-backed insights for all your informational needs.

0 thoughts on “How Deep To Plant Cauliflower Seeds”