Home>Garden Essentials>How To Use Grass Seeds
Garden Essentials
How To Use Grass Seeds
Modified: September 2, 2024
Learn how to effectively use grass seeds in your garden to achieve a lush and vibrant lawn. Discover step-by-step instructions and expert tips for optimal results.
(Many of the links in this article redirect to a specific reviewed product. Your purchase of these products through affiliate links helps to generate commission for Storables.com, at no extra cost. Learn more)
Introduction
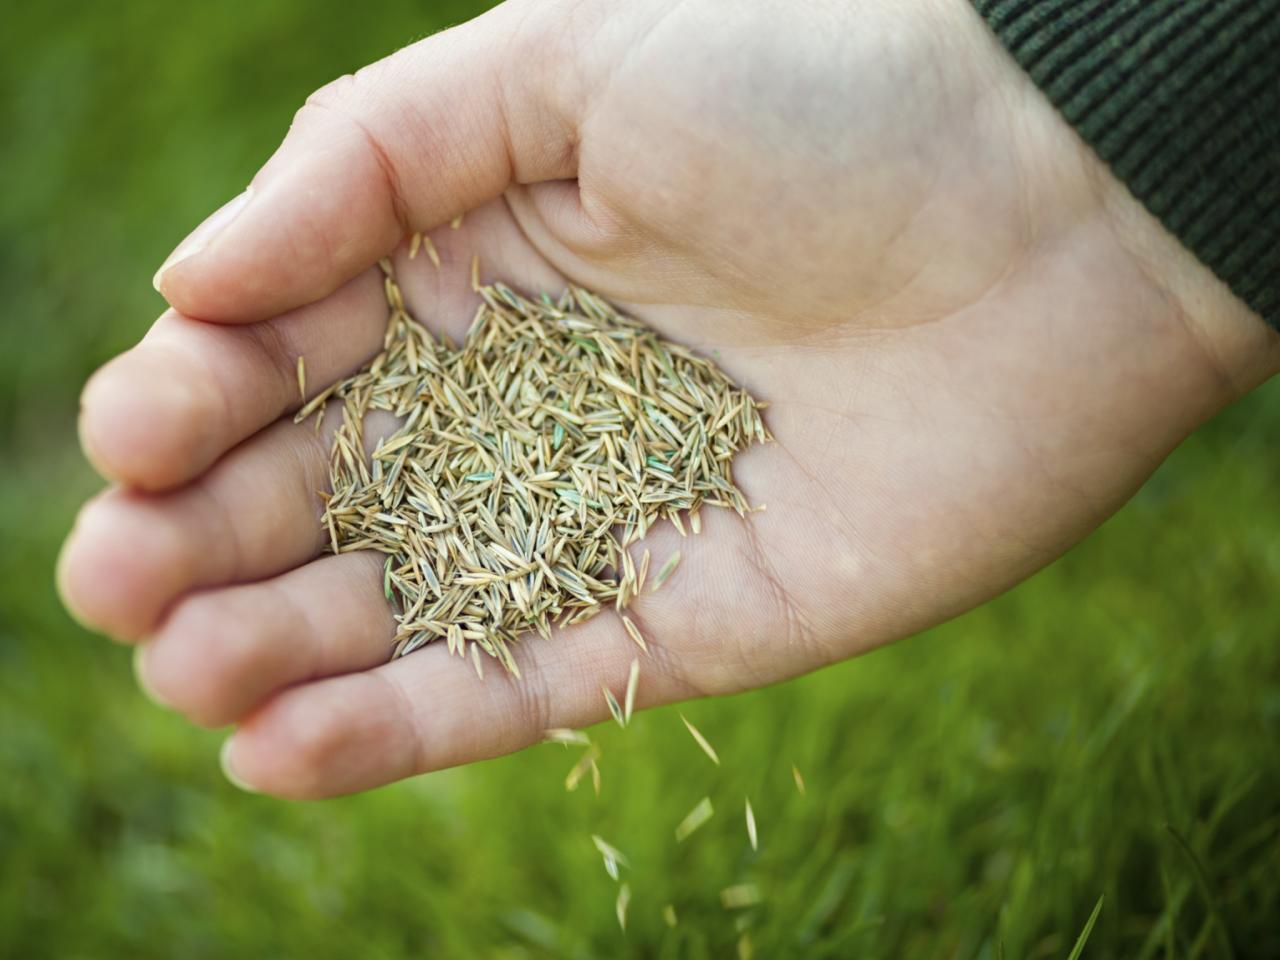
Growing a lush and vibrant garden starts with a solid foundation, and one essential element of any garden is a beautiful and healthy lawn. When it comes to establishing or reviving your lawn, using grass seeds is a cost-effective and efficient option. By sowing grass seeds, you have the opportunity to choose the specific type of grass that suits your climate, soil, and aesthetic preferences.
However, successfully growing grass from seeds requires careful planning, preparation, and ongoing maintenance. This comprehensive guide will walk you through the key steps of using grass seeds to transform your yard into a picturesque green oasis.
From selecting the right grass seed to troubleshooting common issues, we will cover everything you need to know to achieve a thriving and luscious lawn. So, grab your gardening gloves and let’s get started!
Key Takeaways:
- Choose the right grass seed based on your climate, sunlight, soil, and lawn use for a thriving and picturesque lawn. Visit a garden center for expert recommendations.
- Properly prepare the soil, sow the seeds, water consistently, and maintain the lawn to achieve a healthy and vibrant grass carpet. Enjoy the process and take pride in your lush lawn!
Read more: How To Use Amaranth Seeds
Step 1: Choosing the Right Grass Seed
Choosing the right grass seed is crucial for the success of your lawn. There are numerous varieties of grass available, each with its own set of characteristics and requirements. Consider the following factors when selecting the right grass seed for your yard:
- Climate: Start by determining your climate zone. Different grass species thrive in different climates, so choose a seed variety that is well-suited to your region’s temperature and rainfall patterns. For example, cool-season grasses like Kentucky bluegrass and fescue perform well in northern regions with colder winters, while warm-season grasses like Bermuda grass and Zoysia grass prefer hotter climates.
- Light and Shade: Assess the amount of sunlight your lawn receives. Some grasses thrive in full sunlight, while others can tolerate and even thrive in shady areas. If you have areas of your lawn that are heavily shaded, opt for shade-tolerant grass seed varieties such as fine fescue or St. Augustine grass.
- Soil Type: Consider the type and condition of your soil. Different grass species have different preferences regarding soil pH, drainage, and nutrient requirements. Conduct a soil test to determine the soil’s pH level and nutrient deficiencies. This information will help you select a grass seed variety that will thrive in your particular soil conditions.
- Intended Use: Think about how you plan to use your lawn. If you have a high-traffic area where children and pets play, you’ll want a durable and resilient grass variety, such as perennial ryegrass or tall fescue. On the other hand, if you’re looking for a more ornamental lawn, consider fine-textured grasses like Kentucky bluegrass or bentgrass.
Once you’ve considered these factors, it’s time to choose the specific grass seed variety. Visit your local garden center or consult with a lawn care professional to get recommendations for grass seed varieties that are suited to your specific requirements.
Remember, selecting the right grass seed is the first step towards achieving a lush and healthy lawn. Put some thought into this decision, and you’ll set yourself up for success in the next steps of the grass seed growing process.
Step 2: Preparing the Soil
Preparing the soil is a crucial step in ensuring the success of your grass seed growth. The condition of the soil directly affects the germination and establishment of the seeds. Follow these steps to properly prepare your soil:
- Clear the area: Start by clearing the area of any debris, including rocks, sticks, and weeds. These unwanted materials can hinder the growth of grass seeds and compete for nutrients with the young seedlings.
- Test the soil: Conduct a soil test to determine the pH level and nutrient content of your soil. You can purchase a soil testing kit from a garden center or send a sample to a local agricultural extension service for analysis. Based on the test results, you may need to adjust the pH level or amend the soil with nutrients to create the ideal growing environment for the grass seeds.
- Aerate the soil: If your soil is compacted, it’s essential to aerate it before sowing the grass seeds. Aerating involves creating small holes in the soil to improve water infiltration, air circulation, and root development. You can use a manual aerator or rent a mechanical aerator for larger areas.
- Remove weeds: Before seeding, remove any existing weeds in the area. This can be done by hand-pulling or using a weed control product. Be sure to follow the instructions on the weed control product and allow sufficient time for it to take effect before proceeding.
- Level the soil: Smooth out any uneven areas in the soil using a rake or shovel. This will create a uniform surface for the grass seeds to be sown.
- Amend the soil (if necessary): Based on the soil test results, you may need to amend the soil with organic matter or soil additives. Organic matter, such as compost or well-rotted manure, improves soil fertility, structure, and moisture retention. Soil additives, like gypsum or lime, can help adjust the pH level of the soil.
By properly preparing the soil, you are creating an optimal environment for the grass seeds to germinate and establish strong roots. This sets the stage for healthy and vigorous grass growth in the future. So take the time to prepare your soil, and you’ll be rewarded with a thriving lawn.
Step 3: Spreading the Grass Seeds
Now that your soil is prepared, it’s time to sow the grass seeds. Follow these steps to ensure an even and successful distribution of the seeds:
- Read the instructions: Carefully read and follow the instructions on the grass seed package. Different varieties may have specific recommendations for seeding rates, application techniques, and timing.
- Choose the right time: The best time to sow grass seeds depends on the type of grass you’re planting. Warm-season grasses, like Bermuda grass or Zoysia grass, are best sown in late spring or early summer when the soil temperature is consistently warm. Cool-season grasses, such as fescue or Kentucky bluegrass, can be sown in early fall or early spring for optimal growth.
- Divide the area: Divide the area you’re sowing into smaller sections. This will make it easier to ensure even coverage and prevent overlapping or missed spots.
- Use a spreader: Depending on the size of your lawn, use either a handheld spreader or a broadcast spreader to evenly distribute the grass seeds. Adjust the spreader settings according to the recommended seeding rate on the seed package.
- Apply the seeds: Walk slowly and steadily while operating the spreader to ensure consistent seed distribution. Start along the edges of the area and work your way inward, covering the entire section with an even layer of seeds. For larger areas, consider using a crisscross pattern to ensure thorough coverage.
- Rake the seeds in: After spreading the seeds, lightly rake the area with a garden rake to help incorporate the seeds into the soil. This will improve seed-to-soil contact, which is essential for germination.
- Protect the seeds: To prevent birds or other animals from eating the seeds, you can cover the newly seeded area with a thin layer of straw or a lightweight mulch. This will also help retain moisture and provide some insulation to the seeds.
Remember to water the seeded area immediately after sowing the seeds to initiate the germination process. Adequate watering is crucial for the seeds to absorb moisture and sprout. Follow the next step to learn more about watering and maintaining the newly seeded area for successful grass growth.
Step 4: Watering the Seeds
Proper watering is essential for the germination and establishment of your grass seeds. Follow these guidelines to ensure that your seeds receive adequate moisture:
- Start immediately: Begin watering the newly seeded area right after spreading the seeds. This will help the seeds absorb moisture and initiate the germination process.
- Keep the soil consistently moist: During the germination period, which typically lasts two to three weeks, it’s crucial to keep the soil consistently moist. Water the area lightly every day or every other day, depending on weather conditions and the rate of evaporation. Avoid overwatering, as this can lead to poor root development or fungal diseases.
- Monitor moisture levels: Check the soil moisture regularly by digging a small hole about an inch deep. The soil should feel evenly moist but not saturated or overly dry. Adjust your watering schedule as needed to maintain the appropriate moisture level.
- Water deeply: As the grass seedlings start to develop, gradually increase the amount of water applied during each watering session. This will encourage deeper root growth and strengthen the grass plants.
- Use a sprinkler or soaker hose: To ensure uniform watering, consider using a sprinkler or a soaker hose. These irrigation methods can distribute water evenly across the entire seeding area.
- Water in the morning: Watering in the early morning is ideal, as it allows the grass plants to dry out during the day. This reduces the risk of fungal diseases that thrive in damp conditions.
- Adjust watering as the grass matures: Once the grass is established and reaches a height of about 2 to 3 inches, you can reduce the frequency of watering. Instead, focus on deeper, less frequent watering sessions to encourage deep root growth.
Remember, the key to successful watering is to provide consistent moisture to the seeds during the germination phase. Regular monitoring and adjustment are essential to ensure that the young grass plants receive the right amount of water to thrive and establish a healthy root system.
When using grass seeds, make sure to prepare the soil by removing any debris and loosening the top layer. Spread the seeds evenly and lightly cover with soil. Water regularly to keep the soil moist for germination.
Read more: How To Use Anise Seed
Step 5: Maintaining the Newly Seeded Area
Maintaining the newly seeded area is crucial for the healthy growth and development of the grass. Follow these steps to ensure optimal care for your newly seeded lawn:
- Avoid foot traffic: Minimize foot traffic on the newly seeded area to prevent damage to the delicate seedlings. Consider placing temporary barriers or signs to remind family members and visitors to avoid walking on the seeded area.
- Mulch and straw removal: If you used mulch or straw to protect the seeds, gradually remove it as the grass starts to grow. This allows the seedlings to receive sufficient sunlight and prevents the accumulation of excess moisture that can lead to fungal diseases.
- Maintain consistent moisture: Continue to monitor the moisture levels of the soil and adjust your watering schedule accordingly. As the grass grows, you can gradually reduce the frequency of watering while increasing the amount of water applied during each session.
- Avoid mowing until grass reaches proper height: Allow the grass to reach a height of 3 to 4 inches before mowing for the first time. This ensures that the grass has established a strong root system. Be careful not to remove more than one-third of the grass height when mowing to avoid stressing the grass plants.
- Gradually lower mowing height: Over time, gradually lower the mowing height to the desired level. However, be cautious not to scalp the grass by cutting it too short, as this can lead to weak growth and increased weed infestation.
- Watch for weed growth: Keep an eye out for any weeds that may start to sprout in the newly seeded area. These can compete with the grass for nutrients and hinder its growth. Remove weeds manually or use a targeted herbicide, if necessary, following the instructions carefully.
- Fertilize appropriately: After the grass has established and grown for about six to eight weeks, consider applying a slow-release or controlled-release fertilizer to provide the necessary nutrients. Follow the recommended application rates and timing for the specific grass variety you planted.
By following these maintenance practices, you will facilitate the healthy development of your newly seeded lawn. Consistent care, proper mowing, and timely weed control will encourage the growth of a lush and vibrant grass carpet.
Step 6: Mowing the Grass
Mowing is an essential part of maintaining a healthy and attractive lawn. By following proper mowing practices, you can promote the growth and density of your grass. Here are some guidelines to help you mow your lawn effectively:
- Choose the right mower: Select a mower that is appropriate for the size and terrain of your lawn. Whether you opt for a push mower, a self-propelled mower, or a riding mower, make sure it is in good working condition and the blades are sharp.
- Set the mowing height: Set the cutting height of your mower based on the recommended height for your grass variety. Each type of grass has an ideal height range for optimal health and appearance. As a general rule, it’s best to never remove more than one-third of the grass height in a single mowing session.
- Mow when the grass is dry: Mow your lawn when the grass is dry to prevent clumping and uneven cuts. Wet grass can clog the mower and create an uneven appearance, making it difficult to achieve a clean and uniform cut.
- Alternate mowing patterns: Vary your mowing direction each time you mow. This helps ensure an even distribution of wear and encourages upright growth of the grass. Changing your mowing pattern also reduces the chance of soil compaction and prevents the grass from leaning in one direction.
- Leave grass clippings (optional): Leaving grass clippings on the lawn can contribute to its health by acting as a natural fertilizer and providing organic matter. As long as the clippings are not excessive and do not create unsightly clumps, you can choose to leave them on the lawn. This practice is known as “grasscycling.”
- Maintain sharp blades: Regularly sharpen your mower blades to ensure a clean and precise cut. Dull blades can tear the grass, leading to a stressed and weakened lawn. Aim to sharpen the blades at least once per season or more frequently if needed.
- Adjust mowing frequency: Determine the appropriate mowing frequency based on the growth rate of your grass. During periods of rapid growth, such as spring or early summer, you may need to mow more frequently. In slower growth periods, like late summer or early fall, you can adjust the mowing frequency accordingly.
- Clean up after mowing: Remove any grass clippings or debris from the lawn after mowing. This helps prevent the grass from suffocating and allows sunlight to reach the soil and the base of the grass blades.
Regular and proper mowing practices will contribute to a well-maintained lawn with a neat and uniform appearance. Always observe safety precautions while mowing, wear appropriate protective gear, and be mindful of obstacles and uneven terrain.
Step 7: Troubleshooting Common Issues
Even with proper care and maintenance, you may encounter common issues while growing a lawn from grass seeds. Here are some troubleshooting tips to address these challenges:
- Poor Germination: If you notice patches or areas with poor germination, you may need to overseed those areas. Prepare the soil, sprinkle grass seeds, and lightly rake the soil to enhance seed-to-soil contact. Additionally, ensure that the soil is consistently moist during the germination period.
- Weed Infestation: Weeds can compete with grass seeds for nutrients and water. Handpulling the weeds can work for small patches, but for larger areas, you may consider applying an appropriate herbicide that targets the specific weed species. Be sure to follow the instructions and choose a product safe for your grass variety.
- Pests: Insects like grubs or chinch bugs can damage young seedlings. Monitor the lawn regularly for signs of pests and take appropriate actions, such as applying an insecticide designed for lawn pests. You can consult with a local lawn care professional to identify the specific pests and treatment options for your area.
- Disease: Diseases, such as lawn fungus, can affect the health and appearance of your grass. Practice proper watering techniques, promote good air circulation and sunlight exposure, and avoid over-fertilization, as excess nitrogen can make the grass more susceptible to fungal infections. If you suspect a disease, consult a lawn specialist who can help identify the issue and recommend appropriate treatments.
- Thinning or Uneven Growth: If you notice areas with thin or uneven growth, overseeding may be necessary. Prepare the soil, scatter grass seeds in these areas, and lightly rake to incorporate the seeds into the soil. Be sure to water consistently to promote germination and establishment.
- Excessive Thatch: Thatch is a layer of dead organic material that forms between the soil and the base of the grass blades. If thatch buildup exceeds ½ inch, it can hinder air and water movement to the roots. Regular aeration and dethatching can help control excessive thatch. Consider using a thatch rake or a power dethatcher to remove the accumulated thatch layer.
- Uneven Lawn: If your lawn has uneven areas or low spots, you can level the surface by adding topsoil, leveling mix, or a lawn-leveling product. Spread the material evenly over the low areas and rake or roll it to create a smooth and level surface before overseeding.
Addressing these common issues promptly will help your lawn recover and thrive. Regular monitoring, timely intervention, and proper maintenance practices are key to maintaining a healthy and beautiful lawn.
Conclusion
Growing a lush and vibrant lawn from grass seeds is a rewarding endeavor that can transform your outdoor space into a beautiful oasis. By following the steps outlined in this guide, you can achieve successful grass seed germination, establishment, and growth. From choosing the right grass seed for your climate and soil to properly preparing the soil, spreading the seeds, and providing the necessary care, each step plays a vital role in the overall success of your lawn.
Remember that patience and consistency are key throughout the process. It takes time for the grass seeds to germinate, establish strong roots, and develop into a dense and healthy lawn. Regular monitoring, watering, mowing, and maintenance will ensure that your lawn thrives and remains vibrant for years to come.
Overcoming common issues, such as poor germination, weed infestation, pests, diseases, or uneven growth, is part of the journey. By promptly addressing these challenges with appropriate solutions, you can maintain a thriving and beautiful lawn.
Lastly, enjoy the process of transforming your outdoor space with a luscious lawn. Take pride in the efforts you put into caring for your lawn and appreciate the results of your hard work. Whether you’re hosting outdoor gatherings, playing with your family, or simply enjoying the view, a healthy and vibrant lawn will provide a beautiful backdrop for countless memorable moments.
So, grab your gardening tools, follow these steps, and create a stunning and inviting lawn that will become the envy of your neighborhood.
Frequently Asked Questions about How To Use Grass Seeds
Was this page helpful?
At Storables.com, we guarantee accurate and reliable information. Our content, validated by Expert Board Contributors, is crafted following stringent Editorial Policies. We're committed to providing you with well-researched, expert-backed insights for all your informational needs.


0 thoughts on “How To Use Grass Seeds”