Home>Garden Essentials>Garden Storage>How To Paint A Wardrobe
Garden Storage
How To Paint A Wardrobe
Modified: April 28, 2024
Learn how to transform your wardrobe into a stylish storage solution with our step-by-step painting guide. Create a functional and beautiful space.
(Many of the links in this article redirect to a specific reviewed product. Your purchase of these products through affiliate links helps to generate commission for Storables.com, at no extra cost. Learn more)
Introduction
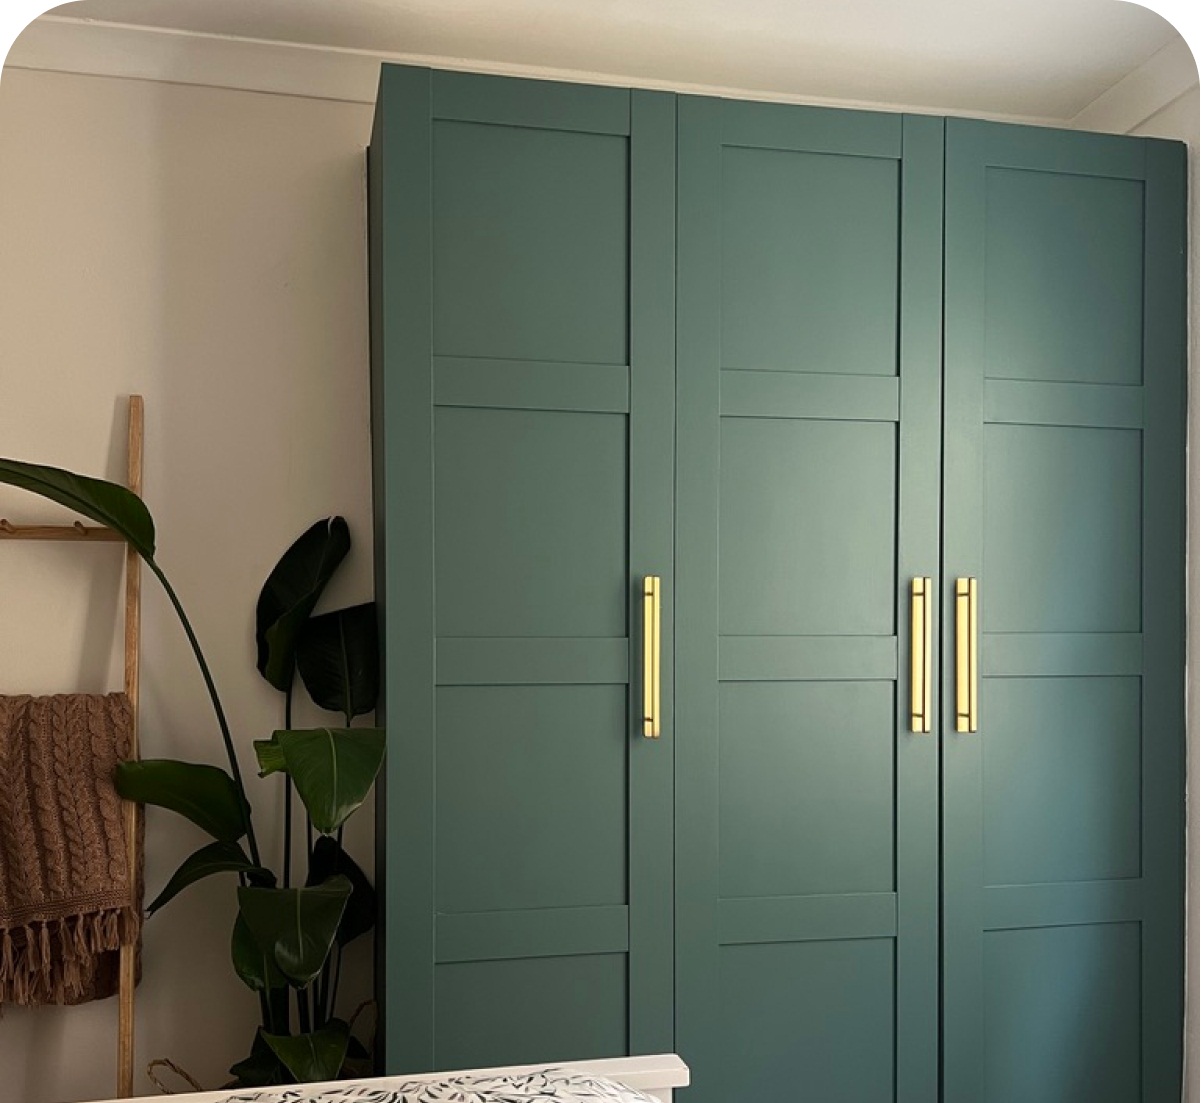
Welcome to the ultimate guide on how to paint a wardrobe! Whether you’re looking to transform an old, worn-out wardrobe or simply want to give your current one a fresh new look, painting is a fantastic way to achieve your desired result. Not only does it allow for endless creative possibilities, but it also breathes new life into your furniture and can completely revamp the overall aesthetic of your space.
With a little bit of preparation, the right materials, and a step-by-step approach, you can easily paint your wardrobe like a pro. In this guide, we will walk you through the entire process, from preparing the surface to adding those finishing touches. So, grab your paintbrush and let’s get started!
Before we dive into the steps, it’s important to mention that painting a wardrobe requires some time and effort. It’s not a project that can be completed in just a few hours, but the end result will be well worth it. So, be sure to set aside enough time and create a comfortable working environment.
Additionally, make sure to gather all the necessary materials beforehand. This includes paintbrushes, rollers, sandpaper, primer, paint, drop cloths, painter’s tape, and any other tools you may need. Taking the time to gather everything you need will save you from running back and forth to the store during the process.
Now that we’ve covered the basics, let’s move on to the first step: Preparation!
Key Takeaways:
- Proper preparation, including thorough cleaning and sanding, is crucial for a successful wardrobe painting project. It sets the foundation for optimal paint adhesion and a professional-looking finish.
- Choosing the right paint, applying multiple coats as needed, and attending to the details of reassembly and hardware reattachment are essential for achieving a vibrant and long-lasting finish.
Read more: How To Update Wardrobe
Step 1: Preparation
The key to a successful painting project is thorough preparation. This step is crucial as it helps to ensure that the paint adheres properly, resulting in a smooth and long-lasting finish. Follow these steps to prepare your wardrobe:
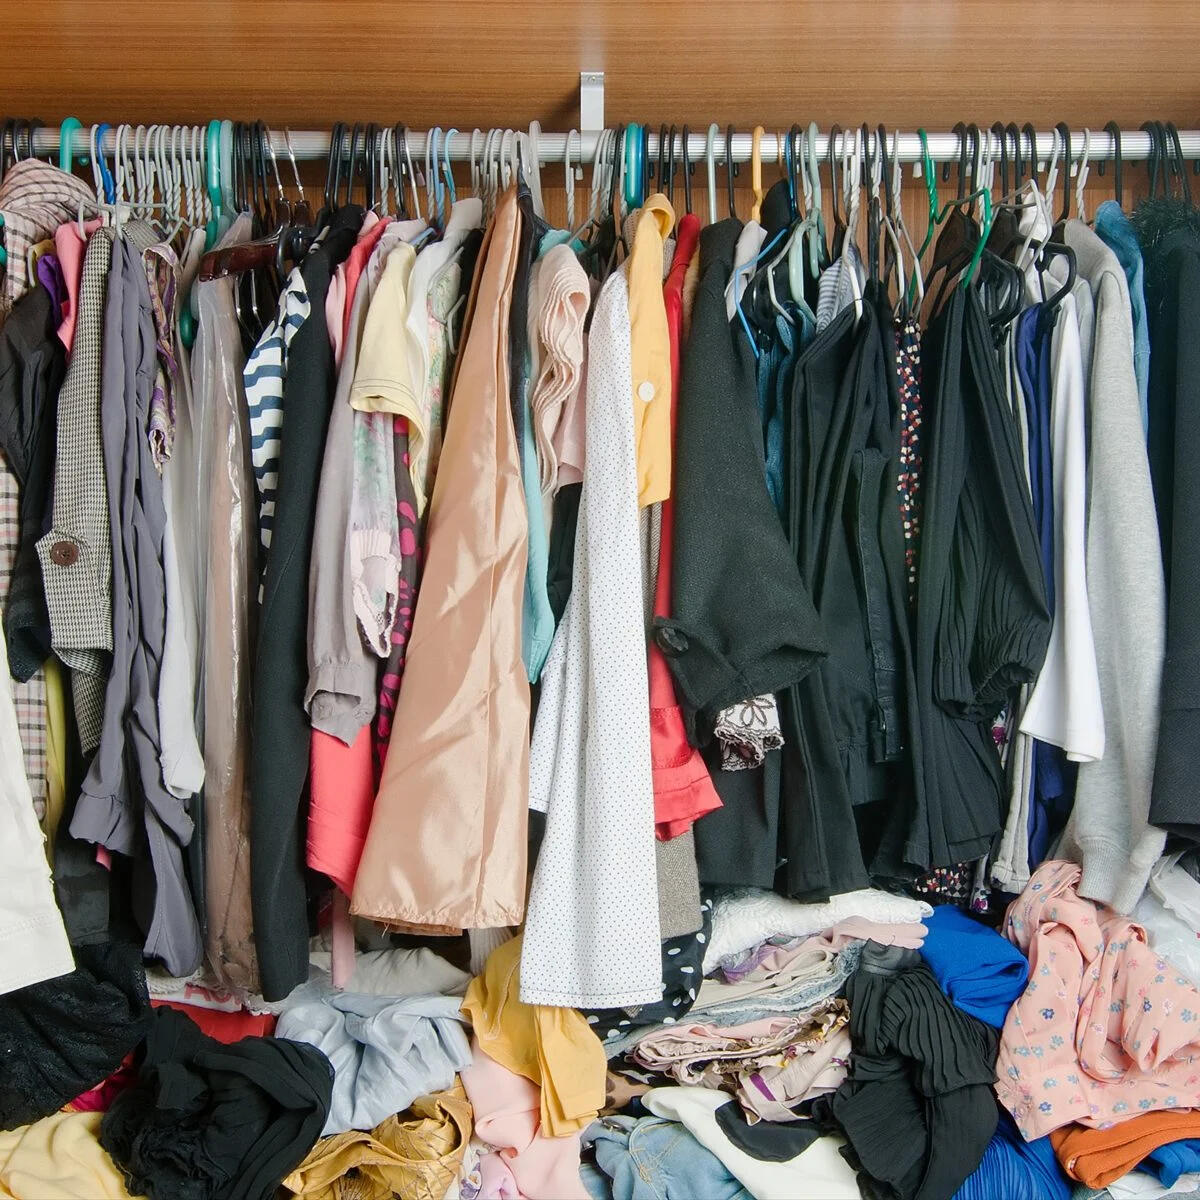
- Clear the space: Start by removing any items from inside the wardrobe. This will give you plenty of room to work and avoid any potential damage to your belongings.
- Clean the surface: Use a mild detergent and water solution to clean the wardrobe’s surface thoroughly. Remove any dust, dirt, or grease that may be present. Wipe it down with a clean, damp cloth and allow it to dry completely.
- Protect surrounding areas: Painting can be a messy process, so take the time to protect the surrounding areas. Cover the floor with drop cloths or old sheets to catch any drips or spills. Use painter’s tape to cover any hinges, handles, or other hardware that you don’t want to get paint on.
- Sand the surface: Lightly sand the surface of the wardrobe to create a smooth, even texture. This helps to remove any imperfections and promotes better paint adhesion. Use a medium-grit sandpaper and sand in the direction of the wood grain. Once you’re done sanding, wipe away the dust with a clean cloth.
By taking the time to prepare your wardrobe properly, you are setting a solid foundation for the rest of the painting process. A clean and well-sanded surface will ensure that the paint goes on smoothly and adheres properly, resulting in a professional-looking finish. Now that your wardrobe is prepped and ready, it’s time to move on to the next step: Removing Hardware and Dismantling.
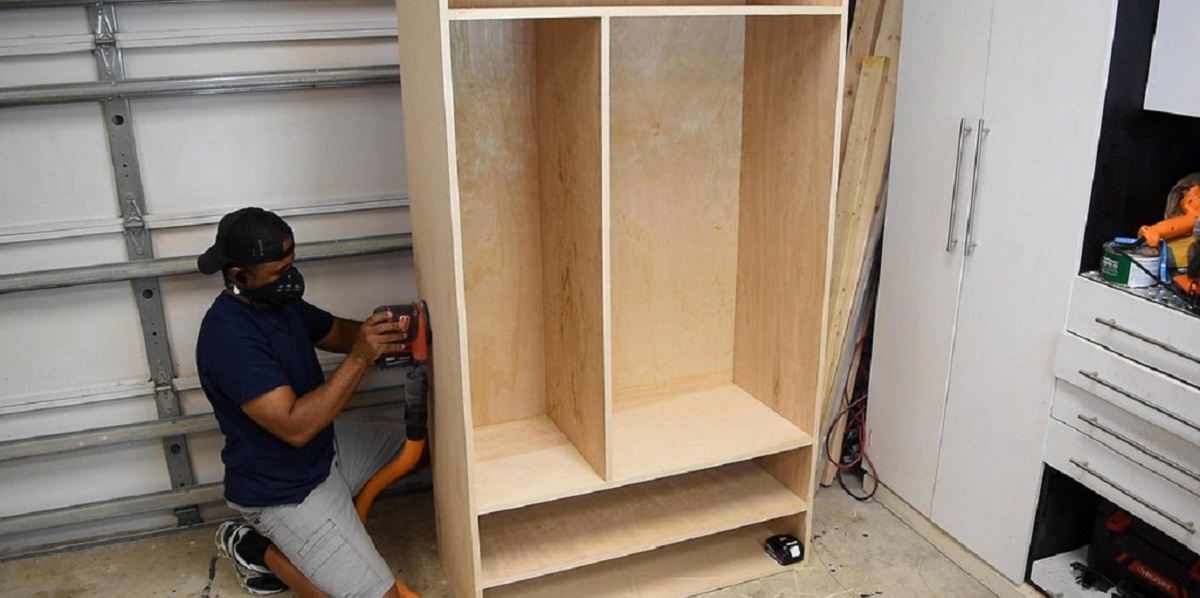
Step 2: Removing Hardware and Dismantling
Before you start painting, it’s essential to remove any hardware and dismantle the wardrobe if possible. This step will make the painting process much easier and more efficient. Here’s how to do it:
- Take off the doors: If your wardrobe has doors, remove them by unscrewing the hinges. Place the hinges and screws in a safe place so that you can easily find them later when it’s time to reassemble the wardrobe.
- Remove the drawers and shelves: If your wardrobe has any drawers or shelves, take them out and set them aside. This will allow you to paint them separately and ensure that you cover every surface evenly.
- Take off the knobs or handles: For a seamless paint job, it’s best to remove any knobs, handles, or other hardware from the wardrobe. Use a screwdriver or a drill to loosen and remove them carefully. Keep all the hardware in a labeled bag or container so that you don’t lose anything during the painting process.
- Dismantle if necessary: If your wardrobe is big or has intricate details, you might consider dismantling it further for easier access. This may include unscrewing panels or separating sections. Just make sure to keep track of all the components and their respective hardware.
By removing the hardware and dismantling the wardrobe if necessary, you’ll have better access to all the surfaces that need to be painted. This will make your painting process more efficient and help you achieve a smoother and more professional-looking finish. Now that everything is disassembled, it’s time to move on to the next step: Sanding the Surface.
Step 3: Sanding the Surface
Sanding the surface of your wardrobe is an important step in the painting process. It helps to create a smooth and even texture, removes any imperfections, and promotes better paint adhesion. Here’s how to sand your wardrobe effectively:
- Gather the right tools: You’ll need sandpaper or a sanding block for this step. Choose a medium-grit sandpaper (around 120 to 150 grit) for wood surfaces. If your wardrobe has any veneer or laminate, opt for a finer grit sandpaper (around 220 to 280 grit).
- Start sanding: Begin by sanding the wardrobe’s surface using smooth, even strokes. Sand in the direction of the wood grain to avoid damaging or splintering the wood. Keep the pressure consistent and be thorough, covering all areas that will be painted.
- Focus on problem areas: Pay extra attention to any rough or damaged areas during the sanding process. These could include scratches, dents, or any previous paint or varnish that needs to be removed. Sand these areas more intensively until they are smooth and even with the rest of the surface.
- Remove dust: Once you’ve finished sanding, use a clean cloth or a vacuum cleaner with a brush attachment to remove all the dust and debris from the surface. This will ensure a clean base for the next steps of the painting process.
Sanding the surface of your wardrobe helps create an ideal surface for the paint to adhere to, resulting in a longer-lasting and more professional-looking finish. It also promotes better paint absorption, allowing for smoother and more even coverage. Now that the surface is sanded and dust-free, it’s time to move on to Step 4: Cleaning the Wardrobe.
Step 4: Cleaning the Wardrobe
Before you start applying paint to your wardrobe, it’s crucial to ensure that the surface is clean and free from any dust or debris. Cleaning the wardrobe thoroughly will help the paint adhere better and result in a smoother finish. Follow these steps to clean your wardrobe effectively:
- Use a gentle cleanser: Mix a mild detergent or dish soap with water to create a cleaning solution. Avoid using harsh cleansers or chemicals as they can damage the surface of the wardrobe.
- Dampen a cloth or sponge: Dip a cloth or sponge in the cleaning solution, wring out any excess water, and wipe down the entire surface of the wardrobe. Pay attention to any areas that may be particularly dirty or stained.
- Rinse with clean water: After you’ve cleaned the wardrobe with the soapy solution, rinse the cloth or sponge with clean water and go over the surface again. This will remove any remaining soap residue.
- Allow the wardrobe to dry: After cleaning, allow the wardrobe to air dry completely before proceeding with the next steps of the painting process. This ensures that the paint adheres properly without any moisture trapped underneath.
Cleaning the wardrobe ensures that the paint has a clean and smooth surface to adhere to, resulting in a professional-looking finish. It also removes any dust or debris that may affect the smoothness of the paint job. Now that your wardrobe is clean and dry, it’s time to move on to the next step: Priming the Wardrobe.
Read more: How To Build A Wardrobe
Step 5: Priming the Wardrobe
Priming your wardrobe is an essential step in the painting process. It provides a smooth and consistent base for the paint to adhere to, improves paint durability, and enhances the overall finish. Here’s how to prime your wardrobe effectively:
- Choose the right primer: Select a primer that is specifically designed for the surface of your wardrobe. If you’re painting a wooden wardrobe, choose a wood primer. If you’re painting over a previously painted surface, use a primer suitable for that type of paint.
- Prepare the primer: Follow the instructions on the primer’s label to properly mix and prepare it. Some primers may need to be shaken or stirred before use, while others may require thinning with water or another specified solvent.
- Apply the primer: Use a high-quality brush or a roller to apply a thin, even coat of primer to the wardrobe. Start from the top and work your way down, paying attention to any intricate details or hard-to-reach areas. Allow the primer to dry completely according to the manufacturer’s instructions.
- Inspect the primed surface: Once the primer is dry, inspect the surface for any imperfections or areas that may require additional priming. If necessary, lightly sand any rough spots and apply a second coat of primer for better coverage and adhesion.
- Allow the primer to cure: Give the primer enough time to cure before proceeding with the next steps of the painting process. Check the manufacturer’s instructions for the recommended curing time, but generally, primers need at least 24 hours to dry and cure properly.
Priming your wardrobe is crucial as it creates a smooth and even surface for the paint to adhere to. It also helps to prevent staining, improves paint adhesion and durability, and enhances the lifespan of your paint job. Now that the wardrobe is properly primed and cured, it’s time to move on to Step 6: Choosing the Right Paint.
Step 6: Choosing the Right Paint
Choosing the right paint for your wardrobe is essential to achieve the desired finish and durability. There are a few factors to consider when selecting the paint for your project. Here’s how to choose the right paint for your wardrobe:
- Type of Paint: Consider the type of paint that is suitable for your wardrobe’s material. If you have a wooden wardrobe, opt for a paint specifically designed for wood surfaces. If your wardrobe is made of metal or laminate, look for paints formulated for those materials.
- Finish: Decide on the finish you want for your wardrobe. Common options include matte, satin, semi-gloss, and high-gloss. Each finish has its own aesthetic appeal and level of durability. Matte finishes offer a more subtle and non-reflective look, while high-gloss finishes provide a shiny and reflective appearance.
- Color: Choose a color that complements your overall interior design and personal style. Consider the existing color scheme of the room and whether you want the wardrobe to blend in or stand out as a statement piece. Don’t be afraid to explore different color options to add a pop of personality to your space.
- Quality of Paint: Invest in high-quality paint to ensure a better finish and durability. High-quality paints have better coverage, resist fading, and are more resistant to wear and tear. They may cost a bit more upfront, but they will ultimately save you time and money in the long run.
- Eco-friendly Options: Consider using eco-friendly paints that are low in VOC (volatile organic compounds). These paints are safer for you and the environment, as they release fewer harmful chemicals into the air. Look for paints that are labeled as low-VOC or zero-VOC.
By choosing the right paint for your wardrobe, you’ll achieve a beautiful and long-lasting finish. Consider the type of paint, finish, color, and quality to ensure that it meets your specific needs and preferences. Now that you’ve chosen the paint, it’s time to move on to Step 7: Applying the First Coat of Paint.
When painting a wardrobe, make sure to sand the surface first to create a smooth and even base for the paint. This will help the paint adhere better and result in a more professional finish.
Step 7: Applying the First Coat of Paint
Now that you’ve prepared the wardrobe and chosen the perfect paint, it’s time to start painting! Applying the first coat of paint is an exciting step that begins to transform your wardrobe. Here’s how to apply the first coat effectively:
- Stir the paint: Before you begin, thoroughly stir the paint to ensure an even consistency and to mix in any settled pigments.
- Prepare your tools: Use a high-quality brush or a roller, depending on the size and intricacy of the wardrobe. Ensure your tools are clean and free from any debris or paint residue.
- Cut in the edges: Start by “cutting in” the edges and corners of the wardrobe using a brush. This means carefully painting around the edges, corners, and any detailed areas that a roller may not reach easily. This will ensure that these areas are fully covered.
- Paint larger surfaces: Once you’ve cut in the edges, use a roller or brush to apply the paint to larger surfaces. Work in small, manageable sections, taking care to maintain a smooth and even application. Apply the paint in the direction of the wood grain or in long, even strokes for a consistent finish.
- Follow proper drying times: Allow the first coat of paint to dry according to the manufacturer’s instructions. This may take several hours, so be patient and avoid touching or disturbing the paint during this time.
- Inspect for coverage: Once the first coat is dry, inspect the wardrobe for any areas that require additional coverage. If there are any areas that seem thin or uneven, apply a second coat of paint to ensure a smooth and uniform finish.
Applying the first coat of paint is a significant step in the transformation of your wardrobe. Take your time, work in small sections, and ensure an even coverage for the best results. Once the first coat is complete, you can move on to Step 8: Applying Additional Coats (if needed).
Step 8: Applying Additional Coats (if needed)
After applying the first coat of paint to your wardrobe, you may find that additional coats are necessary to achieve the desired finish and coverage. Applying additional coats helps to enhance the color, ensure an even application, and provide better durability. Here’s how to apply additional coats effectively:
- Allow the first coat to dry: Before applying additional coats, make sure that the first coat is completely dry. Refer to the paint manufacturer’s instructions for the recommended drying time.
- Inspect the first coat: Take a close look at the wardrobe to evaluate the coverage of the first coat. Look for any thin or uneven areas that may require more paint. If you’re satisfied with the coverage, you can proceed to the next step. Otherwise, move on to applying an additional coat.
- Sand lightly (optional): If you notice any imperfections or rough areas after the first coat has dried, you may choose to lightly sand the surface with a fine-grit sandpaper. This will create a smooth texture and provide better adhesion for the next coat of paint.
- Apply the second coat: Using the same technique as with the first coat, apply a second coat of paint to the wardrobe. Take care to maintain a consistent application and blend the edges with the first coat for a seamless finish. Allow the second coat to dry completely.
- Evaluate the coverage: Once the second coat is dry, inspect the wardrobe again to assess the coverage. If you’re satisfied with the color and overall finish, you can move on to the next steps. However, if you still notice any unevenness or spots that require more coverage, you may need to apply additional coats until you achieve the desired result.
Applying additional coats of paint, if needed, ensures a vibrant and uniform finish for your wardrobe. Take your time and assess the coverage at each stage to achieve the desired results. Once you’re satisfied with the coverage, you can move on to Step 9: Reassembling the Wardrobe.
Read more: How To Purge Wardrobe
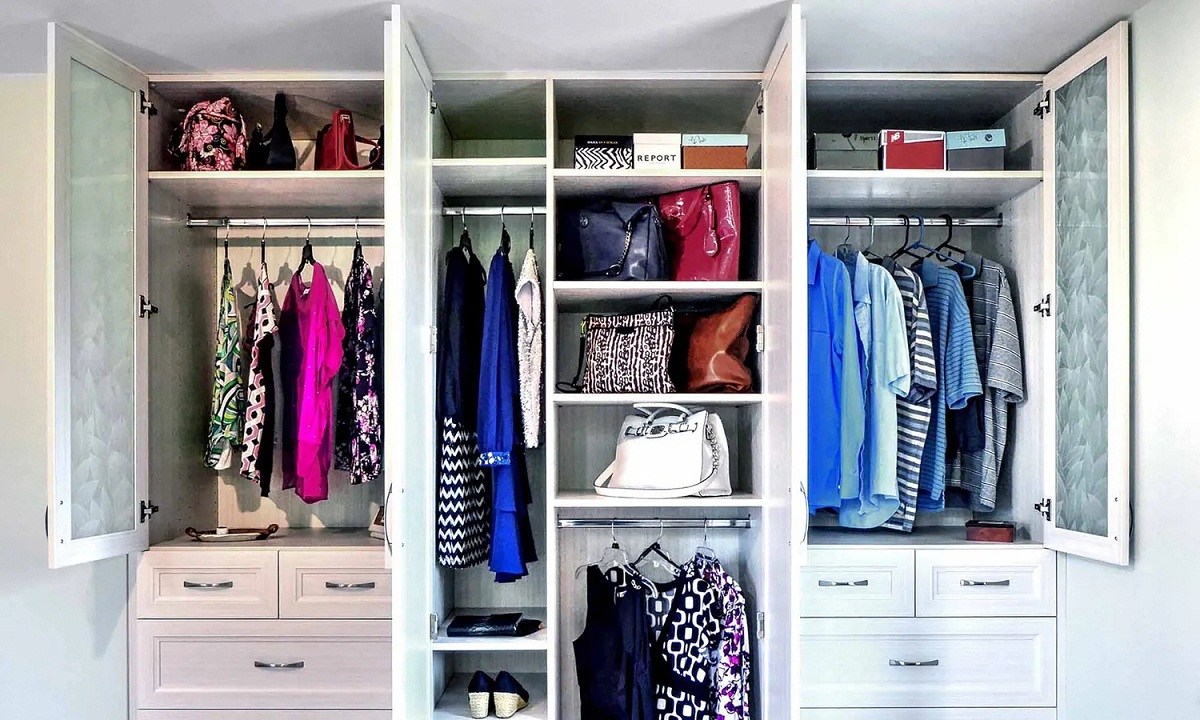
Step 9: Reassembling the Wardrobe
Now that you’ve finished painting the wardrobe and achieved the desired finish, it’s time to reassemble the different components. Reassembling the wardrobe properly will bring everything back together and allow you to enjoy your newly painted piece. Here’s how to reassemble the wardrobe:
- Refer to your documentation: If you have any assembly instructions or diagrams for your wardrobe, consult them to ensure that you reassemble it correctly. If you don’t have any documentation, proceed with caution and use your best judgment.
- Start with the larger sections: Begin by reattaching the main sections of the wardrobe, such as the sides, back panel, and base. Use the appropriate screws or fasteners as indicated in your documentation.
- Attach the shelves and drawers: If your wardrobe has shelves and drawers, insert them back into their respective slots or tracks. Check that they fit properly and slide smoothly.
- Reattach the doors: If you removed the doors during the painting process, now is the time to reattach them. Align the hinges with their corresponding holes and screw them back in securely.
- Check for stability: Once everything is reassembled, double-check that the wardrobe is stable and balanced. Adjust any components if needed to ensure that the wardrobe is level and properly aligned. This will prevent any doors or drawers from sticking or rubbing.
By carefully reassembling the wardrobe, you’ll restore its functionality and ensure that all components are properly aligned. Take your time and refer to any documentation or guidelines you have to ensure a successful reassembly. With the wardrobe back together, you’re almost done! It’s time to move on to Step 10: Reattaching Hardware.
Step 10: Reattaching Hardware
After reassembling the wardrobe, it’s time to reattach the hardware such as knobs, handles, hinges, and any other decorative elements. Reattaching the hardware is the final touch that adds functionality and completes the overall look of your freshly painted wardrobe. Here’s how to reattach the hardware:
- Organize your hardware: Before you start, ensure that you have all the necessary hardware and lay them out in front of you. This will help you keep track of different pieces and ensure nothing gets lost during the process.
- Position the hardware: Place each piece of hardware in its designated location on the wardrobe. Refer to any previous markings or original placements to guide you. If there were no previous markings, use your discretion and align the hardware in a visually appealing and functional manner.
- Secure the hardware: Once positioned, use the appropriate screws or fasteners to secure the hardware in place. Ensure they are tightened enough to hold the hardware securely but not overly tightened to avoid damage to the wood or distortion of the hardware.
- Test the functionality: After attaching each piece of hardware, test its functionality. Open and close doors, slide drawers, and make sure that everything operates smoothly. Adjust any hardware if needed to ensure proper alignment and functionality.
By reattaching the hardware, you bring back the functionality and aesthetics of your wardrobe. Take your time to position and secure each piece properly. Now that your hardware is in place, your wardrobe is almost complete! It’s time for the final touch in Step 11: Finishing Touches and Clean-up.
Step 11: Finishing Touches and Clean-up
Congratulations! You’re in the final step of painting your wardrobe. Step 11 involves adding those finishing touches to enhance the overall look and ensuring a clean and tidy workspace. Here’s what you need to do:
- Inspect the paint job: Take a step back and carefully inspect your painted wardrobe. Look for any areas that may need touch-ups or additional cleaning. Use a small brush or sponge to address any spots that require attention.
- Remove painter’s tape and drop cloths: Carefully remove any painter’s tape from the wardrobe, being mindful not to damage the freshly painted surface. Fold and put away the drop cloths, ensuring that any paint spills or debris are properly disposed of or cleaned up.
- Clean your tools: Clean your paintbrushes, rollers, and any other tools you used for painting. Use warm soapy water for water-based paints and the appropriate solvent for oil-based paints. Ensure that they are thoroughly cleaned and properly stored for future use.
- Dispose of paint and materials: Follow proper guidelines for disposing of any leftover paint, paint cans, and other materials used during the painting process. Be environmentally conscious and dispose of them according to local regulations.
- Reorganize the space: Put everything back in its rightful place and give your workspace a thorough cleaning. Clear away any debris, vacuum or sweep the area, and wipe down any surfaces that may have accumulated dust or paint splatters.
- Enjoy your newly painted wardrobe: Once everything is tidy, step back and admire your hard work. Your wardrobe has been transformed with a fresh new coat of paint, and it’s ready to enhance the look of your space. Enjoy the fruits of your labor!
Completing the finishing touches and clean-up ensures that your wardrobe is in its best condition and that your workspace is left clean and organized. Take pride in your accomplishment and enjoy your beautifully painted wardrobe for years to come!
And there you have it, a comprehensive guide on how to paint a wardrobe. By following these steps and giving proper attention to each stage, you can achieve professional-looking results and bring new life to your furniture. Happy painting!
Conclusion
Congratulations on successfully completing the process of painting your wardrobe! By following the step-by-step guide outlined in this article, you’ve transformed your wardrobe into a stunning piece that adds personality and style to your space. Here are a few key takeaways from this guide:
Preparation is key: Taking the time to prepare the surface, remove hardware, and dismantle the wardrobe sets the foundation for a successful paint job. Thoroughly clean the surface and sand it to create a smooth texture for optimal paint adhesion.
Choosing the right paint: Consider the type of paint suitable for your wardrobe’s material, the desired finish, color, and the overall durability. Opting for high-quality, eco-friendly paints ensures better coverage and longevity.
Applying multiple coats: Depending on the desired color and coverage, applying multiple coats may be necessary. Take the time to inspect each coat, sand if needed, and apply subsequent coats evenly for a professional finish.
Attending to the details: Reassembling the wardrobe, reattaching hardware, and ensuring functionality adds the final touches to your project. Take care with alignment, secure the hardware properly, and thoroughly clean up your workspace once completed.
Painting a wardrobe is a rewarding project that allows you to unleash your creativity and personalize your furniture to suit your style. Not only does it provide a fresh new look, but it also extends the life of your wardrobe, bringing new energy into your living space.
Remember, patience and attention to detail are key to achieving professional results. Take the time to properly prepare, choose the right materials, and follow each step diligently. With the guidance and knowledge provided in this article, you’re well-equipped to tackle your next wardrobe painting project with confidence.
So, gather your supplies, set aside some time, and get ready to embark on a transformative journey. Enjoy the process and have fun refreshing your wardrobe to reflect your personal style, creating a beautiful and functional piece that you’ll enjoy for years to come.
Frequently Asked Questions about How To Paint A Wardrobe
Was this page helpful?
At Storables.com, we guarantee accurate and reliable information. Our content, validated by Expert Board Contributors, is crafted following stringent Editorial Policies. We're committed to providing you with well-researched, expert-backed insights for all your informational needs.


0 thoughts on “How To Paint A Wardrobe”