Home>Garden Essentials>Garden Storage>How To Secure Pax Wardrobe To Wall
Garden Storage
How To Secure Pax Wardrobe To Wall
Modified: May 6, 2024
Learn how to secure your Pax wardrobe to the wall for safe and stable storage. Follow our step-by-step guide for maximum security.
(Many of the links in this article redirect to a specific reviewed product. Your purchase of these products through affiliate links helps to generate commission for Storables.com, at no extra cost. Learn more)
Introduction
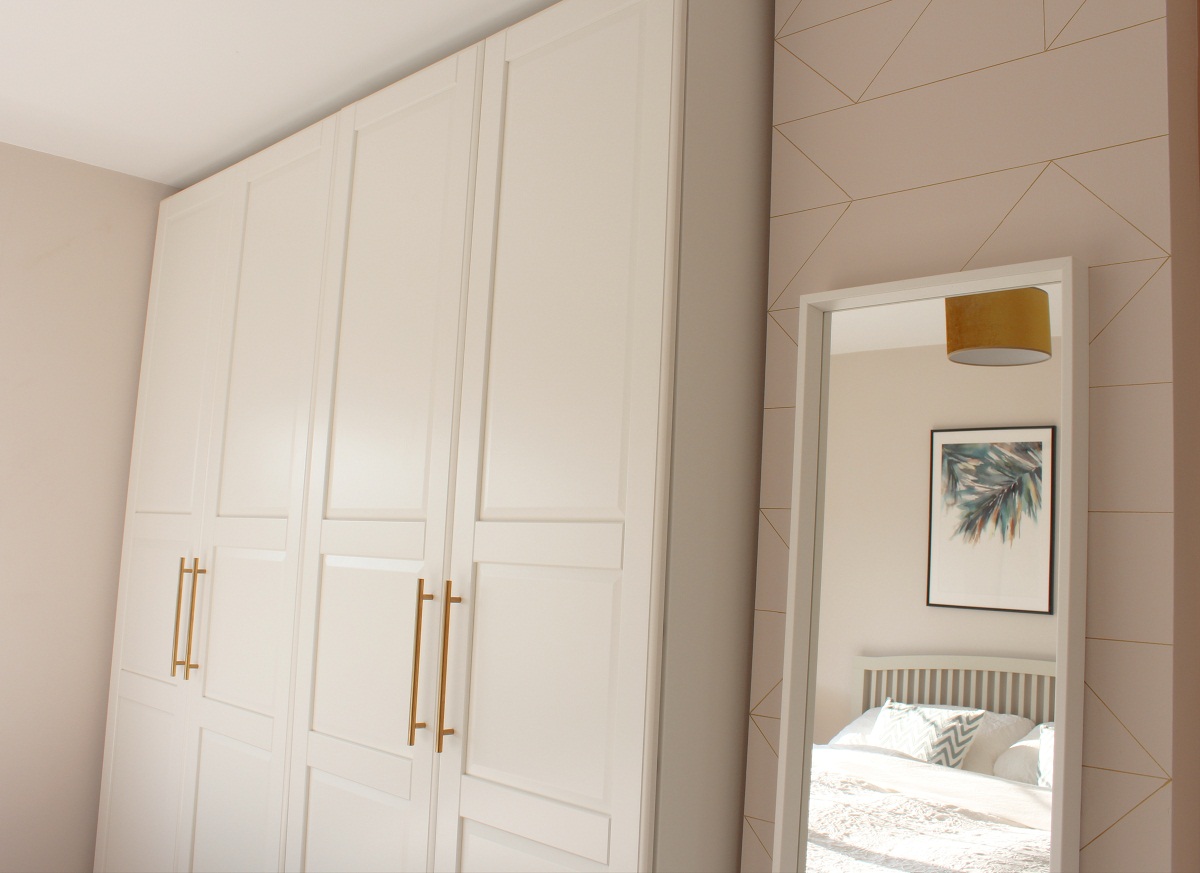
Welcome to our comprehensive guide on how to secure your Pax wardrobe to the wall. The Pax wardrobe from IKEA is a popular choice for its stylish design, spacious storage, and customizable options. However, ensuring its stability is crucial to prevent accidents and provide peace of mind. In this article, we will walk you through the step-by-step process of securing your Pax wardrobe to the wall, along with important safety considerations and additional tips for added stability.
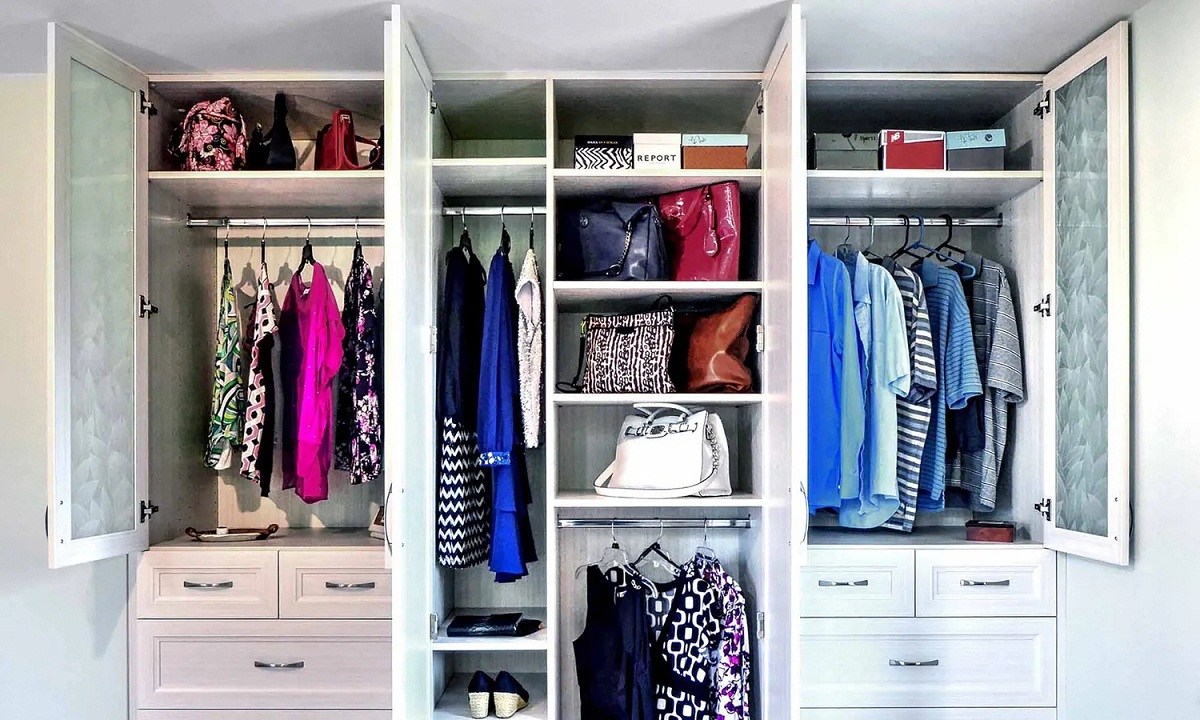
Having a securely mounted Pax wardrobe offers numerous benefits. Firstly, it prevents the wardrobe from tipping over, especially if you have children or pets who may accidentally climb or pull on it. Secondly, securing it to the wall ensures that the wardrobe remains in its desired position without any wobbling or movement. Lastly, it helps to protect your belongings inside the wardrobe, preventing any potential damage or breakage.
Understanding the potential risks associated with an unsecured wardrobe is essential. According to the Consumer Product Safety Commission (CPSC), there have been incidences where unanchored furniture, including wardrobes, has caused injuries and even fatalities due to tipping accidents. These accidents are more prevalent in households with young children who are prone to climbing or pulling on furniture.
Before you begin the process of securing your Pax wardrobe to the wall, it is important to gather the necessary tools and materials. Here is a list of what you will need:
- Anchors or wall plugs
- Screws
- Drill or screwdriver
- Level
- Tape measure
- Pencil
- Stud finder
- Optional: Wall mounting brackets (if not included with your wardrobe)
Now that you have everything ready, let’s dive into the step-by-step instructions for securing your Pax wardrobe to the wall in the next section.
Key Takeaways:
- Securely anchoring your Pax wardrobe to the wall is crucial for preventing tipping accidents, protecting your belongings, and ensuring peace of mind, especially in households with young children or pets.
- Gather the necessary tools and materials, follow the step-by-step instructions, and consider additional stability tips to enhance the safety and longevity of your Pax wardrobe.
Read more: How To Build IKEA Pax Wardrobe
Why secure your Pax wardrobe?
Securing your Pax wardrobe to the wall is of utmost importance for several reasons. Let’s explore why it is crucial to take the necessary steps to ensure the stability and safety of your wardrobe:
- Prevent tipping hazards: The primary reason for securing your Pax wardrobe is to prevent tipping accidents. Unsecured tall furniture, like wardrobes, can easily tip over if enough force is applied. This poses a significant risk, especially in households with young children or pets who may climb or pull on furniture. By securing your wardrobe to the wall, you minimize the risk of it toppling over, leading to potential injuries or damage.
- Ensure stability: A securely mounted Pax wardrobe will have minimal to no wobbling or movement. This is important because an unstable wardrobe can not only be annoying but can also lead to potential damage to the structure, shelves, or items inside. By properly fastening your wardrobe to the wall, you provide stability and ensure that it stays in its desired position, even when opening or closing the doors or drawers.
- Protect your belongings: Pax wardrobes are often used to store a wide range of items, including clothing, accessories, and other personal belongings. By securing the wardrobe to the wall, you reduce the risk of it tipping over and potentially damaging or breaking your valuable items. Additionally, a stable wardrobe ensures that the shelves and drawers remain aligned, minimizing the chances of items falling out or getting damaged due to shifting.
- Peace of mind: Knowing that your Pax wardrobe is securely fastened to the wall can provide you with peace of mind. You can go about your daily activities without worrying about the wardrobe tipping over or causing any harm. Whether you have a busy household or live in an area prone to seismic activity, having a stable and secure wardrobe ensures that it can withstand external forces and remain intact.
Securing your Pax wardrobe to the wall is a simple yet important task that can significantly enhance the safety and stability of your furniture. By taking the time to properly anchor your wardrobe, you can prevent accidents, protect your belongings, and enjoy the peace of mind that comes with knowing your wardrobe is secure. In the following sections, we will guide you through the step-by-step process of securely fastening your Pax wardrobe to the wall.
Understanding the potential risks
Before securing your Pax wardrobe to the wall, it is important to understand the potential risks associated with an unsecured wardrobe. The Consumer Product Safety Commission (CPSC) reports that furniture tip-over accidents have led to injuries, and in some cases, even fatalities, particularly among young children.
Unsecured wardrobes, especially taller and heavier ones like the Pax wardrobe, can be prone to tipping if not properly anchored. This can occur due to various reasons, including a child or pet climbing, pulling, or leaning on the furniture. Additionally, factors like uneven flooring, accidental bumping, or seismic activity can increase the likelihood of a wardrobe tipping over.
Tipping accidents can result in severe injuries, such as broken bones, head trauma, or suffocation if the furniture traps the individual underneath. Young children are particularly vulnerable to these accidents, as they may not have the physical strength or awareness to react quickly and prevent a tip-over.
Understanding these risks reinforces the importance of securing your Pax wardrobe to the wall. By taking the necessary precautions and following the recommended guidelines, you can significantly reduce the risk of accidents and ensure the safety of your household members and belongings.
It is crucial to anchor your wardrobe properly, ensuring that it is securely attached to a solid wall or stud. This will provide stability and prevent the wardrobe from tipping over, even when subjected to external forces or movements.
Furthermore, it is essential to educate and inform all household members about the potential risks associated with unsecured furniture. Ensure that everyone understands the importance of not climbing or hanging on the wardrobe and to be cautious around it. This knowledge will help create a safe environment and minimize the chances of accidents occurring.
By recognizing and understanding the potential risks, you can take the necessary precautions to enhance the safety and stability of your Pax wardrobe. In the next section, we will explore the tools and materials you will need to securely fasten the wardrobe to the wall.
Tools and materials needed
Before you begin securing your Pax wardrobe to the wall, it is important to gather the necessary tools and materials. Here is a list of what you will need:
- Anchors or wall plugs: These will provide the necessary support to fasten your wardrobe to the wall. Different types of anchors are available, such as plastic anchors, metal anchors, or toggle bolts. The specific type of anchor you need will depend on the type of wall you are working with.
- Screws: Select screws that are appropriate for the type of anchors you are using. Make sure the screws are long enough to securely attach the wardrobe to the wall while considering the thickness of any brackets or mounting plates.
- Drill or screwdriver: A drill or screwdriver will be required to create pilot holes for the screws and to drive them into the wall and wardrobe.
- Level: To ensure that your wardrobe is straight and properly aligned, a level is essential. It will help you determine if adjustments are needed during the installation process.
- Tape measure: Accurate measurements are crucial in determining the placement of anchors and ensuring that your wardrobe is securely fastened to the wall. A tape measure will help you measure the distance between the wardrobe and the wall, as well as any required spacing.
- Pencil: A pencil will come in handy for marking the locations of the anchors and pilot holes on both the wall and the wardrobe.
- Stud finder: If possible, using a stud finder will help you locate and secure your wardrobe to a wall stud for added strength and stability.
- Optional: Wall mounting brackets: Depending on the specific model and design of your Pax wardrobe, you may need additional wall mounting brackets to properly secure it to the wall. Check the assembly instructions or consult with the manufacturer or retailer to determine if these brackets are necessary.
Having the necessary tools and materials on hand before you begin will make the installation process smoother and more efficient. It is important to choose high-quality materials and ensure that they are suitable for the specific needs of your wardrobe and wall type. Once you have everything ready, you can proceed with securing your Pax wardrobe to the wall, which we will explain in the next section.
Use L-brackets to secure the top of the Pax wardrobe to the wall studs. Make sure to use appropriate hardware and follow the manufacturer’s instructions for a secure installation.
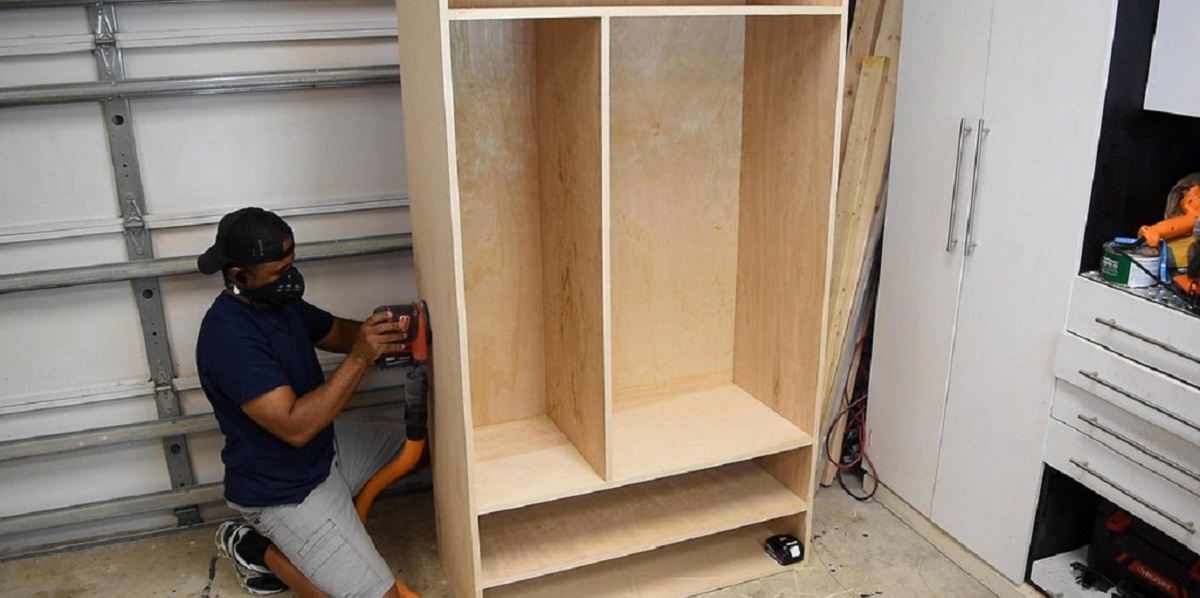
Step-by-step instructions for securing Pax wardrobe to wall
Now that you have gathered the necessary tools and materials, let’s dive into the step-by-step process of securing your Pax wardrobe to the wall:
- Prepare the area: Clear the space around the wardrobe to provide ample room for installation. Remove any items from inside the wardrobe and temporarily move any nearby furniture or obstacles out of the way.
- Locate wall studs: If possible, use a stud finder to locate the wall studs behind the area where you plan to mount the wardrobe. Wall studs offer additional strength and stability. Mark the locations of the studs with a pencil for reference later.
- Measure and mark: Use a tape measure to determine the desired height and placement for your wardrobe. Measure the distance from the floor and mark the desired height on the wall using a pencil. Additionally, use a level to ensure your marks are straight and aligned.
- Attach wall mounting brackets (if applicable): If your Pax wardrobe includes wall mounting brackets, attach them to the designated areas on the top or back of the wardrobe according to the manufacturer’s instructions. These brackets will help secure the wardrobe to the wall.
- Mark anchor locations: Hold the wardrobe against the wall at the desired height and alignment. With the help of an assistant, ensure that the wardrobe is level and make pencil marks at the locations where you will install the anchors. These marks should correspond with the pre-drilled holes or mounting points on the wardrobe and the wall.
- Drill pilot holes: Using a drill or screwdriver, create pilot holes at the marked anchor locations on both the wall and the wardrobe. The pilot holes should be slightly smaller than the diameter of the screws you will be using.
- Install anchors: Insert anchors into the pilot holes on the wall. Depending on the type of anchors you are using, you may need to tap them lightly with a hammer until they are flush with the wall surface.
- Attach wardrobe to the wall: With the assistance of another person, carefully lift the wardrobe and align the pre-drilled holes or mounting points with the anchors on the wall. Insert screws through the holes in the wardrobe and into the anchors in the wall. Use a drill or screwdriver to tighten the screws securely, but be cautious not to over-tighten them.
- Double-check stability: Once the wardrobe is mounted, gently push and pull on it to test its stability. Ensure that it does not wobble or move excessively. If any adjustments are needed, loosen the screws slightly and make the necessary corrections. Then, retighten the screws.
- Reinstall shelves and items: Once you are confident that the wardrobe is securely fastened to the wall, reinstall any shelves, drawers, or items that were removed during the installation process. Ensure that they are properly aligned and secure.
Following these step-by-step instructions will help you securely anchor your Pax wardrobe to the wall, providing stability and minimizing the risk of tip-overs. Remember that it is always recommended to refer to the assembly instructions provided by the manufacturer or consult with a professional if you have any doubts or specific requirements.
Next, we will share some additional tips to further enhance the stability and safety of your Pax wardrobe.
Read also: 14 Unbelievable Pax Wardrobe for 2025
Additional tips for added stability
While following the step-by-step instructions to secure your Pax wardrobe to the wall will greatly enhance its stability, there are a few additional tips you can consider for added stability. These tips will help ensure the long-lasting security of your wardrobe:
- Use additional anchors: Consider using more anchors than recommended by the manufacturer for increased stability, especially if your wardrobe is large or heavy. Adding extra anchors evenly spaced along the back of the wardrobe will distribute the weight and prevent any potential sagging or tilting.
- Secure to multiple wall studs: If possible, locate and secure your wardrobe to multiple wall studs. This will provide even more strength and stability compared to just using anchors. Use a stud finder to locate additional studs and adjust your anchor and screw placements accordingly.
- Check and tighten regularly: Periodically check the screws and anchors to ensure they remain tight and secure. Over time, vibrations and usage can cause screws to loosen. Regularly tightening them will maintain the stability and prevent any potential issues.
- Level the wardrobe: Ensure that your wardrobe is level both horizontally and vertically. An unlevel wardrobe can put added stress on certain areas, potentially compromising its stability. Use a level to adjust the position and alignment, and make any necessary adjustments during installation or afterwards.
- Secure top-heavy items: If you have top-heavy items inside the wardrobe, consider securing them to prevent shifting or imbalance. This can be done using adjustable straps, dividers, or bins to keep the items in place. A well-balanced wardrobe will contribute to its overall stability.
- Avoid placing heavy items on top: To further minimize the risk of tipping, avoid placing excessively heavy items on top of the wardrobe. The added weight can raise the center of gravity and increase the chances of instability. Instead, distribute the weight evenly throughout the wardrobe or place heavier items on lower shelves.
- Keep children and pets away: Educate children and pets about the importance of not climbing, hanging, or playing near the wardrobe. Avoid placing furniture or items nearby that could serve as a stepping stool or encourage climbing. By eliminating potential hazards, you reduce the risk of accidents and ensure the overall stability of the wardrobe.
By implementing these additional tips, you can enhance the stability and safety of your Pax wardrobe. These measures will provide peace of mind, knowing that your wardrobe is securely fastened to the wall and that the risk of accidents or tip-overs is minimized.
Now that you have secured your Pax wardrobe and taken necessary precautions for stability, let’s address some frequently asked questions to further clarify any doubts you may have.
Frequently asked questions
Q: Do I need to secure my Pax wardrobe if I have wall studs?
A: While wall studs provide additional strength and stability, it is still recommended to secure your Pax wardrobe to the wall using anchors. This ensures maximum stability and minimizes the risk of tipping or accidents.
Q: Can I move my Pax wardrobe after it has been secured to the wall?
A: It is possible to move your Pax wardrobe after it has been secured to the wall, but it is important to exercise caution. Carefully remove any screws or anchors from the wall before attempting to move the wardrobe. Once you have relocated the wardrobe, follow the installation steps again to securely fasten it to the new location.
Q: How often should I check the screws and anchors for tightness?
A: It is recommended to check the screws and anchors for tightness on a regular basis, at least once every six months. Over time, due to usage and vibrations, screws may loosen, compromising the stability of your wardrobe. Regular checks and tightening will help maintain its stability.
Q: What should I do if there is no wall stud behind my desired location for anchoring the wardrobe?
A: If you are unable to secure your Pax wardrobe to a wall stud, you will need to use appropriate anchors for your wall type. Toggle bolts or heavy-duty plastic anchors are commonly used in such situations. These anchors provide strong support, even without the presence of a wall stud.
Q: Are there any weight limitations for the Pax wardrobe when securing it to the wall?
A: While the Pax wardrobe is designed to be stable and durable, it is important to consider weight limitations specified by the manufacturer. Exceeding recommended weight limits may compromise the stability of the wardrobe and increase the risk of accidents. Always refer to the manufacturer’s guidelines for weight limitations.
Q: Can I secure my Pax wardrobe to a plasterboard or drywall wall?
A: Yes, you can secure your Pax wardrobe to a plasterboard or drywall wall. However, it is crucial to use appropriate anchors specifically designed for these wall types. Plastic anchors or toggle bolts are commonly used for securing heavy objects to plasterboard or drywall walls.
Q: Can I secure multiple Pax wardrobes together and then anchor them to the wall?
A: Yes, you can secure multiple Pax wardrobes together by connecting them with specially designed connectors or brackets provided by IKEA. Once they are securely connected, you can then anchor the combined structure to the wall using appropriate anchors and screws.
These are some common questions related to securing a Pax wardrobe to the wall. If you have any additional concerns or queries, it is always recommended to consult the manufacturer’s instructions or seek professional assistance.
Now, let’s conclude our comprehensive guide on securing your Pax wardrobe to the wall.
Conclusion
Securing your Pax wardrobe to the wall is a crucial step in ensuring the stability, safety, and longevity of your furniture. By following the step-by-step instructions we’ve provided and considering the additional tips for added stability, you can minimize the risk of accidents, tipping, and damage.
Remember that the main purpose of securing your Pax wardrobe to the wall is to prevent it from tipping over, particularly in households with young children or pets. By properly anchoring the wardrobe and distributing the weight evenly, you create a safer environment for everyone in your home.
Make sure to gather the necessary tools and materials before you begin, and always refer to the manufacturer’s instructions for specific guidelines related to your Pax wardrobe model.
Regularly check the screws and anchors for tightness, and educate your household members on the importance of not climbing or hanging on the wardrobe. By taking these measures, you can further enhance the stability and safety of your Pax wardrobe.
Securing your Pax wardrobe to the wall is a simple yet critical task that provides peace of mind, knowing that your furniture is firmly anchored and your belongings are protected. By following our guide, you can enjoy the functionality, style, and convenience of your Pax wardrobe while ensuring the safety of your household.
We hope this comprehensive guide has provided you with all the necessary information and instructions to successfully secure your Pax wardrobe to the wall. Remember to prioritize safety and take the time to properly secure your furniture. If you have any further questions or concerns, consult the manufacturer or seek professional assistance.
Thank you for reading, and happy securing!
Now that you've mastered securing your Pax wardrobe, why not dive into other hands-on tasks? Check out our guide on the joys and benefits of DIY projects. From creating unique home decor to tackling repairs, DIY activities offer a rewarding way to enhance your living space. These projects not only sharpen skills but also provide a sense of accomplishment. Ready to transform everyday items into personalized masterpieces? Start your DIY adventure today!
Frequently Asked Questions about How To Secure Pax Wardrobe To Wall
Was this page helpful?
At Storables.com, we guarantee accurate and reliable information. Our content, validated by Expert Board Contributors, is crafted following stringent Editorial Policies. We're committed to providing you with well-researched, expert-backed insights for all your informational needs.


0 thoughts on “How To Secure Pax Wardrobe To Wall”