Home>Garden Essentials>When To Plant Black-Eyed Susan Seeds Outdoors

Garden Essentials
When To Plant Black-Eyed Susan Seeds Outdoors
Modified: April 28, 2024
Discover the perfect time to plant black-eyed Susan seeds in your garden. Find out the best outdoor planting tips and techniques for successful germination.
(Many of the links in this article redirect to a specific reviewed product. Your purchase of these products through affiliate links helps to generate commission for Storables.com, at no extra cost. Learn more)
Introduction
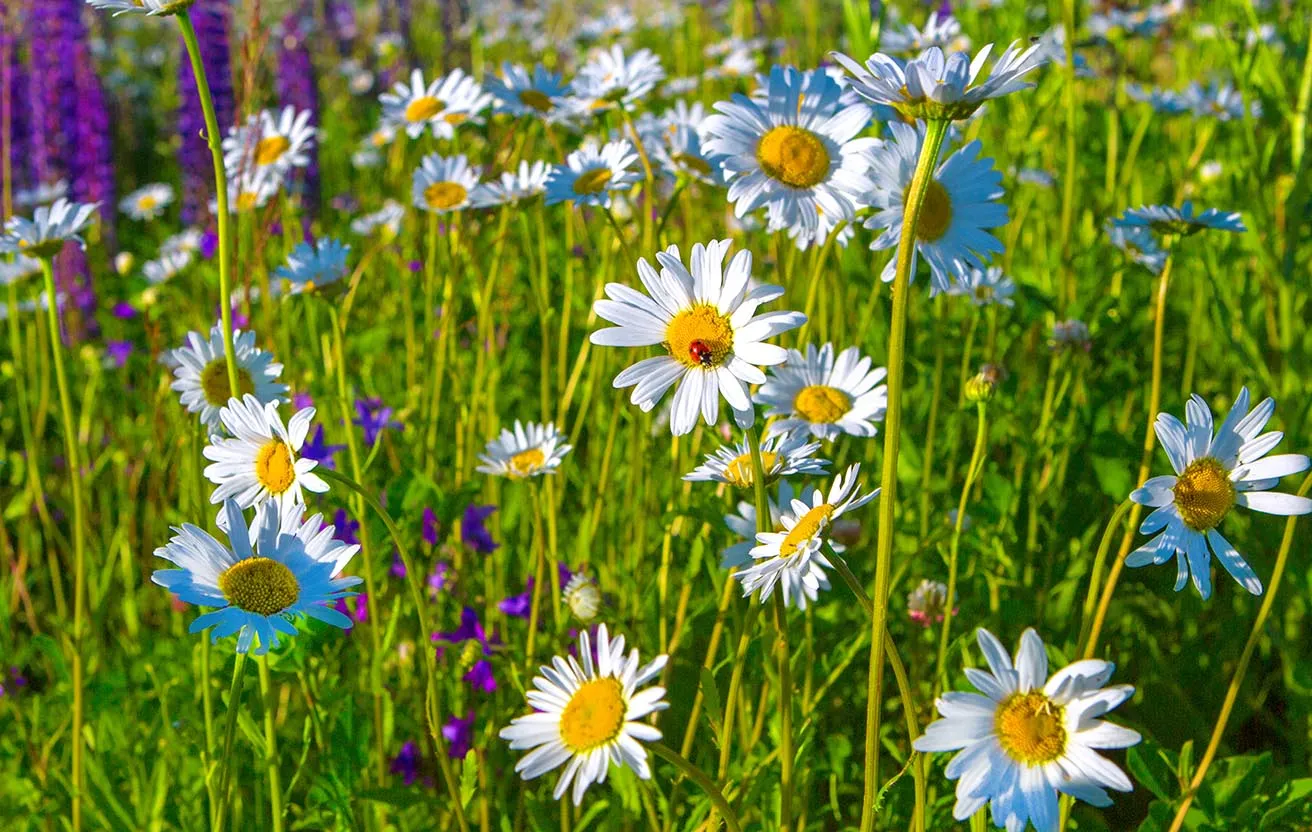
Welcome to the wonderful world of gardening! If you are a fan of vibrant and colorful flowers, then the black-eyed Susan should definitely be on your list of must-have plants. The black-eyed Susan, or Rudbeckia hirta, is a popular perennial flower that adds a burst of beauty to any garden or landscape.
With its striking yellow or orange petals and dark brown centers, the black-eyed Susan is sure to capture your attention. This resilient and low-maintenance flower is native to North America and is beloved for its bright and cheerful blooms.
Whether you’re a seasoned gardener or just starting out, growing black-eyed Susan from seeds outdoors can be a rewarding and enjoyable experience. In this article, we will explore the factors to consider when planting black-eyed Susan seeds outdoors, including climate and temperature requirements, soil conditions, sunlight needs, planting time, and essential care tips.
Before you embark on your gardening journey, it’s important to understand the specific needs of black-eyed Susan and create the ideal conditions for its growth. By following these guidelines, you can ensure that your black-eyed Susan seeds will thrive and produce vibrant blooms.
Key Takeaways:
- Black-eyed Susan seeds should be planted outdoors in late spring or early summer, after the threat of frost has passed, to ensure successful germination and strong root development.
- Providing well-drained soil, full sun, and consistent moisture is essential for the healthy growth and abundant blooming of black-eyed Susan plants.
Read more: When To Plant Black Eyed Susan Seeds
Factors to Consider
Before you start planting black-eyed Susan seeds outdoors, there are a few important factors to consider. These factors will help you create an optimal environment for your seeds to germinate and grow into healthy plants.
Climate and Temperature Requirements: Black-eyed Susan is a hardy plant that can adapt well to a variety of climates. However, it generally thrives in USDA hardiness zones 3-9. It prefers moderate temperatures, around 70-75°F (21-24°C) during the day and slightly cooler temperatures at night. Make sure to check your local climate conditions to ensure that they are suitable for black-eyed Susan.
Soil Requirements: Black-eyed Susan prefers well-drained soil that is rich in organic matter. It can tolerate a wide range of soil types, including sandy, loamy, or clay soils. However, it’s important to avoid waterlogged or compacted soil, as this can hinder root development. Before planting, amend the soil with compost or well-rotted manure to improve its fertility and drainage.
Sunlight Requirements: Black-eyed Susan is a sun-loving plant that thrives in full sun. It requires at least 6-8 hours of direct sunlight per day to ensure healthy growth and abundant blooms. Make sure to choose a location in your garden that receives ample sunlight throughout the day.
Planting Time: The ideal time to plant black-eyed Susan seeds outdoors is in late spring or early summer, after the threat of frost has passed and the soil has warmed up. This timing will give the seeds enough time to germinate and establish strong roots before the colder months arrive.
Preparing the Soil: Before planting black-eyed Susan seeds, it is essential to prepare the soil properly. Begin by removing any weeds or debris from the planting area. Loosen the soil using a garden fork or tiller to a depth of about 6-8 inches. This will create a loose and fertile bed for the seeds to be planted.
Climate and Temperature Requirements
Black-eyed Susan, or Rudbeckia hirta, is a resilient plant that can adapt well to a wide range of climate conditions. However, it does have some preferred temperature ranges for optimal growth and blooming. Understanding and providing the appropriate climate and temperature conditions will help ensure the success of your black-eyed Susan plants.
Black-eyed Susan is native to North America and is well-suited to grow in USDA hardiness zones 3-9. This means it can tolerate both cooler and warmer climates, making it a versatile choice for gardeners in various regions.
When it comes to temperature requirements, black-eyed Susan thrives in moderate temperatures. Ideally, daytime temperatures between 70-75°F (21-24°C) are optimal for healthy growth. While black-eyed Susan can tolerate higher temperatures, make sure to provide some shade during scorching summer days to prevent stress on the plants.
While black-eyed Susan can tolerate cooler temperatures, it’s important to wait until the threat of frost has passed before planting the seeds outdoors. Late spring or early summer is generally the best time, as this allows the plants to establish a strong root system before facing colder weather.
Additionally, black-eyed Susan is a plant that benefits from a period of cold stratification. This process mimics the natural conditions the seeds would experience during winter and helps to break seed dormancy. If you live in an area with mild winters or want to ensure successful germination, you can simulate the cold stratification process by placing the seeds in a moist paper towel inside a sealable plastic bag and refrigerating them for a few weeks before planting.
It’s worth noting that while black-eyed Susan can tolerate various temperature ranges, extreme heat or freezing conditions can still cause stress or damage to the plants. Providing a layer of organic mulch around the base of the plants can help regulate soil temperatures, retain moisture, and protect the roots during temperature fluctuations.
In summary, black-eyed Susan is adaptable to various climates and can tolerate a wide range of temperatures. However, it thrives in moderate temperatures between 70-75°F (21-24°C) during the day. It’s important to consider your local climate and provide the appropriate conditions to ensure the healthy growth and blooming of your black-eyed Susan plants.
Soil Requirements
Black-eyed Susan, or Rudbeckia hirta, is a versatile plant that can grow in a wide range of soil types. However, providing the right soil conditions will help promote healthy growth and abundant blooms. Understanding the soil requirements for black-eyed Susan is crucial to ensure the success of your plants.
One of the key aspects of soil for black-eyed Susan is good drainage. The plants do not tolerate wet or waterlogged soil, as it can lead to root rot and other diseases. To ensure proper drainage, choose a planting location with well-drained soil. If you have heavy clay soil, you can improve its drainage by adding organic matter such as compost or well-rotted manure.
Black-eyed Susan can tolerate a wide range of soil pH levels, from slightly acidic to slightly alkaline. Ideally, the soil pH should be around neutral, ranging between 6.0 and 7.5. If you are unsure about the pH of your soil, you can perform a soil test using a home testing kit or send a sample to a local agricultural extension office for analysis.
In terms of soil fertility, black-eyed Susan prefers soil that is moderately fertile. Before planting, incorporate organic matter such as compost or well-rotted manure into the soil. This will help improve the nutrient content and overall fertility of the soil. Avoid using highly nitrogen-rich fertilizers, as this can result in excessive foliage growth at the expense of flower production.
When preparing the soil for planting, remove any weeds or grass from the area. These can compete with the black-eyed Susan plants for nutrients and water. Loosen the soil to a depth of about 6-8 inches using a garden fork or tiller. This will promote root development and allow the plants to establish themselves more easily.
Lastly, it’s important to regularly monitor the moisture levels in the soil. While black-eyed Susan plants can tolerate drought conditions, they perform best when the soil is evenly moist. Water the plants deeply, allowing the water to reach the root zone, and then allow the top layer of soil to dry out slightly before watering again. Mulching around the base of the plants with organic matter can help retain moisture and suppress weed growth.
In summary, black-eyed Susan can adapt to various soil types but prefers well-drained soil with a neutral pH between 6.0 and 7.5. Improve soil fertility by incorporating organic matter and ensure proper moisture levels for optimal growth and blooming.
Sunlight Requirements
Black-eyed Susan, or Rudbeckia hirta, is a sun-loving plant that thrives in bright and direct sunlight. Providing the appropriate amount of sunlight is crucial for the healthy growth and abundant blooming of these beautiful flowers.
Black-eyed Susan requires at least 6 to 8 hours of direct sunlight each day. As such, it is important to choose a planting location that receives ample sunlight throughout the day. Prioritize a spot that is not obstructed by tall trees or buildings that may cast shade over the plants.
When it comes to sunlight exposure, the more, the better! Black-eyed Susan is known for its ability to tolerate intense heat and full sun conditions. In fact, the plants tend to produce more vibrant and numerous blooms when exposed to plenty of sunlight. However, it is important to keep in mind that extreme heat waves or scorching temperatures can still be stressful for the plants. Providing some afternoon shade or using a shade cloth during intense heat can help protect the plants from excessive stress.
If you are growing black-eyed Susan in an area with very hot summers, consider planting them in a location where they will receive morning sun and afternoon shade. This will help the plants avoid the harshest rays of the midday sun while still receiving sufficient sunlight for healthy growth.
It is also important to note that black-eyed Susan may have reduced flower production if grown in shaded areas. Insufficient sunlight can result in leggy growth and fewer blooms. Avoid planting black-eyed Susan in locations with constant shade or limited sunlight to ensure optimal growth and blooming.
In addition to providing enough sunlight, it is crucial to ensure that the plants receive consistent moisture. Hotter and sunnier conditions can cause the soil to dry out more quickly, so regular watering is essential to keep the plants hydrated. Monitor the soil moisture levels and water the plants deeply when the top layer of soil feels dry to the touch.
In summary, black-eyed Susan thrives in full sun and requires at least 6 to 8 hours of direct sunlight each day. Choose a planting location that receives ample sunlight, but consider providing some shade during intense heat waves. With the right balance of sunlight and consistent moisture, your black-eyed Susan plants will flourish and reward you with their dazzling blooms.
Read more: When To Plant Black Oil Sunflower Seeds
Planting Time
Choosing the right time to plant black-eyed Susan seeds outdoors is crucial for their successful germination and growth. Timing plays a key role in providing the optimal conditions for the seeds to thrive and produce beautiful blooms.
The ideal time to plant black-eyed Susan seeds outdoors is in late spring or early summer. This timing ensures that the soil has warmed up and the threat of frost has passed. Black-eyed Susan seeds require warm soil temperatures to germinate effectively, generally around 70°F (21°C) or higher.
Planting too early, when the soil is still cool, can result in poor germination rates and weak seedlings. On the other hand, planting too late in the summer may limit the growth and development of the plants, as they need a longer growing season to establish themselves before the onset of winter.
It’s important to check your specific climate zone and local weather conditions to determine the appropriate planting time for black-eyed Susan in your area. Depending on where you live, the timing may vary slightly. In general, aim to plant black-eyed Susan seeds when the soil has warmed up consistently and you can expect mild temperatures in the upcoming weeks.
If you’re unsure about the best timing for planting in your region or if you have a short growing season, you can start the seeds indoors 6-8 weeks before the last expected frost date. This will give the seedlings a head start and increase their chances of maturing and producing blooms before the end of the growing season.
When planting black-eyed Susan seeds outdoors, it’s essential to follow the instructions provided on the seed packet. Different varieties may have specific planting requirements, such as depth and spacing. Generally, plant the seeds at a depth of about ¼ to ½ inch (0.6 to 1.3 cm) in the soil, and space them about 12 to 18 inches (30 to 45 cm) apart to allow sufficient room for growth.
By planting black-eyed Susan seeds at the appropriate time, you give them the best opportunity to establish strong roots, grow vigorously, and produce abundant blooms. Be patient and diligent in providing the necessary care throughout the growing season, and you will be rewarded with a stunning display of color in your garden.
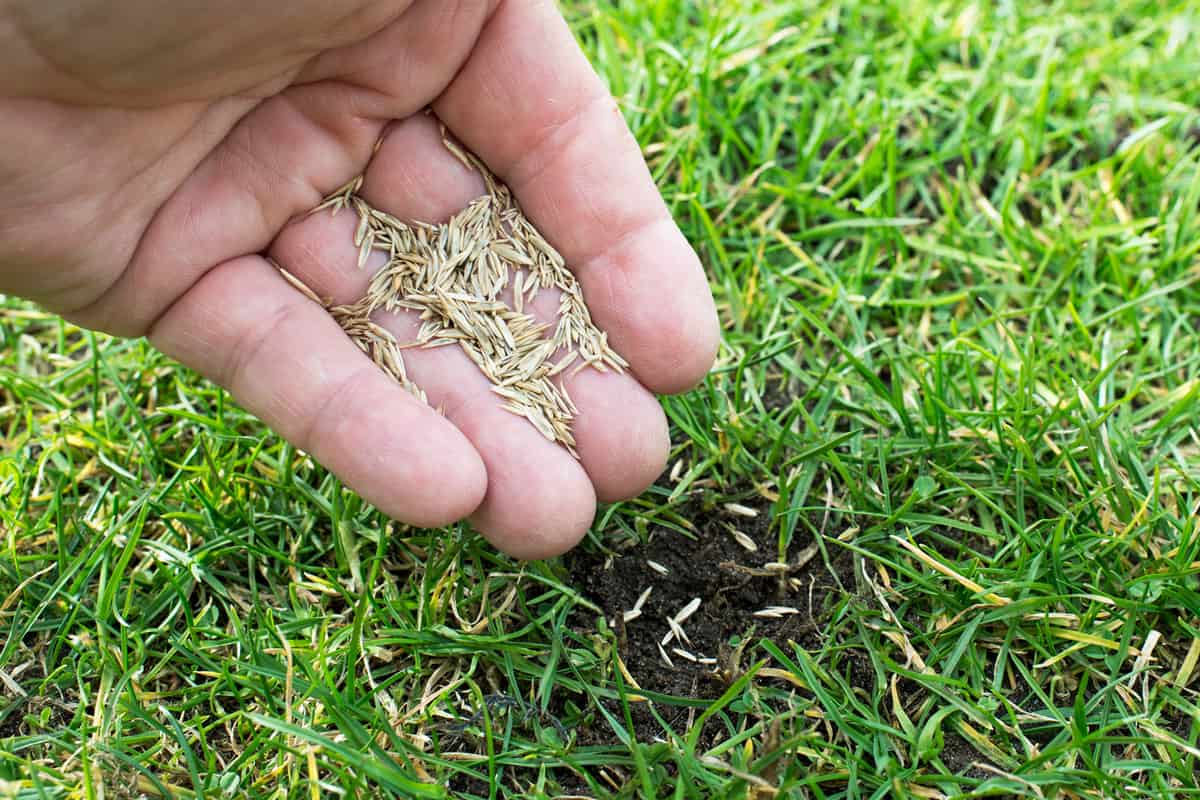
Plant black-eyed Susan seeds outdoors in the spring after the last frost date for your area. Choose a sunny location with well-drained soil, and sow the seeds directly into the ground at a depth of ¼ inch. Keep the soil consistently moist until the seeds germinate.
Preparing the Soil
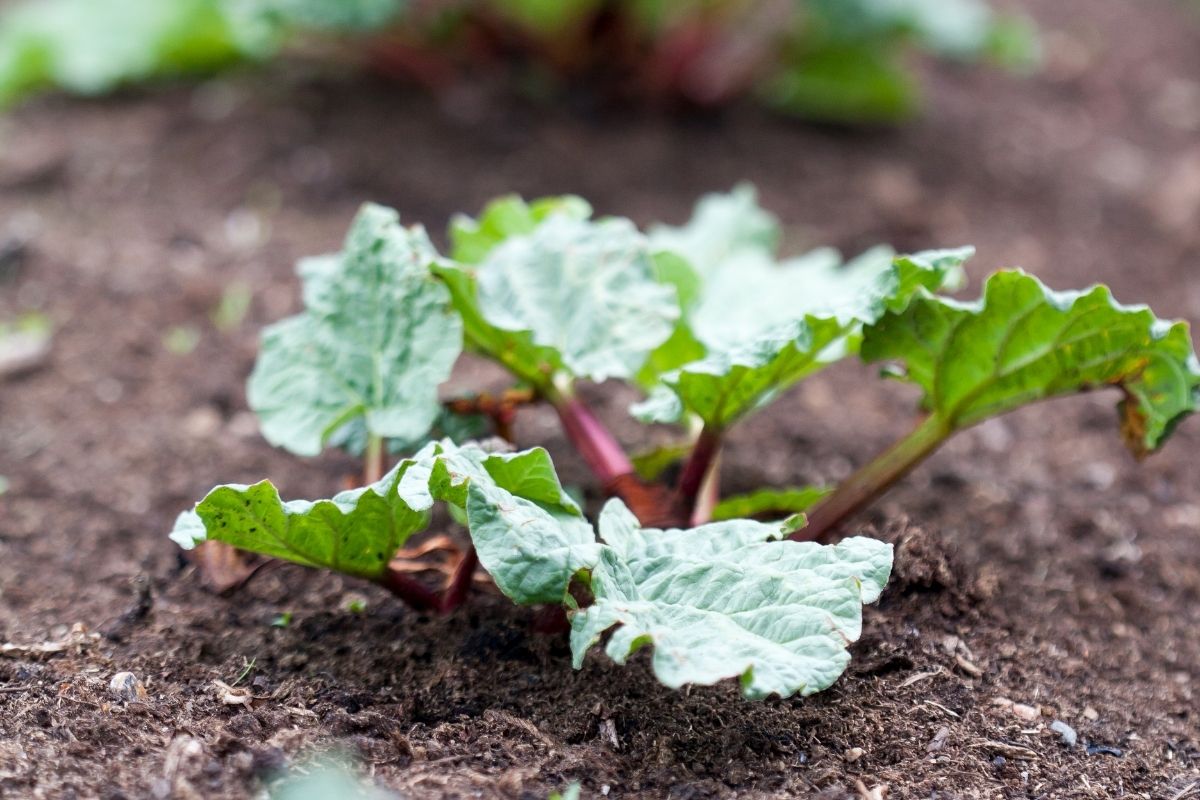
Preparing the soil properly is a crucial step in ensuring the successful growth of black-eyed Susan plants. By creating a fertile and well-prepared planting bed, you provide the seeds with the optimal environment to germinate and establish strong roots.
Here are some steps to follow when preparing the soil for black-eyed Susan:
- Clear the area: Start by clearing the planting area of any weeds, grasses, or debris. This will help prevent competition for nutrients and water once the black-eyed Susan seeds are planted.
- Loosen the soil: Use a garden fork or tiller to loosen the soil to a depth of about 6 to 8 inches. This will help improve aeration, drainage, and root penetration. Avoid working the soil when it is too wet, as this can lead to compaction.
- Amend the soil: Black-eyed Susan prefers well-drained soil that is rich in organic matter. Before planting, incorporate compost or well-rotted manure into the soil. This will enhance its fertility, structure, and moisture-retaining capacity.
- Test the soil: It’s a good idea to test the soil’s pH and nutrient levels before planting. Black-eyed Susan prefers slightly acidic to neutral soil, with a pH range of 6.0 to 7.5. Testing will help you determine if any amendments or adjustments are needed to achieve the optimal pH level.
- Add organic matter: If the soil is heavy clay or sandy, adding organic matter such as compost, leaf mold, or well-rotted manure can improve its texture, structure, and nutrient content. Spread a layer of organic matter and work it into the loosened soil to ensure it is evenly distributed.
- Level the soil: After adding organic matter and mixing it in, level the soil surface using a rake. This will create a smooth and even planting bed for your black-eyed Susan seeds.
- Moisten the soil: Before sowing the black-eyed Susan seeds, make sure the soil is slightly moist. Water the soil lightly if it is too dry, but avoid soaking it. Moist soil will promote seed germination and encourage the seeds to establish roots more effectively.
Preparing the soil properly before planting is essential to provide the black-eyed Susan plants with the best chance of thriving in your garden. Take the time to clear the area, improve soil quality with organic matter, and ensure proper moisture levels. By creating a healthy and nutrient-rich environment, you are setting the stage for vibrant blooms and a successful growing season.
Planting Black-Eyed Susan Seeds
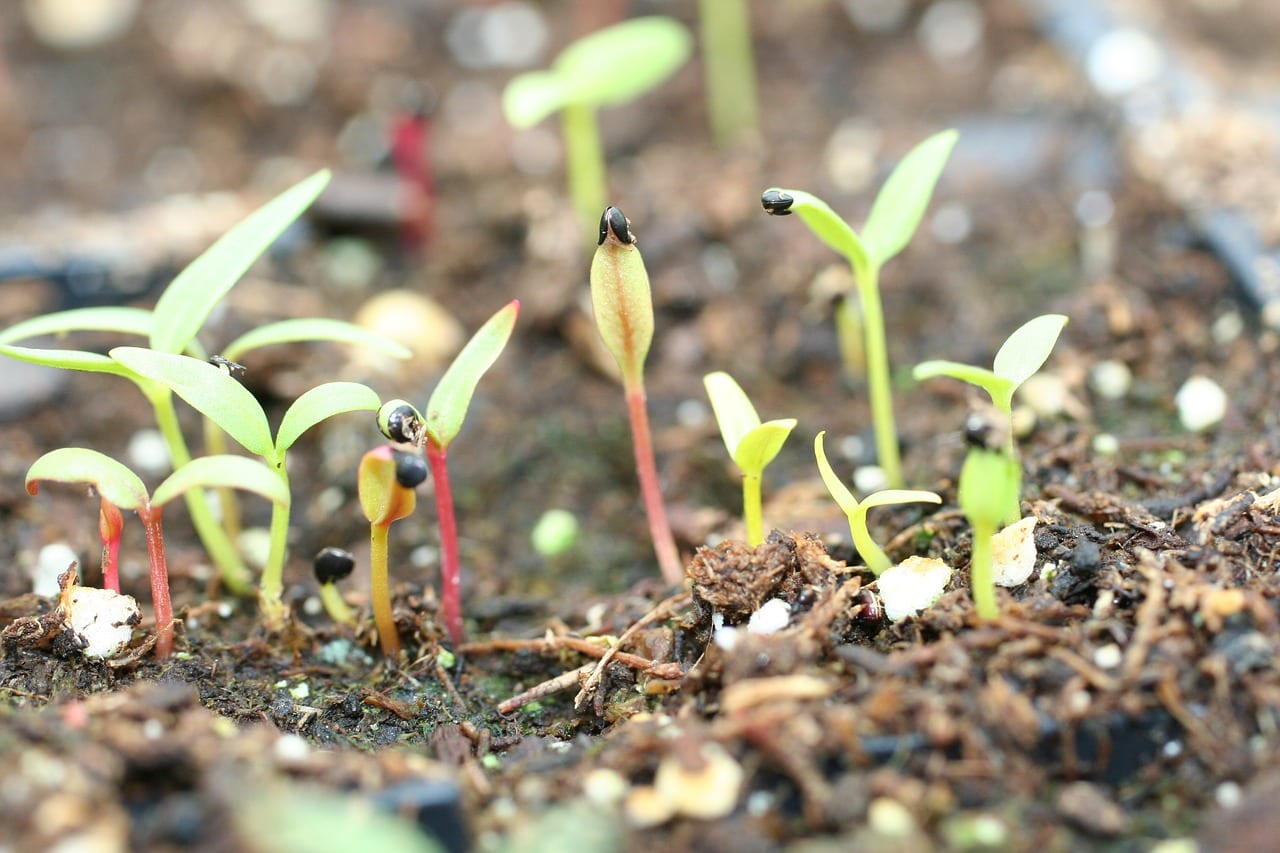
Now that you have prepared the soil, it’s time to plant your black-eyed Susan seeds. Planting black-eyed Susan seeds is a simple and straightforward process, and with the right care, you’ll soon see delightful sprouts emerge from the soil.
Here’s a step-by-step guide to planting black-eyed Susan seeds:
- Sow the seeds: Make small holes in the prepared soil, about ¼ to ½ inch (0.6 to 1.3 cm) deep. Space the holes at least 12 to 18 inches (30 to 45 cm) apart to allow room for the plants to grow. Drop one or two black-eyed Susan seeds into each hole. The extra seeds will provide insurance in case of low germination rates.
- Cover and firm the soil: Gently cover the seeds with soil, using a light layer of the prepared soil or vermiculite. Gently firm the soil over the seeds to ensure good seed-to-soil contact.
- Water the planting area: After planting, water the area thoroughly but gently. This will help settle the soil and provide the necessary moisture for seed germination. Avoid overwatering, as it can lead to soil erosion or rotting of the seeds.
- Keep the soil consistently moist: During the germination period, typically 7 to 14 days, it’s important to keep the soil evenly moist. Regularly check the moisture levels and water as needed. Be careful not to let the soil dry out completely, as this can hinder seed germination.
- Provide proper care: Once the seedlings emerge, continue to provide proper care. Thin out the weaker seedlings, leaving only the strongest ones in each planting hole. This will ensure that the remaining seedlings have enough space and resources to grow.
- Protect from pests: Keep a watchful eye for pests such as slugs, snails, or aphids. Protect the seedlings by implementing appropriate pest control measures, such as using organic insecticidal soaps or companion planting with pest-repellent plants.
- Ensure proper light conditions: Place the black-eyed Susan seedlings in a location that receives full sun, at least 6 to 8 hours of direct sunlight per day. This will promote sturdy growth, abundant blooms, and overall plant vigor.
- Provide support if needed: As the black-eyed Susan plants grow taller, they may require support to prevent them from bending or falling over. You can use stakes or plant supports to keep the plants upright and protect them from strong winds.
Remember to consult the information on the seed packet for specific instructions regarding planting depth, spacing, and any other considerations for the specific variety of black-eyed Susan you are planting.
With proper planting and care, your black-eyed Susan seeds will soon transform into beautiful and vibrant flowering plants, adding a charming and colorful touch to your garden or landscape.
Watering and Care
Proper watering and care are crucial for the health and vitality of black-eyed Susan plants. By providing adequate moisture and implementing essential maintenance practices, you can ensure that your plants thrive and produce abundant blooms. Here are some guidelines for watering and caring for your black-eyed Susan plants:
Watering:
Black-eyed Susan plants require regular watering, especially during periods of dry weather. The key is to maintain consistent soil moisture without overwatering. It’s important to strike a balance, as too much water can lead to root rot, while insufficient water can result in wilting and stunted growth.
Water the plants deeply, allowing the water to reach the root zone. Avoid shallow watering that only wets the surface soil. One to two inches (2.5 to 5 cm) of water per week is generally sufficient. Monitor the moisture levels by checking the soil with your finger. If the top inch (2.5 cm) of soil feels dry, it’s time to water again.
Early morning watering is ideal, as it allows the foliage to dry out during the day. This reduces the risk of fungal diseases and promotes overall plant health. Avoid overhead watering in the late afternoon or evening, as it can lead to prolonged leaf moisture and create favorable conditions for disease development.
Fertilizing:
Black-eyed Susan plants are relatively low-maintenance and usually do well without heavy feeding. However, if you notice slow growth, pale foliage, or diminished blooms, it may be an indication that the plants could benefit from a gentle nutrient boost.
Apply a balanced slow-release fertilizer, following the package instructions for dosage and frequency. Generally, a granular fertilizer with an N-P-K ratio of 10-10-10 or 14-14-14 can provide the necessary nutrients for healthy growth. Apply the fertilizer around the base of the plants, being careful not to get it directly on the leaves or flowers.
Deadheading and Pruning:
Deadheading, or removing spent flowers, is an important practice for black-eyed Susan plants. This not only maintains the overall appearance of the plant but also encourages continuous blooming throughout the season. Regular deadheading prevents the formation of seed heads, redirecting the plant’s energy towards foliage and flower production.
In addition to deadheading, pruning is beneficial to maintain compact and bushy plants. Trim back any leggy or overgrown stems to encourage a fuller and more attractive growth habit. Pruning can also prevent the plants from becoming too tall and floppy, especially in regions with heavy rainfall or strong winds.
Mulching:
Applying a layer of organic mulch around the base of the plants can provide numerous benefits. Mulching helps to regulate soil temperature, retain moisture, suppress weed growth, and improve the overall appearance of the garden bed.
Use organic mulch such as straw, wood chips, or shredded bark. Apply a layer about 2 to 3 inches (5 to 7.5 cm) thick, taking care to leave some space around the stem to prevent excessive moisture buildup. Renew the mulch annually, replenishing it as needed.
Pest and Disease Control:
Black-eyed Susan plants are generally resistant to pests and diseases. However, a few common issues may arise, such as aphids, leafhoppers, or powdery mildew. Monitor your plants regularly and take action if you notice any signs of infestation or disease.
For pest control, use insecticidal soaps or a strong stream of water to dislodge and remove insects. Natural predators, such as ladybugs and lacewings, can also help control aphid populations. To prevent powdery mildew, ensure adequate spacing between plants for good air circulation and avoid overhead watering.
By providing proper watering and care, you can enjoy healthy and vibrant black-eyed Susan plants in your garden for years to come. Regular monitoring, consistent maintenance practices, and timely interventions will ensure the long-term health and vitality of these beautiful flowering plants.
Read more: When To Plant Gaillardia Seeds
Supporting the Growing Plants
As black-eyed Susan plants grow, they may become tall and tend to lean or fall over due to their top-heavy nature. Providing proper support for the growing plants is essential to prevent them from bending or breaking, and to maintain their upright and attractive appearance. Here are some methods for supporting your black-eyed Susan plants:
Staking:
Staking is a common and effective method for supporting tall and leggy black-eyed Susan plants. Choose sturdy stakes that are slightly taller than the expected height of the mature plants. Place the stakes about 8-10 inches (20-25 cm) away from the plant and gently push them into the ground, ensuring they are securely anchored.
As the black-eyed Susan plants grow, gently tie them to the stakes using soft ties or plant ties. Take care not to tie them too tightly or constrict the stems, as this can cause damage. Allow some flexibility for natural growth and movement, while still providing the necessary support to keep the plants upright.
Caging or Trellising:
Another option for supporting black-eyed Susan plants is to provide a cage or trellis structure for them to grow up and around. This method is particularly useful for taller cultivars or vining varieties that require more support.
Place the cage or trellis around the plant, ensuring that it is firmly planted in the ground. As the black-eyed Susan plants grow, gently guide and train the stems to climb and weave through the openings of the structure. This will help support the plants and keep them from sprawling or flopping over.
Companion Planting:
Consider planting companion plants that can naturally provide support to your black-eyed Susan plants. Tall and sturdy perennials, such as coneflowers (Echinacea) or tall sedums (Sedum), can act as living support structures. These plants can grow alongside black-eyed Susan and help to keep them upright through their shared growth habit.
When selecting companion plants, make sure they have similar growth requirements and do not shade or overcrowd the black-eyed Susan plants. Provide sufficient spacing between the plants to allow air circulation and prevent competition for light and nutrients.
Pruning:
Pruning can also play a role in supporting black-eyed Susan plants. Regularly trim back any leggy or overgrown stems to encourage a bushier growth habit. This will help the plants maintain a compact and sturdy form, reducing the need for additional support.
When pruning, cut back the stems to just above a set of healthy leaves or a lateral bud. This will encourage branching and the development of new stems, resulting in a fuller and more robust plant.
Supporting your growing black-eyed Susan plants will help maintain their shape, prevent breakage, and ensure an attractive display in your garden. Choose the method that works best for your specific cultivar and monitor the plants regularly to make any necessary adjustments as they continue to grow and flourish.
Harvesting and Seed Collection
Harvesting the seeds of black-eyed Susan plants not only allows you to save and grow new plants in the future but also contributes to the preservation of this beautiful flower species. Black-eyed Susan, or Rudbeckia hirta, produces seeds that are relatively easy to collect. Here’s a guide to harvesting and collecting black-eyed Susan seeds:
Timing:
The seeds of black-eyed Susan develop in the flower heads after pollination. The flower heads will start to fade and dry out as the seeds mature. It’s important to wait until the flower heads have completely dried on the plant before harvesting the seeds. This typically occurs in late summer or early fall.
Seed Collection:
To collect the seeds, it’s best to work on a dry and sunny day. Follow these steps:
- Select mature flower heads: Choose flower heads that have dried out completely on the plant. The center disk of the flower head should be dark brown or black, and the outer petals may have withered or fallen off.
- Prepare a container: Place a clean and dry container, such as a paper bag or envelope, underneath the flower head to catch the seeds as you collect them.
- Remove the seeds: Gently rub or shake the flower head over the container to dislodge the dry and mature seeds. The seeds are small and dark, resembling miniature black-eyed Susans.
- Discard debris: Remove any remaining plant material, petals, or chaff from the container, ensuring that only the seeds are left behind.
- Label and store: Label the container with the date and the name of the plant variety, if applicable. Store the seeds in a cool, dry, and dark place until you are ready to sow them or share them with other gardeners.
Seed Viability:
Black-eyed Susan seeds have good viability, meaning they can remain viable for several years if stored properly. To ensure the best germination rates, it’s recommended to sow the seeds within a year or two of harvesting them. This will give them the best chance of successful germination and growth.
Sharing Seeds:
Black-eyed Susan seeds make great gifts for fellow gardeners or for seed exchanges. Sharing seeds not only spreads the joy of gardening but also contributes to the conservation and diversity of plant species.
Propagation from Seeds:
To propagate black-eyed Susan from the collected seeds, sow them in well-prepared soil in the spring, after the threat of frost has passed. Follow the planting guidelines provided earlier in this article. Keep the soil consistently moist until the seeds germinate and the young plants are established.
By harvesting and collecting black-eyed Susan seeds, you can continue to enjoy the beauty of these vibrant flowers year after year. Remember to share the seeds with others, practice proper seed storage, and contribute to the preservation and proliferation of this beloved plant species.
Conclusion
Growing black-eyed Susan, or Rudbeckia hirta, from seeds outdoors is a rewarding and enjoyable gardening experience. By considering the factors such as climate and temperature requirements, soil conditions, sunlight needs, and planting time, you can create an optimal environment for your black-eyed Susan plants to thrive.
Properly preparing the soil, planting the seeds at the right depth and spacing, and providing adequate water and care are essential for the successful growth of black-eyed Susan. Supporting the plants as they grow taller and harvesting the seeds for future propagation are additional aspects to consider.
Black-eyed Susan is a remarkably resilient plant that can adapt to a range of conditions. Its vibrant blooms and low-maintenance nature make it a popular choice among gardeners. With its cheerful yellow or orange petals and distinct dark centers, black-eyed Susan adds a burst of color and charm to any garden or landscape.
Whether you’re a seasoned gardener or a beginner, growing black-eyed Susan from seeds outdoors is a delightful way to connect with nature and create a garden filled with beauty. The process of tending to the plants, watching them grow, and harvesting the seeds provides a sense of accomplishment and satisfaction.
As you embark on your black-eyed Susan gardening journey, remember to be patient, observe your plants closely, and adapt your care routine as needed. Each season will bring new growth and surprises, and with proper care, your black-eyed Susan plants will reward you with their vibrant blooms year after year.
So, roll up your sleeves, prepare your soil, sow those seeds, and get ready to enjoy the splendor of black-eyed Susan in your garden. Happy gardening!
Frequently Asked Questions about When To Plant Black-Eyed Susan Seeds Outdoors
Was this page helpful?
At Storables.com, we guarantee accurate and reliable information. Our content, validated by Expert Board Contributors, is crafted following stringent Editorial Policies. We're committed to providing you with well-researched, expert-backed insights for all your informational needs.


0 thoughts on “When To Plant Black-Eyed Susan Seeds Outdoors”