Home>Garden Essentials>When To Plant Rhubarb Seeds
Garden Essentials
When To Plant Rhubarb Seeds
Modified: September 1, 2024
Discover the perfect time to sow rhubarb seeds in your garden. Learn expert tips and tricks for successful cultivation.
(Many of the links in this article redirect to a specific reviewed product. Your purchase of these products through affiliate links helps to generate commission for Storables.com, at no extra cost. Learn more)
Introduction
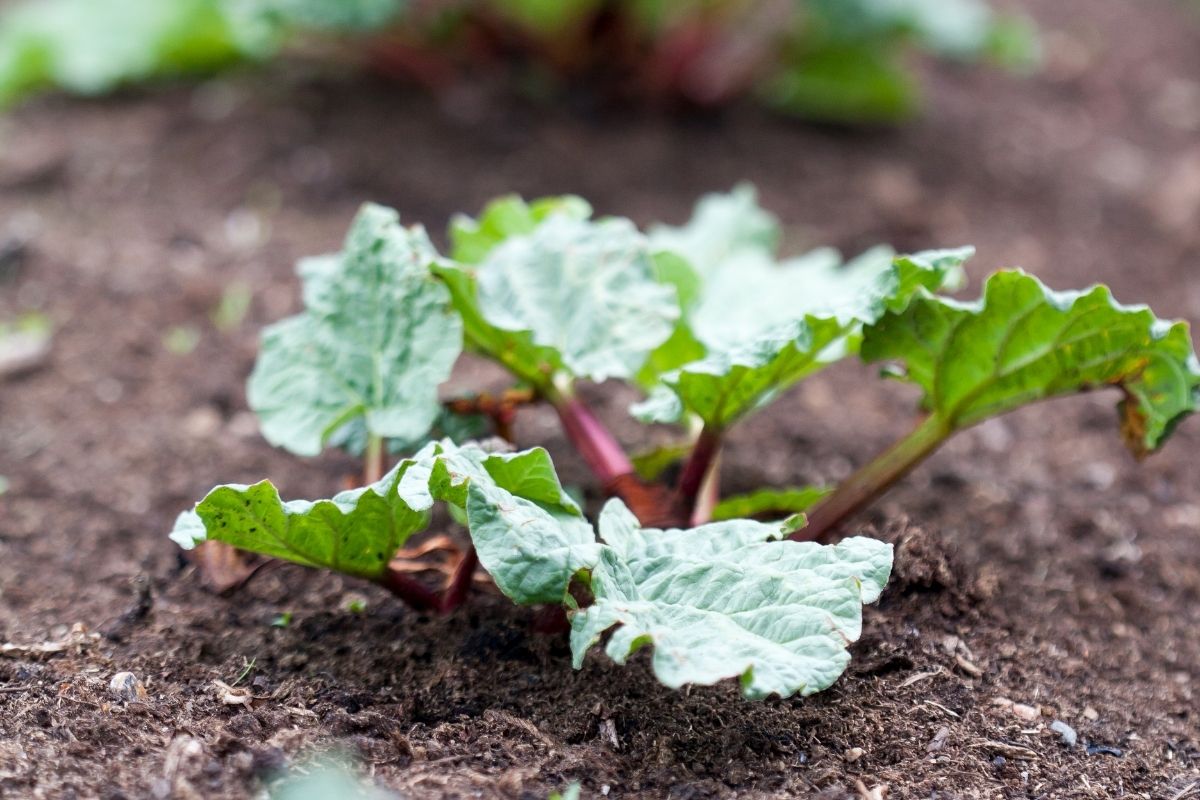
Welcome to the wonderful world of gardening! If you have a passion for growing your own fruits and vegetables, then you’ve come to the right place. In this article, we’ll be focusing on the fascinating plant known as rhubarb. Rhubarb is a perennial vegetable that is not only delicious but also adds a pop of vibrant color to any garden.
Before we dive into the nitty-gritty details of when to plant rhubarb seeds, let’s take a moment to appreciate the beauty and versatility of this incredible plant. Rhubarb, with its ruffled leaves and striking red stalks, is not only a delight for the eyes but also a treat for the taste buds. Its unique tart flavor adds a refreshing twist to pies, jams, and sauces.
Now that we have established the allure of rhubarb, let’s discuss the factors you need to consider before planting its seeds. Understanding these elements will greatly contribute to the success of your rhubarb-growing venture.
Key Takeaways:
- Rhubarb seeds should be planted in early spring in well-drained, sunny spots with slightly acidic soil. Patience is key, as it takes a couple of years for the plants to mature and produce delicious stalks.
- After planting, provide consistent moisture, proper spacing, and regular care to ensure healthy growth. Harvest mature stalks by gently pulling them, and always discard the toxic leaves.
Read more: When To Plant Borage Seeds
Factors to Consider
When it comes to growing rhubarb from seeds, there are several important factors to consider. By taking these factors into account, you will set the stage for a healthy and thriving rhubarb garden.
1. Climate: Rhubarb is a hardy plant that can tolerate colder climates. It thrives in regions with cool summers and cold winters. If you live in an area with mild winters or hot summers, you may need to take additional measures to protect your rhubarb plants.
2. Sunlight: Rhubarb requires a good amount of sunlight to grow well. Choose a spot in your garden that receives at least 6 hours of direct sunlight each day. This will ensure that your rhubarb plants receive the necessary energy to produce vibrant stalks.
3. Soil pH and Drainage: Rhubarb prefers slightly acidic soil, with a pH level between 5.5 and 6.5. It also requires well-drained soil to prevent root rot. Test your soil’s pH level and make necessary amendments to create an optimal growing environment for your rhubarb seeds.
4. Space: Rhubarb plants can spread out quite a bit, so make sure you have enough space in your garden for them to grow. Each plant should be given a minimum of 3 to 4 feet of space in all directions to allow for proper air circulation and prevent crowding.
5. Competition: Rhubarb does not like competition from other plants. Avoid planting it near invasive or aggressive plants that may overshadow or choke out the rhubarb. Optimize your garden layout by carefully selecting companion plants that will complement and support your rhubarb’s growth.
By considering these factors and making appropriate adjustments, you can create an ideal environment for your rhubarb seeds to thrive. In the next section, we will explore the necessary steps for preparing your soil and sowing the seeds.
Soil Preparation
Before planting rhubarb seeds, it is crucial to prepare the soil properly. Providing your rhubarb seeds with a nutrient-rich and well-draining soil will set a solid foundation for their growth and development.
1. Clear the area: Begin by clearing the area where you plan to plant your rhubarb seeds. Remove any weeds, rocks, or debris that may hinder the growth of your plants.
2. Amend the soil: Rhubarb thrives in soil that is rich in organic matter. Add compost or well-rotted manure to improve the soil’s fertility and structure. This will provide the necessary nutrients for the rhubarb plants to grow vigorously.
3. Test the soil: It is essential to test the soil’s pH level and nutrient content. Rhubarb prefers a slightly acidic soil with a pH range of 5.5 to 6.5. Adjust the pH level if needed by adding lime to raise the pH or sulfur to lower it.
4. Improve drainage: Ensure that your soil has good drainage to prevent waterlogging. If your soil is heavy or clayey, you can improve its drainage by adding organic matter such as compost, well-rotted manure, or vermiculite.
5. Dig and loosen the soil: Use a garden fork or tiller to dig and loosen the soil to a depth of at least 12 inches. This will provide ample space for the rhubarb roots to grow and establish themselves.
6. Incorporate fertilizer: Before sowing the rhubarb seeds, add a balanced fertilizer to the soil. Follow the package instructions for the correct application rate, ensuring that you distribute the fertilizer evenly throughout the planting area.
By taking the time to properly prepare the soil, you are giving your rhubarb seeds the best possible chance to thrive. In the next section, we will delve into the steps for sowing the rhubarb seeds and ensuring successful germination.
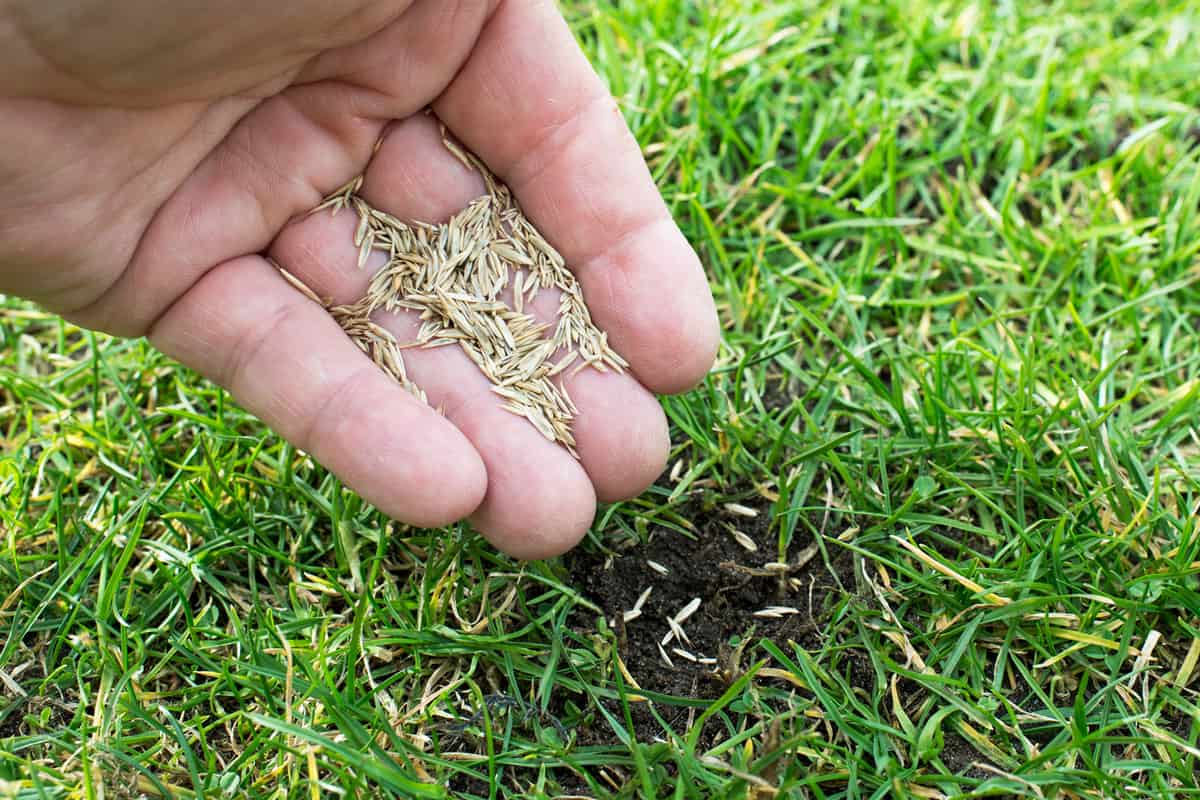
Seed Sowing
Now that you have prepared the soil, it’s time to sow your rhubarb seeds. Rhubarb can be grown from seeds, but keep in mind that it is a slow-growing plant, and it may take a couple of years before you can harvest stalks for consumption. Patience is key when it comes to growing rhubarb from seeds.
1. Timing: The ideal time to sow rhubarb seeds is in early spring, as soon as the soil can be worked. This will give the seeds a head start in establishing themselves before the hot summer months arrive.
2. Seed treatment: Rhubarb seeds have a hard outer coat that can inhibit germination. To increase the germination rate, it is recommended to soak the seeds in water overnight or scarify them by gently rubbing them with sandpaper.
3. Sowing depth: Plant the rhubarb seeds at a depth of about 1/4 inch to 1/2 inch in the prepared soil. Space the seeds 1 inch apart in rows that are at least 12 inches apart. Ensure that the soil is kept consistently moist during the germination process.
4. Seedling care: Once the rhubarb seedlings emerge, thin them out, allowing the strongest ones to remain. Remove any weak or overcrowded seedlings to ensure proper spacing and adequate resources for healthy growth.
5. Transplanting: After one to two years of growth, the rhubarb seedlings will be ready to be transplanted into their permanent location. Dig up the seedlings carefully, ensuring that you do not damage the roots, and transplant them into pre-dug holes that are wide and deep enough to accommodate the root system.
Rhubarb is a resilient plant, and while it may take time to grow from seeds, the end result is worth the wait. In the next section, we will discuss how to care for and maintain your rhubarb plants to ensure optimal growth and harvest.
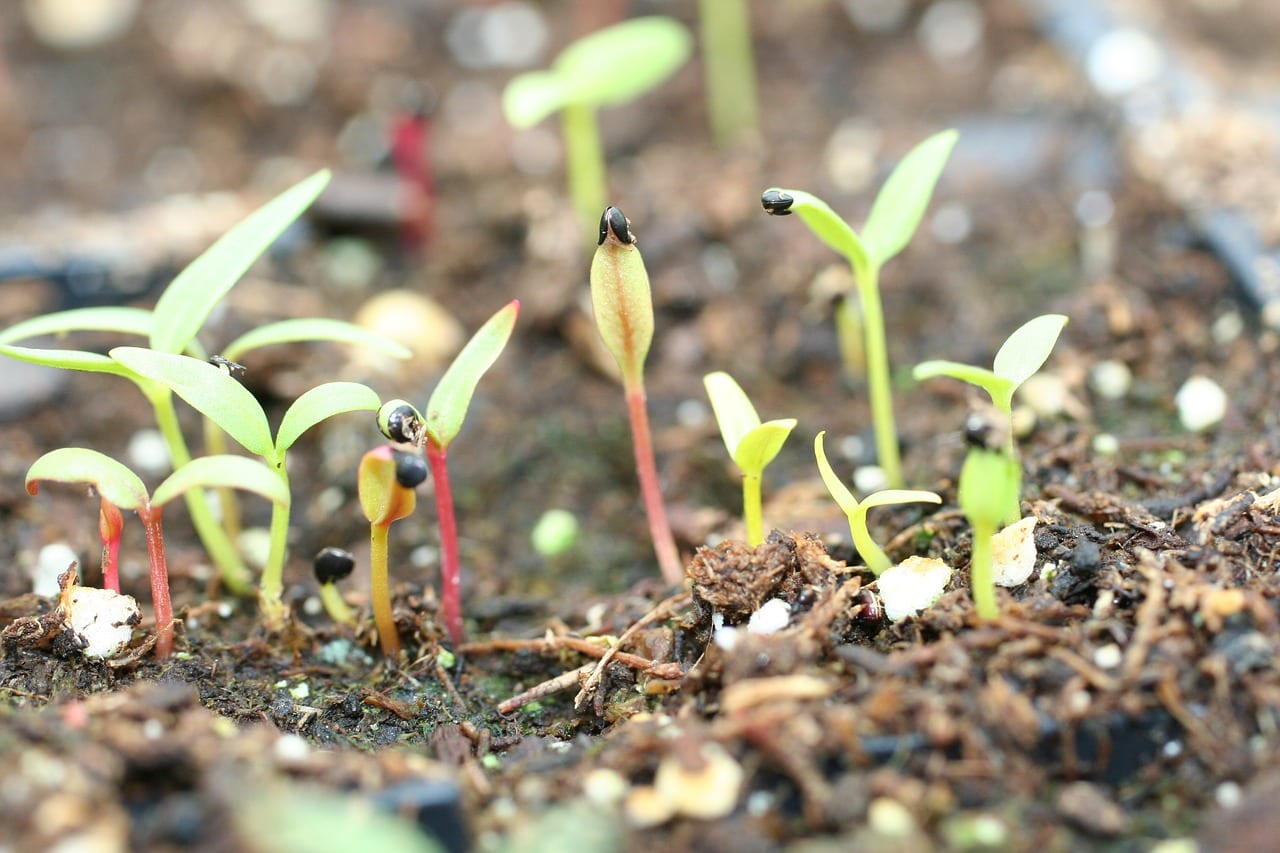
Germination
Once you have sown your rhubarb seeds, it’s time to focus on germination. Germination is the process by which the seeds sprout and begin to grow into seedlings. While rhubarb seeds can take some time to germinate, with the right conditions and care, you will soon see tiny shoots emerging from the soil.
1. Moisture: Rhubarb seeds require consistent moisture for successful germination. Keep the soil evenly moist, but not waterlogged, throughout the germination period. Monitor the moisture levels regularly and water as needed.
2. Temperature: Rhubarb seeds prefer temperatures between 60 to 75 degrees Fahrenheit (15 to 24 degrees Celsius) for germination. Ensure that the planting area remains within this temperature range to provide optimal conditions for seed sprouting.
3. Patience: Rhubarb can be slow to germinate, often taking anywhere from 2 to 4 weeks for the seedlings to emerge. Be patient and resist the temptation to disturb the soil or prematurely assume that the seeds haven’t sprouted. Give them time to establish themselves.
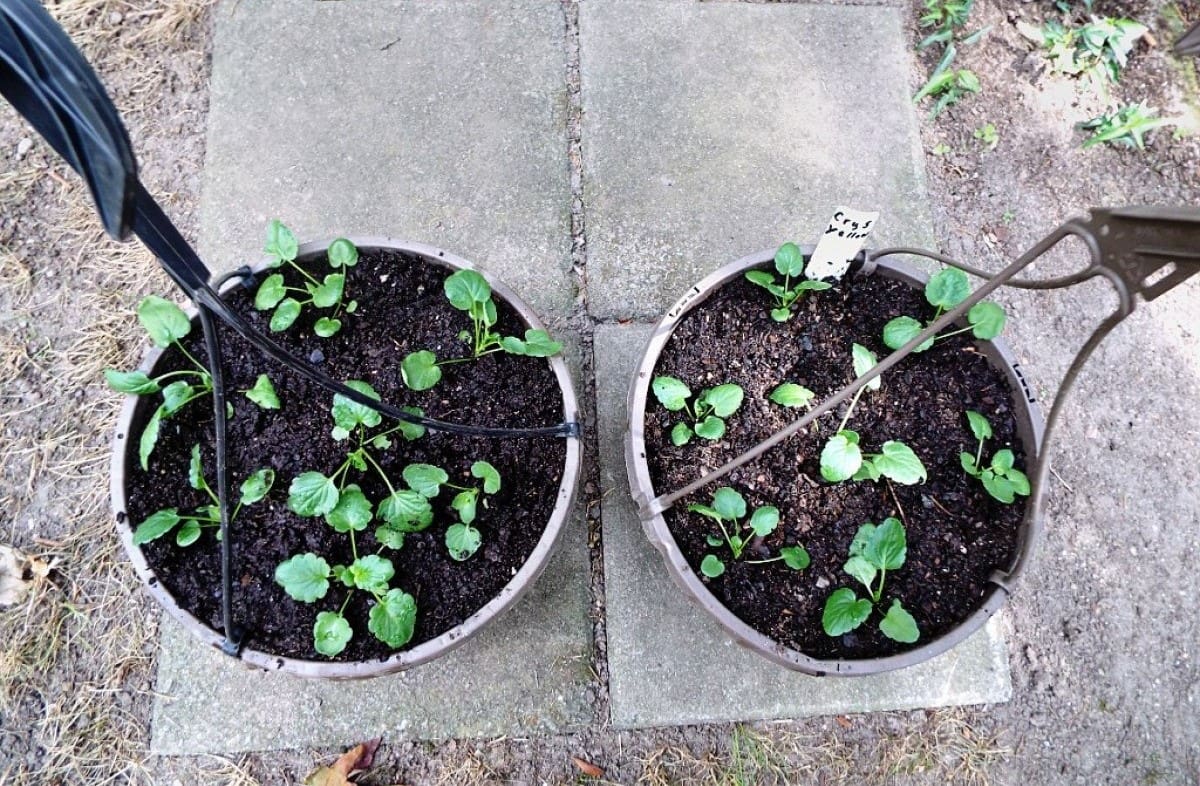
4. Thin out the seedlings: Once the rhubarb seedlings have sprouted and are large enough to handle, thin them out to provide enough space for each plant to grow. Leave the healthiest and strongest seedlings while removing any weak or overcrowded ones.
5. Maintain care: After thinning, continue to care for the remaining seedlings. Ensure they have adequate sunlight, moisture, and proper spacing. Regularly monitor the plants for signs of pests or diseases, and take appropriate action if necessary.
By providing the right conditions and maintaining proper care, your rhubarb seeds will start the germination process and begin their journey towards becoming mature plants. In the next section, we will discuss how to transplant the rhubarb seedlings into their permanent location for continued growth.
Plant rhubarb seeds in early spring, as soon as the soil can be worked. Choose a sunny spot with well-drained soil and sow the seeds 1/2 inch deep. Keep the soil consistently moist until the seeds germinate.
Read more: When To Plant Vinca Seeds
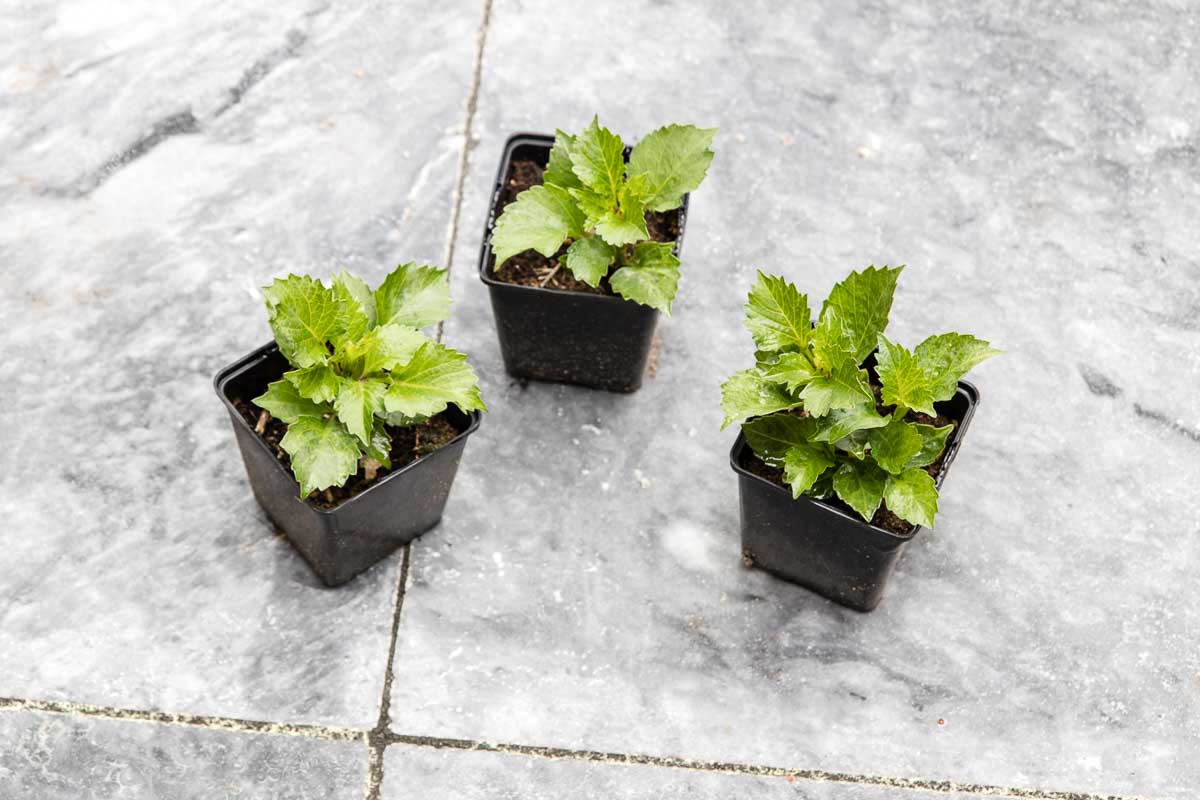
Transplanting Seedlings
Once your rhubarb seedlings have grown and developed for one to two years, they will be ready to be transplanted into their permanent location. Transplanting rhubarb seedlings is an important step in their growth journey, as it allows them to establish strong root systems and continue their development in a more spacious environment.
1. Timing: The best time to transplant rhubarb seedlings is in early spring when the soil is workable and the risk of frost has passed. This gives the plants ample time to acclimate to their new surroundings before the summer heat arrives.
2. Choose a location: Select a well-drained area in your garden that receives full sun or partial shade. Keep in mind that rhubarb plants can grow quite large, so ensure that you have enough space for them to spread out and thrive.
3. Prepare the planting holes: Dig holes that are wide and deep enough to accommodate the rhubarb seedlings’ root systems. Space the holes at least 3 to 4 feet apart to allow for proper air circulation and prevent overcrowding as the plants grow.
4. Transplant the seedlings: Carefully dig up the rhubarb seedlings, being cautious not to damage the delicate roots. Gently place each seedling into a prepared hole, ensuring that the crown (the point where the roots meet the stem) is level with or slightly above the soil surface.
5. Backfill and water: Fill in the holes with soil, lightly firming it around the seedlings. Give the newly transplanted rhubarb plants a thorough watering to settle the soil around the roots and provide them with moisture to aid in their establishment.
6. Mulch and protect: Apply a layer of organic mulch, such as straw or wood chips, around the base of the plants to help conserve moisture and suppress weed growth. Additionally, consider using a protective barrier, such as a row cover, for the first few weeks after transplanting to shield the seedlings from harsh weather or pests.
Transplanting rhubarb seedlings is a significant step in their growth process. By carefully moving them to their permanent location and providing the necessary care, you are setting them up for continued development and eventual harvest. In the next section, we will discuss the care and maintenance required to ensure healthy and fruitful rhubarb plants.
Care and Maintenance
Proper care and maintenance are essential for the healthy growth and productivity of your rhubarb plants. By providing the right conditions, regular attention, and necessary upkeep, you can ensure that your rhubarb plants thrive and produce an abundance of delicious stalks for years to come.
1. Watering: Rhubarb plants require consistent moisture, especially during hot and dry periods. Water the plants deeply, ensuring that the soil is evenly moist but not waterlogged. Avoid overhead watering, as wet foliage can promote disease. Consider using a drip irrigation system or watering at the base of the plants to minimize foliar moisture.
2. Fertilization: Rhubarb is a nutrient-hungry plant. To keep your plants well-nourished, apply a balanced fertilizer in early spring before new growth begins. Follow the package instructions for the appropriate application rate, and avoid overfertilizing, as it can lead to weak growth and decreased productivity.
3. Weed control: Keep the area around your rhubarb plants free from weeds. Weeds compete for nutrients, water, and space, and may hinder the growth of your rhubarb plants. Regularly remove weeds by hand or use a gentle cultivation tool to prevent root damage to your rhubarb.
4. Mulching: Apply a layer of organic mulch around the base of your rhubarb plants. Mulching helps retain moisture, regulate soil temperature, and suppress weed growth. Maintain a 2 to 3-inch layer of mulch, taking care to avoid piling it against the stems as it can promote rotting.
5. Pest and disease control: Keep an eye out for common pests such as aphids, slugs, and snails. Regularly inspect your plants and take appropriate measures, such as using organic pest control methods or introducing beneficial insects, to prevent infestations. Additionally, be vigilant for signs of diseases like crown rot or powdery mildew, and promptly address them to prevent further spread.
6. Dividing and rejuvenation: As rhubarb plants age, they may become crowded, resulting in reduced productivity. Every 4 to 5 years, consider dividing the plants to rejuvenate them. Dig up the plant, carefully separate the crowns, and replant the healthy divisions in fresh, well-prepared soil.
By providing adequate water, fertilization, weed control, pest and disease management, and occasional rejuvenation, you can ensure the long-term health and productivity of your rhubarb plants. In the next section, we will explore the exciting part of growing rhubarb – harvesting!
Harvesting Rhubarb
Harvesting rhubarb is an exciting and rewarding part of growing this delicious vegetable. While it can take a few years for rhubarb plants to become established and produce a bountiful harvest, the wait is well worth it. Once your rhubarb plants have reached maturity, you can enjoy the flavorful and versatile stalks for various culinary delights.
1. Maturity: Rhubarb plants typically reach maturity after two to three years of growth. It is important to allow the plants to establish themselves before harvesting their stalks. A good rule of thumb is to wait until the stalks are thick and have reached a length of about 10 to 12 inches.
2. Harvesting technique: To harvest rhubarb, firmly grasp the stalk near the base and give it a gentle tug or twist. The stalk should detach easily from the plant. Avoid cutting the stalks with a knife, as this can leave open wounds and increase the risk of disease. Only harvest about one-third of the plant’s stalks at a time to ensure that enough leaves remain for the plant’s vitality.
3. Removing the leaves: While the rhubarb stalks are the edible part of the plant, it is important to note that the leaves are toxic and should never be consumed. To remove the leaves, simply grasp the top of the stalk and give it a firm downward pull, causing it to separate from the leaves. Discard the leaves in a compost pile or dispose of them in a manner that will prevent accidental ingestion by humans or animals.
4. Regular harvesting: Rhubarb is a perennial plant that continues to produce stalks throughout the growing season. Regular harvesting encourages the plant to continue producing new stalks. As long as the stalks are thick and vibrant in color, they are ready for harvest. It is best to avoid allowing the stalks to become overly thick and woody, as they can become tough and less enjoyable to eat.
5. Post-harvest care: After harvesting, inspect the remaining plant for any signs of pests or diseases. Remove any damaged or diseased leaves and discard them. Monitor the plants for any signs of stress or nutrient deficiencies and take appropriate measures, such as fertilizing or watering, to maintain their health and vigor.
Harvesting rhubarb is a delightful process that allows you to enjoy the fruits of your labor. Whether you use the stalks for making pies, jams, sauces, or other culinary creations, the tangy and flavorful taste of rhubarb is sure to delight your taste buds. In the concluding section, we will wrap up our discussion on growing rhubarb and summarize the key points to remember.
Conclusion
Congratulations on embarking on your journey to grow rhubarb from seeds! By understanding the various factors involved, preparing the soil, sowing the seeds, and providing proper care, you can enjoy the beauty and deliciousness of this remarkable plant in your own garden.
From considering the climate and sunlight requirements to ensuring proper soil pH and drainage, each factor plays a crucial role in the success of your rhubarb garden. Taking the time to prepare the soil, sow the seeds, and provide the necessary care and maintenance will yield healthy and productive rhubarb plants.
Remember to be patient, as rhubarb is a slow-growing plant. It may take a couple of years before you can fully enjoy the bountiful harvest of vibrant red stalks. But rest assured, the wait will be well worth it.
Once your rhubarb plants have matured, follow proper techniques for harvesting, always removing the toxic leaves and leaving enough stalks for the plant’s vitality. Regular harvesting throughout the growing season will encourage continuous production of fresh and tasty stalks.
As a gardener, you will undoubtedly encounter challenges along the way, such as pests, diseases, or nutrient deficiencies. Stay vigilant, address these issues promptly, and maintain a healthy and thriving environment for your rhubarb plants.
Growing rhubarb from seeds is a rewarding and fulfilling experience that allows you to enjoy the beauty, taste, and versatility of this unique vegetable. So, roll up your sleeves, get your hands dirty, and savor the journey of growing and harvesting your very own rhubarb.
Happy gardening!
Frequently Asked Questions about When To Plant Rhubarb Seeds
Was this page helpful?
At Storables.com, we guarantee accurate and reliable information. Our content, validated by Expert Board Contributors, is crafted following stringent Editorial Policies. We're committed to providing you with well-researched, expert-backed insights for all your informational needs.


0 thoughts on “When To Plant Rhubarb Seeds”