Home>Gardening & Outdoor>Outdoor Recreation & Activities>How To Repair A Swimming Pool Light Leak

Outdoor Recreation & Activities
How To Repair A Swimming Pool Light Leak
Modified: October 19, 2024
Learn how to fix a swimming pool light leak with our step-by-step guide. Keep your outdoor recreation area safe and well-lit. Outdoor-recreation-and-activities enthusiasts, this one's for you!
(Many of the links in this article redirect to a specific reviewed product. Your purchase of these products through affiliate links helps to generate commission for Storables.com, at no extra cost. Learn more)
Introduction
A well-maintained swimming pool provides a refreshing oasis for relaxation and recreation. However, even the most meticulously cared-for pools can encounter issues over time. One common problem that pool owners may face is a leak in the pool light fixture. A leaking pool light not only poses a safety hazard but can also lead to electrical damage and increased maintenance costs if left unaddressed. Fortunately, with the right guidance and a bit of DIY spirit, repairing a swimming pool light leak is a manageable task that can save both time and money.
In this comprehensive guide, we will walk you through the step-by-step process of identifying, addressing, and resolving a leak in your swimming pool light fixture. By following these instructions, you can restore the safety and functionality of your pool while gaining a sense of accomplishment from successfully completing a practical repair project.
Whether you are a seasoned pool owner or a novice in the realm of pool maintenance, this guide is designed to equip you with the knowledge and confidence to tackle the issue of a leaking pool light. From understanding the underlying causes of the leak to executing the repair with precision, each step is outlined in a clear and accessible manner. By the end of this guide, you will have the expertise to diagnose, repair, and test your pool light fixture, ensuring that it operates at its optimal capacity.
So, roll up your sleeves, gather your tools, and get ready to embark on a journey to restore your pool's luminous charm. With the right approach and a willingness to learn, you can conquer the challenge of a swimming pool light leak and bask in the satisfaction of a job well done. Let's dive into the process of identifying and remedying a leak in your swimming pool light fixture.
Key Takeaways:
- Don’t let a pool light leak dampen your fun! Follow these steps to identify, repair, and test for leaks, ensuring a safe and sparkling pool environment.
- Safety first! Always shut off the power, drain the fixture, inspect and repair the seal, and test the repair to keep your pool light leak-free and shining bright.
Read more: How To Fix A Leaking Swimming Pool
Identifying the Leak
Identifying a leak in a swimming pool light fixture is the crucial first step in the repair process. A pool light leak can manifest in various ways, such as water seepage around the fixture, moisture accumulation inside the light, or visible cracks in the housing. To pinpoint the source of the leak, a systematic approach is essential.
-
Visual Inspection: Begin by visually examining the pool light fixture and its surrounding area. Look for any signs of water accumulation, discoloration, or corrosion. Check for moisture or water droplets inside the light fixture, as this is a clear indicator of a leak.
-
Water Level Fluctuation: Observe the water level in the pool over a period of time. If the water level decreases significantly when the pool light is on, it may suggest a leak in the light fixture.
-
Dye Test: A dye test involves adding a small amount of food coloring to the water around the pool light. If the dye is drawn into the light fixture, it indicates a leak in the seal.
-
Professional Inspection: If the source of the leak remains elusive, consider seeking the expertise of a professional pool technician. They can conduct a thorough assessment using specialized tools to detect leaks and identify the exact point of entry.
By carefully examining the pool light fixture and employing these diagnostic methods, you can effectively identify the location and nature of the leak. This critical information will guide the subsequent steps in the repair process, enabling you to address the issue with precision and confidence.
Shutting Off the Power
Before initiating any work on the pool light fixture, it is imperative to ensure the complete safety of the repair environment by shutting off the power supply to the fixture. This precautionary measure minimizes the risk of electrical accidents and guarantees a secure working environment for the repair process.
To shut off the power to the pool light, follow these essential steps:
-
Locate the Circuit Breaker: Identify the circuit breaker that controls the power supply to the pool light. This may be located in the main electrical panel or a sub-panel specifically dedicated to the pool equipment.
-
Turn Off the Circuit Breaker: Carefully switch off the circuit breaker associated with the pool light fixture. Confirm that the power has been successfully disconnected by testing the light switch to ensure it no longer activates the pool light.
-
Additional Precautions: For added safety, place a piece of tape over the light switch to serve as a visual reminder that the power is intentionally turned off. This simple yet effective step helps prevent accidental activation of the light during the repair process.
-
Verify the Power Disconnection: Use a non-contact voltage tester to verify that the power supply to the pool light fixture has been effectively shut off. This tool can detect the presence of electrical current and provides reassurance that it is safe to proceed with the repair.
By diligently following these steps to shut off the power, you create a secure environment for working on the pool light fixture. Prioritizing safety at this stage sets the foundation for a successful and risk-free repair process. Always proceed with caution and adhere to safety protocols when dealing with electrical components to ensure a smooth and secure repair experience.
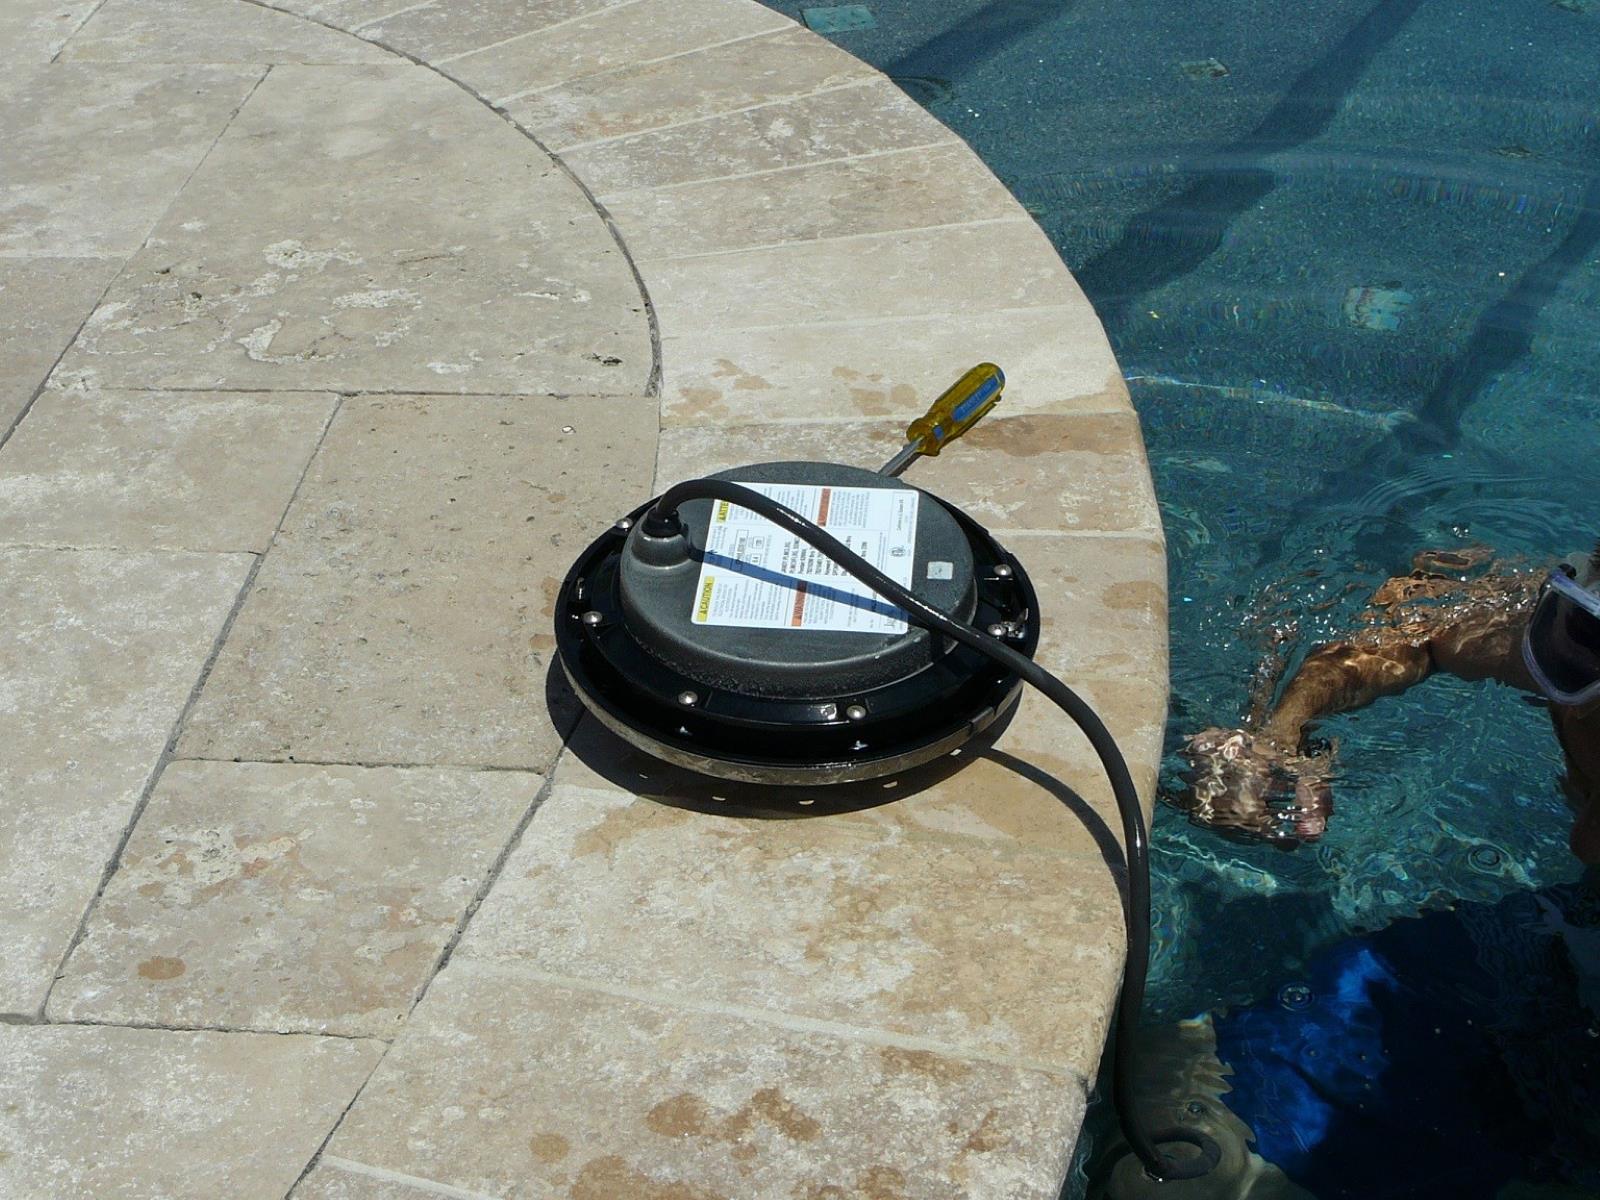
Draining the Pool Light Fixture
Draining the pool light fixture is a critical step in the process of repairing a leak. By removing the water from the fixture, you create a clear workspace for inspecting and addressing the source of the leak. This task requires careful attention to detail and adherence to safety protocols to ensure a smooth and effective draining process.
Steps to Drain the Pool Light Fixture:
-
Turn Off the Pool Pump: Before draining the pool light fixture, it is essential to turn off the pool pump to prevent water circulation. This minimizes the risk of water flowing back into the fixture during the draining process.
-
Locate the Drain Plug: The pool light fixture is equipped with a drain plug typically located at the base of the fixture. Identify the position of the drain plug and prepare to remove it to facilitate the draining process.
-
Use a Suitable Container: Position a suitable container, such as a bucket or a large bowl, beneath the drain plug to capture the water as it is released from the fixture. This prevents water from spilling into the pool or surrounding area.
-
Carefully Remove the Drain Plug: With a firm grip, carefully unscrew the drain plug from the pool light fixture. Be prepared for water to begin flowing out as the plug is loosened.
-
Allow the Fixture to Drain Completely: Once the drain plug is removed, allow the water to drain completely from the fixture. Depending on the amount of water present, this process may take a few minutes to ensure that the fixture is entirely emptied.
-
Inspect the Drained Water: While draining the fixture, take note of any debris or sediment that may have accumulated inside. This observation can provide valuable insights into the condition of the fixture and potential factors contributing to the leak.
By meticulously following these steps, you can effectively drain the pool light fixture, setting the stage for the subsequent inspection and repair tasks. This process creates a clear pathway for identifying the source of the leak and executing the necessary repairs with precision and confidence. Remember to handle the drained water responsibly, disposing of it in accordance with local regulations to maintain environmental consciousness throughout the repair process.
Read more: How To Find Swimming Pool Leaks
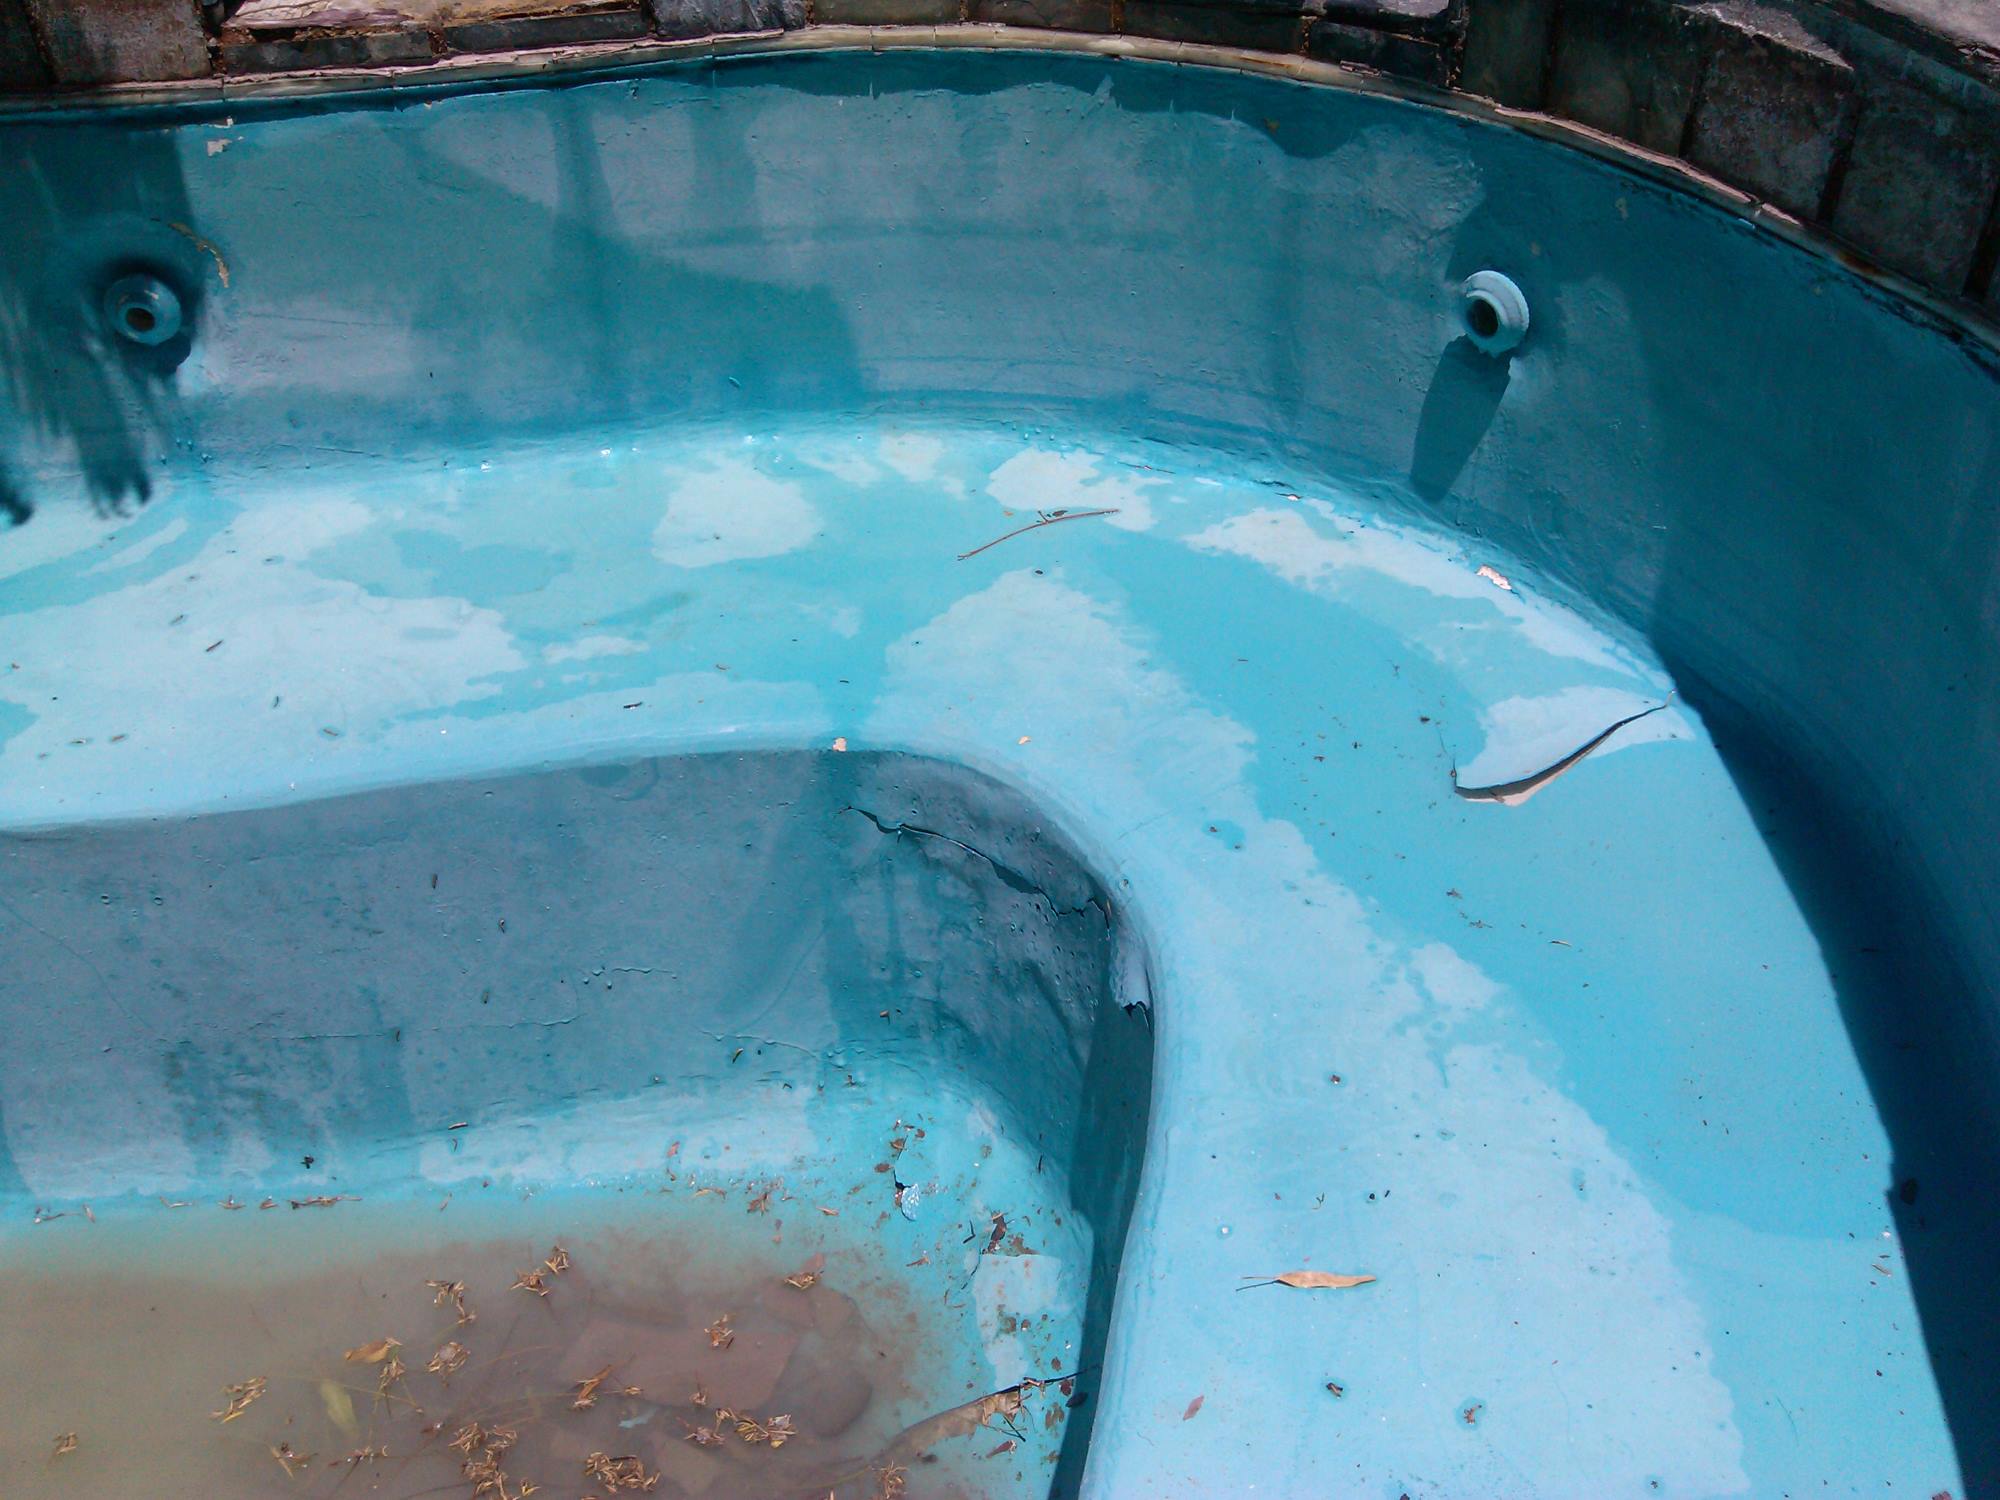
Inspecting and Repairing the Seal
Upon draining the pool light fixture, the next crucial step is to meticulously inspect the seal surrounding the fixture. The seal serves as a protective barrier, preventing water from infiltrating the light housing. A deteriorated or damaged seal is a common culprit behind pool light leaks. By conducting a thorough inspection and addressing any seal-related issues, you can effectively remedy the leak and restore the integrity of the fixture.
Steps to Inspect and Repair the Seal:
-
Clean the Seal Area: Begin by carefully cleaning the seal area using a gentle detergent and a soft brush. Remove any accumulated dirt, debris, or residue that may compromise the seal's effectiveness. Thorough cleaning provides a clear view of the seal and facilitates accurate assessment.
-
Examine the Seal for Damage: With the seal area clean and dry, visually inspect the seal for signs of wear, cracking, or deterioration. Pay close attention to the seal's condition along the edges and seams. Any visible damage indicates the need for repair or replacement.
-
Address Seal Damage: If the seal exhibits damage or wear, it is essential to address it promptly. Depending on the extent of the damage, repair options may include applying a specialized sealant to seal small cracks or replacing the entire seal for more extensive issues.
-
Apply Sealant as Needed: For minor cracks or gaps in the seal, carefully apply a high-quality pool sealant designed for underwater use. Ensure that the sealant is compatible with the material of the seal and follows the manufacturer's instructions for proper application.
-
Replace the Seal if Necessary: In cases where the seal is significantly compromised or aged, replacing it with a new, compatible seal is the most effective solution. Select a high-grade replacement seal that is designed for use in pool environments to ensure optimal performance and longevity.
-
Ensure Proper Seal Alignment: During the repair or replacement process, pay attention to the alignment and positioning of the seal. Proper alignment is crucial for creating a watertight barrier around the pool light fixture, preventing future leaks.
By meticulously inspecting and addressing the condition of the seal, you can effectively mitigate the risk of future leaks and safeguard the functionality of the pool light fixture. This proactive approach ensures that the seal is robust and resilient, providing long-term protection against water intrusion and preserving the safety and performance of the pool light.
Remember, attention to detail and precision are key when inspecting and repairing the seal. By investing time and care into this critical step, you can achieve a durable and reliable seal that upholds the integrity of the pool light fixture, allowing you to enjoy a leak-free and luminous pool environment.
Reassembling the Pool Light Fixture
After inspecting and repairing the seal, the reassembly of the pool light fixture is a pivotal stage in the repair process. Proper reassembly ensures that the fixture is securely restored to its functional state, ready to illuminate the pool area without the risk of leaks or operational issues. This step demands attention to detail and precision to guarantee the seamless integration of components and the effective containment of the light housing.
Steps to Reassemble the Pool Light Fixture:
-
Prepare the Components: Gather all the necessary components for reassembly, including the cleaned and repaired pool light fixture, the drain plug, and any additional accessories or tools required for the task.
-
Inspect the Fixture Interior: Before reassembly, conduct a final inspection of the interior of the pool light fixture. Ensure that the interior is clean, free of debris, and devoid of any residual moisture. This meticulous examination sets the stage for a successful reassembly process.
-
Position the Seal and Fixture: Carefully position the repaired or replaced seal around the perimeter of the pool light fixture. Ensure that the seal is aligned securely and uniformly to create a watertight barrier when the fixture is reinstalled.
-
Secure the Drain Plug: If the drain plug was removed during the draining process, securely reattach it to the base of the pool light fixture. Tighten the plug with precision to prevent any potential water seepage once the fixture is operational.
-
Reinsert the Fixture: With the seal and drain plug in place, gently reinsert the pool light fixture into its designated position in the pool. Exercise caution to avoid damaging the seal or the fixture housing during this reinstallation process.
-
Tighten the Fixture: Once the fixture is correctly positioned, ensure that it is securely fastened in place. Follow the manufacturer's guidelines or specifications for tightening the fixture to the pool structure, guaranteeing stability and a snug fit.
-
Double-Check the Seal: Verify that the seal is intact and properly aligned around the fixture. Confirm that there are no gaps or irregularities that could compromise the seal's effectiveness once the pool light is operational.
By meticulously following these steps, you can effectively reassemble the pool light fixture, setting the stage for the subsequent testing and validation of the repair. This process ensures that the fixture is securely reinstated, with a robust seal in place to prevent future leaks and maintain the operational integrity of the pool light.
The reassembly phase marks a significant milestone in the repair journey, bringing the pool light fixture one step closer to its optimal state. With the fixture securely reassembled and the seal in place, you are poised to proceed to the final phase of testing the repair and confirming the successful resolution of the pool light leak.
To repair a swimming pool light leak, first turn off the power to the light. Then, remove the light fixture and inspect the gasket for any damage. Replace the gasket if necessary and reseal the fixture before turning the power back on.
Read more: How To Find A Leak In A Swimming Pool Liner
Testing the Repair
After completing the meticulous process of inspecting, repairing, and reassembling the pool light fixture, the final crucial step is to test the repair to ensure that the leak has been effectively addressed. Testing the repair involves a comprehensive evaluation of the fixture's functionality and the integrity of the seal to validate the success of the repair process.
Steps to Test the Repair:
-
Visual Inspection: Begin by conducting a visual inspection of the pool light fixture and its surrounding area. Look for any signs of water seepage, moisture accumulation, or discoloration. A thorough visual examination provides initial insights into the effectiveness of the repair and the presence of any residual leaks.
-
Power Restoration: With the repair completed and the fixture reassembled, cautiously restore the power supply to the pool light. Turn on the circuit breaker associated with the light fixture and verify that the light switch activates the pool light. This step allows you to assess the electrical functionality of the fixture following the repair.
-
Observation Period: Allow the pool light to operate for an extended period, observing its performance closely. Monitor the fixture for any indications of water intrusion, such as condensation inside the light housing or water droplets forming on the exterior. A prolonged observation period provides valuable insights into the effectiveness of the seal and the absence of leaks.
-
Underwater Examination: For added assurance, consider conducting an underwater examination of the pool light fixture. Utilize a waterproof flashlight or an underwater camera to inspect the seal and the interior of the fixture while it is operational. This underwater assessment offers a comprehensive view of the fixture's condition and the integrity of the seal in a real-world setting.
-
Dye Test Verification: If previous dye testing was conducted to identify the leak, consider repeating the dye test after the repair. Add a small amount of food coloring around the pool light and observe whether the dye infiltrates the fixture. A lack of dye ingress confirms the successful repair and the restoration of the seal's effectiveness.
By meticulously following these testing steps, you can effectively validate the success of the repair and confirm the elimination of the pool light leak. This comprehensive evaluation ensures that the fixture operates without leaks and that the seal functions as intended, providing long-term protection against water intrusion.
The testing phase serves as the ultimate validation of the repair efforts, offering peace of mind and confidence in the restored functionality of the pool light fixture. With a successful test outcome, you can enjoy a leak-free and luminous pool environment, knowing that the repair has been executed with precision and thoroughness.
Conclusion
In conclusion, addressing a leak in a swimming pool light fixture is a manageable task that, when approached with the right knowledge and methodical execution, can yield rewarding results. By following the step-by-step process outlined in this guide, pool owners can effectively diagnose, repair, and validate the resolution of a pool light leak, ensuring the safety and functionality of their pool environment.
The journey begins with the crucial step of identifying the leak, where visual inspection, water level fluctuation observation, dye testing, and professional assessment play pivotal roles in pinpointing the source of the leak. This initial phase sets the foundation for the subsequent repair process, providing valuable insights into the nature and location of the leak.
Shutting off the power to the pool light fixture is a non-negotiable safety measure that precedes any repair work. By diligently following the steps to disconnect the power supply, pool owners create a secure environment for addressing the leak, minimizing the risk of electrical accidents and ensuring a safe workspace.
Draining the pool light fixture is a meticulous task that clears the way for inspecting and repairing the seal. By carefully removing the water from the fixture and conducting a thorough inspection of the seal, pool owners can identify and address any damage or deterioration, setting the stage for a robust and effective repair.
Inspecting and repairing the seal is a critical phase that demands attention to detail and precision. By cleaning, examining, and addressing any seal-related issues, pool owners can mitigate the risk of future leaks, ensuring that the seal serves as a resilient barrier against water intrusion.
The reassembly of the pool light fixture marks a significant milestone in the repair journey, bringing the fixture one step closer to its optimal state. By meticulously positioning the seal, securing the drain plug, and reinserting the fixture, pool owners set the stage for the final phase of testing the repair.
Testing the repair is the ultimate validation of the meticulous repair efforts, offering assurance that the leak has been effectively addressed and the pool light fixture operates without the risk of water intrusion. Through visual inspection, power restoration, observation, and dye testing verification, pool owners can confirm the successful resolution of the pool light leak.
In essence, by embracing the guidance provided in this comprehensive guide, pool owners can navigate the process of repairing a swimming pool light leak with confidence and expertise. This journey culminates in a restored pool environment, free from leaks and illuminated by the luminous charm of a fully functional pool light fixture.
Frequently Asked Questions about How To Repair A Swimming Pool Light Leak
Was this page helpful?
At Storables.com, we guarantee accurate and reliable information. Our content, validated by Expert Board Contributors, is crafted following stringent Editorial Policies. We're committed to providing you with well-researched, expert-backed insights for all your informational needs.


0 thoughts on “How To Repair A Swimming Pool Light Leak”