Home>Gardening & Outdoor>Pool & Spa Care>How To Disassemble A Hot Tub

Pool & Spa Care
How To Disassemble A Hot Tub
Modified: October 19, 2024
Learn the step-by-step process of disassembling a hot tub for maintenance and repairs with expert tips for pool and spa care. Discover the essential tools and techniques.
(Many of the links in this article redirect to a specific reviewed product. Your purchase of these products through affiliate links helps to generate commission for Storables.com, at no extra cost. Learn more)
Introduction
A hot tub can provide years of relaxation and enjoyment, but there may come a time when you need to disassemble it. Whether you're moving to a new home, upgrading to a new hot tub, or simply need to remove an old one, knowing how to properly disassemble a hot tub is essential. In this comprehensive guide, we will walk you through the step-by-step process of disassembling a hot tub, ensuring that you can tackle this task with confidence and safety.
Disassembling a hot tub is a multi-step process that requires careful planning, the right tools, and a keen understanding of the components involved. From draining the water and disconnecting electrical components to removing the panels and disassembling the shell, each step is crucial to the overall disassembly process. Additionally, proper disposal of the various components is essential for environmental sustainability and safety.
By following the guidelines outlined in this article, you will gain the knowledge and skills necessary to disassemble a hot tub efficiently and safely. Whether you are a seasoned hot tub owner or a newcomer to the world of spa maintenance, this guide will equip you with the information needed to navigate the disassembly process with ease. Let's dive in and explore the essential steps and considerations for disassembling a hot tub.
Key Takeaways:
- Properly disassembling a hot tub requires careful planning, safety precautions, and the right tools. Prioritize safety, drain the water, disconnect electrical components, remove panels, and dispose of components responsibly.
- Disassembling a hot tub involves multiple steps, including draining water, disconnecting electrical components, removing panels, disconnecting plumbing, and disassembling the shell. Prioritize safety, use the right tools, and ensure responsible disposal of components.
Read more: How To Keep Hot Tub Hot In Winter
Safety Precautions
Before embarking on the task of disassembling a hot tub, it is paramount to prioritize safety. Hot tubs are complex systems that involve electrical components, heavy materials, and water, making it crucial to take the necessary precautions to prevent accidents and injuries. Here are some essential safety measures to keep in mind:
- Electricity Precautions: Prior to any disassembly, ensure that the hot tub is completely disconnected from its power source. This involves turning off the power at the breaker and, if applicable, unplugging the hot tub from the electrical outlet. It is advisable to use a voltage tester to confirm that no electricity is flowing to the hot tub.
- Personal Protective Equipment (PPE): Wear appropriate PPE, including gloves and safety goggles, to protect yourself from sharp edges, debris, and potential electrical hazards during the disassembly process.
- Secure Lifting Techniques: Hot tub components can be heavy and awkward to maneuver. Use proper lifting techniques, and if necessary, seek assistance from others to prevent strain or injury.
- Water Drainage: Ensure that the hot tub is fully drained before initiating disassembly. Standing water can create slippery conditions, increasing the risk of accidents.
- Sturdy Workspace: Work on a stable and level surface to prevent the hot tub or its components from shifting or falling during disassembly.
- Follow Manufacturer Guidelines: Refer to the hot tub’s manual or manufacturer’s guidelines for specific safety instructions and disassembly procedures tailored to your hot tub model.
By adhering to these safety precautions, you can mitigate potential risks and create a secure environment for disassembling your hot tub. Prioritizing safety not only safeguards you and those assisting with the process but also ensures a smooth and efficient disassembly experience.
Tools and Equipment Needed
Disassembling a hot tub requires the use of specific tools and equipment to facilitate the process and ensure that each step is carried out effectively. Before beginning the disassembly, gather the following tools and equipment:
- Adjustable Wrench: Used for loosening and tightening various plumbing connections and fittings.
- Screwdriver Set: A variety of screwdrivers, including Phillips and flat-head, will be needed to remove panels, access components, and disconnect electrical elements.
- Pliers: Both regular and needle-nose pliers are essential for gripping, twisting, and maneuvering small components and fasteners.
- Hacksaw or Reciprocating Saw: In some cases, cutting through stubborn or inaccessible plumbing may be necessary, requiring the use of a hacksaw or reciprocating saw.
- Utility Knife: Useful for cutting and removing sealants, adhesives, or caulking securing various components.
- Socket Set: A set of sockets and ratchets will aid in loosening and removing bolts and nuts securing the hot tub panels and components.
- Shop Vacuum: To effectively remove any residual water from the hot tub’s plumbing and interior components.
- Protective Gear: Safety goggles, work gloves, and sturdy footwear are essential for personal protection during the disassembly process.
- Assistance: Enlist the help of at least one other person, as hot tub components can be heavy and unwieldy to handle alone.
Having the right tools and equipment at your disposal will streamline the disassembly process and contribute to a safer and more efficient workflow. Additionally, it is advisable to organize the tools in a designated area near the hot tub, ensuring easy access throughout the disassembly.
With these tools and equipment in hand, you will be well-prepared to tackle the disassembly of your hot tub with confidence and precision.
Draining the Water
Before initiating the disassembly of your hot tub, it is essential to thoroughly drain all the water from the tub and its associated plumbing. Follow these steps to ensure a complete and efficient drainage process:
- Turn Off Power: Ensure that the hot tub is completely disconnected from its power source to prevent any electrical hazards during the drainage process.
- Locate Drain Valve: Identify the drain valve, typically located near the bottom of the hot tub. This valve may be connected to a hose for directing the water to a suitable drainage area.
- Connect Garden Hose: If the hot tub has a designated drain hose attachment, connect a garden hose to the valve to direct the water away from the disassembly area.
- Open Drain Valve: Carefully open the drain valve, allowing the water to flow out of the hot tub. Monitor the drainage progress to ensure that all water is effectively expelled from the tub and plumbing.
- Flush Plumbing: After draining the water from the hot tub, it is advisable to flush the plumbing system to remove any residual water. This can be achieved by using a shop vacuum to suction out remaining water from the plumbing lines.
- Inspect and Secure: Once drained, inspect the hot tub and its plumbing to ensure that no water remains. Secure the drain valve and remove the garden hose, preparing the hot tub for the subsequent disassembly steps.
By thoroughly draining the water from the hot tub and its plumbing, you create a safer and more manageable environment for the subsequent disassembly tasks. Additionally, proper drainage minimizes the risk of water-related accidents and facilitates the efficient removal of components.
With the water successfully drained, you are now ready to proceed to the next steps of disconnecting the electrical components and removing the panels as part of the comprehensive hot tub disassembly process.
Disconnecting the Electrical Components
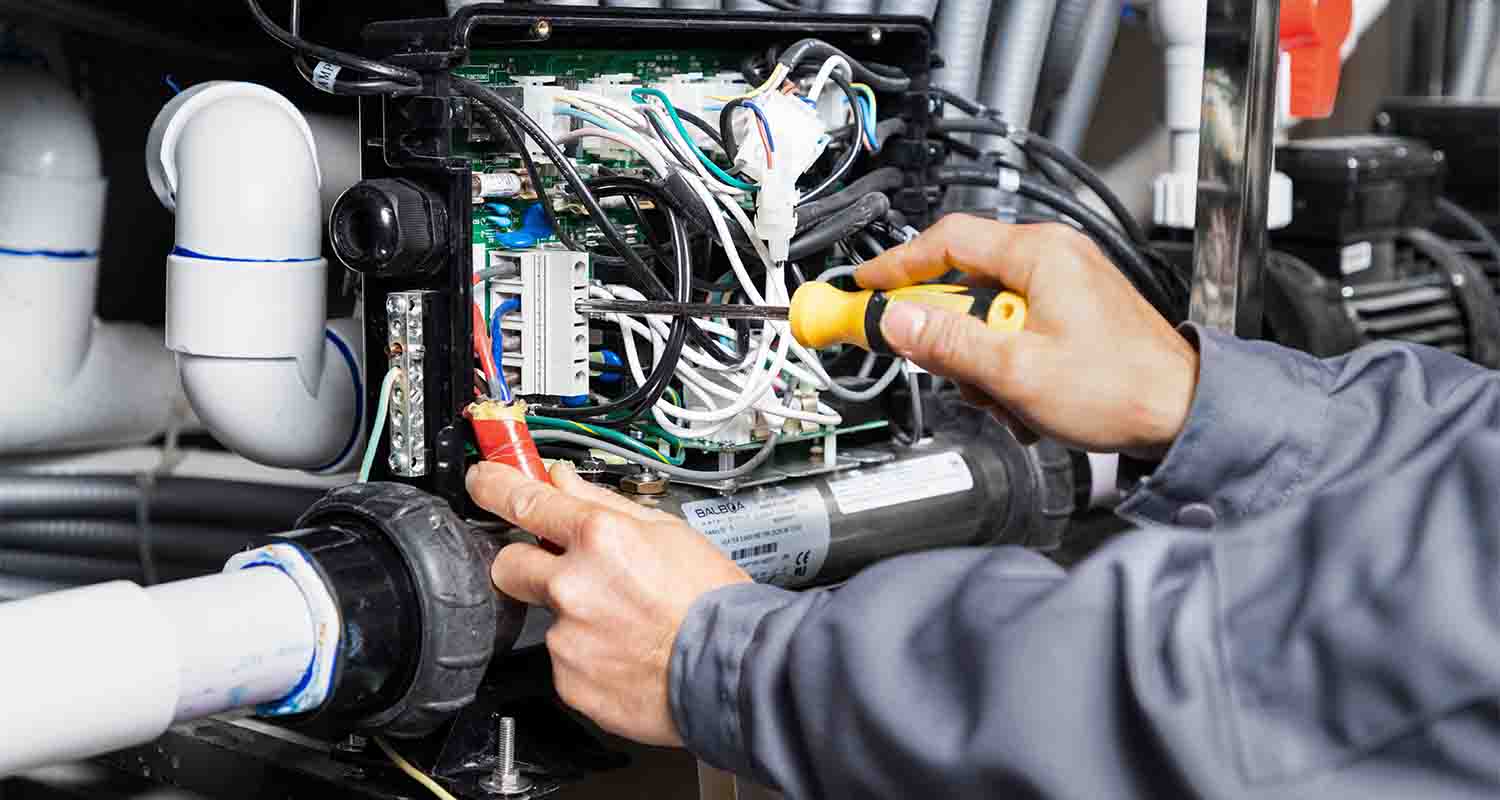
When disassembling a hot tub, it is crucial to prioritize the safe disconnection of all electrical components to prevent potential hazards and ensure a smooth disassembly process. Follow these steps to effectively disconnect the electrical elements of your hot tub:
- Turn Off Power: Before handling any electrical components, ensure that the hot tub is completely disconnected from its power source. This involves turning off the power at the breaker and unplugging the hot tub from the electrical outlet.
- Refer to the Manual: Consult the hot tub’s manual or manufacturer’s guidelines to identify the specific location and arrangement of electrical connections, including the control panel, heater, pump, and any additional electrical features.
- Label Wires and Components: Prior to disconnecting any wires or components, use adhesive labels or markers to clearly mark each wire and its corresponding connection point. This will facilitate reassembly and prevent confusion during the reinstallation process.
- Disconnect Power Supply: Carefully disconnect the power supply to the control panel and any other electrical components, ensuring that all wires and cables are safely removed from their respective terminals.
- Secure Loose Wires: After disconnecting the electrical components, securely fasten any loose wires or cables to prevent them from interfering with subsequent disassembly tasks or posing a safety risk.
- Cap and Insulate: If applicable, cap and insulate any exposed electrical connections to safeguard against accidental contact and to maintain the integrity of the electrical system during the disassembly process.
By meticulously following these steps, you can effectively disconnect the electrical components of your hot tub, mitigating the risk of electrical hazards and ensuring a structured and secure disassembly process. Prioritizing safety and organization during this phase will streamline the overall disassembly and contribute to a successful reassembly when the time comes.
With the electrical components safely disconnected, you are now prepared to progress to the subsequent steps of removing the panels and disconnecting the plumbing as part of the comprehensive hot tub disassembly process.
Before disassembling a hot tub, make sure to turn off the power and drain all the water. Label and organize all the parts and hardware to make reassembly easier. Keep track of the steps and take pictures for reference.
Read more: How A Hot Tub Works
Removing the Panels
As you continue the disassembly process of your hot tub, removing the panels is a pivotal step that grants access to the internal components and facilitates the subsequent stages of disassembly. Follow these steps to effectively remove the panels from your hot tub:
- Identify Panel Fastenings: Inspect the perimeter of the hot tub to locate the fastenings securing the panels. These may include screws, bolts, or clips, depending on the specific design of your hot tub.
- Use Appropriate Tools: Utilize the appropriate tools, such as a screwdriver or socket set, to remove the fastenings and detach the panels. Ensure that the tools are compatible with the fastening types to prevent damage and facilitate efficient removal.
- Enlist Assistance: Some hot tub panels can be large and cumbersome to handle alone. Enlist the assistance of another person to support and stabilize the panels during removal, preventing accidental damage or injury.
- Set Aside Panels Safely: Once detached, carefully set aside the panels in a secure location to prevent tripping hazards and ensure that they remain in good condition for potential reuse or disposal.
- Inspect Panel Interiors: With the panels removed, take the opportunity to inspect the interior components of the hot tub, including the insulation, plumbing, and electrical elements. This visual assessment can provide valuable insights for the subsequent disassembly tasks.
- Label and Organize Fastenings: As you remove the panels, label and organize the fastenings to correspond with their respective panel locations. This will simplify the reassembly process and prevent confusion when reinstalling the panels.
By methodically following these steps, you can efficiently remove the panels from your hot tub, granting access to the internal components and preparing the framework for the subsequent stages of disassembly. Prioritizing care and organization during this phase will contribute to a structured and successful disassembly process.
With the panels safely removed, you are now ready to proceed to the next steps of disconnecting the plumbing and disassembling the shell as part of the comprehensive hot tub disassembly process.
Disconnecting the Plumbing
As you progress through the disassembly of your hot tub, disconnecting the plumbing is a critical step that requires attention to detail and a systematic approach. Follow these steps to effectively disconnect the plumbing from your hot tub:
- Locate Plumbing Connections: Identify the various plumbing connections within the hot tub, including pipes, hoses, and fittings. These connections may link the pump, heater, jets, and other plumbing components.
- Turn Off Water Supply: If applicable, turn off the water supply to the hot tub to prevent any residual water from flowing through the plumbing during disconnection.
- Drain Remaining Water: Ensure that any remaining water within the plumbing lines is fully drained to minimize the risk of spills and facilitate the disconnection process.
- Use Adjustable Wrenches: Utilize adjustable wrenches to loosen and disconnect the plumbing fittings and connections. Exercise caution to avoid damaging the fittings or adjacent components during this process.
- Cap or Seal Open Ends: After disconnecting the plumbing, cap or seal the open ends of the pipes or hoses to prevent debris ingress and maintain the cleanliness of the plumbing system.
- Label Plumbing Components: As you disconnect the plumbing, label the components and connections to ensure clarity during the reassembly phase. This labeling will streamline the process of reconnecting the plumbing in the future.
By meticulously following these steps, you can effectively disconnect the plumbing from your hot tub, preparing the system for the subsequent stages of disassembly. Taking the time to execute this phase with precision and care will contribute to a structured and successful disassembly process.
With the plumbing safely disconnected, you are now prepared to progress to the subsequent steps of disassembling the shell and ensuring the proper disposal of the various components as part of the comprehensive hot tub disassembly process.
Disassembling the Shell
Disassembling the shell of your hot tub marks a significant phase in the overall disassembly process, requiring careful attention to detail and a methodical approach. Follow these steps to effectively disassemble the shell of your hot tub:
- Assess Access Points: Identify the access points and fastenings securing the shell to the framework or base of the hot tub. These may include screws, bolts, or other fasteners located around the perimeter and within the interior of the shell.
- Use Proper Tools: Utilize the appropriate tools, such as a socket set or screwdriver, to remove the fastenings and detach the shell from the underlying structure. Ensure that the tools are suited to the specific fastener types to facilitate efficient disassembly.
- Enlist Assistance: The shell of a hot tub can be sizable and cumbersome to handle alone. Enlist the assistance of another person to support and stabilize the shell during removal, preventing accidental damage or injury.
- Secure and Store Fastenings: As you remove the fastenings securing the shell, carefully store them in labeled containers or bags to prevent loss and facilitate organized reassembly in the future.
- Lift and Remove Shell: With the fastenings removed, carefully lift and remove the shell from the hot tub, ensuring that it is set aside in a secure location to prevent damage and maintain its structural integrity.
- Inspect Interior Components: Once the shell is removed, take the opportunity to inspect the interior components of the hot tub, including the plumbing, insulation, and framework. This visual assessment can provide valuable insights for the subsequent steps of disposal and potential reassembly.
By diligently following these steps, you can successfully disassemble the shell of your hot tub, paving the way for the proper disposal of the various components and the potential reassembly of the hot tub in a new location or configuration. Prioritizing care and organization during this phase will contribute to a structured and successful disassembly process.
With the shell safely removed, you have completed a pivotal phase in the disassembly process and are now prepared to proceed to the subsequent steps of ensuring the proper disposal of the various components as part of the comprehensive hot tub disassembly process.
Proper Disposal of Components
As you near the completion of the hot tub disassembly process, it is essential to address the proper disposal of the various components. From the shell and panels to the plumbing and electrical elements, each component requires careful consideration to ensure responsible and environmentally conscious disposal. Follow these guidelines for the proper disposal of hot tub components:
- Reuse and Recycling: Whenever possible, explore opportunities for reusing or recycling hot tub components. The shell, panels, and certain plumbing and electrical elements may have potential for repurposing or recycling, reducing the environmental impact of disposal.
- Local Disposal Regulations: Research and adhere to local regulations and guidelines for the disposal of large items and potentially hazardous materials. Contact local waste management facilities or recycling centers to inquire about specific disposal protocols for hot tub components.
- Professional Disposal Services: Consider engaging professional disposal services that specialize in the removal and responsible disposal of large items such as hot tubs. These services can ensure that the components are handled and disposed of in accordance with environmental regulations.
- Disassemble for Disposal: Disassemble any components that can be broken down into smaller, more manageable pieces for disposal. This may include separating the shell, panels, and plumbing into individual components to facilitate proper disposal.
- Hazardous Materials Handling: Exercise caution when handling any materials that may be considered hazardous, such as electrical components, insulation, or certain plumbing elements. Follow recommended safety protocols for the handling and disposal of these materials.
- Consult with Professionals: If uncertain about the proper disposal methods for specific hot tub components, seek guidance from waste management professionals or environmental agencies to ensure compliance with disposal regulations.
By conscientiously addressing the proper disposal of hot tub components, you contribute to environmental sustainability and responsible waste management practices. Prioritizing reuse, recycling, and adherence to disposal regulations ensures that the disassembled components are handled and disposed of in a manner that minimizes environmental impact.
With the proper disposal of the hot tub components addressed, you have successfully completed the comprehensive disassembly process, paving the way for potential reuse, recycling, or responsible disposal of the various components.
Read more: How To Install A Hot Tub
Conclusion
Disassembling a hot tub is a multi-step process that demands careful planning, attention to detail, and a commitment to safety and environmental responsibility. By following the comprehensive guidelines outlined in this article, you have gained the knowledge and insights necessary to navigate the disassembly process with confidence and precision.
From draining the water and disconnecting the electrical components to removing the panels, disconnecting the plumbing, and disassembling the shell, each step is crucial to the overall disassembly process. Prioritizing safety measures, utilizing the appropriate tools, and enlisting assistance as needed are key elements in ensuring a smooth and efficient disassembly experience.
Proper disposal of the various components, including exploration of reuse and recycling options, adherence to local disposal regulations, and consideration of professional disposal services, underscores the commitment to environmental sustainability and responsible waste management practices.
Whether you are relocating a hot tub, upgrading to a new model, or simply seeking to responsibly dispose of an old unit, the knowledge and skills acquired through this guide empower you to approach the hot tub disassembly process with clarity and confidence.
By addressing each phase of the disassembly process with care and consideration, you contribute to the sustainable management of resources and the preservation of the environment. The insights gained from this guide not only support a successful hot tub disassembly but also underscore the importance of responsible and conscientious practices in all aspects of home and recreational maintenance.
As you embark on the journey of disassembling a hot tub, may these guidelines serve as a valuable resource, guiding you through each step with proficiency and ensuring a successful and environmentally mindful disassembly process.
Frequently Asked Questions about How To Disassemble A Hot Tub
Was this page helpful?
At Storables.com, we guarantee accurate and reliable information. Our content, validated by Expert Board Contributors, is crafted following stringent Editorial Policies. We're committed to providing you with well-researched, expert-backed insights for all your informational needs.




0 thoughts on “How To Disassemble A Hot Tub”