Home>Home Maintenance>How To Service Your Air Conditioner
Home Maintenance
How To Service Your Air Conditioner
Modified: March 7, 2024
Learn how to service your air conditioner with our comprehensive home maintenance guide. Keep your home cool and comfortable with these expert tips and tricks.
(Many of the links in this article redirect to a specific reviewed product. Your purchase of these products through affiliate links helps to generate commission for Storables.com, at no extra cost. Learn more)
Introduction
Welcome to our comprehensive guide on how to service your air conditioner. As the summer months approach, it’s crucial to ensure that your air conditioning system is in optimal condition to keep your home cool and comfortable. Regular maintenance of your air conditioner not only improves its efficiency and performance but also extends its lifespan, saving you money on costly repairs or replacements in the long run.
In this article, we will walk you through a step-by-step process to service your air conditioner effectively. We will provide you with essential safety precautions to follow, tools and materials you’ll need, and guidance on how to clean and maintain various components of your AC unit. By following these instructions, you’ll be able to keep your air conditioner running smoothly throughout the summer, providing you with the cooling relief you need.
Remember, if you’re uncomfortable performing any of the maintenance tasks or if your air conditioner requires more advanced repairs, it’s always best to contact a professional HVAC technician to assist you. However, for routine maintenance and general cleaning, this guide will equip you with the knowledge and skills to keep your air conditioner in top shape.
Now, let’s dive into the safety precautions you should take before servicing your air conditioner to ensure your well-being.
Key Takeaways:
- Keep your air conditioner running smoothly by following safety precautions, gathering necessary tools, and performing regular maintenance tasks. This ensures optimal performance, energy efficiency, and a cool, comfortable home.
- Regular maintenance of your air conditioner prevents costly repairs, extends its lifespan, and ensures reliable, energy-efficient cooling for your home. Prioritize safety, gather tools, and follow step-by-step servicing instructions.
Safety Precautions
Before servicing your air conditioner, it’s important to prioritize safety to avoid any accidents or injuries. Follow these safety precautions to ensure a secure working environment:
- Turn off the power: Before you begin any maintenance tasks, make sure to turn off the power to your air conditioner. Locate the main electrical disconnect switch near your outdoor unit and switch it off. This is crucial to prevent any electrical shocks or accidents while working on your AC system.
- Wear protective gear: While servicing your air conditioner, it’s recommended to wear protective gear such as gloves and safety glasses to protect your hands and eyes from any debris, sharp edges, or chemicals. Additionally, consider wearing long sleeves and pants to prevent any contact with moving parts.
- Use stable ladder or platform: If you need to access the internal components of your air conditioner, make sure to use a stable ladder or platform for safety. Avoid using chairs, stools, or other unstable surfaces that may cause you to lose balance and fall.
- Avoid contact with high-voltage parts: While inspecting or cleaning your air conditioner’s electrical components, be mindful of high-voltage areas and avoid direct contact. If you’re uncertain about handling electrical parts, it’s best to leave it to a qualified professional.
- Keep the area well-ventilated: When working with cleaning agents or chemicals, make sure to open windows or doors to maintain proper ventilation. This will prevent the accumulation of potentially harmful fumes and improve air quality.
- Follow manufacturer’s instructions: Always refer to your air conditioner’s user manual or manufacturer’s instructions for specific safety guidelines and maintenance recommendations. These instructions may vary from one unit to another, so it’s crucial to follow the guidelines specific to your model.
By following these safety precautions, you can ensure a secure environment while servicing your air conditioner. Now, let’s move on to the tools and materials you’ll need for the maintenance process.
Tools and Materials Needed
Before you begin servicing your air conditioner, gather the following tools and materials to ensure a smooth and efficient maintenance process:
- Screwdrivers: You may need both flathead and Phillips-head screwdrivers to remove screws and access various components of your air conditioner.
- Socket Set: A socket set with different sizes of sockets will help you loosen and tighten bolts and nuts on your air conditioning unit.
- Adjustable Wrench: An adjustable wrench is essential for loosening or tightening connections and fittings on your AC system.
- Shop Vacuum: A shop vacuum with a long hose attachment will be useful for cleaning debris from the air conditioner’s coils and other hard-to-reach areas.
- Soft Brush: A soft-bristle brush, such as a paintbrush or coil brush, can help remove dust and debris from the air conditioner’s coils and fins without causing damage.
- Fin Comb: A fin comb is a tool with different-sized teeth designed to straighten bent fins on the air conditioner’s outdoor condenser coil.
- Garden Hose: A garden hose with a spray nozzle attachment will be used to clean the condenser coils and rinse off any dirt or debris.
- Bleach or Vinegar: You’ll need bleach or vinegar to clean the condensate drain line and prevent any blockages caused by algae or mold growth.
- Air Filter: Depending on the type of air conditioner you have, you may need to replace or clean the air filter. Check your user manual for the appropriate type and size of filter required.
- Protective Gear: As mentioned in the safety precautions section, wear gloves, safety glasses, and appropriate clothing to protect yourself during the maintenance process.
By having these tools and materials ready, you’ll be fully prepared to service your air conditioner efficiently. Next, we’ll move on to the step-by-step process of servicing your AC unit, starting with turning off the power.
Step 1: Turn off the Power
Before you start any maintenance tasks on your air conditioner, it’s crucial to turn off the power to ensure your safety. Follow these steps to turn off the power:
- Locate the electrical disconnect: The electrical disconnect switch is usually located near your outdoor unit. It may be a box mounted on the wall or a switch on the unit itself.
- Turn off the power: Open the electrical disconnect box or flip the switch to the “off” position. This will cut off electrical power supply to your air conditioner.
- Double-check the power: Once you have turned off the power, it’s important to double-check that the unit is not receiving electricity. Test the unit by turning on the air conditioner from your thermostat. If it doesn’t start, you have successfully disconnected the power.
Turning off the power is an essential step to prevent any electrical accidents or injury while servicing your air conditioner. It’s crucial to remember not to skip this step and always prioritize safety. Once you’ve ensured the power is off, you can proceed with the next maintenance tasks.
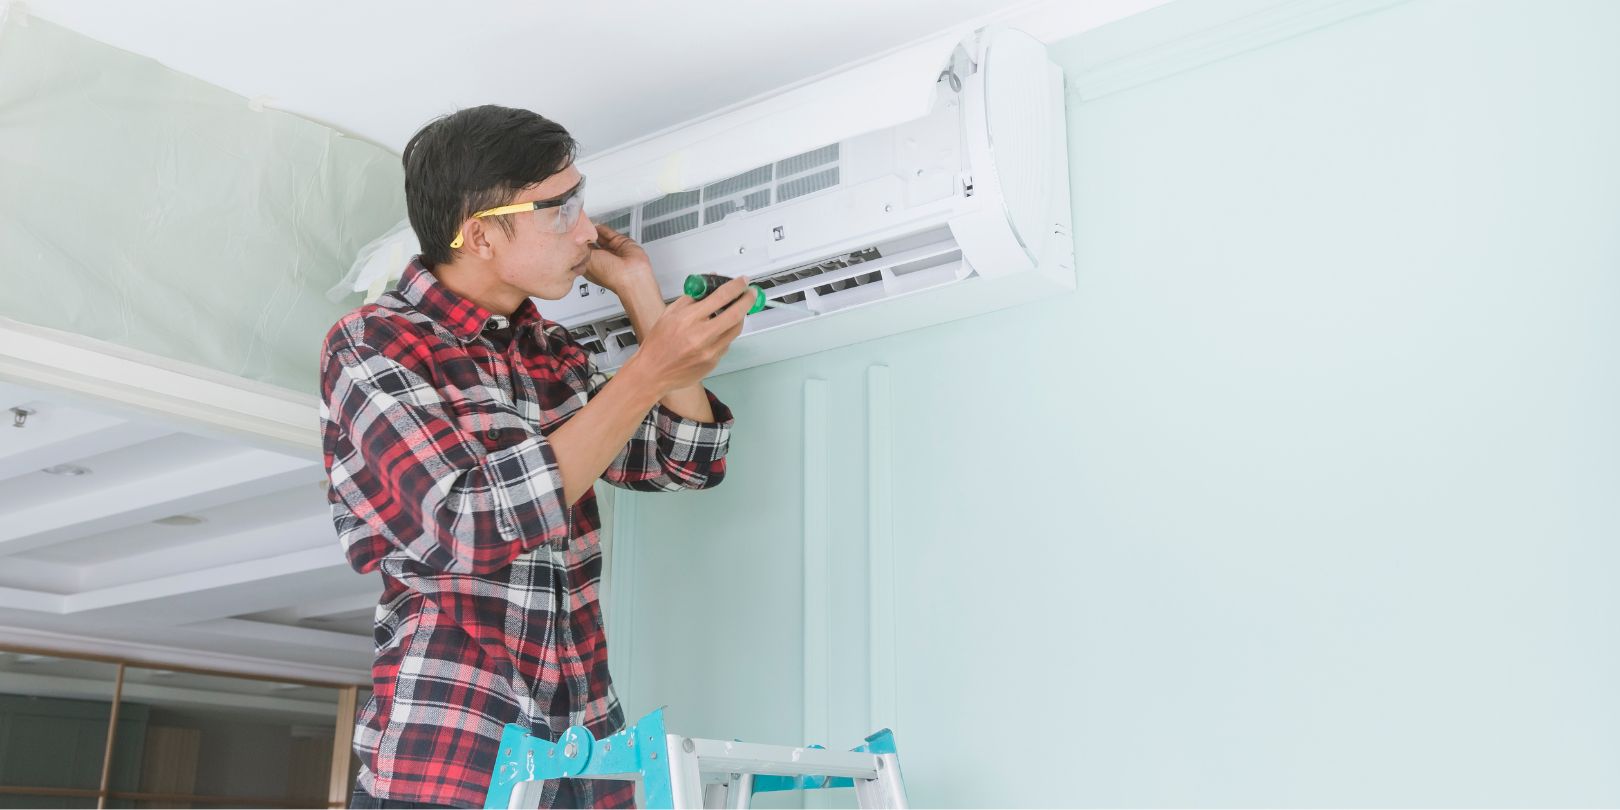
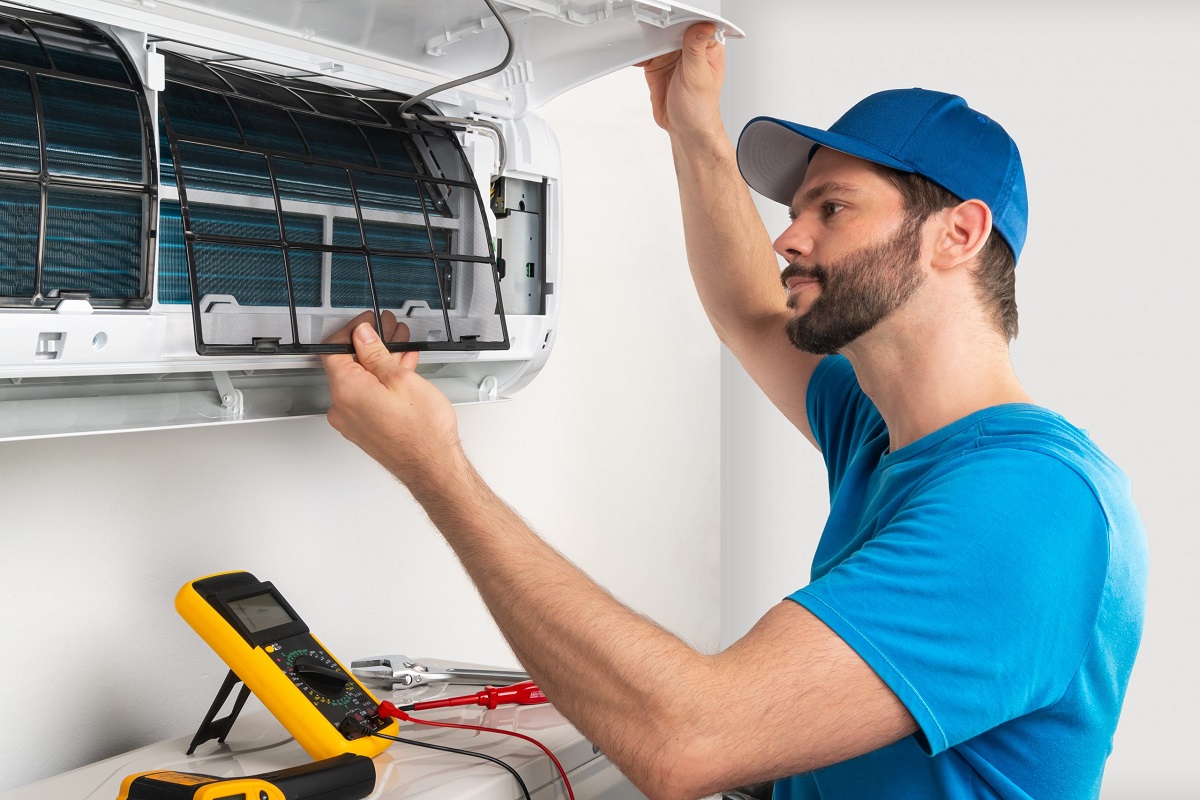
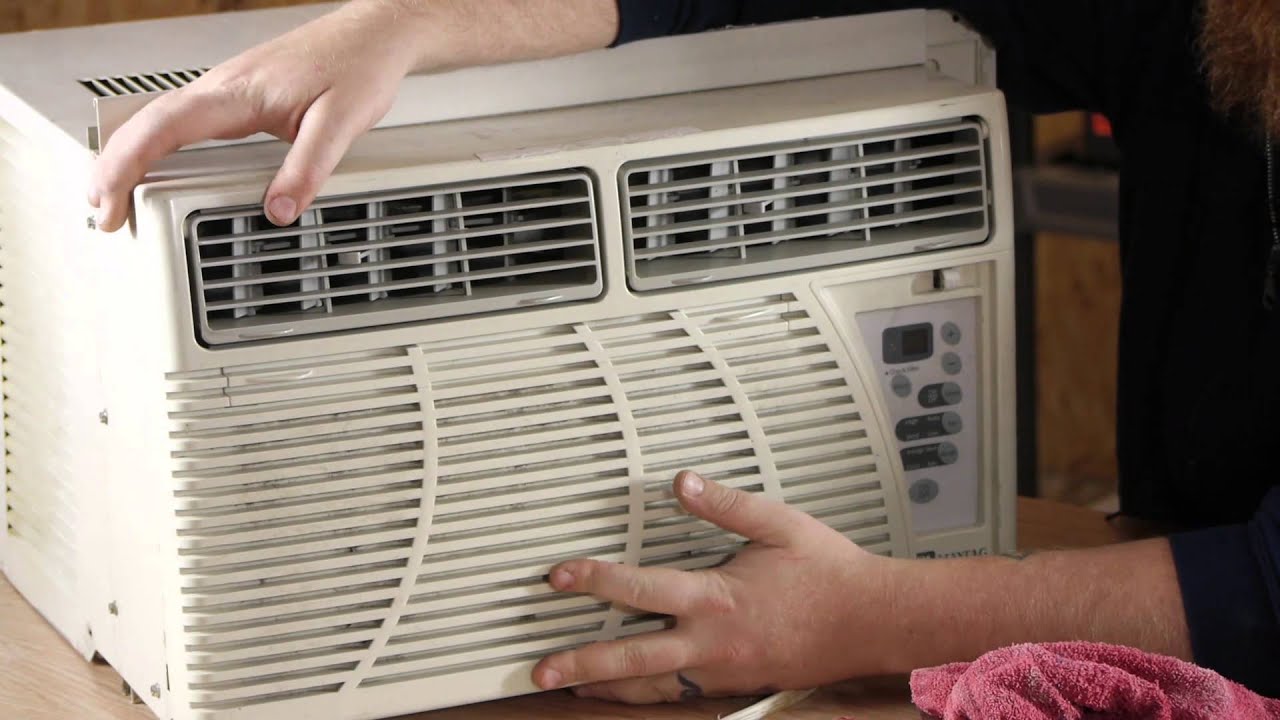
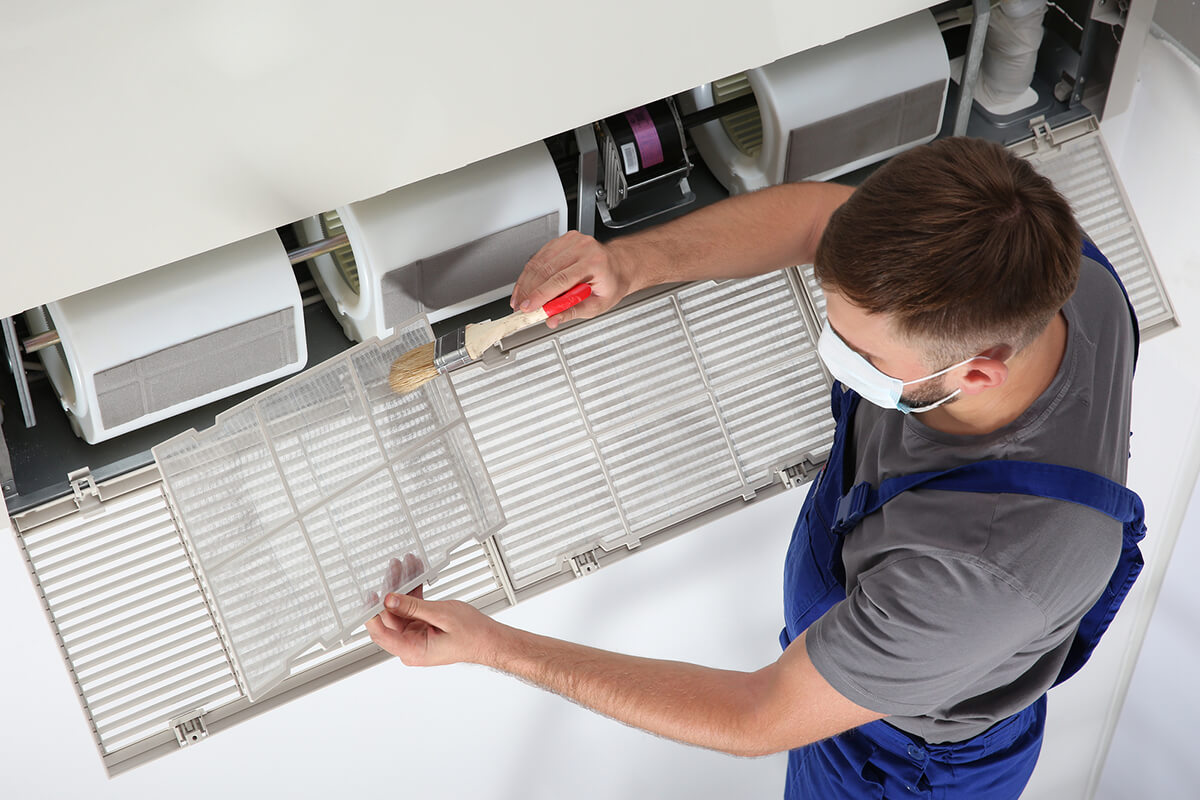
Step 2: Clean or Replace the Air Filter
The air filter plays a critical role in maintaining good indoor air quality and ensuring smooth airflow in your air conditioner. Over time, the air filter can become clogged with dust, dirt, and debris, hindering the system’s performance. Follow these steps to clean or replace the air filter:
- Locate the air filter: The air filter is typically located in the air handler unit of your air conditioner. It can be found behind a removable panel on the indoor unit.
- Remove the air filter: Carefully remove the air filter from its housing. Take note of its size and type for future reference.
- Inspect the air filter: Examine the air filter for dirt, dust, and debris buildup. If it’s heavily soiled or damaged, it’s best to replace it with a new one. Otherwise, you can proceed with cleaning.
- Clean the air filter: If you choose to clean the air filter, gently vacuum or rinse it under running water. Be sure to follow the manufacturer’s instructions for cleaning, as some filters may require specific cleaning methods or solutions.
- Allow the air filter to dry: After cleaning, allow the air filter to dry completely before reinstallation. This is important to prevent mold or mildew growth.
- Reinstall the air filter: Place the clean or new air filter back into its housing, making sure it fits securely. Follow the directional arrows on the filter to ensure proper airflow.
- Reset the filter indicator (if applicable): Some air conditioners have a filter indicator light that reminds you when to clean or replace the filter. If you have resettable indicator, follow the manufacturer’s instructions to reset it.
Cleaning or replacing the air filter regularly is crucial for optimal airflow, energy efficiency, and indoor air quality. It is recommended to clean or replace the air filter every 1 to 3 months, depending on the manufacturer’s guidelines and the level of dust in your environment.
With a clean or new air filter in place, you can now move on to the next step of cleaning the condenser coils.
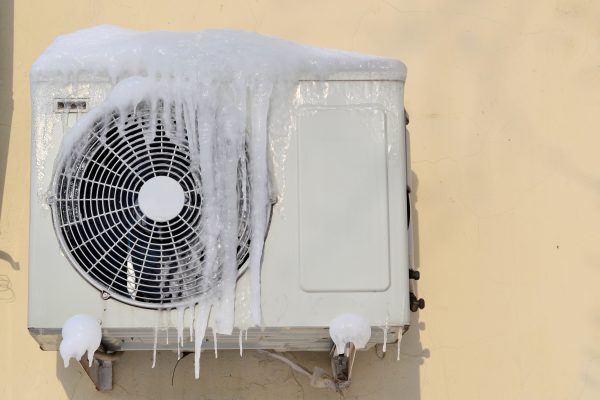
Step 3: Clean the Condenser Coils
The condenser coils of your air conditioner are responsible for releasing heat absorbed from your indoor space. Over time, these coils can accumulate dirt, debris, and even plant matter, reducing the efficiency of your AC unit. Cleaning the condenser coils is an important maintenance task that helps to improve the cooling efficiency of your air conditioner. Follow these steps to clean the condenser coils:
- Locate the condenser unit: The condenser unit is usually located outside your home. It is a large metal box with fins on the sides and a fan on top.
- Turn off the power: As a safety precaution, make sure to turn off the power to the condenser unit by disconnecting the power supply at the electrical disconnect box.
- Remove debris: Use a soft brush or a shop vacuum with a brush attachment to remove any leaves, dirt, or debris that may have accumulated on the condenser coils and fins.
- Spray with water: Using a garden hose with a spray nozzle attachment, gently spray water onto the condenser coils. Start from the top and work your way down, ensuring that the water flows through the coils and rinses away any remaining dirt or debris.
- Be gentle: While cleaning the coils, be gentle and avoid bending the delicate fins. If you notice any bent fins, use a fin comb to straighten them out carefully.
- Allow the coils to dry: After cleaning, allow the condenser coils to dry completely before proceeding to the next step. This may take some time, especially on a hot day.
- Reassemble the unit: Once the coils are dry, reinstall any protective grilles or covers that were removed during the cleaning process.
- Turn on the power: Return to the electrical disconnect box and turn the power supply back on to the condenser unit.
Cleaning the condenser coils on a regular basis improves the airflow and heat transfer efficiency of your air conditioner. It is recommended to clean the coils at least once a year, preferably before the summer season begins. However, if you live in an area with heavy dirt or foliage, more frequent cleanings may be necessary.
Now that the condenser coils are clean, let’s move on to the next step: checking and cleaning the condensate drain.
Step 4: Check and Clean the Condensate Drain
The condensate drain in your air conditioning system is responsible for removing the moisture that forms during the cooling process. Over time, this drain can become clogged with dirt, debris, or algae growth, leading to water leakage or even damage to your AC unit. Follow these steps to check and clean the condensate drain:
- Locate the condensate drain: The condensate drain is typically a PVC pipe located near the indoor unit of your air conditioner. It may be connected to a drain line or an external drain.
- Inspect the drain line: Check the condensate drain line for any signs of blockage or water leakage. Look for standing water or signs of moisture around the pipe.
- Clear the blockage: If you notice a blockage or slow drainage, use a wet/dry vacuum or a pipe cleaner to remove any debris clogging the drain line. Alternatively, you can gently flush the drain line with a mixture of bleach and water or vinegar and water to kill any algae or mold growth.
- Test the drainage: Once you have cleared the drain line, pour a small amount of water into the drain pan to ensure that it flows freely through the drain line and exits the system without any obstructions. If the water flows smoothly, your condensate drain is clear.
- Check the drain pan: While inspecting the condensate drain, also inspect the drain pan underneath the indoor unit. Ensure that there is no standing water or debris in the pan. If you spot any issues, clean the pan thoroughly and remove any accumulated water.
- Prevent future blockages: To prevent future blockages, consider installing a condensate drain cleaner or a drain pan overflow switch. These devices can help prevent clogs and notify you of any potential drainage issues before they cause damage.
Cleaning and maintaining the condensate drain is essential to prevent water leaks and potential damage to your air conditioning system. It’s recommended to check the condensate drain at least once a year or as part of your regular air conditioner maintenance routine.
With a clean condensate drain, we’re ready to move on to the next step: inspecting the fan motor and blades.
Regularly clean or replace the air filters in your air conditioner to ensure proper airflow and efficiency. This can help prevent breakdowns and improve air quality.
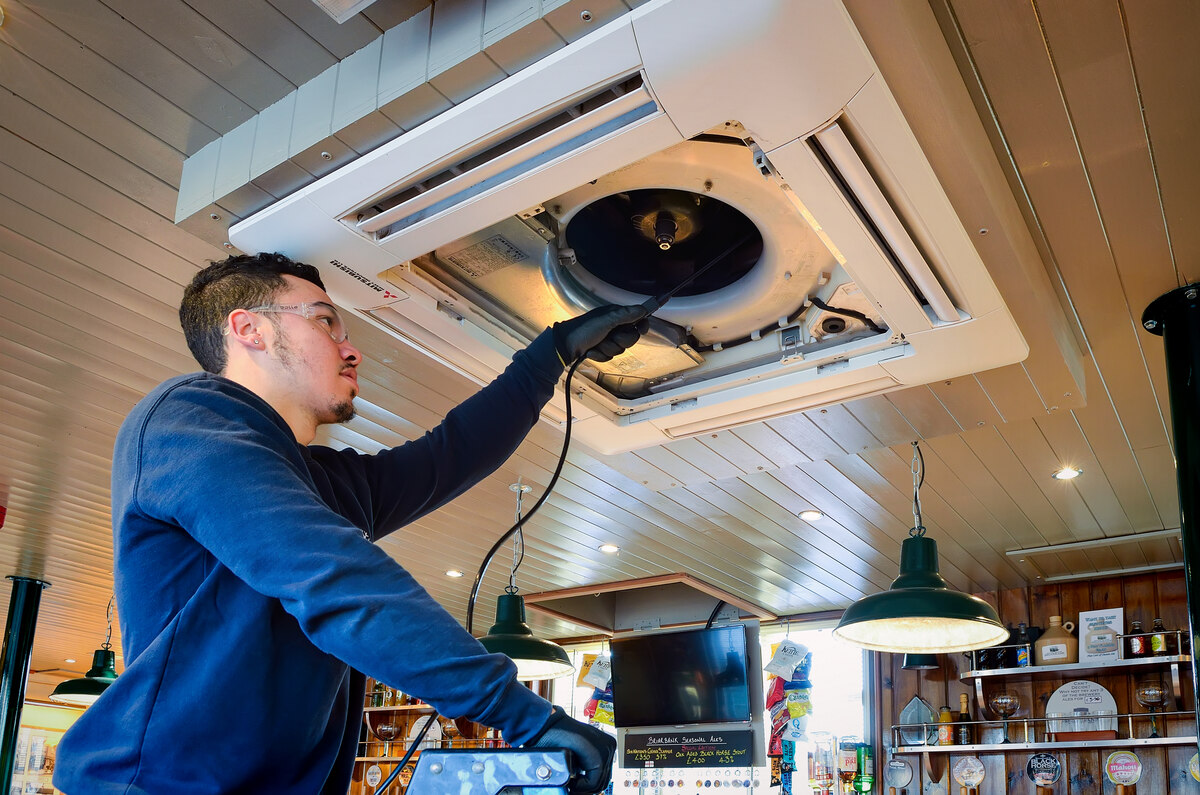
Step 5: Inspect the Fan Motor and Blades
The fan motor and blades in your air conditioner play a crucial role in circulating air and maintaining optimal airflow. Regular inspection and maintenance of these components ensure that they are in good condition and functioning properly. Here’s how to inspect the fan motor and blades:
- Access the fan motor and blades: Typically, the fan motor and blades are located in the outdoor condenser unit. Remove any protective covers or panels to gain access to these components.
- Inspect the fan blades: Carefully examine the fan blades for any signs of damage, such as cracks, chips, or bent blades. Ensure that they are clean and free of debris that may hinder their rotation.
- Check for balance: Spin the fan blades manually and observe if they rotate smoothly and evenly. Any wobbling or uneven rotation indicates an imbalance that may require professional attention.
- Inspect the fan motor: Inspect the fan motor for any signs of wear, loose wires, or overheating. Check if the motor is properly secured and ensure that the wiring connections are tight.
- Lubricate the fan motor bearings (if applicable): Some fan motors have lubrication ports to ensure smooth operation. If your fan motor has these ports, apply a few drops of electric motor oil to the bearings as per the manufacturer’s instructions.
- Clean the fan motor and blades: Use a soft brush or a cloth to clean the fan blades and motor of any dirt, dust, or debris. Gentle vacuuming can also be done to remove any stubborn particles.
- Reassemble and test: After inspecting and cleaning, reassemble any protective covers or panels that were removed. Turn on the power to the air conditioner and observe the fan motor and blades as they operate. Listen for any unusual noises or vibrations that may indicate a problem.
Regular inspection of the fan motor and blades is vital to maintain efficient airflow and prevent any potential issues with your air conditioning system. If you notice any significant damage or suspect problems with the fan motor or blades, it’s advisable to seek professional assistance to avoid further damage or personal injury.
With the fan motor and blades inspected, let’s move on to the next step: checking and tightening electrical connections.
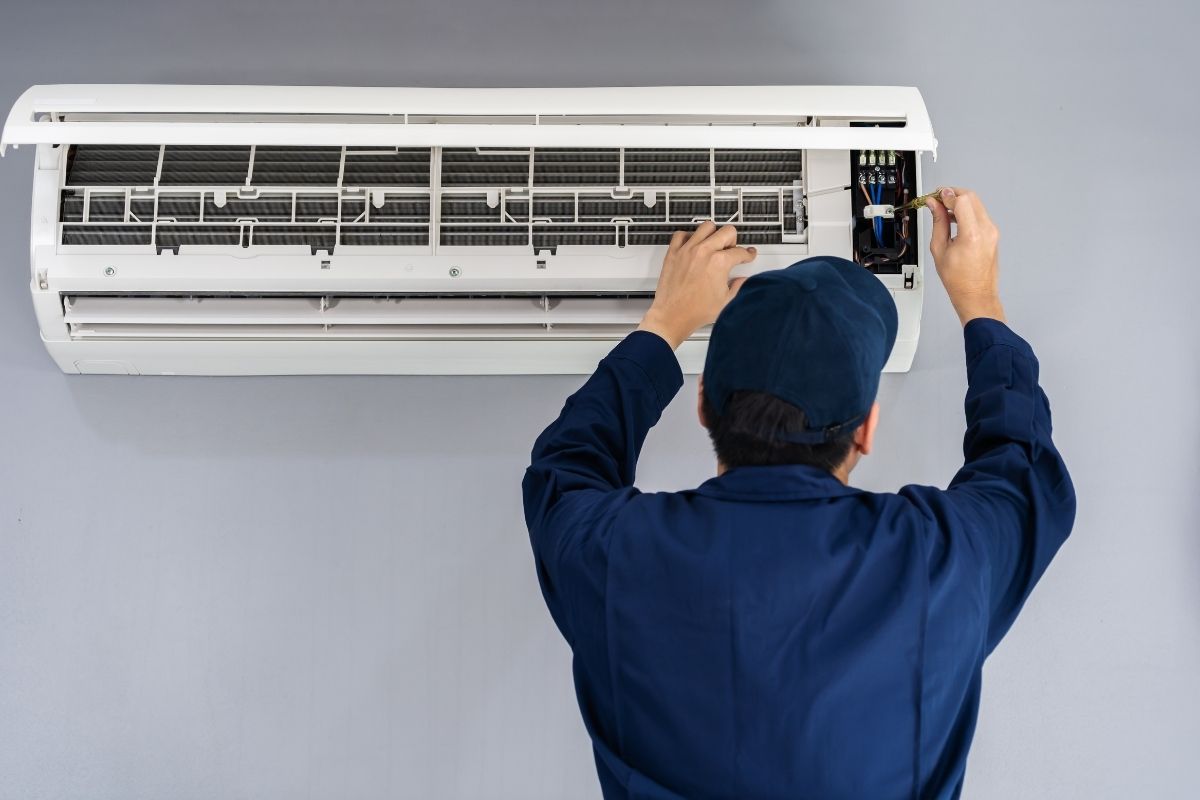
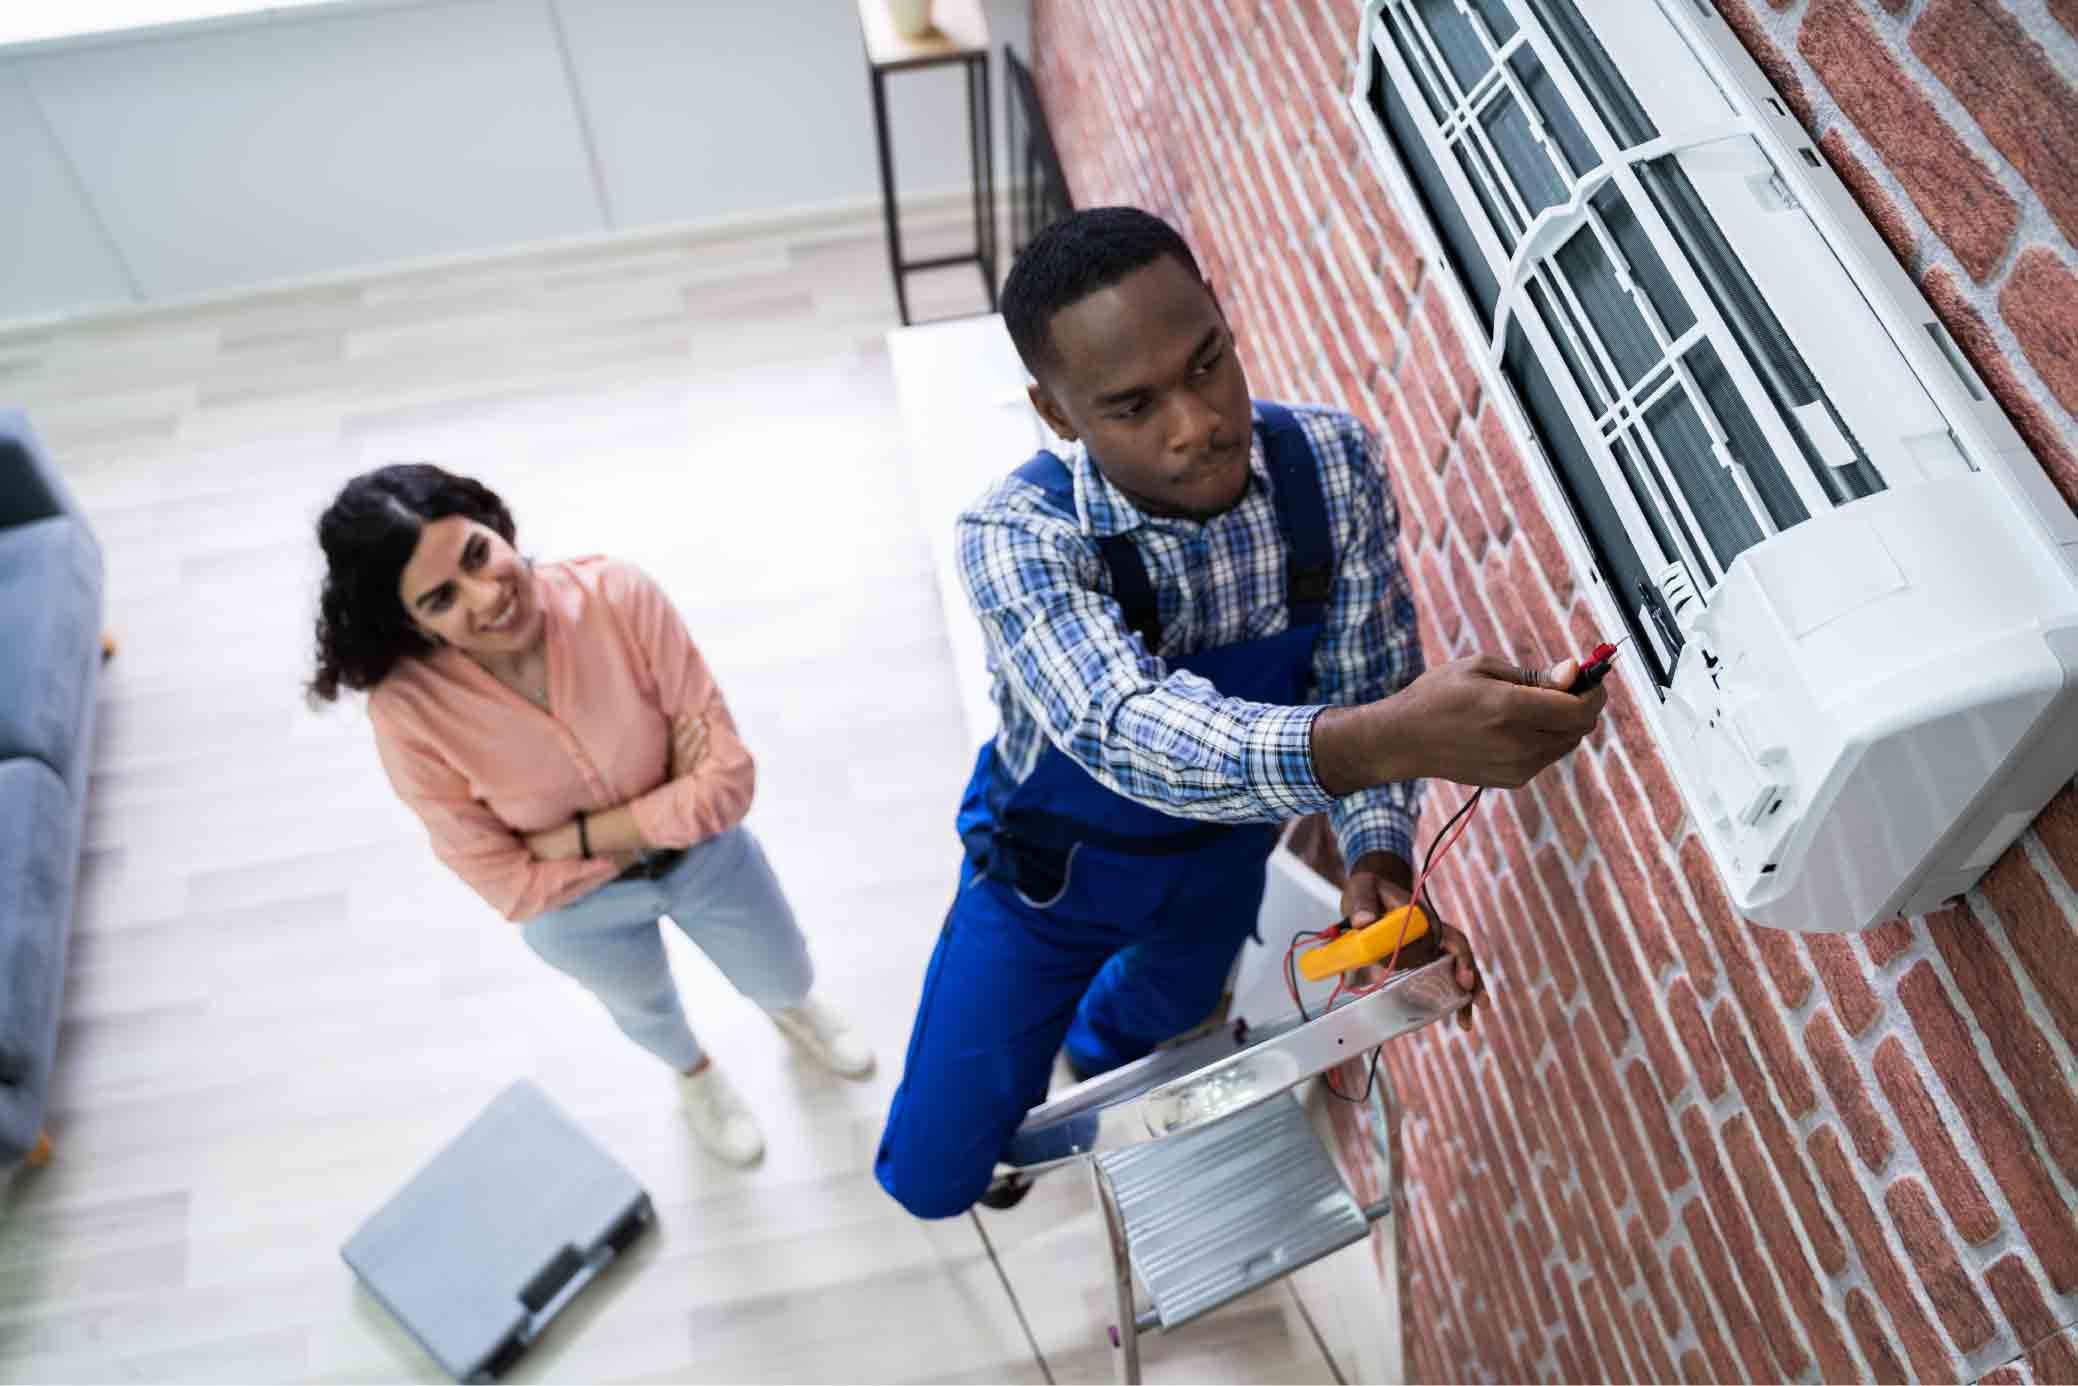
Step 6: Check and Tighten Electrical Connections
Proper electrical connections are essential for the safe and efficient operation of your air conditioning system. Over time, electrical connections can become loose or corroded, leading to poor performance or even electrical hazards. Follow these steps to check and tighten the electrical connections:
- Turn off the power: Before inspecting or adjusting any electrical connections, turn off the power to your air conditioner at the main electrical disconnect box.
- Inspect the connections: Carefully examine all electrical connections, including those at the electrical panel, thermostat, air handler unit, and outdoor condenser unit. Look for loose wires, corroded terminals, or any signs of burning or overheating.
- Tighten the connections: Using a screwdriver or an adjustable wrench, gently tighten any loose electrical connections. Be cautious not to overtighten, as this can damage the terminals or wiring.
- Clean corroded terminals: If you notice any corrosion on the terminals, clean them using a wire brush or sandpaper. Ensure that the terminals are clean and free from any rust or oxidation before re-tightening the connections.
- Inspect the wiring: Check the condition of the wiring for any signs of fraying, damage, or wear. Replace any damaged wiring using appropriate wire connectors and following electrical standards.
- Secure cable clamps: Make sure that all cable clamps or connectors are secure and properly fastened. Loose or dislodged cable clamps can lead to strain on the wiring, causing potential electrical issues.
- Double-check the connections: After tightening and cleaning the electrical connections, double-check all the connections to ensure they are tight, secure, and free from any signs of damage.
Checking and tightening electrical connections is essential to prevent electrical hazards and ensure the smooth operation of your air conditioning system. If you are unfamiliar with electrical work, it is always recommended to seek the assistance of a qualified electrician or HVAC technician to ensure proper and safe connections.
With the electrical connections checked and tightened, let’s move on to the next step: lubricating moving parts (if applicable).
Step 7: Lubricate Moving Parts (If Applicable)
Lubricating the moving parts of your air conditioner helps reduce friction, minimize wear and tear, and ensure smooth operation. Not all air conditioners require lubrication, so check your unit’s user manual or manufacturer’s instructions to determine if lubrication is necessary. If lubrication is recommended, follow these steps:
- Turn off the power: As a safety precaution, turn off the power supply to your air conditioner at the main electrical disconnect box.
- Identify the moving parts: Locate the moving parts that require lubrication. These may include fan motor bearings, fan blade shafts, or other accessible moving components.
- Choose the correct lubricant: Consult your air conditioner’s user manual to determine the appropriate lubricant to use. Different parts may require specific lubricants, such as electric motor oil or white lithium grease.
- Apply the lubricant: Apply a few drops of the recommended lubricant to each moving part as directed by the manufacturer. Be careful not to over-lubricate, as excess lubricant can attract dust and debris.
- Rotate the parts: After applying the lubricant, manually rotate or spin the moving parts to distribute the lubricant evenly.
- Remove excess lubricant: Wipe off any excess lubricant using a clean cloth or paper towel. Excess lubricant can collect dirt and debris, which can cause further issues.
- Reassemble and clean: Reassemble any components that were removed to access the moving parts. Clean any surfaces that may have come into contact with the lubricant to maintain cleanliness and prevent buildup.
- Turn on the power: Reconnect the power supply by switching on the main electrical disconnect box.
Remember, not all air conditioners require lubrication, so it’s important to follow the manufacturer’s recommendations. If you’re unsure or uncomfortable with lubricating the moving parts yourself, it’s best to consult a professional HVAC technician to ensure proper maintenance.
With the moving parts lubricated (if applicable), let’s move on to the next step: checking and adjusting thermostat settings.
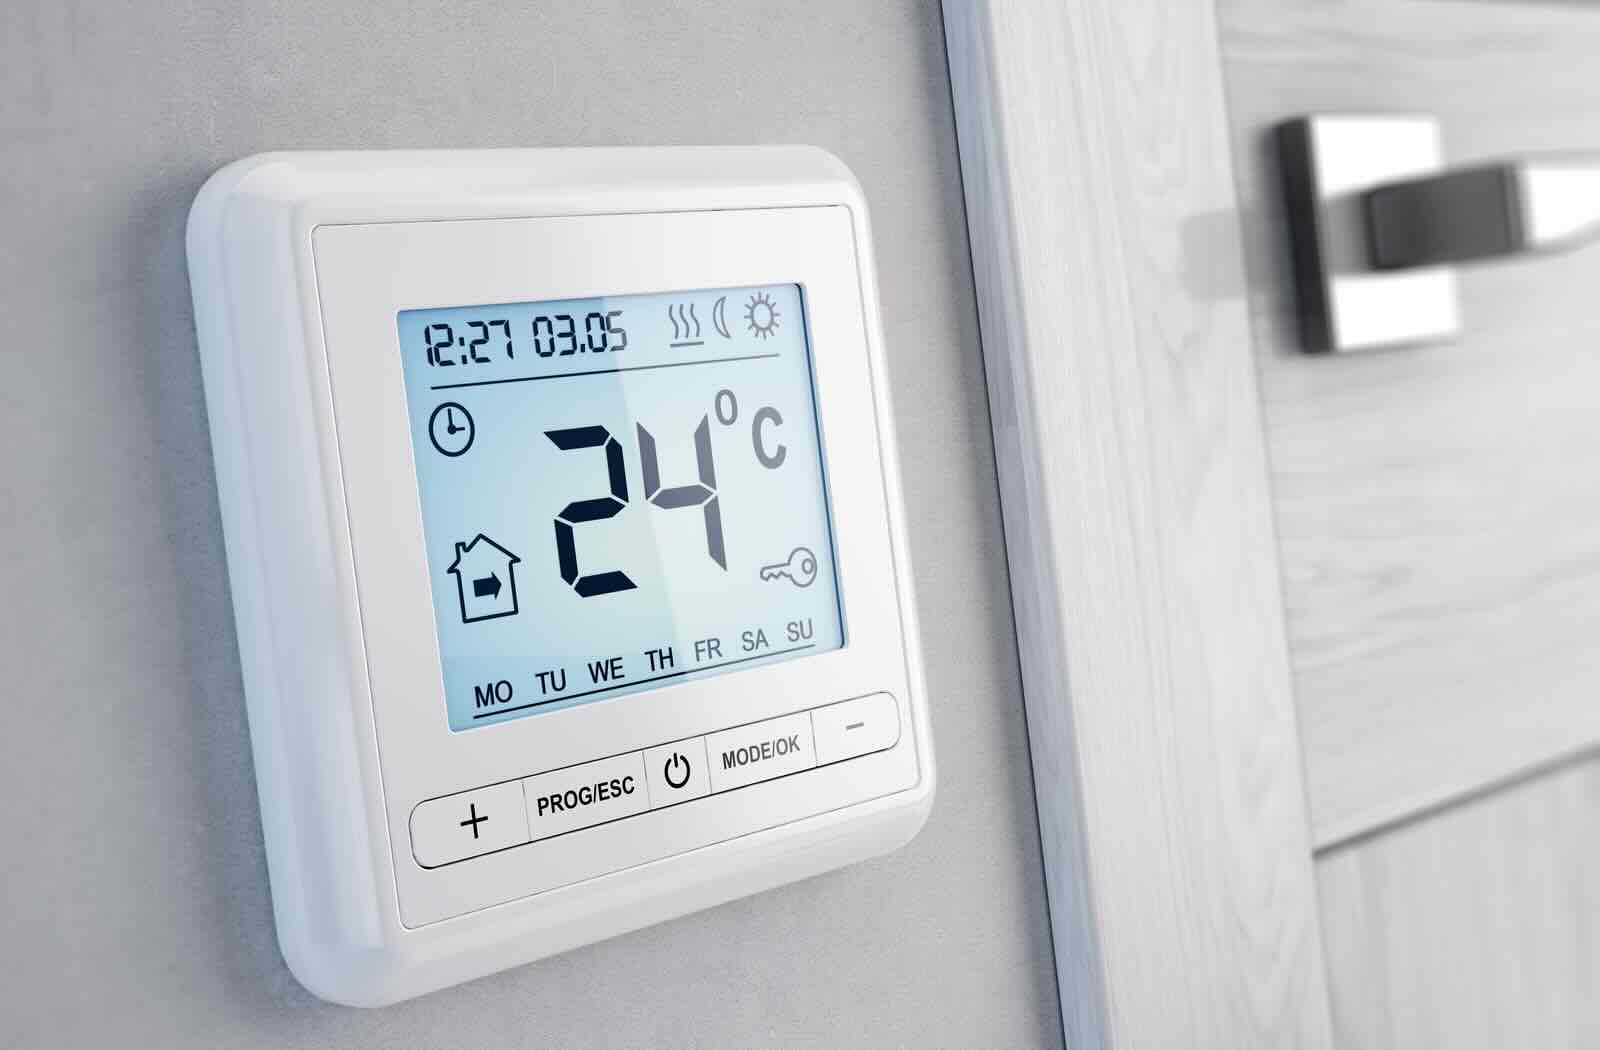
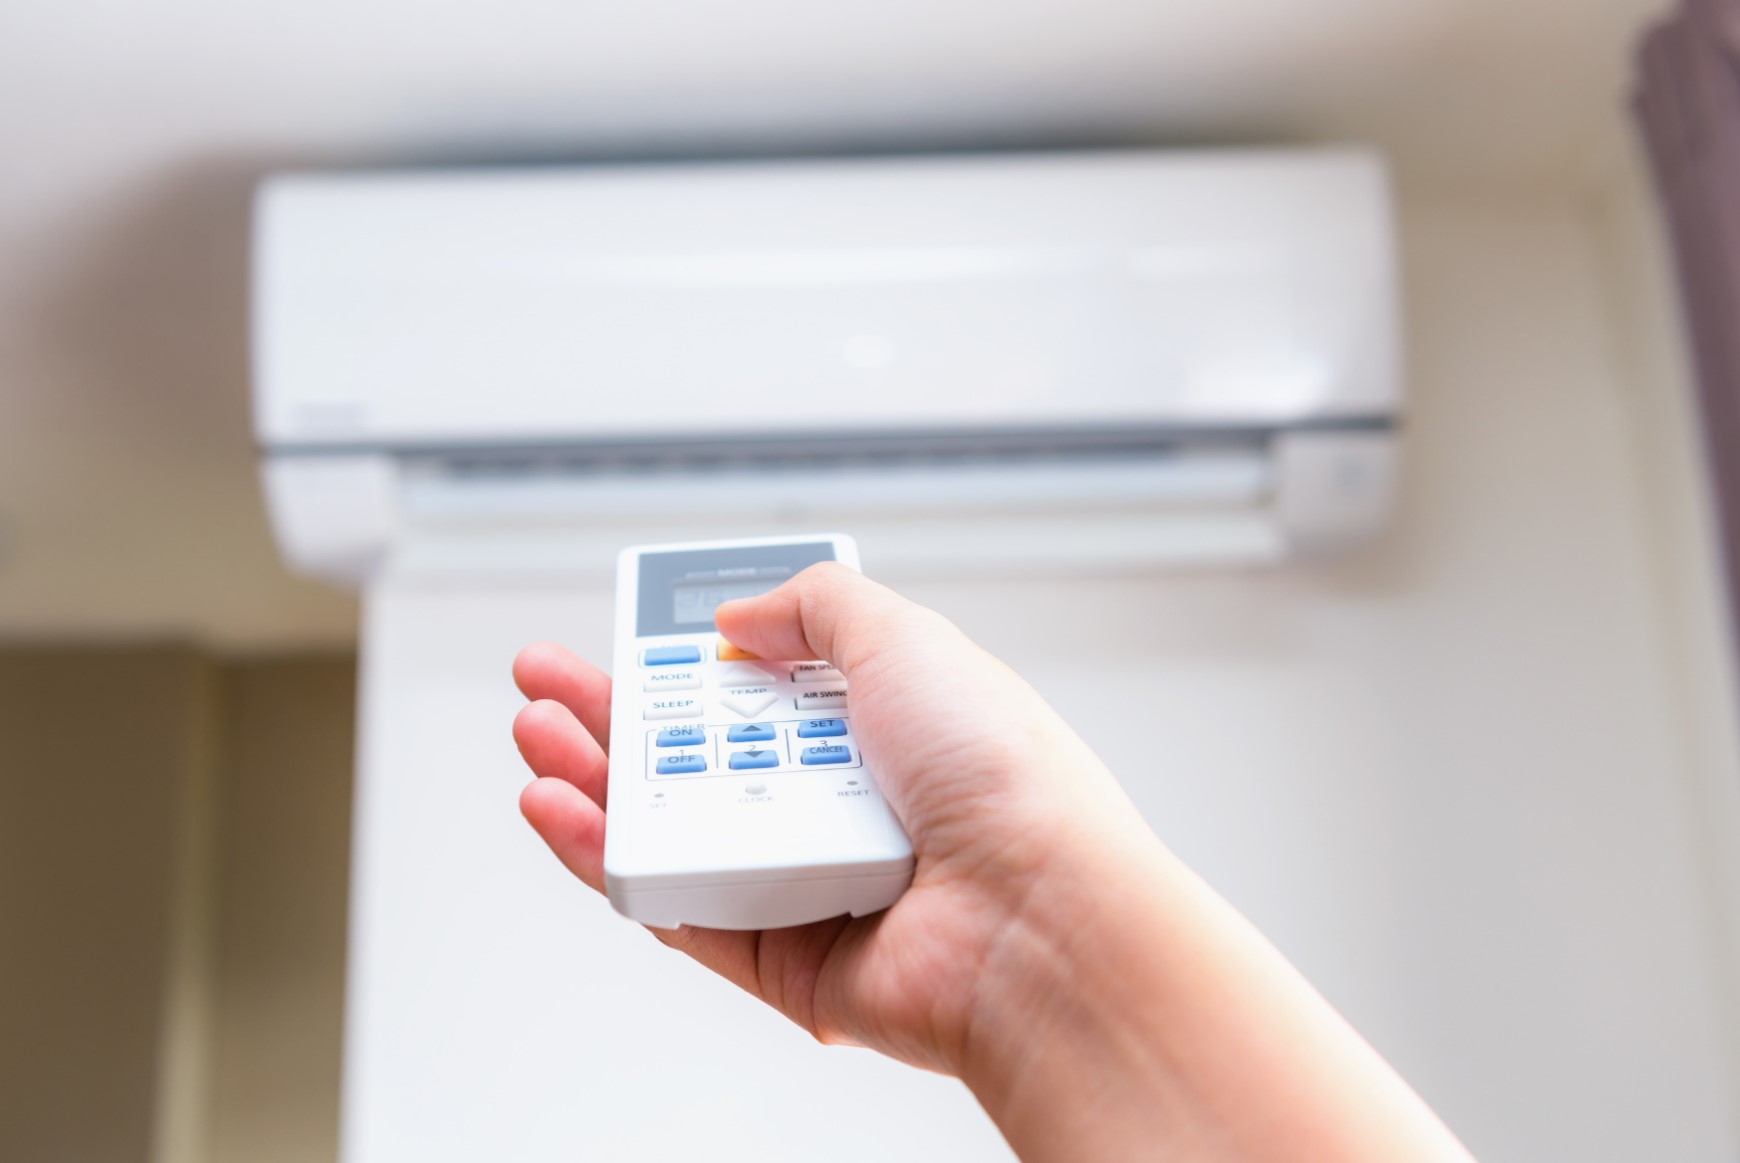
Step 8: Check and Adjust Thermostat Settings
The thermostat is the control center of your air conditioning system, allowing you to set and adjust the desired temperature in your home. Properly calibrating and adjusting the thermostat settings ensures optimal comfort and energy efficiency. Follow these steps to check and adjust the thermostat settings:
- Access the thermostat: Locate your thermostat, which is typically mounted on a wall in a central area of your home.
- Check the temperature: Verify that the thermostat is displaying the correct temperature. If you suspect an inaccurate reading, compare it to a separate thermometer to confirm.
- Calibrate the thermostat (if necessary): If your thermostat has a calibration feature, you can adjust it to match the temperature reading from a separate thermometer. Refer to your thermostat’s user manual for specific calibration instructions.
- Adjust the temperature setting: Set the desired temperature for your home. Ensure that it is appropriate for the season and your comfort preferences.
- Program the thermostat (if applicable): If you have a programmable thermostat, take advantage of its features to create a schedule that reflects your daily routine. Set different temperatures for times when you’re away from home or asleep to optimize energy efficiency.
- Change the batteries (if applicable): If your thermostat is battery-operated, check the battery status and replace them if necessary. Fresh batteries ensure reliable operation.
- Verify proper functioning: Test the thermostat by adjusting the temperature settings and observing if the air conditioner turns on and off in response. Listen for any unusual noises or irregular cycling that may indicate a problem with the thermostat.
- Consider upgrading to a programmable or smart thermostat: If you don’t already have one, consider upgrading to a programmable or smart thermostat. These advanced devices offer more precise temperature control, scheduling options, and energy-saving features.
Checking and adjusting the thermostat settings is crucial to maintaining a comfortable living environment and maximizing energy efficiency. Proper calibration and programming ensure that your air conditioning system operates according to your needs and preferences.
With the thermostat settings checked and adjusted, let’s move on to the final step: testing the unit to ensure proper functioning.
Step 9: Test the Unit
After completing the maintenance tasks on your air conditioner, it’s important to test the unit to ensure that it is functioning properly. Follow these steps to test your air conditioner:
- Turn on the power: Make sure the power supply to your air conditioner is turned on at the main electrical disconnect box.
- Set the thermostat to cool: Adjust the thermostat to the “cool” mode and set the desired temperature. Wait a few minutes for the air conditioner to start up.
- Listen for unusual noises: As the air conditioner operates, listen for any unusual noises such as grinding, squealing, or rattling. Unusual noises may indicate a problem with the unit that requires further investigation or professional assistance.
- Check airflow and temperature: Stand near the supply vents and ensure that there is proper airflow. Feel the air coming out of the vents to determine if it is cool and consistent with the temperature set on the thermostat.
- Observe the condenser unit: Go outside and observe the condenser unit. Ensure that the fan is running smoothly and that the condenser coil is releasing heat. Check for any signs of water leakage or unusual vibrations.
- Monitor the system’s performance: Allow the air conditioning system to run for a while, monitoring its performance. Observe if the temperature in your home reaches the set temperature and if the system cycles on and off properly.
- Make notes of any issues: If you notice any problems, such as insufficient cooling, inconsistent temperatures, or unusual behavior from the unit, make a note of them. These observations will be helpful if you need to consult a professional HVAC technician.
Testing the unit after maintenance ensures that it is operating as expected. If you encounter any issues or suspect a problem with your air conditioner during the testing process, it’s best to contact a qualified HVAC technician for further inspection and assistance.
Congratulations! You have successfully completed the steps to service your air conditioner. By following these maintenance practices, you can maximize the performance, efficiency, and lifespan of your air conditioning system.
Remember to perform regular maintenance tasks at appropriate intervals and consult the manufacturer’s instructions or seek professional help for any complex repairs or servicing needs. Enjoy the cool comfort provided by your well-maintained air conditioner!
Conclusion
Proper maintenance of your air conditioner is essential to ensure optimal performance, energy efficiency, and comfort in your home. By following the comprehensive steps outlined in this guide, you can effectively service your air conditioner and keep it in excellent condition.
From turning off the power and cleaning or replacing the air filter to checking and adjusting thermostat settings, lubricating moving parts (if applicable), and testing the unit, each step plays a critical role in maintaining the functionality and performance of your air conditioning system.
Regular maintenance helps prevent costly repairs, extends the lifespan of your air conditioner, and ensures that it operates smoothly and efficiently, keeping your home cool and comfortable throughout the hot summer months.
Remember to follow safety precautions, gather the necessary tools and materials, and consult your air conditioner’s user manual for specific instructions and recommendations for your model. If you are unsure about any aspect of the maintenance process or encounter complex issues, it’s always best to seek the assistance of a professional HVAC technician.
By investing time and effort in servicing your air conditioner, you’ll enjoy the benefits of a reliable, energy-efficient system that provides optimal cooling and comfort to you and your family.
So, take the initiative to service your air conditioner regularly and enjoy the cool and refreshing environment in your home for years to come!
Frequently Asked Questions about How To Service Your Air Conditioner
Was this page helpful?
At Storables.com, we guarantee accurate and reliable information. Our content, validated by Expert Board Contributors, is crafted following stringent Editorial Policies. We're committed to providing you with well-researched, expert-backed insights for all your informational needs.