Home>Home Maintenance>How To Use Air Conditioning Gauges
Home Maintenance
How To Use Air Conditioning Gauges
Modified: August 16, 2024
Learn how to use air conditioning gauges for home maintenance. Keep your HVAC system running efficiently with our step-by-step guide.
(Many of the links in this article redirect to a specific reviewed product. Your purchase of these products through affiliate links helps to generate commission for Storables.com, at no extra cost. Learn more)
Introduction
Welcome to our comprehensive guide on how to use air conditioning gauges. If you’re a homeowner or a DIY enthusiast looking to maintain or troubleshoot your air conditioning system, having a set of air conditioning gauges is an essential tool. These gauges help you measure and monitor the pressure and temperature levels of your AC system, providing crucial information for diagnosing and addressing any issues.
Understanding how to properly use air conditioning gauges is key to effectively maintaining and troubleshooting your AC system. In this article, we will provide an overview of air conditioning gauges, explain the different types available, discuss the components of these gauges, and guide you on how to read and connect them to your AC system. Additionally, we will provide a step-by-step guide on using air conditioning gauges and offer some helpful tips and precautions to keep in mind.
Whether you’re a novice or an experienced DIYer, this article will equip you with the knowledge and confidence to make the most of air conditioning gauges and ensure the optimal performance of your AC system. So, let’s dive in and explore the world of air conditioning gauges!
Key Takeaways:
- Air conditioning gauges are essential tools for monitoring pressure and temperature in your AC system. They help diagnose issues like low refrigerant levels and ensure efficient operation.
- Properly connecting and reading air conditioning gauges is crucial for accurate measurements. Follow safety guidelines, monitor fluctuations, and seek professional help if needed.
Read more: What Countries Use Air Conditioning
What are Air Conditioning Gauges?
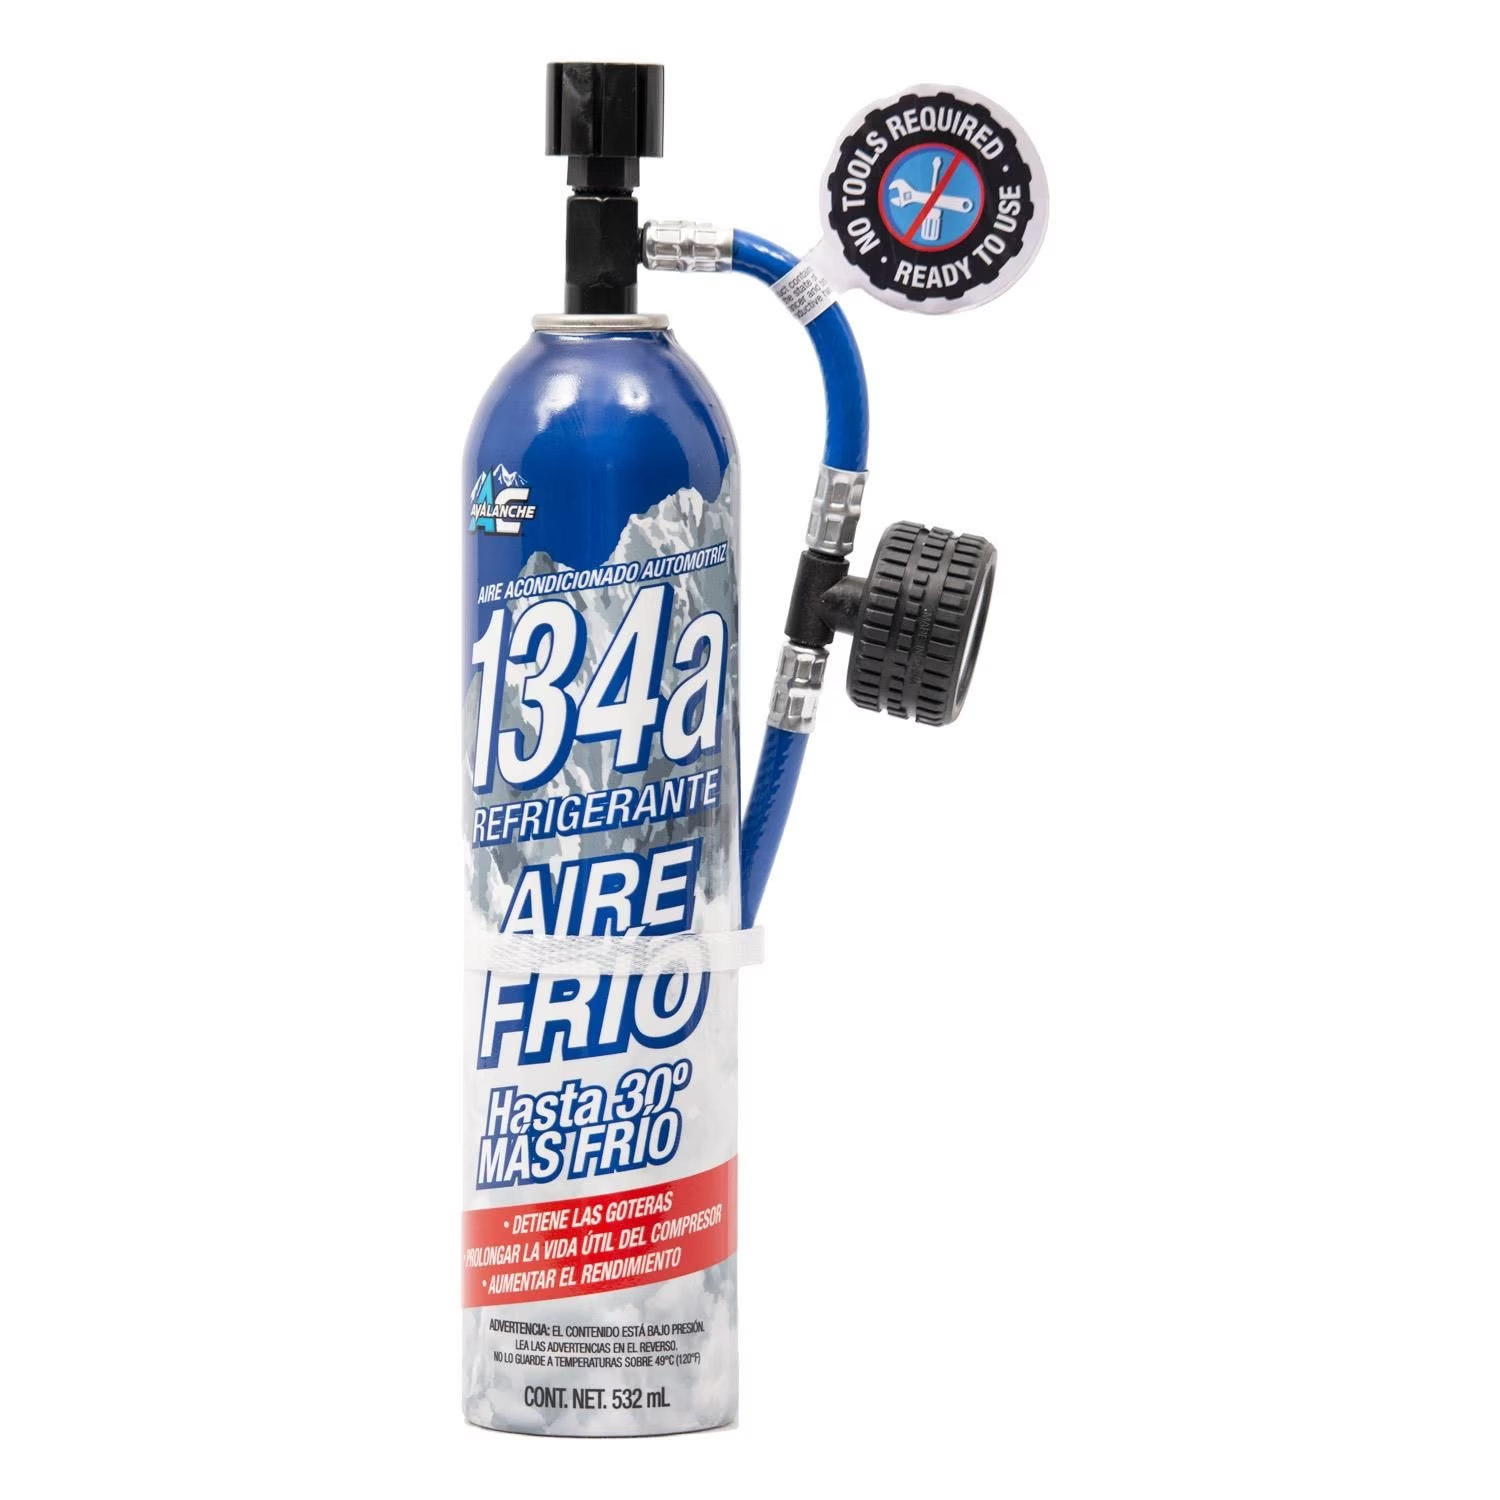
Air conditioning gauges, also known as HVAC gauges or AC manifold gauges, are instruments used to measure and monitor the pressure and temperature levels of an air conditioning system. These gauges are crucial for diagnosing and troubleshooting AC issues, as they provide valuable insights into the performance and health of the system.
With air conditioning gauges, you can accurately determine the refrigerant pressures inside the AC system, ensuring that they are within the manufacturer’s recommended range. They allow you to assess if the refrigerant levels are too low or too high, which can indicate leaks or other problems that need to be addressed.
Furthermore, air conditioning gauges enable you to measure the temperature of the refrigerant at various points in the AC system, such as the evaporator and condenser coils. This information helps you identify if the system is operating efficiently and can aid in diagnosing issues related to overheating or inadequate cooling.
In addition to pressure and temperature measurements, some air conditioning gauges may include additional features and functionalities. These can include vacuum readings, which are useful during evacuation and charging procedures, as well as built-in valves and hoses for convenient connections to the AC system.
Overall, air conditioning gauges are indispensable tools for HVAC technicians, contractors, and DIY enthusiasts alike. They provide precise measurements and invaluable insights into the inner workings of an AC system, enabling effective maintenance, troubleshooting, and repairs.
Types of Air Conditioning Gauges
There are two primary types of air conditioning gauges: low-pressure gauges and high-pressure gauges. Each type serves a different purpose and is used in specific scenarios during AC maintenance and troubleshooting.
1. Low-Pressure Gauges: These gauges are designed to measure the pressure on the low side of the AC system. The low side refers to the section of the system where the refrigerant is in its gaseous state, coming from the evaporator coil. Low-pressure gauges typically have a range of 0 to 150 psi (pounds per square inch) and are used to determine the suction or inlet pressure of the AC system. They are essential for diagnosing issues related to low refrigerant levels, such as leaks or insufficient charging.
2. High-Pressure Gauges: As the name suggests, high-pressure gauges are used to measure the pressure on the high side of the AC system. The high side refers to the section of the system where the refrigerant is in its liquid or compressed state, nearing the condenser coil. High-pressure gauges typically have a range of 0 to 500 psi or higher, depending on the specific application. These gauges help assess the discharge or outlet pressure of the AC system and are useful for diagnosing issues related to high pressure, such as condenser blockages or restrictions.
It’s important to note that air conditioning gauges are often sold in sets, commonly referred to as manifold gauge sets. These sets typically include both low-pressure and high-pressure gauges, along with hoses and valves for connecting to the AC system. Having a complete manifold gauge set allows you to accurately measure and monitor both sides of the AC system, ensuring a comprehensive assessment of its performance.
While low-pressure and high-pressure gauges are the most commonly used types, there are also specialized gauges available for specific purposes. For example, some gauges have built-in features for measuring vacuum levels during evacuation and charging procedures. These vacuum gauges assist in ensuring proper evacuation and refrigerant charging, which are critical for the efficient operation of an AC system.
Overall, the type of air conditioning gauges you need will depend on the specific tasks you are undertaking and the requirements of your AC system. By understanding the different types available, you can choose the appropriate gauges that will enable you to effectively maintain and troubleshoot your AC system.
Components of Air Conditioning Gauges
Air conditioning gauges consist of several components that work together to provide accurate pressure and temperature readings of an AC system. Understanding the various components of these gauges is essential for ensuring proper usage and accurate measurements. Here are the key components you will find in a typical set of air conditioning gauges:
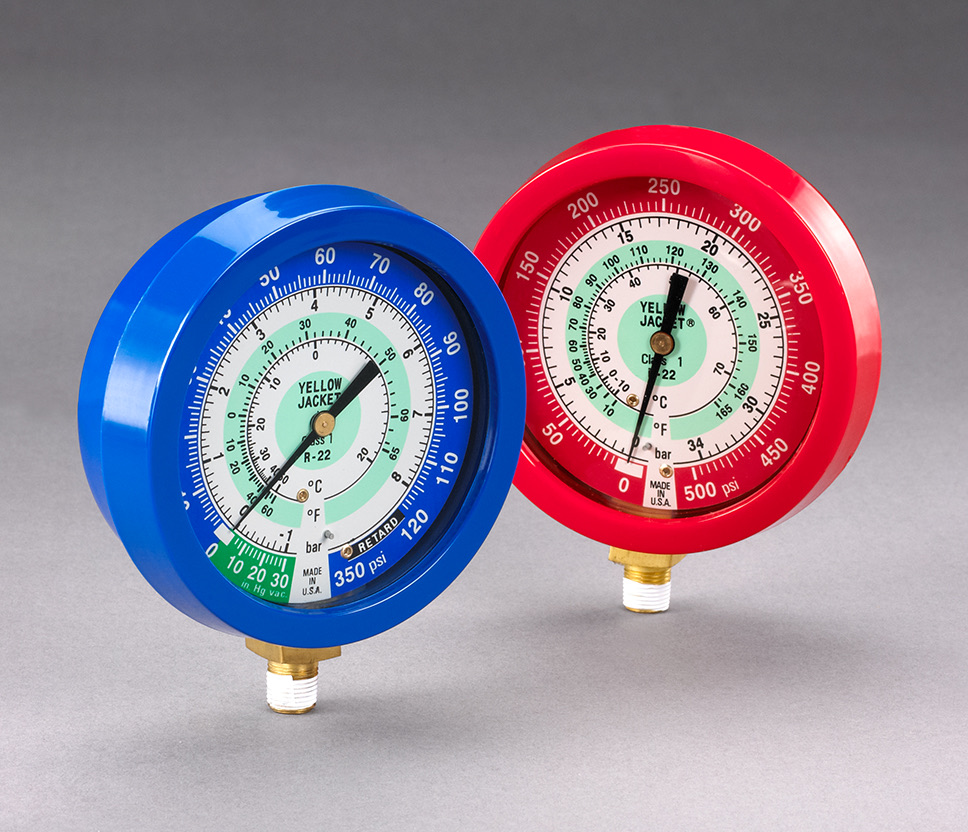
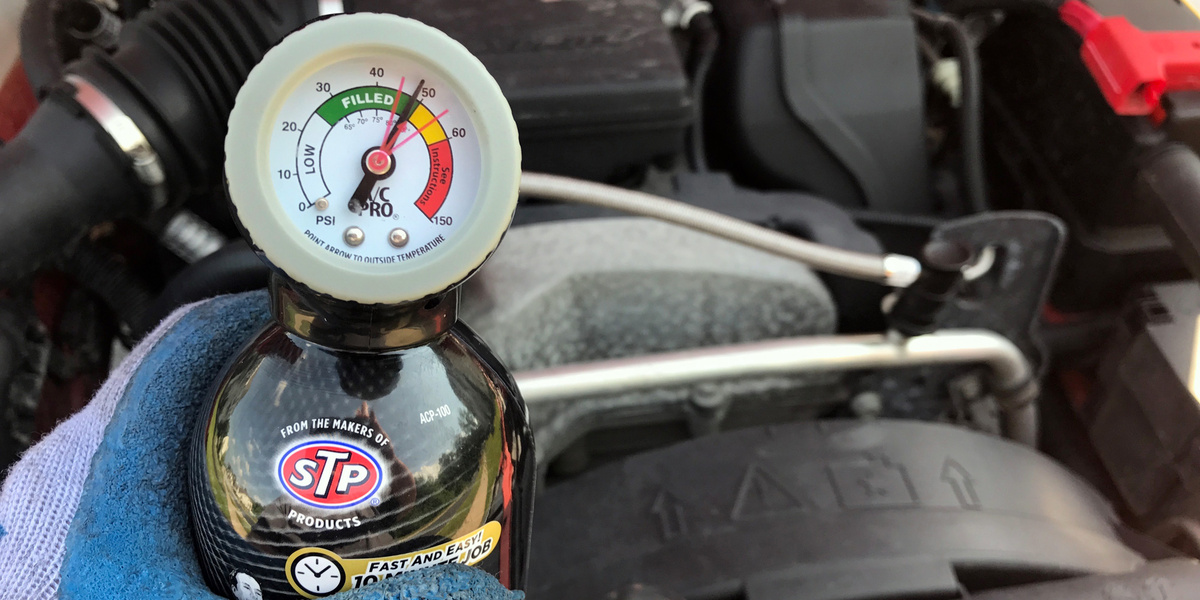
- Gauge Face: The face of the gauge is where the pressure and temperature readings are displayed. It usually has a circular design and is marked with pressure and temperature units. The gauge face is calibrated to provide accurate measurements within the specified range.
- Pressure Scale: The pressure scale is a graduated scale on the gauge face that indicates the pressure level in psi or other pressure units. It helps you read and interpret the pressure measurements accurately.
- Temperature Scale: Similar to the pressure scale, the temperature scale on the gauge face indicates the temperature level in degrees Fahrenheit (°F) or Celsius (°C). It allows you to monitor the temperature of the refrigerant at different points in the AC system.
- Needle and Pointer: The needle or pointer on the gauge face moves in response to the pressure or temperature changes in the AC system. It helps you visualize the readings and identify any fluctuations in the system’s performance.
- Hose Connections: Air conditioning gauges have hose connections that allow you to connect the gauges to the AC system. These connections are typically color-coded, with blue indicating the low-pressure side and red indicating the high-pressure side. The hose connections ensure a secure and leak-free connection between the gauges and the AC system.
- Valves: The gauges may also have built-in valves that control the flow of refrigerant and assist in maintaining pressure levels during testing and monitoring. These valves help you control the refrigerant flow, isolate different sections of the AC system, and prevent the loss of refrigerant during the gauge connection process.
- Pressure Relief Valve: Some air conditioning gauges feature a pressure relief valve for safety purposes. This valve releases excess pressure from the gauges and prevents damage or injury in case of readings going beyond the gauge’s maximum capacity.
Understanding these components and their functions will help you utilize air conditioning gauges effectively and accurately assess the pressure and temperature levels of your AC system. It’s important to carefully read the manufacturer’s instructions and familiarize yourself with the specific components of your gauges to ensure safe and correct usage.
Reading the Gauges
Reading air conditioning gauges is a fundamental skill that allows you to interpret the pressure and temperature measurements and assess the performance of your AC system. Here’s a step-by-step guide on how to read the gauges:
- Refer to the Pressure Scale: Start by looking at the pressure scale on the gauge face. The pressure scale is typically marked in psi (pounds per square inch) and ranges from 0 to a specific maximum value. Locate the needle or pointer on the gauge that indicates the pressure level.
- Check the Low-Pressure Gauge: If you are measuring the low side pressure, focus on the gauge marked as the low-pressure gauge. The needle or pointer on this gauge will indicate the suction or inlet pressure of the AC system. Ensure that the pressure reading falls within the recommended range specified by the manufacturer.
- Check the High-Pressure Gauge: For measuring the high side pressure, refer to the gauge marked as the high-pressure gauge. The needle or pointer on this gauge will indicate the discharge or outlet pressure of the AC system. Again, ensure that the pressure reading is within the recommended range for optimal performance.
- Interpret the Temperature Scale: In addition to pressure readings, air conditioning gauges often include a temperature scale. Look for the temperature reading on the gauge face, usually in degrees Fahrenheit (°F) or Celsius (°C). This reading indicates the temperature of the refrigerant at the specific point in the AC system, such as the evaporator or condenser coil.
- Monitor Fluctuations: As you operate the AC system or make adjustments, keep an eye on the gauges to observe any fluctuations in pressure or temperature readings. Fluctuations can indicate potential issues such as a refrigerant leak, clogged filters, or a malfunctioning component. It’s important to compare the readings with the recommended values for your specific AC system and take appropriate action if necessary.
Remember, accurate readings from the air conditioning gauges are crucial for proper diagnosis and maintenance of your AC system. Regularly monitoring the gauges can help you identify any potential problems early on and take proactive measures to ensure the efficient operation of your air conditioner.
It’s important to note that reading air conditioning gauges requires some knowledge and experience. If you are uncertain about interpreting the readings or suspect a severe issue with your AC system, it’s best to consult a professional HVAC technician for further inspection and assistance.
When using air conditioning gauges, always make sure to connect the high-pressure side (red hose) to the high-pressure port and the low-pressure side (blue hose) to the low-pressure port. This will ensure accurate readings and prevent damage to the system.
Read more: How To Use Air Conditioning Most Efficiently
Connecting the Gauges to the Air Conditioning System
Properly connecting the air conditioning gauges to the AC system is crucial for obtaining accurate pressure and temperature measurements. Here’s a step-by-step guide on how to connect the gauges to your air conditioning system:
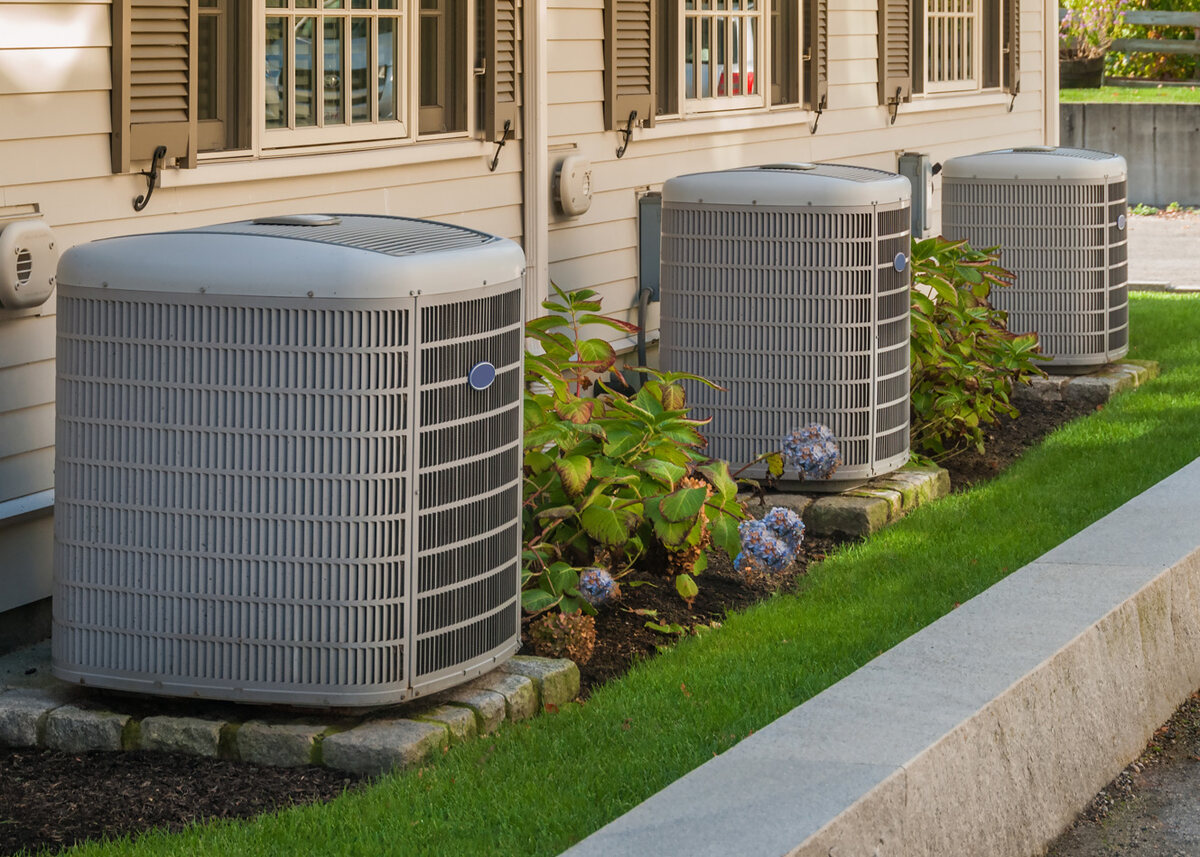
- Locate the Service Ports: Begin by locating the service ports on your AC system. These ports are typically located on the refrigerant lines near the condenser unit and evaporator coil. The low-pressure service port is usually designated by a blue cap, and the high-pressure service port is marked with a red cap.
- Prepare the Gauges: Ensure that the gauges are properly set up and ready for use. This includes ensuring that all valves on the gauges are closed, and the hoses are securely attached to the gauge connections.
- Connect the Hoses: Take the hose with the blue connector (low-pressure side) and connect it to the low-pressure service port on the AC system. Make sure to secure the connection by tightening the connector. Repeat this process with the hose having the red connector (high-pressure side) and connect it to the high-pressure service port.
- Open the Valves: Before taking any readings, make sure that all valves on the gauges are closed. Slowly open the valve on the blue hose (low-pressure side) first, followed by the valve on the red hose (high-pressure side). This will allow refrigerant to flow from the AC system into the gauges.
- Stabilize Readings: Once the valves are open, allow a few moments for the refrigerant pressure to stabilize within the gauges. This will ensure accurate pressure readings. Monitor the gauge face and observe the needle or pointer to determine the pressure levels.
- Take Temperature Readings: In addition to pressure readings, you can also use the gauges to measure the temperature of the refrigerant. Refer to the temperature scale on the gauge face and note the temperature reading indicated by the needle or pointer. This will help you assess the temperature at different points within the AC system.
Remember, it’s essential to handle refrigerants with care and always follow safety precautions when connecting the gauges to the AC system. If you are unsure about the proper procedures or safety measures, it’s recommended to seek assistance from a qualified HVAC technician.
By correctly connecting the air conditioning gauges to your AC system, you can obtain accurate readings that will help diagnose any issues and ensure the optimal performance and efficiency of your air conditioning system.
Step-by-Step Guide on Using Air Conditioning Gauges
Using air conditioning gauges requires proper technique and understanding of the AC system. Here’s a step-by-step guide to help you effectively use air conditioning gauges:
- Prepare the Workspace: Start by ensuring that you have a clean and well-lit workspace. Clear any obstructions around the AC system and make sure there is enough space to maneuver the gauges.
- Check Safety Precautions: Before starting, make sure to wear appropriate safety gear, including gloves and safety glasses. Familiarize yourself with the safety instructions provided by the manufacturer of the gauges.
- Connect the Gauges: Follow the steps outlined in the previous section to properly connect the gauges to the AC system. Ensure that the hose connections are secure and the valves on the gauges are closed before turning on the AC system.
- Turn on the AC System: Start the AC system and allow it to run for a few minutes to stabilize. This will ensure that the refrigerant pressure and temperature within the system reach a steady state.
- Read the Gauges: Carefully observe the gauge faces and the corresponding needles or pointers. Note the pressure readings indicated on both the low-pressure gauge and the high-pressure gauge. Refer to the pressure scale on the gauge face to interpret the readings accurately.
- Monitor the Temperatures: Utilize the temperature scale on the gauge faces to monitor the temperature readings of the refrigerant at different points within the AC system. Compare these readings to the recommended operating temperatures for your specific AC system.
- Make Adjustments if Needed: If the pressure or temperature readings are outside the recommended range, you may need to take corrective action. Consult the manufacturer’s guidelines or seek the assistance of a professional HVAC technician to address any issues or make necessary adjustments.
- Close the Valves: Once you have completed the readings and made any necessary adjustments, close the valves on the gauges to stop the flow of refrigerant into the gauges. This will help prevent any accidental leaks or pressure fluctuations.
- Disconnect the Gauges: Safely disconnect the gauges from the AC system by removing the hoses from the service ports. Take care to avoid any contact with refrigerant and ensure that the valves on the gauges are fully closed.
- Properly Store the Gauges: After using the gauges, store them in a clean and secure location to protect them from damage. Properly coil the hoses and store them alongside the gauges. Follow any specific storage instructions provided by the manufacturer.
Remember, utilizing air conditioning gauges requires practice and familiarity with the AC system. If you are unsure about any aspect of using the gauges or encounter complex issues, it’s recommended to seek the assistance of a qualified HVAC technician.
By following this step-by-step guide, you can effectively utilize air conditioning gauges to monitor and troubleshoot your AC system, ensuring its optimal performance and longevity.
Tips and Precautions when Using Air Conditioning Gauges
When using air conditioning gauges, it’s important to keep in mind certain tips and precautions to ensure your safety and the accuracy of your measurements. Here are some valuable tips and precautions to consider:
- Follow Safety Guidelines: Always prioritize your safety and follow the safety guidelines provided by the manufacturer of the gauges. Wear appropriate safety gear, including gloves and safety glasses, to protect yourself from any potential hazards.
- Handle Refrigerant Properly: Refrigerants can be hazardous if mishandled. Ensure that you understand how to handle refrigerant safely before attempting to use the gauges. Avoid coming into direct contact with refrigerant and dispose of any used refrigerant according to local regulations.
- Read the Manufacturer’s Instructions: Familiarize yourself with the specific instructions provided by the manufacturer of the gauges. Each set of gauges may have unique features and recommended usage techniques. Following the manufacturer’s instructions will help you make the most out of your gauges.
- Calibrate the Gauges: Regularly calibrate your air conditioning gauges to ensure their accuracy. Over time, gauges may drift from their original calibration, resulting in incorrect readings. Consult the manufacturer’s guidelines or seek professional calibration services to maintain the accuracy of your gauges.
- Keep the Gauges Clean: Regularly clean the gauge faces and ensure that they are free of any dirt, debris, or oil residues. Accumulated dirt or oil can interfere with the readability of the gauges and potentially affect the accuracy of your measurements.
- Avoid Excessive Pressure: Do not exceed the maximum pressure rating of your gauges. Applying excessive pressure can damage the gauges and potentially lead to dangerous situations. Monitor the pressure readings closely and take appropriate action if they approach the gauge’s maximum capacity.
- Practice Patience: Allow sufficient time for the refrigerant pressures and temperatures to stabilize before taking measurements. Rushing the process may result in inaccurate readings. Take the time to observe and ensure that the gauge readings have stabilized before interpreting the values.
- Seek Professional Assistance if Unsure: If you are uncertain about any aspect of using the air conditioning gauges or encounter complex issues, it’s best to seek the guidance of a qualified HVAC technician. They have the expertise and experience to handle intricate AC systems and can provide accurate diagnoses and solutions.
By adhering to these tips and precautions, you can ensure the safe and accurate use of air conditioning gauges. Remember to prioritize your safety, thoroughly understand the instructions, and seek professional assistance when needed. With proper usage, air conditioning gauges can be powerful tools in maintaining and troubleshooting your AC system.
Conclusion
Understanding how to use air conditioning gauges is essential for any homeowner or DIY enthusiast looking to maintain and troubleshoot their AC system. These gauges provide valuable measurements of pressure and temperature, allowing you to identify potential issues and ensure the optimal performance of your air conditioner.
In this comprehensive guide, we have covered the basics of air conditioning gauges, including their types, components, and how to read and connect them to your AC system. We have also provided a step-by-step guide on how to use the gauges effectively and offered valuable tips and precautions to keep in mind.
Remember, safety should always be a priority when using air conditioning gauges. Follow the manufacturer’s instructions, wear appropriate safety gear, and handle refrigerant with caution. If you encounter complex issues or are unsure about any aspect of using the gauges, it’s best to seek the assistance of a qualified HVAC technician.
Regularly monitoring your AC system with air conditioning gauges can help you detect any potential problems early on, allowing you to take proactive measures and prevent costly repairs. By understanding how to interpret the pressure and temperature readings, you can make informed decisions regarding maintenance, adjustments, or seeking professional help when needed.
We hope that this guide has equipped you with the knowledge and confidence to effectively use air conditioning gauges and maintain the efficiency and performance of your AC system. Stay proactive, stay safe, and enjoy the comfort of your well-functioning air conditioner!
Frequently Asked Questions about How To Use Air Conditioning Gauges
Was this page helpful?
At Storables.com, we guarantee accurate and reliable information. Our content, validated by Expert Board Contributors, is crafted following stringent Editorial Policies. We're committed to providing you with well-researched, expert-backed insights for all your informational needs.