Home>Home Maintenance>Why Isn’t My Freezer Making Ice
Home Maintenance
Why Isn’t My Freezer Making Ice
Modified: September 1, 2024
Discover the possible reasons why your freezer is not producing ice. Read our informative articles to troubleshoot and resolve the issue.
(Many of the links in this article redirect to a specific reviewed product. Your purchase of these products through affiliate links helps to generate commission for Storables.com, at no extra cost. Learn more)
Why Isn’t My Freezer Making Ice
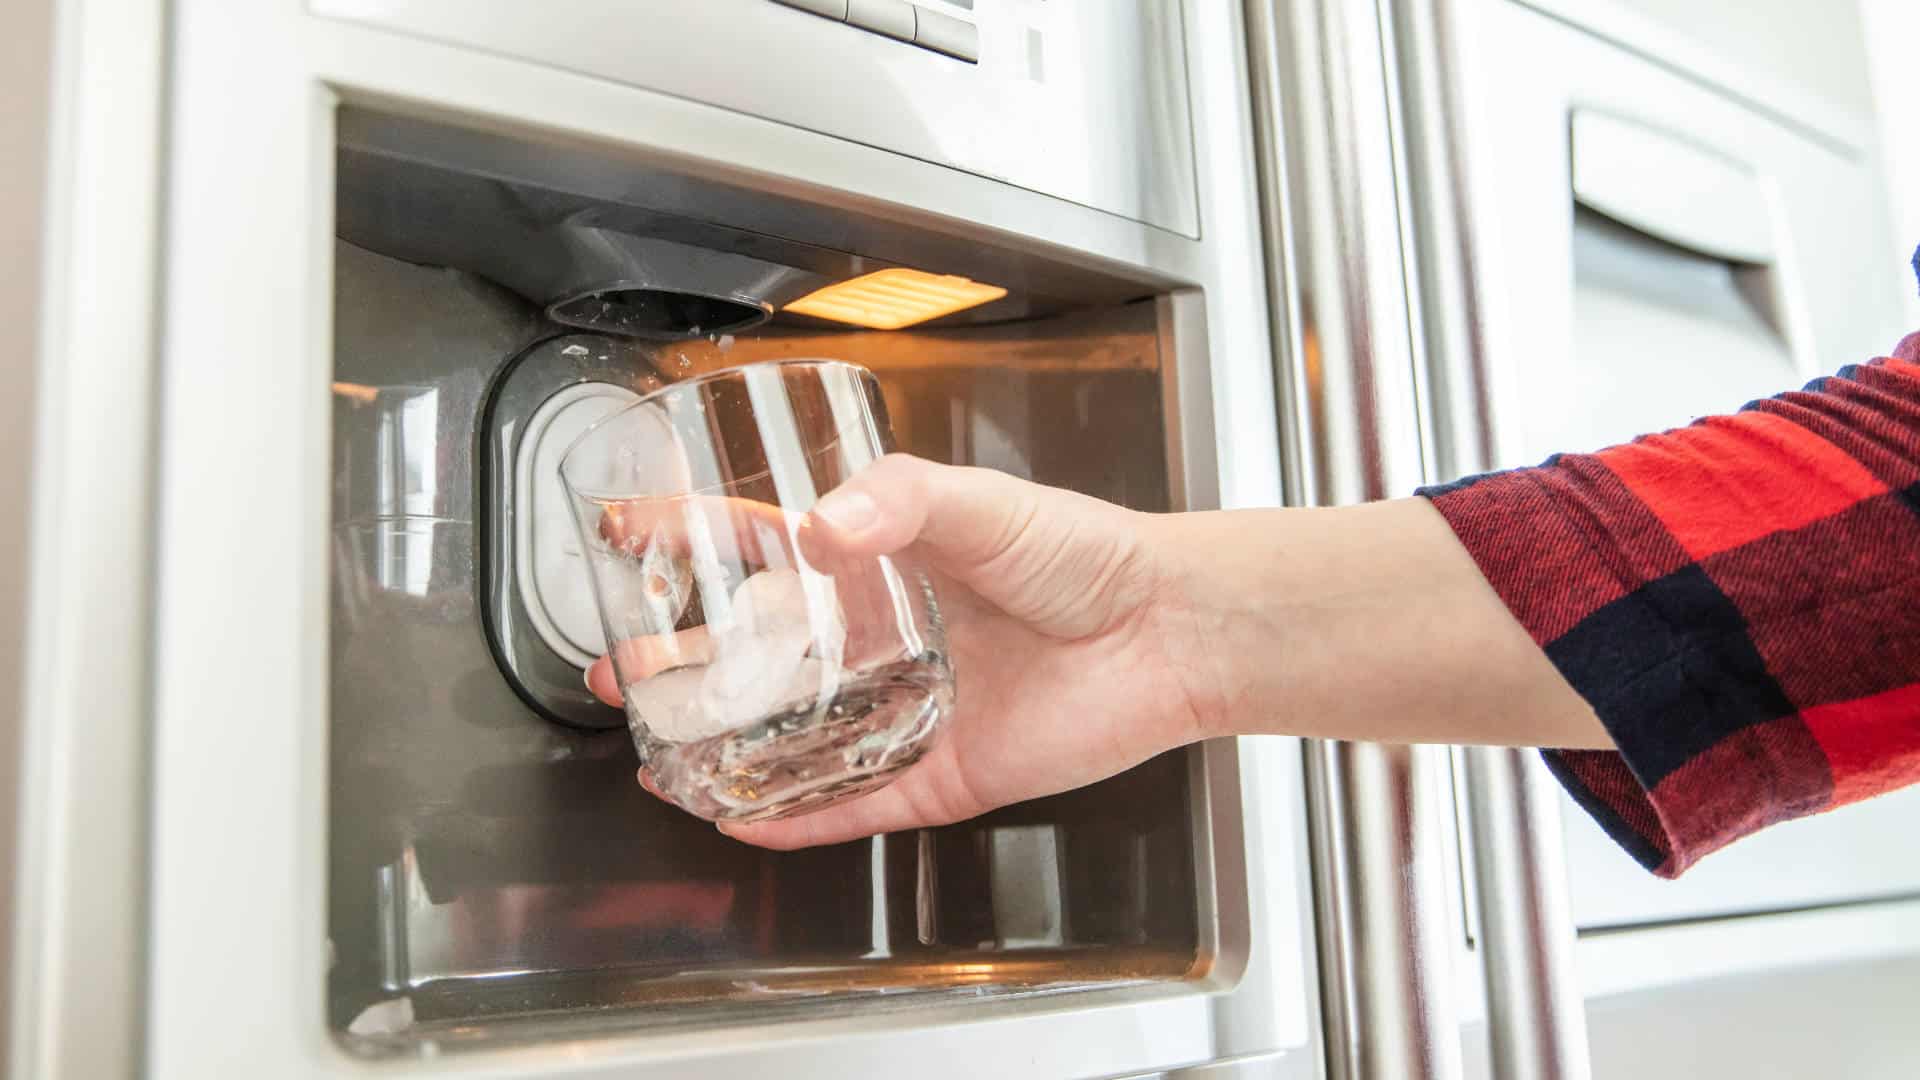
Having a functioning ice maker in your freezer is a convenient and common feature that many homeowners depend on. So, when you open your freezer and find a lack of ice cubes, it can be a frustrating situation. There are several possible reasons why your freezer isn’t making ice. Let’s explore some of the common culprits and solutions to get your ice maker working again.
Key Takeaways:
- Troubleshoot your freezer’s ice maker by checking power supply, temperature settings, water supply, ice maker components, water filter, overcrowding, defrosting cycle, and freezer door seal to ensure optimal ice production.
- Regularly maintain and inspect your freezer’s power supply, temperature settings, water supply, ice maker components, water filter, overcrowding, airflow, defrosting cycle, and freezer door seal to troubleshoot and resolve ice production issues.
Read more: Why Isn’t My Freezer Freezing
Power Supply
The first step in troubleshooting an ice maker that is not producing ice is to check the power supply. Ensure that your freezer is properly connected to a power source and that the power switch is turned on. Also, make sure that the power outlet is functioning correctly by plugging in another appliance or device to confirm if it works.
Temperature Settings
The temperature settings in your freezer play a crucial role in ice production. Check the temperature setting of the freezer and make sure it is set to an appropriate level, ideally around 0°F (-18°C) for optimal ice making conditions. Adjust the temperature setting accordingly and wait for a few hours to see if ice production resumes.
Water Supply
Adequate water supply is essential for the ice maker to produce ice. Inspect the water supply line connected to the freezer for any kinks, blockages, or leaks. If you find any issues, it’s important to address them promptly. Additionally, ensure that the water supply valve is fully open to allow water flow to the ice maker.
Ice Maker Components
Examine the various components of the ice maker for any malfunctions or damages. Common issues include a faulty water inlet valve, a defective ice maker motor module, or a broken ice maker mold. If you identify any faulty components, they may need to be repaired or replaced to restore ice production.
Read more: Why Isn’t My Printer Responding
Water Filter
A clogged or expired water filter can hinder water flow to the ice maker, impacting ice production. Check the condition of the water filter and replace it if necessary. Regularly changing the water filter is essential to maintain the quality of ice and ensure smooth operation of the ice maker.
Overcrowding and Airflow
An overcrowded freezer can restrict proper airflow, affecting ice production. Organize the items in your freezer to allow for adequate air circulation. Avoid blocking the vents and ensure that there is sufficient space around the ice maker for optimal performance.
Defrosting Cycle
Freezers typically go through a defrosting cycle to prevent ice buildup. Check if your freezer is in the midst of a defrosting cycle, as this can temporarily affect ice production. Allow the cycle to complete, and the ice maker should resume normal operation afterward.
Freezer Door Seal
A damaged or worn-out door seal can result in warm air entering the freezer, causing ice production problems. Inspect the door seal for any gaps or damages and replace it if necessary. A tight and secure door seal is vital for maintaining the ideal temperature in the freezer.
If you have checked all the potential issues listed above and your freezer still isn’t making ice, it may be time to seek professional assistance. An appliance repair technician can diagnose and resolve more complex problems with your ice maker, ensuring that you can enjoy a steady supply of ice once again.
In summary, when your freezer isn’t making ice, start by checking the power supply, temperature settings, water supply, ice maker components, water filter, overcrowding, defrosting cycle, and freezer door seal. By addressing these common issues, you can get your ice maker back up and running, providing you with the ice you need for your everyday needs.
Why Isn’t My Freezer Making Ice
Having a functioning ice maker in your freezer is a convenient and common feature that many homeowners depend on. So, when you open your freezer and find a lack of ice cubes, it can be a frustrating situation. There are several possible reasons why your freezer isn’t making ice. Let’s explore some of the common culprits and solutions to get your ice maker working again.
Ice makers rely on a series of components and processes to produce ice. When one or more of these factors are not functioning correctly, it can lead to a disruption in ice production. Understanding the potential causes will help you troubleshoot the problem effectively and determine if you need to seek professional assistance.
The first step in diagnosing the issue is to check the power supply. Ensure that your freezer is properly connected to a power source and that the power switch is turned on. It may seem obvious, but a loose connection or a mistakenly switched off power switch can easily cut off power to the ice maker, resulting in no ice production.
Once you have verified the power supply, the next step is to check the temperature settings. Ice makers require freezing temperatures to produce ice. Make sure the freezer is set to an appropriate temperature, typically around 0°F (-18°C). If the temperature is too high, ice production may be impaired. Adjust the temperature setting if necessary and wait a few hours to see if the ice maker starts working again.
The water supply is another critical factor in ice production. Check the water supply line connected to the freezer for any kinks, blockages, or leaks. A restricted or damaged water supply line can prevent water from reaching the ice maker, causing it to stop making ice. Additionally, ensure that the water supply valve is fully open to allow water to flow freely to the ice maker.
The components of the ice maker itself also need to be examined. A malfunctioning water inlet valve, a defective ice maker motor module, or a broken ice maker mold can all lead to a lack of ice production. Inspect these components for any signs of damage or malfunction and take the necessary steps to repair or replace them.
It is crucial to consider the condition of the water filter as well. A clogged or expired water filter can restrict water flow to the ice maker, resulting in reduced or no ice production. Check the water filter and replace it if necessary. Regularly changing the water filter is essential for maintaining the quality of ice and the proper functioning of the ice maker.
Other factors that can affect ice production include overcrowding in the freezer and impeded airflow. An overcrowded freezer can limit air circulation, which is necessary for proper ice production. Organize the items in the freezer to allow for adequate airflow, and ensure that the vents are not blocked. Additionally, ensure that the freezer is not undergoing a defrosting cycle, as this can temporarily halt ice production.
Finally, inspect the door seal of the freezer. A damaged or worn-out door seal can cause warm air to enter the freezer, leading to ice production issues. Check for any gaps or damages in the door seal and replace it if needed. A tight and secure door seal is essential for maintaining the ideal temperature in the freezer and ensuring optimal ice production.
If you have checked all the potential issues listed above and your freezer still isn’t making ice, it may be time to seek professional assistance. An appliance repair technician can diagnose and resolve more complex problems with your ice maker, ensuring that you can enjoy a steady supply of ice once again.
In summary, when your freezer isn’t making ice, start by checking the power supply, temperature settings, water supply, ice maker components, water filter, overcrowding, airflow, defrosting cycle, and freezer door seal. By addressing these potential issues, you can increase the chances of resolving the problem and restore the ice maker to its normal functioning.
Key Takeaways:
- Troubleshoot your freezer’s ice maker by checking power supply, temperature settings, water supply, ice maker components, water filter, overcrowding, defrosting cycle, and freezer door seal to ensure optimal ice production.
- Regularly maintain and inspect your freezer’s power supply, temperature settings, water supply, ice maker components, water filter, overcrowding, airflow, defrosting cycle, and freezer door seal to troubleshoot and resolve ice production issues.
Read more: Why Isn’t My Freezer Freezing
Power Supply
One of the first things to check when your freezer isn’t making ice is the power supply. Start by ensuring that the freezer is properly connected to a power source. Check the power cord connection at the back of the freezer to make sure it is securely plugged in.
If the power cord appears loose or disconnected, firmly plug it back into the appropriate outlet. Ensure that the outlet is functioning by plugging in another device or appliance to see if it powers on. If the outlet is not working, you may need to reset the circuit breaker or contact an electrician to address the issue.
Additionally, check if the power switch on the freezer is turned on. It’s possible that someone accidentally switched it off, cutting off power to the appliance. If the power switch is off, simply turn it back on and wait for the freezer to start up.
It’s also essential to check if the power outlet is working correctly. Use a multimeter or a plug-in circuit tester to verify if the outlet is receiving power and if it is grounded properly. This step is crucial to ensure that the freezer is getting the necessary power supply for the ice maker to function.
If the power supply is determined to be the issue, check if there are any frayed or damaged wires on the power cord. In such cases, it is essential to replace the power cord to avoid any safety hazards. If you are unsure about handling electrical components, it’s best to consult a professional electrician.
By checking the power supply and ensuring that the freezer is connected to a functional outlet, you can eliminate power-related issues as the cause of your freezer’s lack of ice production. If the problem persists, continue troubleshooting other potential factors that may be affecting ice production.
Temperature Settings
When troubleshooting why your freezer isn’t making ice, it’s important to examine the temperature settings. Ice makers require a specific temperature range for optimal ice production. If the temperature is too high, it can impede the freezing process and result in a lack of ice production.
Start by checking the temperature setting of your freezer. Most freezers have a temperature dial or digital display that allows you to adjust the temperature. Ideally, the freezer temperature should be set to around 0°F (-18°C) for optimal ice production.
If you find that the temperature setting is too high, adjust it to a lower temperature and wait for a few hours to see if it starts making ice. It’s important to note that it may take several hours for the temperature to stabilize and for ice production to resume. Be patient and give the freezer enough time to reach the desired temperature.
Keep in mind that extreme cold temperatures can also affect ice production. If the freezer is set to a very low temperature, the water in the ice maker may freeze too quickly and prevent the ice cubes from fully forming. In such cases, adjusting the temperature slightly higher, within the recommended range, can help promote proper ice formation.
When adjusting the temperature settings, avoid drastic temperature changes. Sudden shifts in temperature can affect the overall performance of the freezer and the ice maker. It’s best to make gradual adjustments and monitor the ice production over a period of time to determine the optimal setting for your freezer.
Additionally, ensure that the freezer door is properly sealed. An inadequate door seal can allow warm air to enter the freezer, causing the interior temperature to rise. This can disrupt ice production. Check the door seal for any gaps or damages and repair or replace it if needed.
By ensuring that the freezer is set to an appropriate temperature and adjusting the temperature settings if necessary, you can create the optimal environment for ice production. If adjusting the temperature doesn’t resolve the issue, continue troubleshooting other possible factors that may be affecting ice production in your freezer.
Water Supply
When your freezer isn’t making ice, one of the potential reasons is a problem with the water supply. Ice makers rely on a steady flow of water to produce ice cubes. Therefore, it’s crucial to check the water supply line and the water supply valve to ensure proper functionality.
Start by inspecting the water supply line connected to the freezer. Look for any kinks, bends, or blockages that may be obstructing the water flow. A kinked or blocked water supply line can prevent water from reaching the ice maker, leading to a lack of ice production.
If you find any blockages, carefully straighten the water supply line or remove any debris that may be causing the obstruction. Once the line is clear, reattach it to the freezer securely.
Next, verify if the water supply valve is fully open. This valve controls the flow of water to the ice maker. Check if the valve handle is in the “on” position. If it’s partially or fully closed, turn it clockwise to open the valve completely.
If the water supply valve appears to be faulty or doesn’t provide a steady flow of water, it may need to be replaced. Consult the freezer’s user manual or contact the manufacturer for guidance on replacing the water supply valve.
In addition to checking the water supply line and valve, consider the water pressure. Insufficient water pressure can also impact ice production. Ideally, the water pressure should be between 20-120 PSI (pounds per square inch). If the water pressure is too low, contact a plumber to assess and adjust the water pressure in your home.
It’s worth noting that some refrigerators with ice makers also have a water filter. The water filter removes impurities from the water, ensuring clean and fresh-tasting ice cubes. However, a clogged or expired water filter can restrict water flow to the ice maker.
Inspect the water filter and check the manufacturer’s recommendations for how often it should be replaced. If the water filter is clogged or has exceeded its lifespan, replace it with a new one. This simple step can significantly improve the water flow to the ice maker and restore ice production.
By checking the water supply line for blockages or leaks and verifying that the water supply valve is open, you can eliminate water supply issues as the cause of your freezer’s ice-making problem. If the problem persists, investigate other potential factors that may be affecting ice production.
Ice Maker Components
When your freezer isn’t making ice, it’s essential to inspect the various components of the ice maker itself. Issues with these components can prevent the ice maker from functioning properly. By checking for malfunctions or damages, you can identify and troubleshoot common problems that may be affecting ice production.
Start by locating the ice maker assembly in your freezer. Depending on the model of your freezer, it may be located on the freezer door or inside the freezer compartment. Once you have located the ice maker, visually inspect its components for any visible malfunctions or damages.
Common components to inspect include:
- Ice maker motor module: This component controls the various functions of the ice maker, such as filling the ice mold and ejecting the ice cubes. Check for any signs of damage or malfunction, such as broken wires or burnt-out smell.
- Water inlet valve: The water inlet valve controls the flow of water into the ice maker. Ensure that it is functioning correctly and supplying water to the ice maker. If the water inlet valve appears to be defective, it may need to be replaced.
- Ice mold: The ice mold is where the water is frozen into ice cubes. Carefully inspect the ice mold for any cracks, leaks, or blockages. A damaged or clogged ice mold can hinder ice production and may need to be repaired or replaced.
- Ice maker thermostat: The thermostat regulates the temperature inside the ice maker. If it is not functioning correctly, the ice maker may not receive the optimal temperature for ice production. Look for any visible damage or signs of malfunction.
- Ice maker control board: The control board controls and coordinates the various functions of the ice maker. Check for any visible signs of damage or loose connections. If there are any issues with the control board, it may need to be replaced.
If you notice any malfunctions or damages during your inspection, attempt to troubleshoot the problem based on the specific issue you have identified. Consult the user manual or contact the manufacturer for guidance on troubleshooting and repairing the specific component.
Some common troubleshooting steps for ice maker issues include:
- Resetting the ice maker: In some cases, a simple reset can resolve minor issues with the ice maker. Refer to the user manual for instructions on how to reset the ice maker properly.
- Cleaning the ice maker: Ice maker components can accumulate minerals or debris over time, causing blockages and affecting ice production. Clean the ice maker thoroughly following the manufacturer’s instructions.
- Replacing faulty components: If you have identified a specific component that is not functioning correctly, such as a faulty motor module or water inlet valve, it may be necessary to replace that component to restore ice production.
By inspecting the ice maker components for malfunctions or damages and troubleshooting common issues, you can address specific problems that may be causing the lack of ice production in your freezer. If the problem persists or you are unable to identify the cause, it may be advisable to contact a professional appliance repair technician for further assistance.
Read more: Why Isn’t My Printer Responding
Water Filter
The water filter in your freezer plays a vital role in ensuring clean and filtered water for your ice maker. Over time, water filters can become clogged or reach their expiration date, which can impact ice production. It’s important to evaluate the condition of the water filter and replace it if needed to maintain optimal ice production.
The purpose of a water filter is to remove impurities and contaminants from the water before it enters the ice maker. This ensures that the ice cubes produced are free from any potential pollutants or unpleasant tastes and odors.
To evaluate the condition of the water filter, consult the user manual for your freezer to determine the recommended replacement schedule. Generally, water filters should be replaced every six months or according to the manufacturer’s guidelines.
Inspect the water filter for any visible signs of clogging, such as a build-up of sediment or debris. A clogged water filter can restrict water flow to the ice maker, reducing ice production. Additionally, check if the water filter has reached its expiration date, as an expired filter may no longer effectively remove impurities from the water.
If the water filter appears clogged or expired, it’s important to replace it with a new one. Refer to the user manual for instructions on how to properly remove and install the water filter. Make sure to use a compatible replacement filter recommended by the manufacturer to ensure optimal performance.
By replacing a clogged or expired water filter, you can improve water flow to the ice maker and maintain the quality and taste of your ice cubes. It’s important to note that failing to replace a clogged or expired water filter may not only impact ice production but also compromise the overall performance of your refrigerator’s water and ice system.
Regularly changing the water filter is essential for the long-term functionality of your ice maker and the overall quality of your ice cubes. Additionally, some refrigerators have a built-in water filter indicator that alerts you when it’s time to replace the filter. Pay attention to these indicators or set a reminder to ensure timely maintenance.
Remember, a clean and properly functioning water filter is crucial for optimal ice production and maintaining the highest quality of ice cubes. By evaluating the condition of the water filter and replacing it as needed, you can ensure that your ice maker continues to produce ice that is free from impurities and provides a refreshing experience.
Overcrowding and Airflow
When troubleshooting why your freezer isn’t making ice, it’s essential to consider the potential impact of overcrowding and improper airflow. An overstuffed freezer can restrict airflow and hinder the proper functioning of the ice maker. It’s important to examine the freezer for overcrowding and optimize the arrangement of items to promote proper air circulation.
Start by examining the contents of your freezer. If it is packed with food, containers, or other items, there is a higher chance of obstructing the airflow. When the airflow is restricted, it can impact the cooling process and ice production. Look for any items that are blocking the vents or impeding the circulation of air around the ice maker.
Organize the items in your freezer in such a way that promotes optimal air circulation. Ensure that there is enough space around the ice maker for air to flow freely. Consider rearranging or removing any unnecessary items that may be overcrowding the freezer and obstructing proper airflow.
Avoid placing items directly against the back wall of the freezer, as this can obstruct the airflow and the cooling process. Leave a clearance of a few inches between the items and the freezer walls to allow the air to circulate effectively.
It’s also important to maintain a consistent temperature within the freezer. Opening the freezer frequently or leaving the door open for extended periods can cause temperature fluctuations and affect ice production. Limit the number of times you open the freezer door and make sure it is closed securely after each use.
Regularly defrosting your freezer can also help improve airflow and ice production. Ice buildup can obstruct air circulation and impact the performance of the ice maker. Follow the manufacturer’s instructions or consult the user manual to defrost the freezer properly.
Additionally, keep in mind that proper maintenance of your freezer can contribute to better airflow and ice production. Clean the freezer regularly to remove any spills, debris, or ice buildup that may hinder proper airflow. Vacuum the vents or coils to remove any dust or dirt that can restrict airflow.
By examining the freezer for overcrowding and optimizing the arrangement of items to promote proper air circulation, you can create an ideal environment for ice production. Maintaining a clear space around the ice maker, limiting temperature fluctuations, and regularly cleaning and defrosting the freezer can all contribute to improved airflow and ensure efficient ice production.
However, if you have checked for overcrowding and optimized the airflow within your freezer, and the ice maker still isn’t producing ice, it may be necessary to investigate other potential factors that may be affecting ice production.
Defrosting Cycle
When troubleshooting why your freezer isn’t making ice, it’s important to understand the role of the defrosting cycle and its impact on ice production. Freezers are designed to periodically go through a defrosting cycle to prevent ice buildup and maintain efficient operation. Checking if your freezer is undergoing a defrosting cycle can help determine if it’s a temporary interruption in ice production.
The defrosting cycle is essential because over time, frost and ice can accumulate on the evaporator coils inside the freezer. This buildup can insulate the coils and prevent efficient cooling. To prevent this, the defrosting cycle activates to melt the ice and frost, allowing the freezer to return to optimal cooling conditions.
During the defrosting cycle, the freezer’s temperature may rise slightly, and the ice maker may pause its operations. This temporary interruption can lead to a lack of ice production. It’s important to note that this is a normal part of the freezer’s operation and should resolve once the defrosting cycle is complete.
Check if there are any indicators on your freezer that show if it’s currently in a defrosting cycle. Some freezers have a defrosting cycle indicator light or display that alerts you when the cycle is active. This indicator will typically turn off once the defrosting cycle is finished and normal cooling operations resume.
If there is no specific indicator on your freezer, you can typically estimate the length of a defrosting cycle. Most defrosting cycles last between 20 minutes to an hour. If you suspect that your freezer is in a defrosting cycle, wait for the estimated duration and then check if the ice maker resumes its normal operations.
It’s important to mention that if your freezer is not undergoing a defrosting cycle, or if the ice maker does not start producing ice once the cycle is complete, there may be other underlying issues affecting ice production that need to be addressed.
Be patient while waiting for the defrosting cycle to complete. Avoid manually accelerating or interrupting the cycle, as this can cause further issues and may void any warranty on the freezer.
If you are unsure whether your freezer is undergoing a defrosting cycle or if the interruption in ice production persists even after the cycle, it may be necessary to continue troubleshooting other potential factors that may be affecting your freezer’s ice production.
Understanding the importance of the defrosting cycle and being aware of its impact on ice production can help you determine if it’s a temporary interruption or if further investigation is needed to identify the cause of the lack of ice production.
Freezer Door Seal
When troubleshooting why your freezer isn’t making ice, it’s important to inspect the condition of the door seal. The door seal, also known as the gasket, creates an airtight seal when the freezer door is closed. A damaged or worn-out door seal can result in warm air infiltrating the freezer, affecting the overall temperature and ice production. Inspecting and maintaining the door seal is crucial for the proper functioning of your freezer.
Carefully examine the door seal for any signs of damage, such as cracks, tears, or gaps. Run your fingers along the entirety of the seal to feel for any areas where the seal may be loose or ineffective in creating a tight seal.
If you notice any damage or gaps in the door seal, it’s important to address them promptly. A compromised door seal allows warm air to enter the freezer, causing the temperature to rise and potentially impacting ice production. Additionally, warm air infiltration can lead to frost or ice buildup on the coils, which can further impair cooling efficiency.
In some cases, small gaps or minor damage to the door seal can be repaired. Use a hairdryer on a low heat setting to soften the seal and reshape it, helping it create a better seal when the door is closed. You can also use a sealant specifically designed for refrigerator/freezer door seals to repair small cracks or gaps. Follow the manufacturer’s instructions for the sealant and ensure it is safe for use in food storage areas.
However, if the door seal is extensively damaged or worn out, it may be necessary to replace it. Contact the manufacturer or consult the freezer’s user manual for guidance on replacing the door seal. They can provide you with the compatible replacement seal and instructions for installation.
When replacing the door seal, ensure that you follow the manufacturer’s instructions carefully. Proper installation is crucial to create a tight and effective seal. An improperly installed door seal may not provide the necessary insulation and can result in ongoing issues with ice production and temperature control.
By inspecting the door seal for any gaps or damages and promptly repairing or replacing it, you can ensure that warm air infiltration is minimized, thereby maintaining the optimal temperature for ice production in your freezer. A properly functioning door seal plays a vital role in preserving the freshness of your food, promoting energy efficiency, and ensuring the efficient operation of your ice maker.
Remember, the door seal is a critical component of your freezer, and any issues with it should be addressed promptly to prevent further complications and maintain the optimal conditions for ice production.
Conclusion
In conclusion, there are several potential reasons why your freezer may not be making ice. Throughout this troubleshooting guide, we have covered various factors that can impede ice production and provided solutions to address them. Let’s recap the potential culprits we have discussed:
1. Power Supply: Ensure that the freezer is properly connected to a power source and that the power outlet is functional. Verify if the power switch is turned on.
2. Temperature Settings: Check the temperature setting of the freezer and adjust it to the recommended temperature for ice production. Avoid extreme cold temperatures that can impact ice formation.
3. Water Supply: Inspect the water supply line for any blockages, leaks, or kinks. Ensure that the water supply valve is fully open to allow water flow to the ice maker.
4. Ice Maker Components: Examine the different components of the ice maker, such as the motor module, water inlet valve, ice mold, thermostat, and control board, for any malfunctions or damages. Troubleshoot and replace any faulty components as needed.
5. Water Filter: Evaluate the condition of the water filter and replace it if clogged or expired. A clean and functional water filter ensures proper water flow to the ice maker and improves the quality of the ice.
6. Overcrowding and Airflow: Check for overcrowding in the freezer that may obstruct proper airflow. Optimize the arrangement of items to allow for optimal air circulation around the ice maker.
7. Defrosting Cycle: Understand the importance of the defrosting cycle for ice production. Check if the freezer is undergoing a defrosting cycle and wait for it to complete before assessing ice production.
8. Freezer Door Seal: Inspect the door seal for any gaps, cracks, or damages that may allow warm air infiltration. Repair or replace the door seal if necessary to maintain optimal temperature and ice production.
If you have gone through these troubleshooting steps and your freezer still isn’t making ice, despite following the recommended solutions, it may be advisable to seek professional assistance. An appliance repair technician will have the expertise to diagnose and resolve more complex issues with your ice maker.
Professional help may be necessary if you are unsure about handling electrical components, if there are extensive damages to the freezer components, or if you have exhausted the available troubleshooting options.
Remember, each freezer model may have unique features and requirements, so it’s important to refer to the user manual or contact the manufacturer for specific guidance related to your appliance.
By following these troubleshooting steps and seeking professional assistance when needed, you can increase the chances of resolving the issue and restoring the ice production in your freezer. Enjoy the convenience of a fully functioning ice maker once again!
Frequently Asked Questions about Why Isn’t My Freezer Making Ice
Was this page helpful?
At Storables.com, we guarantee accurate and reliable information. Our content, validated by Expert Board Contributors, is crafted following stringent Editorial Policies. We're committed to providing you with well-researched, expert-backed insights for all your informational needs.


0 thoughts on “Why Isn’t My Freezer Making Ice”