Home>Home Maintenance>Why It Is Important To Learn How To Do Simple Home Repairs At Home
Home Maintenance
Why It Is Important To Learn How To Do Simple Home Repairs At Home
Modified: October 20, 2024
Learn why it is crucial to master simple #home-maintenance repairs at home and save money on professional services. Enhance your skills and become a confident DIY homeowner.
(Many of the links in this article redirect to a specific reviewed product. Your purchase of these products through affiliate links helps to generate commission for Storables.com, at no extra cost. Learn more)
Introduction
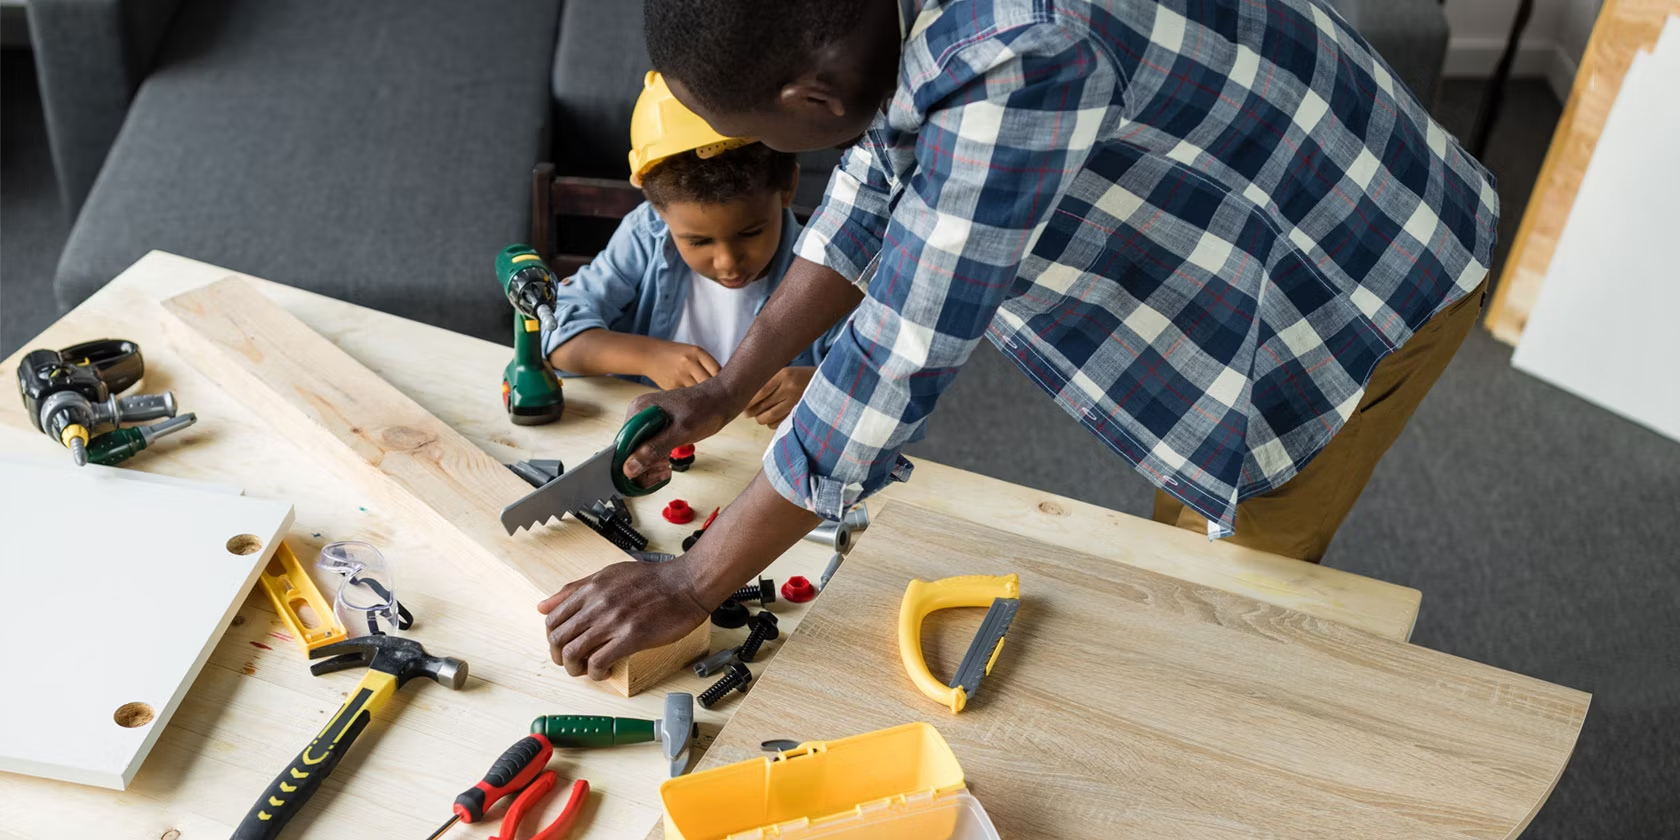
When it comes to maintaining our homes, it’s easy to find ourselves overwhelmed by the number of issues that can arise. From leaky faucets to squeaky doors, there’s always something that needs fixing. While hiring a professional may seem like the easiest solution, there are numerous benefits to learning how to do simple home repairs yourself.
Learning how to handle basic home repairs not only saves you money, but it also provides a sense of empowerment and independence. Additionally, it can be a rewarding and fulfilling experience to take ownership of maintaining your living space. In this article, we will explore the benefits of learning home repairs, as well as some common simple repairs that you can tackle on your own.
Key Takeaways:
- Learning simple home repairs saves money, time, and empowers independence. It’s rewarding and beneficial to handle common repairs like leaky faucets and squeaky doors on your own.
- Basic home repairs, such as fixing broken tiles and unclogging drains, can be easily learned and mastered. Taking charge of these tasks leads to a more efficient and self-sufficient living environment.
Read more: Why Insulation Is Important
Benefits of Learning Home Repairs
Learning how to do simple home repairs comes with a range of benefits that can positively impact your everyday life. Here are some key advantages:
- Cost Savings: One of the most significant benefits of learning home repairs is the cost savings. By taking care of basic repairs yourself, you can eliminate the need to hire a professional and save a substantial amount of money in the long run. Whether it’s fixing a leaky faucet or patching a hole in the wall, the costs can add up over time. By acquiring a few basic skills, you can handle these repairs on your own and avoid unnecessary expenses.
- Time Efficiency: Another advantage of learning home repairs is the time efficiency it provides. When an issue arises, you won’t have to wait for a professional to schedule an appointment or spend hours researching and contacting different repair services. Instead, you can address the problem immediately, solving it on your own terms and at your own convenience. This can save you valuable time and allow you to move on with your day without prolonged disruptions.
- Increased Independence: Being able to handle simple home repairs gives you a sense of independence and self-reliance. You no longer have to rely on others to fix common household issues. Instead, you can take charge and tackle the repairs yourself, empowering yourself with the knowledge and skills to maintain your home. This increased independence can boost your confidence and make you feel more capable in handling other challenges that may arise in your life.
- Enhanced Problem-Solving Skills: When you learn how to do home repairs, you develop valuable problem-solving skills. Each repair presents a unique challenge that requires critical thinking and analysis. By identifying the cause of the issue and determining the best course of action to fix it, you sharpen your problem-solving abilities. These skills can extend beyond home repairs and benefit you in various aspects of your life, such as in your career or personal relationships.
Overall, learning home repairs offers a range of benefits, including cost savings, time efficiency, increased independence, and enhanced problem-solving skills. By investing some time and effort into acquiring these skills, you can take control of maintaining your home and enjoy a more self-sufficient lifestyle.
Cost Savings
One of the most compelling reasons to learn how to do simple home repairs is the significant cost savings it can provide. Hiring professional contractors or repair services can be expensive, especially for minor repairs that you can easily handle yourself. By taking the time to learn basic repair skills, you can save a considerable amount of money in the long run. Here’s how:
1. Eliminating Labor Costs: When you hire a professional, a significant portion of the cost goes towards their labor. By doing the repairs yourself, you eliminate this expense entirely. Instead, you invest your time and effort into learning and completing the repair, which can save you a substantial amount of money in the process.
2. Avoiding Service Fees: In addition to labor costs, professional contractors often charge service fees for their expertise and experience. These fees can quickly add up, especially if you require frequent repairs or maintenance. By learning how to handle simple repairs at home, you can avoid these service fees altogether and keep more money in your pocket.
3. Reducing Material Costs: When you hire a professional, they typically include the cost of materials in their service charge. However, when you do the repairs yourself, you have the freedom to choose the most cost-effective materials or utilize items you already have at home. This allows you to control and minimize the expenditure on materials, further contributing to your overall cost savings.
4. Preventing Further Damage: Ignoring or delaying repairs can often lead to more severe issues and costly repairs down the line. By learning how to quickly address and fix simple repairs, you can prevent the problem from escalating and avoid more expensive repairs in the future. Proactive maintenance and timely repairs can save you significant amounts of money by nipping potential issues in the bud.
5. Investment in Long-Term Savings: While there may be upfront costs associated with learning how to do simple repairs, it is an investment that can yield long-term savings. Once you acquire the necessary skills, you can confidently handle a wide range of repairs without relying on outside help. This self-sufficiency allows you to save money on future repairs and maintenance expenses, ultimately making a positive impact on your overall budget.
Learning how to do simple home repairs not only empowers you with valuable skills, but it also offers substantial cost savings. By eliminating labor costs, avoiding service fees, reducing material expenses, preventing further damage, and investing in long-term savings, you can effectively manage your home maintenance without breaking the bank.
Time Efficiency
When it comes to home repairs, time is often of the essence. Waiting for a professional to schedule an appointment or spending hours researching and contacting different repair services can cause unnecessary delays and disruptions in your daily life. By learning how to do simple home repairs yourself, you can significantly improve time efficiency. Here’s how:
1. Immediate Action: When a repair issue arises, you no longer have to wait for a professional to become available. Instead, you can take immediate action and start tackling the problem right away. This allows you to address the issue promptly and prevent it from worsening or causing further damage to your home. Responding quickly to repairs can save you time, money, and stress in the long run.
2. Flexibility with Scheduling: Learning how to do home repairs gives you the flexibility to choose when to work on the repairs. You can tailor your repair schedule to fit your availability and preferences. Whether you prefer to tackle repairs on weekends, evenings, or whenever you have a free moment, you have the freedom to decide when it’s most convenient for you. This flexibility allows you to seamlessly integrate repairs into your daily routine without disrupting your other commitments.
3. Efficient Problem-Solving: As you gain experience in handling home repairs, you become more efficient at diagnosing and solving issues. Instead of spending excessive time researching or struggling to identify the problem, your growing knowledge and skills enable you to quickly identify the root cause of the repair and determine the best course of action. This efficient problem-solving ability saves you valuable time and enables you to complete the repairs more swiftly.
4. Minimized Downtime: When you can address repairs promptly and efficiently, you minimize the downtime caused by the issue. Whether it’s a leaky faucet, a broken tile, or a squeaky door, these issues can be disruptive and hinder your everyday activities. By resolving the problem yourself, you can restore normalcy to your home and minimize any interruptions or inconveniences caused by the repair.
5. Continuous Learning and Improvement: As you gain more experience in handling home repairs, your skills and knowledge will continue to grow. This ongoing learning process allows you to become even more time-efficient in handling repairs. You’ll develop a better understanding of common issues, learn new techniques, and become quicker and more effective at solving problems. This continuous improvement further enhances your time efficiency and allows you to handle repairs with ease.
Learning how to do simple home repairs empowers you to take immediate action, provides flexibility with scheduling, enhances problem-solving efficiency, minimizes downtime, and encourages continuous learning and improvement. By maximizing time efficiency in home repairs, you can efficiently handle issues and promptly restore the functionality and comfort of your home.
Increased Independence
Learning how to do simple home repairs not only saves you money and time, but it also fosters a sense of increased independence. Relying on professionals for every repair can make you feel dependent and helpless when faced with maintenance issues. By taking the initiative to learn and handle home repairs yourself, you gain a newfound sense of empowerment. Here are some ways in which learning home repairs can enhance your independence:
1. Self-Sufficiency: When you possess the skills to handle basic home repairs, you become self-sufficient in maintaining your own living space. You no longer have to rely on others or wait for external help to resolve common repair issues. This self-sufficiency gives you a sense of control over your home and allows you to take charge of its upkeep without relying on outside assistance.
2. Confidence: Acquiring the knowledge and skills to handle home repairs boosts your confidence. The ability to troubleshoot and fix common issues on your own empowers you to take on new challenges and tackle obstacles head-on. This newfound confidence can extend beyond home repairs and positively impact other areas of your life, as you become more confident in your problem-solving abilities and resourcefulness.
3. Adaptability: Learning home repairs fosters adaptability and a willingness to learn new things. When you encounter a new repair problem, you become open to exploring solutions, trying different approaches, and gaining the necessary knowledge to address the issue. This ability to adapt and learn extends beyond the realm of home repairs, helping you become more adaptable and resourceful in various aspects of your life.
4. Empowerment: Taking control of maintaining your home through learning home repairs gives you a sense of empowerment. You are no longer at the mercy of repair services or the limitations of your budget. Instead, you become the one who can identify, troubleshoot, and fix problems as they arise. This empowerment instills a sense of pride and ownership in your home, leading to a greater appreciation and connection to your living space.
5. Problem-Solving Skills: Learning home repairs develops your problem-solving skills. Each repair presents a unique challenge that requires critical thinking, troubleshooting, and finding creative solutions. By honing your problem-solving skills, you become more adept at identifying the cause of the issue, evaluating the options available to you, and implementing the most effective solution. These problem-solving skills extend beyond home repairs and can benefit you in various areas of your life.
Learning how to do simple home repairs increases your independence by allowing you to become self-sufficient, boosting your confidence, fostering adaptability, instilling empowerment, and developing problem-solving skills. By taking ownership of maintaining your home, you gain a sense of control and independence that can enhance your overall well-being.
Read more: Why Is A Stable Home Life Important
Enhanced Problem-Solving Skills
Learning how to do simple home repairs not only enables you to maintain your living space but also enhances your problem-solving skills. Each repair presents a unique challenge that requires critical thinking, evaluation, and the ability to find creative solutions. Here are some ways in which learning home repairs can improve your problem-solving abilities:
1. Identifying the Issue: When faced with a repair problem, the first step is to identify the root cause of the issue. Through observation and analysis, you learn to recognize the symptoms and signs that indicate a specific problem. This skill of identifying the core issue carries over into other areas of life, allowing you to assess situations accurately and address the underlying problems.
2. Evaluating Options: Once you have identified the problem, the next step is to evaluate the available options for fixing it. Learning home repairs encourages you to consider different approaches and weigh the pros and cons of each. This ability to evaluate options and make informed decisions is valuable in various aspects of life where critical thinking is required.
3. Adopting a Systematic Approach: Home repairs often require a systematic approach, breaking down the problem into smaller components and addressing them one by one. This approach helps you organize your thoughts and actions, ensuring that you tackle the problem in an orderly manner. This systematic thinking can be applied to other situations, allowing you to approach complex problems methodically.
4. Resourcefulness: When handling home repairs, you often have limited resources at your disposal. This cultivates resourcefulness, as you learn to adapt and find creative solutions using the tools and materials available to you. This skill of being resourceful can be transferred to other aspects of life, enabling you to find innovative ways to overcome challenges and accomplish goals even with limited resources.
5. Trial and Error: Home repairs provide a safe environment to practice trial and error. Not every repair may work perfectly the first time, but through trial and error, you gain insights and refine your problem-solving skills. This iterative process of trying different solutions and learning from mistakes helps you develop a resilient and adaptable mindset.
6. Building Confidence: As you successfully handle home repairs and overcome challenges, your confidence grows. This newfound confidence translates into a belief in your abilities to solve problems, both in home maintenance and other areas of life. The more you practice problem-solving, the more confident you become in your problem-solving skills.
7. Transferable Skills: The problem-solving skills honed through home repairs are transferable to various facets of life. From navigating professional challenges to resolving personal conflicts, the ability to analyze problems, evaluate options, and implement effective solutions is valuable in all domains.
Learning how to do simple home repairs enhances your problem-solving skills by teaching you how to identify issues, evaluate options, adopt a systematic approach, practice resourcefulness, learn from trial and error, build confidence, and develop transferable skills. These skills not only make you more proficient in home maintenance but also equip you with vital problem-solving abilities for many other aspects of your life.
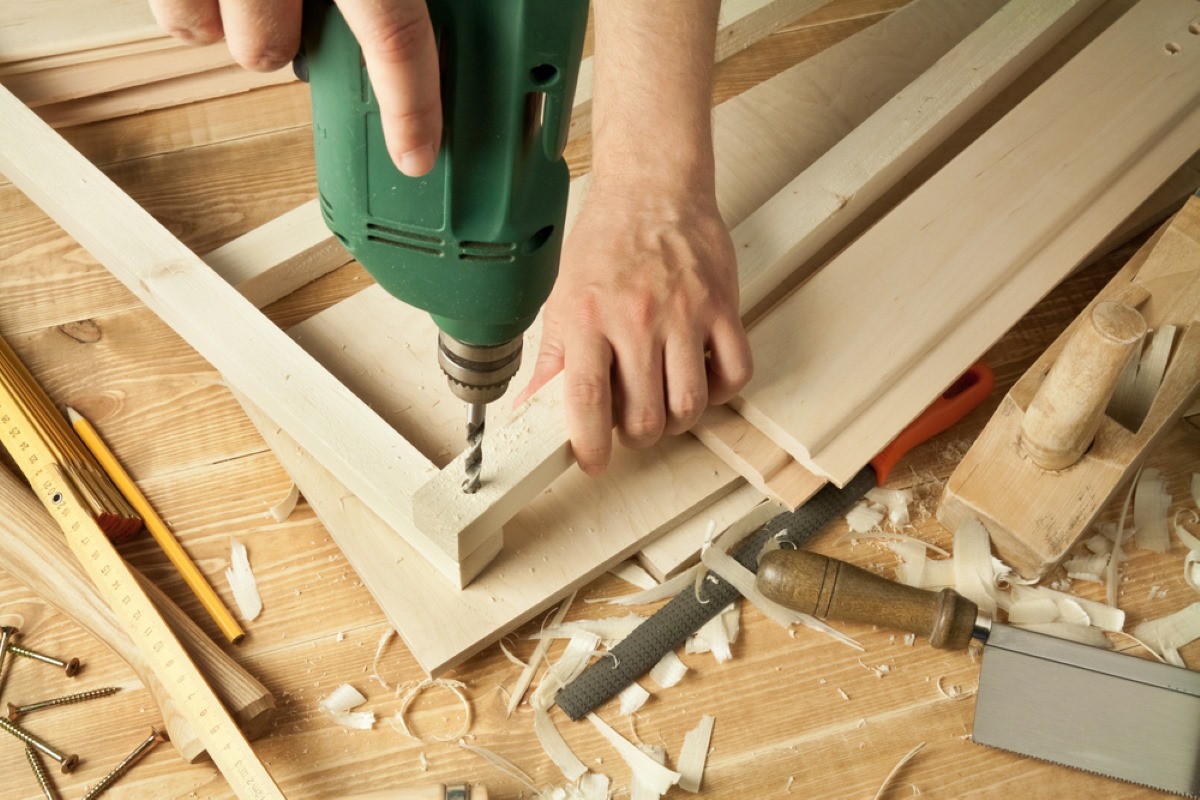
Common Simple Home Repairs
Knowing how to handle common home repairs can save you time, money, and the hassle of waiting for professional help. While some repairs may require specialized knowledge or equipment, there are several simple repairs that you can learn to do yourself. Here are some of the most common simple home repairs:
1. Repairing Leaky Faucets: Leaky faucets are not only annoying but also wasteful. Luckily, fixing a leaky faucet is a relatively simple repair. Most leaks can be resolved by replacing a worn-out washer or O-ring. With a few basic tools and some guidance, you can easily fix a leaky faucet in no time.
2. Fixing Broken Tiles: Broken or chipped tiles can be unsightly and pose a safety hazard. Repairing them involves removing the damaged tile, cleaning the area, applying new adhesive, and laying down a new tile. With some patience and attention to detail, you can restore the appearance and functionality of your tiled surfaces.
3. Patching Holes in Walls: Whether caused by hanging artwork or accidental bumps, small holes in walls are a common occurrence. Thankfully, repairing them is straightforward. You’ll need to clean the hole, fill it with spackle or putty, sand it smooth, and paint over the patched area. With a little practice, you’ll be able to seamlessly repair these holes and maintain a neat and clean wall surface.
4. Repairing Squeaky Doors: Squeaky doors can be an annoyance, but they are easily fixable. The most common cause of a squeaky door is the hinges needing some lubrication. Applying lubricating oil or graphite powder to the hinges can help eliminate the squeak. If the squeak persists, you may need to adjust or replace the hinges. With a few simple tools and lubricant, you can silence those squeaky doors.
5. Unclogging Drains: Clogged drains can cause water backup and unpleasant odors. Plunging and using a drain snake are effective methods for clearing minor blockages. Chemical drain cleaners can also be used but should be used with caution and following the instructions. By learning these simple techniques, you can keep your drains flowing smoothly and avoid the need for costly plumbing services.
6. Replacing Light Fixtures: Updating light fixtures can instantly enhance the aesthetic appeal of a room. Fortunately, replacing a light fixture is a relatively simple process. By following the instructions provided with the new fixture, you can safely disconnect the old fixture, connect the new one, and enjoy a fresh new lighting look in your space.
7. Replacing Outlet or Switch Covers: Over time, outlet and switch covers can become worn or damaged. Replacing them is a simple and quick fix. Turn off the power to the outlet or switch, remove the old cover, and install the new one. Ensure that the wiring is secure and that the cover fits snugly. This simple repair can instantly freshen up the appearance of your walls.
These are just a few examples of common simple home repairs that you can learn to do yourself. By acquiring the necessary tools and knowledge, you can save money and have the satisfaction of maintaining and improving your home on your own terms.
Learning how to do simple home repairs can save you money, time, and stress. It also gives you a sense of independence and accomplishment. Start with small tasks and gradually build your skills.
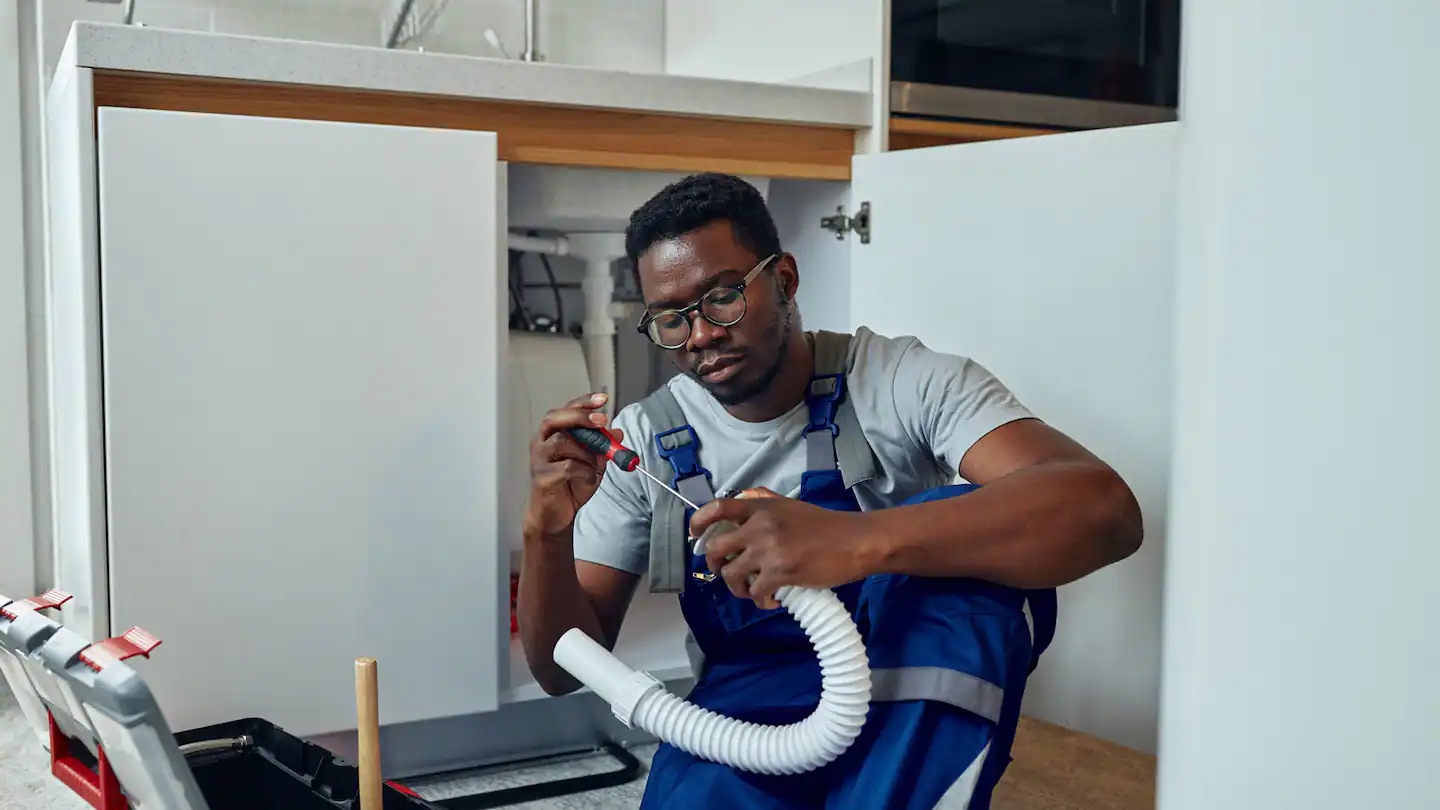
Repairing Leaky Faucets
Dealing with a leaky faucet can be both frustrating and wasteful. The constant dripping not only leads to higher water bills but can also cause unnecessary wear and tear on your plumbing fixtures. Fortunately, repairing a leaky faucet is a simple task that you can easily tackle on your own. Here are the steps to repair a leaky faucet:
1. Gather the Necessary Tools: Before you begin, gather the tools you’ll need for the repair. This typically includes an adjustable wrench, a screwdriver, replacement washers or O-rings, and plumber’s tape. Having these tools readily available will streamline the repair process.
2. Turn Off the Water Supply: Before you start disassembling the faucet, it’s crucial to turn off the water supply. Locate the shut-off valves under the sink and close them to prevent water from flowing while you work. If you can’t find shut-off valves, turn off the main water supply to your home.
3. Disassemble the Faucet: Begin by removing the handle of the faucet. This may require unscrewing or gently prying off a decorative cap to access the screw underneath. Once the screw is removed, carefully detach the handle from the base. Next, use an adjustable wrench to loosen and remove the packing nut or bonnet that secures the stem of the faucet.
4. Replace the Washer or O-ring: After removing the packing nut, you’ll see the stem assembly. This is where you’ll find the rubber washer or O-ring that may be causing the leak. Carefully remove the old washer or O-ring and replace it with a new one of the same size and shape. If the O-ring is damaged, make sure to replace it with a new one as well.
5. Reassemble the Faucet: Once you’ve replaced the washer or O-ring, carefully reassemble the faucet in the reverse order of disassembly. Make sure all parts are properly aligned and tightened. Use plumber’s tape to wrap the threads of the faucet stem for a secure seal.
6. Turn On the Water Supply: With the faucet reassembled, slowly turn on the water supply to the faucet. Check for any leaks around the base of the faucet or from the handle. If you notice any leaks, tighten the necessary connections until the leak stops.
7. Test and Check: After completing the repair, turn on the faucet and test for any remaining leaks. Make sure the water flow is steady and that the faucet does not drip when fully closed. If you still encounter issues, double-check that all connections are properly tightened or consider seeking professional assistance if needed.
Repairing a leaky faucet is a simple home repair task that can save you both money and water. By following these steps and taking the time to properly diagnose and fix the issue, you can restore your faucet’s functionality and prevent further damage to your plumbing fixtures. Learning how to repair a leaky faucet is a valuable skill that can be easily mastered and applied whenever leakage issues arise in your home.
Fixing Broken Tiles
Seeing a broken or chipped tile in your home can be unsightly and may pose a safety hazard. Fortunately, fixing broken tiles is a simple home repair task that you can easily handle on your own. By following a few steps, you can restore the appearance and functionality of your tiled surfaces. Here’s how to fix broken tiles:
1. Assess the Damage: Begin by assessing the extent of the damage to the tile. Determine whether the tile needs to be repaired or replaced. If it’s a minor chip or crack, you can often fix it by filling it in. However, if the tile is completely shattered or extensively damaged, it will need to be replaced.
2. Gather the Necessary Tools and Materials: To fix the broken tile, you’ll need a few tools and materials. These may include safety goggles, gloves, a chisel, a hammer, tile adhesive or mortar, a notched trowel, grout, a grout float, and a sponge. Having these tools ready beforehand will make the repair process smoother.
3. Remove the Broken Tile: If you need to replace the broken tile, start by carefully removing it. Put on safety goggles and gloves for protection. Use a chisel and hammer to gently chisel away the broken tile pieces. Be cautious not to damage the surrounding tiles. Clean any debris or remnants left behind.
4. Prepare the Surface: Before installing the new tile, ensure that the surface is clean and free of any adhesive or grout residue. Use a scraper or sandpaper to smooth out the area and create a clean, level surface for the replacement tile.
5. Apply Tile Adhesive or Mortar: If you’re replacing the tile, apply a thin layer of tile adhesive or mortar to the back of the new tile using a notched trowel. Ensure that the adhesive or mortar is evenly spread and covers the entire back surface of the tile.
6. Install the New Tile: Carefully place the new tile into the prepared space, pressing it firmly into the adhesive or mortar. Make sure the tile is level and aligned with the surrounding tiles. Use spacers if necessary to maintain an even grout line.
7. Allow the Adhesive or Mortar to Set: Follow the manufacturer’s instructions regarding the drying and setting time for the adhesive or mortar. It’s essential to allow sufficient time for the tile to firmly adhere to the surface before proceeding to the next step.
8. Apply Grout: Once the adhesive or mortar has properly set, it’s time to apply grout. Use a grout float to press the grout into the gaps between the tiles, ensuring complete coverage. Remove any excess grout using the edge of the grout float.
9. Clean and Finish: After applying the grout, use a damp sponge to clean the tiles and remove any grout haze. Rinse the sponge frequently and continue wiping until the tiles are clean. Allow the grout to dry according to the manufacturer’s instructions.
By following these steps, you can fix broken tiles and restore the visual appeal and functionality of your tiled surfaces. Whether it’s a minor chip or a shattered tile, handling this home repair task on your own can save you money and give you a sense of accomplishment.
Read more: Why Is Home Security So Important
Patching Holes in Walls
Accidents happen, and sometimes you may find yourself with a hole in your wall. Whether it’s from a misplaced furniture bump or removing a wall fixture, patching holes in walls is a simple home repair task that you can easily tackle on your own. Here’s a step-by-step guide on how to patch holes in walls:
1. Assess the Size of the Hole: Start by assessing the size and depth of the hole. Smaller holes, such as nail or screw holes, can often be filled in with a simple spackling compound. Larger holes may require additional steps and materials to properly patch.
2. Gather the Necessary Tools and Materials: To patch the hole in your wall, gather the tools and materials you’ll need. This may include a putty knife, sandpaper, spackling compound or joint compound, a patching mesh or drywall patch, and primer and paint for finishing the repair.
3. Prepare the Hole: Clean the area around the hole, removing any loose debris or dust. If the edges of the hole are uneven or protruding, use sandpaper to smooth them out. This will help the patch adhere properly.
4. Fill in the Hole: For small holes, use a putty knife to fill the hole with spackling compound. Apply the compound in thin layers, gradually building up until the hole is fully filled. Smooth the surface with the putty knife, ensuring it is flush with the surrounding wall. Allow the compound to dry completely.
5. Patch Larger Holes: For larger holes, you may need to use a patching mesh or drywall patch. Place the patch over the hole, ensuring it covers the entire damaged area. Apply a layer of joint compound over the patch, extending it beyond the edges to blend with the surrounding wall. Feather the edges of the compound with a putty knife to create a seamless transition. Allow the compound to dry completely.
6. Sand and Smooth the Surface: Once the compound is fully dry, use fine-grit sandpaper to sand the patched area. Sand in a circular motion, being careful not to apply too much pressure. Continue sanding until the surface is smooth and even with the surrounding wall.
7. Prime and Paint: Before applying paint, use a primer to ensure even coverage and adhesion. Allow the primer to dry according to the manufacturer’s instructions. Once dry, apply paint to match the color of the surrounding wall. Use a brush or roller to apply the paint in thin, even coats, blending it seamlessly with the rest of the wall.
8. Final Touches: After the paint has dried, inspect the patched area to ensure it is smooth and visually matches the rest of the wall. If necessary, make any touch-ups or additional layers of paint to achieve a flawless finish.
By following these steps, you can successfully patch holes in your walls and restore a seamless and visually appealing surface. With a little time and effort, you can achieve professional-looking results while saving money by handling the repair yourself.
Repairing Squeaky Doors
Squeaky doors can be quite annoying and disrupt the peaceful atmosphere of your home. Fortunately, fixing a squeaky door is a straightforward home repair task that you can easily tackle on your own. By taking a few simple steps, you can restore the quiet and smooth operation of your doors. Here’s how to repair squeaky doors:
1. Diagnose the Source: Before starting the repair, it’s important to identify the source of the squeak. Squeaks can occur in different parts of the door, such as the hinges, the doorknob mechanism, or the hinges rubbing against the door frame. Determining the cause of the squeak will help you choose the right solution.
2. Lubricate the Hinges: In many cases, squeaky hinges are the culprits behind the noise. To fix this, apply lubricating oil or silicone spray to the hinges. Open and close the door several times to distribute the lubricant evenly. This should reduce friction and eliminate the squeak. If the squeaking persists, you may need to remove the hinge pins, clean them, apply grease or a thicker lubricant, and reinsert them.
3. Tighten Loose Screws: Squeaks can also occur if the screws holding the hinges or other door hardware become loose over time. Use a screwdriver or a drill to tighten any loose screws. Be careful not to overtighten as it may strip the screw holes. Tightening the screws can help stabilize the door and eliminate squeaking caused by loose components.
4. Check the Strike Plate: Sometimes, when the door latch hits the strike plate, it can create a squeaking noise. If this is the case, try adjusting the strike plate slightly to ensure proper alignment. You can use a screwdriver to loosen the screws holding the plate, move it slightly in the desired direction, and retighten the screws. Test the door to see if the squeak has been resolved.
5. Address Door Frame Rubbing: If the squeaking persists even after lubricating the hinges, it may be due to the door rubbing against the door frame. One solution is to use a pencil to mark the areas where the door is rubbing and causing the squeak. Use a sandpaper or a hand plane to carefully remove a small amount of wood from the door or the frame in the marked areas. Be sure to test the door after each adjustment to avoid removing too much material.
6. Consider Wax or Paraffin: If the above solutions don’t eliminate the squeak, you can try using a wax candle or a bar of paraffin. Rub the wax along the hinge pins and other areas of friction. Open and close the door several times to distribute the wax. This can provide temporary relief by reducing the friction that causes the squeak.
7. Seek Professional Help (if necessary): If the squeak persists and you’re unable to find a solution, it may be time to seek professional assistance. A door repair specialist can diagnose the issue and provide expert guidance or perform the necessary repairs to eliminate the squeak.
By following these steps, you can successfully repair squeaky doors and restore peace and quiet to your home. Taking care of squeaking doors not only improves your daily living experience but also helps maintain the longevity of your doors and hinges.
Unclogging Drains
Dealing with a clogged drain can be a frustrating and inconvenient experience. However, before reaching for harsh chemicals or calling a plumber, there are several simple and effective methods to unclog drains that you can try on your own. By following these steps, you can often clear the clog and restore proper drainage. Here’s how to unclog drains:
1. Clear the Area: Start by removing any debris or visible blockages around the drain, such as hair, food particles, or foreign objects. Use a pair of gloves or tweezers to carefully pull out as much material as possible from the drain opening.
2. Boiling Water: Boiling water is one of the simplest and most effective methods for unclogging drains. Boil a kettle or a pot of water and carefully pour it down the drain in stages. The hot water will help break up and dissolve the clog, allowing water to flow freely. Repeat this process a few times to achieve optimal results.
3. Plunging: Plunging can be an effective method for clearing clogs in toilets, sinks, and shower drains. Ensure there is enough water in the sink or tub to cover the plunger’s cup. Position the plunger over the drain and vigorously plunge up and down for several seconds. The pressure created by the plunging motion can dislodge the clog and restore proper water flow.
4. Using a Drain Snake: A drain snake, also known as a plumber’s snake or auger, is a useful tool for removing clogs that are deeper in the drain pipe. Insert the snake into the drain, rotating it gently as you push it forward. This action will help break up the clog and allow it to be pulled out. Once you’ve cleared the clog, run hot water down the drain to ensure it is fully flushed out.
5. Baking Soda and Vinegar: This natural remedy can often dissolve minor clogs and freshen up drains. Start by pouring a pot of boiling water down the drain to loosen any debris. Then, sprinkle a handful of baking soda into the drain followed by a cup of vinegar. Cover the drain with a cloth or a drain plug to contain the fizzing reaction. After 10-15 minutes, flush the drain with hot water to remove the clog.
6. Chemical Drain Cleaners: If the above methods don’t work, you can consider using commercial drain cleaners as a last resort. However, exercise caution when handling these products, as they can be harmful to your health and the environment. Follow the instructions carefully, and be aware that some drain cleaners can damage certain types of pipes.
7. Call a Professional: If your efforts to unclog the drain are unsuccessful or if you’re dealing with a persistent and stubborn clog, it’s advisable to seek professional help. Plumbers have specialized tools and expertise to diagnose and resolve more complex drainage issues.
By following these steps, you can often clear clogged drains and restore proper water flow in your home. Remember to use preventive measures, such as regular drain maintenance and using drain screens, to minimize the occurrence of clogs in the future.
Conclusion
Learning how to do simple home repairs is a valuable skill that can save you time, money, and frustration. By taking the initiative to acquire some basic knowledge and skills, you can effectively maintain your home and tackle common repair issues on your own. The benefits of learning home repairs are numerous.
First and foremost, learning home repairs can lead to substantial cost savings. By handling repairs yourself, you eliminate labor costs and avoid service fees charged by professionals. You also have more control over material costs, choosing cost-effective options that fit your budget.
Time efficiency is another significant advantage of learning home repairs. Rather than waiting for professional help, you can address issues immediately and at your convenience. This eliminates unnecessary delays and disruptions in your daily life.
Learning home repairs also enhances your independence. You become self-sufficient in maintaining your living space, gaining a sense of control and empowerment. This increased independence boosts your confidence and problem-solving skills, making you more resilient and adaptable in various aspects of life.
Common simple home repairs, such as fixing leaky faucets, repairing broken tiles, patching holes in walls, addressing squeaky doors, and unclogging drains, can often be tackled with basic tools and a little guidance. By learning these repairs, you can save money, improve the functionality of your home, and feel a sense of accomplishment in handling these tasks on your own.
While some repairs may require professional assistance, learning how to do simple home repairs allows you to distinguish when it’s necessary to call for help and when you can handle the repair yourself. It gives you the confidence to take charge and be proactive in maintaining your home.
In conclusion, investing time and effort in learning home repairs is beneficial in many ways. It empowers you with the ability to save money, time, and resources, while also enhancing your problem-solving skills, independence, and overall confidence. By taking control of simple home repairs, you can create a more efficient, self-sufficient, and comfortable living environment.
Frequently Asked Questions about Why It Is Important To Learn How To Do Simple Home Repairs At Home
Was this page helpful?
At Storables.com, we guarantee accurate and reliable information. Our content, validated by Expert Board Contributors, is crafted following stringent Editorial Policies. We're committed to providing you with well-researched, expert-backed insights for all your informational needs.


0 thoughts on “Why It Is Important To Learn How To Do Simple Home Repairs At Home”