Home>Home Maintenance>How To Do Home Repairs Yourself

Home Maintenance
How To Do Home Repairs Yourself
Modified: October 19, 2024
Learn how to do home repairs yourself with our step-by-step guides and expert tips. Save money and take control of your home maintenance projects.
(Many of the links in this article redirect to a specific reviewed product. Your purchase of these products through affiliate links helps to generate commission for Storables.com, at no extra cost. Learn more)
Introduction
Welcome to the world of home repairs! While it may seem intimidating at first, tackling small repairs yourself can save you time and money. Plus, there’s a sense of accomplishment and satisfaction in fixing things around your house. Whether you’re a seasoned DIY enthusiast or just starting out, this article will guide you through various home maintenance tasks, providing you with the necessary knowledge and tips to successfully complete them.
Before you begin any repair work, it’s important to have the right tools and equipment on hand. This ensures that you’re prepared for any situation that may arise during the repair process. You don’t need to invest in expensive tools; a basic toolkit containing essentials such as a hammer, screwdrivers, pliers, wrenches, a tape measure, and a level will suffice for most home repairs.
Safety should always be a priority when it comes to home repairs. Familiarize yourself with basic safety practices and use protective gear, such as safety glasses and gloves, when necessary. Remember to turn off the power supply or shut off the water before working on electrical or plumbing repairs, respectively.
In this article, we’ll cover a range of common home repairs that you can easily tackle yourself. From fixing leaky faucets and repairing broken windows to patching holes in drywall and unclogging drains, we’ve got you covered. We’ll also walk you through repairing a running toilet, replacing electrical outlets, fixing a dripping showerhead, and dealing with squeaky doors. Additionally, we’ll address repairing or replacing damaged flooring, painting walls and ceilings, and even maintaining and cleaning gutters and downspouts.
By following the step-by-step instructions provided, you’ll be able to effectively address these issues and restore your home to its former glory. Not only will you save money on professional repair services, but you’ll also gain valuable skills and confidence in your ability to handle maintenance tasks around the house.
So, grab your tools and let’s dive into the world of DIY home repairs. Whether you’re a weekend warrior or a first-time fixer-upper, this article will empower you to take charge of your home’s maintenance and keep everything in tip-top shape.
Key Takeaways:
- Takeaway 1:
Regular maintenance and cleaning of gutters and downspouts are essential to protect your home from water damage. By following simple steps, you can ensure that your gutters and downspouts function properly and effectively divert rainwater away from your home. - Takeaway 2:
Embracing DIY home repairs not only empowers you to take control of your living space but also provides a sense of accomplishment and satisfaction. With each successful repair or maintenance task, you’ll become more confident in your abilities and more self-reliant in maintaining your home.
Read more: How To Do Spray Foam Insulation Yourself
Tools and Equipment Needed for Home Repairs
Having the right tools and equipment is essential for any home repair project. With a well-stocked toolkit, you’ll be ready to tackle a wide range of maintenance tasks. Here are some essential tools and equipment that every DIY homeowner should have:
- Hammer: A claw hammer is a versatile tool that can be used for various tasks, from driving nails to removing them.
- Screwdrivers: Having a set of both flathead and Phillips screwdrivers in different sizes will ensure you’re prepared for any type of screw.
- Pliers: Needle-nose pliers are great for gripping and bending wires, while adjustable pliers can handle a variety of tasks, such as holding, turning, and twisting objects.
- Wrenches: A set of adjustable wrenches in different sizes will help you tackle plumbing repairs, loosen or tighten nuts and bolts, and more.
- Tape Measure: Precise measurements are crucial for many home repairs. Invest in a sturdy tape measure with both metric and imperial measurements.
- Level: To ensure your repairs are straight and level, a bubble level is essential.
- Utility Knife: A sharp utility knife is useful for cutting various materials, such as carpet, drywall, and packaging.
- Stud Finder: If you’re hanging heavy items or mounting shelves, a stud finder will help you locate the wood studs in your walls for secure installation.
- Cordless Drill: This versatile tool allows you to drill holes, drive screws, and even mix paint with the appropriate attachments.
- Safety Gear: Always prioritize safety and wear appropriate gear, such as safety glasses, gloves, and a dust mask, depending on the task at hand.
In addition to these basic tools, it’s a good idea to have a collection of screws, nails, and other fasteners on hand. This way, you’ll be ready to replace any broken or missing pieces during repairs.
Beyond hand tools, some home repairs may require specific equipment. For example, electrical repairs might necessitate a multimeter to test circuits, while plumbing repairs may require a pipe wrench. It’s best to assess the needs of each individual repair project and acquire any additional tools or equipment accordingly.
By having a well-equipped toolkit, you’ll be prepared to tackle various home repairs with confidence. Remember to invest in quality tools that will stand the test of time, as they will be your trusted companions throughout your DIY journey.
Basic Home Repair Safety Tips
When undertaking home repairs, it’s crucial to prioritize safety to avoid accidents and injuries. Here are some basic safety tips to keep in mind:
- Protective Gear: Always wear appropriate protective gear, such as safety glasses, gloves, and a dust mask, when working with tools, chemicals, or materials that may cause harm.
- Turn off Power and Water: Before starting any electrical or plumbing repairs, switch off the power supply or shut off the water source to avoid electrical shocks or flooding.
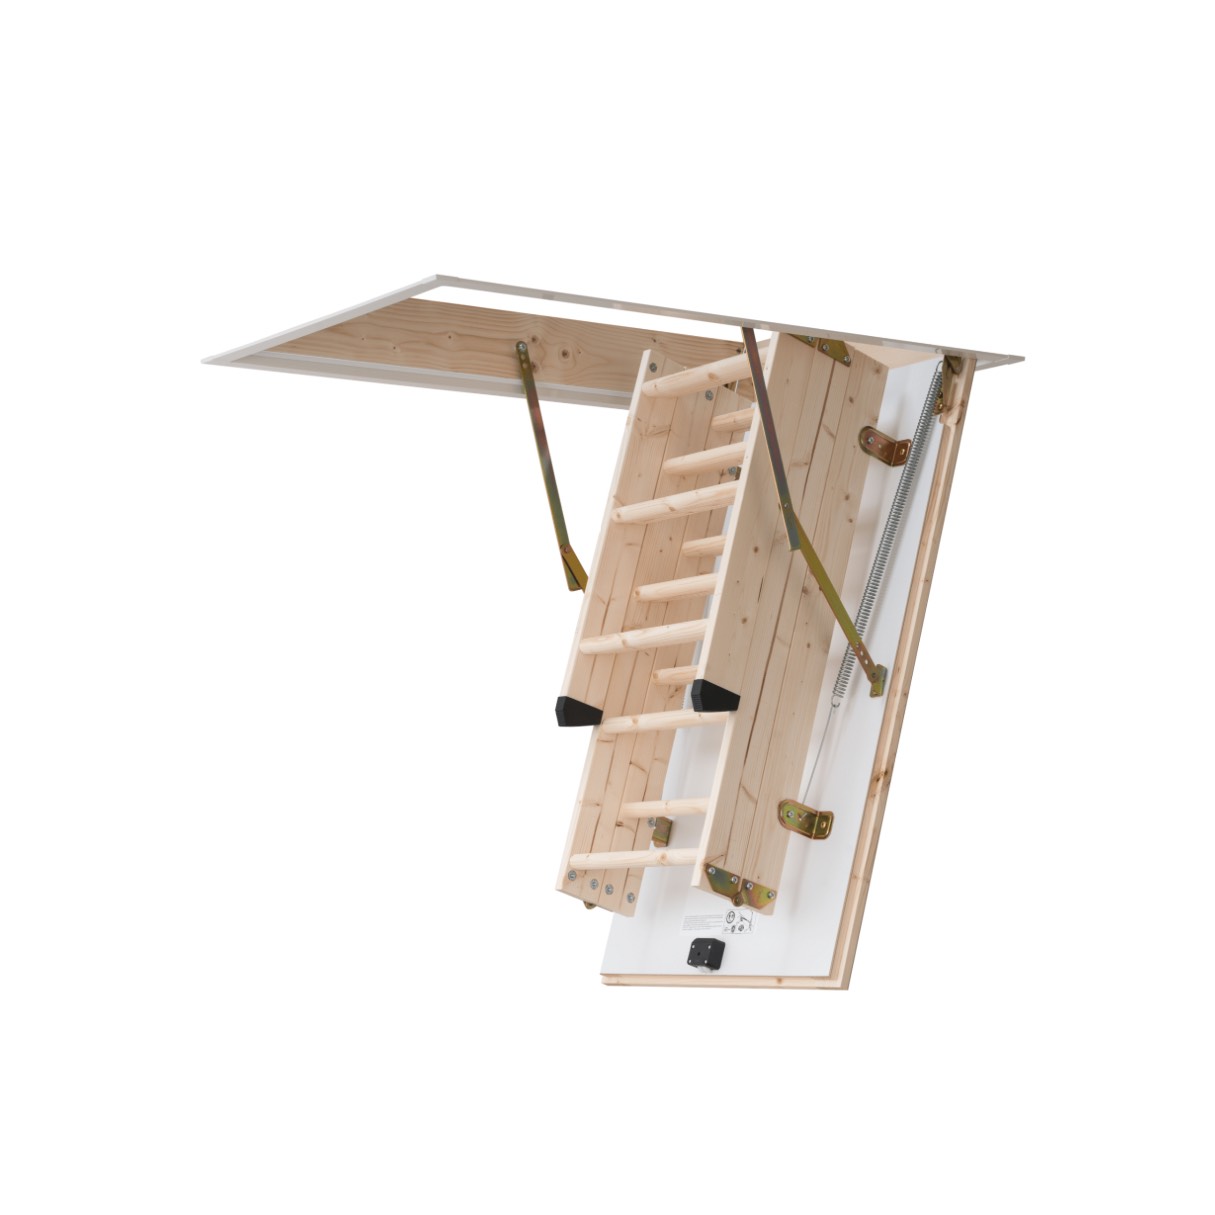
- Use Ladders Safely: When working at heights, ensure that your ladder is stable and secure. Place it on a level surface, lock the spreaders, and never stand on the top two rungs.
- Work in a Well-Ventilated Area: If you’re working with chemicals or paints that emit fumes, make sure to open windows or doors to maintain proper ventilation.
- Proper Tool Usage: Familiarize yourself with each tool’s proper usage and follow the manufacturer’s instructions. Misusing tools can lead to accidents and injuries.
- Take Breaks: Home repairs can be physically demanding. Take regular breaks to avoid fatigue, which can increase the risk of accidents.
- Keep Work Areas Clean and Organized: Cluttered work areas can be hazardous. Keep your tools and materials organized and clean up debris to prevent trips and falls.
- Use Sharp Blades: Dull blades can slip and cause accidents. Always use sharp blades in utility knives or saws and replace them when necessary.
- Don’t Rush: Take your time and work at a steady and deliberate pace. Rushing can lead to mistakes and accidents.
- Know Your Limits: If a repair project seems beyond your skill level or requires professional expertise, don’t hesitate to call a qualified contractor. Don’t attempt repairs that you are not confident in completing safely.
Remember, safety should always be your top priority. Don’t compromise your well-being for the sake of completing a repair quickly. Take the necessary precautions, be aware of potential hazards, and follow safety guidelines throughout the repair process.
By adhering to these safety tips, you’ll create a secure environment for yourself and anyone else involved in the project. With proper safety measures in place, you can confidently tackle home repairs while minimizing the risk of accidents or injuries.
Fixing Leaky Faucets
Leaky faucets are not only annoying but can also waste a significant amount of water over time. Fortunately, fixing a leaky faucet is a relatively easy home repair task that you can tackle on your own. Here’s how to do it:
- Gather the necessary tools: You’ll need an adjustable wrench, a screwdriver, and replacement parts such as a new O-ring or washer.
- Turn off the water supply: Locate the shut-off valve under the sink and turn it off to prevent water flow to the faucet.
- Remove the faucet handle: Use a screwdriver to remove the screws or decorative caps and then pull off the faucet handle. This will expose the cartridge or valve stem.
- Inspect the cartridge or valve stem: Examine the cartridge or valve stem for any damage or wear. If it looks worn-out or damaged, replace it with a new one.
- Replace the O-ring or washer: Locate the O-ring or washer inside the faucet body and carefully remove it using a small screwdriver. Replace it with a new one of the same size. This should help create a watertight seal and eliminate the leak.
- Reassemble the faucet: Put the faucet handle back in place, secure it with the screws or caps, and tighten them with a screwdriver. Make sure the handle moves smoothly without any resistance.
- Turn on the water supply: Turn the shut-off valve back on and test the faucet for any leaks. If there are no leaks, congratulations, you’ve successfully fixed the leaky faucet!
If the leak persists even after replacing the cartridge or valve stem and the O-ring or washer, you may need to consider replacing the entire faucet. In such cases, it’s best to consult a plumbing professional.
Fixing leaky faucets not only saves water but also helps you avoid costly water bills and potential water damage. By following these steps, you can easily resolve this common household issue and keep your faucets in excellent working condition.
Repairing or Replacing a Broken Window
Accidents happen, and a broken window can be a major inconvenience and a safety hazard. Whether your window is cracked, shattered, or has a damaged frame, repairing or replacing it is a crucial home repair task. Here’s a step-by-step guide to help you through the process:
- Assess the damage: Determine the extent of the damage to decide whether the window can be repaired or needs to be completely replaced. Small cracks or chips may be repairable, while larger or completely shattered windows will require replacement.
- Take measurements: Measure the dimensions of the broken window accurately. This will help when purchasing a replacement or ordering custom glass.
- Remove broken glass: Carefully remove any broken glass pieces from the window frame using gloves and protective eyewear. Be cautious to avoid injury.
- Repairing small cracks: For small cracks, you can use a clear epoxy or nail polish to fill in and seal the crack. Apply it evenly and allow it to dry thoroughly.
- Replace broken window panes: If the window pane is completely shattered or beyond repair, remove the broken pieces and replace them with a new glass pane. You can purchase glass from a home improvement store or have a professional glass company cut a custom piece for you.
- Repair damaged window frames: If the window frame is damaged, repair it before installing the new glass pane. Use wood filler or epoxy to fill in cracks or holes, and sand the surface to ensure a smooth finish. Alternatively, if the frame is severely damaged, you may need to replace it entirely.
- Install the new glass pane: Apply a thin layer of clear silicone caulk around the edges of the window frame. Carefully place the new glass pane into the frame and press it firmly to create a seal. Wipe away any excess caulk.
- Secure the glass pane: Depending on the type of window, use glazing points or clips to secure the glass pane in place. These will keep the glass securely in the frame and prevent it from shifting or falling out.
- Seal the window: Apply another layer of clear silicone caulk around the edges of the window frame to provide an additional seal and prevent drafts or water leakage.
- Paint or finish the window frame: If necessary, paint or finish the window frame to match the rest of your windows and enhance its appearance.
- Clean up: Dispose of any broken glass shards safely. Thoroughly clean the window frame and glass to remove any debris or residue from the repair process.
Remember, if you’re uncertain about repairing or replacing a broken window, it’s best to consult a professional for assistance. They can provide guidance and ensure the job is done correctly and safely.
By following these steps, you can restore the functionality and aesthetics of your windows, maintaining the comfort and security of your home.
Read more: Lawn Care: How To Do It Yourself
Patching Holes in Drywall
Small holes in drywall can occur for various reasons, such as accidentally bumping into a wall or removing wall fixtures. Fortunately, patching these holes is a straightforward process that you can easily handle on your own. Here’s a step-by-step guide to help you:
- Gather the necessary tools: You’ll need a utility knife, sandpaper, a putty knife, joint compound, a patching material (such as a drywall patch or mesh tape), and a primer and paint to match your wall.
- Clean the area: Before patching the hole, make sure the area is clean and free of any loose debris or paint chips. Use a damp cloth or sponge to gently wipe the surface and remove any dust.
- Prepare the hole: If the hole has any jagged edges or loose pieces of drywall, trim them with a utility knife to create a clean, even hole.
- Apply the patching material: For small holes, you can use a self-adhesive drywall patch. Simply peel off the backing and place it over the hole, pressing firmly to adhere it to the wall. For larger holes, use a piece of mesh tape. Apply a thin layer of joint compound over the hole, place the mesh tape over it, and gently press it into the compound.
- Apply joint compound: Use the putty knife to apply a layer of joint compound over the patching material, extending it slightly beyond the edges of the patch. Smooth it out evenly, making sure it is flush with the surrounding wall.
- Let it dry: Allow the joint compound to dry completely. This may take several hours or overnight, depending on the thickness of the compound and the humidity in the room. Consult the manufacturer’s instructions for more precise drying times.
- Sand the patch: Once the joint compound is dry, use sandpaper to gently sand the patched area until it is smooth and blends seamlessly with the rest of the wall. Be careful not to sand too aggressively, as you don’t want to damage the surrounding paint or drywall.
- Prime and paint: Apply a coat of primer to the patched area to ensure an even surface for painting. Once the primer is dry, paint the patched area to match the color of your wall. Feather the paint out slightly beyond the patch to blend it with the surrounding wall for a seamless finish.
With these steps, you can easily patch small holes in drywall and restore the appearance of your walls. Remember, for larger or more complex holes, it may be best to consult a professional to ensure a proper and long-lasting repair.
Patching holes in drywall is a valuable skill to have as a homeowner. By mastering this simple technique, you can maintain the beauty and integrity of your walls, keeping your home looking its best.
Unclogging Drains
A clogged drain is a common household problem that can disrupt daily routines and cause frustration. Luckily, unclogging a drain is a task you can tackle on your own with a few simple tools. Here’s a step-by-step guide to help you unclog drains effectively:
- Boiling water: Start by pouring boiling water down the drain. This can often help break up minor clogs, especially if the clog is caused by grease or soap residue.
- Using a plunger: If boiling water doesn’t work, use a plunger to create suction and dislodge the blockage. Ensure that the plunger completely covers the drain opening and plunge vigorously for a few minutes. Repeat the process if necessary.
- Using a drain snake or auger: If plunging doesn’t work, it’s time to use a drain snake or auger. Insert the snake into the drain and turn the handle clockwise, feeding the snake further down the pipe. Continue rotating and pushing the snake until you encounter resistance. Rotate the snake to break up the clog, and then pull it out. Run hot water down the drain to flush away any remaining debris.
- Using a baking soda and vinegar solution: For mild clogs, a mixture of baking soda and vinegar can be effective. Pour half a cup of baking soda down the drain, followed by half a cup of vinegar. Let it sit for 15-20 minutes, and then flush the drain with hot water.
- Using a chemical drain cleaner: As a last resort, you can use a commercial chemical drain cleaner. Follow the instructions on the product carefully, as these cleaners can be caustic and may require specific safety precautions. Ensure the area is well-ventilated and avoid contact with your skin or eyes.
If none of these methods work, or if you have a persistent and severe clog, it’s advisable to seek professional assistance from a plumber. They have the necessary tools and expertise to handle more complex drain clogs.
To prevent clogs in the future, be mindful of what you’re putting down the drain. Avoid dumping grease, coffee grounds, food scraps, or excessive amounts of hair. Use drain covers to catch larger debris, and periodically clean them out to prevent build-up.
By following these steps and being proactive in drain maintenance, you can effectively unclog drains and keep them running smoothly.
Fixing a Running Toilet
A running toilet can be not only an annoyance but also a source of wasted water and increased utility bills. Fortunately, fixing a running toilet is a relatively simple home repair task that you can tackle on your own. Here’s how to do it:
- Identify the problem: A running toilet is usually caused by a faulty flapper valve, a faulty fill valve, or an issue with the flush handle. Determining the specific cause will help you fix the problem more efficiently.
- Adjust the flapper valve chain: If the flapper valve is not sealing properly, it can result in a running toilet. Adjust the chain attached to the flapper valve, ensuring that it has enough slack to allow the flapper to close fully after flushing.
- Check the flapper valve for damage: If the flapper valve is worn or damaged, it won’t create a proper seal, resulting in a running toilet. Remove the flapper valve and inspect it for any cracks or wear. If necessary, replace it with a new one.
- Replace the fill valve: The fill valve is responsible for refilling the toilet tank after flushing. If it’s faulty, it can cause continuous water flow and a running toilet. Turn off the water supply to the toilet, drain the tank, and replace the fill valve with a new one according to the manufacturer’s instructions.
- Check the float mechanism: The float is a small device that regulates the water level in the tank. If it’s set too high, it can cause the toilet to run continuously. Adjust the float mechanism to ensure it sits at the proper level and doesn’t interfere with the fill valve’s operation.
- Inspect the flush handle: Sometimes, a running toilet can be caused by a malfunctioning flush handle that doesn’t return to its original position. Adjust or replace the flush handle if necessary.
- Test and adjust: Once you’ve made the necessary repairs, turn the water supply back on and let the tank refill. Flush the toilet a few times to ensure that the running has stopped. Make any additional adjustments if needed.
If you’ve tried these steps and the toilet still runs, or if you’re unsure about performing the repairs yourself, it’s best to seek the assistance of a professional plumber. They have the expertise to diagnose and fix complex toilet issues.
Fixing a running toilet not only saves water but also prevents wasted money on high utility bills. By following these steps, you can successfully resolve a running toilet and restore proper functionality to your bathroom.
When doing home repairs yourself, always start by thoroughly researching the project and gathering the necessary tools and materials. This will help you understand the process and ensure you have everything you need before getting started.
Replacing Electrical Outlets
Replacing electrical outlets is a common home repair task that can help enhance the safety and functionality of your home’s electrical system. Whether you’re updating outdated outlets or addressing faulty ones, you can easily replace electrical outlets on your own with the right tools and precautions. Here’s a step-by-step guide:
- Gather the necessary tools: You’ll need a screwdriver, wire cutters, a voltage tester, and a replacement outlet of the same size and type.
- Turn off the power: Before starting any electrical work, turn off the power supply to the outlet you’ll be replacing. Locate the correct circuit breaker in your electrical panel and switch it off.
- Test for power: Use a voltage tester to ensure that the power is truly off before proceeding. Test the outlet and adjacent outlets to confirm that there is no electricity flowing to them.
- Remove the old outlet: Unscrew the faceplate and carefully remove it. Next, unscrew the outlet from the electrical box. Gently pull the outlet out, being cautious not to pull on the wires.
- Disconnect the wiring: Take note of how the wires are connected to the existing outlet. Usually, there will be three wires: black (hot), white (neutral), and green or bare (ground). Disconnect the wires by loosening the terminal screws or using a small screwdriver to release them. Remove the old outlet completely.
- Prepare the new outlet: Take the new outlet and prepare the wires for connection. Strip about 3/4 inch of insulation from the ends of each wire using wire cutters.
- Connect the new outlet: Attach the wires to the corresponding terminals on the new outlet. Typically, the black wire connects to the brass or gold terminal, the white wire connects to the silver terminal, and the green or bare wire connects to the green terminal or grounding screw. Make sure the connections are tight and secure.
- Mount the new outlet: Carefully push the wires back into the electrical box, making sure not to pinch or damage them. Align the new outlet with the screw holes in the box and screw it in place. Then, attach the faceplate.
- Restore power and test: Turn the power back on at the circuit breaker. Test the new outlet with a voltage tester to ensure that it’s working properly.
It’s important to note that if you’re not comfortable working with electrical systems or if you encounter any unusual issues during the process, it’s best to consult a licensed electrician for assistance.
By following these steps and taking necessary safety precautions, you can replace electrical outlets and maintain a safe and functional electrical system in your home.
Read more: How Do You Move A Hot Tub By Yourself
Repairing a Dripping Showerhead
A dripping showerhead can be both annoying and wasteful, as it leads to water wastage and potential damage to your bathroom fixtures. Fortunately, repairing a dripping showerhead is a relatively simple home maintenance task that you can easily handle on your own. Here’s a step-by-step guide to help you fix a dripping showerhead:
- Turn off the water supply: Before starting any repair work, locate the shut-off valve for your shower and turn off the water supply. This will prevent water from flowing while you work on the showerhead.
- Take apart the showerhead: Carefully unscrew the showerhead from the shower arm using a wrench or pliers. Wrap a towel or cloth around the showerhead to protect the finish from scratches.
- Inspect the washer and O-ring: The most common cause of a dripping showerhead is a worn-out washer or O-ring. Take a close look at these components and check for any signs of damage, wear, or mineral buildup. If necessary, take note of their sizes to ensure you purchase the correct replacement parts.
- Replace the washer and O-ring: If the washer or O-ring is damaged, remove the old ones and replace them with new ones of the same size. You can find replacement parts at your local hardware store or home improvement center. Make sure to lubricate the new O-ring with plumber’s grease before installing it.
- Reassemble the showerhead: Carefully reattach the showerhead to the shower arm and use the wrench or pliers to tighten it securely. Be careful not to overtighten, as it can cause damage to the showerhead or shower arm.
- Turn on the water supply: With the showerhead securely attached, turn on the water supply and check for any leaks. If the dripping has stopped, congratulations! You’ve successfully repaired your dripping showerhead.
If the above steps do not resolve the issue or if you encounter any difficulties during the process, it may be best to consult a professional plumber for assistance. They can help diagnose the problem and offer a solution tailored to your specific showerhead.
Remember, regular maintenance and cleaning of your showerhead can help prevent future drips. Consider soaking the showerhead in a vinegar and water solution to remove mineral deposits and improve water flow.
By following these steps, you can quickly and easily repair a dripping showerhead, saving water and restoring functionality to your bathroom.
Fixing Squeaky Doors
Squeaky doors can be an annoying disturbance in your home, but luckily, fixing them is a relatively simple task that you can tackle on your own. Here’s a step-by-step guide to help you silence those squeaky doors:
- Identify the source of the squeak: Squeaks can be caused by a variety of factors, including loose hinges, dry hinges, or rubbing between the door and the frame. Examine the door to determine the source of the noise.
- Tighten loose hinges: If the squeak is coming from loose hinges, use a screwdriver to tighten the screws. First, try tightening the existing screws. If that doesn’t help, remove one screw at a time, coat it with a bit of wood glue, and then reinsert and tighten it. Repeat this process for each screw.
- Lubricate the hinges: If the hinges are dry, apply lubricant to them. You can use a silicone-based lubricant, WD-40, or another type of lubricating oil. Carefully apply the lubricant to the top and bottom of each hinge, allowing it to penetrate into the hinge mechanism.
- Remove rust or debris: If there is visible rust or debris on the hinges, clean it off with a wire brush or abrasive sponge. Ensure that the hinges are completely clean before lubricating them.
- Check the door alignment: If the door is rubbing against the frame, causing the squeak, you may need to adjust the door alignment. Use a level to check if the door is plumb and adjust the hinges or strike plates if necessary. You can add shims behind the hinges or adjust the strike plate to provide a proper fit and eliminate the rubbing.
- Apply powdered graphite: If the hinges are still squeaking after lubrication, you can try using powdered graphite. Dust some powdered graphite onto the hinge pins and work them in by opening and closing the door several times. This can help provide long-lasting lubrication and silence the squeak.
If the squeaking persists after attempting these steps, it may be best to consult a professional for further assistance. They can help identify any underlying issues that may require more extensive repairs.
Remember, regular maintenance and lubrication can prolong the lifespan of your door hinges and prevent future squeaks. Make it a habit to inspect and treat your hinges periodically to keep your doors in smooth and silent operation.
By following these steps and addressing the cause of the squeak, you can easily fix squeaky doors and restore peace and quiet to your home.
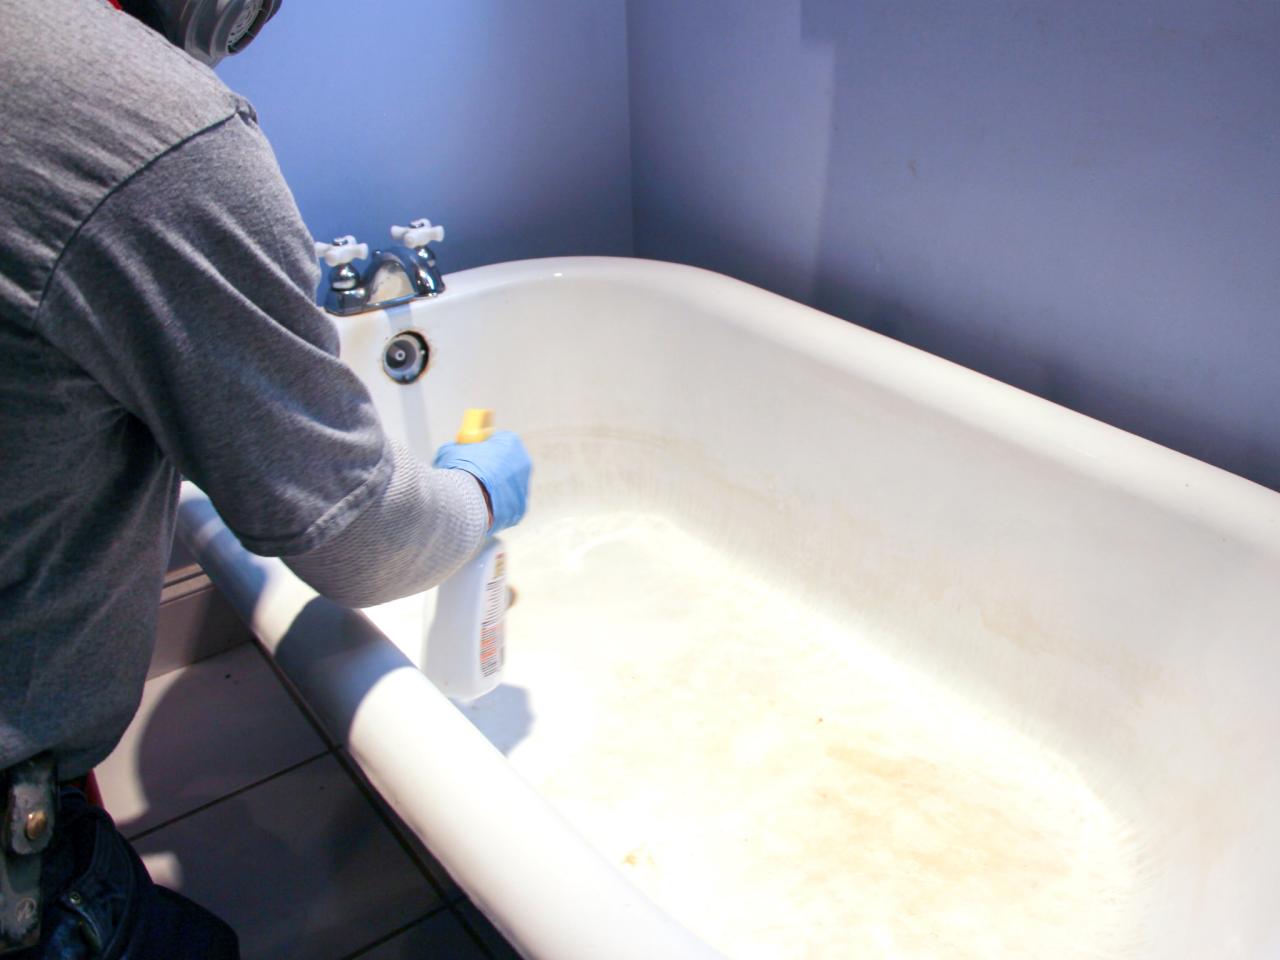
Repairing or Replacing Damaged Flooring
Over time, flooring can become damaged due to wear and tear, accidents, or other factors. Whether you’re dealing with scratches, dents, stains, or more extensive damage, repairing or replacing damaged flooring is essential to maintain the aesthetic appeal and functionality of your space. Here’s a step-by-step guide to guide you through the process:
- Assess the extent of the damage: Evaluate the damage to determine if it can be repaired or if replacement is necessary. Minor scratches, stains, or small areas of damage can often be repaired, while larger areas or heavily damaged flooring may require complete replacement.
- Repair minor scratches or stains: For minor scratches, use a touch-up kit or wood filler in a matching color to fill in the scratches. Sand the area gently, following the wood grain, and finish with a protective sealant or wax. For stains, try using a stain remover or a light sanding to buff out the stain. Remember to clean and dry the area thoroughly before applying any repairs.
- Replace damaged tiles or planks: If you have tile or laminate flooring with individual damaged pieces, carefully remove the affected piece using a putty knife or chisel. Purchase a replacement tile or plank that matches your existing flooring and install it according to the manufacturer’s instructions. It’s important to ensure a proper fit and tight seams to maintain a seamless look.
- Repair or replace damaged hardwood flooring: For hardwood flooring, repairing or replacing damaged areas requires more effort. For minor scratches or dents, sand the area lightly and apply a matching stain or touch-up kit. If the damage is more severe, such as deep scratches or water damage, you may need to replace the affected boards. Remove the damaged boards carefully, install new ones, and refinish the entire floor, if necessary, to ensure a consistent appearance.
- Repair or replace damaged carpet: If your carpet has stains, burns, or tears, you can attempt to repair it by cutting out the damaged section and replacing it with a patch from an inconspicuous area of your carpet or a remnant piece. For larger damaged areas, it’s best to consult a professional carpet installer to assess the extent of the damage and provide the appropriate repair or replacement options.
- Consider professional help: If you’re unsure about the repairs or if the damage is extensive, it’s advisable to seek professional assistance. Flooring professionals have the knowledge, expertise, and tools to handle a wide range of flooring repairs and replacements effectively.
When repairing or replacing damaged flooring, it’s important to ensure that the new materials closely match the existing flooring in terms of color, style, and quality. This will help maintain a cohesive look throughout your space.
By following these steps and taking the necessary care and attention to detail, you can effectively repair or replace damaged flooring and restore the beauty and functionality of your floors.
Painting Walls and Ceilings
Painting walls and ceilings is a fantastic way to refresh the look and feel of any room in your home. Whether you’re looking to change the color, cover up imperfections, or simply update the style, painting is a cost-effective and relatively easy home improvement project. Here’s a step-by-step guide to help you paint your walls and ceilings:
- Prepare the room: Clear the room of furniture, cover the floors and any remaining items with drop cloths or plastic sheets to protect them from paint splatter.
- Clean the surfaces: Remove any dust, dirt, or grease from the walls and ceilings by gently washing them with a mild detergent and water. Rinse them thoroughly and allow them to dry completely before painting.
- Repair imperfections: Fill in any cracks, holes, or blemishes on the walls and ceilings with spackling compound or a suitable filler. Once dry, sand the repaired areas until they are smooth and blend with the surrounding surface.
- Apply primer: Applying a coat of primer is essential, especially if you’re changing the color significantly or if the walls and ceilings have never been painted before. Use a high-quality primer that is suitable for your surface and apply it evenly with a roller or brush. Allow the primer to dry fully according to the manufacturer’s instructions.
- Cut in the edges: Use a high-quality angled brush to cut in along the edges where the walls meet the ceiling, corners, and around trim and baseboards. This will create a clean and precise line and make it easier to paint the larger areas with a roller.
- Paint the walls: Start by using a roller with a medium nap to paint the larger areas of the walls. Begin in a corner and work your way across, applying the paint in a “W” or “M” shape for even coverage. Use long, even strokes and be mindful of any drips. Allow the first coat to dry completely before applying a second coat, if necessary.
- Paint the ceilings: When painting the ceiling, use a roller with an extended handle and work in small sections at a time. Start at one corner and roll the paint in one direction, overlapping each stroke slightly. Be mindful of any drips and apply a second coat if needed.
- Clean up: Once you’ve finished painting the walls and ceilings, carefully remove the tape from the edges while the paint is still slightly damp. Clean your brushes and rollers promptly with soap and water or according to the manufacturer’s instructions.
Remember to choose high-quality paint that is suitable for your walls and ceilings. Consider the finish you desire, whether it’s matte, satin, or gloss, and select the appropriate paint for the desired effect.
By following these steps and taking your time, you can achieve beautiful, professional-looking results when painting your walls and ceilings. Enjoy the transformative power of paint as you create a fresh and inviting space!
Read more: 17 Do-It-Yourself Outdoor Project Ideas
Repairing or Replacing a Damaged Fence
A damaged fence not only affects the appearance of your property but also compromises its security and privacy. Repairing or replacing a damaged fence is an important home maintenance task that can restore its functionality and enhance the curb appeal of your home. Here’s a step-by-step guide to help you tackle this project:
- Assess the damage: Evaluate the extent of the damage to determine whether it can be repaired or if a complete replacement is necessary. Consider factors such as the age of the fence, the type of damage, and the overall condition of the materials.
- Repairing minor damage: If the damage is minor, such as a loose post, a broken picket, or a small hole, you can often repair it without replacing the entire fence. Secure loose posts by adding extra support, such as braces or concrete footings. Replace broken pickets or panels, and patch small holes with wood putty or filler. Sand and paint the repaired areas to match the existing fence.
- Replacing sections: If the damage is more extensive but still localized to specific sections of the fence, it may be more cost-effective to replace those sections rather than the entire fence. Remove the damaged sections carefully and replace them with new materials that match the style and design of the existing fence. Secure the new sections in place using nails, screws, or appropriate fasteners.
- Inspect and reinforce: While repairing or replacing damaged sections, thoroughly inspect the entire fence for any areas of weakness or potential future damage. Reinforce weak spots, tighten loose connections, and replace any deteriorated or rotting wood. This will help extend the lifespan of the fence and prevent further issues down the line.
- Complete fence replacement: In cases where the damage is extensive, the fence is old and deteriorated, or repairing is not a viable option, a complete fence replacement may be necessary. Remove the existing fence entirely, including posts, panels, and foundations. Install new fence posts at appropriate intervals, ensuring they are set securely in the ground. Attach new fence panels or boards, using nails, screws, or appropriate fasteners. Apply a protective finish or paint to the new fence to enhance its durability and appearance.
Before you begin any repair or replacement work, it’s essential to check with your local building codes and any homeowners’ association guidelines to ensure compliance and obtain any necessary permits.
Also, consider factors such as weather resistance, durability, and maintenance requirements when selecting materials for your fence repair or replacement. Whether you choose wood, vinyl, metal, or another material, make sure it suits your needs and preferences.
By following these steps and investing time and effort, you can repair or replace a damaged fence, improving the security, beauty, and value of your property.
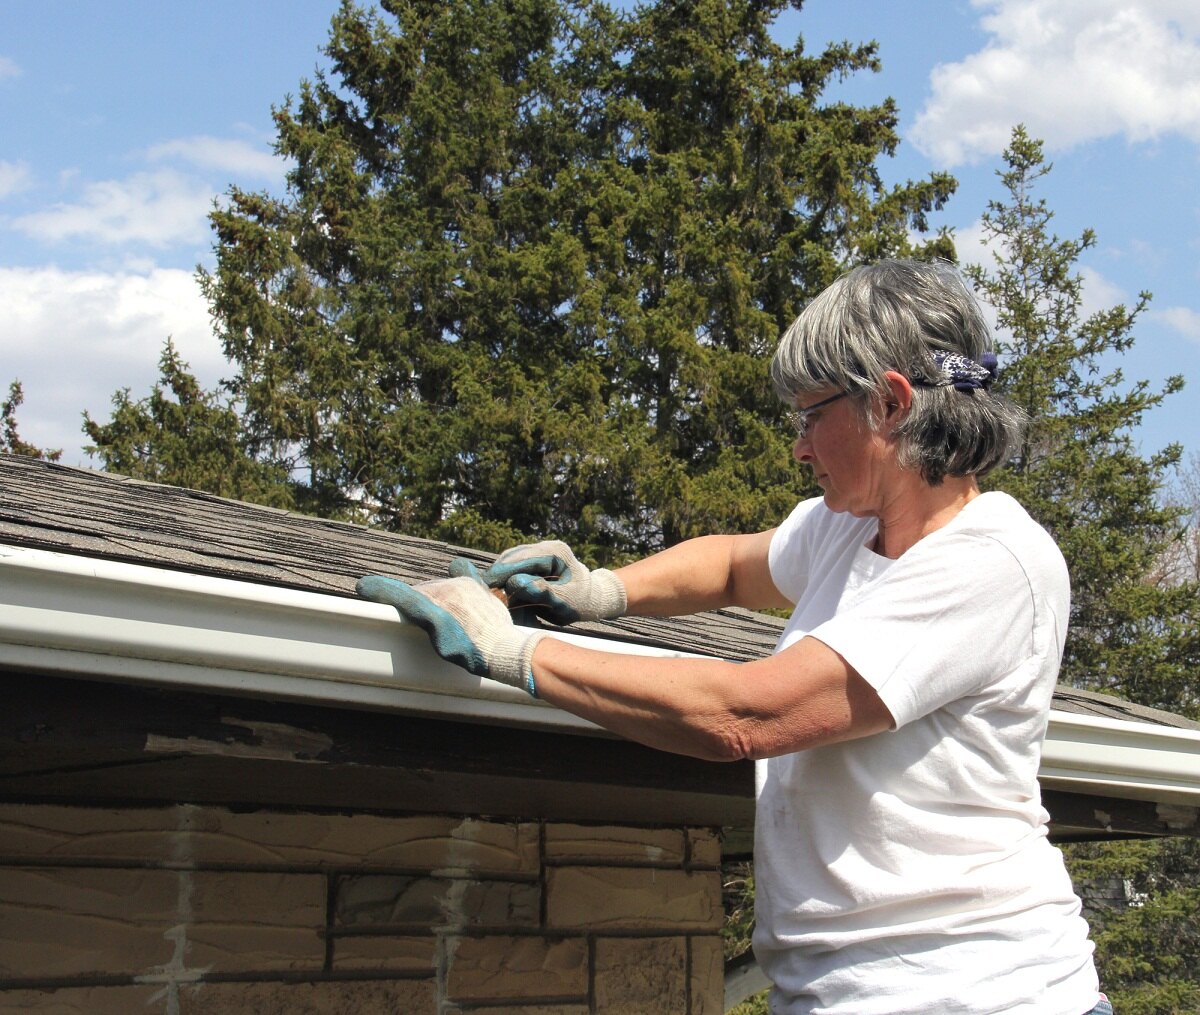
Maintaining and Cleaning Gutters and Downspouts
Gutters and downspouts play a crucial role in protecting your home from water damage by directing rainwater away from the foundation. However, they can become clogged with debris, leading to water overflow and potential damage to your property. Regular maintenance and cleaning of gutters and downspouts are essential to ensure their proper functioning. Here’s a step-by-step guide to help you maintain and clean your gutters and downspouts:
- Check gutters and downspouts regularly: Inspect your gutters and downspouts at least twice a year, ideally in the spring and fall, to identify any signs of damage or clogging. Look for sagging gutters, loose or missing fasteners, and any debris or plant growth.
- Safety first: When working on your gutters and downspouts, always prioritize safety. Use a sturdy ladder with someone to spot you, wear gloves and protective eyewear, and be cautious of power lines or other hazards around your home.
- Remove debris: Start by removing any debris, such as leaves, twigs, and dirt, from the gutters. You can use a small garden trowel or a handheld scoop to gather the debris and deposit it into a bucket or tarp.
- Flush gutters with water: Once the debris is removed, use a garden hose to flush the gutters and downspouts thoroughly. Check for any clogs or slow water flow and clear them using a plumber’s snake or a high-pressure nozzle attachment for your hose.
- Check for leaks and damage: Inspect the gutters and downspouts for any leaks, cracks, or other signs of damage. Ensure that all seams are tightly connected and sealed. Repair any damaged areas with gutter sealant or replace the damaged sections.
- Trim tree branches: Trim any overhanging tree branches or foliage near your gutters to minimize the amount of debris that can fall into the gutters and cause clogs.
- Ensure proper downspout placement: Make sure the downspouts are securely connected and directed away from the foundation of your home. Extend the downspouts to divert water at least 3-4 feet away from the foundation to prevent water damage.
- Consider gutter guards: To reduce the frequency of gutter cleaning, you may want to consider installing gutter guards. These devices help to prevent debris from entering the gutters while allowing water to flow freely. However, regular maintenance and occasional cleaning may still be necessary.
Regular maintenance and cleaning of gutters and downspouts are essential to protect your home from water damage. Neglecting this maintenance can lead to costly repairs and potential foundation problems. By following these steps and performing regular inspections and cleaning, you can ensure that your gutters and downspouts function properly and effectively divert rainwater away from your home.
Conclusion
Congratulations! You have now been equipped with valuable knowledge and insights into various home repair and maintenance tasks. From fixing leaky faucets and repairing broken windows to patching holes in drywall and maintaining gutters and downspouts, you have learned essential skills to tackle common problems around the house.
Remember, safety should always be a priority when performing any repairs. Take necessary precautions, use protective gear, and consult professionals when needed. It’s also important to invest in quality tools and materials to ensure long-lasting results.
By taking a proactive approach to home maintenance, you can save time and money in the long run. Regularly inspecting and addressing minor issues can help prevent larger problems from occurring and extend the lifespan of various components in your home.
Furthermore, embracing DIY home repairs not only empowers you to take control of your living space but also provides a sense of accomplishment and satisfaction. With each successful repair or maintenance task, you’ll become more confident in your abilities and more self-reliant in maintaining your home.
Remember, it’s important to strike a balance between tackling repairs yourself and seeking professional help when necessary. Certain tasks may require specific expertise or equipment, and it’s important to know your limits and prioritize safety.
Now, armed with your newfound knowledge, you can confidently address home repair and maintenance tasks. You have the power to keep your home in excellent condition and preserve its value, functionality, and aesthetic appeal.
So, don your safety gear, gather your tools, and embark on your home maintenance journey. From fixing dripping faucets and squeaky doors to replacing damaged flooring and maintaining gutters, you’re now ready to keep your home in tip-top shape and enjoy the satisfaction of a well-maintained living space.
Frequently Asked Questions about How To Do Home Repairs Yourself
Was this page helpful?
At Storables.com, we guarantee accurate and reliable information. Our content, validated by Expert Board Contributors, is crafted following stringent Editorial Policies. We're committed to providing you with well-researched, expert-backed insights for all your informational needs.


0 thoughts on “How To Do Home Repairs Yourself”