Articles
How To Patch Large And Small Holes In Drywall
Modified: October 20, 2024
Learn how to patch holes of any size in drywall with our comprehensive articles. From small cracks to large punctures, we provide expert tips and techniques for flawless repairs.
(Many of the links in this article redirect to a specific reviewed product. Your purchase of these products through affiliate links helps to generate commission for Storables.com, at no extra cost. Learn more)
Introduction
Drywall is a commonly used material in modern construction, but it’s not impervious to damage. Whether it’s a small nail hole or a larger hole caused by accident or renovation work, patching holes in drywall is a necessary skill for any homeowner or DIY enthusiast.
In this article, we will provide you with step-by-step instructions on how to patch both small and large holes in drywall. We will also share important tips and considerations to ensure a seamless and professional-looking repair.
Before we dive into the specifics of patching holes in drywall, let’s take a look at the tools and materials you’ll need for the job.
Key Takeaways:
- Master the art of patching drywall, from small nail holes to larger damage, with the right tools, techniques, and attention to detail. Achieve seamless repairs and restore the beauty of your walls.
- Prepare, patch, and perfect your drywall repairs with patience, precision, and the right materials. Follow step-by-step instructions for small and large holes, and finish with priming and painting for a flawless result.
Read more: How To Patch Large Hole In Wood Siding
Tools and Materials Needed
To successfully patch holes in drywall, you will need the following tools and materials:
- Utility knife or drywall saw
- Sanding sponge or sandpaper
- Patching compound or spackling paste
- Putty knife or taping knife
- Self-adhesive mesh patch or fiberglass mesh tape (for larger holes)
- Primer
- Paint
- Paintbrush or roller
- Spackle or joint compound (for minor touch-ups)
- Drywall screws (for larger holes)
- Measuring tape
- Pencil
- Dust mask
- Drop cloth or plastic sheeting
- Painter’s tape
- Sponge or damp cloth
- Masking tape
Having these tools and materials on hand will ensure that you have everything you need when it’s time to patch those unsightly holes in your drywall.
Preparing the Area
Before you begin patching the holes in your drywall, it’s crucial to properly prepare the area to ensure a clean and smooth repair.
Here are the steps to follow:
- Clear the area: Remove any furniture, decorations, or obstructions from the vicinity of the damaged wall. This will provide you with ample space to work and prevent any accidental damage or mess.
- Cover the floor: Lay down a drop cloth or plastic sheeting to protect your floor from dust, debris, and paint splatters. Secure it with masking tape to prevent it from moving or shifting during the repair process.
- Protect adjacent surfaces: Use painter’s tape to cover any trim, baseboards, or adjacent walls that you want to keep free of patching compound or paint. This will create clean lines and prevent any accidental smudges or marks.
- Put on safety gear: Although patching small holes in drywall is generally a safe task, it’s always a good idea to wear a dust mask to prevent the inhalation of dust particles. Additionally, consider wearing safety glasses to protect your eyes from any flying debris.
- Prepare the damaged area: Use a utility knife or drywall saw to gently remove any loose edges or debris around the hole. Sand the edges with a sanding sponge or sandpaper to create a smooth surface for the patch to adhere to.
By taking the time to properly prepare the area, you are setting yourself up for a successful and professional-quality repair job.
Patching Small Holes in Drywall
Small holes in drywall, such as nail holes or picture hanging holes, can be easily patched with spackling paste or patching compound. Follow these steps to patch small holes:
- Clean the hole: Use a damp cloth or sponge to clean the hole and its surrounding area. Make sure to remove any dust or debris.
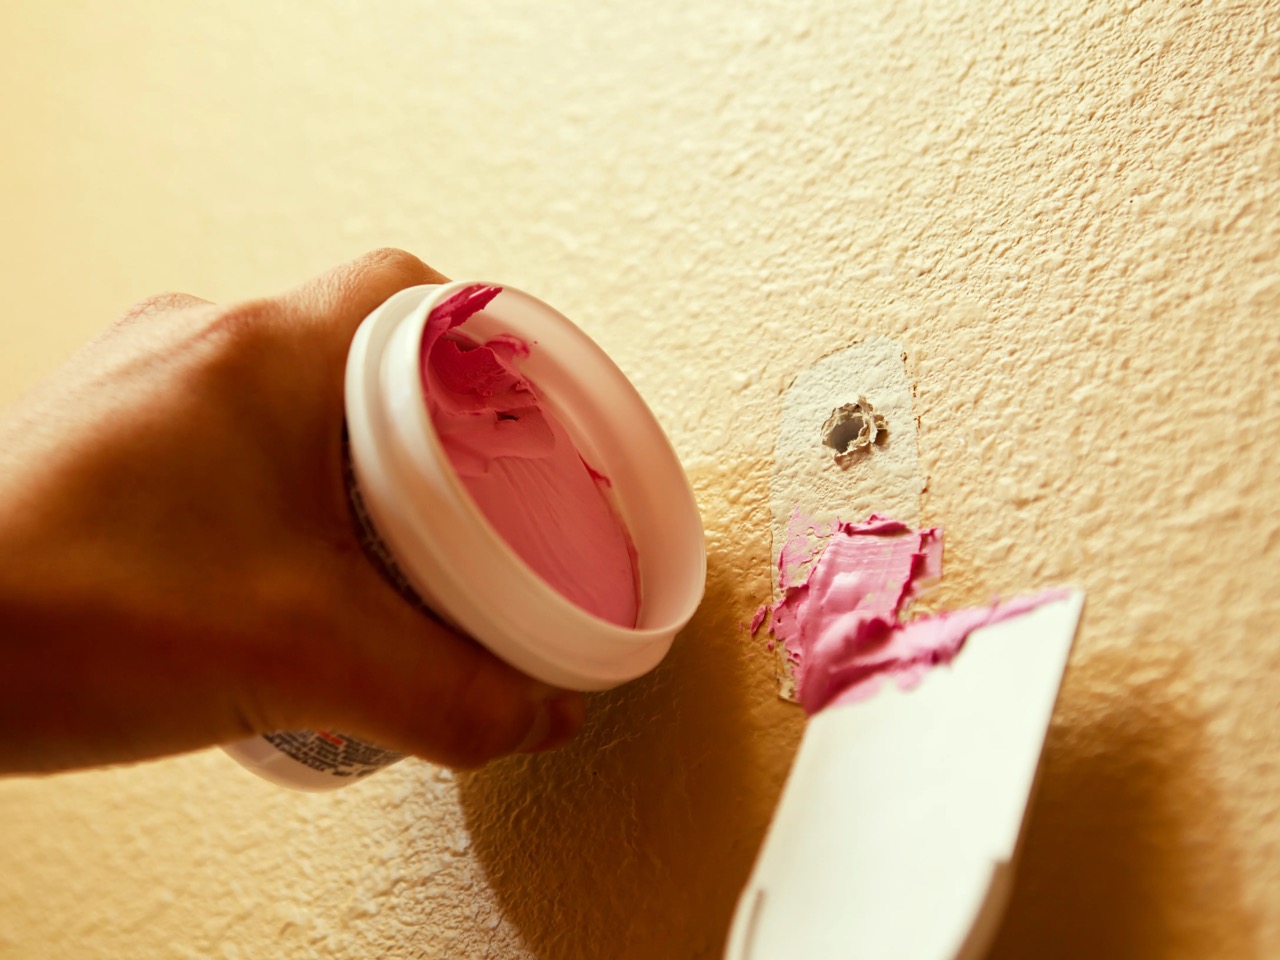
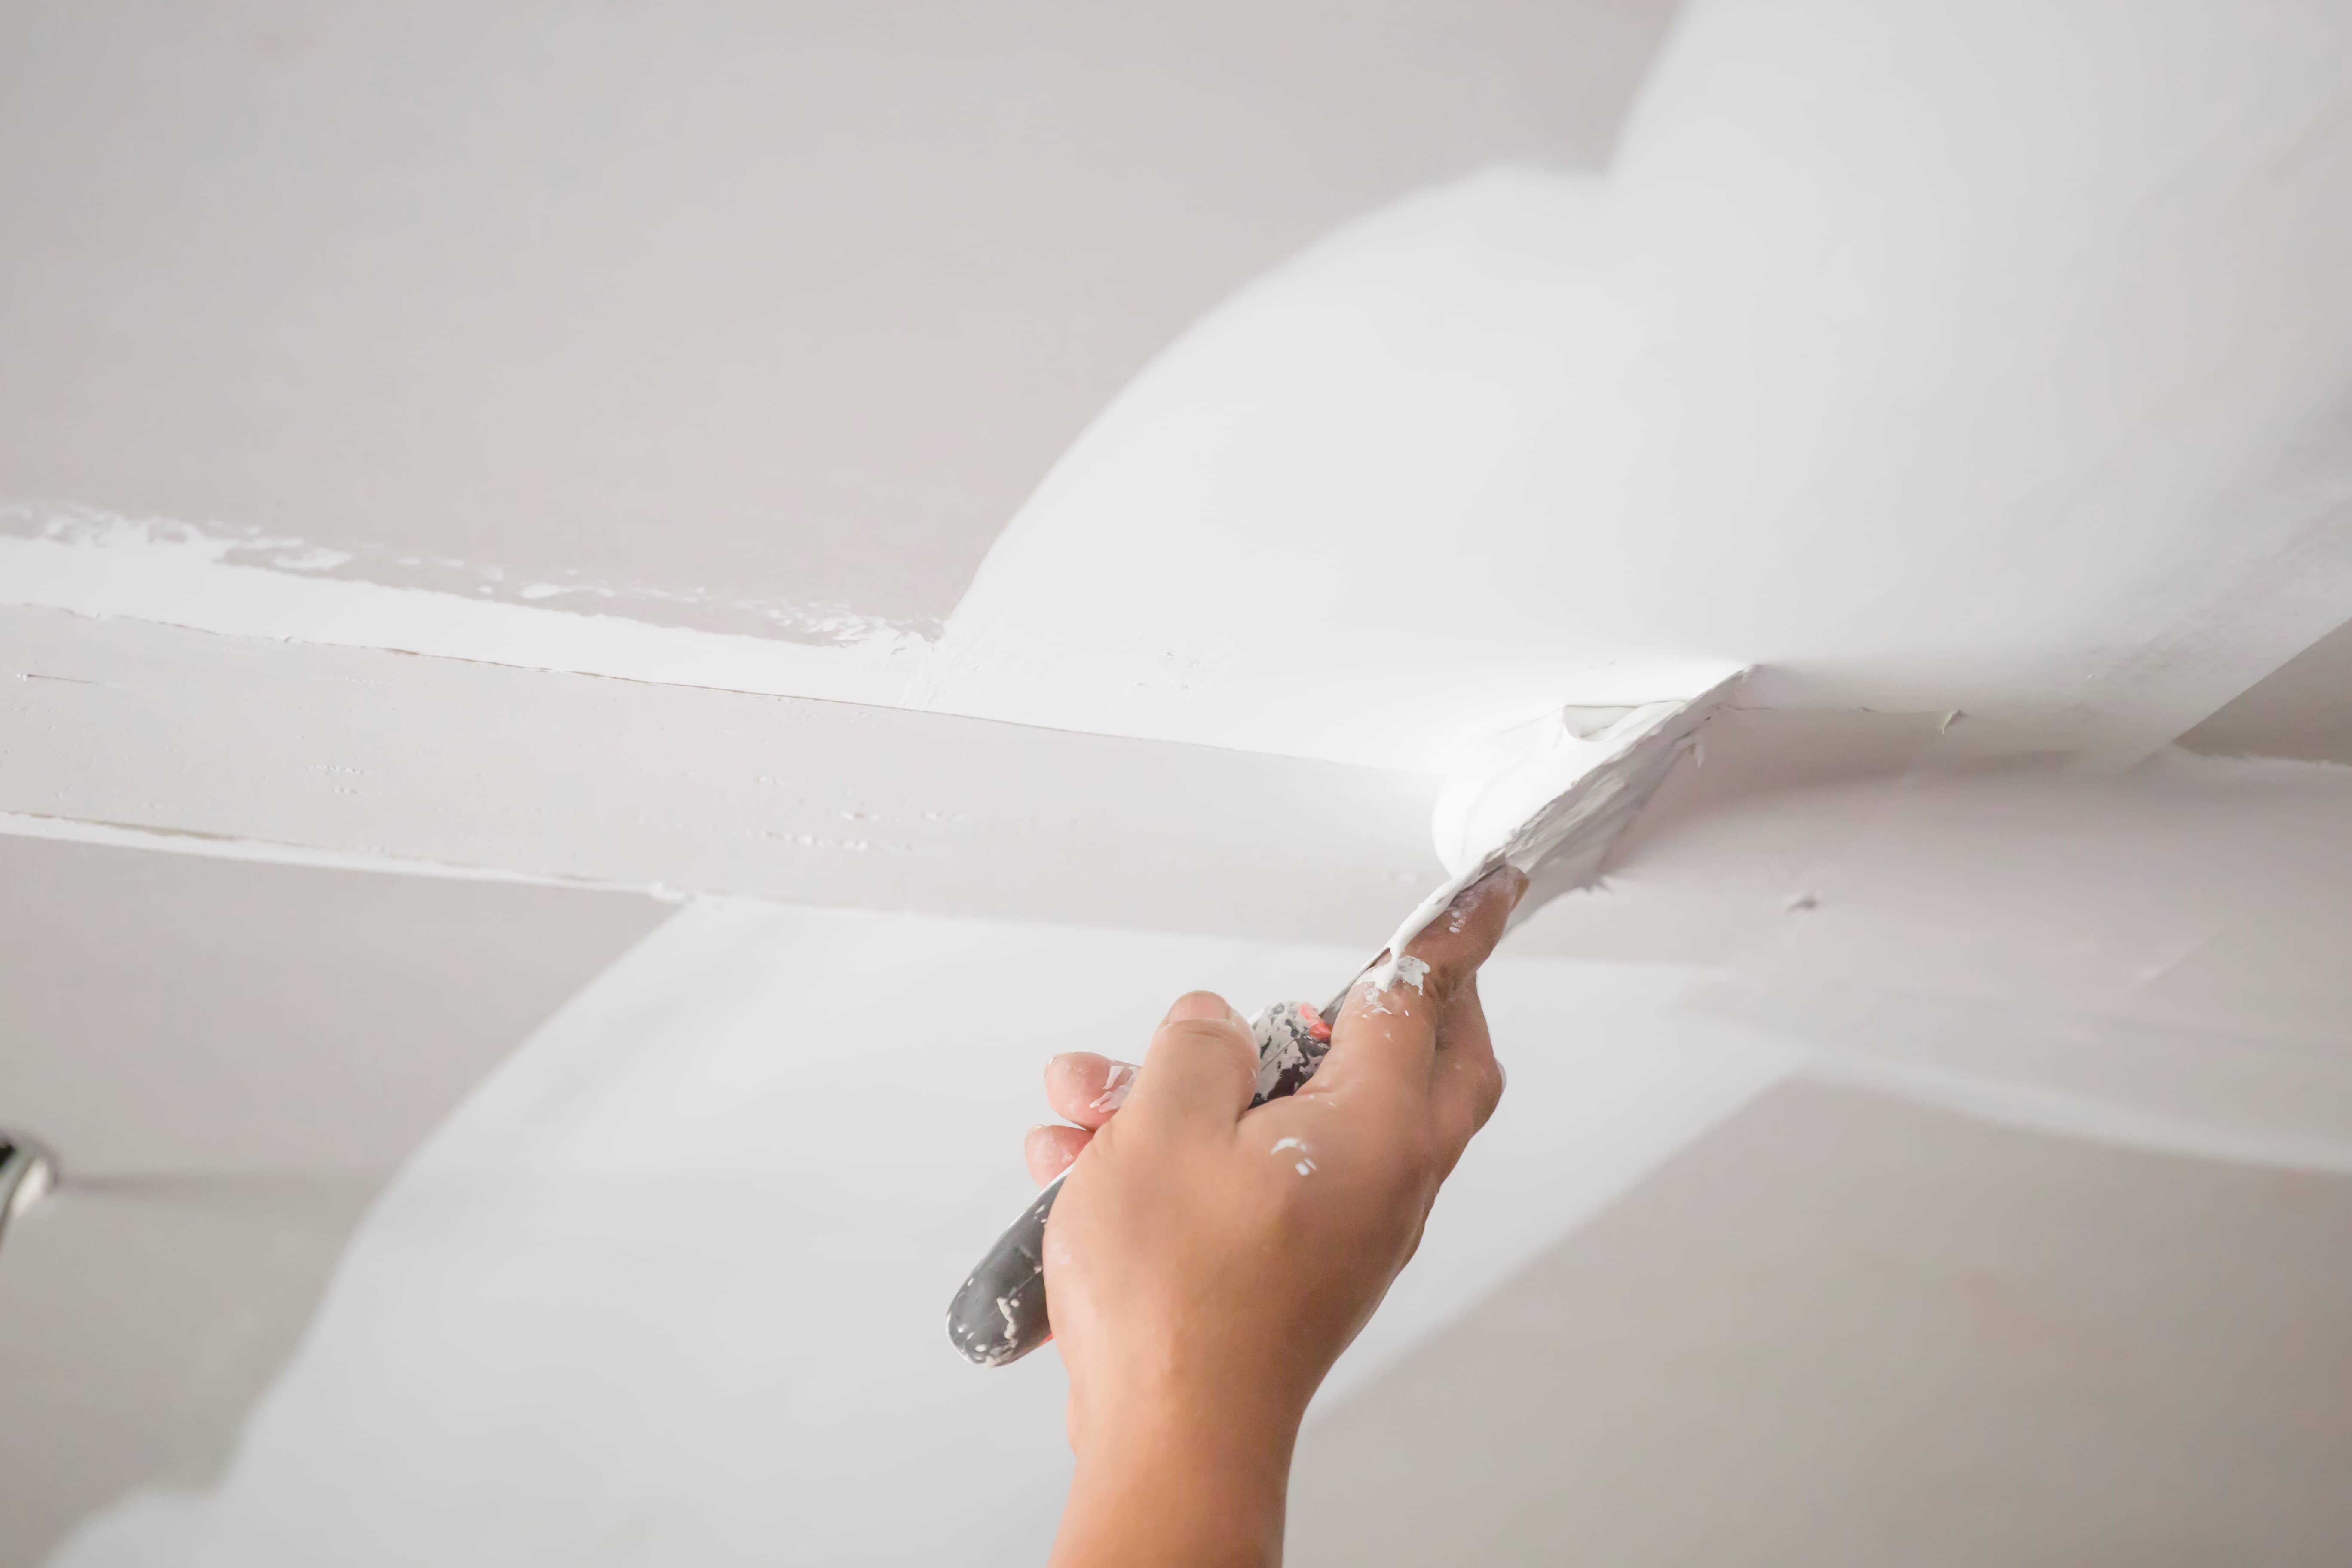
- Apply the patching compound: Using a putty knife or taping knife, apply a small amount of patching compound or spackling paste to the hole. Smooth it out evenly and level with the wall surface.
- Let it dry: Allow the patching compound to dry completely. The drying time may vary depending on the product, so refer to the manufacturer’s instructions for guidance.
- Sand the surface: Once the compound is fully dry, sand the patched area using a sanding sponge or sandpaper. Sand in a circular motion, blending the patch with the surrounding wall until it is smooth and seamless.
- Wipe off dust: Use a damp cloth or sponge to wipe away any resulting dust from the sanding process. This will ensure a clean surface for priming and painting.
After completing these steps, you can proceed with priming and painting the patched area to match the rest of the wall.
Patching Large Holes in Drywall
Patching larger holes in drywall requires a slightly different approach. Follow these steps to successfully patch larger holes:
- Clean and prep the hole: Remove any loose debris or edges around the hole. Use a utility knife to trim any frayed or uneven edges to create a clean and smooth surface for the patch.
- Create a patch: Cut a self-adhesive mesh patch or fiberglass mesh tape slightly larger than the hole. The patch should overlap the hole by at least an inch on all sides.
- Apply the patch: Position the patch over the hole, pressing it firmly to stick to the drywall. Smooth out any wrinkles or bubbles to ensure a flat surface.
- Fill the hole: Using a putty knife, apply a layer of patching compound or spackling paste over the mesh patch. Extend the compound beyond the edges of the patch to feather the edges and create a smooth transition with the wall.
- Reinforce the patch: For added stability, insert a few drywall screws into the patch around the edges. Sink the screws slightly below the surface of the patch.
- Allow it to dry: Give the patching compound ample time to dry and harden. This may take several hours or overnight, depending on the product and humidity levels in your area.
- Sand and smooth: Once the compound is completely dry, use a sanding sponge or sandpaper to smooth the patched area. Blend the edges of the patch with the surrounding wall, ensuring a seamless finish.
- Remove dust: Wipe away any dust created from sanding using a damp cloth or sponge. Allow the area to dry before proceeding.
After completing these steps, you are ready to prime and paint the patched area to restore the wall’s appearance.
For small holes in drywall, use spackling or joint compound to fill the hole, then sand it smooth. For larger holes, use a drywall patch kit or cut a piece of drywall to fit the hole, secure it in place, and then apply joint compound to finish.
Read more: How To Patch Holes In Driveway
Sanding and Smoothing the Patched Area
After patching the holes in your drywall, it’s important to sand and smooth the patched area to create a seamless finish. Follow these steps to achieve a professional-looking result:
- Prepare the sanding tools: Grab a sanding sponge or sandpaper with a fine grit, typically around 120 to 220. This will help you achieve a smooth surface without damaging the surrounding wall.
- Sand the patched area: Gently sand the patched area in a circular motion, applying even pressure. Start from the outer edges of the patch and work your way towards the center. This will blend the patch with the surrounding wall, creating a smooth transition.
- Remove excess compound: As you sand, periodically wipe away the dust and excess compound using a damp cloth or sponge. This will help you assess your progress and prevent it from clogging the sandpaper.
- Check for smoothness: After sanding, run your hand over the patched area to check for any rough spots or unevenness. If necessary, continue sanding until the surface feels smooth to the touch.
- Wipe off dust: Use a clean, damp cloth or sponge to thoroughly wipe away any remaining dust from the sanding process. This will provide a clean surface for priming and painting.
By carefully sanding and smoothing the patched area, you will achieve a professional-looking finish that seamlessly blends with the rest of the wall, ensuring a visually appealing result.
Priming and Painting the Patched Area
Once you have patched and sanded the holes in your drywall, it’s time to prime and paint the area to restore its appearance. Follow these steps for priming and painting the patched area:
- Prepare the materials: Ensure you have primer and paint that match the existing wall color. If needed, take a sample of the paint to a local hardware store for color matching.
- Protect surrounding areas: Use painter’s tape to cover any adjacent surfaces or trim to prevent accidental paint splatters or smudges.
- Apply the primer: Using a brush or roller, apply a coat of primer to the patched area. Follow the manufacturer’s instructions for the recommended drying time, usually around 1-2 hours.
- Sand the primer: After the primer is completely dry, lightly sand the primed area with a fine-grit sandpaper. This will create a smooth surface for the paint to adhere to.
- Wipe off dust: Once again, use a damp cloth or sponge to wipe away any dust created from sanding. Allow the area to dry before proceeding with painting.
- Paint the patched area: Apply a thin coat of paint to the patched area, using a brush or roller. Blend the paint with the surrounding wall, feathering the edges to achieve a seamless finish.
- Let it dry and assess: Allow the first coat of paint to dry completely. Assess if a second coat is necessary to achieve the desired color and coverage. Apply additional coats as needed, allowing each coat to dry before applying the next.
- Remove painter’s tape: Once the paint is dry, carefully remove the painter’s tape from the protected areas. This will reveal clean lines and ensure a professional-looking result.
Remember to follow the drying time recommendations for both the primer and paint to ensure a durable and long-lasting finish. With proper priming and painting, the patched area will seamlessly blend in with the rest of the wall, leaving no traces of the previous damage.
Final Tips and Considerations
As you patch holes in drywall, keep these final tips and considerations in mind to ensure a successful repair:
- Choose the right patching material: Use spackling paste or patching compound for small holes, and self-adhesive mesh patches or fiberglass mesh tape for larger holes. Selecting the appropriate material will ensure a strong and durable repair.
- Follow the manufacturer’s instructions: Read and follow the instructions provided by the manufacturer for the patching compound, primer, and paint. This will help you achieve the best results and ensure proper drying and application techniques.
- Take your time: Rushing through the patching, sanding, and painting process may result in a less-than-desirable finish. Be patient, follow the steps carefully, and allow sufficient drying time between each stage.
- Blend the patch with the surrounding wall: Smoothly feather the edges of the patch with the wall using sanding techniques to create a seamless finish. This will make the repair less noticeable and more visually appealing.
- Consider texture matching: If your wall has a textured finish, you may need to use additional techniques to match the texture of the surrounding area. You can use a texture spray or a sponge to mimic the texture pattern.
- Use proper ventilation: When applying primer and paint, ensure adequate ventilation in the room to aid in drying and prevent the build-up of fumes. Open windows or use fans to promote air circulation.
- Maintain a clean work area: Continually clean up debris, dust, and excess compound during the patching process. This will prevent any contamination and ensure a smooth, professional-looking repair.
- Keep extra paint for touch-ups: It’s always a good idea to keep a small amount of paint for touch-ups in case any future damages occur. This will allow you to quickly and seamlessly repair any minor imperfections.
By following these tips and considerations, you’ll be able to patch holes in drywall effectively and achieve a result that blends seamlessly with the surrounding wall, restoring the beauty and integrity of your interior spaces.
Conclusion
Patching holes in drywall is a common task that every homeowner or DIY enthusiast should know how to do. Whether you’re dealing with small nail holes or larger holes caused by accidents or renovations, knowing how to properly patch and repair drywall can save you time and money.
In this article, we have provided you with comprehensive step-by-step instructions on how to patch both small and large holes in drywall. We covered the tools and materials needed, preparing the area, patching techniques for small and large holes, sanding and smoothing the patched area, and priming and painting the finished repair.
Remember to take your time throughout the process and follow the manufacturer’s instructions for any products you use. By doing so, you can achieve a professional-looking result that seamlessly blends in with the surrounding wall.
Additionally, we shared some final tips and considerations to keep in mind, such as using the appropriate patching materials, blending the patch with the wall, considering texture matching, maintaining a clean work area, and keeping spare paint for future touch-ups. These tips will help you achieve a successful repair and ensure that your patched drywall remains durable and visually appealing over time.
Now that you have a thorough understanding of how to patch holes in drywall, you can confidently tackle any damage or imperfections that arise in your home. Remember, practice makes perfect, so don’t be discouraged if your first patch isn’t flawless. With time and experience, you’ll become an expert at patching drywall and achieving seamless repairs.
Frequently Asked Questions about How To Patch Large And Small Holes In Drywall
Was this page helpful?
At Storables.com, we guarantee accurate and reliable information. Our content, validated by Expert Board Contributors, is crafted following stringent Editorial Policies. We're committed to providing you with well-researched, expert-backed insights for all your informational needs.


0 thoughts on “How To Patch Large And Small Holes In Drywall”