Home>Home Security and Surveillance>How To Install Motion Detection Outdoor Camera: Light Bulb Night Vision Security Camcorder
Home Security and Surveillance
How To Install Motion Detection Outdoor Camera: Light Bulb Night Vision Security Camcorder
Modified: March 6, 2024
Looking for a home security and surveillance solution? Learn how to install a motion detection outdoor camera with light bulb night vision for enhanced security and peace of mind.
(Many of the links in this article redirect to a specific reviewed product. Your purchase of these products through affiliate links helps to generate commission for Storables.com, at no extra cost. Learn more)
Introduction
In today’s fast-paced world, it’s crucial to protect our homes and loved ones from potential threats. Home security systems have evolved over the years, and one of the most effective tools in safeguarding our homes is motion detection outdoor cameras. These advanced cameras offer a wide range of features to ensure round-the-clock surveillance and provide peace of mind.
Motion detection outdoor cameras are designed to detect any movement within their field of view and trigger an alert or recording. This technology allows homeowners to monitor their property in real-time and receive notifications whenever any suspicious activity occurs. Whether it’s monitoring the front porch, backyard, or driveway, these cameras are an invaluable asset in deterring intruders and recording evidence in case of any incidents.
In addition to deterring potential burglars, motion detection outdoor cameras offer many other benefits. They provide visual evidence in case of theft or vandalism, assist in identifying suspicious individuals, and help in remote monitoring of the property while homeowners are away. With the advent of smart home technology, these cameras can be easily integrated into existing security systems, allowing for seamless control and accessibility through mobile apps.
Choosing the right motion detection outdoor camera is crucial to ensure optimal performance and functionality. There are various factors to consider, such as the camera’s resolution, field of view, night vision capabilities, weather resistance, and connectivity options. It’s essential to prioritize features that align with your specific needs and budget.
Once you’ve selected the perfect camera, it’s time to prepare for the installation process. Gathering the necessary tools and equipment is the first step, which may include a ladder, screws, drill, and a power source. Familiarize yourself with the camera’s installation instructions and determine the best location for mounting, ensuring maximum coverage while considering factors such as lighting conditions and obstruction-free views.
The installation process itself can be broken down into several steps. First, mount the camera securely using the provided brackets or mounts. Then, set up the light bulb night vision feature, which enhances visibility during low-light conditions. Connect the camera to a power source and establish a secure Wi-Fi connection. Install the mobile app provided by the camera’s manufacturer and configure the settings according to your preferences. Lastly, test and fine-tune the camera to ensure optimal performance and adjust any settings as needed.
With motion detection outdoor cameras in place, homeowners can have peace of mind knowing their property is under constant surveillance. These cameras serve as a deterrent, provide evidence in case of incidents, and offer remote monitoring capabilities. By following the proper installation procedures and utilizing the features of these cameras effectively, homeowners can enhance the security of their homes and protect what matters most.
In the following sections, we will explore the detailed steps involved in installing and setting up a motion detection outdoor camera with a light bulb night vision feature. So, let’s dive in and learn how to install these advanced security devices for utmost protection and peace of mind.
Key Takeaways:
- Motion detection outdoor cameras provide round-the-clock surveillance, deter intruders, and offer peace of mind. Choosing the right camera, preparing for installation, and testing its features are crucial for optimal home security.
- Installing a motion detection outdoor camera involves mounting securely, setting up night vision, connecting to power and Wi-Fi, and configuring the mobile app. Testing and fine-tuning the camera ensures reliable surveillance and functionality.
Read more: How To Detect A Night Vision Camera
Benefits of Motion Detection Outdoor Cameras
Motion detection outdoor cameras offer a wide range of benefits when it comes to home security and surveillance. Let’s explore some of the key advantages of these advanced cameras:
1. Intrusion Detection: The primary benefit of motion detection outdoor cameras is their ability to detect any movement within their field of view. When someone enters the monitored area, the camera will trigger an alert, recording the event and notifying homeowners via mobile app or email. This helps in immediate intervention and can deter potential intruders.
2. Visual Evidence: In the unfortunate event of a break-in or vandalism, motion detection outdoor cameras provide valuable visual evidence. The recorded footage can be used to identify the perpetrator and provide evidence to law enforcement. This greatly increases the chances of apprehending the culprits and recovering stolen items.
3. Remote Monitoring: Another significant advantage is the ability to remotely monitor your property. With the help of a mobile app, homeowners can access live camera feeds and recorded footage from anywhere in the world. This is particularly useful when you’re away on vacation or at work, allowing you to keep an eye on your property at all times.
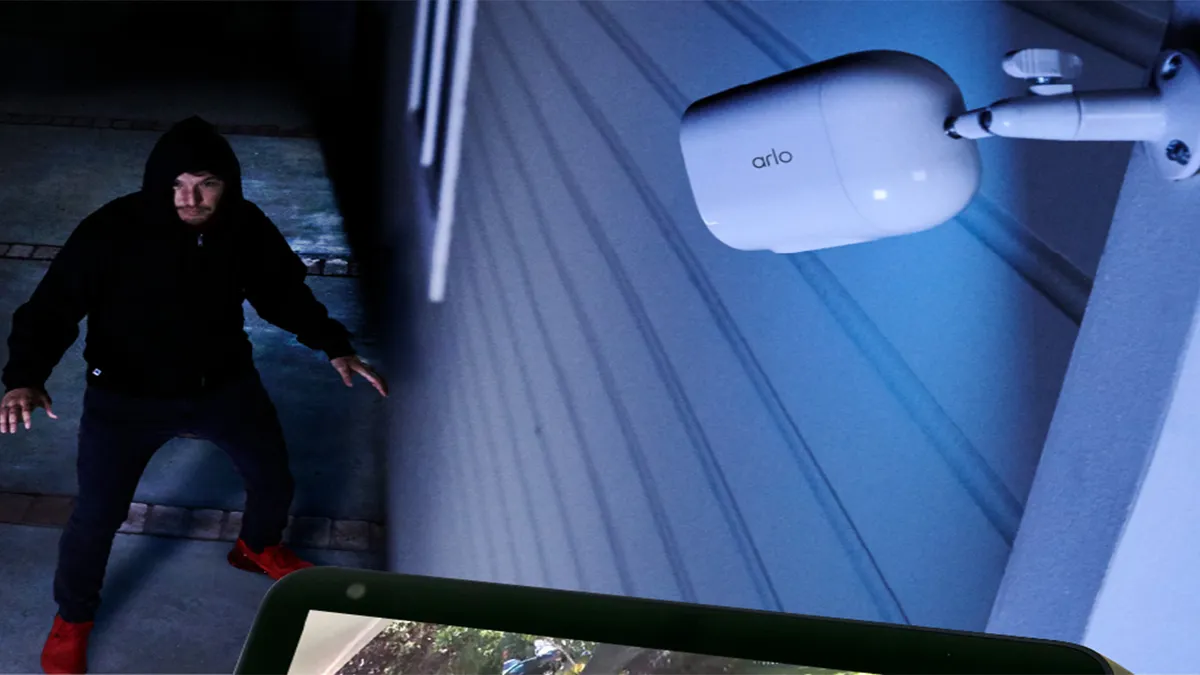
4. Deterrence: The presence of visible outdoor cameras has been proven to be a significant deterrent for potential burglars and trespassers. Criminals are less likely to target a property that has visible cameras, knowing that their actions will be captured on video. Motion detection outdoor cameras provide an extra layer of security by raising the risk for would-be intruders.
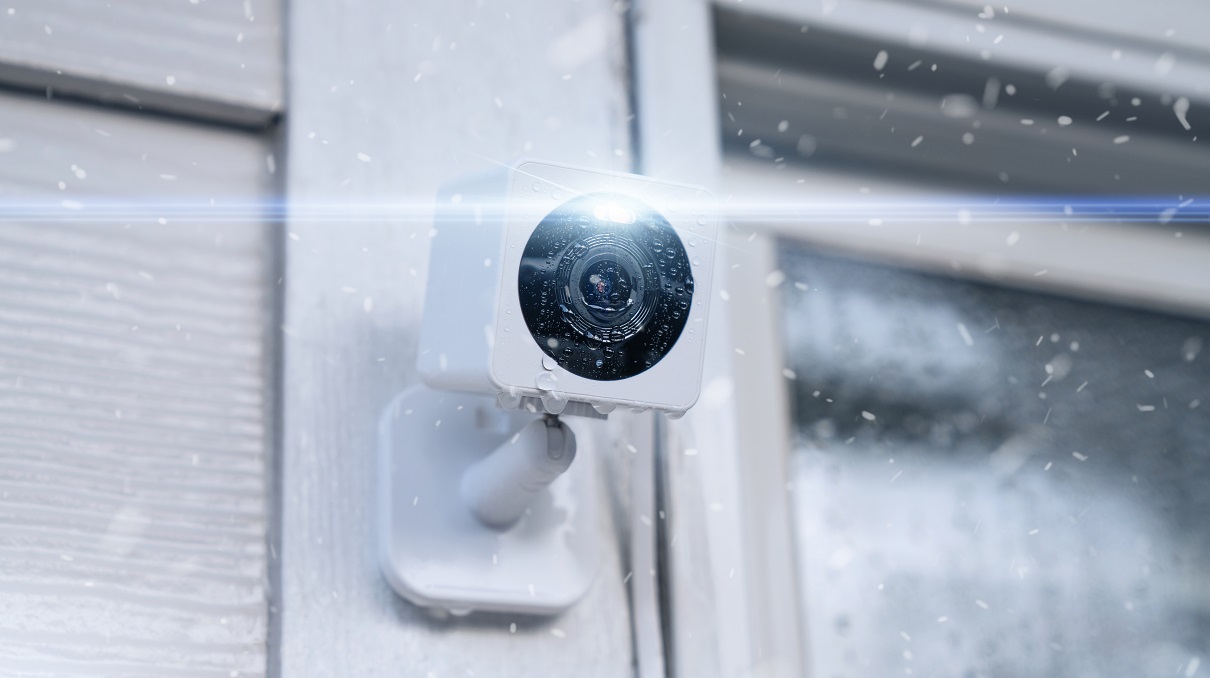
5. Night Vision Capability: Many motion detection outdoor cameras are equipped with night vision technology, allowing them to capture clear footage even in low-light or complete darkness. This is essential for maintaining surveillance during nighttime hours. With infrared LEDs or other advanced night vision capabilities, these cameras can provide a clear view of your surroundings 24/7.
6. Customizable Motion Zones: Most motion detection outdoor cameras allow users to define specific areas within the camera’s field of view to monitor for motion. This enables you to avoid false alarms from areas with regularly occurring movements, such as trees or passing vehicles. You can customize the detection settings to focus on specific areas of interest, such as entrances or sensitive areas.
7. Integration with Smart Home Systems: Motion detection outdoor cameras can typically be integrated seamlessly into existing smart home systems. This allows for centralized control and monitoring of all connected devices through a single app or hub. You can create automation rules, such as triggering lights or sounding an alarm when motion is detected, further enhancing your home security.
8. Peace of Mind: Above all, motion detection outdoor cameras provide homeowners with a sense of security and peace of mind. Knowing that your property is being monitored and that you have the ability to access real-time footage at any time can greatly reduce anxiety and create a safer living environment for you and your loved ones.
Installing motion detection outdoor cameras is a proactive approach to home security. The benefits mentioned above highlight the effectiveness of these cameras in deterring intruders, providing visual evidence, enabling remote monitoring, and enhancing overall home security. With advancements in technology and the affordability of these devices, motion detection outdoor cameras are becoming an essential component of a comprehensive home security system.
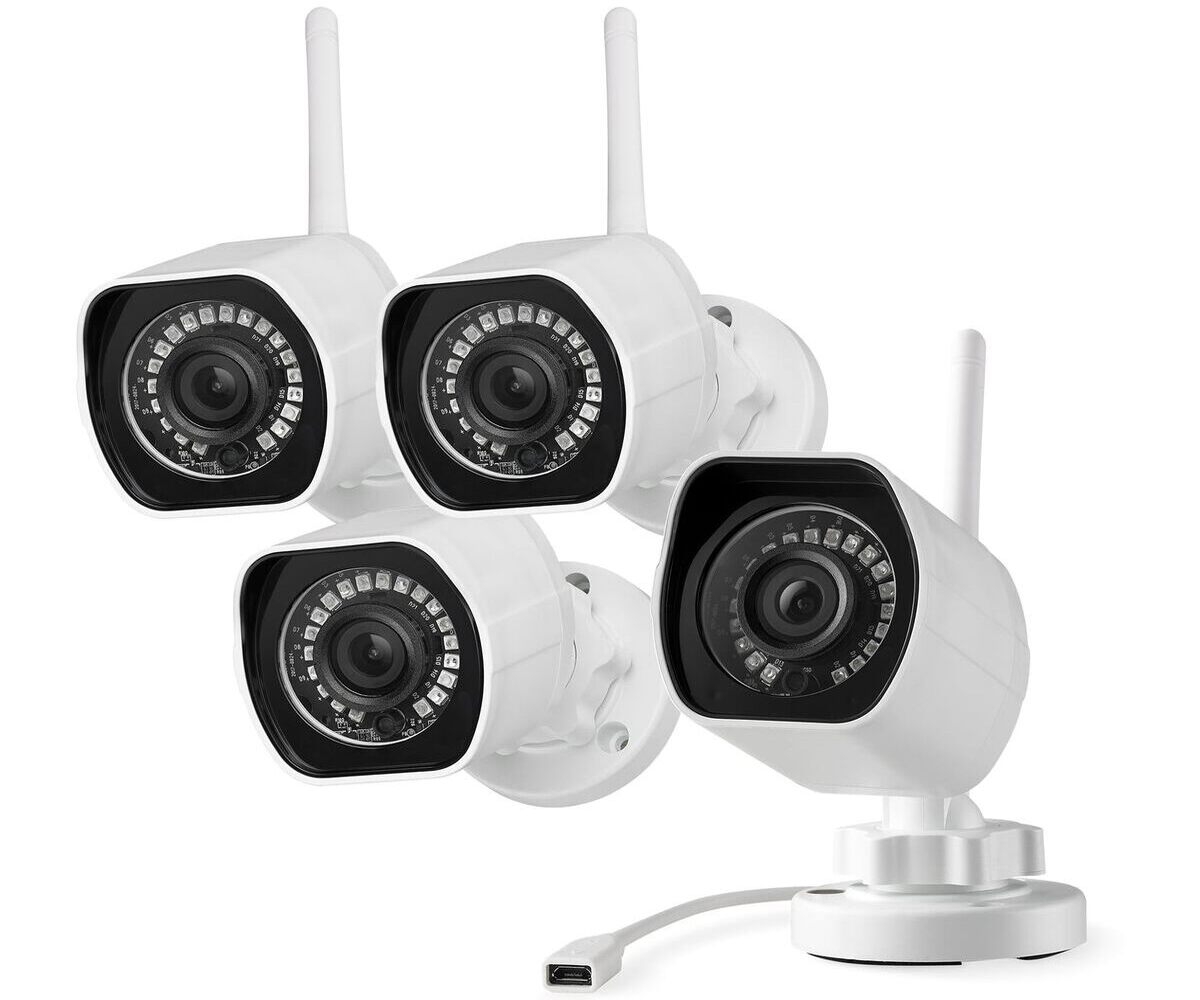
Choosing the Right Outdoor Camera
When it comes to selecting an outdoor camera for motion detection, there are several factors to consider that will ensure you choose the right one for your specific needs. Here are some key considerations to keep in mind:
1. Resolution: The resolution of the camera determines the clarity and detail of the captured footage. Higher resolution cameras, such as 1080p or even 4K, will provide sharper images and make it easier to identify individuals or objects. It’s recommended to choose a camera with at least 1080p resolution for optimal results.
2. Field of View: The field of view (FOV) determines the area that the camera can capture. A wider FOV allows for more comprehensive coverage, reducing the number of cameras needed to monitor a larger area. Consider the layout of your property and choose a camera with a suitable FOV to cover your desired monitoring areas effectively.
3. Night Vision Capability: If you intend to monitor your property during nighttime hours, night vision capability is essential. Look for cameras that have built-in infrared LEDs or other advanced night vision technology. These cameras can provide clear and detailed footage even in complete darkness, ensuring round-the-clock surveillance.
4. Weather Resistance: Outdoor cameras are exposed to various weather conditions, so it’s crucial to choose a camera that is weather-resistant. Look for cameras with an IP65 or higher rating, indicating resistance to dust and water. This ensures that the camera will continue to function properly and capture footage even in rain, snow, or extreme temperatures.
5. Connectivity Options: Consider how the camera connects to your home network. Most outdoor cameras support Wi-Fi connectivity, allowing for easy installation and remote access. Ensure that the camera is compatible with your home’s Wi-Fi network and offers a stable connection. Some cameras also offer options for wired connection, which may be preferred in certain situations.
6. Storage Options: Determine how the recorded footage will be stored. Many outdoor cameras offer cloud storage options, where footage is securely stored in the cloud for easy access and backup. However, this often requires a subscription plan. Alternatively, some cameras allow for local storage using a microSD card or a network-attached storage (NAS) device. Consider your storage preferences and choose a camera with suitable options.
7. Integration with Smart Home Systems: If you have an existing smart home system, consider choosing a camera that integrates seamlessly with your system. This allows for centralized control and monitoring of all connected devices through a single app or hub. Ensure compatibility with popular smart home platforms such as Alexa, Google Assistant, or Apple HomeKit.
8. Budget: Finally, establish a budget for your outdoor camera. Prices can vary significantly depending on the features and capabilities of the camera. Determine your priorities and find a balance between the desired features and your budget to make an informed decision.
By considering these factors, you can choose an outdoor camera for motion detection that suits your specific needs and provides reliable surveillance for your property. Remember to prioritize the features that are most important to you and research different camera models to find the best option within your budget.
Preparing for Installation
Before you begin the installation process for your motion detection outdoor camera, it’s important to properly prepare. This involves gathering the necessary tools and equipment, familiarizing yourself with the camera’s installation instructions, and determining the ideal location for mounting. Here’s a step-by-step guide to help you prepare for a successful installation:
Step 1: Gathering Necessary Tools and Equipment
Make sure you have all the tools and equipment needed for installation. These may include:
– Ladder: Depending on the height at which you plan to mount the camera, a ladder may be necessary to safely reach the installation location.
– Screws and Drill: Check the camera’s installation instructions for the recommended screw size and type. Ensure you have the appropriate drill and necessary screws to secure the camera mounting bracket or mount.
– Power Source: Determine the power source requirements for your camera, whether it’s a nearby electrical outlet or a power-over-Ethernet (PoE) connection. Make arrangements to ensure easy access to power during the installation process.
– Mobile Device: To complete the camera setup and configuration, you will likely need a mobile device compatible with the camera’s mobile app. Ensure your device is fully charged and ready for use.
Step 2: Determining the Installation Location
Survey your property to determine the ideal location for mounting your motion detection outdoor camera. Consider the following factors:
– Coverage Area: Identify the areas you want to monitor and ensure that the camera’s field of view will cover those areas adequately.
– Height and Angle: Mount the camera at a height and angle that provides optimal coverage while ensuring it remains discreet and protected from tampering.
– Accessibility: Consider how easily you can access the camera for maintenance, adjustments, or cleaning. Ensure there are no obstructions that would hinder the camera’s view.
Step 3: Familiarize Yourself with the Installation Instructions
Read through the camera’s installation instructions provided by the manufacturer. Familiarize yourself with the specific steps, requirements, and any additional tools or accessories needed for a successful installation.
Step 4: Planning Cable Routing (if applicable)
If your camera requires a wired connection for power or network connectivity, plan the cable routing. Determine the best path for the cables, ensuring they are hidden or protected from the elements. Consider drilling holes or using cable conduits to keep the cables organized and secure.
Step 5: Check Local Regulations
Before proceeding with the installation, it’s important to check local regulations regarding the placement and installation of outdoor cameras. Some neighborhoods or communities may have specific guidelines or restrictions in place. Ensure that you comply with any relevant regulations to avoid any potential issues.
By properly preparing for the installation process, you can ensure a smooth and efficient setup of your motion detection outdoor camera. Take the time to gather the necessary tools, determine the ideal mounting location, read through the installation instructions, plan the cable routing if applicable, and check local regulations. With everything in place and prepared, you’ll be ready to move on to the installation process itself.
Step 1: Gathering Necessary Tools and Equipment
Before you begin the installation process for your motion detection outdoor camera, it’s essential to gather all the necessary tools and equipment. By having everything you need at your fingertips, you’ll be able to efficiently and effectively complete the installation. Here’s a list of the key tools and equipment you’ll require for a successful installation:
1. Ladder: Depending on the height at which you plan to mount the camera, a ladder may be necessary to safely reach the installation location. Choose a ladder that is sturdy and appropriate for the height requirements of your camera installation.
2. Screws and Drill: Most outdoor cameras come with mounting brackets or mounts that require screws for secure installation. Check the camera’s installation instructions or packaging for the recommended screw size and type. It’s crucial to use the appropriate screws to ensure the camera is securely mounted. Additionally, you’ll need a drill or screwdriver to drive the screws into the surface.
3. Power Source: Determine the power source requirements for your camera. Some cameras can be powered by a nearby electrical outlet, while others may require a power-over-Ethernet (PoE) connection. If you’re using an electrical outlet, ensure that it is within reach of the camera’s power cord. If you’re using PoE, make sure you have a PoE switch or injector to provide power to the camera through an Ethernet cable.
4. Network Connectivity: If your camera requires a Wi-Fi connection for remote access and monitoring, ensure that you have a stable and reliable Wi-Fi network in place. Check your router’s compatibility with the camera and ensure that the signal reaches the installation location.
5. Mobile Device: To complete the camera setup and configuration, you’ll likely need a mobile device such as a smartphone or tablet. Check the camera’s requirements for mobile device compatibility and ensure that your device meets those requirements. Make sure your mobile device is fully charged and ready to use during the setup process.
6. Additional Tools: Depending on the specific camera and installation requirements, you may need additional tools such as a level to ensure the camera is mounted straight, a pencil or marker to mark the drilling points, and a stud finder to locate sturdy areas for mounting.
By gathering all the necessary tools and equipment before starting the installation process, you’ll save time and frustration. Ensure that you have a ladder, screws and the appropriate drill, a power source (either an electrical outlet or PoE), a stable network connectivity option, a compatible mobile device, and any additional tools required for your specific installation. Having everything you need at hand will make the installation process smooth and efficient, allowing you to set up your motion detection outdoor camera with ease.
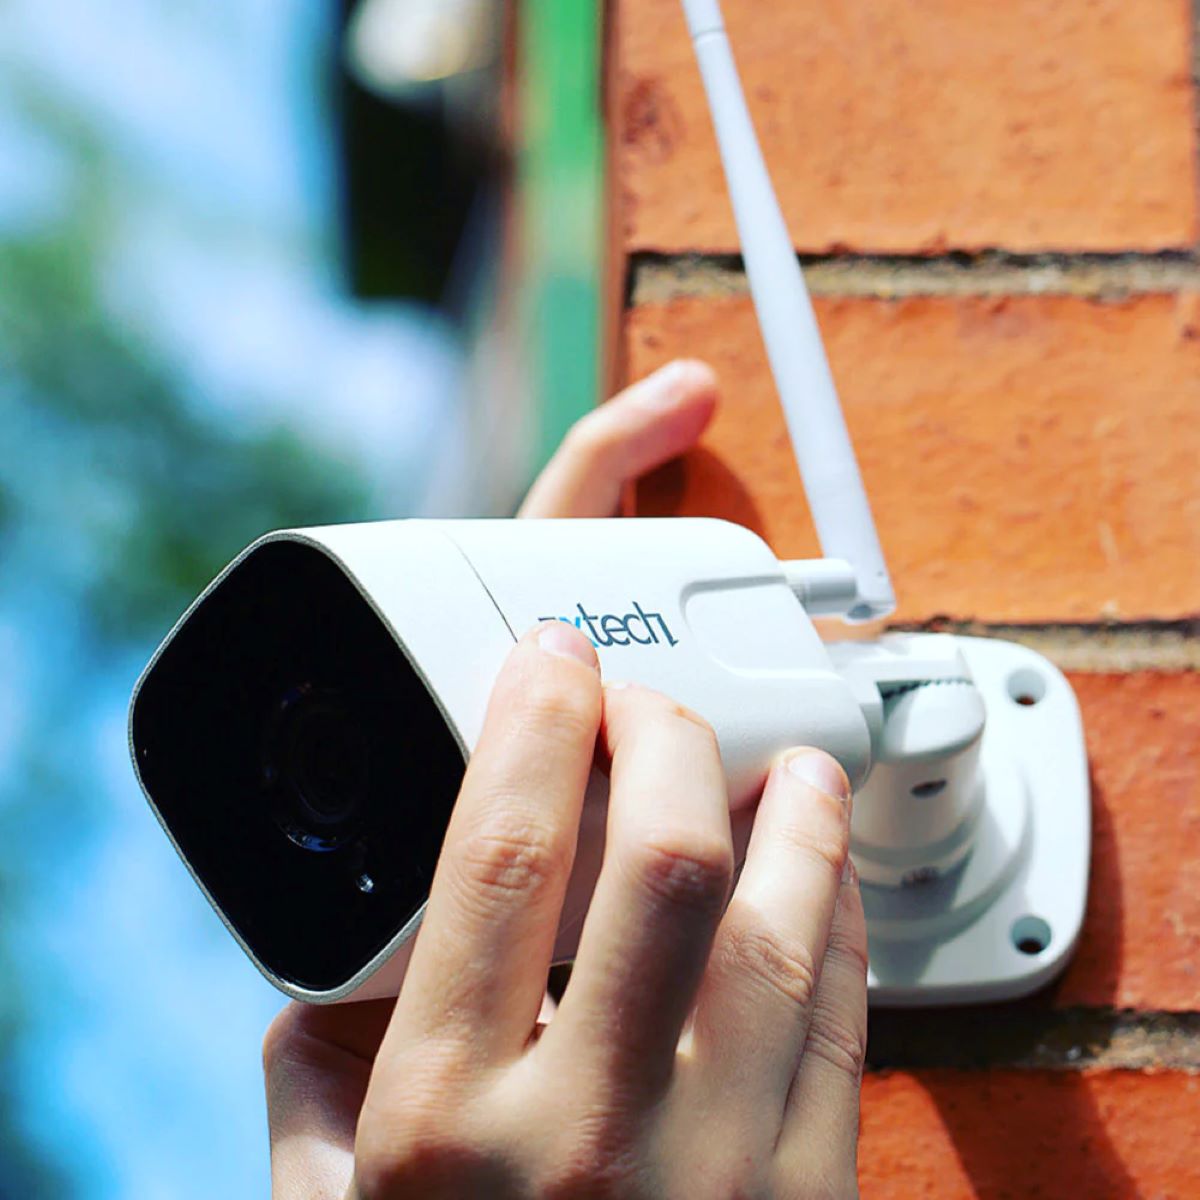
Step 2: Determining the Installation Location
Determining the installation location for your motion detection outdoor camera is a crucial step in ensuring optimal surveillance coverage. Choosing the right spot will give you the best view of the areas you want to monitor and help deter potential intruders. Here are some factors to consider when determining the installation location:
1. Coverage Area: Identify the areas you want to monitor with your outdoor camera. This may include the front entrance, backyard, driveway, or any other vulnerable areas. Consider the camera’s field of view (FOV) and ensure that it covers the desired monitoring areas effectively. Keep in mind that the FOV may vary depending on the camera model and lens specifications.
2. Height and Angle: Mount the camera at an optimal height and angle to capture clear footage. The height should be high enough to avoid tampering but low enough to capture facial features and other identifying details. The angle should be carefully adjusted to cover the intended monitoring areas and minimize blind spots. Consider using a mounting bracket or mount that allows for flexibility in adjusting the camera’s position.
3. Accessibility: Ensure that the chosen installation location allows for easy access to the camera for maintenance, adjustments, or cleaning. You may need to remove the camera periodically to clean the lens or adjust the positioning. Select a location that doesn’t require excessive effort or specialized equipment to access the camera.
4. Obstructions: Take note of any potential obstructions that may interfere with the camera’s view. Trees, shrubs, or other objects can obstruct the field of view and reduce the effectiveness of your surveillance. Trim any foliage or consider alternative installation locations to minimize potential obstructions.
5. Lighting Conditions: Consider the lighting conditions in the chosen installation location. Natural lighting during the day and sufficient artificial lighting at night are crucial for capturing clear and detailed footage. Avoid areas with harsh backlighting or areas that are completely dark at night, as it may impact the quality of the captured video.
6. Protection from the Elements: Ensure that the installation location provides adequate protection for your camera from the elements. Look for areas that offer some natural protection, such as eaves or covered porches. If this is not possible, consider purchasing a camera enclosure or housing to shield the camera from rain, snow, dust, or extreme temperatures.
7. Safety and Security: Prioritize safety and security when choosing the installation location. If possible, mount the camera in an area that is not easily accessible or within reach of potential intruders. This will help prevent tampering or theft of the camera itself. Additionally, consider the security of the camera’s cables and connections, ensuring they are protected from vandalism or unauthorized access.
By carefully considering these factors and evaluating potential installation locations, you can choose the optimal spot for your motion detection outdoor camera. Take time to assess the coverage area, height and angle, accessibility, obstructions, lighting conditions, protection from the elements, and safety and security considerations. Once you have determined the ideal location, you can proceed with the installation process, knowing that your camera will provide the best possible surveillance coverage for your property.
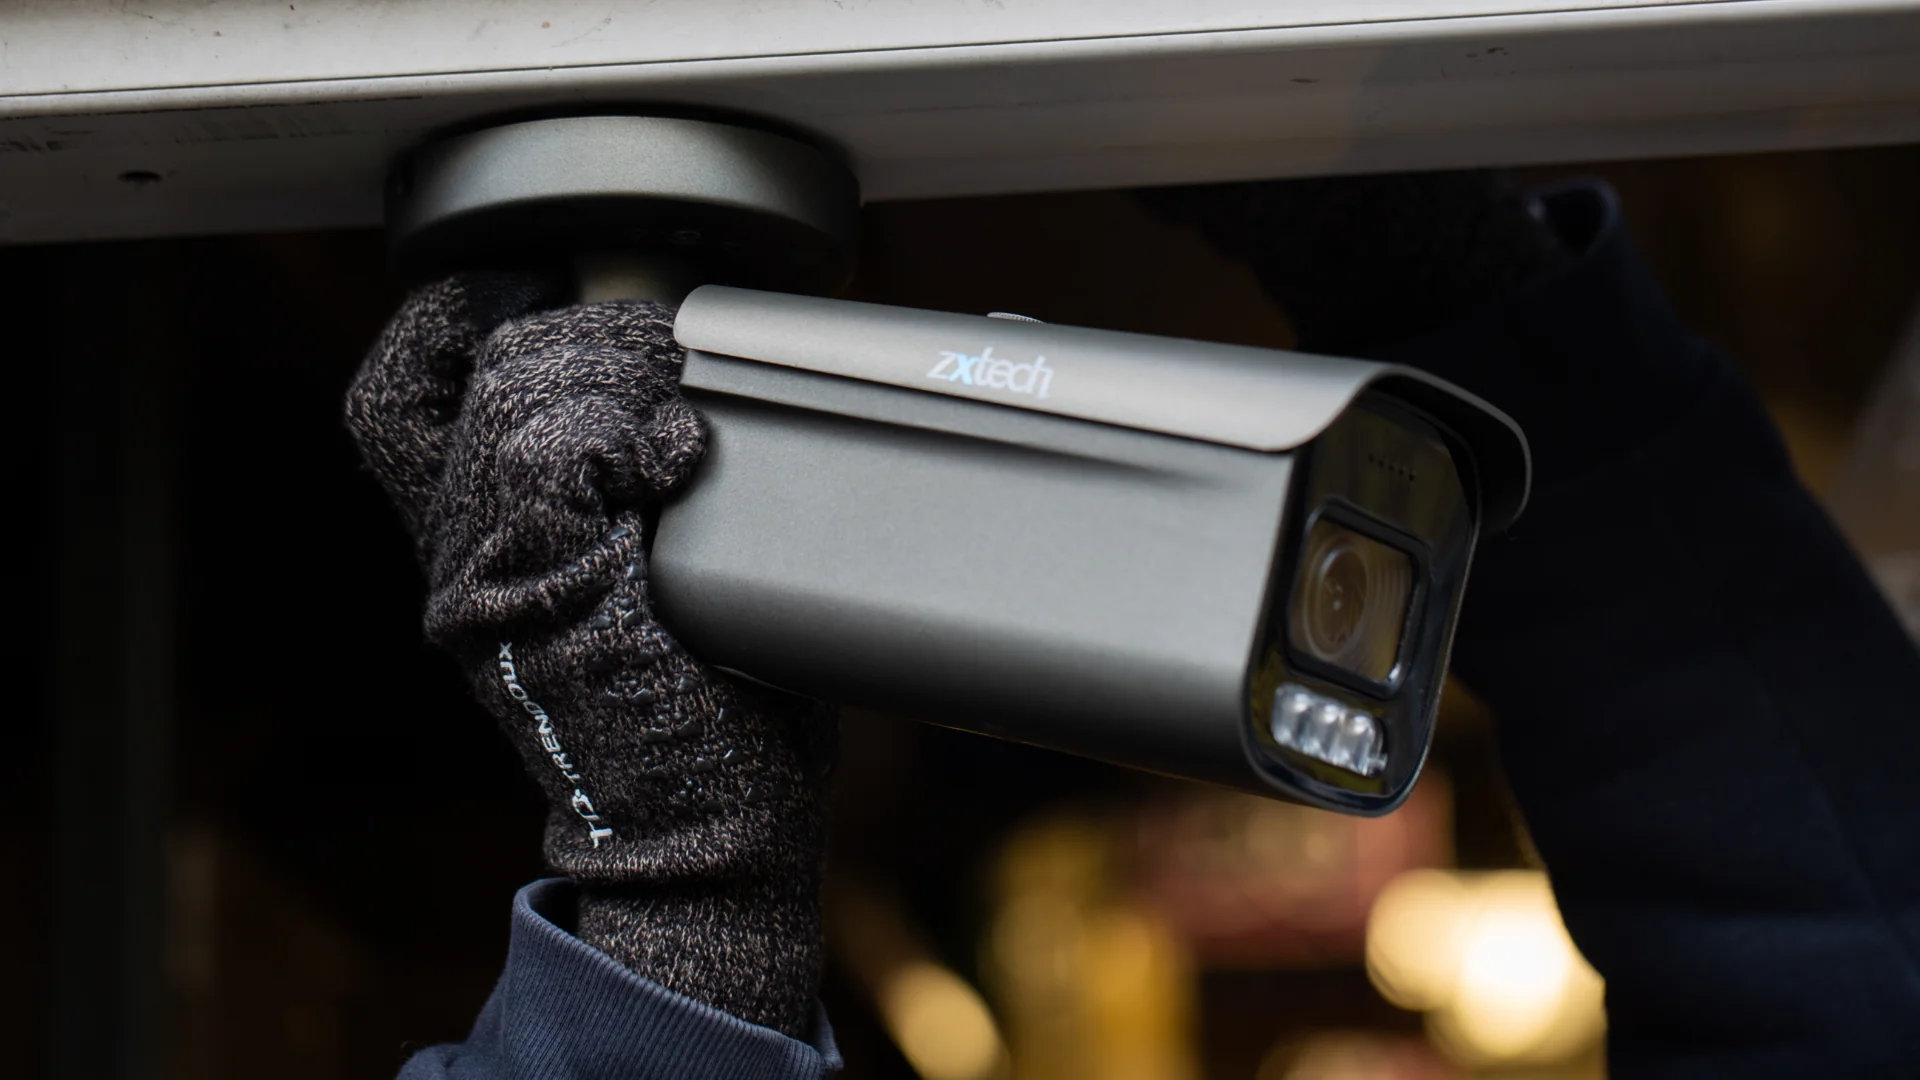
Step 3: Mounting the Camera
Mounting your motion detection outdoor camera properly is essential to ensure optimal coverage and stability. By securely mounting the camera, you’ll be able to capture clear and stable footage of the areas you want to monitor. Follow these steps to mount your camera effectively:
1. Locate the Mounting Surface: Identify the spot on the chosen installation location where you will mount the camera. Ensure that the surface is sturdy enough to hold the weight of the camera and withstand environmental conditions. Use a stud finder or other appropriate tools to locate studs or secure mounting points on the surface.
2. Attach the Mounting Bracket: Many outdoor cameras come with a mounting bracket or plate. Attach the mounting bracket to the chosen mounting surface using the appropriate screws and drill. It’s important to use the recommended screw size and type provided by the camera manufacturer to ensure a secure installation. Ensure that the mounting bracket is level and firmly attached to the surface.
3. Adjust the Camera Position: Depending on the camera model and mounting bracket design, you may be able to adjust the camera’s position before finalizing the mounting. Tilt and rotate the camera to ensure it is angled correctly to cover the desired monitoring area. Take the time to align the camera properly, making sure it is level and pointing in the right direction. Use a level tool to ensure the camera is correctly aligned.
4. Securely Mount the Camera: Once the camera is properly positioned, secure it to the mounting bracket using the provided screws. Ensure that the camera is tightly secured to prevent any movement or slippage. Double-check that the camera remains level and aligned as you tighten the screws.
5. Test the Stability: Gently shake the camera after mounting to ensure it is stable and securely mounted. The camera should not come loose or move excessively when tested. If there is any instability, adjust the mounting and tighten the screws further until the camera is firmly secured.
6. Verify the Camera’s Field of View: Once the camera is mounted, verify that the camera’s field of view covers the desired monitoring area effectively. Walk around the monitored area while checking the live video feed or recorded footage to ensure there are no blind spots or obstructions obstructing the camera’s view.
Remember to follow the camera’s specific installation instructions provided by the manufacturer. The steps above are general guidelines, but it’s important to refer to the camera’s manual for any specific requirements or recommendations.
By carefully mounting your motion detection outdoor camera, you can ensure stability and proper positioning for optimal surveillance coverage. Taking the time to align the camera, securely fasten it to the mounting bracket, and verify the stability and field of view will contribute to the effectiveness of your camera system. With the camera securely mounted, you can proceed to the next steps, such as setting up the camera’s features and connecting it to power and Wi-Fi.
When installing a motion detection outdoor camera light bulb night vision security camcorder, make sure to follow the manufacturer’s instructions carefully. Ensure the camera is positioned in a way that provides a clear view of the area you want to monitor, and test the motion detection feature to make sure it is working properly.
Step 4: Setting Up the Light Bulb Night Vision Feature
The light bulb night vision feature is a valuable aspect of motion detection outdoor cameras. It enhances visibility during low-light conditions and allows for clearer surveillance footage, even in the dark. Follow these steps to set up the light bulb night vision feature on your camera:
1. Verify Night Vision Capability: Confirm that your motion detection outdoor camera is equipped with a light bulb night vision feature. Check the camera’s specifications or consult the manufacturer’s documentation to ensure that it has the necessary capabilities.
2. Identify Light Bulb Type: Determine the type of light bulb required for the night vision feature. Some cameras use standard incandescent bulbs, while others may require specific types such as LEDs. Check the camera’s documentation for the recommended bulb type and wattage.
3. Purchase and Install the Light Bulb: If your camera does not come with a built-in light bulb, purchase the recommended bulb type and install it in the designated socket. Follow the instructions provided with the light bulb to ensure proper installation. Ensure that the light bulb is securely connected and functional.
4. Configure Night Vision Settings: Access the camera’s settings interface, either through a mobile app or a web browser, to configure the night vision settings. Depending on the camera model and manufacturer, these settings may be labeled differently, but they typically include options to enable and adjust the night vision feature.
5. Adjust Brightness and Sensitivity: Experiment with the brightness and sensitivity settings to achieve the desired night vision functionality. Higher brightness settings may provide clearer visibility but could potentially create more glare. Adjust the sensitivity to control how the camera detects and adjusts to low-light conditions. Keep in mind that each environment may require different settings, so it’s essential to test and fine-tune the settings for optimal results.
6. Test the Night Vision Feature: Once the settings are configured, test the night vision feature to ensure it is functioning correctly. Activate the night vision feature and observe the surveillance footage in low-light conditions. Check for clarity, visibility, and any potential issues such as excessive glare or dark spots. Make any necessary adjustments to the settings if needed.
7. Maintain the Light Bulb: Regularly check and maintain the light bulb to ensure its proper functioning. Clean the bulb regularly to remove any dust or dirt that may affect the clarity of the night vision feature. Additionally, monitor the bulb’s lifespan and replace it as needed. Following the manufacturer’s recommendations for maintenance and replacement will help ensure the longevity and effectiveness of the light bulb night vision feature.
By properly setting up the light bulb night vision feature, you can enhance the surveillance capabilities of your motion detection outdoor camera even in low-light or dark conditions. Remember to verify night vision capability, identify the required light bulb type, install the bulb correctly, configure the night vision settings, fine-tune the brightness and sensitivity, and regularly maintain the light bulb. With the night vision feature set up, you can now proceed to the next steps in the installation process.
Step 5: Connecting the Camera to Power
Ensuring a reliable power connection is crucial for the proper functioning of your motion detection outdoor camera. By accurately connecting the camera to a power source, you can ensure continuous surveillance and prevent any interruptions. Follow these steps to connect your camera to power:
1. Verify Power Requirements: Check the power requirements of your motion detection outdoor camera. Some cameras may be powered by a standard electrical outlet, while others require a power-over-Ethernet (PoE) connection. Refer to the camera’s documentation or installation manual to determine the specific power requirements.
2. Locate Nearby Power Source: Identify a nearby power source that can be used to power your camera. If your camera requires a direct electrical outlet connection, select a location where an outlet is readily accessible. If your camera uses PoE, ensure that you have a PoE switch or injector available nearby.
3. Prepare the Power Cable: If your camera utilizes a power cable, prepare it for installation. Ensure that the cable is long enough to reach the power source from the camera mounting location. If necessary, use extension cables or consider hiring a professional electrician to properly extend the power cable.
4. Connect the Power Cable: Depending on the camera’s power requirements, connect the power cable to the camera and the power source. If your camera utilizes a standard electrical outlet, plug the power adapter into the outlet and connect the cable to the camera’s power port. For PoE cameras, connect one end of the Ethernet cable to the camera’s designated port and the other end to the PoE switch or injector.
5. Secure the Power Connection: Ensure that the power connection is secure and firmly connected. Double-check that the cables are properly inserted into their respective ports and that there are no loose connections. This will prevent any power disruptions or potential damage to the camera due to loose connections.
6. Test the Power Connection: Once the camera is powered on, test the power connection to confirm that the camera has successfully powered up. Check for any LED indicators or display on the camera that indicate it is receiving power. Additionally, monitor the camera’s activity to ensure that there are no power-related issues, such as frequent power loss or unexpected shutdowns.
7. Consider Backup Power: It is advisable to have a contingency plan for power outages or failures. Consider installing a battery backup or an uninterruptible power supply (UPS) system to provide temporary power to the camera in case of power disruptions. This will ensure that your camera continues to operate even during power outages and maintain uninterrupted surveillance.
By properly connecting your motion detection outdoor camera to a reliable power source, you can ensure continuous surveillance and reliable functionality. Remember to verify the camera’s power requirements, locate a nearby power source, prepare and connect the power cable accordingly, securely fasten the connections, test the power connection, and consider backup power options. Once the camera is successfully connected to power, you can proceed to the next step, which involves connecting the camera to Wi-Fi.
Step 6: Connecting the Camera to Wi-Fi
Connecting your motion detection outdoor camera to Wi-Fi is crucial for remote access, monitoring, and receiving alerts on your mobile device. By establishing a stable and secure Wi-Fi connection, you can ensure seamless communication between the camera and your network. Follow these steps to connect your camera to Wi-Fi:
1. Verify Network Compatibility: Ensure that your camera is compatible with your Wi-Fi network. Check the camera’s documentation or installation manual for the required Wi-Fi specifications, such as frequency (2.4 GHz or 5 GHz) and network encryption (WPA2 recommended). Ensure that your Wi-Fi network meets these requirements.
2. Position the Camera Proximity to the Wi-Fi Router: If your camera’s Wi-Fi signal strength is weak, consider moving it closer to the Wi-Fi router. This can ensure a more stable and reliable connection. Avoid placing the camera too far from the router, as it may result in poor connectivity or signal degradation.
3. Power On the Camera: Make sure the camera is powered on and actively running before attempting to connect it to Wi-Fi. Ensure that the camera is successfully connected to the power source and turned on.
4. Access the Camera’s Configuration Settings: Depending on the camera model, access the configuration settings interface using either a mobile app or a web browser. Refer to the camera’s documentation for the specific instructions on how to access the settings interface.
5. Select the Wi-Fi Network: Within the camera’s settings interface, locate the Wi-Fi connection settings. Select the option to search for available networks. Choose your Wi-Fi network from the list of detected networks. If your network is hidden, you may need to manually enter the network name (SSID) and password. Enter the correct network credentials to proceed with the connection.
6. Enter the Wi-Fi Password: If your Wi-Fi network is password protected, you will need to enter the Wi-Fi password to authenticate the connection. Double-check the password for accuracy and carefully enter it into the appropriate field within the camera’s settings interface. Ensure that the password is entered correctly, as any errors can result in a failed connection.
7. Establish the Wi-Fi Connection: Once you have provided the necessary network details, initiate the connection process. The camera will attempt to establish a connection with your Wi-Fi network. Make sure to remain within the proximity of the Wi-Fi router during the connection process to ensure a stable connection.
8. Verify the Connection: After a brief period, the camera will attempt to connect to the Wi-Fi network. Verify that the connection has been successfully established. Some cameras may indicate the connection status through LEDs or within the settings interface. Test the connection by accessing the camera’s live feed or by verifying that you can remotely access and control the camera through the mobile app or a web browser.
9. Test Stability and Range: After the connection is established, test the stability and range of the Wi-Fi signal. Walk around the perimeter of the camera’s coverage area while monitoring the live feed or recorded footage. Ensure that the Wi-Fi signal remains strong and stable throughout the area of interest. If there are any connectivity issues or areas with weak signal, consider relocating the camera or adjusting the Wi-Fi router placement to improve the signal strength.
By correctly connecting your motion detection outdoor camera to your Wi-Fi network, you enable remote access and monitoring capabilities. Remember to verify network compatibility, position the camera within proximity to the Wi-Fi router, power on the camera, access the camera’s configuration settings, select the Wi-Fi network and enter the correct password, establish the connection, and verify the stability and range of the Wi-Fi signal. Once the camera is successfully connected to Wi-Fi, you can move on to the next step of installing the mobile app and configuring the camera settings.
Step 7: Installing the Mobile App and Configuring Settings
Installing the mobile app provided by the camera manufacturer and configuring the settings is essential for seamless control and access to your motion detection outdoor camera. The mobile app allows you to monitor, manage, and customize various features and settings of the camera. Follow these steps to install the app and configure the settings:
1. Identify the Mobile App: Determine the specific mobile app required for your motion detection outdoor camera. Check the camera’s documentation, packaging, or manufacturer’s website for the official app name. Look for the app on your mobile device’s app store (e.g., Google Play Store for Android or App Store for iOS).
2. Download and Install the Mobile App: Open the app store on your mobile device and search for the camera manufacturer’s app. Once you find the correct app, download and install it by following the on-screen instructions. Make sure to grant any necessary permissions for the app to function properly.
3. Create an Account (if necessary): Depending on the camera manufacturer, you may need to create an account within the mobile app. Follow the provided prompts to create an account using your email address or other required information. If you already have an account, log in using your existing credentials.
4. Add Your Camera: Once the app is installed and you have logged in (if necessary), follow the instructions within the app to add your motion detection outdoor camera. This typically involves scanning a QR code on the camera or manually entering its unique identifying information.
5. Connect the App to Your Camera: After adding the camera, the app will guide you through the process of connecting it to your mobile device. This may involve selecting your Wi-Fi network and entering the network password within the app to establish a connection.
6. Configure Camera Settings: Within the mobile app, explore the various settings and features available for your motion detection outdoor camera. These settings may include motion detection sensitivity, notification preferences, recording options, and more. Customize the settings according to your preferences and security requirements.
7. Enable Remote Access: If remote access is desired, ensure that the app’s settings enable the ability to remotely access and control the camera. This typically involves setting up a secure login method (such as a PIN, fingerprint, or facial recognition) and ensuring that the camera is accessible through the app’s interface from anywhere with an internet connection.
8. Test Functionality: Once the app settings are configured, test the camera’s functionality through the app. Verify that you can view the live feed, playback recorded footage, and receive notifications on your mobile device. Check the accuracy and responsiveness of the alerts and fine-tune the settings as needed.
9. Integrate with Other Devices (optional): Depending on your smart home setup, you may have the option to integrate your motion detection outdoor camera with other devices or platforms. Explore the app’s integration options and follow the specified instructions to connect and control the camera through other compatible devices or automation systems.
By installing the mobile app provided by the camera manufacturer and configuring the settings, you gain access to a wide range of features and control over your motion detection outdoor camera. Remember to identify and download the correct app, create an account if necessary, add your camera within the app, connect the app to your camera, configure the camera settings, enable remote access, test the functionality, and explore any available integration options. With these steps completed, you can now monitor and manage your camera conveniently from the palm of your hand.
Step 8: Testing and Fine-tuning the Camera
Testing and fine-tuning your motion detection outdoor camera is crucial to ensure optimal performance and accurate surveillance. By conducting a thorough evaluation of the camera’s settings and capabilities, you can make necessary adjustments and achieve the most effective results. Follow these steps to test and fine-tune your camera:
1. Verify Camera Orientation: Double-check that the camera is positioned correctly and capturing the desired monitoring area. Ensure that the camera is level, angled properly, and there are no obstructions blocking the view.
2. Check Motion Detection Sensitivity: Adjust the motion detection sensitivity settings to avoid false alarms caused by irrelevant movements, such as swaying trees or passing cars. Fine-tune the settings to detect only significant motion activities that require attention.
3. Test Alert Notifications: Trigger motion events in front of the camera to test the alert notification functionality. Verify that you receive real-time notifications on your mobile device as configured in the camera’s settings. Adjust the notification preferences, such as sound or vibration, to suit your needs.
4. Review Recording and Storage Settings: Check the camera’s recording and storage settings. Ensure that the camera is recording footage and storing it according to your preferred settings. Verify the available storage capacity and consider expanding it if necessary. Review the retention period for recorded footage and adjust it based on your requirements.
5. Assess Video Quality: Analyze the quality of the captured video footage to ensure clarity and detail. Evaluate the image resolution, color accuracy, and overall video quality. If necessary, adjust camera settings such as resolution or compression to optimize video quality while considering storage limitations.
6. Test Night Vision Performance: Conduct a test of the camera’s night vision capabilities by monitoring the live feed or recorded footage in low-light conditions. Ensure that the night vision feature provides clear visibility and that the infrared or other night vision technology is functioning correctly.
7. Check Wi-Fi Stability: Monitor the stability of your camera’s Wi-Fi connection. Walk around the perimeter of the camera’s coverage area and verify that the signal strength remains strong throughout the area. If there are areas with weak connections, consider adjusting the placement of the camera or extending the Wi-Fi coverage range.
8. Review Mobile App Functionality: Evaluate the functionality of the mobile app used to access and control your camera. Ensure that all features, such as live view, playback, and camera settings, are working correctly. Test remote access from different networks to confirm reliable connectivity.
9. Consider Privacy and Security: Assess the privacy and security measures implemented on the camera and within the mobile app. Verify encryption protocols, password strength, and any other security features. Set up additional security measures, such as two-factor authentication, if available.
10. Perform Regular Maintenance: Schedule periodic maintenance checks to ensure the camera’s ongoing functionality. Clean the camera lens regularly to maintain clear image quality. Check for firmware updates from the manufacturer and apply them to benefit from performance improvements and security patches.
By thoroughly testing and fine-tuning your motion detection outdoor camera, you can optimize its performance and ensure reliable surveillance. Remember to verify the camera orientation, adjust motion detection sensitivity, test alert notifications, review recording settings, assess video quality, evaluate night vision performance, check Wi-Fi stability, review mobile app functionality, consider privacy and security, and perform regular maintenance. With these steps completed, you can have confidence in your camera’s ability to provide accurate surveillance and protect your property effectively.
Conclusion
Motion detection outdoor cameras with their advanced features and capabilities serve as a crucial component of a comprehensive home security system. By installing these cameras, homeowners can enhance the protection of their property, deter potential intruders, and gain valuable visual evidence in case of incidents. Through remote monitoring, mobile app integration, and night vision technology, these cameras provide round-the-clock surveillance and peace of mind.
When choosing a motion detection outdoor camera, it’s important to consider factors such as resolution, field of view, night vision capability, weather resistance, connectivity options, and budget. By selecting the right camera for your needs, you can ensure optimal functionality and performance.
Preparing for the installation process involves gathering the necessary tools and equipment, determining the ideal installation location, and familiarizing yourself with the camera’s installation instructions. By properly preparing, you can streamline the installation process and achieve the best possible surveillance coverage.
Following the step-by-step installation guide, including mounting the camera securely, setting up the light bulb night vision feature, connecting the camera to power, and establishing a Wi-Fi connection, ensures a reliable and efficient setup.
Installing the mobile app provided by the camera manufacturer and configuring the settings is crucial for remote access, monitoring, and customization. Through the mobile app, homeowners can adjust motion detection sensitivity, customize notification preferences, review recorded footage, and fine-tune camera settings for optimal performance.
Testing and fine-tuning the camera is essential to ensure accurate surveillance and functionality. By verifying camera orientation, adjusting motion detection settings, testing alert notifications, assessing video quality, and reviewing Wi-Fi stability, homeowners can optimize the camera’s performance and tailor it to their specific needs.
In conclusion, motion detection outdoor cameras with their advanced features and seamless integration with smart home systems play a critical role in enhancing home security. By following the installation steps carefully, configuring the settings accurately, and performing regular maintenance, homeowners can maximize the benefits of their motion detection outdoor camera and gain peace of mind knowing that their property is under constant surveillance. With these cameras in place, homeowners can effectively protect their homes and loved ones, deter potential threats, and have greater control over their security.
Frequently Asked Questions about How To Install Motion Detection Outdoor Camera: Light Bulb Night Vision Security Camcorder
Was this page helpful?
At Storables.com, we guarantee accurate and reliable information. Our content, validated by Expert Board Contributors, is crafted following stringent Editorial Policies. We're committed to providing you with well-researched, expert-backed insights for all your informational needs.