Home>Ideas and Tips>DIY Guide: Installing A Backyard Fire Pit In A Weekend
Ideas and Tips
DIY Guide: Installing A Backyard Fire Pit In A Weekend
Modified: November 1, 2024
Transform your outdoor space with our DIY guide to installing a backyard fire pit in a weekend. Easy steps, essential tools, and safety tips included!
(Many of the links in this article redirect to a specific reviewed product. Your purchase of these products through affiliate links helps to generate commission for Storables.com, at no extra cost. Learn more)
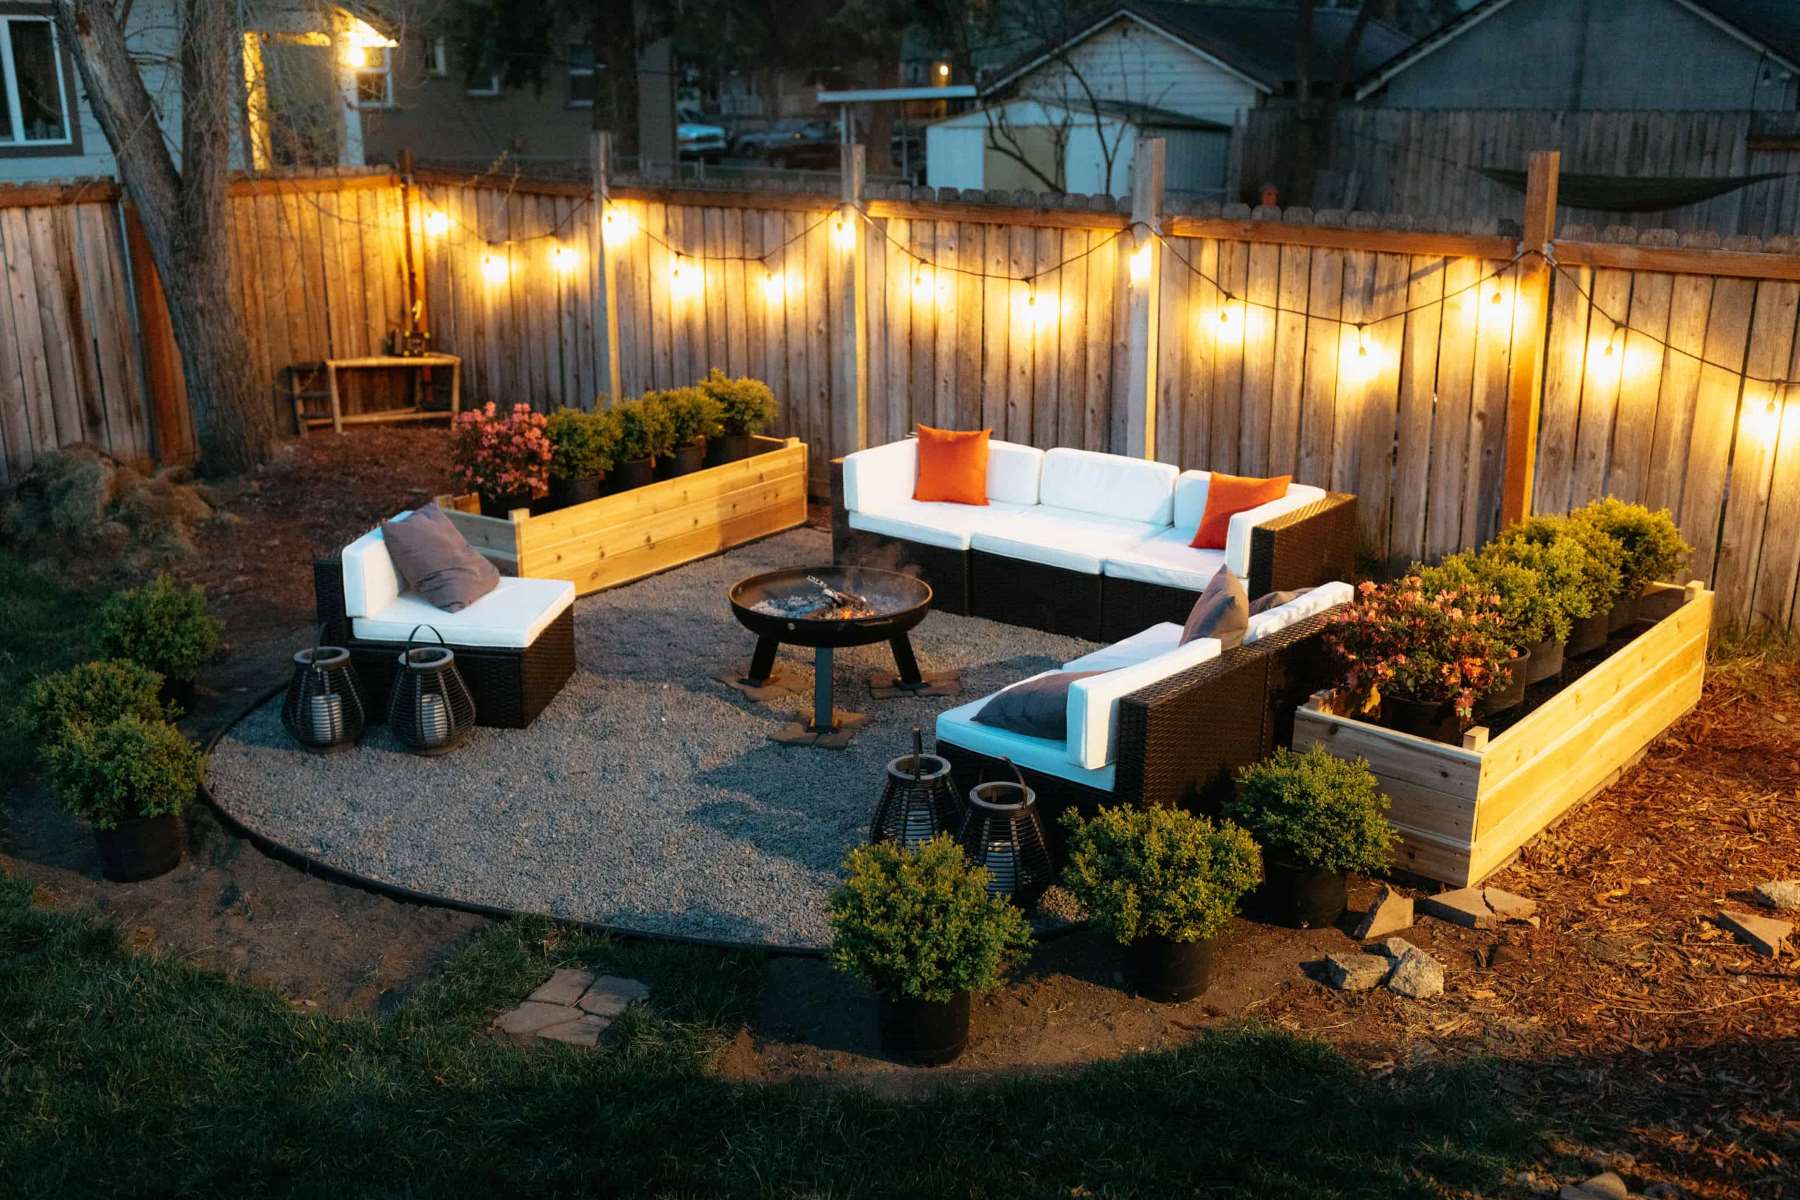
Installing a backyard fire pit is a fantastic way to enhance your outdoor living space, creating a cozy and inviting area for gatherings and relaxation. This DIY guide will walk you through the process of building a fire pit in just a weekend, ensuring that you have all the necessary tools and materials ready to go.
Planning Your Fire Pit Project
Before diving into the installation process, it's crucial to plan your fire pit project carefully. This involves deciding on the location, size, and materials that will impact the functionality and design of your fire pit.
Read more: DIY Guide To Building A Backyard Fire Pit
Choosing the Right Location
Selecting the right spot for your fire pit is essential for safety and functionality. Here are some key considerations:
-
Distance from Buildings and Trees: The ideal distance is 25 feet from buildings and trees, but if your lawn space doesn't allow for that, place the fire pit at least 10 feet away. This distance helps prevent accidental fires and ensures that smoke doesn't blow towards your home or seating areas.
-
Wind Direction: Consider wind direction when planning your fire pit. Positioning it upwind from your house can keep smoke from blowing into the house when windows are open.
-
Flat Area: Choose a flat area for stability and proper drainage. This will prevent water from accumulating around the fire pit and ensure that it remains stable during use.
-
Low-Hanging Branches and Power Lines: Make sure there are no low-hanging branches or power lines above the pit. This will prevent any potential hazards and ensure a safe environment.
Determining Size and Shape
The size and shape of your fire pit will depend on your available space and personal preferences. Here are some general guidelines:
-
Inside Diameter: An interior diameter of 3 to 4-1/2 feet creates enough space for a robust fire while keeping the fire pit small enough so everyone around it can talk. This size is ideal for two to four people. If you plan to entertain larger groups, increase the size of the fire pit.
-
Shape Options: While circular pits are more common, square and rectangular designs can also work depending on layout and preference. Consider how you'll most often use your fire pit area to choose the right design.
Selecting Materials
When choosing materials, consider durability, design, and functionality. Here are some essential materials you'll need:
-
Gravel Base: Gravel should be used for drainage and as a base for the fire pit. This helps create a level, stable surface for the fire pit and insulates it from cold and dampness.
-
Fire-Rated Bricks: Use fire-rated bricks cut to fit the inside of the pit. These bricks protect the sand in paver patios from heat damage and ensure a safe burning area.
-
Steel Fire Ring: A steel fire ring protects the concrete from heat damage and provides a durable, long-lasting solution for your fire pit.
-
Masonry Adhesives: Masonry adhesives keep the blocks securely in place, ensuring that your fire pit remains stable and secure during use.
-
Capstones: Capstones provide a finished look to protect the top of the wall and add an aesthetic touch to your fire pit.
Essential Tools and Materials
Having the right tools and materials on hand before starting your project will make for a smooth building process. Here’s what you’ll need:
Read more: Where To Place Fire Pit In The Backyard
Required Tools
- Circular Saw with Concrete Blade: For cutting fire-rated bricks.
- Stone Chisel and Hammer: For cutting and shaping bricks.
- Level: To ensure that your base is level and stable.
- Trowel: For applying masonry adhesives.
- Hammer or Mallet: For tapping blocks into place.
- Tiller (Optional): For tilling the soil to create a consistent depth.
- Spade: For digging and edging around the fire pit area.
- Metal Landscape Edging: To create a stable border around the pit.
- Landscape Fabric/Weed Screen: To prevent weeds from growing through the gravel base.
Required Materials
- Gravel or Sand: For drainage and base material.
- Fire-Rated Bricks: For building the fire pit.
- Steel Fire Ring: For protecting the concrete from heat damage.
- Masonry Adhesives: For securing the blocks in place.
- Capstones: For finishing the top of the wall.
- Decorative Gravel (Optional): For adding an aesthetic touch around the fire pit.
How to Build a DIY Fire Pit
Step 1: Prepare the Area
-
Mark the Fire Pit Layout: Use a stake, string, and marking paint to create a compass and mark the outline of the pit. If you’re building on grass, make sure to stay outside the spray paint line to avoid digging into any underground utilities.
-
Dig the Base: Dig two to three inches deep, then tap down the soil with your spade. Apply a layer of paver base, tap it down, and repeat this process until you have a smooth level surface.
-
Level the Base: Use a level to ensure that your base is perfectly level and stable. This is crucial for preventing water accumulation and ensuring that your fire pit remains stable during use.
Read more: DIY Guide To Building A Backyard Pergola
Step 2: Lay the Paver Base
If you’re building the fire pit in your yard, you’ll need a paver base to create a stable foundation for the blocks. If you’re installing on a paver patio with polymeric sand in the joints, line the bottom of the fire pit with fire-rated bricks to protect the sand.
Step 3: Set the Stone Ring
With the paver base down, start placing the blocks around it. Use a mallet to tap each block into place, ensuring they are snug against each other. Stagger the joints in each row for a beautiful look.
Step 4: Install Fire Bricks
Continue installing fire-rated bricks around the stone ring. Apply masonry adhesives between each brick to secure them in place. Make sure to stagger the seams for added stability and aesthetics.
Step 5: Add Capstones
Once you’ve completed the walls of your fire pit, add capstones to protect the top of the wall and give it a finished look. This step adds an aesthetic touch and ensures that your fire pit remains safe and secure.
Read more: DIY Guide To Installing Wainscoting
Additional Tips and Considerations
Safety Precautions
- Fire Extinguisher: Keep a fire extinguisher nearby in case of emergencies.
- Hose Access: Plan your fire pit so that it’s within reach of your hose for easy water access.
- Wind Direction: Position your fire pit with wind direction in mind to prevent smoke from blowing into your home.
Enhancing Your Fire Pit Area
- Outdoor Furniture: Keep the back legs of furniture about 6 to 7 feet away from the pit for safety.
- Accessories: Add outdoor end tables for drinks and snacks, garden décor like statues and sculptures, and string lights or wind chimes to create a perfect mood.
DIY Fire Pit Ideas
Read more: How To Install A Gas Fire Pit
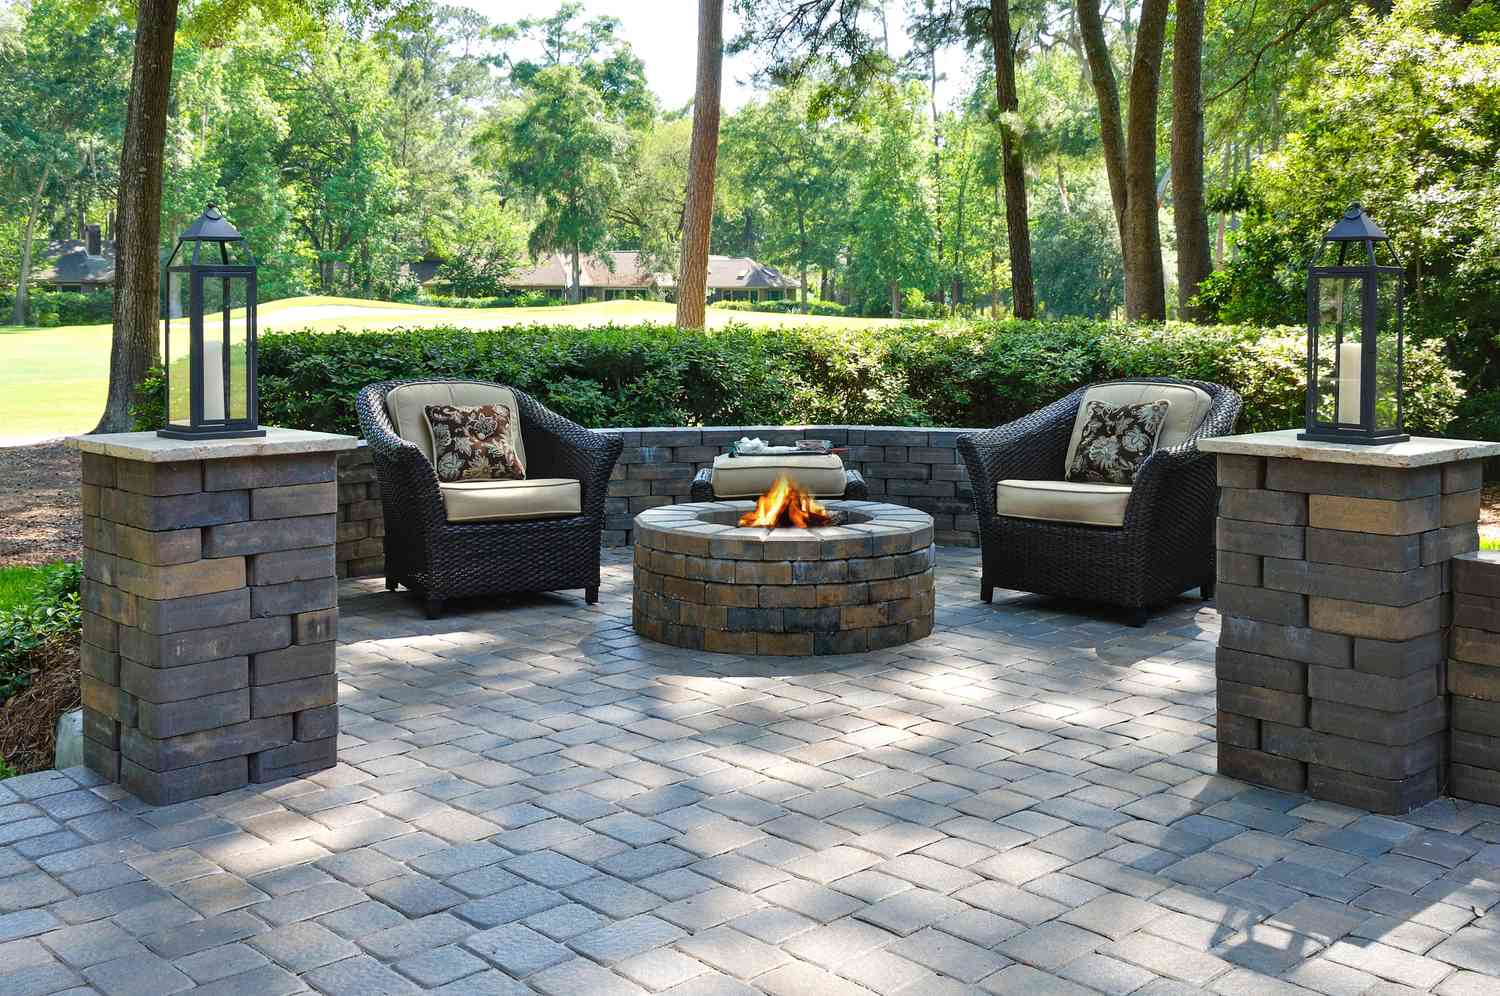
Custom Fire Pit
If you want a unique design that matches your existing patio, consider building an in-ground fire pit with pavers. This classic design is perfect for gatherings and can be customized to fit your needs.
Fire Pit Ring Kit
For a simpler project, use a fire pit ring kit. These kits are easy to assemble and require minimal materials. They are ideal for beginners and can be installed on grass or a patio.
Modern Fire Pit
If you prefer a more rustic look, consider building a modern fire pit using retaining wall blocks. This design is perfect for smaller gatherings and can be completed quickly.
Conclusion
Building a backyard fire pit is an affordable and simple DIY project that can transform your outdoor space. By following these steps and considering the essential tools and materials, you can create a cozy and inviting area for gatherings and relaxation. Remember to always prioritize safety and enhance your fire pit area with the right accessories to make it more comfortable and inviting. With this guide, you can enjoy your new fire pit in no time!
References: Lowe's – How to Build a Custom Fire Pit Lowe's – How to Build a Fire Pit Ring Yellow Brick Home – Make Your Own Fire Pit Lowe's YouTube – How To DIY a Backyard Fire Pit This Old House – How To Build a DIY Fire Pit
Was this page helpful?
At Storables.com, we guarantee accurate and reliable information. Our content, validated by Expert Board Contributors, is crafted following stringent Editorial Policies. We're committed to providing you with well-researched, expert-backed insights for all your informational needs.


0 thoughts on “DIY Guide: Installing A Backyard Fire Pit In A Weekend”