Home>Ideas and Tips>DIY Guide To Installing A Herringbone Tile Pattern
Ideas and Tips
DIY Guide To Installing A Herringbone Tile Pattern
Published: September 18, 2024
Learn how to install a herringbone tile pattern with our step-by-step DIY guide. Perfect for adding elegance to your home.
(Many of the links in this article redirect to a specific reviewed product. Your purchase of these products through affiliate links helps to generate commission for Storables.com, at no extra cost. Learn more)
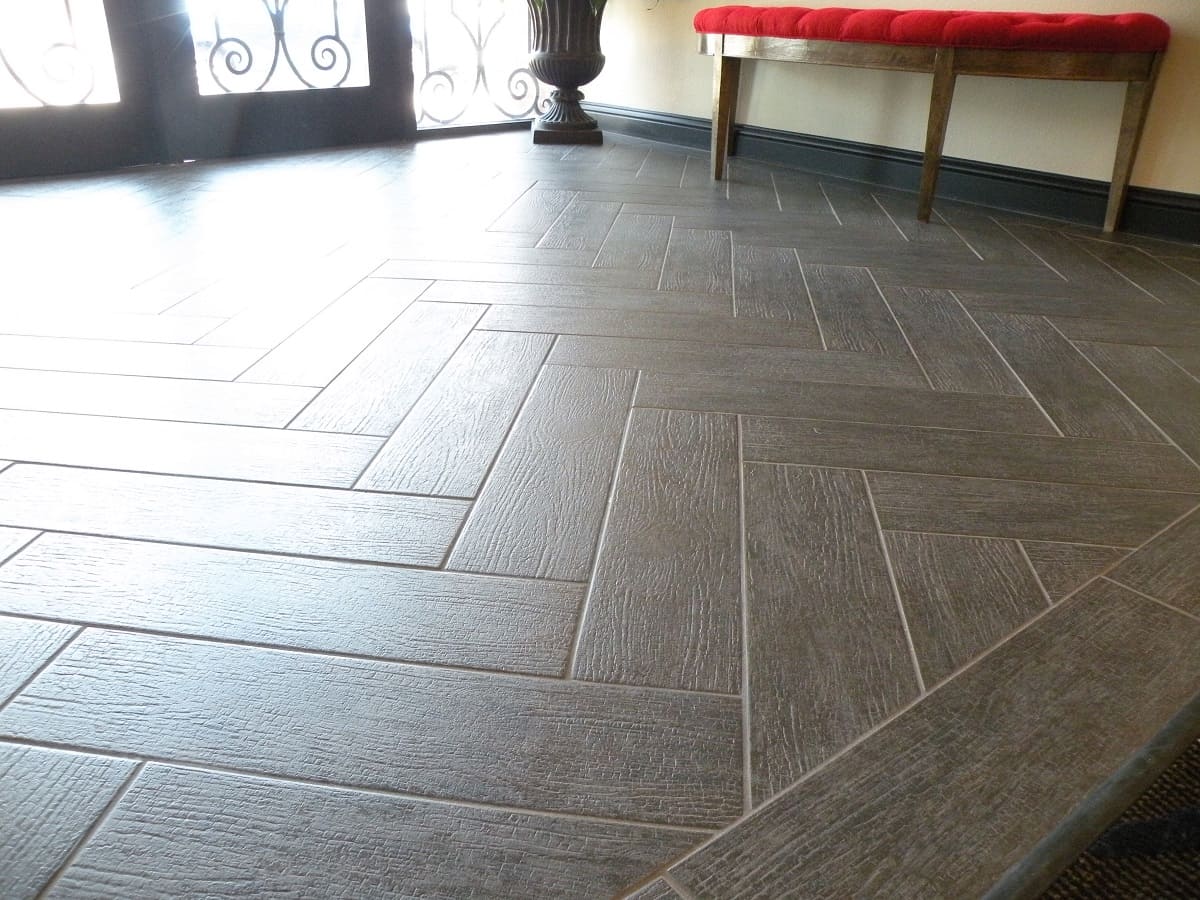
Installing a herringbone tile pattern can be a challenging but rewarding DIY project for homeowners who want to add a touch of elegance and sophistication to their floors or walls. This guide will walk you through the steps required to plan and execute a herringbone tile layout, including the necessary tools and materials, measuring techniques, and tips for making accurate cuts.
Tools and Materials Needed
Before you begin your project, it's essential to ensure that you've got all the necessary tools and materials. Here are the key items you'll need:
-
Tiles: Choose tiles that are suitable for a herringbone layout. Ideally, the tiles should have a length divisible by their width to ensure consistent grout joints. Be vigilant about the batches you purchase, as inconsistencies in tile color and size can cause headaches later on.
-
Adhesives: A slower-setting adhesive is recommended to allow you to work with the tiles laid for a longer period before they set completely.
-
Trowel: A trowel is necessary for applying tile adhesive. The type of trowel you use may vary depending on the tile size and type.
-
Spacers: Spacers ensure consistent spacing between tiles, which is crucial for maintaining the herringbone pattern.
-
Level: A level is essential for ensuring that your tiles are perfectly aligned and level.
-
Tape Measure: A tape measure helps in measuring the area where you plan to install the herringbone tile pattern.
-
Pencil: A pencil is used for marking the center point and reference lines on the floor or wall.
-
Manual Tile Cutter: A manual tile cutter, preferably one that can cut at multiple angles with the help of a rotating set square, is necessary for making precise cuts. The RUBI TX Max range is ideal for this purpose.
Measuring the Space and Calculating Tile Requirements
To start your project, you need to measure the area where you plan to install the herringbone tile pattern. Multiply the length and width of the space to determine the square footage. It's advisable to add an additional 10% for waste and cuts, as not every tile will cut perfectly.
Step-by-Step Measurement Guide
- Measure the Length and Width: Measure the length and width of the area where you plan to install the herringbone tile pattern.
- Calculate Square Footage: Multiply the length and width to determine the square footage.
- Add 10% for Waste: Add an additional 10% to account for waste and cuts.
Example Calculation
Let's say you have a room that is 12 feet long and 10 feet wide.
- Square Footage Calculation: (12 text{ feet} times 10 text{ feet} = 120 text{ square feet})
- Adding 10% for Waste: (120 text{ square feet} times 0.10 = 12 text{ square feet})
- Total Tiles Required: (120 text{ square feet} + 12 text{ square feet} = 132 text{ square feet})
Installing the Herringbone Tile Pattern
Read more: DIY Guide To Installing A Tile Floor
Step 1: Apply Tile Adhesive
Begin by applying tile adhesive to a small section of the floor or wall, following the manufacturer’s instructions. Start laying the tiles along the reference line, placing the first tile at a 45-degree angle (or 90 degrees if that’s the pattern you’re going for).
Step 2: Lay Tiles
Insert spacers between each tile to ensure consistent spacing, finishing off with levelling clips. Continue laying tiles, overlapping at the very top of the tiles at a 45-degree angle to create the herringbone tile layout. Ensure that you’re aligning the edges and corners as you go, making adjustments when needed.
Step 3: Use a Laser Level
To ensure that your pattern stays straight, use a laser level. Position it so that the line runs between the very center X in the room and the X on the outside edge of the room. Make sure that in your first two tiles, both the upper corner of the first tile and the point where that tile and the next meet are aligned to that laser level line. As you continue down the pattern, keep an eye on that laser level line and make sure each point where the tiles meet follows along that line.
Step 4: Cut Tiles
Cut your tiles row by row to save time and ensure accurate cuts. Always measure twice before cutting to avoid mistakes. The rotating set square on your manual tile cutter will make harder corner cuts easier, leaving you with a perfectly symmetrical pattern.
Read more: How To Install Herringbone Brick Pattern
Grouting and Finishing Your Herringbone Tiles
Once the adhesive has dried, remove the spacers and levelling clips. Prepare the grout according to the manufacturer’s instructions. Apply the grout, working it into the spaces between the tiles with a grout float. Wipe off excess grout with a damp sponge, taking care not to disturb the tiles. Allow the grout to cure before applying a sealant to protect the tiles and grout.
Tips for Grouting
- Apply Grout Carefully: Work the grout into the spaces between the tiles with a grout float.
- Wipe Off Excess Grout: Use a damp sponge to wipe off excess grout, ensuring that no grout remains on the surface of the tiles.
- Allow Grout to Cure: Let the grout cure according to the manufacturer’s instructions before applying a sealant.
Additional Tips for a Successful Installation
Starting the Pattern
When starting a herringbone tile pattern, it's crucial to identify the center of your room. Measure the center across both the width and length of the room and mark a small X in the center spot. This will help you establish a straight line for your pattern.
Read more: DIY Guide To Installing A Pebble Tile Floor
Dry Laying
Before applying adhesive, perform a dry lay of your tiles to ensure that your pattern is correct. Hold the first tile at roughly a 45-degree angle with its upper corner on the marked center point. Align the second piece of tile so that it makes a 90-degree angle with the first tile, ensuring that it goes in the opposite direction with its long edge aligned straight with the upper short edge of the first tile.
Maintaining Pattern Straightness
Use a laser level to ensure that your pattern stays straight. Position it so that it runs between the very center X in the room and the X on the outside edge of the room. This will help you keep each point where the tiles meet aligned with that line, maintaining symmetry throughout your installation.
Using Spacers
Insert spacers between each tile to ensure consistent spacing. This is particularly important in maintaining an even grout joint throughout your herringbone pattern.
Common Mistakes to Avoid
Read more: DIY Guide To Installing A Subway Tile Shower
Inconsistent Tile Size
Inconsistencies in tile size can cause headaches during installation. Ensure that you purchase tiles from the same batch to avoid color and size variations.
Incorrect Cutting
Incorrect cutting can ruin your entire installation. Always measure twice before cutting to avoid mistakes. Use a manual tile cutter with a rotating set square for precise cuts.
Uneven Grout Joints
Uneven grout joints can detract from the overall appearance of your herringbone tile pattern. Use spacers consistently to maintain even spacing between tiles.
Conclusion
Installing a herringbone tile pattern requires precision and attention to detail. By following these steps, including measuring the space accurately and making precise cuts with a manual tile cutter, you can achieve a stunning herringbone pattern that elevates the aesthetic appeal of any room. Remember to use a slower-setting adhesive, insert spacers for consistent spacing, and maintain alignment using a laser level. With patience and practice, you can master the art of herringbone tile installation and create a beautiful, professional-looking finish in your home.
By following this comprehensive guide, you will be well-equipped to tackle your DIY herringbone tile installation project with confidence. Remember to take your time, measure carefully, and maintain attention to detail throughout the process. The end result will be a beautifully designed herringbone tile pattern that adds elegance and sophistication to any space.
Was this page helpful?
At Storables.com, we guarantee accurate and reliable information. Our content, validated by Expert Board Contributors, is crafted following stringent Editorial Policies. We're committed to providing you with well-researched, expert-backed insights for all your informational needs.


0 thoughts on “DIY Guide To Installing A Herringbone Tile Pattern”