Articles
How To Layout A Herringbone Tile Floor
Modified: August 28, 2024
Learn how to properly layout a stunning herringbone tile floor with our helpful articles. Step-by-step guides and expert tips for achieving the perfect design.
(Many of the links in this article redirect to a specific reviewed product. Your purchase of these products through affiliate links helps to generate commission for Storables.com, at no extra cost. Learn more)
Introduction
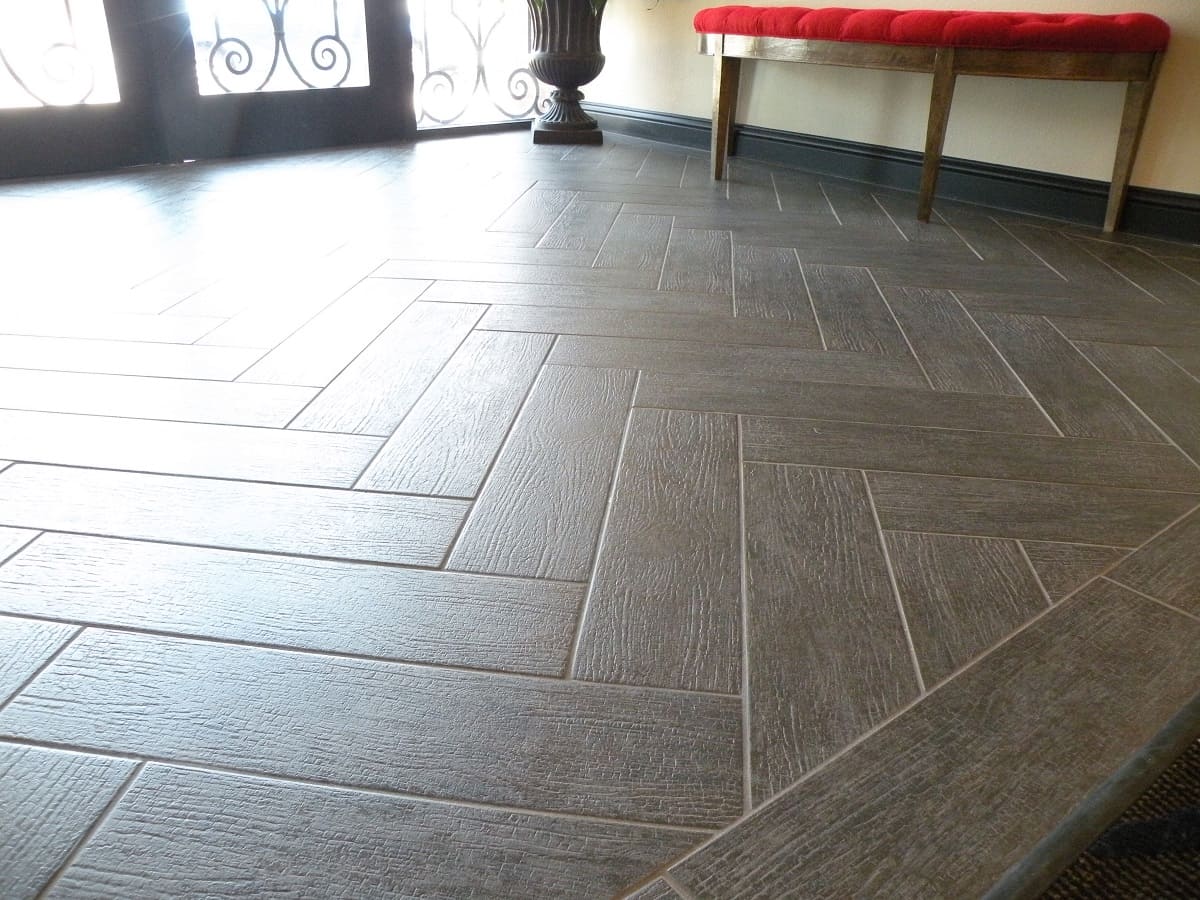
Herringbone tile floors have become increasingly popular in recent years due to their timeless and elegant design. The pattern, which resembles the bones of a herring fish, creates a stunning visual effect that adds a touch of sophistication to any space. Whether you’re renovating your bathroom, kitchen, or entryway, a herringbone tile floor is a perfect choice to elevate the overall look and feel.
However, properly laying a herringbone tile floor requires some technical know-how. With the right tools and a bit of patience, you can achieve a professional-looking installation that will last for years to come. In this article, we will guide you through the step-by-step process of laying a herringbone tile floor, from choosing the right tiles to grouting and sealing the finished product.
Before we dive into the specifics of the installation process, let’s talk about the importance of selecting the right herringbone tile for your project. The type of tile you choose will depend on your personal preferences, as well as the specific requirements of your space.
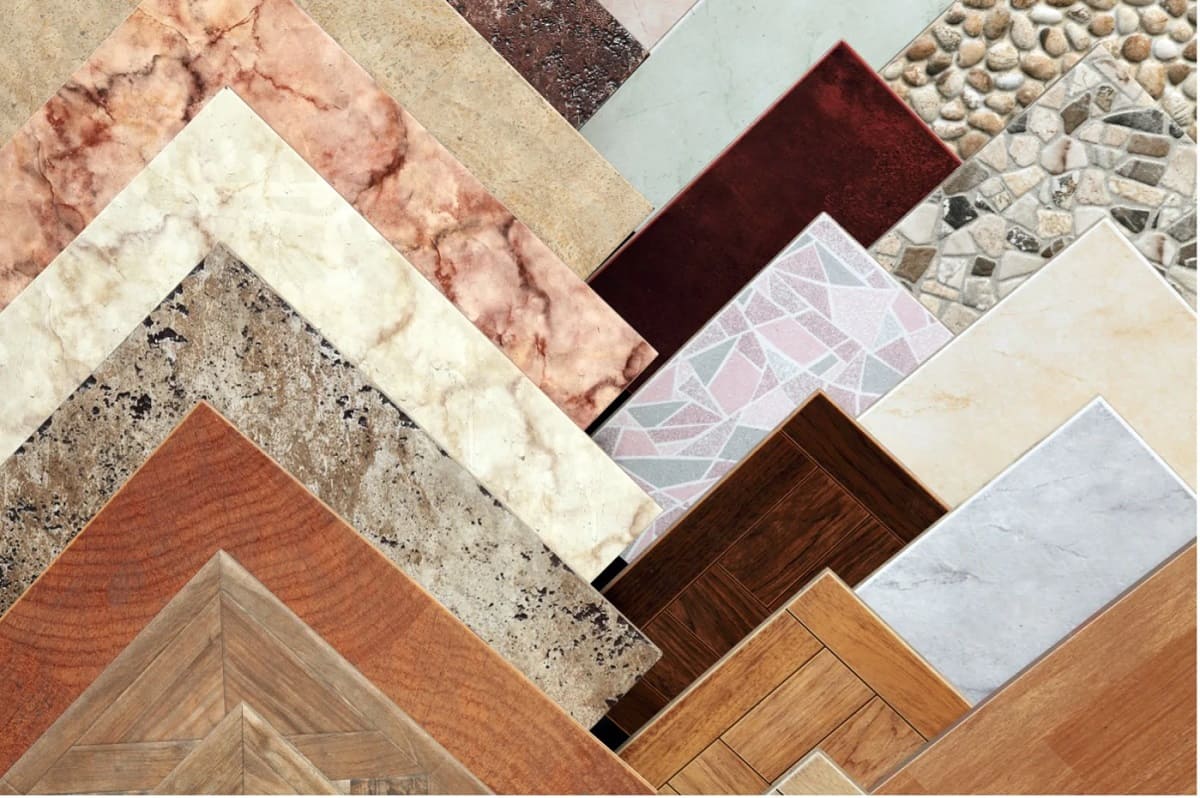
Herringbone tiles are available in a variety of materials, including ceramic, porcelain, and natural stone. Each material has its own unique qualities and considerations. For instance, porcelain tiles are highly durable and resistant to moisture and stains, making them ideal for high-traffic areas such as kitchens and bathrooms. On the other hand, natural stone tiles, such as marble or travertine, offer a luxurious and timeless appeal, but may require more maintenance to keep them looking their best.
In addition to the material, you’ll also need to consider the size and color of the tiles. The size of the tiles will depend on the scale of your space, as well as the herringbone pattern you wish to achieve. Larger tiles can create a more contemporary and spacious look, while smaller tiles offer a classic and intricate pattern.
Choosing the right color is equally important in creating the desired aesthetic. Neutral tones, such as white, gray, or beige, can create a clean and modern look, while bold colors and patterns can add a pop of personality to your space. Consider the overall color scheme and style of your room when selecting the perfect herringbone tile.
Now that we’ve covered the basics of choosing the right herringbone tile, let’s move on to the next step: preparing the surface.
Key Takeaways:
- Elevate your space with a timeless herringbone tile floor by choosing the right tiles, preparing the surface, and mastering the art of laying, cutting, grouting, and sealing for a flawless and visually stunning result.
- Achieve a professional and visually appealing herringbone tile floor by carefully selecting the perfect tiles, marking the centerline, laying the first tile, continuing the pattern, cutting tiles for edges and corners, and filling in the gaps with precision and attention to detail.
Choosing the Right Herringbone Tile
Choosing the right herringbone tile is essential to ensure a successful and visually appealing installation. As mentioned earlier, there are various factors to consider when selecting the perfect tile for your project.
First, assess the material options available to you. Ceramic and porcelain tiles are popular choices due to their durability and ease of maintenance. They are also available in a wide range of colors and finishes, allowing you to find the perfect match for your design vision. If you’re looking for a more luxurious feel, natural stone tiles like marble or travertine can add a touch of elegance to your space.
Next, consider the size of the tiles. Larger tiles can create a more modern and spacious feel, while smaller tiles offer a classic and intricate pattern. The size should be proportional to the scale of the room and the herringbone pattern you desire. Remember that larger tiles may require more precise cutting and installation.
The color of the tiles is another important consideration. Neutral tones like white, gray, or beige can create a clean and timeless look, while bold colors and patterns can add a dramatic touch. Think about the overall color scheme and style of your space to determine the best color option for your herringbone tile.
Additionally, consider the finish of the tiles. A matte finish provides a more understated and rustic look, while a glossy finish offers a sleek and modern feel. Choose a finish that complements the overall design aesthetic of your room.
While aesthetics are important, it’s crucial to also consider the practical aspects of the tile. Look for tiles that are suitable for the specific area you wish to install them in. For example, for high-traffic areas like kitchens and bathrooms, opt for tiles that are resistant to moisture, stains, and scratches to ensure longevity and easy maintenance.
Lastly, take into account your budget. Herringbone tiles can range in price depending on the material, size, and brand. Set a budget that allows for a good quality tile without exceeding your financial limitations.
By carefully considering these factors, you can select the perfect herringbone tile that not only matches your design vision but also meets your functional requirements and budget constraints. Now that you have chosen the ideal tile, it’s time to prepare the surface for installation.
Preparing the Surface
Before you begin laying the herringbone tile, it’s crucial to properly prepare the surface to ensure a smooth and long-lasting installation.
The first step is to ensure that the existing floor is clean and free of any debris. Sweep or vacuum the area to remove any dust, dirt, or loose particles that could interfere with the tile adhesive. If there are any existing flooring materials, such as carpet, vinyl, or laminate, they should be removed to create a level surface.
Next, inspect the subfloor for any cracks, unevenness, or moisture issues. If you notice any cracks, it’s important to repair them using a suitable floor patching compound. Fill in any low spots or uneven areas with a self-leveling compound to ensure that the surface is even and flat.
If your subfloor is wooden, make sure it is sturdy and secure. Check for any loose boards and fix them in place. It is recommended to install cement backer board over wooden subfloors to provide stability and prevent any flexing or movement that could cause the tiles to crack over time.
Once the subfloor is secure and level, it’s time to apply a primer. Priming the subfloor helps to improve adhesion between the subfloor and the tile adhesive, ensuring a strong bond. Follow the manufacturer’s instructions to prepare and apply the primer, making sure to let it dry completely before proceeding to the next step.
If you are installing the herringbone tile in a wet area, such as a bathroom or a kitchen backsplash, it is important to install a waterproofing membrane. This will help protect the subfloor and surrounding areas from water damage. Apply the membrane according to the manufacturer’s instructions, ensuring complete coverage over the entire surface.
Lastly, measure the room and determine the center point. Use a chalk line to mark the centerline on the floor. This will serve as a guide when laying the tiles and ensuring that the herringbone pattern is centered and symmetrical.
By properly preparing the surface, you create a solid foundation for the herringbone tile installation. Taking the time to clean, repair, and level the subfloor will help ensure a successful and durable finished product. With the surface ready, it’s time to start marking the centerline and laying the first tile.
Marking the Centerline
Marking the centerline is a crucial step in the process of laying a herringbone tile floor. It ensures that the pattern is symmetrical and visually appealing. Follow these steps to accurately mark the centerline:
- Measure the width of your room and divide it in half. This will give you the center point.
- Using a measuring tape, measure from one wall to the center point and make a small mark with a pencil. Repeat this step from the opposite wall to the center point.
- Using a chalk line, stretch it from one mark to the other, making sure it is taut. Snap the chalk line against the floor to create a straight and visible line. This line will serve as the centerline for your herringbone pattern.
- For larger rooms, it may be necessary to divide the space into smaller sections to maintain accuracy. Measure and mark the centerline for each section separately.
Ensure that the chalk line is straight and evenly aligned with the walls. Take extra care to make precise measurements and markings, as any inaccuracies at this stage will have a domino effect on the rest of the tile installation process.
Keep in mind that the centerline should be based on the layout of the entire room, not just the area where you plan to lay the herringbone tile. This will create a harmonious flow and continuity throughout the space.
Once the centerline is marked, it’s time to move on to laying the first tile.
Laying the First Tile
Now that you have marked the centerline, it’s time to lay the first tile of your herringbone pattern. This initial tile will set the foundation for the rest of the installation. Follow these steps to ensure a successful start:
- Start at the intersection of the centerline and one of the walls. This corner will be the starting point for your herringbone pattern.
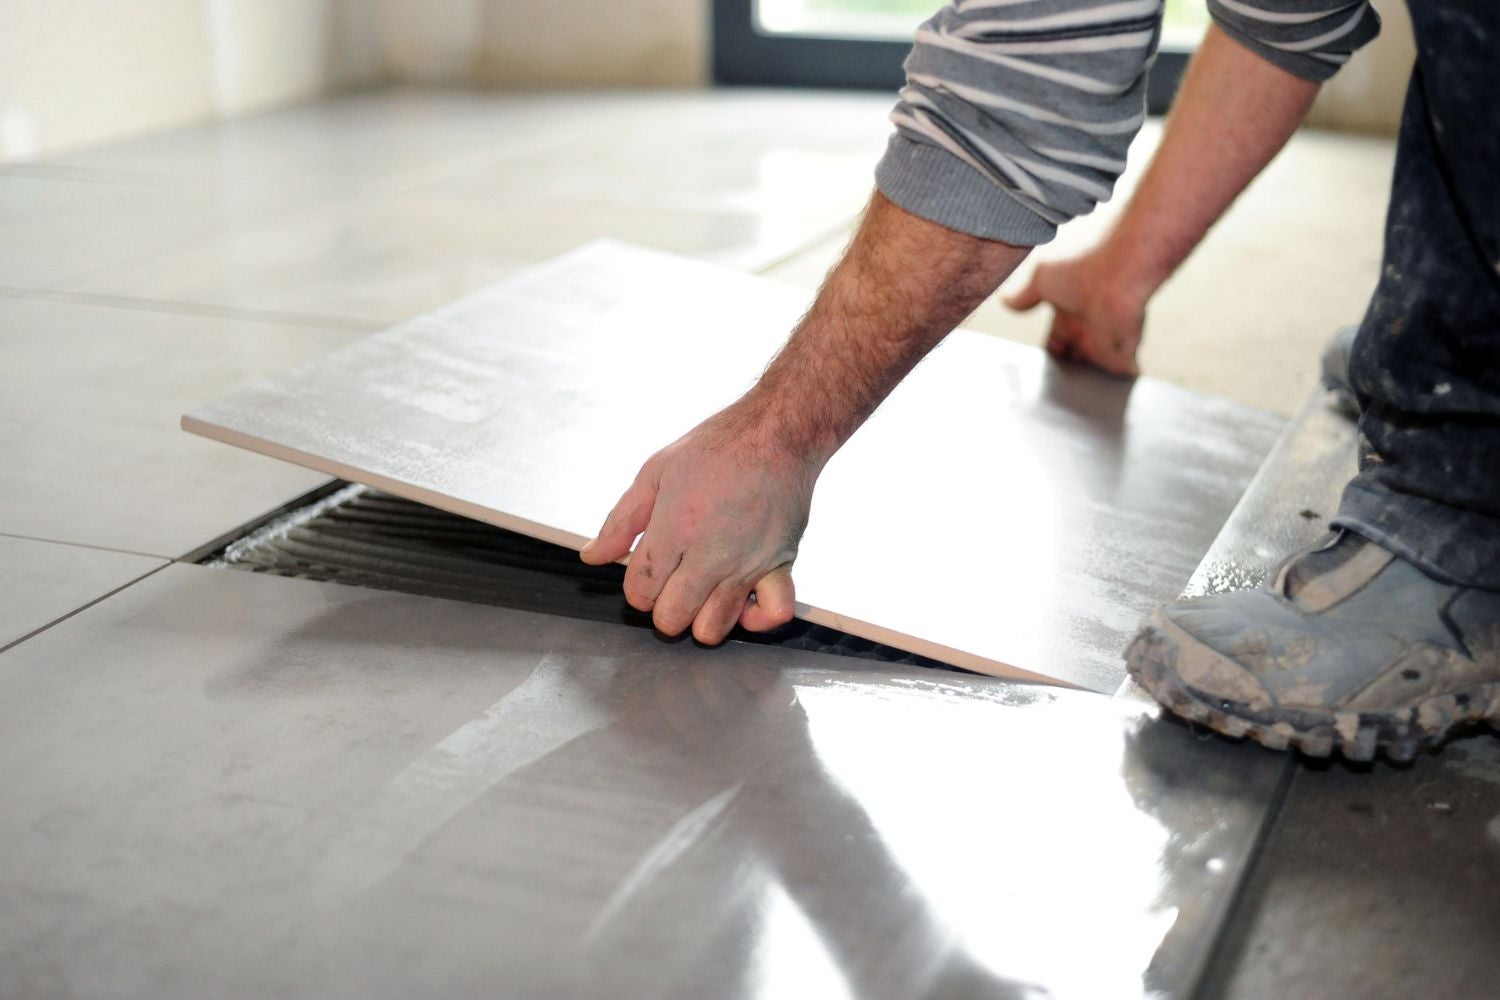
- Apply a thin layer of tile adhesive to the floor using a notched trowel. Make sure the adhesive is spread evenly and fully covers the area where the first tile will be placed.
- Place the first tile at the corner of the centerline and press it firmly into the adhesive. Use slight twisting motions to ensure proper adhesion.
- Make sure the tile is aligned with both the centerline and the wall. Use a level to check for any unevenness. Adjust the tile if needed.
- Apply gentle pressure to the tile to ensure it is securely bonded to the adhesive. Check again for levelness and adjust if necessary.
- Use tile spacers to create even gaps between the tiles. This will ensure a consistent and professional-looking installation. The size of the spacers will depend on the desired grout width. Refer to the manufacturer’s recommendations for the appropriate spacer size.
- Continue laying the tiles along the centerline, following the herringbone pattern. Apply adhesive and place each tile, making sure they are aligned, level, and spaced properly.
As you lay each tile, periodically check for levelness and adjust if needed. It’s important to maintain a consistent level throughout the herringbone pattern to ensure a seamless and visually appealing result.
Remember to work in small sections to allow for better control over the adhesive drying time. This will prevent the adhesive from drying out before laying all the tiles.
Once you have completed the first row of tiles along the centerline, you can begin working on the subsequent rows, following the herringbone pattern. With each row, the process becomes easier as you continue to build upon the foundation set by the first tile.
Now that you have mastered the technique of laying the first tile, it’s time to move on to continuing the herringbone pattern in the rest of the room.
Continuing the Pattern
As you continue laying the herringbone pattern, it’s important to maintain consistency and precision to ensure a visually appealing and professional-looking result. Follow these steps to successfully continue the pattern:
- After laying the first row of tiles along the centerline, proceed with the next row. Start by placing a tile at the beginning of the row, aligning it with the bottom corner of the previous tile.
- Apply adhesive to the back of the tile and press it firmly onto the floor, making sure it is leveled and evenly spaced from the adjacent tile.
- Continue laying subsequent tiles in a zigzag pattern, alternating the angle of each tile to create the herringbone effect.
- Regularly use a level to check for levelness and adjust as necessary. This will ensure that the tiles are evenly aligned throughout the pattern.
- Keep in mind that precision and attention to detail are key to achieving a seamless herringbone pattern. Make sure the corners of the tiles are aligned and that the pattern remains consistent and visually pleasing.
- Continue working row by row, adhering the tiles with adhesive, leveling them, and spacing them properly.
- Periodically step back and inspect the overall pattern for any inconsistencies or misalignments. It’s easier to make adjustments early on rather than waiting until the entire floor is laid.
Take your time in this process, as it requires careful planning and execution. Double-check your work as you progress to ensure a flawless and cohesive herringbone pattern.
Remember to work in sections that allow you to maintain control over the adhesive’s drying time. This will prevent the adhesive from drying out before you can properly lay the tiles.
If you encounter any obstacles, such as fixtures or corners, measure and cut the tiles accordingly. Precision is crucial when cutting the tiles to fit along the edges of the room or around obstacles. Use a tile cutter, wet saw, or score-and-snap tile cutter for accurate cuts.
By following these steps and maintaining attention to detail, you can continue the herringbone pattern flawlessly, creating a stunning and visually appealing floor.
Next, we will discuss how to cut tiles for edges and corners to ensure a polished and professional finish.
When laying a herringbone tile floor, start by finding the center of the room and work outwards in a zigzag pattern. Use spacers to ensure even spacing between tiles. Always dry fit the tiles before applying adhesive.
Cutting Tiles for Edges and Corners
When working on a herringbone tile floor, you’ll likely encounter edges and corners that require carefully measured and cut tiles for a seamless and finished look. Here’s a step-by-step guide on how to cut tiles for edges and corners:
- Measure the distance between the last full tile and the edge of the room or the corner where the cut tile will be placed. Use a measuring tape to get an accurate measurement.
- Transfer the measurement onto the tile you need to cut. Use a pencil or a tile marker to mark the measurement on the surface of the tile.
- Using a tile cutter or a wet saw, carefully cut along the marked line. Follow the manufacturer’s instructions for the specific tool you’re using to ensure proper cutting technique.
- Once the tile is cut, place it in the designated area, making sure it fits snugly against the wall or corner. Ensure that the cut tile aligns with the existing pattern and is level with the surrounding tiles.
- If the cut tile requires any additional adjustments, such as trimming or shaping, use fine-grit sandpaper or a tile file to refine the edges for a precise fit.
- Repeat this process for all the edges and corners that require cut tiles, ensuring each piece is accurately measured and cut.
- As you work your way around the room, continuing the herringbone pattern, periodically step back and assess the overall look to ensure consistency and symmetry.
Remember to wear safety goggles and gloves when using tile cutting tools to protect your eyes and hands. Take your time and work with caution to prevent injuries and achieve clean and precise cuts.
It’s also helpful to have spare tiles on hand in case of mistakes or accidents during the cutting process. Having extra tiles will ensure that you can easily replace any damaged or incorrectly cut pieces.
By carefully measuring and cutting tiles for edges and corners, you can achieve a polished and professional finish to your herringbone tile floor.
Now that you have mastered the art of cutting tiles, you can proceed to fill in the gaps between the tiles before grouting.
Filling in the Gaps
After laying the herringbone tiles and ensuring a precise fit, it’s time to fill in the gaps between the tiles. This step is important to both enhance the overall appearance of the floor and to stabilize the tiles. Follow these steps to fill in the gaps:
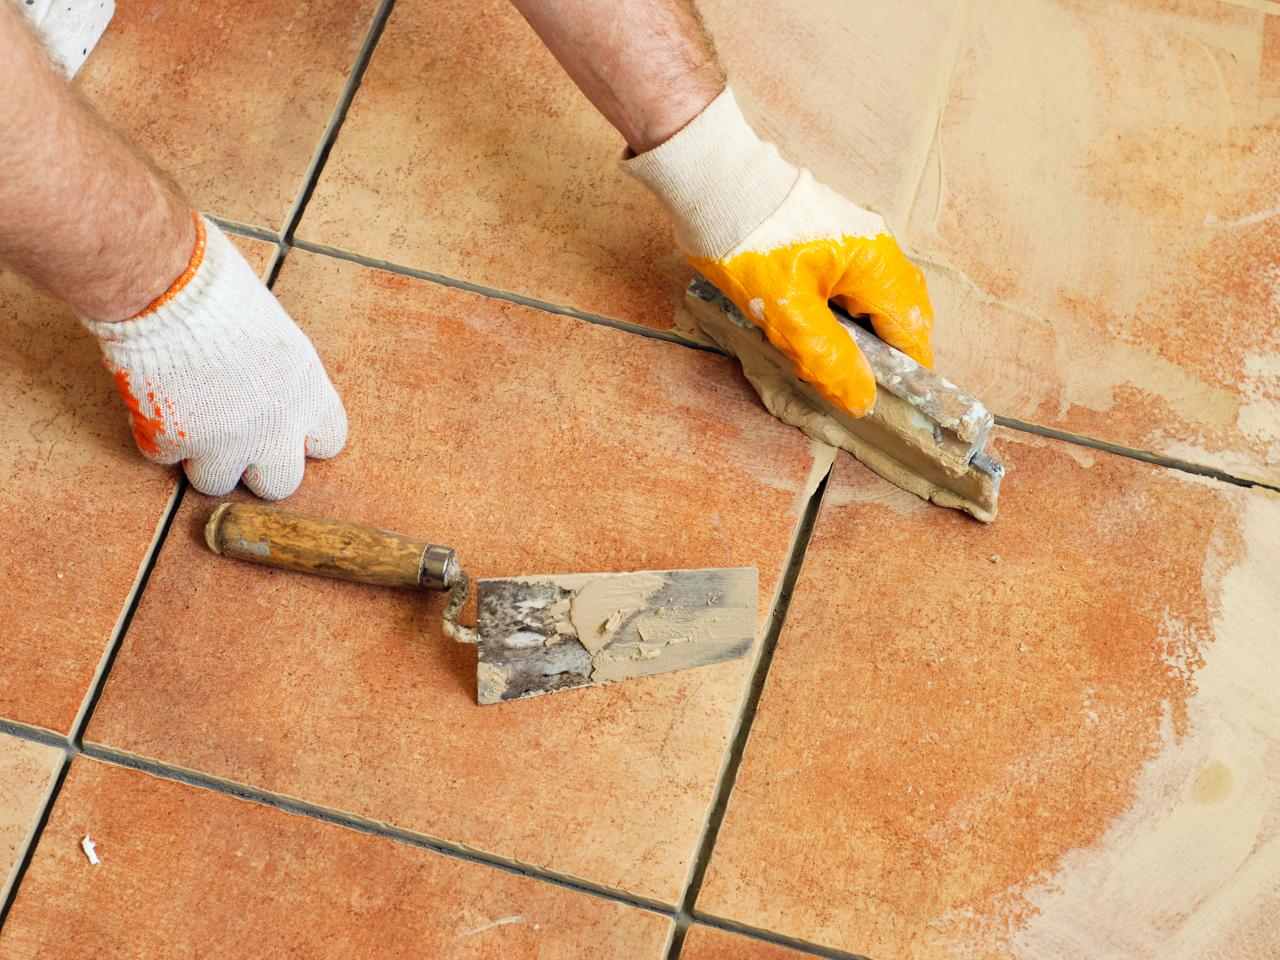
- Mix the grout according to the manufacturer’s instructions. Typically, this involves combining the grout powder with water in a clean bucket and stirring until you achieve a smooth, paste-like consistency.
- Using a grout float or a rubber grout applicator, scoop a generous amount of grout onto the float.
- Hold the float at a 45-degree angle and spread the grout diagonally across the tiles, ensuring that the gaps are completely filled. Work in small sections at a time.
- Using the edge of the float, remove any excess grout from the tile surface by holding it at a 45-degree angle and scraping it diagonally across the tiles. This will help achieve a smooth, level surface.
- Continue spreading and removing excess grout until all the gaps between the tiles are filled.
- Allow the grout to set for the specified time given by the manufacturer. This usually ranges from 15 to 30 minutes.
- Use a damp sponge or grout sponge to wipe away any remaining grout residue from the tiles. Rinse the sponge frequently in clean water to ensure a thorough cleaning.
- After the initial cleaning, perform a final wipe down to smooth and polish the tiles. Use a soft cloth or towel to gently buff the tiles and remove any haze or film left behind by the grout.
- Allow the grout to fully cure according to the manufacturer’s instructions. This typically takes a few days.
During the grouting process, it’s important to work efficiently to avoid the grout drying on the tile surface. Avoid excessive water on the sponge to prevent washing away the grout from the gaps.
Once the grout has cured, inspect the floor for any remaining residue or haze. If necessary, repeat the cleaning process to achieve a clean and polished finish.
With the gaps filled and the floor cleaned, it’s time to move on to the final steps of the herringbone tile installation: cleaning and sealing the floor.
Grouting the Tiles
Grouting is a crucial step in the herringbone tile installation process as it not only fills in the gaps between the tiles but also helps to stabilize and seal the floor. Here’s a step-by-step guide on how to grout the tiles:
- Start by mixing the grout according to the manufacturer’s instructions. Combine the grout powder with water in a clean bucket and stir until you achieve a smooth, lump-free consistency.
- Allow the grout mixture to sit for a few minutes to activate. During this time, it’s important to note the recommended working time of the grout, as it can vary depending on the product.
- Begin by scooping a generous amount of grout onto a rubber grout float or a grout applicator.
- Hold the float at a 45-degree angle and spread the grout diagonally across the tiles, ensuring that the gaps are completely filled. Work in small sections at a time.
- Press the grout into the gaps using a firm, sweeping motion. Make sure to fill the gaps completely, leaving no voids or air pockets.
- Hold the float at a 45-degree angle and remove any excess grout from the tile surface by scraping it diagonally across the tiles. This will help achieve a smooth, level finish.
- Continue spreading and removing excess grout until all the gaps between the tiles are filled.
- Once the grout is applied, allow it to set according to the manufacturer’s instructions. This typically ranges from 15 to 30 minutes.
- After the grout has set, use a damp sponge or grout sponge to wipe away any excess grout from the surface of the tiles. Rinse the sponge frequently and avoid excessive water to prevent washing away the grout from the gaps.
- Perform a final wipe down to smooth and polish the tiles. Use a soft cloth or towel to gently buff the tiles and remove any haze or film left behind by the grout.
- Allow the grout to fully cure according to the manufacturer’s instructions. This can take several days.
During the grouting process, it’s important to work efficiently to prevent the grout from drying on the tile surfaces. However, be careful not to rush, as you want to ensure that the grout is properly applied and the gaps are completely filled.
Once the grout has cured, inspect the floor for any remaining residue or haze. If necessary, repeat the cleaning process to achieve a clean and polished finish.
Congratulations! You have successfully grouted the herringbone tile floor. The final steps involve cleaning and sealing the floor to protect and enhance its appearance.
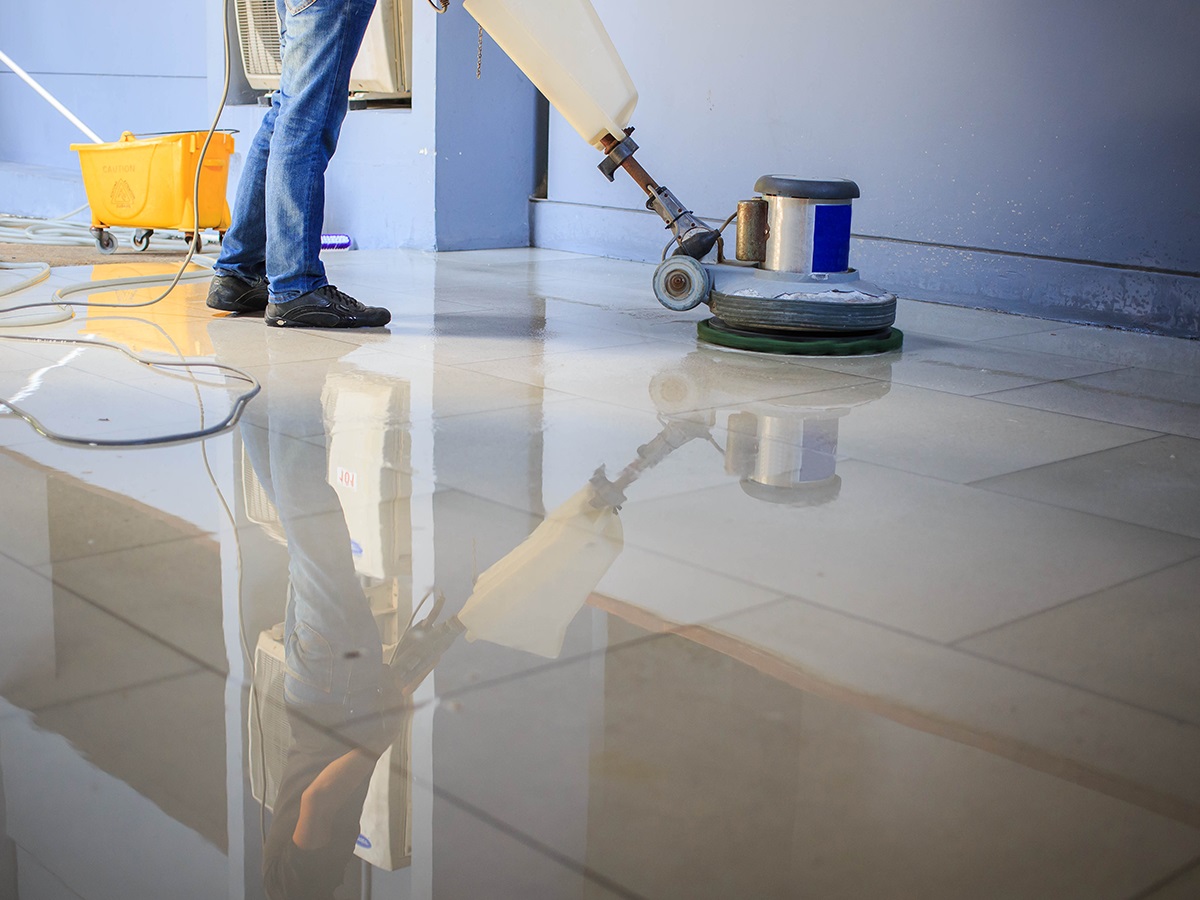
Cleaning and Sealing the Floor
After grouting the herringbone tile floor, it’s important to thoroughly clean the surface to remove any grout residue, haze, and dirt. Once the floor is clean, applying a sealer will help protect the tiles and maintain their appearance over time. Follow these steps to clean and seal your herringbone tile floor:
- Begin by allowing the grout to fully cure according to the manufacturer’s instructions. This may take several days.
- Once the grout is cured, sweep or vacuum the floor to remove any loose dirt and debris. Pay extra attention to the gaps between the tiles.
- Prepare a bucket of warm water and a mild, pH-neutral tile cleaner. Follow the instructions provided by the cleaner manufacturer.
- Dip a sponge or mop into the cleaning solution and wring out any excess water.
- Gently scrub the tiles and grout lines using the sponge or mop. Focus on any areas with visible dirt or grime.
- Rinse the sponge or mop frequently in the cleaning solution to avoid spreading dirt.
- After cleaning the entire floor, thoroughly rinse the tiles with clean water to remove any remaining cleaning solution.
- Dry the floor with a clean, dry towel or a microfiber cloth. Make sure the tiles are completely dry before applying the sealer.
- Choose a sealer specifically designed for your type of herringbone tile. Follow the manufacturer’s instructions for application.
- Apply the sealer to the floor using a clean sponge or a paint roller. Work in small sections and ensure that the sealer is evenly distributed.
- Allow the sealer to penetrate the tiles for the recommended amount of time. This may vary depending on the product.
- Using a clean, dry cloth, buff the tiles to remove any excess sealer and achieve a smooth finish.
- Let the sealer dry completely before walking on the floor or placing any furniture back in the room. This may take several hours or even overnight.
Regularly clean and maintain your herringbone tile floor to keep it looking its best. Sweep or vacuum the floor regularly to remove dirt and debris. Use a pH-neutral cleaner for routine cleaning and avoid harsh chemicals that can damage the tiles or grout.
It’s recommended to reapply the sealer periodically to maintain the protection and preserve the appearance of the tiles. Follow the sealer manufacturer’s instructions for reapplication frequency.
Congratulations! You have successfully cleaned and sealed your herringbone tile floor. The result will be a beautiful, durable, and long-lasting addition to your space.
Remember to consult the manufacturer’s instructions for any specific care recommendations or guidelines for your particular type of herringbone tile.
Thank you for following this comprehensive guide and we hope you enjoy your stunning herringbone tile floor for years to come!
Conclusion
Congratulations on completing the installation of your herringbone tile floor! By following this comprehensive guide, you have acquired the knowledge and skills required to achieve a professional and visually stunning result. The herringbone pattern has added a touch of elegance and sophistication to your space, elevating its overall design.
Throughout the process, you learned how to choose the right herringbone tile, prepare the surface, mark the centerline, lay the first tile, continue the pattern, cut tiles for edges and corners, fill in the gaps, grout the tiles, and finally clean and seal the floor. Each step was essential in creating a flawless and durable herringbone tile floor.
Remember to maintain and care for your herringbone tile floor to ensure its longevity and beauty. Regular cleaning, using pH-neutral tile cleaners, and periodic reapplication of sealers will help preserve the tiles’ appearance and protect them from stains and damage.
By mastering the art of herringbone tile installation, you have not only enhanced the aesthetic appeal of your space but also acquired valuable skills that can be applied to future projects. Whether it’s a bathroom, kitchen, or entryway, the herringbone pattern will continue to be a timeless and classic choice.
We hope this guide has provided you with the necessary insights and guidance to successfully lay a herringbone tile floor. If you have any further questions or need additional assistance, don’t hesitate to reach out. Enjoy your beautiful herringbone tile floor and the endless compliments it will surely receive!
Now that you've mastered laying a herringbone tile floor, why not tackle another exciting home improvement project? If you're considering updating your space, our guide on selecting the best hardwood floors could be just what you need. Offering practical advice and stylish options, this article will help elevate any home renovation you plan. Dive into our comprehensive review and make an informed choice that'll transform your home's look.
Frequently Asked Questions about How To Layout A Herringbone Tile Floor
Was this page helpful?
At Storables.com, we guarantee accurate and reliable information. Our content, validated by Expert Board Contributors, is crafted following stringent Editorial Policies. We're committed to providing you with well-researched, expert-backed insights for all your informational needs.


0 thoughts on “How To Layout A Herringbone Tile Floor”