Home>Ideas and Tips>DIY Guide to Installing a Kitchen Pot Filler with a Tile Backsplash
Ideas and Tips
DIY Guide to Installing a Kitchen Pot Filler with a Tile Backsplash
Modified: October 20, 2024
Learn how to install a kitchen pot filler and tile backsplash with our step-by-step DIY guide. Enhance your kitchen's functionality and aesthetics today!
(Many of the links in this article redirect to a specific reviewed product. Your purchase of these products through affiliate links helps to generate commission for Storables.com, at no extra cost. Learn more)
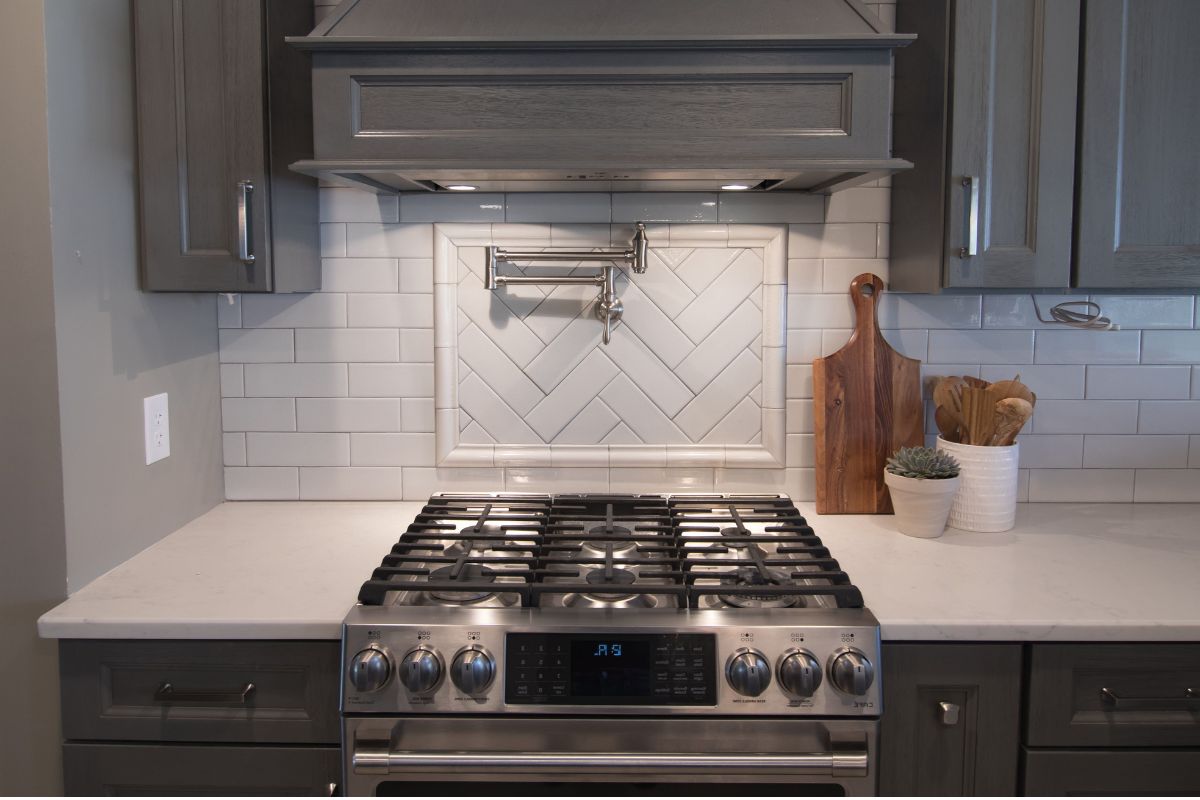
Installing a kitchen pot filler and tile backsplash can be a challenging but rewarding DIY project. This guide will walk you through the steps required to complete both tasks, ensuring that your kitchen is both functional and aesthetically pleasing. Before you begin, it's essential to understand the importance of proper planning and execution.
Planning Your Project
Choosing the Right Pot Filler
-
Consider Your Needs: A pot filler is designed to provide easy access to water when cooking, especially for large pots and pans. Choose a model that can reach all burners on your stove and consider the height and reach of the faucet.
-
Material and Design: Pot fillers come in various materials such as stainless steel, bronze, and chrome. Stainless steel is durable and easy to clean, while bronze adds a touch of elegance.
-
Brand Selection: Popular brands like Delta offer high-quality pot fillers with features like MagnaTite docking for the wand, ensuring it stays securely in place when not in use.
Preparing Your Space
-
Assess Your Backsplash: If you already have a tile backsplash, you'll need to determine if it's suitable for drilling through. Glass tile, for instance, requires special care to avoid damage.
-
Locate the Plumbing Line: Identify the plumbing line that will be used for the pot filler. This line should be accessible from the central utility closet or basement.
-
Measure and Plan: Measure the distance between the stove and where you plan to install the pot filler. Ensure that there is enough space to accommodate both the faucet and any necessary plumbing.
Roughing In the Plumbing
Roughing in the plumbing involves running the PEX line from the central water supply to the desired location above the stove.
Tools and Materials Needed
- PEX Tubing
- PEX Fittings
- Teflon Tape
- Drill Bit (for tile)
- Tile Drill Bit (for glass tile)
- Pipe Sealant
- Manual Screwdriver
Steps for Roughing In
-
Drill Through Tile: If you're dealing with a tile backsplash, use a tile drill bit to avoid damaging the tile. For glass tile, use a smaller tile drill bit and apply pipe sealant to prevent leaks.
-
Attach PEX to Supply Line: Use PEX fittings to connect the new PEX line to the existing supply line. Ensure that the connection is secure and won't leak.
-
Run PEX Line: Route the PEX line from the central utility closet or basement to the desired location above the stove. Use pipe sealant to prevent leaks at threaded connections.
-
Affix PEX Every Few Feet: While not always necessary, affixing PEX lines to studs or joists can help minimize damage to drywall and ensure stability.
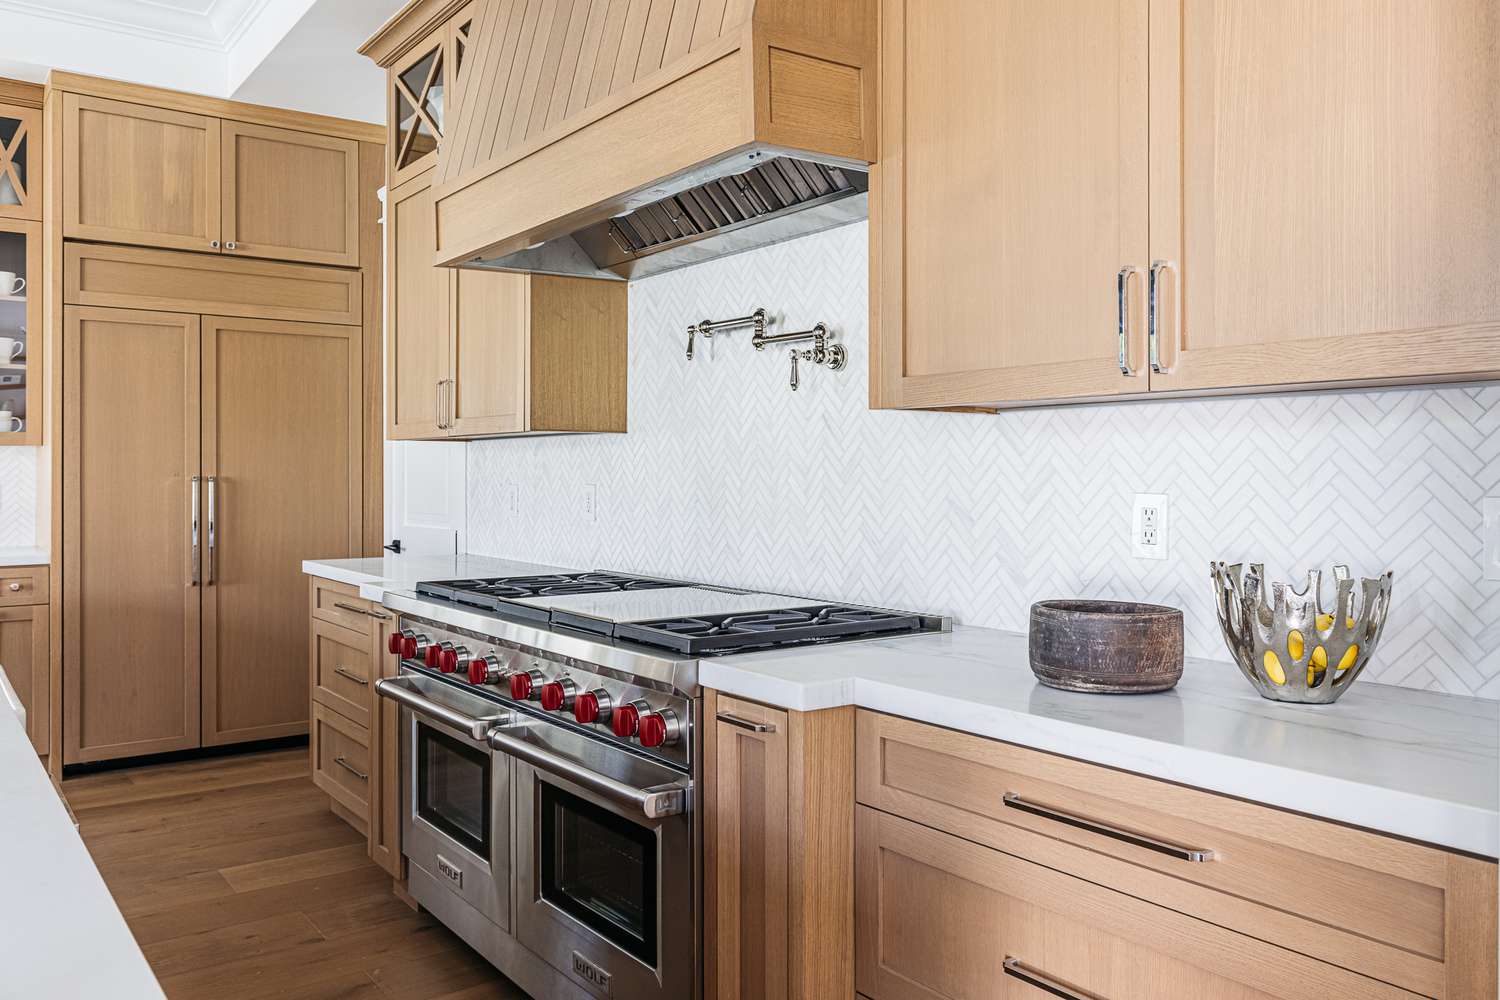
Installing the Pot Filler
Tools and Materials Needed
- Pot Filler Faucet
- Mounting Bracket
- Screws
- Inlet Housing
- Inlet Housing Cover
- Allen Keys (10mm and 2.5mm)
- Teflon Tape
Steps for Installation
-
Position the Pot Filler: Choose a position on the wall that allows the pot filler to reach all burners comfortably. Ensure it is at least 13 inches from the cooking surface and no more than 18 inches high.
-
Mounting Bracket Installation:
- Secure the mounting bracket to a wall stud using screws.
- Ensure that the mounting bracket is oriented properly and level along its vertical scale.
-
Inlet Housing Installation:
- Wrap the 1/2” inlet with Teflon tape in the direction of the threads fully 2-3 times.
- Thread the housing onto the 1/2” inlet, leaving the inlet housing cover in place until the pot filler is installed.
-
Pot Filler Installation:
- Remove the inlet housing cover.
- Install the pot filler tap onto the trim piece with the centering pin positioned on top right.
- Fully extend and articulate the arm to ensure it is securely fastened to the inlet housing.
- Secure it by using a set screw located on the bottom of the main body with a 2.5mm Allen key.
- Insert the pot filler trim piece into the inlet housing and firmly tighten it using a 10mm Allen key.
-
Final Check:
- Turn off the water supply lines before starting installation.
- Inspect both water supplies for signs of damage and replace if necessary.
- Flush supply lines thoroughly before installation to ensure no debris is present.
Installing Tile Backsplash
Tools and Materials Needed
- Tile Backsplash Material
- Tile Drill Bit (for glass tile)
- Acrylic Mastic (e.g., Carillo Pro)
- Level
- Straight Edge Board
- Tile Spacers
- Grout
- Grout Float
- Grout Sponge
Steps for Installation
-
Prepare the Area:
- Clear the area around where you will be working to ensure safety and accessibility.
-
Mark Tile Line:
- Lay a level across the counter spaces to ensure a level surface.
- Mark a line along the edge of the counter where you want your tile backsplash to start.
-
Measure Tile Thickness:
- Measure the thickness of your tile and add an eighth of an inch to account for grout joints.
-
Lay Tile Board:
- Place a straight edge board along your marked line and gently press it into place.
- Lay your tile off this board, ensuring it is straight and even.
-
Apply Acrylic Mastic:
- Apply acrylic mastic (such as Carillo Pro) to the back of your tiles before placing them on the wall.
-
Install Tiles:
- Start from one corner and work your way across, using tile spacers to maintain even spacing.
- Use a level to ensure each tile is straight and level.
-
Grout Tiles:
- Once all tiles are in place, mix grout according to manufacturer’s instructions.
- Apply grout using a grout float, spreading it evenly between tiles.
- Wipe excess grout from surface with a damp grout sponge before it dries.
-
Clean Grout Lines:
- Allow grout to dry completely before cleaning grout lines with a damp sponge.
- Use a grout cleaner if necessary to remove any stains or discoloration.
-
Seal Grout (Optional):
- Apply a grout sealer if desired to protect grout lines from stains and moisture.
Final Touches
Final Check on Pot Filler
-
Turn On Water Supply: Turn on the water supply lines after ensuring all connections are secure and leak-free.
-
Test Pot Filler: Test the pot filler by turning it on and off several times to ensure proper function and no leaks.
Final Check on Tile Backsplash
-
Inspect Tile Backsplash: Inspect your tile backsplash for any imperfections or unevenness.
-
Touch-Up Paint (if necessary): If necessary, touch up any paint around the edges of your tile backsplash where it meets other surfaces.
-
Clean Entire Area: Clean the entire area thoroughly with a soft cloth to remove any dust or debris accumulated during installation.
By following these steps carefully, you can successfully install both a kitchen pot filler and tile backsplash, enhancing both functionality and aesthetics in your kitchen space.
Additional Tips
-
Winterize Outdoor Pot Fillers: If you live in an area where temperatures fall below freezing, winterize your outdoor pot filler by turning off water supply lines and draining any remaining water from the faucet.
-
Regular Maintenance: Regularly clean your pot filler using a soft wet cloth without detergents to preserve its finish.
-
DIY Challenges: Be prepared for potential challenges such as drilling through glass tile or dealing with PEX lines in finished kitchens. Always use protective gear like gloves and safety glasses when working with power tools.
By understanding these tips and following this detailed guide, you'll be well-equipped to tackle this DIY project confidently and achieve professional-looking results in your kitchen renovation.
This comprehensive guide provides everything you need to know about installing a kitchen pot filler with a tile backsplash, ensuring that your kitchen is both functional and beautiful. Whether you're a seasoned DIY enthusiast or just starting out, this step-by-step guide will help you navigate through each stage of the project seamlessly.
Was this page helpful?
At Storables.com, we guarantee accurate and reliable information. Our content, validated by Expert Board Contributors, is crafted following stringent Editorial Policies. We're committed to providing you with well-researched, expert-backed insights for all your informational needs.


0 thoughts on “DIY Guide to Installing a Kitchen Pot Filler with a Tile Backsplash”