Home>Ideas and Tips>DIY Guide to Installing a Kitchen Pot Filler with a Decorative Tile Surround
Ideas and Tips
DIY Guide to Installing a Kitchen Pot Filler with a Decorative Tile Surround
Modified: October 28, 2024
Learn how to install a kitchen pot filler with a decorative tile surround in this comprehensive DIY guide. Perfect for enhancing both style and functionality!
(Many of the links in this article redirect to a specific reviewed product. Your purchase of these products through affiliate links helps to generate commission for Storables.com, at no extra cost. Learn more)
Introduction
A pot filler is a versatile kitchen accessory that provides a convenient water source right above your stove. It's perfect for filling pots, kettles, and other cooking vessels without the hassle of walking to the sink. However, integrating a pot filler with decorative tile surrounds can add an extra layer of complexity to the installation process. In this article, we'll cover everything from choosing the right materials to the final installation steps.
Choosing the Right Pot Filler
Before you start your project, it's essential to choose the right pot filler for your kitchen. Here are some factors to consider:
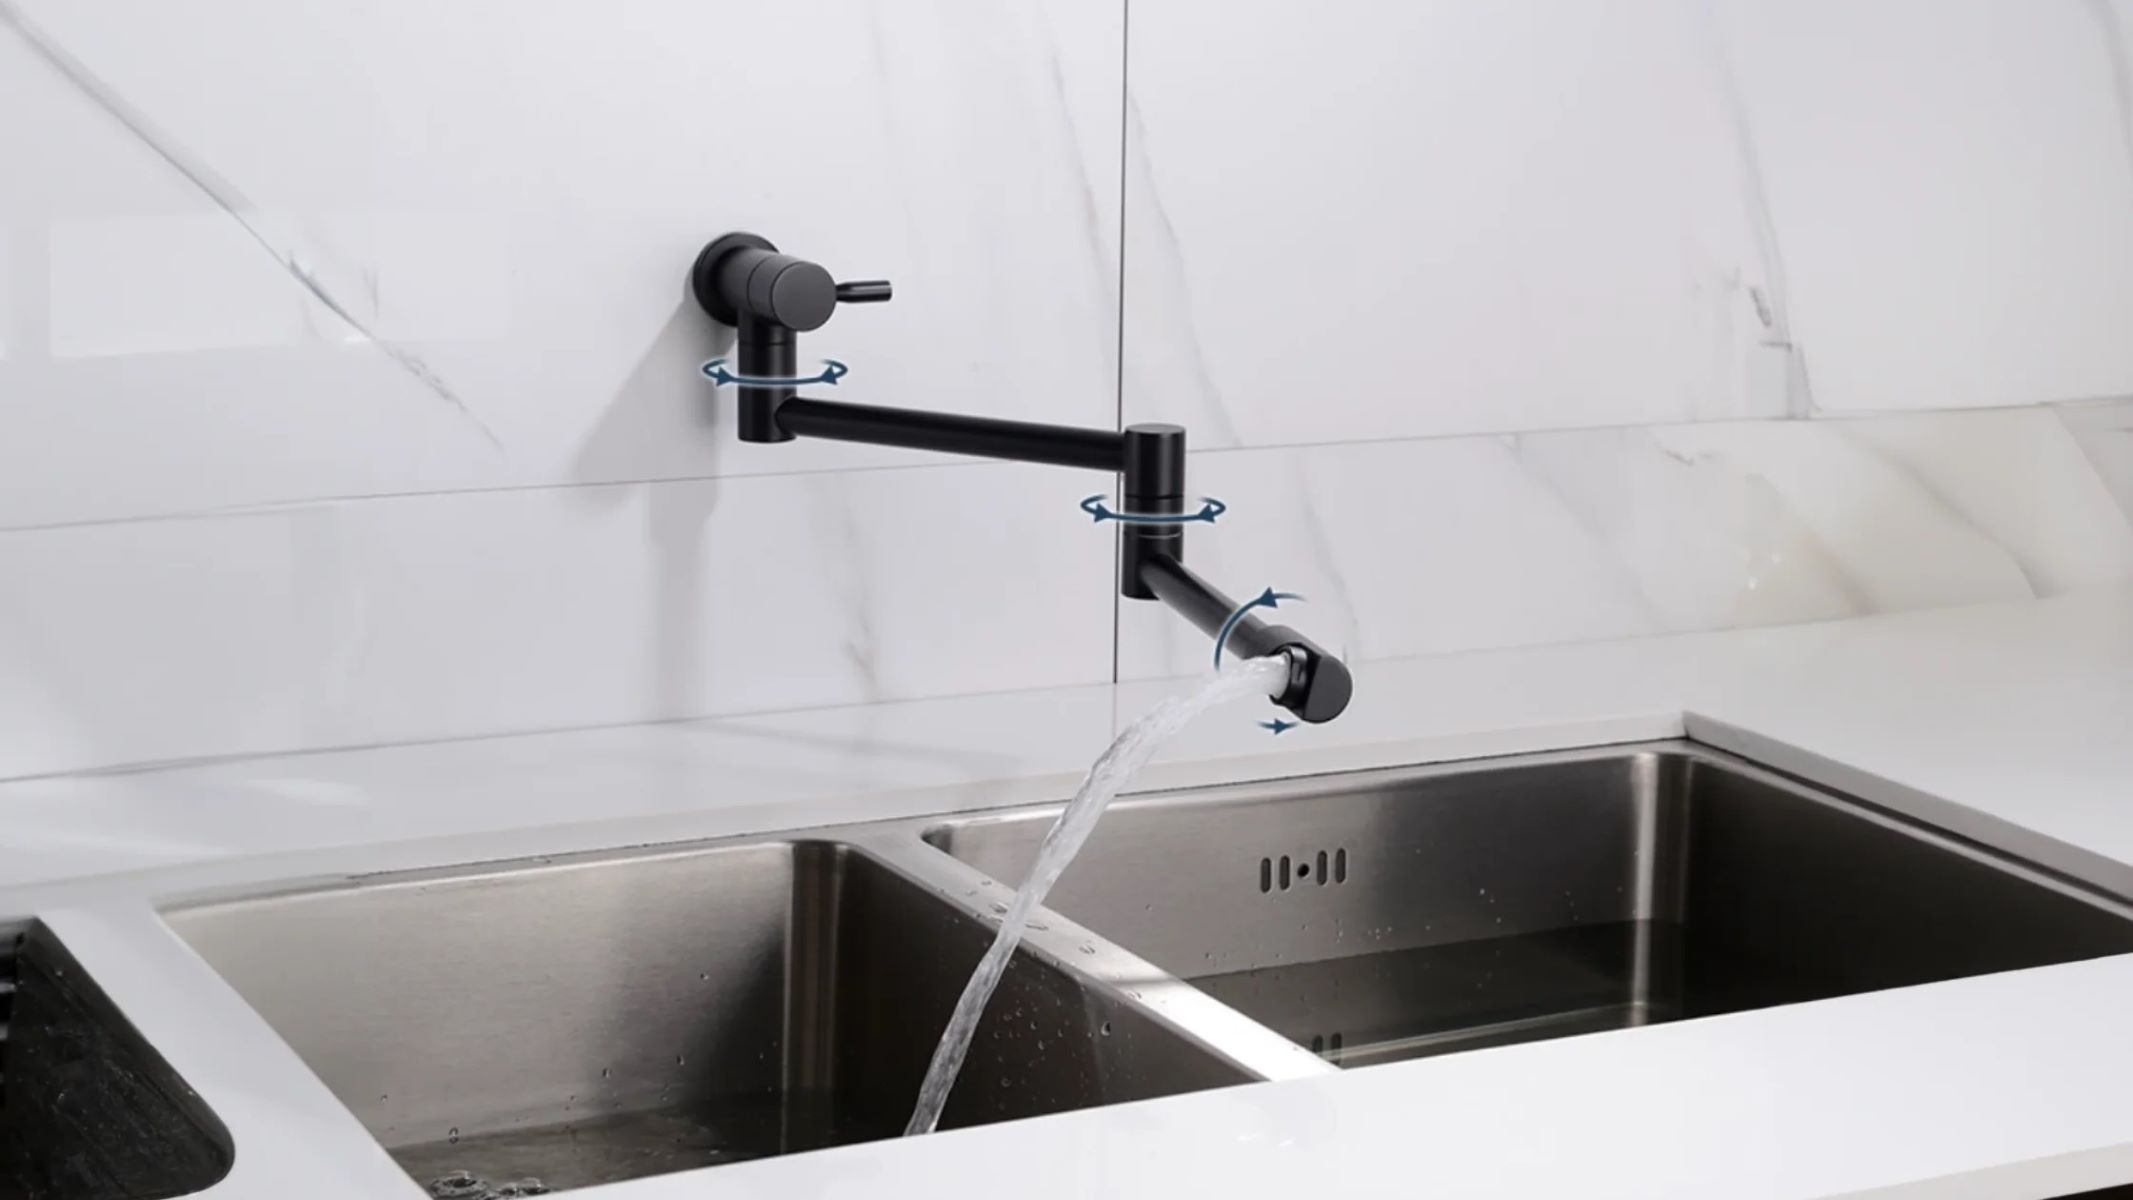
- Style: Pot fillers come in various styles, including wall-mounted, deck-mounted, and countertop models. Each style has its own advantages and disadvantages. For example, a wall-mounted pot filler is sleek and modern but may require more plumbing work.
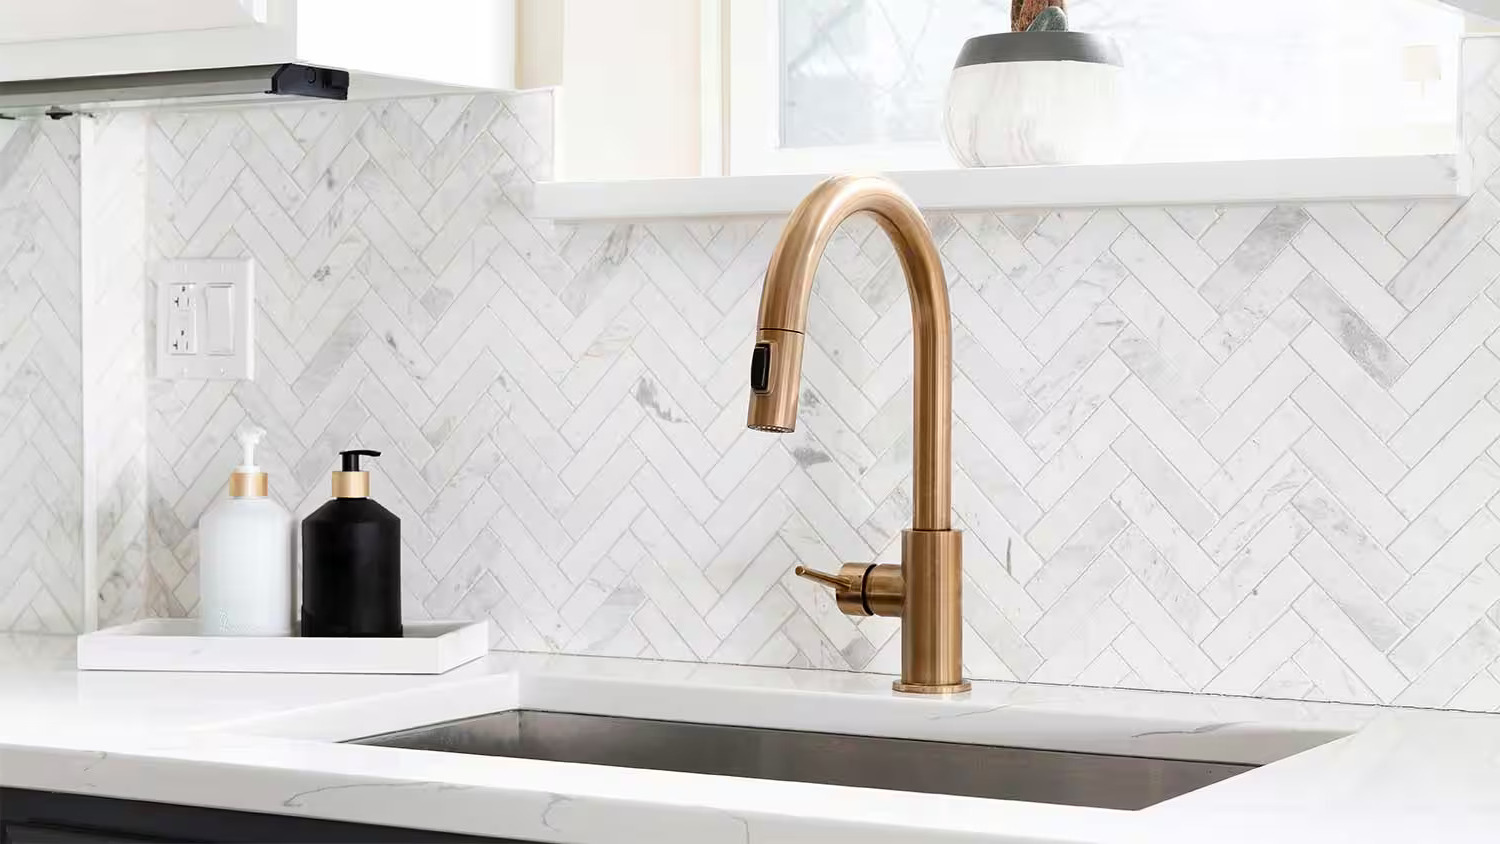
- Material: Pot fillers are available in different materials such as stainless steel, brass, and bronze. Each material has its own aesthetic appeal and durability.
- Functionality: Some pot fillers come with additional features like adjustable height settings or multiple water flow options. Consider what features are most important to you.
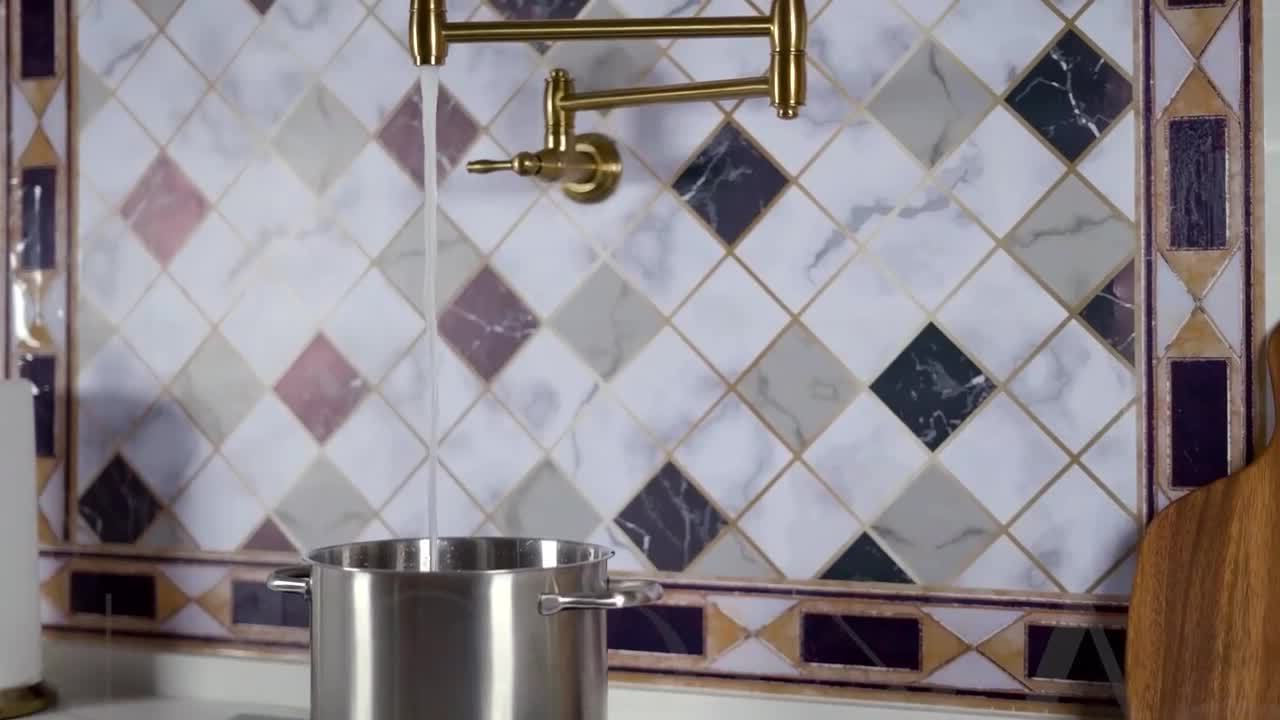
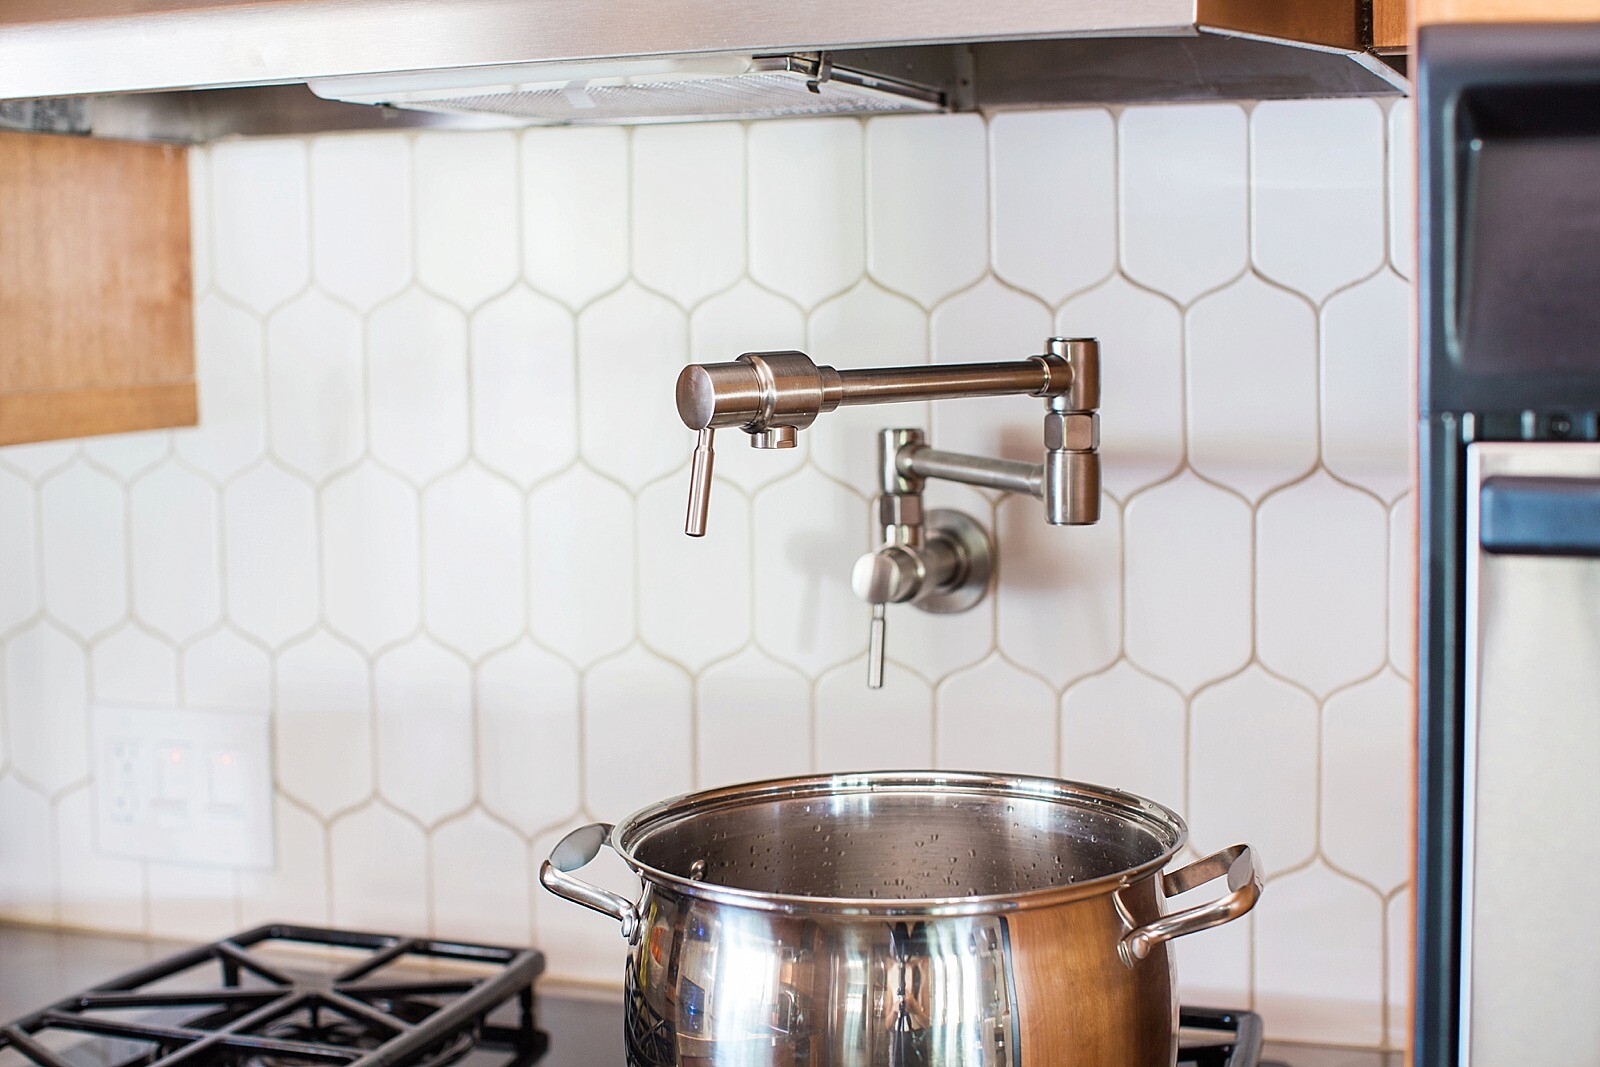
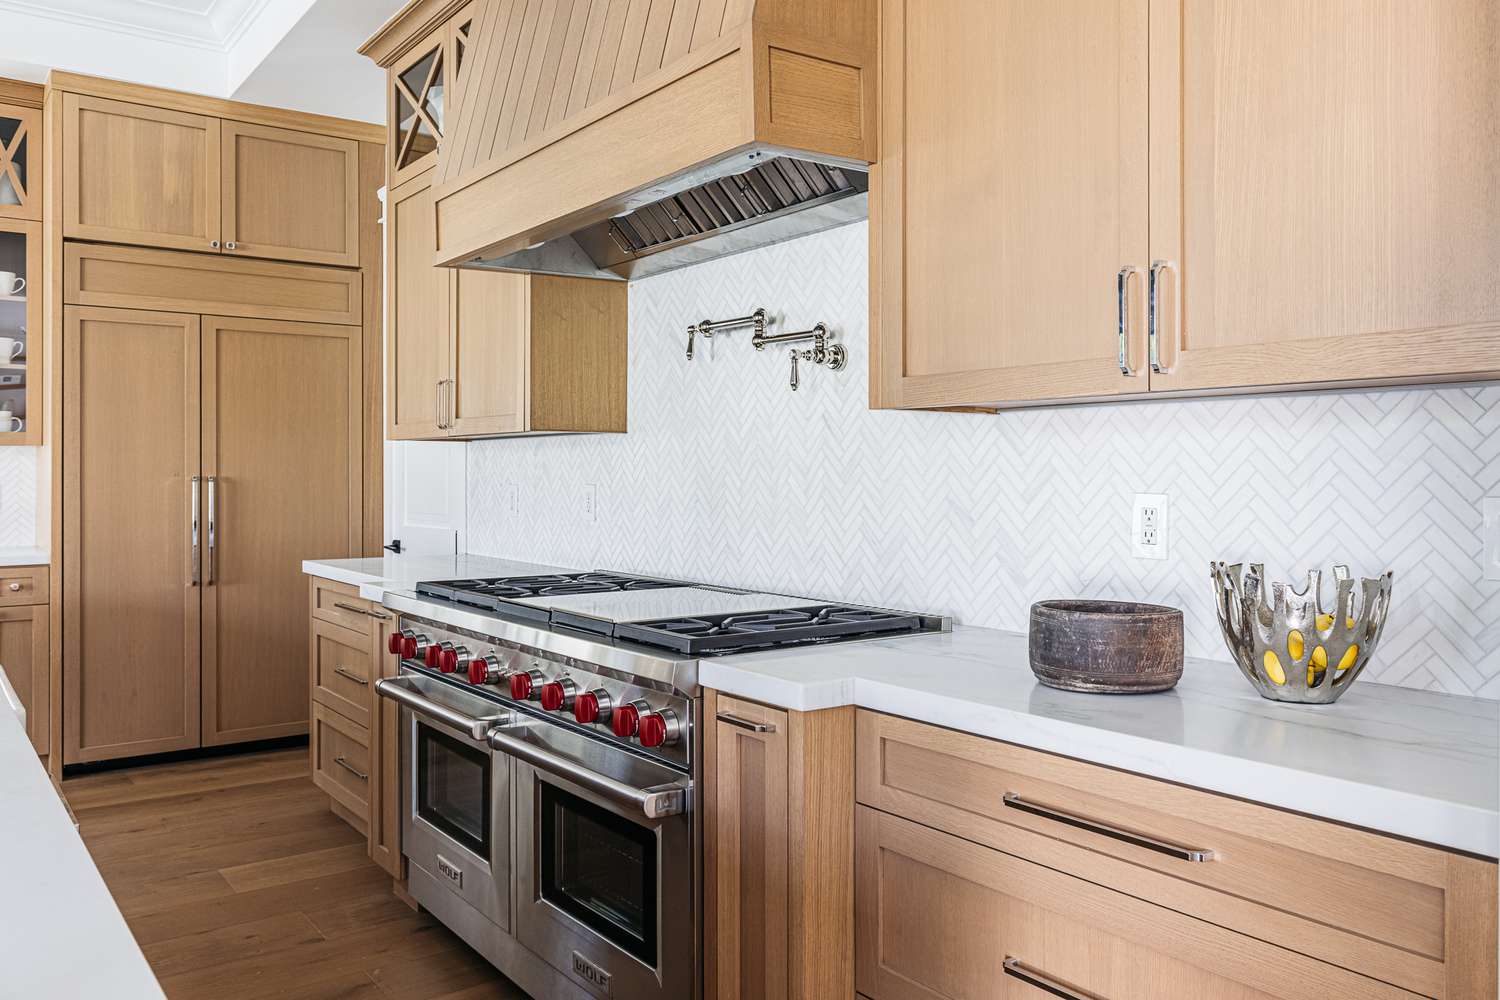
For this guide, we'll focus on installing a wall-mounted pot filler with a decorative tile surround.
Planning Your Installation
Before you begin the installation process, it's crucial to plan carefully. Here are some steps to help you plan:
- Measure Your Space: Measure the area above your stove where you plan to install the pot filler. Ensure that there is enough space for the pot filler and the tile surround.
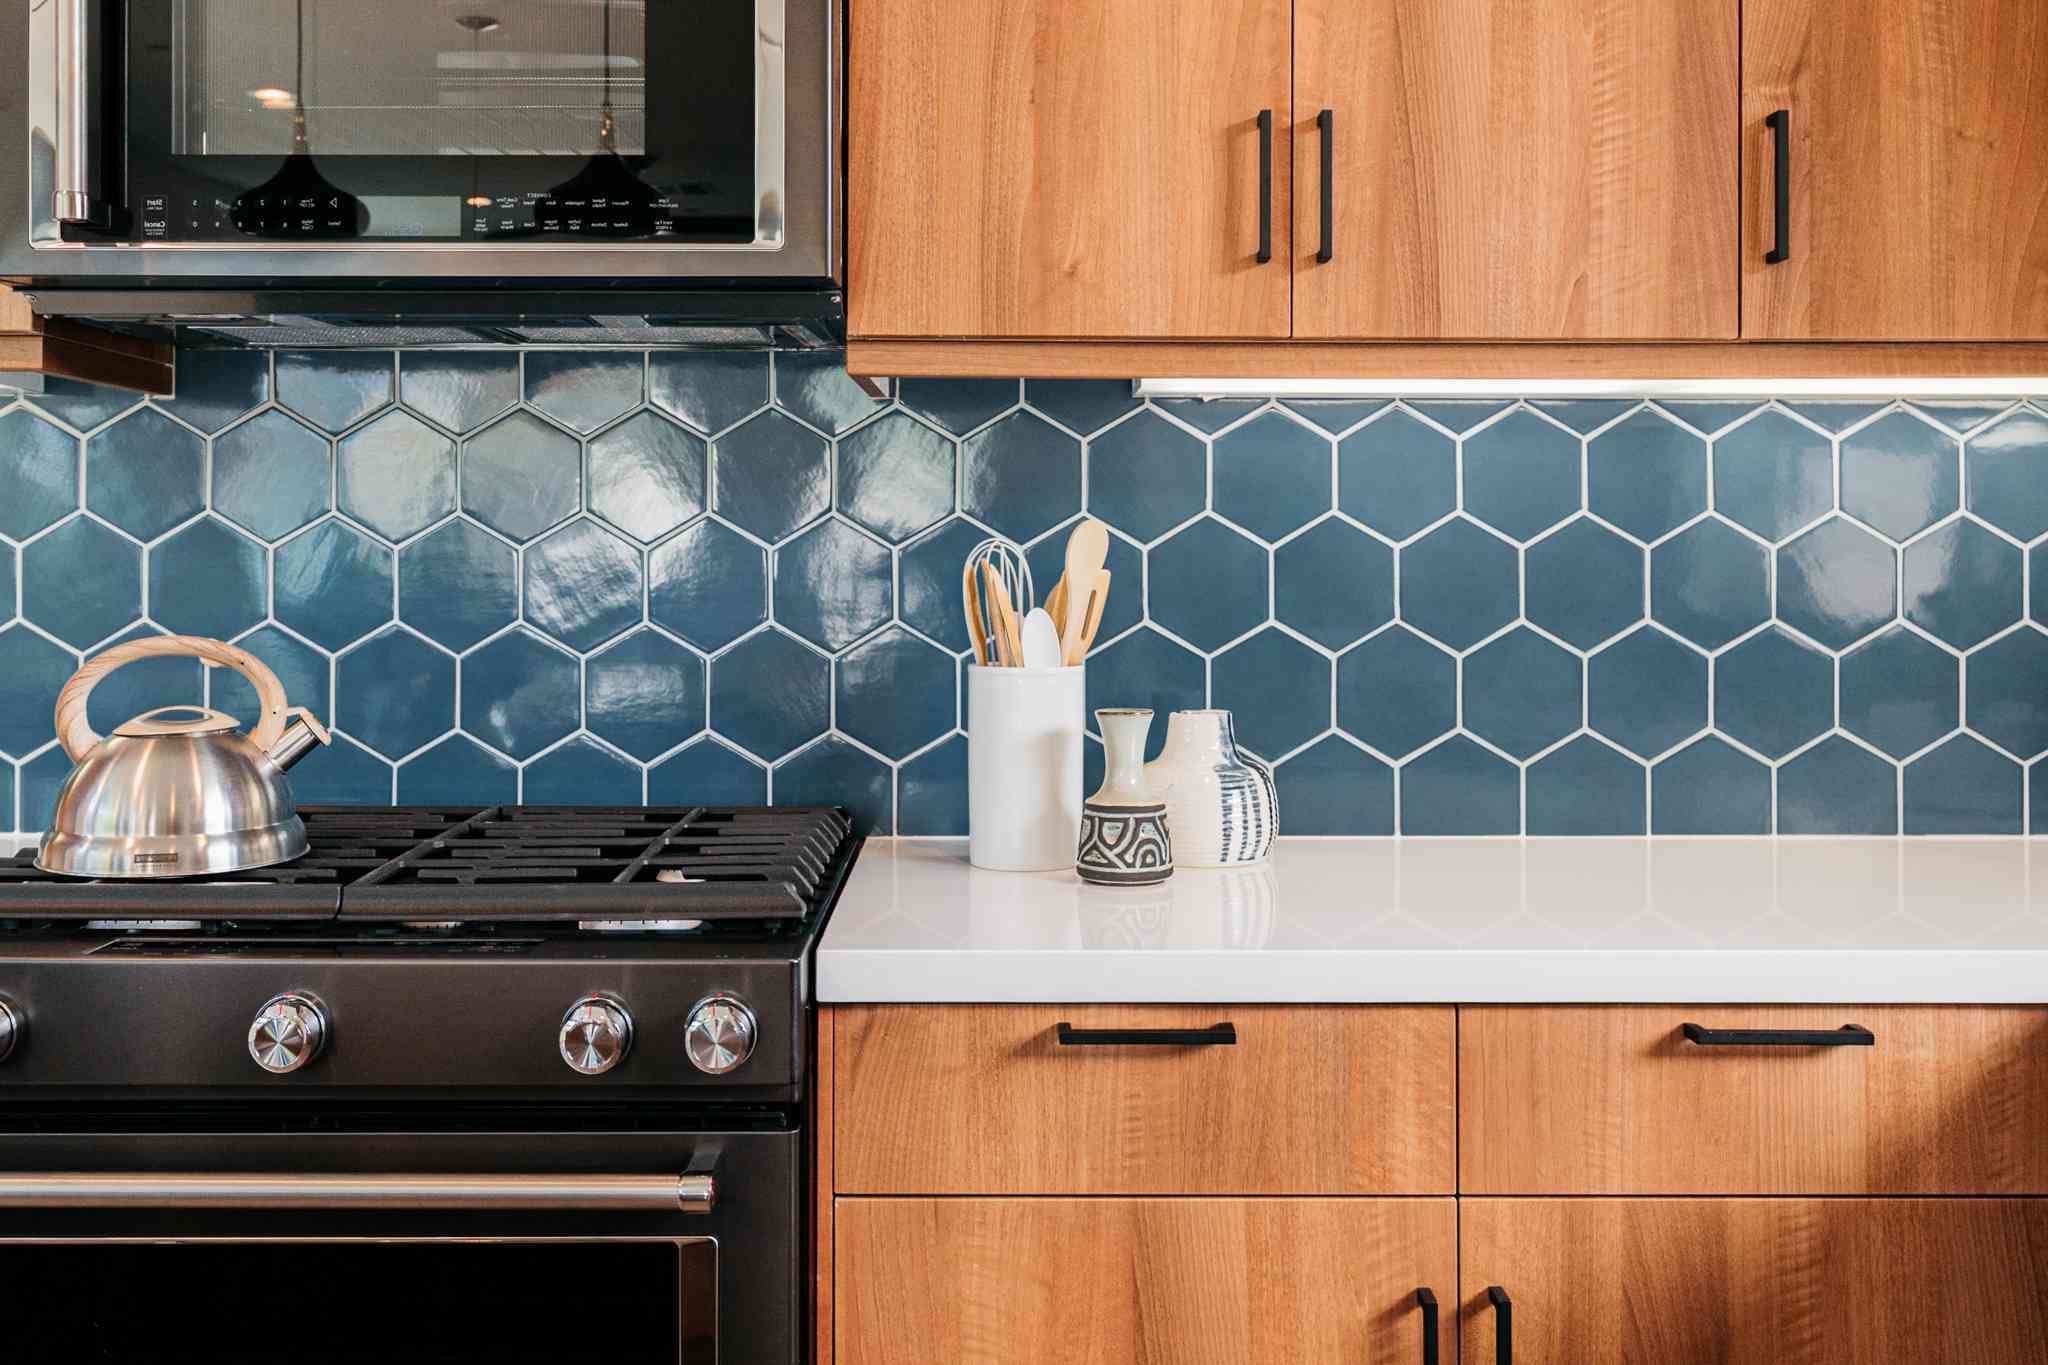
- Choose Your Tile: Select a tile that complements your kitchen decor. Consider factors like color, pattern, and material (e.g., glass, ceramic, or natural stone).
- Plan Your Design: Sketch out a design for your tile surround. Decide on the pattern and layout of the tiles.
Tools and Materials Needed
To install a pot filler with a decorative tile surround, you'll need the following tools and materials:
- Pot Filler: Choose a wall-mounted pot filler that fits your kitchen style.
- Tile: Select the tile for your surround based on your design plan.
- Tile Adhesive: Also known as thinset, this is used to adhere the tiles to the wall.
- Grout: Grout is used to fill the gaps between the tiles.
- Grout Float: A tool used to spread and smooth out the grout.
- Grout Sponge: A sponge used to clean excess grout from the surface of the tiles.
- Tile Drill Bit: A specialized drill bit designed for drilling into tile without damaging it.
- Drill: A power drill is necessary for drilling holes in the wall and tile.
- Level: Ensures that the pot filler is installed level.
- Pencil and Straightedge: For marking the area where you'll drill holes.
- Screwdriver: For tightening screws that hold the pot filler in place.
- Pipe Fittings: If you're running a new water line, you'll need pipe fittings like couplers and adapters.
- Pipe Sealant: To prevent leaks in the threaded pipe.
Step-by-Step Installation Guide
Step 1: Prepare the Area
Before you start installing the pot filler, ensure that the area above your stove is clean and free of debris. If you're working with an existing backsplash, remove any old tile or adhesive.
Step 2: Mark the Area
Using a pencil and straightedge, mark the area where you'll install the pot filler. Ensure that the marks are level and aligned with your design plan.
Step 3: Drill Holes
Using a tile drill bit, drill holes in the wall for the screws that will hold the pot filler in place. If you're working with glass tile, be cautious not to damage it by applying gentle pressure and using a smaller drill bit if necessary.
Step 4: Apply Tile Adhesive
Apply tile adhesive (thinset) to the back of the first tile and press it firmly into place. Use a level to ensure that it's straight.
Step 5: Install Remaining Tiles
Continue installing tiles around the marked area, using tile adhesive for each tile. Leave space for grouting between each tile.
Step 6: Grout the Tiles
Once all tiles are in place, mix grout according to the manufacturer's instructions. Apply grout between each tile using a grout float, pressing it firmly into place. Wipe away excess grout with a damp grout sponge.
Step 7: Allow Grout to Dry
Let the grout dry completely before proceeding with the next step. This can take several hours or overnight depending on the type of grout used.
Step 8: Install Pot Filler
With the tile surround complete and grout dry, you can now install the pot filler. Follow these steps:
- Mounting Hardware: Attach mounting hardware provided with your pot filler to the back of it.
- Drill Pilot Holes: Drill pilot holes into the tile where you marked earlier using a smaller drill bit if necessary.
- Screw into Place: Screw mounting hardware into place through pilot holes, ensuring they are securely fastened to the wall.
- Connect Water Line: Connect water line from your kitchen sink or plumbing system to the pot filler using pipe fittings if necessary.
- Apply Pipe Sealant: Apply pipe sealant around threaded connections to prevent leaks.
Step 9: Test Installation
Turn on water supply and test your pot filler by filling a pot or kettle. Check for leaks around connections and ensure everything is working properly.
Tips and Considerations
Here are some additional tips and considerations when installing a pot filler with decorative tile surround:
- Tile Pattern: Choose a tile pattern that complements your kitchen decor without overwhelming it.
- Tile Material: Consider durability when choosing tile material; glass or ceramic tiles are good options for their ease of installation and maintenance.
- Grout Color: Select grout color that matches or complements tile color; white or clear grout works well with most tile types.
- Plumbing Work: If you're running new plumbing lines, consider hiring a professional plumber if you're not experienced in this area.
- Safety Precautions: Always follow safety precautions when working with power tools and electrical connections.
Conclusion
Installing a pot filler with decorative tile surround can add both functionality and style to your kitchen. By following these steps carefully and considering all factors involved in planning and execution, you'll achieve a beautiful result that enhances both form and function in your cooking space.
Whether you're looking to create an elegant farmhouse-style kitchen or a modern minimalist space, integrating a pot filler into your design plan can make all the difference. Remember to take your time during each step of installation and don't hesitate to seek professional help if needed.
With patience and attention to detail, you'll be enjoying the convenience of having a pot filler right above your stove while admiring its stylish integration into your kitchen decor.
Additional Resources
For more detailed instructions or specific advice tailored to your situation, consider consulting YouTube tutorials or professional home improvement blogs like those mentioned below:
- YouTube Tutorial: "How To Install Pot Filler" by [Your Channel Name] provides a step-by-step guide with visual aids.
- Home Improvement Blog: Websites like Maria Killam's blog offer valuable insights into various home improvement projects including accent tile installation tips.
By combining these resources with this comprehensive guide, you'll be well-equipped to tackle any challenges that come up during installation while achieving stunning results that elevate both functionality and aesthetics in your kitchen space.
Was this page helpful?
At Storables.com, we guarantee accurate and reliable information. Our content, validated by Expert Board Contributors, is crafted following stringent Editorial Policies. We're committed to providing you with well-researched, expert-backed insights for all your informational needs.


0 thoughts on “DIY Guide to Installing a Kitchen Pot Filler with a Decorative Tile Surround”