Home>Interior Design>Cleaning With Vinegar: 15 Things You Can Clean With Vinegar
Interior Design
Cleaning With Vinegar: 15 Things You Can Clean With Vinegar
Modified: September 2, 2024
Discover the magic of cleaning with vinegar! Transform your home with these 15 interior design tips and discover the versatility and effectiveness of this eco-friendly cleaning solution.
(Many of the links in this article redirect to a specific reviewed product. Your purchase of these products through affiliate links helps to generate commission for Storables.com, at no extra cost. Learn more)
Cleaning with Vinegar: 15 Things You Can Clean with Vinegar
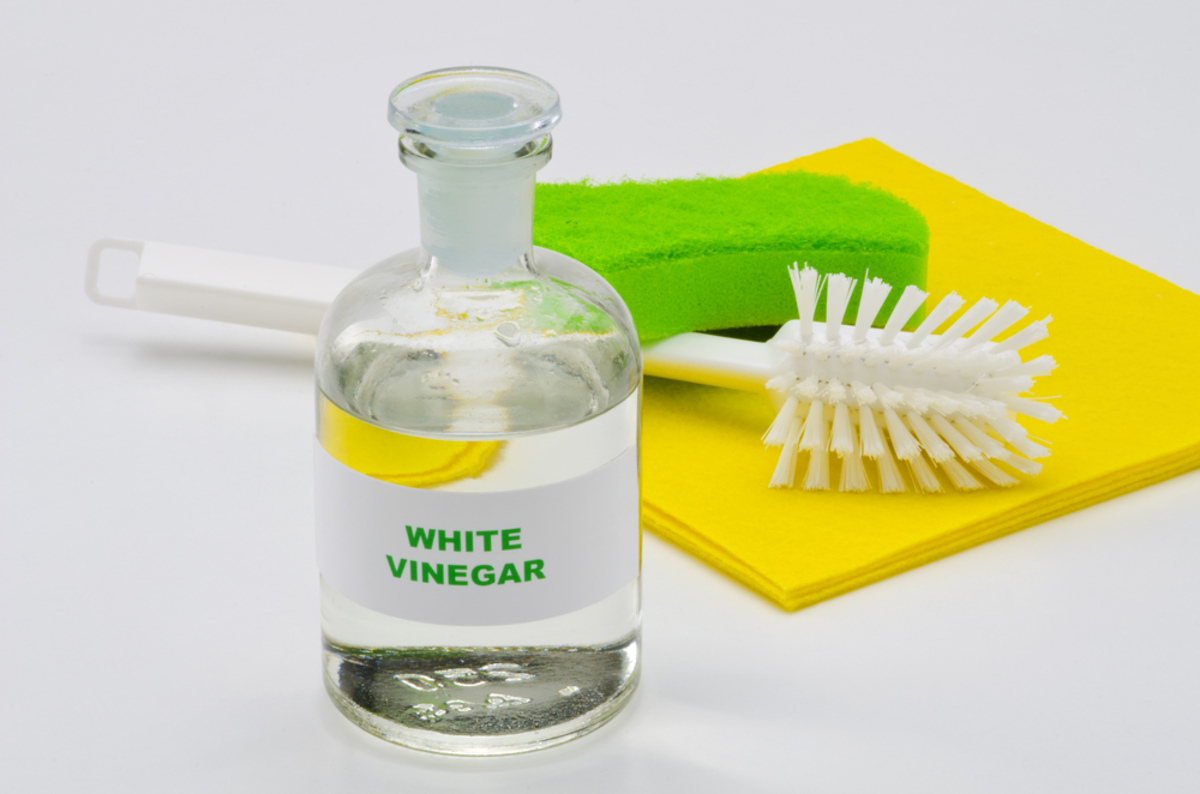
Cleaning your home doesn’t always require expensive or harsh chemicals. In fact, you might be surprised to learn that one ingredient you probably already have in your pantry can effectively clean a variety of surfaces and appliances – vinegar! Vinegar is a natural, non-toxic cleaner that not only removes dirt and grime but also disinfects and deodorizes. Read on to discover 15 things you can clean with vinegar and revolutionize your cleaning routine!
1. Kitchen Appliances: Vinegar works wonders on stainless steel appliances like refrigerators and dishwashers. To remove streaks and smudges, simply dampen a cloth with vinegar and wipe it down.
2. Countertops and Surfaces: Whether it’s granite, marble, or laminate, vinegar is safe to use on most countertops. Mix equal parts vinegar and water in a spray bottle, and use it to wipe down surfaces, removing grease and leaving them sparkling clean.
3. Microwave and Oven: Say goodbye to stubborn food stains and odors by placing a microwave-safe bowl filled with equal parts vinegar and water in the microwave. Heat it on high for a few minutes, then wipe clean. For the oven, create a paste using vinegar and baking soda, apply it to the interior, let it sit for an hour, and then scrub away grime.
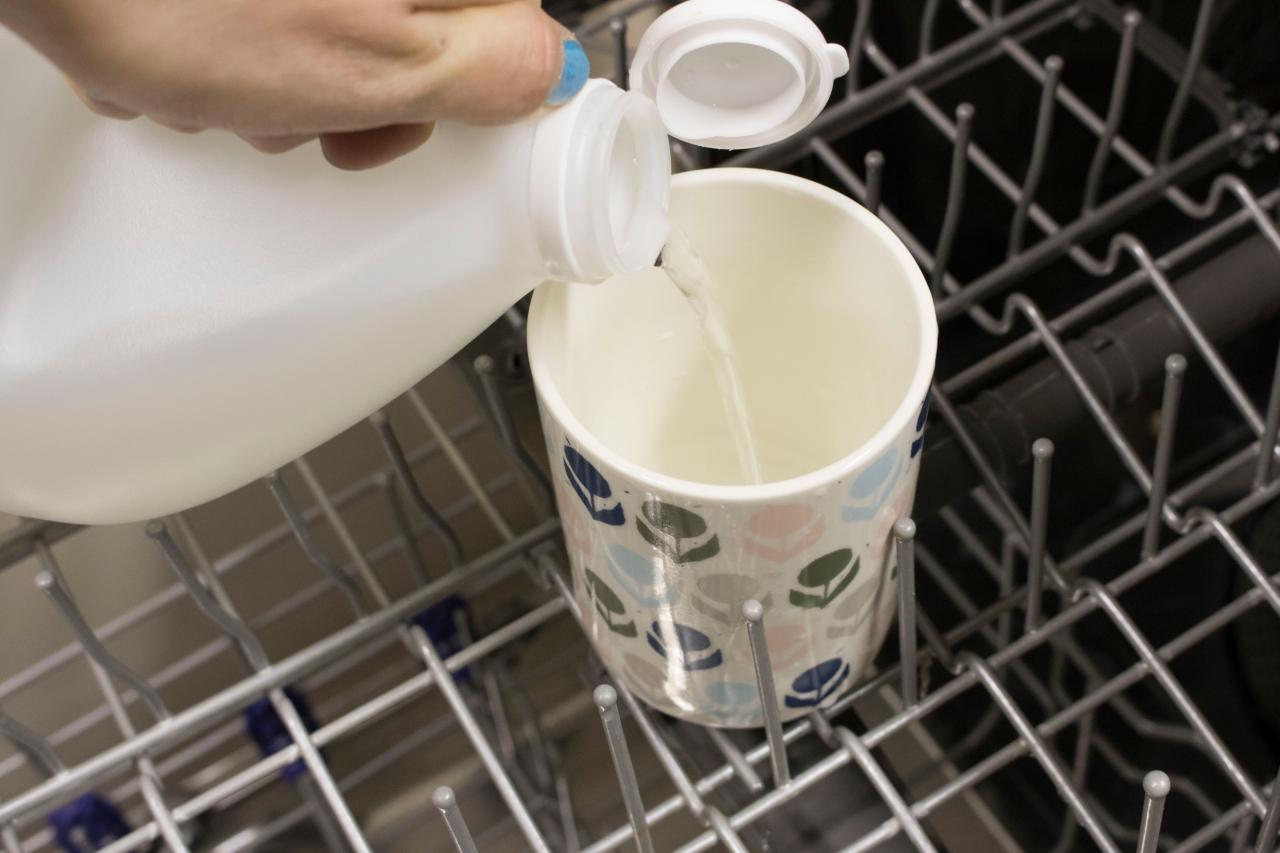
4. Dishwasher: Vinegar is great for keeping your dishwasher clean and odor-free. Fill a cup with vinegar and place it on the top rack, then run a hot cycle – this will help remove built-up soap scum and keep your dishwasher functioning optimally.
5. Coffee Maker: Improve the taste of your coffee and remove mineral deposits by brewing a pot of vinegar and water. Run a regular cycle, followed by a couple of cycles with clean water to rinse.
6. Cutting Boards: Sanitize and deodorize cutting boards by wiping them down with vinegar. Its antiseptic properties will help kill bacteria and eliminate lingering odors.
7. Refrigerator: Remove stains, spills, and odors by wiping down the interior of your fridge with a solution of vinegar and water. This will keep your fridge fresh while also preventing the growth of mold and mildew.
8. Sink and Drain: Unclog and deodorize your sink and drain by pouring a cup of vinegar down the drain. Let it sit for a few minutes, then flush with hot water. The vinegar will help break down grease and remove unpleasant odors.
9. Glassware and Silverware: Revive dull glassware and shine silverware by soaking them in a mixture of vinegar and warm water. Rinse them thoroughly afterward to remove any vinegar residue.
10. Floors: Vinegar is an excellent cleaner for various types of flooring, including tile, laminate, and vinyl. Mix a ½ cup of vinegar with a gallon of warm water, and use this solution to mop your floors, leaving them clean and shiny.
11. Windows and Mirrors: Say goodbye to streaky windows and mirrors by using a 1:1 vinegar-water solution and a clean cloth or squeegee. This will leave your glass surfaces crystal clear.
12. Furniture: Remove water stains and refresh wooden furniture by mixing equal parts vinegar and olive oil. Apply this mixture with a soft cloth and buff away to restore your furniture’s natural shine.
13. Laundry: Brighten your whites and remove stains by adding a splash of vinegar to your laundry. It acts as a natural fabric softener and can even help eliminate lingering odors.
14. Bathroom Fixtures: Vinegar is an effective cleaner for bathroom fixtures like faucets, showerheads, and toilets. Apply vinegar directly or use a vinegar-soaked cloth to remove mineral deposits, soap scum, and stains.
15. Pet Stains and Odors: If you have pets, vinegar can be your best friend. It effectively removes pet stains and odors from carpets and upholstery. Blot the stain with vinegar, then clean as usual to eliminate lingering smells.
So, before you reach for those harsh chemicals, give vinegar a try. It’s a versatile, eco-friendly, and budget-friendly cleaning solution that can tackle a wide range of cleaning tasks in your home. Give it a go and be amazed at the sparkling results!
Key Takeaways:
- Say goodbye to harsh chemicals and try vinegar for a natural, eco-friendly, and budget-friendly cleaning solution. From kitchen appliances to pet stains, vinegar can tackle a wide range of cleaning tasks in your home.
- Vinegar is a game-changer for cleaning your home. It’s a versatile, non-toxic, and effective cleaner that can remove dirt, disinfect, and deodorize various surfaces and appliances. Give it a try and be amazed at the sparkling results!
Read more: 15 Things You Can Clean With Baking Soda
Kitchen Appliances
When it comes to cleaning your kitchen appliances, vinegar is a game-changer. Not only is it affordable and readily available, but it is also a natural and safe alternative to harsh chemical cleaners. Here are some ways you can use vinegar to clean your kitchen appliances:
Refrigerator: Over time, your refrigerator can accumulate spills, stains, and unpleasant odors. To tackle this, create a mixture of equal parts vinegar and water in a spray bottle. Spray the solution onto a cloth and wipe down the interior of your refrigerator, paying particular attention to any sticky or stained areas. Vinegar’s natural acidity helps to break down grime and eliminate odors, leaving your fridge fresh and clean.
Dishwasher: Your dishwasher may be responsible for cleaning your dishes, but it also requires regular cleaning to maintain its efficiency. To clean your dishwasher, fill a glass or dishwasher-safe cup with vinegar and place it on the top rack. Run a hot water cycle to allow the vinegar to circulate and remove any built-up soap scum or debris. This simple step will leave your dishwasher odor-free and running smoothly.
Microwave: Microwaves can quickly become dirty and develop strong food odors. To tackle this, fill a microwave-safe bowl with equal parts water and vinegar. Place it in the microwave and heat it on high for a few minutes, allowing the steam to loosen any stuck-on food particles. Once the time is up, carefully remove the bowl (it will be hot!) and use a cloth or sponge to wipe down the interior of the microwave. The vinegar will help eliminate smells and leave your microwave looking and smelling fresh.
Oven: Cleaning your oven can be a daunting task, but vinegar can make it easier. Begin by removing any loose debris or large food particles from the oven. Then, create a paste by mixing vinegar and baking soda until it forms a thick consistency. Apply this paste to the interior of your oven, paying particular attention to areas with stubborn grime or stains. Let the paste sit for an hour or overnight, allowing it to work its magic. After the waiting period, scrub the interior of the oven using a sponge or brush, and then wipe away the paste with a damp cloth. This method is effective in removing grease and grime, leaving your oven looking spotless.
Coffee Maker: If you rely on a coffee maker to kick-start your day, you’ll want to keep it clean for optimal performance and taste. Over time, mineral deposits can build up in your coffee maker, affecting the flavor of your brew. To combat this, fill the water reservoir with equal parts vinegar and water. Run a regular brewing cycle, allowing the vinegar mixture to work its way through the coffee maker. Once the cycle is complete, run two cycles with clean water to rinse away any residual vinegar. This process will remove mineral deposits and ensure your coffee tastes its best.
With vinegar, you can easily and effectively clean your kitchen appliances without relying on harsh chemicals. It’s an affordable and eco-friendly solution that will leave your appliances looking and smelling fresh. Give it a try and experience the power of vinegar in maintaining a clean and inviting kitchen.
Countertops and Surfaces
The surfaces in your kitchen are prone to accumulating dirt, grease, and food stains. Thankfully, vinegar can come to the rescue when it comes to cleaning countertops and other surfaces. Here’s how you can use vinegar to keep your countertops and surfaces looking spotless:
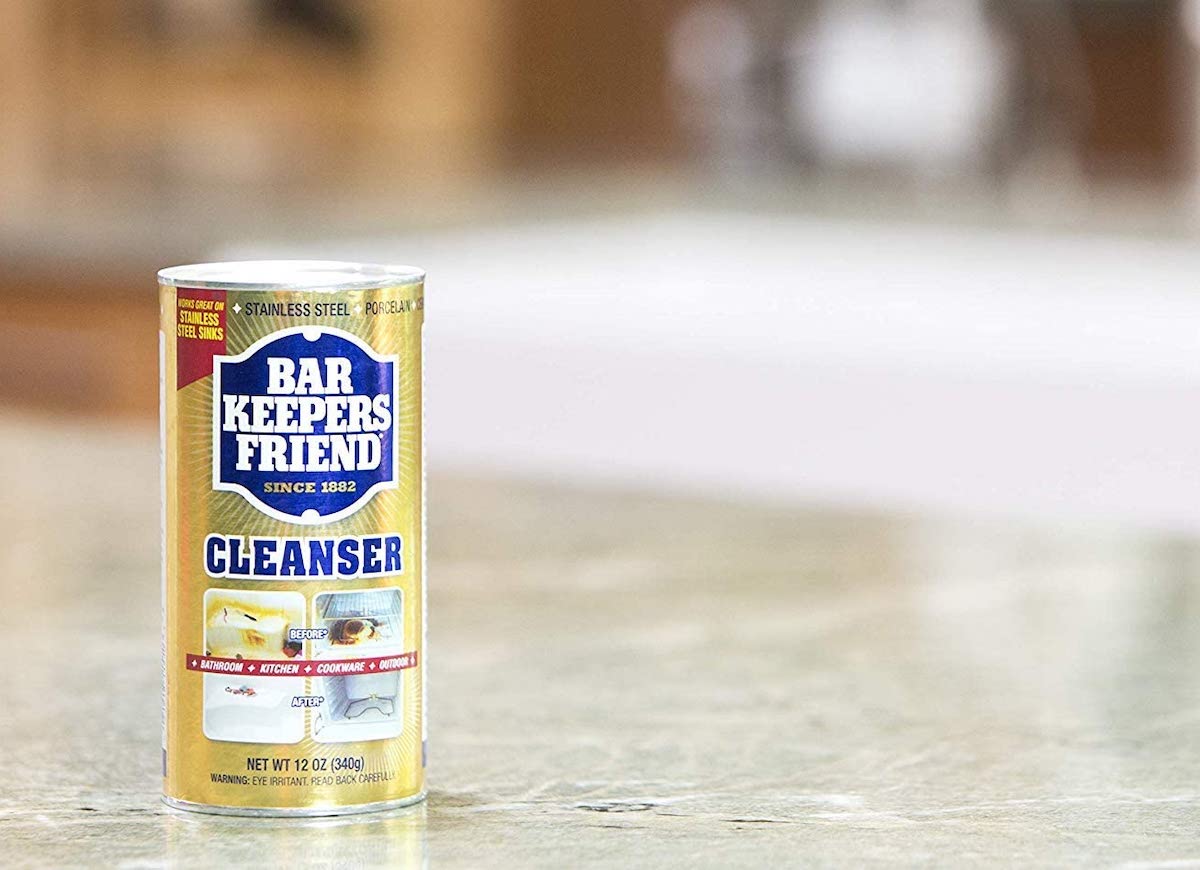
Granite and Marble Countertops: While vinegar is safe to use on most countertops, it’s important to note that it should not be used on granite or marble surfaces. The acidity in vinegar can dull the shine and potentially etch the surface of these materials. Instead, opt for a gentle cleanser specifically designed for granite or marble surfaces.
Laminate and Tile Countertops: For laminate or tile countertops, vinegar is a safe and effective cleaning solution. Mix equal parts vinegar and water in a spray bottle, and then spray the solution onto the surface. Use a clean cloth or sponge to wipe away dirt, grease, and stains. Vinegar’s acidity helps to break down grime and restore the shine to your countertops. Rinse with water and dry with a clean cloth to prevent streaking.
Stainless Steel Surfaces: Stainless steel countertops and appliances lend a sleek and modern look to your kitchen. However, they can also be prone to fingerprints and smudges. To clean stainless steel surfaces, dampen a cloth with undiluted vinegar and wipe down the area, following the grain of the stainless steel. This will remove fingerprints and restore the shine. For stubborn stains, you can create a paste of vinegar and baking soda and gently scrub the area. Rinse with water and dry with a clean cloth to prevent water spots.
Wooden Cutting Boards: Cutting boards are a breeding ground for bacteria, and it’s important to keep them clean and sanitized. Vinegar is a natural disinfectant and can be used to clean wooden cutting boards. Scrub the surface with a mixture of equal parts vinegar and water, then rinse with plain water. For more challenging odors, sprinkle the board with baking soda, followed by a drizzle of vinegar. The fizzing action will help break down odors, and you can scrub the board again before rinsing thoroughly.
Tile and Grout: Tiles and grout can accumulate dirt and grime, especially in high-traffic areas such as the kitchen. Create a cleaning solution by mixing equal parts vinegar and water. Apply the solution to the tile and grout surfaces and let it sit for a few minutes to allow the vinegar to penetrate and loosen the dirt. Scrub the grout lines with a toothbrush or grout brush and wipe away the solution with a damp cloth. Rinse with water and dry the surface thoroughly to prevent water spots.
Whether you have laminate, stainless steel, or tile countertops, vinegar is a versatile cleaner that can effectively remove dirt, grease, and stains. It’s a safe and affordable alternative to harsh chemicals, and it leaves your surfaces clean and refreshed. Give vinegar a try and see the difference it makes in maintaining the cleanliness and beauty of your kitchen countertops and surfaces.
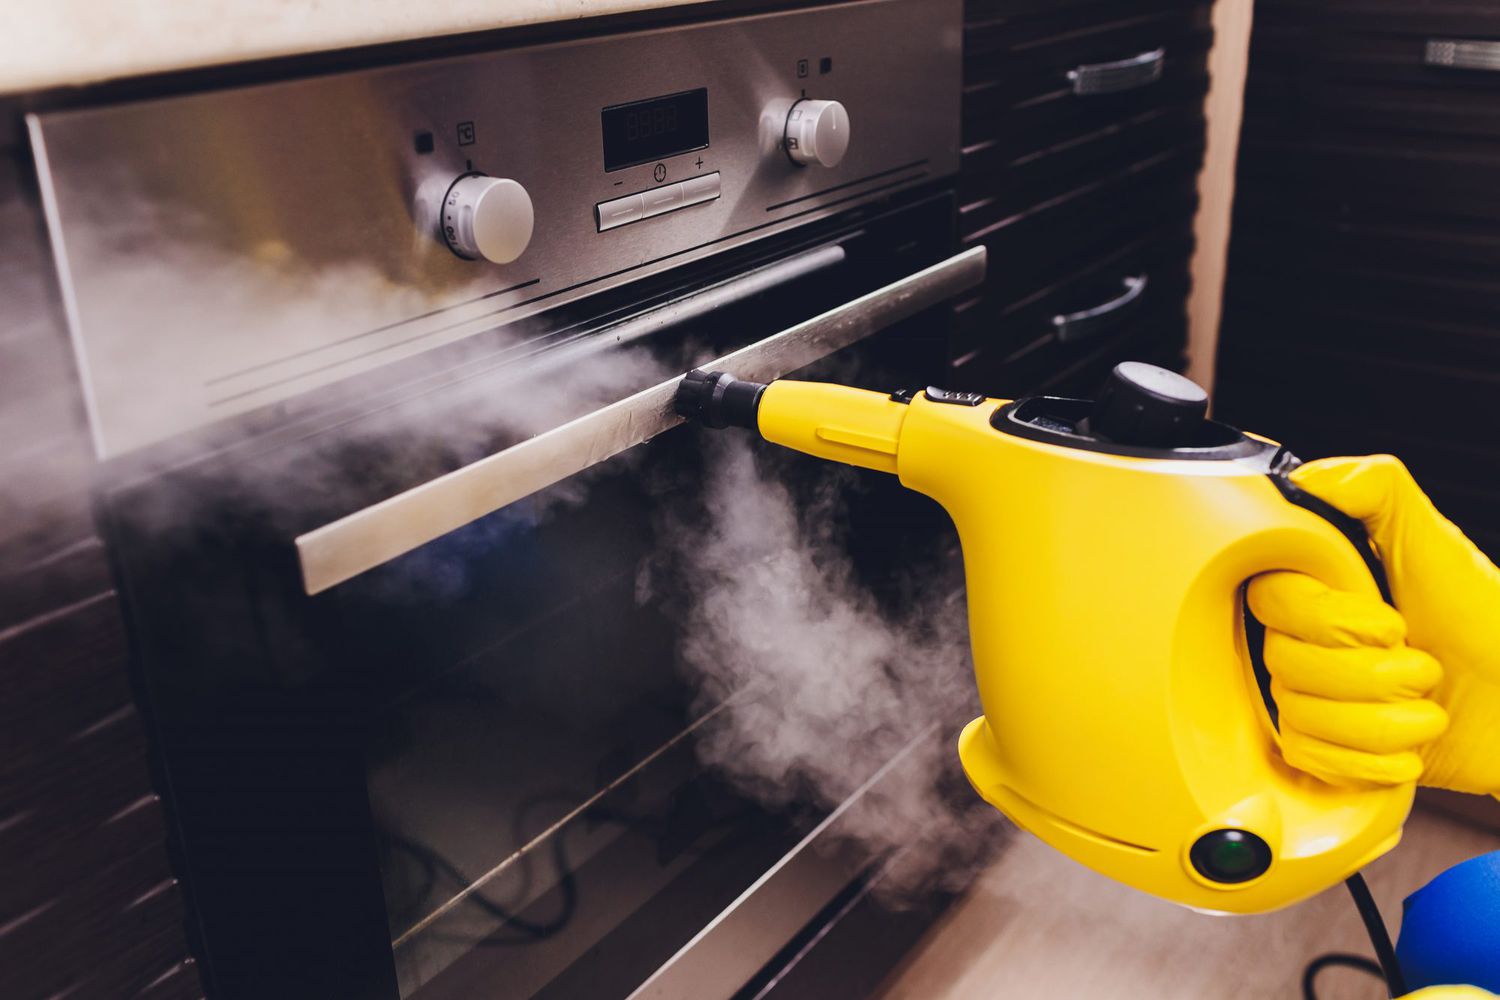
Microwave and Oven
The microwave and oven are two kitchen appliances that often get heavily soiled with grease, food splatters, and tough stains. Cleaning these appliances can be a chore, but with vinegar, you can tackle the grime effectively and restore their cleanliness. Here’s how you can use vinegar to clean your microwave and oven:
Microwave: Over time, the interior of your microwave can accumulate food stains and develop unpleasant odors. To tackle this, start by filling a microwave-safe bowl with equal parts vinegar and water. Place the bowl in the microwave and heat it on high for three to five minutes until the mixture comes to a boil, producing steam. The steam will help loosen the stuck-on food particles and soften stains.
Once the microwave beeps, leave the door closed for a couple of minutes to allow the steam to work its magic. Then, carefully remove the bowl as it will be hot. Take a damp cloth or sponge and wipe down the interior of the microwave, paying extra attention to any stubborn stains. The acidity of the vinegar will help break down the grime, while the steam will help remove the odors. Finish by rinsing the cloth or sponge and giving the interior a final wipe with clean water.
Oven: Cleaning the oven may seem like a daunting task, but vinegar can make the process easier. Begin by removing any loose debris or large food particles from the oven. Then, create a paste by mixing vinegar and baking soda until it forms a thick consistency. The paste will start to foam due to the chemical reaction between the vinegar and baking soda.
Using gloves, apply the paste to the interior of the oven, focusing on areas with stubborn dirt or heavy grease buildup. Spread the paste evenly, ensuring all stained surfaces are covered. Leave the paste to work its magic for at least 30 minutes or overnight for heavily soiled ovens.
After the waiting period, take a damp cloth or sponge and start scrubbing the interior of the oven. The combination of vinegar and baking soda will help loosen the grime, making it easier to remove. Rinse the cloth or sponge frequently and continue scrubbing until all the stains and grime have been lifted.
Once the interior is clean, use a damp cloth or sponge to wipe away any remaining residue. Rinse thoroughly to ensure no baking soda or vinegar remains. Finish by drying the oven with a clean cloth.
Using vinegar to clean your microwave and oven is an effective way to remove stains, grease, and odors. It is a natural and non-toxic option that helps you avoid harsh chemicals. Give vinegar a try, and you’ll be amazed at how easy it is to restore the cleanliness of these essential kitchen appliances.
Dishwasher
The dishwasher is a lifesaver in the kitchen, but over time, it can start to accumulate residue, develop unpleasant smells, and even become less efficient. To keep your dishwasher running smoothly and to ensure your dishes come out sparkling clean, regular cleaning is necessary. Vinegar can be a powerful ally in maintaining your dishwasher’s cleanliness. Here’s how you can use vinegar to clean and deodorize your dishwasher:
Step 1: Empty the dishwasher: Start by removing any dishes, utensils, or other items from the dishwasher. This will allow you to access all the necessary parts for cleaning.
Step 2: Inspect the filter: Check the dishwasher’s filter, which is responsible for trapping food particles and debris. Remove the filter and give it a thorough rinse under running water to remove any built-up residue. You may need to scrub the filter gently with a brush to dislodge stubborn dirt.
Step 3: Clean the spray arms: The spray arms distribute water to clean the dishes. Over time, these spray arms can become clogged with food particles, affecting their effectiveness. Remove the spray arms and soak them in a mixture of vinegar and warm water. This will help dissolve any built-up residue and restore their performance. After soaking, rinse the spray arms under running water to ensure they are clean from any vinegar solution.
Step 4: Wipe down the interior: Using a damp cloth or sponge, wipe down the interior walls, racks, and door of the dishwasher. Remove any visible food particles, stains, or residue. For stubborn stains or hard-to-reach areas, you can dampen a cloth with vinegar and gently scrub. Vinegar’s acidity helps dissolve grime and restore the dishwasher’s cleanliness.
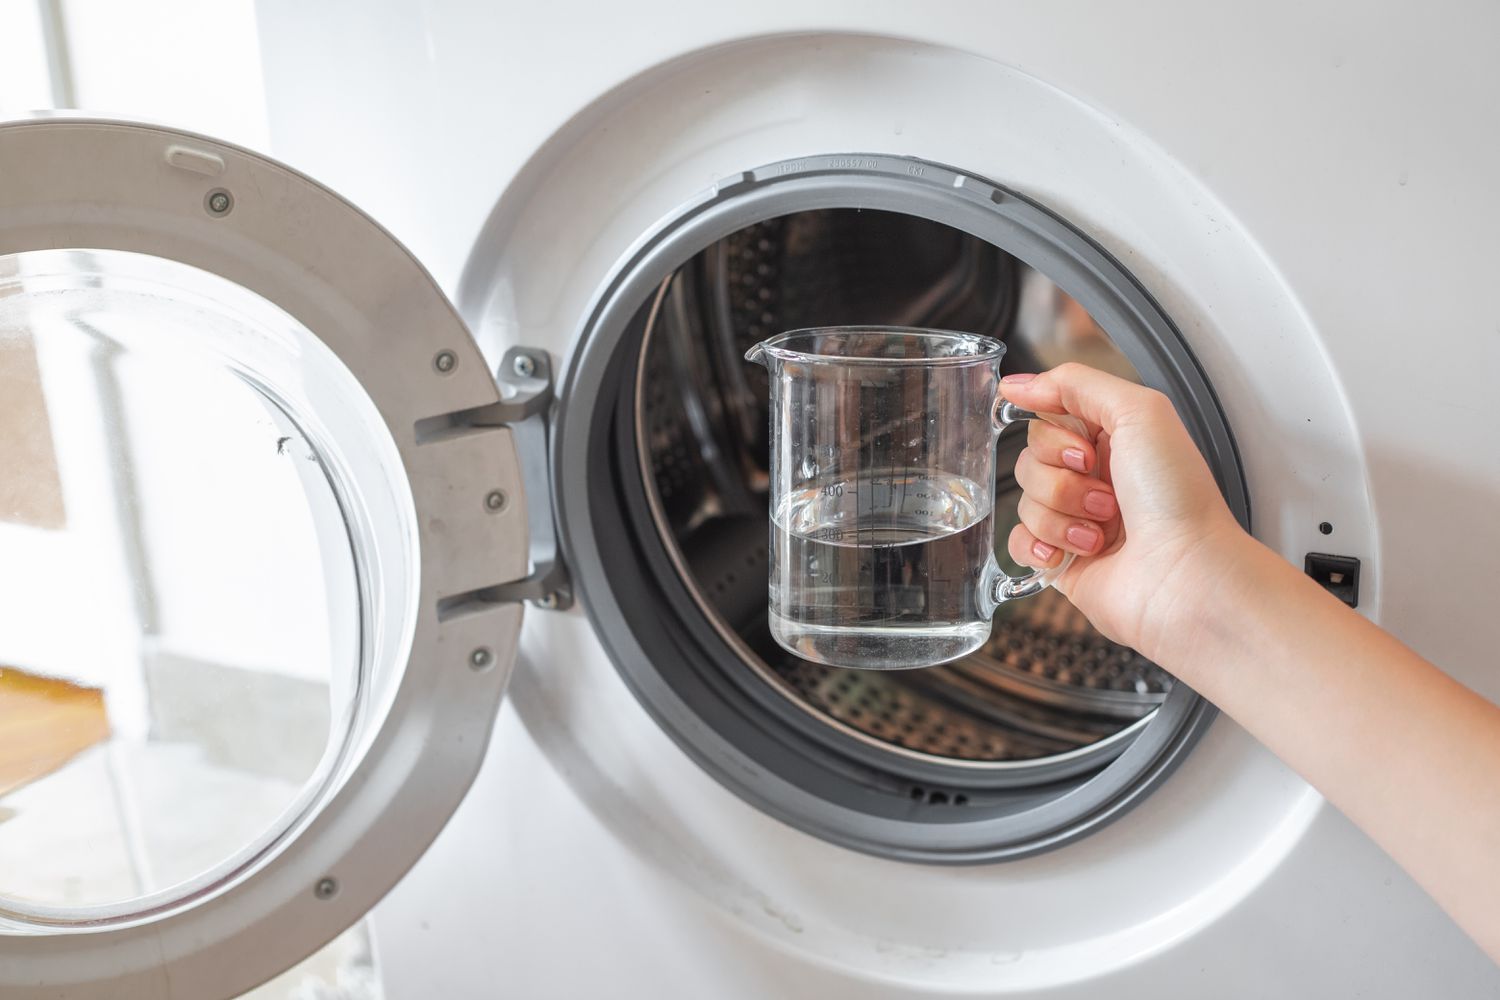
Step 5: Deodorize with vinegar: To combat any unpleasant odors lingering in your dishwasher, place a cup filled with vinegar on the top rack. This will allow the vinegar to circulate during a hot water cycle. Run a hot water cycle without any dishes or detergent. The vinegar will help remove built-up soap scum and eliminate odors, leaving your dishwasher smelling fresh.
Step 6: Rinse and maintain: After the vinegar cycle is complete, rinse your dishwasher by running a hot water cycle with no vinegar or dishes. This will ensure any remaining vinegar residue is flushed away. It is also a good idea to regularly clean the dishwasher by running a hot water cycle with a dishwasher cleaner or vinegar to prevent mineral build-up and maintain optimal performance.
Cleaning your dishwasher with vinegar on a regular basis will keep it running efficiently and ensure your dishes come out clean and shiny. Vinegar is a natural and affordable option that eliminates the need for harsh chemicals. Incorporate this simple cleaning routine into your household chores, and you’ll enjoy the benefits of a clean and fresh-smelling dishwasher.
Read more: Surprising Things You Can Clean With Vodka
Coffee Maker
Our trusty coffee makers work hard to give us our daily dose of caffeine, but they can also accumulate mineral deposits, coffee residue, and contribute to a less than stellar coffee taste. Fortunately, vinegar can come to the rescue and help clean and descale your coffee maker, improving both its performance and the quality of your coffee. Here’s how you can use vinegar to clean your coffee maker:
Step 1: Preparation: Before you begin cleaning, make sure to empty any leftover coffee grounds from the coffee maker and remove the filter.
Step 2: Vinegar-water solution: Fill the water reservoir of your coffee maker with equal parts water and vinegar. The vinegar’s acidity will help break down mineral deposits and eliminate any coffee residue that may have built up.
Step 3: Run a brewing cycle: Turn your coffee maker on and initiate a brewing cycle. Let the vinegar-water solution run through the machine as if you were making a regular pot of coffee. This process will help remove any built-up mineral deposits and eliminate any lingering coffee residue.
Step 4: Pause and let it sit: Once the brewing cycle is complete, pause the process and let the vinegar-water solution sit in the coffee maker for about 15 minutes. This will give the vinegar time to work its magic on any stubborn stains or deposits.
Step 5: Resume the brewing cycle: After the pause, resume the brewing cycle and let the remaining vinegar-water solution complete the process. This will flush out any remaining residue and vinegar from the coffee maker.
Step 6: Rinse with clean water: Once the brewing cycle is complete, run two cycles with just clean water. This will rinse away any remaining vinegar taste or smell, ensuring that your next cup of coffee tastes fresh and delicious.
Step 7: Wipe down and clean: While the coffee maker is still slightly warm, use a clean cloth or sponge dampened with water to wipe down the exterior of the machine. This will remove any coffee stains or spills, giving your coffee maker a polished and clean look.
It’s recommended to clean your coffee maker with vinegar every month or as needed, depending on the hardness of your water and frequency of use. By doing so, you can keep your coffee maker functioning optimally and ensure that each cup of coffee is brewed to perfection. Additionally, remember to clean the coffee pot, filter basket, and any removable parts regularly to maintain hygiene and extend the life of your coffee maker.
Using vinegar to clean your coffee maker is a cost-effective, eco-friendly, and safe solution that eliminates the need for harsh chemicals. So, grab a bottle of vinegar, give your coffee maker a good cleaning, and enjoy a delicious cup of coffee every time!
Cutting Boards
Cutting boards are an essential tool in the kitchen, but over time, they can become stained, absorb odors, and harbor bacteria from raw meat, fish, and vegetables. To keep your cutting boards clean and safe for food preparation, vinegar can be your secret weapon. Here’s how you can use vinegar to clean and disinfect your cutting boards:
Step 1: Rinse the cutting board: Before cleaning, rinse the cutting board with warm water to remove any loose food particles or debris.
Step 2: Create a vinegar solution: Mix equal parts white vinegar and water in a spray bottle or a small container.
Step 3: Disinfect the cutting board: Spray or pour the vinegar solution onto the cutting board, ensuring that it covers the entire surface. The acidity in vinegar acts as a natural disinfectant, killing bacteria that may be present on the cutting board. Let the vinegar solution sit on the cutting board for a few minutes to allow it to work its magic.
Step 4: Scrub the cutting board: Use a scrub brush or a clean cloth to scrub the cutting board, paying particular attention to any stained or heavily soiled areas. The scrubbing action will help remove any remaining food particles and stains while the vinegar solution disinfects the board. For cutting boards made of wood, make sure not to scrub too vigorously to prevent damage to the wood fibers.
Step 5: Rinse and dry: After scrubbing, rinse the cutting board with warm water to remove any vinegar residue and remaining debris. Ensure that all traces of the vinegar solution are rinsed off. Next, pat the cutting board dry with a clean towel or let it air dry upright on a drying rack. Moisture can promote the growth of bacteria, so ensuring the cutting board is completely dry is important.
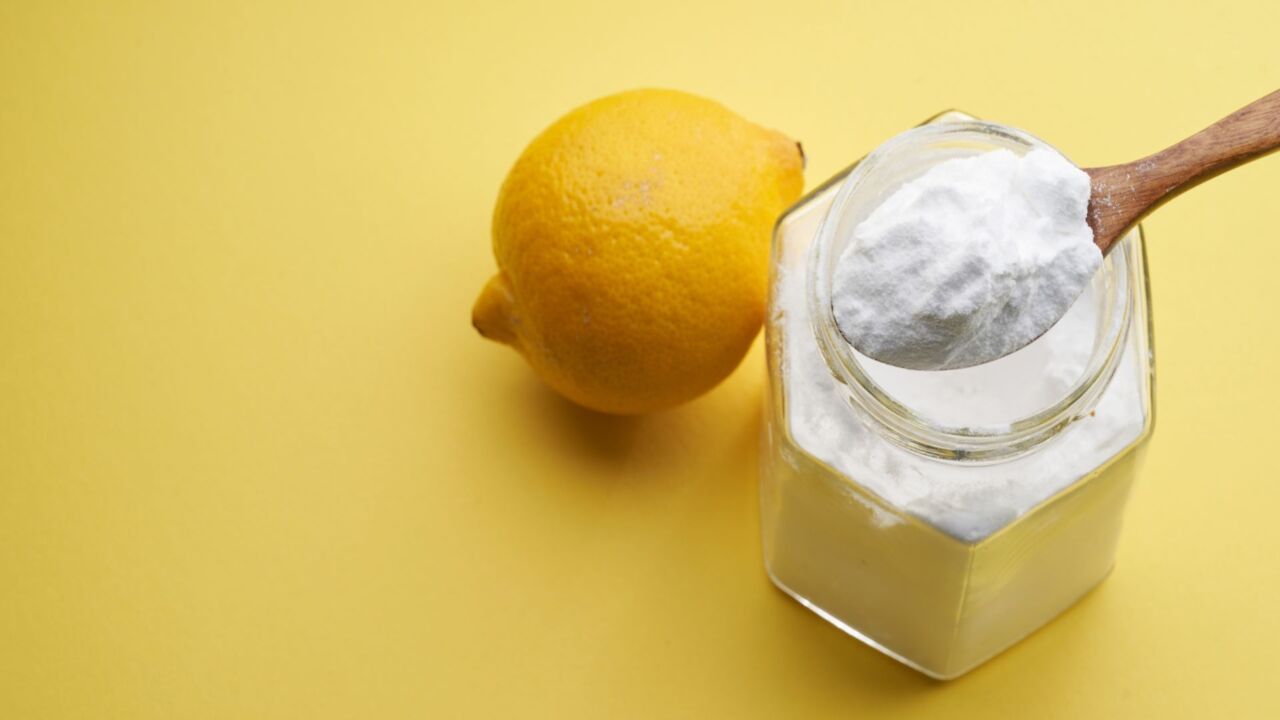
Step 6: Optional: Remove odors: If your cutting board has developed strong odors from pungent foods like garlic or onions, you can eliminate them by rubbing the surface of the board with a sliced lemon or a paste of vinegar and baking soda. Let it sit for a few minutes before rinsing and drying as usual.
Step 7: Maintenance: To maintain the cleanliness of your cutting board, it’s essential to occasionally apply a food-safe oil, such as mineral oil, to condition the wood and prevent it from drying out or cracking. Follow the instructions on the oil packaging for best results.
By incorporating vinegar into your cutting board cleaning routine, you can effectively sanitize your cutting boards and prevent cross-contamination. Remember to clean your cutting board after each use, especially when transitioning between different types of foods. With regular cleaning and proper maintenance, your cutting boards will remain a reliable tool for healthy food preparation in your kitchen.
Refrigerator
The refrigerator is the heart of the kitchen, keeping our perishable foods fresh and safe to consume. However, over time, spills, stains, and lingering odors can build up, making it necessary to give your refrigerator a thorough cleaning. Vinegar is a natural and effective cleaner that can help you tackle these issues and keep your refrigerator hygienic. Here’s how you can use vinegar to clean your refrigerator:
Step 1: Empty and organize: Start by emptying the contents of your refrigerator. Take this opportunity to throw away any expired or spoiled items. It’s also a good time to organize and separate different food categories to prevent cross-contamination.
Step 2: Create a vinegar solution: Mix a solution of equal parts water and vinegar in a spray bottle or a bucket. This solution will serve as a cleaning agent to remove stains, spills, and odors from your refrigerator.
Step 3: Remove shelves and drawers: Take out the removable shelves, drawers, and any other detachable parts from your refrigerator. Place them in the sink or a large basin filled with warm water and a few tablespoons of vinegar. Allow them to soak while you clean the interior of the refrigerator.
Step 4: Wipe down the interior: Spray the vinegar solution onto a clean cloth or sponge and wipe down the interior walls, shelves, and drawers of your refrigerator. Pay close attention to any stained or soiled areas, making sure to remove all traces of food residue. Vinegar’s acidity helps break down grime and disinfects the surfaces, leaving your refrigerator clean and fresh.
Step 5: Clean the door seals: Use a cloth dampened with the vinegar solution to clean the rubber door seals. These seals can accumulate dirt and food particles over time, leading to an inefficient seal and potential odors. Wipe them thoroughly to ensure they are clean and free from any debris.
Step 6: Rinse and dry: After wiping down the interior with the vinegar solution, rinse the cloth or sponge with plain water and wipe down the surfaces again to remove any vinegar residue. Next, rinse the shelves and drawers that were soaking, making sure no vinegar solution remains. Dry all the surfaces thoroughly with a clean towel, ensuring that there is no moisture left in the refrigerator.
Step 7: Put everything back: Once the interior is completely dry, place the shelves, drawers, and food items back into the refrigerator. Take the opportunity to organize the items, placing frequently used items within easy reach.
By using vinegar to clean your refrigerator, you’ll remove stains, spills, and eliminate lingering odors, leaving your fridge fresh and sanitized. Regular cleaning will also help prevent the growth of mold and mildew. Incorporate this simple cleaning routine into your regular kitchen maintenance, and you’ll enjoy a clean and well-organized refrigerator that keeps your food fresh and your kitchen pristine.
When using vinegar to clean, always dilute it with water to avoid damaging surfaces. Test in a small, inconspicuous area first to ensure it won’t cause any damage.
Sink and Drain
The sink and drain in your kitchen can easily become a breeding ground for germs, odors, and clogs. Keeping them clean and free from debris is essential for maintaining a hygienic and functional kitchen. Vinegar can be a powerful ally in tackling these issues while being safe for the environment. Here’s how you can use vinegar to clean and freshen up your sink and drain:
Step 1: Clear any debris: Before cleaning, remove any dishes, utensils, or other items from the sink. Dispose of any food particles, as they can contribute to drain clogs and unpleasant odors.
Step 2: Pour vinegar down the drain: Begin by pouring a cup of vinegar down the drain. This will help break down any built-up grease, soap scum, or food residue that may be lining the walls of the drain pipe.
Step 3: Let it sit: Allow the vinegar to sit in the drain for about 15 minutes to allow it to work its magic. Vinegar’s acidity helps dissolve blockages and eliminate odors.
Step 4: Boil some water: While the vinegar is working, bring a kettle of water to a boil.
Step 5: Flush with hot water: After the vinegar has had time to work, carefully pour the boiling water down the drain. The hot water will help flush away any loosened debris, leaving your drain clean and clear.
Step 6: Clean the sink: While the drain is being treated, use a cloth or sponge soaked in a vinegar-water solution to wipe down the surfaces of your sink. The vinegar will help remove stains, mineral deposits, and sanitize the sink. Focus on areas like the faucet, handles, and rim of the sink where grime tends to accumulate.
Step 7: Rinse and dry: Once you have wiped down the sink with the vinegar-water solution, rinse thoroughly with warm water to remove any vinegar residue. Use a clean towel to dry the sink, preventing water spots and maintaining its cleanliness.
Step 8: Maintenance: To keep your sink and drain fresh and odor-free, it’s recommended to repeat this cleaning routine once or twice a month or as needed. Regularly removing debris and using vinegar to prevent clogs will help maintain the proper functioning of your drain.
By using vinegar to clean your sink and drain, you can effectively remove germs, eliminate odors, and prevent clogs, all while using a natural and eco-friendly solution. Keep your kitchen sink and drain in top shape with this simple and efficient cleaning method.
Read more: 10 Things You Can Clean With The Pink Stuff
Glassware and Silverware
Glassware and silverware add elegance and charm to our dining experiences, but over time, they can become tarnished and lose their luster. Vinegar can be a powerful tool to bring back the shine to your glassware and silverware. Here’s how you can use vinegar to clean and restore the beauty of these items:
Glassware:
1. Remove soap scum: Glassware can develop a cloudy film due to soap residue left behind after washing. To remove this film, mix equal parts vinegar and warm water in a basin or sink. Submerge the glassware in the solution and let it soak for a few minutes. Then, use a soft cloth or sponge to gently scrub away the soap scum. Rinse the glassware with clean water and dry it with a lint-free towel to reveal its sparkling clarity.
2. Rejuvenate cloudy glass: If your glassware appears cloudy, even after washing, fill a container large enough to hold the glassware with undiluted vinegar. Submerge the cloudy glassware in the vinegar and let it sit for a few hours or overnight. The vinegar’s acidity will work to dissolve any build-up and restore transparency. Once done, rinse the glassware with water and dry it thoroughly.
3. Remove hard water stains: Hard water stains can make glassware look dull and less appealing. Create a paste of vinegar and baking soda, and gently rub it onto the stained areas using a soft cloth or sponge. Let the paste sit on the stains for a few minutes before rinsing with warm water. Repeat the process if necessary, and then dry the glassware to prevent water spots.
Silverware:
1. Remove tarnish: Tarnished silverware can be brought back to its former glory with vinegar. Create a paste using a mixture of vinegar, salt, and flour. Apply the paste to the tarnished areas using a soft cloth or sponge. Gently rub the silverware until the tarnish is lifted. Rinse the silverware under warm water and dry it thoroughly with a soft cloth.
2. Clean silverware with vinegar soak: Alternatively, you can create a vinegar soak by combining equal parts white vinegar and water in a basin or sink. Place the tarnished silverware into the solution and let it soak for a few minutes. The vinegar will react with the tarnish, helping to break it down. After soaking, rinse the silverware with water and dry it with a soft cloth.
3. Maintain silverware shine: To keep your silverware looking its best, periodically wipe it with a soft cloth dampened with vinegar. This will help remove any surface stains or tarnish, and keep your silverware bright and shiny.
Using vinegar to clean and restore glassware and silverware is a simple and cost-effective solution. It’s important to note that vinegar may not be suitable for delicate or antique items, so exercise caution when using it on valuable or fragile pieces. With regular cleaning and maintenance, you can enjoy the timeless beauty of your glassware and silverware for years to come.
Floors
Keeping your floors clean is an important part of maintaining a tidy and healthy home. Vinegar can be a versatile and effective cleaner for various types of flooring, including tile, laminate, and vinyl. Here’s how you can use vinegar to clean your floors:
Tile Floors:
1. Create a vinegar cleaning solution: In a bucket, mix equal parts warm water and vinegar. This solution will act as a gentle yet effective cleaner for your tile floors.
2. Mop with the vinegar solution: Dip a mop or a microfiber cloth into the vinegar cleaning solution and wring out any excess liquid. Mop the tile floor, working in small sections at a time. Pay attention to any stained or heavily soiled areas, and give them a little extra scrub with the mop.
3. Remove stubborn stains: For stubborn stains or grout lines, use a scrub brush or an old toothbrush dipped in the vinegar solution. Gently scrub the affected areas to lift the stain or dirt. Rinse the brush frequently and continue scrubbing until the stain is removed.
4. Rinse the floor: After mopping, rinse the tile floor with clean water to remove any residual vinegar solution. This step is vital to prevent any leftover acidic residue from damaging the floor’s finish. Thoroughly dry the floor with a clean mop or towel.
Laminate and Vinyl Floors:
1. Mix a vinegar cleaning solution: For laminate and vinyl floors, mix ½ cup of vinegar with one gallon of warm water in a bucket. This diluted vinegar solution is safe for these types of flooring.
2. Mop the floors: Dip a mop or a microfiber cloth into the vinegar cleaning solution, wring it out, and mop the floors. Be sure to remove any excess liquid from the mop or cloth to avoid saturating the floor.
3. Spot clean stubborn marks: If you notice any stubborn marks or stains on the floor, dampen a cloth with undiluted vinegar and gently scrub the affected area. Vinegar’s acidity helps break down stains and grime effectively.
4. Rinse and dry: After mopping, rinse the laminate or vinyl floors with clean water to remove any vinegar residue. Thoroughly dry the floor with a clean mop or towel to prevent any water spots or damage.
Some precautions to consider:
– Avoid using vinegar on natural stone floors, such as marble or granite, as the acidity of vinegar can etch or dull the surface. Instead, use a pH-neutral cleaner recommended for these types of floors.
– Before using vinegar on any floor, it’s always a good idea to test a small, inconspicuous area first to ensure there is no adverse reaction.
– Do not soak laminate or vinyl floors with excessive liquid, as this can cause damage to the floorboards or adhesive.
Using vinegar as a floor cleaner offers a natural, budget-friendly, and effective solution for maintaining clean and sparkling floors. Regular cleaning with vinegar will help remove dirt, grime, and stains, leaving your floors looking their best.
Windows and Mirrors
Windows and mirrors are notorious for accumulating fingerprints, streaks, and dirt, hindering your view and making your home look less clean. Vinegar is a fantastic natural cleaner that can help you achieve spotless and streak-free surfaces. Here’s how you can use vinegar to clean your windows and mirrors:
Step 1: Prepare the vinegar cleaning solution: In a spray bottle, mix equal parts vinegar and water. This solution will effectively clean your windows and mirrors without leaving streaks behind.
Step 2: Spray the vinegar solution: Generously spray the vinegar cleaning solution onto the window or mirror surface. Ensure that the entire area is covered, paying particular attention to any stubborn spots or fingerprints.
Step 3: Wipe with a lint-free cloth: Take a lint-free microfiber cloth or a clean, non-abrasive paper towel and begin wiping the surface in a circular motion. Start from the top and work your way down. The vinegar solution will help dissolve dirt and grime, while the cloth or paper towel will absorb it.
Step 4: Remove any remaining streaks: If you notice any remaining streaks, dampen a clean cloth with plain water and go over the surface again. This final wipe with water will help remove any excess vinegar residue, leaving your windows and mirrors sparkling and streak-free.
Tip: When cleaning large windows, consider using a squeegee instead of a cloth or paper towel. Start at the top corner and pull the squeegee down in a continuous motion, wiping the blade between each pass. This method helps eliminate streaks and ensures a more uniform finish.
Additional Tips:
– To reach high windows, use a sturdy step ladder or an extendable window cleaning pole.
– For outdoor windows, choose a cloudy day or work during the early morning or late evening when the sun’s heat is less intense. This will allow the vinegar solution to stay on the surface longer, preventing it from drying too quickly and causing streaks.
– Always clean windows and mirrors in a well-ventilated area to prevent inhaling any strong vinegar fumes.
Remember, vinegar is an effective and natural alternative to commercial window cleaners. It not only cleans but also helps eliminate bacteria and leaves a streak-free shine. By using vinegar, you can easily maintain clean and crystal-clear windows and mirrors in your home.
Furniture
Furniture is an integral part of our homes, and regular cleaning helps maintain its appearance and longevity. Vinegar is a versatile and eco-friendly cleaner that can be used on various types of furniture to remove dust, dirt, and stains. Here’s how you can use vinegar to clean different types of furniture:
Wooden Furniture:
1. Create a vinegar cleaning solution: Mix equal parts white vinegar and water in a spray bottle. This solution is safe for most types of wood.
2. Dust the furniture: Before cleaning, remove any dust or debris from the furniture using a microfiber cloth or a soft brush. Gently wipe or brush the surface, making sure to reach all crevices and corners.
3. Spot-clean stains: If there are any stubborn stains on the wooden surface, dip a soft cloth in the vinegar cleaning solution. Blot the stain gently, being careful not to oversaturate the wood. Let the solution sit for a few minutes before wiping it away with a clean, damp cloth.
4. General cleaning: Spray the vinegar cleaning solution onto a soft cloth and wipe down the entire surface of the furniture. Follow the wood grain, working in small sections at a time. Pay attention to areas that are frequently used or come into contact with hands, such as table edges or armrests. Wipe away any excess moisture with a clean cloth.
5. Polish, if desired: If you wish to add some shine to your wooden furniture, you can prepare a natural furniture polish. Mix one part olive oil with one part vinegar in a separate container. Dab a soft cloth into the mixture and apply it to the wood in gentle, circular motions. Let it sit for a few minutes before buffing the furniture with a clean cloth.
Fabric Upholstery:
1. Vacuum: Start by vacuuming your upholstered furniture to remove any loose dirt or debris. Use a brush attachment or a handheld vacuum with a soft brush.
2. Spot-clean stains: For small stains, create a solution of equal parts vinegar and water. Dampen a clean cloth or sponge with the solution, and gently blot the stain. Be careful not to oversaturate the fabric. Blot with a clean, damp cloth to rinse the area, and allow it to air dry.
3. Deodorize: To remove odors from fabric upholstery, lightly spray a mixture of equal parts vinegar and water onto the fabric. Let it air dry; the vinegar smell will dissipate as it dries, taking any lingering odors with it.
Leather Furniture:
1. Dust: Use a soft, dry cloth to remove any dust or loose dirt from the leather furniture.
2. Mild cleaning: Mix equal parts white vinegar and water in a spray bottle. Dampen a soft cloth with the solution and gently wipe the leather surface. Avoid oversaturating the leather and wipe away any excess moisture with a clean, dry cloth.
3. Condition: After cleaning, apply a leather conditioner or a commercial leather treatment to keep the leather soft and supple. Follow the instructions on the product carefully.
Remember to always test the vinegar cleaning solution on an inconspicuous area of your furniture before applying it to the entire surface. Different finishes and materials may react differently. By using vinegar, you can effectively clean and maintain your furniture, keeping it looking pristine and extending its lifespan.
Laundry
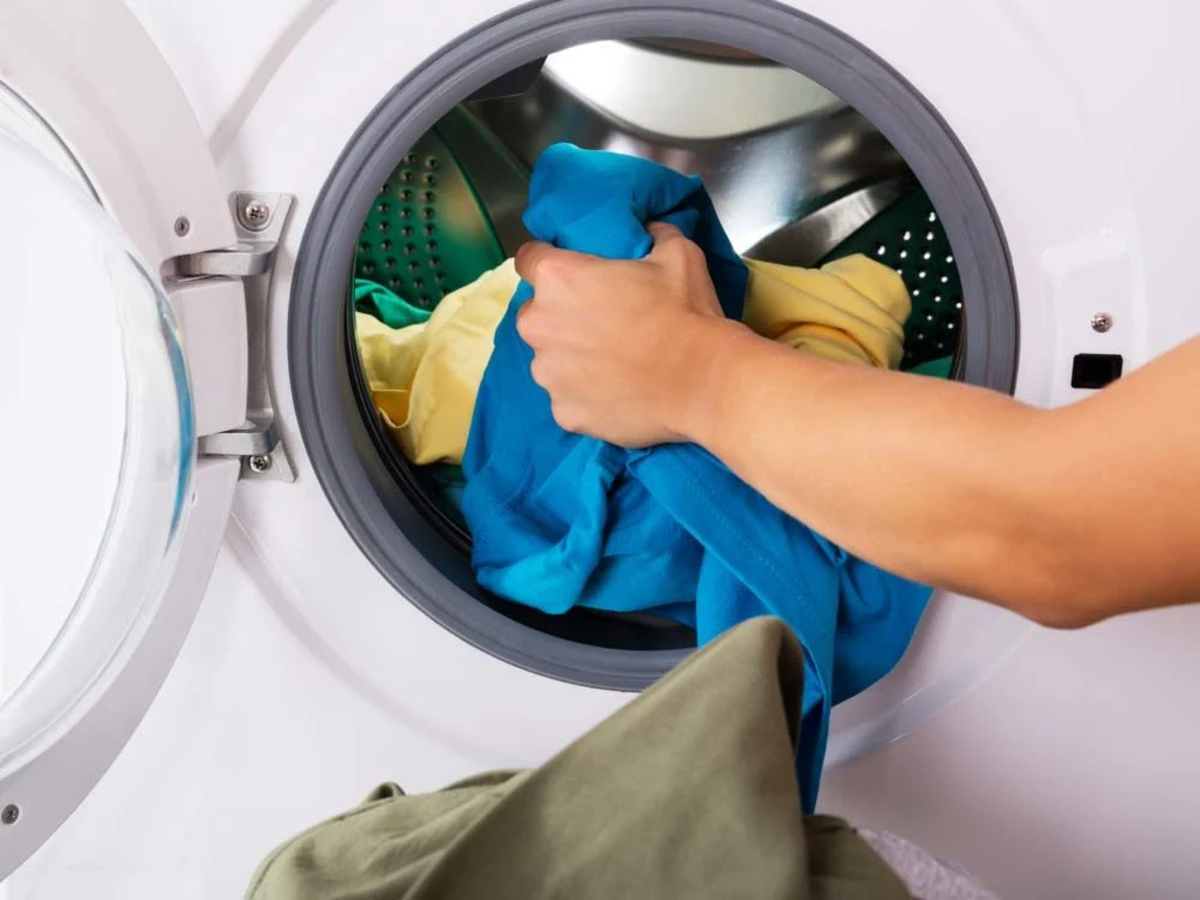
When it comes to doing laundry, vinegar can be a valuable addition to your cleaning routine. Not only does it act as a natural fabric softener, but it also helps remove odors, brighten colors, and tackle stubborn stains. Here’s how you can use vinegar in your laundry:
1. Fabric Softener:
– In place of commercial fabric softeners, add 1/2 to 1 cup of vinegar to the rinse cycle of your washing machine. This will leave your clothes feeling soft and reduce static cling.
2. Odor Removal:
– For clothes with persistent odors, pre-soak them in a mixture of equal parts vinegar and water for 30 minutes to an hour before washing.
– Alternatively, you can add 1/2 to 1 cup of vinegar directly to your washing machine along with the detergent to eliminate odors.
3. Brightening Whites and Colors:
– To restore the brightness of white clothes, add 1 cup of vinegar to the wash cycle. This helps remove yellowing or dinginess and keeps your whites looking fresh.
– For colored clothes, add 1/2 to 1 cup of vinegar to the wash cycle to help revive their vibrancy.
4. Stain Treatment:
– Vinegar can be effective in treating various types of stains. For example, apply undiluted vinegar directly to sweat stains, collar stains, or ink stains before laundering. Let it sit for 10-15 minutes, then wash as usual. You can also create a paste using vinegar and baking soda for a powerful stain-removing scrub.
5. Washing Machine Maintenance:
– Add 1 cup of vinegar to an empty washing machine and run a hot water cycle to remove any built-up soap scum, mineral deposits, or mildew. This will help keep your machine clean and smelling fresh.
Precautions:
– Ensure that your laundry items are compatible with vinegar before using it. Vinegar works well for most fabrics, but it’s always best to check the care labels.
– Avoid using vinegar on delicate fabrics such as silk or acetate, as it may cause damage or discoloration. Test a small, inconspicuous area first if you are unsure.
By incorporating vinegar into your laundry routine, you can naturally freshen, soften, and brighten your clothes while also tackling tough stains. It’s a cost-effective and eco-friendly alternative to commercial laundry products. Give vinegar a try in your next load of laundry, and enjoy the benefits of cleaner and fresher clothes.
Bathroom Fixtures
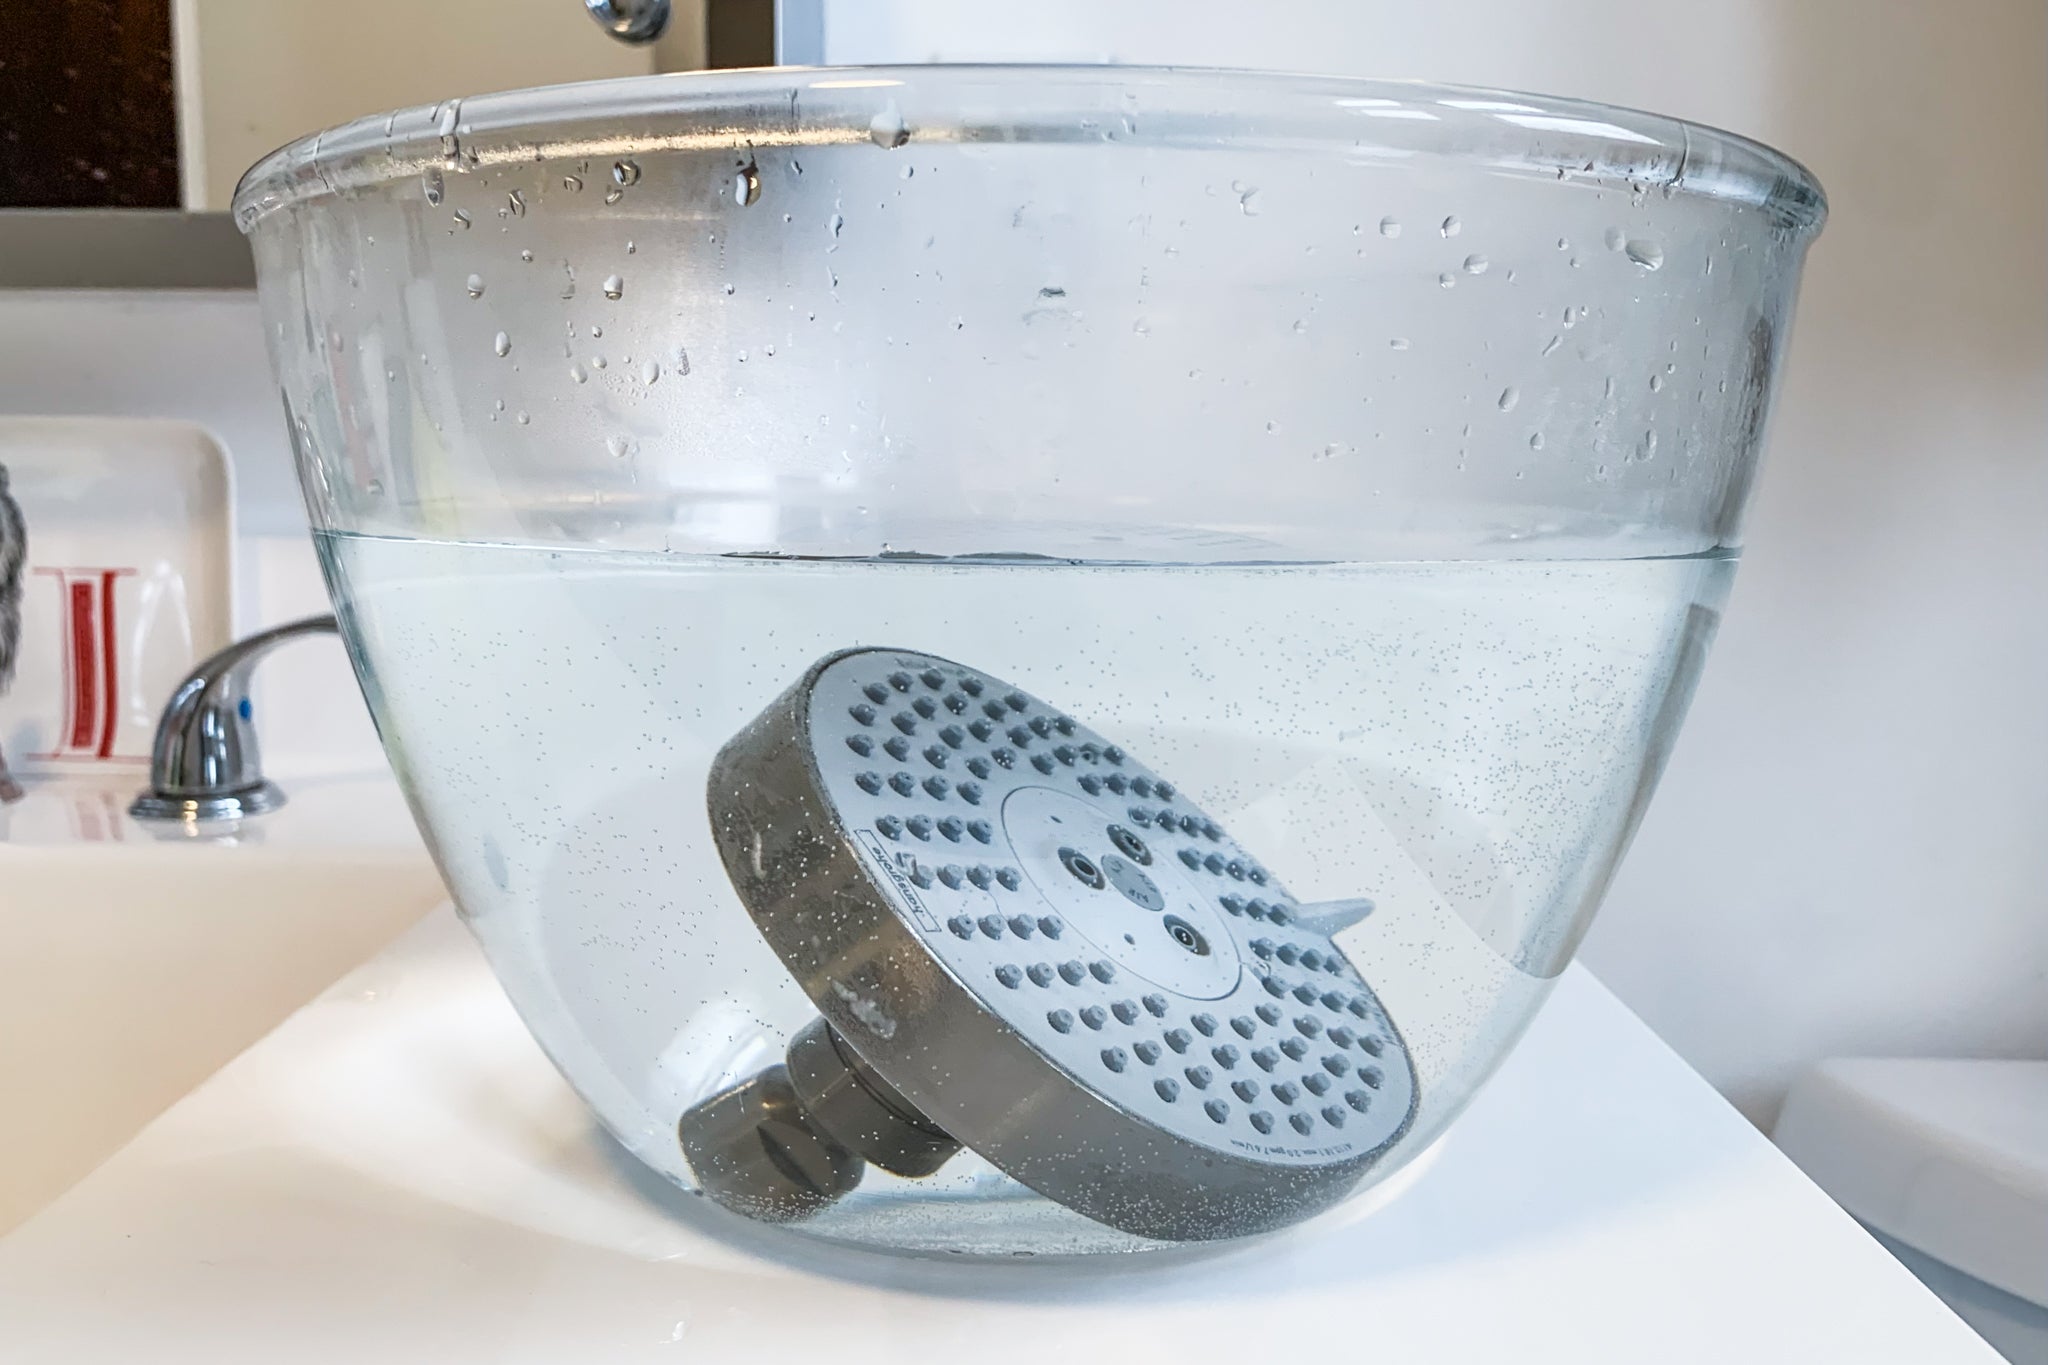
Bathroom fixtures, such as faucets, showerheads, and toilets, can accumulate mineral deposits, soap scum, and stains over time. Vinegar can be a powerful cleaner to tackle these issues, leaving your bathroom fixtures shiny and clean. Here’s how you can use vinegar to clean your bathroom fixtures:
Faucets:
– Soak a cloth or paper towel in vinegar and wrap it around the faucet, ensuring the affected areas are covered. Let it sit for 15-20 minutes to allow the vinegar to dissolve mineral deposits.
– After soaking, remove the cloth and use a soft brush or toothbrush to scrub away any remaining residue or build-up.
– Rinse the faucet thoroughly with water and dry it with a clean cloth to prevent water spots.
Showerheads:
– Fill a plastic bag with enough vinegar to submerge the showerhead. Secure the bag around the showerhead with a rubber band or a piece of string, ensuring the showerhead is submerged in the vinegar.
– Let it soak for a few hours or overnight, allowing the vinegar to break down mineral deposits. You may gently agitate the bag occasionally to expedite the cleaning process.
– Remove the bag, give the showerhead a thorough rinse with water, and use a soft brush or toothbrush to scrub away any remaining residue if needed.
Toilets:
– Pour 1-2 cups of vinegar into the toilet bowl and let it sit for a few hours or overnight to remove stains and mineral deposits.
– Use a toilet brush to scrub the bowl, paying extra attention to areas with stains or build-up.
– Flush the toilet to rinse away the vinegar and reveal a clean and fresh bowl.
Bathtub and Shower:
– Create a vinegar cleaning solution by mixing equal parts vinegar and water in a spray bottle.
– Spray the solution onto the surfaces of your bathtub and shower walls, focusing on areas with soap scum or stains.
– Let the vinegar solution sit for a few minutes to allow it to break down the residue. Use a scrub brush or sponge to scrub away the soap scum or stains.
– Rinse the surfaces thoroughly with water to remove any vinegar residue. Wipe them dry with a clean cloth or towel.
General Tips:
– For extra stubborn stains, you can create a paste using vinegar and baking soda. Apply the paste to the affected area, let it sit for a few minutes, and then scrub it away.
– Always test the vinegar solution on a small, inconspicuous area first, especially if you are uncertain about the compatibility of vinegar with specific materials or finishes.
– Open windows or ensure proper ventilation while cleaning with vinegar, as the scent can be strong.
By incorporating vinegar into your bathroom cleaning routine, you can effectively dissolve mineral deposits, remove stains, and restore the shine to your bathroom fixtures. Vinegar is a natural and cost-effective solution that helps you maintain a clean and hygienic bathroom environment.
Pet Stains and Odors
Dealing with pet stains and odors can be a common challenge for pet owners. Luckily, vinegar can be a lifesaver when it comes to eliminating those unpleasant smells and removing stains caused by your furry friends. Here’s how you can use vinegar to tackle pet stains and odors effectively:
Step 1: Blot the area:
If your pet has an accident and leaves behind a wet stain, begin by blotting the area with paper towels or a clean cloth. Gently press down to absorb as much of the moisture as possible. Avoid rubbing, as this can spread the stain and push it deeper into the carpet or fabric.
Step 2: Dilute with vinegar solution:
Create a vinegar cleaning solution by mixing equal parts water and vinegar. For upholstery and delicate fabrics, consider using a lower concentration of vinegar to prevent any potential damage. Test the solution on a small, inconspicuous area first to ensure it doesn’t cause discoloration.
Step 3: Apply the vinegar solution:
Pour or spray the vinegar solution directly onto the stained area. The vinegar solution will help neutralize the odor and break down the stain. Be generous with the solution to ensure it penetrates deep into the affected area.
Step 4: Blot the stain:
Using fresh paper towels or a clean cloth, blot the stained area gently. Press down to absorb the liquid, working from the outside edges inward. Repeat this process until no more liquid is being absorbed.
Step 5: Rinse and dry:
Once you have blotted the stain, rinse the area with clean water to remove any residual vinegar solution. Blot again to remove excess moisture, then allow the area to air dry completely. Open windows or turn on fans to promote airflow and aid in drying.
Step 6: Treat persistent odors:
If the odor persists, you can further eliminate it by sprinkling baking soda over the affected area. Let it sit for a few hours or overnight, as baking soda naturally absorbs unpleasant odors. Vacuum up the baking soda the next day.
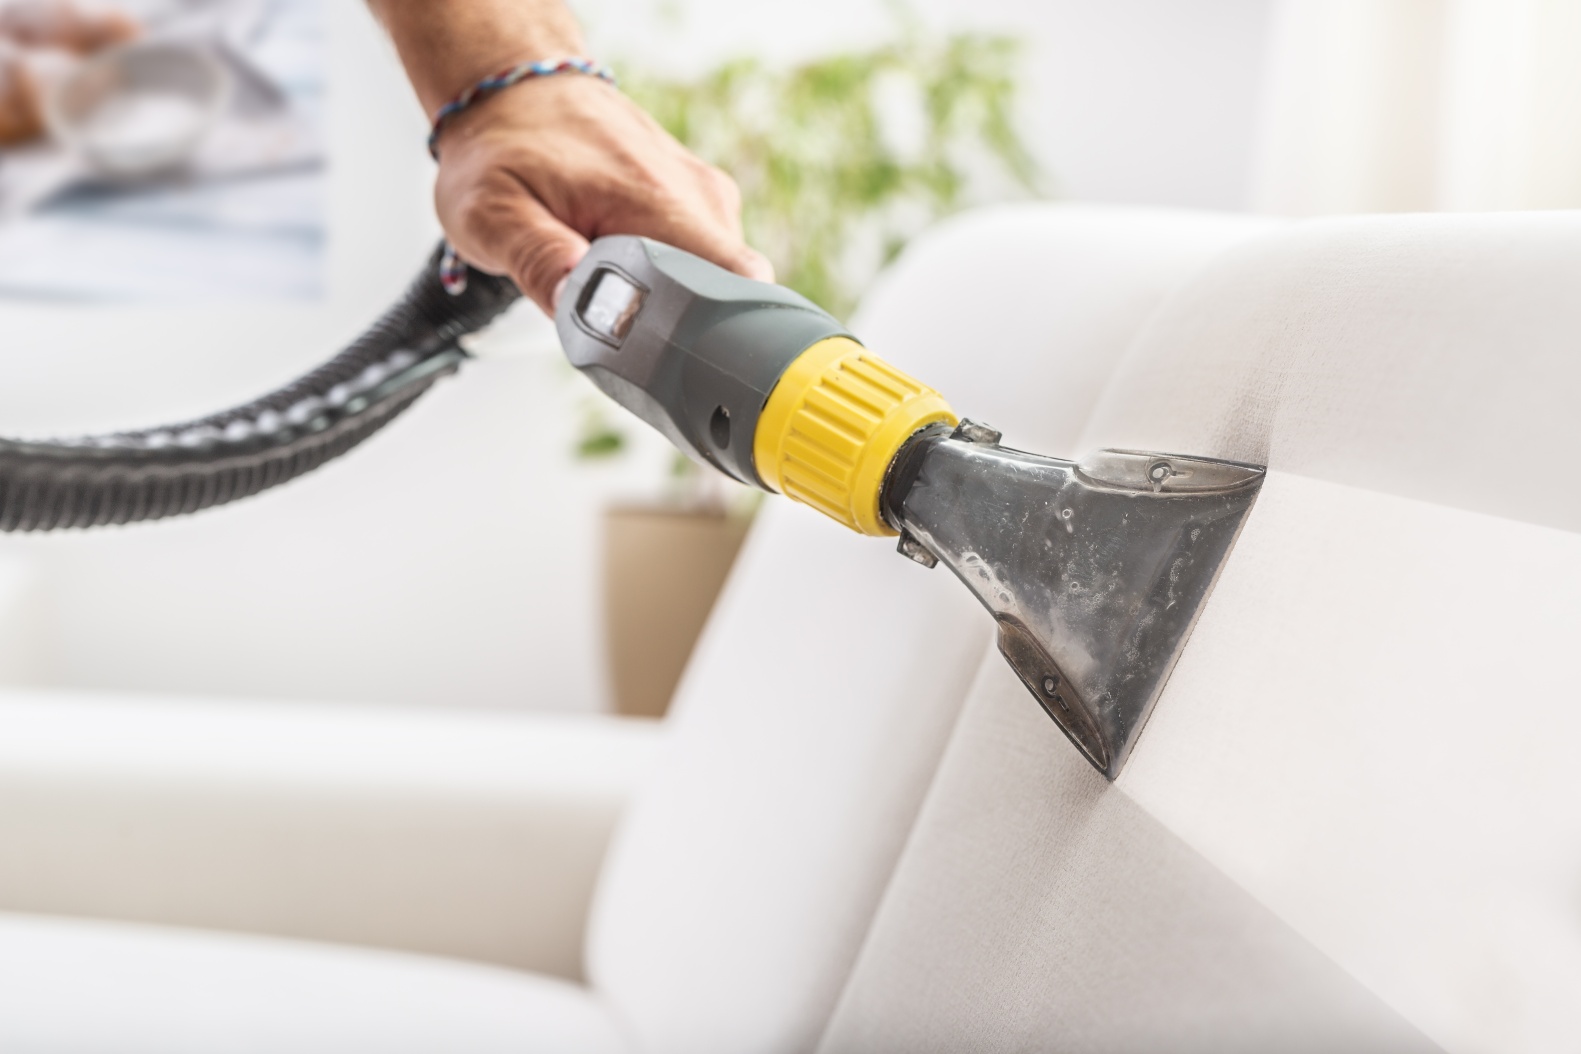
Step 7: Carpet cleaning machines:
For larger or more stubborn stains, you can use a carpet cleaning machine. Fill the machine’s tank with a solution of vinegar and water. Follow the manufacturer’s instructions for operating the machine and treating the specific stain or area.
Remember, vinegar is an effective natural cleaner, but it’s always a good idea to test it on a small, inconspicuous area before using it on a larger surface. Additionally, be prompt in cleaning up pet accidents to prevent stains from setting in.
By using vinegar to address pet stains and odors, you can effectively eliminate unpleasant smells and maintain a fresh and clean environment for both you and your furry companions.
Frequently Asked Questions about Cleaning With Vinegar: 15 Things You Can Clean With Vinegar
Was this page helpful?
At Storables.com, we guarantee accurate and reliable information. Our content, validated by Expert Board Contributors, is crafted following stringent Editorial Policies. We're committed to providing you with well-researched, expert-backed insights for all your informational needs.


0 thoughts on “Cleaning With Vinegar: 15 Things You Can Clean With Vinegar”