Home>Interior Design>Hidden, Dirty Areas Of The Living Room We Forget To Clean
Interior Design
Hidden, Dirty Areas Of The Living Room We Forget To Clean
Modified: January 23, 2024
Discover the hidden and often overlooked areas of your living room that are in desperate need of cleaning. Enhance your interior design by tackling these dirty spots today!
(Many of the links in this article redirect to a specific reviewed product. Your purchase of these products through affiliate links helps to generate commission for Storables.com, at no extra cost. Learn more)
Hidden, Dirty Areas of the Living Room We Forget to Clean
When it comes to cleaning our living rooms, we often focus on the obvious areas like the floors, furniture, and electronics. However, there are some hidden areas in the living room that tend to accumulate dirt and dust over time, and we tend to overlook cleaning them. In this article, we will uncover these hidden and dirty areas in the living room that often go unnoticed. Let’s dive in!
Key Takeaways:
- Don’t overlook hidden dirt in your living room! Clean underneath furniture, behind the TV, inside couch cushions, and more to maintain a fresh and inviting space.
- Regularly cleaning often-forgotten areas like air vents, lampshades, and decorative items enhances air quality and preserves the beauty of your living room.
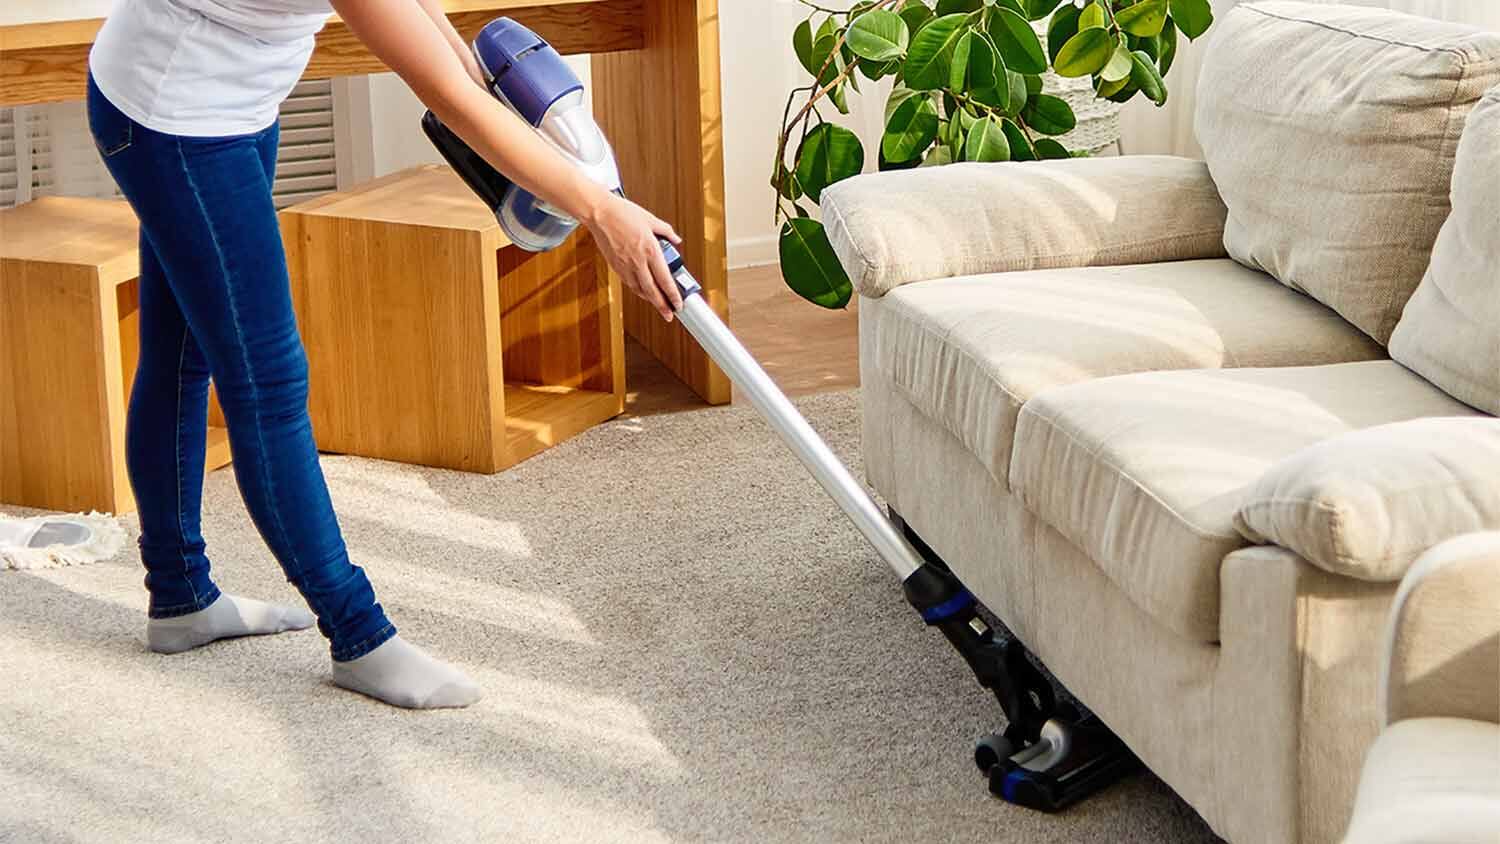
Underneath the Furniture
One area that many of us neglect to clean in our living rooms is underneath the furniture. Dust bunnies and debris can accumulate under couches, coffee tables, and entertainment centers. To clean these areas, simply move the furniture and use a vacuum or duster to remove the accumulated dirt. Don’t forget to vacuum the floor as well before returning the furniture to its original position.
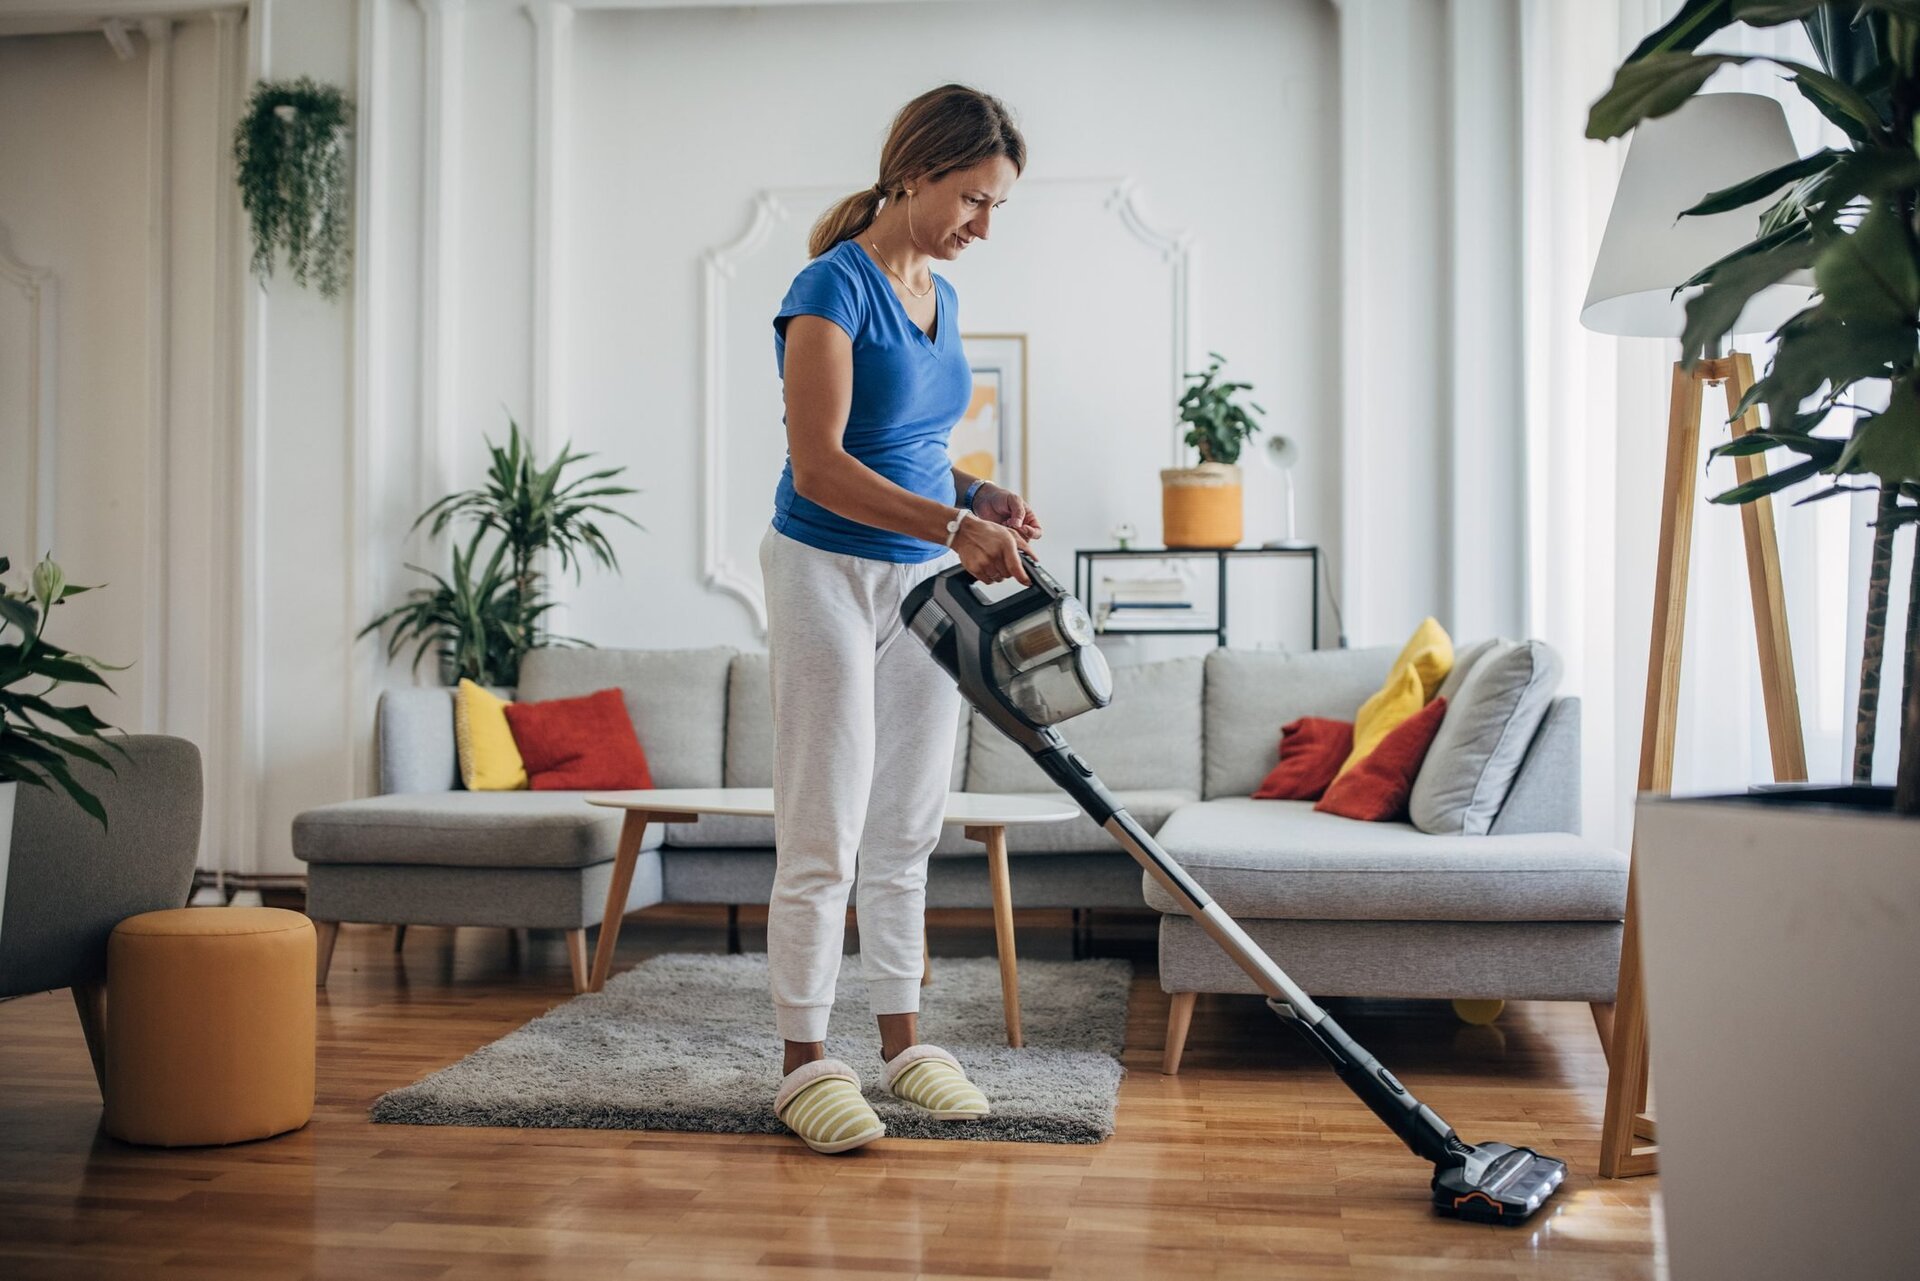
Behind the TV
The area behind the TV is another spot that often gets overlooked. Dust and dirt can accumulate there due to the static electricity generated by electronic devices. Use a microfiber cloth or a duster with an extendable handle to reach behind your TV and gently wipe away the dust. You can also use compressed air to blow away any stubborn dirt particles.
Inside the Couch Cushions
We spend a lot of time sitting on our couches, which means dust, crumbs, and other debris can easily find their way inside the couch cushions. Remove the cushions and give them a good shake to get rid of any loose dirt. Use a vacuum cleaner with a brush attachment to thoroughly clean the crevices and surfaces of the cushions. If your cushions have removable covers, check the care label for washing instructions and give them a good wash if possible.
Behind Curtains or Blinds
While we may remember to clean the curtains or blinds themselves, we often forget about the areas behind them. Dust and cobwebs tend to accumulate in these hidden spots. Use a duster or a vacuum cleaner with a brush attachment to clean behind the curtains or blinds. You may also consider removing them altogether and giving them a good wash or shake outside to remove any accumulated dust.
Read more: How To Place Area Rugs In Living Room
Baseboards and Corners
Baseboards and corners are often overlooked during regular cleaning routines. These areas are prone to collecting dust, pet hair, and other debris. Take a damp cloth or a cleaning solution and wipe down the baseboards and corners to remove any dirt buildup. Don’t forget to vacuum or sweep the floor around these areas to prevent the dust from re-settling.
Lampshades
Lampshades can easily accumulate dust and can become a hidden source of dirt in the living room. Gently dust the lampshades with a soft cloth or use a vacuum cleaner with a brush attachment to remove any loose dirt. If the lampshade is removable, you can also give it a gentle wash according to the manufacturer’s instructions.
Remote Controls
Remote controls are one of the most frequently used items in the living room, but they can also be a breeding ground for germs and bacteria. Use disinfecting wipes or a cloth dampened with rubbing alcohol to clean the remote controls thoroughly. Be sure to remove the batteries before cleaning and let the remote controls dry completely before putting the batteries back in.
Decorative Items
Decorative items like vases, sculptures, and figurines can accumulate dust over time. Remember to remove and clean these items regularly. Use a soft cloth or a brush to gently remove the dust. If the item is delicate or has intricate details, consider using a small paintbrush or a compressed air canister to prevent damage.
Read more: How To Create A Play Area In Living Room
Air Vents
Air vents in the living room can collect dust and circulate it throughout the space. Use a vacuum cleaner with a brush attachment or a duster to clean the vents. You can also remove the vent covers and wash them if they are removable. By keeping the air vents clean, you can improve the air quality in your living room.
Wall Hangings and Picture Frames
Wall hangings and picture frames can accumulate dust over time, especially if they are not regularly moved or cleaned. Use a soft cloth or a duster to remove the dust from these items. Take extra care when dusting fragile or delicate frames to prevent any damage.
Remember, these hidden and dirty areas in the living room may not be obvious at first glance, but they can contribute to an overall dusty and unclean environment. By incorporating these often-overlooked areas into your regular cleaning routine, you can maintain a fresh and inviting living room space. So, the next time you tackle your living room cleaning, don’t forget to pay attention to these hidden spots!
Key Takeaways:
- Don’t overlook hidden dirt in your living room! Clean underneath furniture, behind the TV, inside couch cushions, and more to maintain a fresh and inviting space.
- Regularly cleaning often-forgotten areas like air vents, lampshades, and decorative items enhances air quality and preserves the beauty of your living room.
Underneath the Furniture
When it comes to cleaning our living rooms, one area that often goes unnoticed is underneath the furniture. We tend to focus on the visible surfaces, such as the floors and the tops of tables, but forget about the hidden dirt and dust that gathers beneath our couches, coffee tables, and entertainment centers.
The space underneath furniture tends to be a magnet for dust bunnies, pet hair, and food crumbs. Over time, this can not only lead to a buildup of dirt but also contribute to poor indoor air quality. Therefore, it is essential to include this area in your regular cleaning routine.
The first step is to move the furniture to gain access to the hidden areas underneath. You may need someone to assist you, especially if the furniture is heavy or bulky. Once you have cleared the space, grab a vacuum cleaner with a crevice tool attachment. This will help you reach deep into the corners and crevices where the dust and dirt tend to accumulate.
Start by vacuuming the area thoroughly, paying close attention to the corners and edges. Move the nozzle back and forth in a slow and steady motion to ensure that you capture all the dust and debris. If you come across any stubborn dirt or pet hair, you can use a soft brush to loosen it before vacuuming it up.
In addition to vacuuming, you can also use a microfiber duster or a damp cloth to wipe down the surfaces under the furniture. This will help pick up any remaining dust particles and give the area a more thorough clean. If you have hardwood floors, consider using a gentle cleaning solution diluted with water to remove any sticky or greasy residues.
Once you have finished cleaning underneath the furniture, it’s time to tackle the furniture itself. Take a moment to inspect the legs and frames for any dust or cobwebs. Use a damp cloth or a microfiber cloth to wipe them down and remove any dirt or grime. If the furniture has removable cushions or covers, take the opportunity to vacuum and clean them as well.
Finally, before placing the furniture back in its original position, take a moment to clean the floor beneath it. Use a broom or a vacuum to remove any loose dirt, and then mop the area with a suitable floor cleaner to ensure a thorough clean.
By including the often-forgotten area underneath the furniture in your cleaning routine, you will not only maintain a cleaner living room but also improve the overall air quality of your home. So, the next time you clean your living room, don’t forget to give those hidden spots the attention they deserve!
Behind the TV
When it comes to cleaning the living room, one area that often gets overlooked is behind the TV. The TV area tends to accumulate dust and dirt over time due to the static electricity generated by electronic devices. It’s essential to include this often-neglected spot in your regular cleaning routine to maintain a clean and dust-free living room.
Here’s how you can effectively clean behind the TV:
1. Power off and unplug the TV: Before you begin cleaning, make sure to turn off the TV and unplug it from the power source to ensure your safety.
2. Move the TV: This step might require an extra pair of hands, especially if the TV is large and heavy. Carefully move the TV away from the wall, creating enough space for you to access the area behind it.
3. Dusting: Begin by dusting the back of the TV and the surrounding area. Use a microfiber cloth or a soft duster to remove the loose dust particles. Make sure to reach the corners and edges where dust tends to accumulate.
4. Vacuuming: After dusting, use a vacuum cleaner with a brush attachment to vacuum the area behind the TV. Move the nozzle back and forth, ensuring that you capture all the dust and debris. Pay special attention to the cables and cords, as they can also accumulate dust. Use a soft brush attachment or a damp cloth to wipe down the cables and remove any dust or dirt.
5. Wall cleaning: Take this opportunity to inspect and clean the wall behind the TV. If there are any marks or stains, use a mild detergent or a specialized wall cleaner to gently remove them. Be cautious when using liquids near electrical outlets.
6. Cleaning the TV screen: While you have the TV moved away from the wall, it’s a good idea to clean the screen as well. Use a microfiber cloth or a cleaning solution specifically designed for electronics to wipe away fingerprints, dust, and smudges. Avoid using harsh chemicals or abrasive materials that can damage the screen.
7. Reassembling: Once you’re done cleaning, carefully move the TV back into its original position, ensuring that all cables are properly connected. Be gentle when handling the TV to avoid any damage.
By regularly cleaning behind the TV, you not only remove dust and dirt but also improve the performance and lifespan of your electronic devices. It also helps maintain better air quality in your living room. Remember to include this step in your cleaning routine to keep your living room looking fresh and dust-free.
Inside the Couch Cushions
One of the hidden areas in our living rooms that often gets overlooked when cleaning is inside the couch cushions. Over time, dust, crumbs, pet hair, and other debris tend to accumulate in this cozy hiding spot. Cleaning inside the couch cushions not only helps to maintain a clean and fresh living room but also extends the lifespan of your furniture. Here’s how you can effectively clean inside the couch cushions:
1. Start by removing the cushions: Take each cushion off the couch and set them aside. Shake them gently outside to remove any loose debris. This initial step will help you get rid of larger particles and make the cleaning process easier.
2. Vacuum the cushions: Use a vacuum cleaner with an upholstery attachment or a handheld vacuum to thoroughly clean the cushions. Pay special attention to the crevices and corners where dirt tends to accumulate. Move the attachment in a slow and controlled manner to ensure that you remove as much dust and debris as possible. If your vacuum cleaner has a brush attachment, use it to loosen any stubborn dirt or pet hair.
3. Clean any stains or spills: If you notice any stains or spills on the cushions, address them promptly. Check the care label or the manufacturer’s instructions to determine the best cleaning method for your specific couch cushions. You may need to spot clean using a mild soap and water solution or a specialized upholstery cleaner. Gently blot the stain using a clean cloth, taking care not to rub or scrub vigorously as it can spread the stain and damage the fabric.
4. Freshen up the cushions: To eliminate any odors that may have accumulated inside the cushions, sprinkle baking soda liberally on each cushion. Allow the baking soda to sit for at least 15 minutes before vacuuming it up. Baking soda is a natural deodorizer that helps absorb and neutralize odors.
5. Washable cushion covers: If your couch has removable cushion covers, it’s a good idea to check the care label to determine if they are machine washable. If so, remove the covers and wash them according to the manufacturer’s instructions. This will ensure a thorough cleaning of the cushions and leave them looking fresh and clean.
6. Reassemble the cushions: Once the cushions and covers are cleaned and dry, reposition them back onto the couch. Arrange them evenly and fluff them up to restore their original shape and appearance.
Regularly cleaning inside the couch cushions not only helps maintain a cleaner living room environment but also keeps your couch looking and smelling fresh. By removing the dust, debris, and any potential allergens, you create a more hygienic and inviting space for you and your family to enjoy. So, the next time you clean your living room, don’t forget to give some attention to the often-ignored area inside the couch cushions.
Behind Curtains or Blinds
When it comes to cleaning our living rooms, we often remember to clean the curtains or blinds themselves but forget about the hidden dirt that accumulates behind them. Dust, cobwebs, and even insects can find their way behind curtains or blinds, making it essential to include this often overlooked area in your regular cleaning routine. Here are some steps to effectively clean behind curtains or blinds:
1. Start by opening the curtains or lifting the blinds: Fully open the curtains or lift the blinds to expose the area behind them. This will give you easy access to the hidden spaces where dust tends to accumulate.
2. Dusting: Use a duster or a microfiber cloth to dust the wall and window frames behind the curtains or blinds. Start from the top and work your way down. Be thorough and pay extra attention to the corners and edges where dust and cobwebs are likely to gather.
3. Vacuuming: After dusting, use a vacuum cleaner with a brush attachment to remove any loose dirt, dust, or cobwebs from the area. Move the vacuum nozzle along the walls and window frames, ensuring that you cover the entire surface. You can also use a handheld vacuum cleaner or a crevice tool to reach tight spaces that the brush attachment may not reach easily.
4. Cleaning the curtains or blinds: While you’re cleaning behind them, take the opportunity to clean the curtains or blinds themselves. Follow the manufacturer’s instructions for cleaning, as different materials and types of curtains or blinds may require specific care. This may involve machine washing, hand washing, or spot cleaning. If the curtains or blinds are not washable, use a fabric-specific cleaner or a damp cloth to gently wipe away any dust or stains.
5. Washing or replacing curtain liners: If your curtains have liners, check them for dirt or stains. Some liners can be machine washed, while others may require spot cleaning or even replacement. Ensure the liners are completely dry before reattaching them to the curtains.
6. Reassembling: Once you’ve completed the cleaning process, carefully close the curtains or lower the blinds back into their original position. Make sure they are properly aligned and evenly distributed.
By regularly cleaning behind curtains or blinds, you not only remove dust, cobwebs and potential allergens, but you also create a cleaner and healthier living environment. It also helps to maintain the overall appearance and functionality of your curtains or blinds. So, the next time you clean your living room, don’t forget to give some attention to the often-neglected area behind the curtains or blinds.
Read more: How To Place Area Rugs In Living Room
Baseboards and Corners
Baseboards and corners are often overlooked when it comes to cleaning our living rooms, yet they can easily accumulate dust, dirt, and pet hair over time. These areas are prone to collecting debris that falls or gets kicked up during regular activities, making it important to include them in your cleaning routine. Here are some steps to effectively clean baseboards and corners:
1. Dusting: Start by dusting the baseboards and corners using a microfiber cloth or a duster. Run the cloth along the length of the baseboards, ensuring that you cover all the surfaces. Pay extra attention to the corners where dust tends to collect. Dusting regularly can prevent the buildup of dirt and debris.
2. Vacuuming: After dusting, use a vacuum cleaner with a brush attachment to vacuum the baseboards and corners. Move the attachment along the surfaces, making sure to reach the crevices and tight areas. The vacuum will help remove any remaining dust or dirt that the dusting may have missed.
3. Scrubbing: For tough stains or dirt buildup on the baseboards, you may need to give them a more thorough cleaning. Dampen a cloth or a sponge with a mild cleaning solution, such as a mixture of warm water and gentle dish soap. Wring out any excess moisture to avoid damaging the baseboards. Gently scrub the stained or dirty areas, applying light pressure to remove the grime. Rinse the cloth or sponge frequently and repeat the process as needed.
4. Detailing: To ensure a thorough clean, use a small brush or a toothbrush to clean the corners and crevices that may be difficult to reach with a cloth or sponge. This will help remove any stubborn dirt or dust that may have accumulated. Afterward, wipe down the baseboards and corners with a clean, damp cloth to remove any cleaning residue.
5. Preventive Measures: To maintain clean baseboards and corners, consider using a baseboard wax or a furniture polish after cleaning. This will create a protective barrier that repels dust and makes future cleaning easier. Additionally, placing mats or rugs near entrances can help trap dirt and prevent it from reaching the baseboards.
6. Regular Maintenance: Baseboards and corners should be included in your regular cleaning routine. Dust and vacuum them at least once a week, and give them a deeper clean as needed. By incorporating these steps into your routine, you can maintain clean and presentable baseboards and corners in your living room.
By taking the time to clean and maintain the baseboards and corners in your living room, you not only improve the overall cleanliness of the space but also prolong the life of these areas. Plus, clean baseboards and corners add a neat and finished look to any room. So, don’t forget to give them the attention they deserve during your cleaning sessions!
Lampshades
When it comes to cleaning our living rooms, one area that often goes unnoticed is the lampshades. Lampshades can easily accumulate dust, pet hair, and other airborne particles, which not only affect their appearance but also diminish the quality of light they emit. Including lampshades in your regular cleaning routine will help maintain a cleaner and more inviting living room. Here’s how you can effectively clean lampshades:
1. Dusting: Start by dusting the lampshade to remove any loose dirt or debris. You can use a soft, dry cloth or a duster specifically designed for delicate surfaces. Carefully run the cloth or duster over the entire surface of the lampshade, making sure to reach all the nooks and crannies. A gentle swipe or light tapping motion is usually sufficient to dislodge the dust.
2. Vacuuming: For fabric or fabric-lined lampshades, vacuuming is an effective way to remove stubborn dust and pet hair. Use a vacuum cleaner with a brush attachment or a handheld vacuum with a soft brush attachment. Gently run the brush over the surface of the lampshade, applying light pressure to avoid damaging the fabric. Make sure to cover the entire surface, including the top and bottom edges.
3. Spot cleaning: If your lampshade has stubborn stains or marks, spot cleaning may be necessary. Check the manufacturer’s instructions or the care label for specific cleaning recommendations. Depending on the material, you can use a mild soap solution, a specialized fabric cleaner, or a gentle upholstery cleaner. Apply the cleaning solution to a clean cloth or sponge, and gently dab or blot the stained areas. Avoid rubbing or scrubbing vigorously, as this can damage the fabric. Once the stains are removed, use a clean, damp cloth to rinse any remaining residue from the lampshade.
4. Cleaning plastic or glass lampshades: If your lampshade is made of plastic or glass, you can use a mild glass cleaner or a mixture of water and mild dish soap. Dampen a soft cloth with the cleaning solution and gently wipe both the inside and outside surfaces of the lampshade. Be cautious not to saturate the fabric trim or any electrical components. Rinse the cloth and wipe away any soapy residue before allowing the lampshade to air dry.
5. Lampshade maintenance: To minimize dust accumulation on lampshades, you can use a soft-bristle brush or a lint roller to regularly remove surface dust between cleanings. Additionally, avoid touching lampshades with dirty hands, as oils and dirt can transfer onto the fabric or surface and become more difficult to clean.
Remember to consult the manufacturer’s instructions or care label for specific cleaning guidelines, as some lampshades may require special care. By including lampshades in your regular cleaning routine, you can enjoy a cleaner and brighter living room with well-maintained lighting fixtures.
So, the next time you clean your living room, don’t forget to give your lampshades the attention they deserve!
Remote Controls
In our living rooms, one of the most frequently used items is the remote control. Whether it’s for the TV, the sound system, or various other devices, remote controls can quickly accumulate dirt, grime, and germs over time. To maintain a clean and hygienic living room, it’s essential to include remote controls in your regular cleaning routine. Here are some tips on how to effectively clean remote controls:
1. Remove the batteries: Before you start cleaning, always remove the batteries from the remote control. This prevents any accidental button presses and ensures your safety during the cleaning process.
2. Use disinfecting wipes: Disinfecting wipes are a quick and convenient option for cleaning remote controls. These wipes are pre-moistened with cleaning agents that help kill germs and bacteria. Gently wipe down the entire surface of the remote control, paying extra attention to the buttons and crevices where dirt and grime tend to accumulate. Be sure to follow the instructions on the packaging.
3. Alcohol solution: If you don’t have disinfecting wipes on hand, you can create your own cleaning solution using isopropyl alcohol and a soft cloth. Mix a small amount of isopropyl alcohol with water, dampen the cloth with the solution, and gently wipe down the entire surface of the remote control. Again, pay extra attention to the buttons and crevices.
4. Q-tips or cotton swabs: For hard-to-reach areas and tight spaces between the buttons, use a cotton swab or a Q-tip dampened with a small amount of cleaning solution. Gently scrub these areas to remove any dirt or grime that may be hiding.
5. Dry thoroughly: After cleaning, use a dry, lint-free cloth to wipe down the remote control and remove any excess moisture. Ensure that the remote control is completely dry before reinserting the batteries. Moisture can damage the internal components of the remote control.
6. Preventive measures: To keep your remote controls cleaner for longer, consider using protective covers or cases. These can help shield the surfaces from dirt, spills, and general wear and tear. Additionally, encourage family members and guests to wash their hands before using the remote controls, as oils and dirt from hands can easily transfer onto the surface.
By regularly cleaning your remote controls, you not only maintain a cleaner living room but also promote better hygiene. Remember to perform this cleaning routine periodically, especially during periods of illness or when multiple people are using the remote controls. A clean remote control ensures a more enjoyable and germ-free experience while watching your favorite shows or movies in the living room.
So, the next time you clean your living room, don’t forget to sanitize those ubiquitous remote controls!
Decorative Items
When it comes to decorating our living rooms, we often focus on finding the perfect furniture and accessories to create an inviting space. However, one aspect that is often overlooked when it comes to cleaning is the upkeep of these decorative items. Dust and dirt can accumulate on vases, sculptures, figurines, and other decorative objects, impacting their appearance over time. Including decorative items in your regular cleaning routine will help maintain a clean and visually appealing living room. Here’s how you can effectively clean your decorative items:
1. Dusting: Begin by dusting the items with a soft cloth or a duster. Gently run the cloth or duster over the surfaces, making sure to reach all the nooks and intricate details. Pay special attention to areas that tend to collect more dust, such as crevices and corners. For delicate items, opt for a brush with soft bristles to avoid causing damage.
2. Use a mild cleaning solution: For items made of non-porous materials like glass or ceramic, you can use a mild cleaning solution to remove any stubborn dirt or fingerprints. Mix a small amount of gentle dish soap with warm water in a bowl. Dampen a soft cloth or sponge in the solution and gently wipe down the decorative items. Avoid immersing items with electrical components or porous materials in water.
3. Rinse and dry: After cleaning with the mild solution, rinse the cloth or sponge with clean water and wring out any excess moisture. Use the damp cloth or sponge to remove any soapy residue from the decorative items. Then, use a dry, lint-free cloth to thoroughly dry each item. This step helps prevent water spots or potential damage to porous materials.
4. Delicate or fragile items: For delicate or fragile decorative items, such as porcelain figurines or delicate glassware, it’s best to consult the manufacturer’s instructions or seek professional cleaning advice. These items may require specialized cleaning techniques or professional care to ensure they are properly cleaned without causing damage.
5. Handling and placement: Pay attention to how you handle and place your decorative items. Avoid touching them with dirty or greasy hands, as oils and dirt can transfer onto the surfaces. Also, be mindful of their placement in the living room. Keep them away from direct sunlight, which can cause fading or discoloration, and avoid placing them in areas where they are at risk of being knocked over or damaged.
By cleaning and maintaining your decorative items, you not only preserve their beauty but also contribute to the overall cleanliness of your living room. Regular dusting and occasional cleaning will help keep these items looking fresh and enhance the overall aesthetic appeal of your space.
So, the next time you clean your living room, don’t forget to give some attention to your beloved decorative items!
Read more: How To Create A Play Area In Living Room
Air Vents
When it comes to cleaning our living rooms, we often focus on visible surfaces like floors and furniture, but one area that often gets overlooked is the air vents. Air vents play a crucial role in the circulation of air throughout the room, and over time, they can accumulate dust, dirt, pet hair, and other allergens. Cleaning air vents not only helps maintain a healthier living environment but also improves the efficiency of your heating and cooling systems. Here’s how you can effectively clean your air vents:
1. Turn off the HVAC system: Before you begin cleaning, turn off your heating, ventilation, and air conditioning (HVAC) system. This ensures your safety and prevents any dust or debris from being redistributed into your living room.
2. Remove vent covers: Most air vents have removable covers or grilles that can be easily taken off for cleaning. Remove the vent covers gently by unscrewing them or releasing any clips or locks. If you’re not sure how to remove the covers, refer to the manufacturer’s instructions or seek professional assistance.
3. Vacuum the vent covers: Use a vacuum cleaner with a brush attachment to thoroughly clean the vent covers. Vacuum both sides of the covers to remove dust, dirt, and any loose debris. Pay special attention to the nooks and grooves where dirt tends to accumulate.
4. Clean the vent ducts: After vacuuming the covers, use the brush attachment or the crevice tool of your vacuum cleaner to clean inside the vent ducts. Gently insert the attachment as far as possible without causing any damage. Move the attachment in a sweeping motion to loosen and remove any dust or debris. If needed, you can also use a soft brush to dislodge stubborn dirt.
5. Wash removable vent covers: If your vent covers are washable, fill a sink or basin with warm water and a mild dish soap solution. Place the vent covers in the soapy water and let them soak for a few minutes. Use a soft brush or cloth to gently scrub away any remaining dirt or grime. Rinse the covers with clean water and pat them dry with a soft towel before reinstalling.
6. Clean non-removable vent covers: For non-removable vent covers, use a damp cloth or sponge to wipe away any visible dirt or dust. Ensure that the cloth or sponge is not soaking wet to prevent water from entering the vent ducts or damaging any electrical components. Be cautious when cleaning near electrical components.
7. Reinstall the vent covers: Once the vent covers are dry and clean, carefully reattach them to their original position. Ensure that they are securely fastened and aligned correctly with the vent ducts.
Regularly cleaning your air vents helps maintain better air quality in your living room by reducing the circulation of dust, allergens, and other airborne particles. It also allows for better airflow and energy efficiency. Aim to clean your air vents every few months or as needed, depending on the amount of dust or dirt present in your living environment.
So, the next time you clean your living room, don’t forget to give some attention to the often-overlooked air vents!
Wall Hangings and Picture Frames
When it comes to decorating our living rooms, wall hangings and picture frames play a vital role in personalizing the space and adding character. However, these decorative items can accumulate dust and become dirty over time. Cleaning wall hangings and picture frames not only helps maintain their appearance but also contributes to a clean, fresh, and inviting living room. Here’s how you can effectively clean them:
1. Remove from the wall: Before you start cleaning, carefully remove the wall hangings and picture frames from the wall. Use caution and ensure you have a safe place to set them down, such as a soft cloth or a clean surface.
2. Dusting: Begin by dusting the front and back surfaces of the wall hangings and picture frames. Use a soft microfiber cloth or a duster to gently remove any loose dust particles. Pay close attention to the frames, corners, and decorative elements. For more intricate designs or delicate items, you can use a soft-bristled brush or a compressed air canister to remove dust.
3. Glass cleaning: If your picture frames have glass fronts, it’s important to clean them to remove fingerprints, smudges, and any other marks. Use a glass cleaner or a mixture of vinegar and water to spray onto a lint-free cloth or paper towel. Wipe the glass in a gentle, circular motion, ensuring that you cover the entire surface. Avoid spraying the cleaner directly onto the glass to prevent any liquid from seeping into the frame or damaging the artwork.
4. Cleaning frames: For wooden, metal, or other types of frames, you can use a slightly damp cloth or sponge to wipe them down. If the frames are particularly dirty, you can add a small amount of mild soap to the water to create a gentle cleaning solution. Make sure to wring out any excess moisture from the cloth or sponge before wiping the frames to prevent water damage.
5. Removing stubborn stains: If there are any stubborn stains or marks on the frames, you can use a specialized cleaner or a paste made from baking soda and water. Apply the cleaner or paste to a soft cloth or sponge and gently rub the stained area. Be cautious not to apply too much pressure or scrub vigorously, as this can damage the finish or the artwork.
6. Drying and rehanging: After cleaning, ensure that the wall hangings and picture frames are completely dry before rehanging them. Use a dry, lint-free cloth to remove any excess moisture. Take care when hanging them back on the wall, making sure they are securely fastened and straight.
Regularly cleaning your wall hangings and picture frames not only keeps them looking their best but also helps protect the artwork from dirt and dust that can cause damage over time. Aim to clean them every few months or as needed, depending on the level of dust and the location of the items in your living room.
So, the next time you clean your living room, don’t forget to give some attention to your beloved wall hangings and picture frames!
Frequently Asked Questions about Hidden, Dirty Areas Of The Living Room We Forget To Clean
Was this page helpful?
At Storables.com, we guarantee accurate and reliable information. Our content, validated by Expert Board Contributors, is crafted following stringent Editorial Policies. We're committed to providing you with well-researched, expert-backed insights for all your informational needs.


0 thoughts on “Hidden, Dirty Areas Of The Living Room We Forget To Clean”