Home>Interior Design>July 4th Decorations: 14 Best Ideas For A Fun And Festive Holiday
Interior Design
July 4th Decorations: 14 Best Ideas For A Fun And Festive Holiday
Modified: September 1, 2024
Looking to spruce up your home for July 4th? Discover 14 interior design ideas that will make your holiday celebrations fun and festive.
(Many of the links in this article redirect to a specific reviewed product. Your purchase of these products through affiliate links helps to generate commission for Storables.com, at no extra cost. Learn more)
Introduction
When it comes to celebrating Independence Day, there’s no better way to show your patriotic spirit than by decorating your home in red, white, and blue. July 4th is a time to gather with family and friends, enjoy delicious barbecues, and watch stunning fireworks displays. Adding some festive decorations to your space can elevate the mood and make the occasion even more memorable.
In this article, we will explore 14 of the best ideas for a fun and festive July 4th celebration. From DIY crafts to stylish table decorations, these ideas will help you create a patriotic ambiance that will impress your guests and make your holiday celebrations truly unforgettable.
Key Takeaways:
- Elevate your July 4th celebrations with vibrant decorations like red, white, and blue balloon arches, DIY American flag wreaths, and charming Mason jar centerpieces. Create a festive ambiance that captures the spirit of Independence Day.
- Showcase your patriotic spirit with creative DIY projects such as lawn stars, Mason jar luminaries, and Uncle Sam hat decorations. From photo booths to party favor bags, these ideas will make your July 4th celebrations truly unforgettable.
Read more: What To Make For 4Th Of July Picnic
Red, White, and Blue Balloon Arch
A balloon arch is a versatile and eye-catching decoration that can instantly transform any space into a festive paradise. To create a red, white, and blue balloon arch, you will need balloons in these colors, fishing line or balloon arch strip, and a balloon pump.
Start by inflating the balloons in varying sizes and tying them off. Then, thread the fishing line through the tied-off ends of the balloons, alternating between the three colors to create a vibrant pattern. If you prefer a more structured look, you can use a balloon arch strip, which has pre-made holes to hold the balloons in place.
Next, determine the length of the arch you want, and secure the ends of the fishing line or balloon arch strip to an anchor point such as two heavy objects or wall hooks. You can adjust the shape and height of the arch as desired.
Once your arch is in place, you can add extra flair by attaching ribbon, streamers, or string lights to it. You can also incorporate themed accents like star-shaped balloons or patriotic banners. The balloon arch will serve as a stunning backdrop for photos, or as an entrance decoration for your Independence Day party.
Remember to use a good-quality balloon pump to save time and effort in inflating the balloons. Additionally, keep in mind that latex balloons may pop in direct sunlight or extreme heat, so it’s best to set up the balloon arch in a shaded area or indoors.
Whether you use it as a centerpiece or a photo booth backdrop, a red, white, and blue balloon arch will add a festive touch to your July 4th celebrations. It’s an impressive decoration that will elicit smiles and create a celebratory atmosphere that captures the spirit of Independence Day.
DIY American Flag Wreath
Add a patriotic touch to your front door with a DIY American Flag wreath. This classic decoration is not only easy to make but also a great way to showcase your love for the country.
To create your own American Flag wreath, you will need a foam wreath form, red, white, and blue fabric strips, a hot glue gun, and a few star-shaped embellishments.
Start by cutting the fabric strips into approximately 4-inch wide and 10-inch long pieces. Fold each strip in half lengthwise and secure it to the foam wreath form with hot glue, alternating between red and white strips to create the stripes of the flag. Leave some space at the top left corner for the blue section.
Once you have completed all the stripes, cut a larger blue fabric piece into a rectangle, and fold it in half lengthwise. Glue the rectangle to the top left corner of the wreath, creating the blue section of the flag.
To add the stars, you can either use star-shaped embellishments or cut out star shapes from white fabric and glue them onto the blue section of the wreath.
Once all the elements are in place, trim any excess fabric and fluff up the secured strips to give the wreath a full and textured appearance. You can also add a bow made of patriotic ribbon or a small American flag to the wreath for extra flair.
Hang your DIY American Flag wreath on your front door, or display it indoors on a wall or above a mantel. It’s a beautiful and meaningful decoration that will surely catch the attention of your guests and show off your patriotic spirit.
Remember to choose fabric that is suitable for outdoor use if you plan to hang the wreath outside. Alternatively, you can spray a clear sealant onto the fabric to protect it from the elements.
The DIY American Flag wreath is a versatile decoration that you can proudly display not only on Independence Day but also throughout the year as a symbol of your patriotism and love for your country.
Patriotic Mason Jar Centerpieces
Add a charming and rustic touch to your July 4th celebration with patriotic Mason jar centerpieces. These versatile decorations can be used as table centerpieces or displayed throughout your home to create a festive atmosphere.
To make your own patriotic Mason jar centerpieces, you will need Mason jars, red, white, and blue acrylic paint, foam brushes, star-shaped stickers or stencils, and twine or ribbon for embellishment.
Start by thoroughly cleaning and drying the Mason jars. Then, use the foam brushes to paint each jar – one red, one white, and one blue. Apply multiple coats if needed, allowing each coat to dry before applying the next.
Once the paint is completely dry, use star-shaped stickers or stencils to create a stencil pattern on the blue jar. Press the stickers firmly onto the jar, making sure they are securely attached.
Paint over the stencil area with white acrylic paint, covering the entire surface. Allow the paint to dry for a few minutes, then carefully remove the stickers to reveal the star pattern underneath.
After the jars are fully decorated, you can add a rustic touch by wrapping twine or ribbon around the necks of the jars, tying them into bows or knots. This will give the Mason jars a charming and festive look.
Once your patriotic Mason jar centerpieces are complete, you can fill them with various decorative items. For a simple yet beautiful option, fill each jar with red, white, and blue flowers, such as roses, carnations, or baby’s breath. You can also add small American flags or LED tea lights to create a warm and inviting glow.
Arrange the Mason jar centerpieces on your table or scatter them around your living space to add a touch of patriotism and rustic charm. These versatile decorations can be customized to fit any style of decor and are sure to be a focal point of your July 4th celebration.
Remember to experiment with different sizes of Mason jars and different variations of the red, white, and blue colors to create an interesting and visually appealing display.
Whether you choose to use them as centerpieces, accents on your mantel, or even as vases for your outdoor gathering, these patriotic Mason jar centerpieces will bring a delightful and festive atmosphere to your Independence Day festivities.
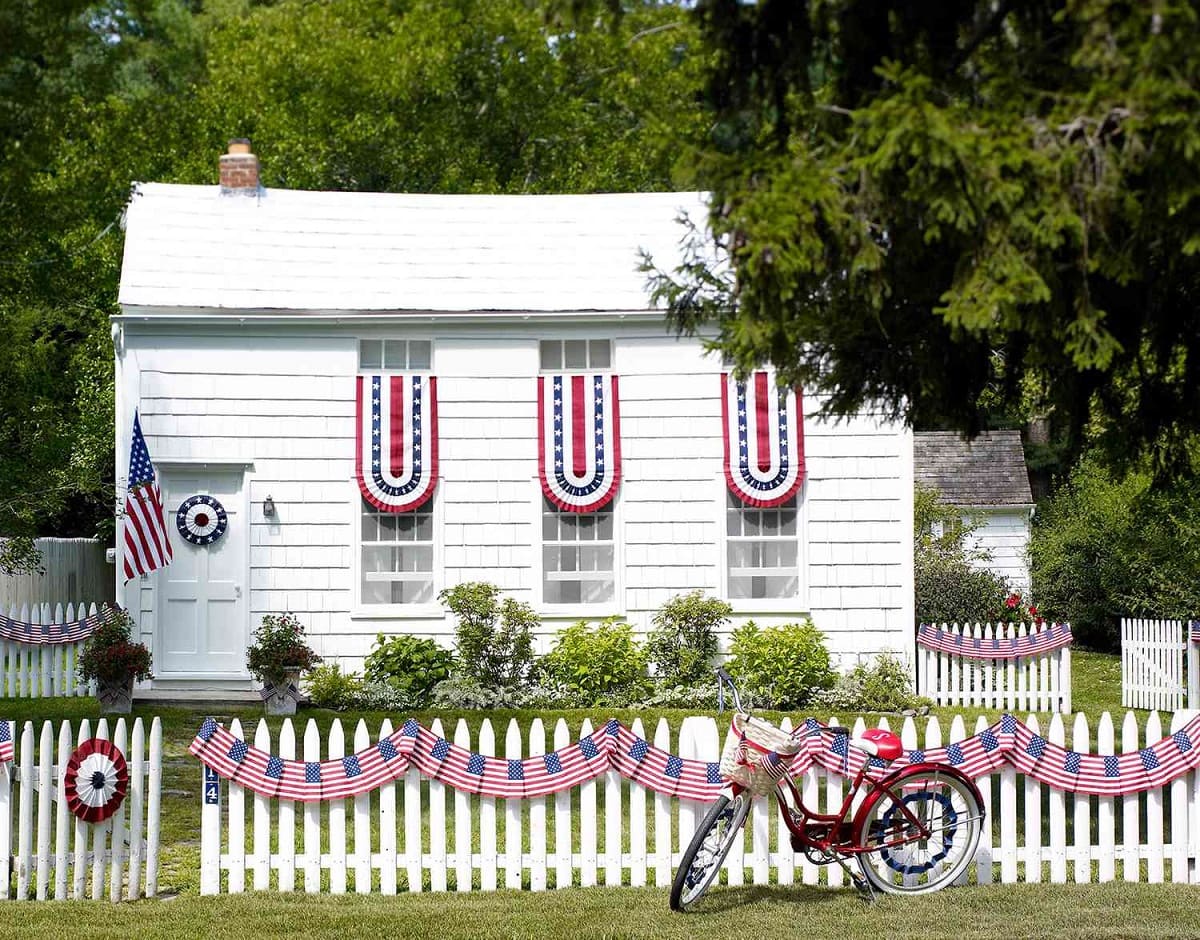
Star-Spangled Banner Bunting
Complete the patriotic look of your July 4th celebration with star-spangled banner bunting. This classic decoration adds a festive touch to any outdoor or indoor space, instantly evoking the spirit of Independence Day.
To create your own star-spangled banner bunting, you will need red, white, and blue fabric, scissors, fabric glue or a sewing machine, and a string or ribbon for hanging.
Start by measuring and cutting rectangles of fabric in your desired size for each flag. The proportions can vary depending on your preference, but a common size is around 12 inches wide by 18 inches long.
Next, cut out stars from white fabric or purchase star-shaped stickers. Place the stars on the blue fabric, evenly spacing them to create a pattern. Then, secure the stars with fabric glue or use a sewing machine to stitch around the edges.
Once the stars are attached, take two rectangles of fabric – one red and one white – and place them together, back to back. Glue or sew the two sides together, leaving the top open to create a pocket for the string or ribbon.
Repeat this process with the remaining fabric pieces until you have a collection of flag-shaped pockets. Make sure to alternate the red and white flags, leaving the blue starry flag to be displayed at the center.
Next, thread the string or ribbon through the open pockets of each flag, creating a bunting effect. Leave enough extra string or ribbon on both ends for hanging.
Once you have assembled the flags and strung them together, hang your star-spangled banner bunting in your desired location. It can be draped along a fence, porch railing, fireplace mantel, or even across a table as a festive backdrop.
This star-spangled banner bunting is not only a versatile decoration for the Fourth of July, but it can also be reused for other patriotic holidays or events throughout the year. It adds a timeless and patriotic flair to your celebrations and serves as a reminder of the importance of Independence Day.
Remember to secure the bunting properly when hanging it outdoors to prevent it from blowing away in the wind. You can use hooks or clips to keep it in place.
With its nostalgic appeal and festive design, the star-spangled banner bunting is a must-have decoration for a patriotic celebration. Whether you’re hosting a backyard BBQ or a small gathering with friends and family, this bunting will instantly elevate the ambiance and make your July 4th festivities truly memorable.
Firework Piñatas
Add a burst of excitement to your July 4th celebration with firework piñatas. These festive decorations not only look fantastic but also provide a fun and interactive activity for both kids and adults.
To create your own firework piñatas, you will need cardboard, tissue paper in red, white, and blue, scissors, glue, string or ribbon, and small toys or treats to fill the piñatas.
Start by drawing and cutting out a firework shape from the cardboard. It can be as simple or intricate as you like – the choice is yours! Make sure to cut two identical shapes for each piñata.
Once you have your cardboard shapes, cut long strips of tissue paper in red, white, and blue. These will be used to cover the piñata and create the vibrant colors reminiscent of fireworks.
Apply glue to one side of the cardboard shape and begin layering the tissue paper strips, alternating colors to create a fireworks effect. Overlap the strips slightly, ensuring the entire cardboard shape is covered.
Repeat this process with the second cardboard shape, creating a mirrored image. Leave a small opening at the top of one of the shapes to fill the piñata with toys or treats.
Before sealing the piñata, attach a length of string or ribbon to serve as a handle for hanging. Secure it between the two cardboard shapes and reinforce it with glue.
Fill the piñata with small toys, candies, or other treats through the opening. Once filled, seal the opening with glue or tape to ensure nothing falls out.
Now, your firework piñata is ready to be enjoyed in all its colorful splendor. Hang it securely from a tree branch, porch, or any other sturdy location, making sure there is enough space for participants to swing at it.
Invite your guests to take turns blindfolded, armed with a stick or bat, to try and break open the piñata. Once it bursts open, everyone can scramble to collect the treats and toys that spill out.
Firework piñatas are not only a fun activity, but they also serve as visually appealing decorations that add a festive element to your Independence Day celebration. They are sure to bring joy and excitement to your gatherings, creating lasting memories for all involved.
Remember to exercise caution when swinging at the piñata and make sure there is plenty of space for participants to move around safely. For younger children, consider using a pull-string piñata for a safer alternative.
With their vibrant colors and surprise-filled interiors, firework piñatas are sure to be a highlight of your July 4th festivities. They provide entertainment for guests of all ages and make the celebration even more memorable.
American Flag Tablecloth
Create a patriotic table setting with an American flag tablecloth that showcases your love for the country. This simple yet impactful decoration will add a touch of national pride to your Independence Day gathering.
To make your own American flag tablecloth, you will need a white tablecloth or fabric, red and blue fabric paint, painters tape or stencils, and a paintbrush or sponge.
Start by laying the white tablecloth on a flat surface and securing it in place to prevent movement while you paint. If you are using fabric instead of a pre-made tablecloth, make sure to hem the edges for a clean finish.
Once the tablecloth is in position, use painters tape or stencils to create the outlines for the stripes and stars. Apply the tape horizontally across the tablecloth to create the stripes, leaving space for the blue section on the top left corner.
Apply the blue fabric paint to the designated area for the stars. Use a brush or sponge to evenly spread the paint, ensuring full coverage. Allow the blue paint to dry before moving on to the next step.
Next, remove the painters tape or stencils from the stripes section. Use a brush or sponge to apply red fabric paint to the exposed areas, creating the alternating stripes of the American flag. Repeat this process until all the stripes are painted.
After the paint has completely dried, flip the tablecloth over and repeat the painting process on the other side, ensuring that both sides of the tablecloth have the American flag design.
Once the paint is dry on both sides, your American flag tablecloth is ready to be used. Drape it over your table, making sure the blue section with the stars is in the top left corner.
Complete the patriotic table setting by adding red, white, and blue tableware, such as plates, napkins, and utensils. Consider using star-shaped or flag-inspired decor items, such as candleholders, vases, or napkin rings, to further enhance the theme.
The American flag tablecloth serves as a bold and impactful statement piece that embodies the spirit of Independence Day. It not only adds a decorative touch but also creates a cohesive look for your festive celebrations.
Remember to follow the manufacturer’s instructions for fabric paint, including any recommended heat-setting techniques to ensure the longevity of your design.
With its patriotic symbolism and visual appeal, the American flag tablecloth will make your dining area the focal point of your July 4th festivities, creating a stunning backdrop for your celebrations.
Sparkler Cupcakes
Add a dazzling touch to your dessert table with sparkler cupcakes, a fun and festive treat that will light up your July 4th celebration. These cupcakes not only look amazing, but they also provide an exciting and interactive element for your guests to enjoy.
To create sparkler cupcakes, you will need your favorite cupcake recipe, frosting, festive cupcake liners, sparkler candles (specifically designed for use on cakes), and edible decorations such as sprinkles or colored sugar.
Start by baking your cupcakes according to your chosen recipe and allow them to cool completely. Once cooled, frost the cupcakes with your preferred frosting, creating a smooth or swirled design.
Place the cupcakes in festive cupcake liners, choosing designs that complement your Independence Day theme, such as red, white, and blue patterns or star-shaped liners.
Before adding the sparkler candles, make sure your cupcakes are on a fire-safe surface. Remove any paper wrapping or protective covers from the sparkler candles.
Insert one sparkler candle into the center of each cupcake, making sure it is securely anchored in the frosting. Light the sparkler candles just before serving to ensure they burn brightly and safely.
As an extra touch, you can add edible decorations like red, white, and blue sprinkles or colored sugar on top of the frosting to further enhance the festive look.
When serving the sparkler cupcakes, be sure to inform your guests to exercise caution and remove the sparkler candles before eating the cupcakes. Always follow safety guidelines and supervise children when using sparklers.
The sparkler cupcakes will create a stunning visual display as the sparklers burn, filling the room with a celebratory ambiance. They make for a memorable moment and a fantastic photo opportunity for your guests.
Remember to keep a fire extinguisher nearby, just in case, and place the cupcakes away from any flammable materials or decorations.
Sparkler cupcakes are an exciting and unique way to light up your July 4th celebration. They combine delicious cupcakes with a dazzling spectacle, making them the perfect addition to your dessert table and a highlight of your festivities.
When decorating for July 4th, consider using red, white, and blue color schemes, incorporating stars and stripes, and adding patriotic elements like flags and banners for a fun and festive holiday atmosphere.
Patriotic Paper Lanterns
Create a vibrant and festive atmosphere with patriotic paper lanterns, a simple yet effective decoration that will bring a touch of charm to your July 4th celebration. These colorful lanterns add a pop of red, white, and blue to your decor and can be easily customized to fit your desired theme or style.
To make your own patriotic paper lanterns, you will need colored paper in red, white, and blue, a ruler, scissors, glue, and string or twine for hanging.
Start by measuring and cutting the colored paper into long rectangular strips. The width of the strips will determine the size of your lanterns, so choose accordingly, keeping in mind the desired length and diameter.
Once you have the strips cut, overlap the short ends of each strip and secure them together with glue, forming a loop or circle. Repeat this with several strips of each color to create enough loops for your desired number of lanterns.
Next, take one loop of each color and glue them together at the overlapping points, creating a pattern with alternating red, white, and blue loops. Continue adding loops until you have a complete circle of layered strips.
To add depth and structure to the lantern, cut another strip of colored paper and glue it vertically along the inside of the circle, connecting the top and bottom edges. This will give the lantern a more three-dimensional shape.
Once the glue is dry, create a handle for hanging the lantern by attaching a piece of string or twine to opposite sides of the circle. Ensure the handle is securely attached.
To complete the look, you can cut out star shapes from white or yellow paper and glue them onto the blue section of the lantern to resemble stars on the American flag.
Hang the patriotic paper lanterns in your desired location, whether it’s indoors or outdoors. You can string them along a fence, from tree branches, or even indoors as a festive ceiling decoration.
Consider incorporating LED tea lights or small string lights inside the lanterns to create a magical glow after sunset. Alternatively, you can fill the lanterns with battery-operated fairy lights to make them shine.
Patriotic paper lanterns are a versatile and cost-effective way to add a decorative touch to your July 4th celebration. They create a festive ambiance and can be customized to suit any space or style.
Remember to use flameless lighting options to ensure the safety of your paper lanterns, especially if they will be hung near flammable objects or used outdoors.
With their vibrant colors and charming design, these patriotic paper lanterns will stand out and create a visually appealing display, enhancing the festive spirit of your Independence Day celebrations.
DIY Patriotic Backdrop
Add a captivating and patriotic touch to your July 4th celebrations with a DIY patriotic backdrop. This versatile decoration can be used as a photobooth backdrop, a focal point for your party area, or even as a backdrop for a stage or performance.
To create your own DIY patriotic backdrop, you will need red, white, and blue fabric or paper, scissors, measuring tape, a sewing machine or fabric glue, and any additional decorative elements you’d like to incorporate, such as ribbons or banners.
Start by measuring the dimensions of the area where you plan to hang the backdrop. This will help you determine the amount and size of the fabric or paper needed.
Cut the fabric or paper into long strips or panels, alternating between red, white, and blue, or creating a pattern that fits your desired design. The width and length of the strips can vary depending on your preference and the space you are working with.
If you are using fabric, you can sew the strips together to create a seamless backdrop. If you are using paper, you can overlap and secure the strips with fabric glue or double-sided tape.
Once the strips are connected, you can add additional decorative elements such as ribbon streamers, bunting, or banners. These elements can be attached across the top of the backdrop or intermittently along the length of the strips to add visual interest.
Consider adding star-shaped cutouts or adhesive star stickers to the blue fabric or paper to represent the stars on the American flag and add a patriotic touch.
Hang your DIY patriotic backdrop using hooks, tape, or a backdrop stand, ensuring it is securely fastened. You may need multiple hooks or stands depending on the size and weight of the backdrop.
Once your backdrop is in place, you can further enhance the patriotic theme by adding additional decorations in front of or around the backdrop. This can include balloons, American flags, string lights, or other festive elements.
The DIY patriotic backdrop serves as a stunning and immersive backdrop for photos, creating memorable moments for you and your guests. It also helps to set the scene and capture the essence of Independence Day.
Remember to check the area where you plan to hang the backdrop for any specific rules or restrictions regarding decorations or hanging methods. Take safety precautions and ensure that the backdrop is securely fastened to prevent accidents or damage.
With its vibrant colors and customizable design, the DIY patriotic backdrop will undoubtedly be a standout element of your July 4th celebration, adding a festive and patriotic atmosphere to your gatherings.
Uncle Sam Hat Decorations
Get crafty and embrace the spirit of patriotism with Uncle Sam hat decorations. These festive and iconic hats are a perfect DIY project to add a playful touch to your July 4th celebration. They can be used as decorations, party favors, or even photo props.
To create your own Uncle Sam hat decorations, you will need red, white, and blue craft foam or construction paper, scissors, glue, a stapler, and additional embellishments like glitter, sequins, or ribbon.
Start by cutting out the main hat shape from the red craft foam or construction paper. This shape can be made by starting with a large circle as the brim and attaching a tall, rectangular shape as the top of the hat.
Once you have the basic hat shape, cut out a strip of white craft foam or paper to serve as the hatband. Glue or staple it around the base of the tall rectangular shape.
Next, cut out stars from the blue craft foam or paper and glue or staple them onto the white hatband to represent the stars on the American flag.
To add extra flair and dimension to your Uncle Sam hat decorations, you can use glitter, sequins, or other embellishments to decorate the red and white sections. Get creative and add your own personal touch to each hat.
For the finishing touch, cut out a strip of blue craft foam or paper to create the hat’s hatband at the base of the brim. Attach it with glue or staples, giving the hat a polished and cohesive look.
Your Uncle Sam hat decorations are now ready to be showcased. Place them as table centerpieces, hang them on walls, or place them on wooden dowels or headbands for guests to wear.
You can also create a larger version of the Uncle Sam hat to serve as a statement decoration at your gathering. It can be placed at the entrance or used as a backdrop for photos.
Uncle Sam hat decorations are a fun and whimsical way to embrace the patriotic spirit of July 4th. They offer a playful touch and serve as a festive reminder of the celebration of independence and freedom.
Remember to have fun with the decoration process and encourage guests to wear the hats and pose for memorable photos. They can also be used as party favors, allowing guests to take home a piece of the celebration.
With their iconic design and colorful appearance, Uncle Sam hat decorations will surely bring a festive and patriotic atmosphere to your July 4th festivities.
Fourth of July Photo Booth
Add an element of fun and capture unforgettable memories with a Fourth of July photo booth. This interactive and engaging activity will keep your guests entertained while providing them with a chance to create lasting keepsakes.
To create your own Fourth of July photo booth, you will need a backdrop, props, and a camera or smartphone for capturing the photos.
Start by selecting a backdrop that fits your desired theme. Consider using a patriotic fabric, a large American flag, or a DIY backdrop we discussed earlier, such as a patriotic paper lantern or Uncle Sam hat decorations.
Hang the backdrop in a designated area where there is ample space for guests to pose and capture their photos. Ensure that the backdrop is secure and won’t fall or shift during use.
Next, gather a collection of props that are patriotic and fun. Some popular options include American flag accessories, red, white, and blue sunglasses, hats, wigs, feather boas, and noise-makers.
You can also create custom props by printing out and cutting images of famous American landmarks, such as the Statue of Liberty or Mount Rushmore, and attaching them to sticks or popsicle sticks for guests to hold and pose with.
Place the props in an easily accessible and organized manner, such as arranging them on a table or in baskets next to the photo booth area. This will encourage guests to experiment with different props and poses.
Lastly, set up a camera or smartphone on a tripod or stand to ensure stable and easy capturing of the photos. You can also designate a friend or family member as the designated photographer for the event.
Encourage guests to use their own devices to take photos as well, allowing for instant sharing on social media using a unique hashtag for your event.
To further enhance the experience, you can also provide a selection of patriotic-themed photo booth props or frames that guests can hold or pose with.
Remember to include signage or instructions on how to operate the photo booth to ensure guests know how to use it and have a seamless experience.
A Fourth of July photo booth is a crowd-pleasing activity that adds an element of excitement and creativity to your celebrations. Guests will enjoy capturing fun and festive moments while creating beautiful memories that they can cherish for years to come.
Make sure to have plenty of lighting in the photo booth area to ensure the best quality photos. Consider using string lights or other decorative lighting options to create a cozy and inviting atmosphere.
With its entertainment value and ability to create lasting memories, a Fourth of July photo booth is a must-have addition to your celebrations, adding a unique and interactive element for your guests to enjoy.
Red, White, and Blue Mason Jar Luminaries
Create a mesmerizing ambiance with red, white, and blue Mason jar luminaries for your July 4th celebration. These beautiful and easy-to-make lanterns add a warm and patriotic glow to any outdoor or indoor space, setting the perfect mood for your festivities.
To create your own red, white, and blue Mason jar luminaries, you will need Mason jars, red, white, and blue tissue paper or acrylic paint, a foam brush, Mod Podge or clear-drying glue, and tea light candles or battery-operated LED lights.
If you prefer using tissue paper:
Start by cutting or tearing the tissue paper into small pieces or strips. Apply a layer of Mod Podge or clear-drying glue to the outside of the Mason jar using a foam brush.
Place the tissue paper pieces onto the sticky surface, creating a pattern or layering the colors as desired. Smooth down any wrinkles or bubbles with your fingers or a brush.
Apply another layer of Mod Podge or glue on top of the tissue paper to seal it and give it a glossy finish. Allow the jars to dry completely.
If you prefer using acrylic paint:
Start by applying a base layer of white paint to the Mason jar using a foam brush. Allow it to dry completely before proceeding.
Once the base layer is dry, use the foam brush to apply red and blue acrylic paint in desired patterns and designs. You can create stripes, stars, or any other patriotic design that resonates with you.
Allow the paint to dry completely before moving on to the next step.
Regardless of the method you choose, once the Mason jars are dry, you can place tea light candles or battery-operated LED lights inside to illuminate them. The warm flickering glow will create a mesmerizing effect through the colored tissue paper or painted glass.
Arrange the red, white, and blue Mason jar luminaries along your walkway, on tables, or hang them from tree branches using twine or ribbon for a whimsical touch.
For added charm, consider tying patriotic ribbons or bows around the rims of the jars or attaching small American flags to the twine or ribbon used for hanging.
Remember to exercise caution and keep the flames of the tea light candles away from flammable materials, such as tissue paper or ribbons. If using battery-operated LED lights, ensure they have fresh batteries before placing them inside the Mason jars.
Red, white, and blue Mason jar luminaries are a creative and beautiful way to add patriotic flair to your July 4th celebrations. They provide a soothing glow and serve as gorgeous decorations that will captivate your guests.
With their radiant colors and gentle illumination, these luminaries bring a touch of magic and patriotism to your festivities, creating an enchanting atmosphere that perfectly complements the spirit of Independence Day.
Read more: What Can Be Home Decor After July 4
Lawn Stars
Elevate your outdoor decor this Fourth of July with lawn stars, a charming addition that will transform your yard into a patriotic wonderland. These delightful accents add a festive touch to your outdoor space and show off your patriotic spirit in a unique and eye-catching way.
To create your own lawn stars, you will need plywood or foam board, a jigsaw or utility knife, sandpaper, acrylic paint in red, white, and blue, a foam brush or paintbrush, and stakes or wooden dowels for securing the stars into the ground.
Start by drawing star shapes of various sizes on the plywood or foam board. You can use stencils or print out star templates to ensure accurate and uniform shapes. Carefully cut out the star shapes using a jigsaw or utility knife, following your drawn lines.
Once the stars are cut out, use sandpaper to smooth any rough edges and create a clean surface for painting.
Next, apply a coat of white paint to each star using a foam brush or paintbrush. Be sure to cover the entire surface of the stars and allow the paint to dry completely.
Once the white paint is dry, you can begin painting the stars with red and blue acrylic paint. Consider using a sponge or a dry brush technique to create a distressed or weathered look for a rustic touch.
Alternatively, you can also use painter’s tape to create crisp, clean lines for a more modern and polished appearance. Apply the tape to create stripes or other patterns and paint the exposed areas with the desired colors.
Allow the paint to dry thoroughly, and then remove any painter’s tape if used.
Finally, attach stakes or wooden dowels to the back of the stars using screws or strong adhesive. Make sure they are securely fastened and will be able to support the weight of the stars when inserted into the ground.
Place the lawn stars throughout your yard, using them to line walkways, decorate flower beds, or create a focal point in a specific area. Consider arranging them in a pattern that complements the overall layout of your outdoor space.
For an extra enchanting touch, consider adding solar-powered lights or string lights around the edges of the stars. This will illuminate the stars during the evening, creating a magical and patriotic display.
Lawn stars are a fantastic way to showcase your love for your country and add a festive touch to your outdoor space. They can serve as a standalone decoration or be combined with other patriotic elements for a cohesive and visually appealing display.
Remember to secure the lawn stars properly to ensure they remain upright and stable, especially during windy conditions. Additionally, if using solar-powered lights, make sure they receive ample sunlight during the day for optimal illumination in the evening.
With their striking appearance and symbolic representation, lawn stars bring a touch of patriotism and whimsy to your Fourth of July celebrations, making your outdoor area shine with national pride.
Independence Day Party Favor Bags
Add an extra special touch to your July 4th celebration with Independence Day party favor bags. These personalized and festive bags not only show your appreciation for your guests but also serve as a memorable keepsake from the festivities.
To create your own Independence Day party favor bags, you will need small gift bags in red, white, and blue, scissors, patriotic-themed stickers or adhesive labels, ribbons or twine, and an assortment of party favors and treats.
Start by choosing small gift bags in patriotic colors, such as red, white, and blue, or a combination of these colors. Consider using bags made from recyclable or biodegradable materials for an environmentally friendly option.
Next, customize the bags with patriotic-themed stickers or adhesive labels. You can use pre-made stickers featuring American flags, stars, or other patriotic symbols, or create your own labels using a printer and adhesive paper.
Write personalized messages or names on the labels to make each party favor bag feel unique and special to the recipient.
Attach the stickers or labels to the front of the bags, ensuring they are centered and secure. This will add a decorative and personal touch to each favor bag.
Once the bags are personalized, fill them with an assortment of party favors and treats. Consider including small items such as mini American flags, sparklers, temporary tattoos, patriotic wristbands, bubbles, or confetti poppers.
You can also add edible treats like red, white, and blue candies, customized cookies, or miniature bags of popcorn with patriotic-themed labels.
Tie the tops of the bags with ribbons or twine to secure the contents and add an extra decorative element. Consider using ribbons in patriotic colors or patterns, or opting for natural twine for a rustic touch.
Arrange the completed Independence Day party favor bags in a designated area for your guests to pick up on their way out or include them as part of the place settings at the dining table.
These party favor bags not only express your gratitude to your guests but also double as a charming decoration that adds to the festive atmosphere. They serve as a delightful reminder of the fun and celebration of Independence Day.
Remember to consider any allergies or dietary restrictions when selecting treats to include in the party favor bags. Provide options that are suitable for all guests to ensure everyone can enjoy their treat.
With their personalized touch and thoughtful contents, Independence Day party favor bags are a wonderful way to show appreciation to your guests and leave them with a lasting impression of your celebration.
Conclusion
Celebrating Independence Day is an opportunity to showcase your love for your country and honor the spirit of freedom and patriotism. By incorporating these 14 ideas into your July 4th decorations, you can create a festive atmosphere that captures the essence of this special holiday.
From the vibrant and eye-catching red, white, and blue balloon arch to the charming Uncle Sam hat decorations, each idea adds its own unique touch to your celebrations. The DIY projects, such as the American flag wreath and patriotic paper lanterns, allow you to showcase your creativity and craftsmanship.
Creating a festive ambiance is not limited to indoor spaces. Consider incorporating lawn stars and Mason jar luminaries to light up your outdoor area and make it feel like a patriotic wonderland. Set up a Fourth of July photo booth where guests can capture fun and memorable moments while showcasing their proud and patriotic spirits.
Add a personal touch with the Independence Day party favor bags, expressing appreciation to your guests while giving them a memento to cherish. All these ideas come together to ignite the patriotic spirit and foster a sense of unity and pride.
As you embark on your decorating journey, keep in mind the importance of safety precautions. Be mindful of fire hazards with sparklers, candles, or any open flames, and ensure that any hanging decorations or structures are securely fastened to avoid accidents.
Remember that these ideas are meant to inspire and serve as a starting point for your own creative interpretations. Tailor them to your space, preferences, and budget to create a unique and memorable July 4th celebration.
Whether you’re hosting a small gathering or a big backyard barbecue, these 14 ideas for a fun and festive July 4th celebration will help you create a patriotic atmosphere that will impress your guests and make your holiday celebrations truly unforgettable. Let your imagination soar, and have a happy and safe Fourth of July!
Frequently Asked Questions about July 4th Decorations: 14 Best Ideas For A Fun And Festive Holiday
Was this page helpful?
At Storables.com, we guarantee accurate and reliable information. Our content, validated by Expert Board Contributors, is crafted following stringent Editorial Policies. We're committed to providing you with well-researched, expert-backed insights for all your informational needs.


0 thoughts on “July 4th Decorations: 14 Best Ideas For A Fun And Festive Holiday”