Home>Interior Design>When Should You Remove Painter’s Tape? Professionals Explain
Interior Design
When Should You Remove Painter’s Tape? Professionals Explain
Modified: January 19, 2024
Learn when to remove painter's tape from your interior design project with expert advice from professionals. Avoid damaging your surfaces and achieve a flawless finish.
(Many of the links in this article redirect to a specific reviewed product. Your purchase of these products through affiliate links helps to generate commission for Storables.com, at no extra cost. Learn more)
Introduction
Painter’s tape is a valuable tool used in the world of interior design. It helps protect surfaces from paint, creates clean and sharp lines, and ensures a professional-looking finish. But how long should you leave painter’s tape on before removing it? In this article, we will explore the reasons behind using painter’s tape, the factors to consider when deciding when to remove it, and professional tips for removing it effectively.
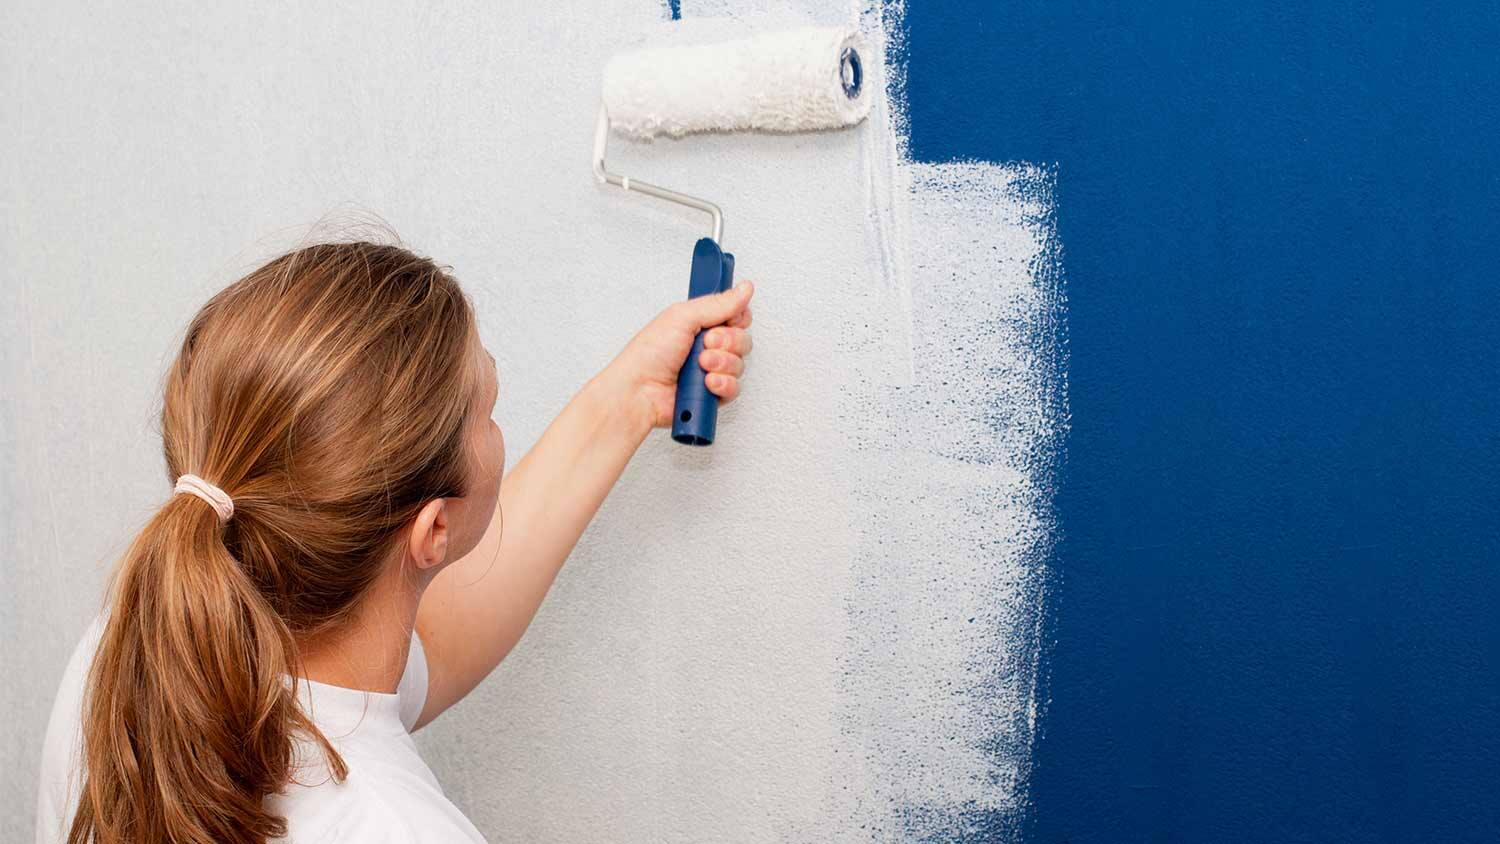
When embarking on a painting project, whether it’s a small touch-up or a full room makeover, using painter’s tape is essential. It is typically a light and easy-to-tear tape that is specifically designed to be applied to surfaces, such as walls, ceilings, trim, and baseboards, to create clean and precise paint lines. By adhering the tape to the desired area, you can paint with confidence and without worrying about accidental paint spills or smudges.
While painter’s tape is an invaluable asset, it is not designed to be left on indefinitely. Leaving it on for too long can result in difficulty removing the tape, peeling paint, or even damage to the underlying surface. Therefore, knowing when to remove painter’s tape is important to achieve the best results.
There are several factors to consider when deciding how long to leave painter’s tape on. The first factor to take into account is the type of paint being used. Certain paints dry faster than others, and if the paint dries completely before removing the tape, it may cause the paint to peel off the surface along with the tape. It’s essential to refer to the paint manufacturer’s recommendations for drying times and follow them accordingly.
Another factor to consider is the environment in which the paint is drying. Humidity and temperature can affect the drying time of paint. High humidity levels or cooler temperatures can significantly slow down the drying process, so it’s essential to take these variables into account when determining when to remove painter’s tape.
The complexity of the paint job is also a crucial factor to consider. If the painting project involves multiple layers of paint or intricate designs, it may be necessary to remove the tape sooner to avoid it bonding to the paint and becoming difficult to remove. On the other hand, if the paint job is simpler and consists of a single layer, you may be able to leave the tape on for a longer period without any issues.
Lastly, it’s essential to assess the adhesive quality of the painter’s tape itself. Some tapes are specifically designed to be left on for extended periods without leaving residue or damaging the surface. However, if you’re using a standard painter’s tape, it’s recommended to remove it within a few days to a week to ensure easy removal and prevent damage.
Professional painters recommend removing painter’s tape within 24 to 48 hours for most painting projects. This timeframe allows the paint to dry and set without the risk of sticking to the tape. However, for complex paint jobs or in challenging environmental conditions, it may be necessary to remove the tape sooner.
In the next sections, we will provide professional tips for removing painter’s tape effectively and ensuring a seamless finish for your interior design projects.
Key Takeaways:
- Knowing when to remove painter’s tape is crucial for achieving a flawless finish. Consider paint type, environmental conditions, and complexity of the job to ensure clean lines and prevent damage.
- Professional tips for removing painter’s tape include peeling at a 45-degree angle, removing slowly, and inspecting for touch-ups. Follow these techniques for a seamless finish and crisp paint lines.
Why is painter’s tape used?
Painter’s tape is a crucial tool in the world of interior design and painting. It serves several important purposes that help achieve a professional-looking finish and protect surfaces from accidental paint spills or smudges.
One of the primary reasons painter’s tape is used is to create clean and sharp lines. When painting a wall or any other surface, it’s crucial to have well-defined edges and straight lines. Painter’s tape helps achieve this by acting as a barrier between the painted and non-painted areas. By placing the tape carefully along the edges or trim of the surface, you create a clear boundary that ensures the paint stays within the intended area.
Painter’s tape is also used to protect surfaces from paint splatters or drips. Even the most experienced painters can accidentally get paint onto areas where it’s not desired, such as baseboards, window frames, or light switches. Applying painter’s tape to these surfaces provides a protective barrier, allowing you to paint freely without worrying about damaging other elements of the room.
In addition to creating clean lines and providing protection, painter’s tape is also used to achieve crisp paint color transitions. For example, if you want to paint two adjacent walls different colors, using painter’s tape along the corner where the two walls meet ensures a clean and precise color separation. This technique is commonly used in accent walls or rooms with contrasting paint colors.
An often-overlooked aspect of painter’s tape is its ability to prevent paint bleed. Paint bleed occurs when paint seeps under the edge of the tape, resulting in uneven lines and smudged edges. Painter’s tape, when applied correctly, forms a seal that prevents paint from bleeding through. This ensures a professional-looking finish and saves you the time and effort of having to touch up mistakes.
Painter’s tape is also commonly used to create intricate patterns or designs on walls or furniture. With the tape’s flexible and easy-to-tear nature, you can experiment with various shapes and sizes, allowing you to unleash your creativity and achieve unique designs. Once the paint is dry, simply remove the tape to reveal your beautifully crafted patterns.
Overall, painter’s tape is a versatile and indispensable tool that plays a vital role in achieving precise, clean, and professional paint finishes. Whether you’re a seasoned painter or a DIY enthusiast, using painter’s tape will elevate the quality of your interior design projects and ensure a stunning end result.
How long should you leave painter’s tape on?
Knowing how long to leave painter’s tape on is crucial in order to achieve the best results for your painting projects. Leaving the tape on for too short a time can result in paint bleeding and uneven lines, while leaving it on for too long can make it difficult to remove and potentially damage the surface.
The recommended timeframe for leaving painter’s tape on varies depending on several factors, including the type of paint, environmental conditions, complexity of the paint job, and the adhesive quality of the tape itself.
The type of paint being used is an important factor to consider. Different paints have varying drying times, and it’s essential to follow the manufacturer’s recommendations for drying before removing the tape. Generally, latex or water-based paints dry more quickly than oil-based paints. Latex paints usually dry within a few hours, while oil-based paints may take several hours to overnight. Refer to the paint can or consult with the manufacturer for specific drying time guidelines.
Environmental conditions can also affect the drying time of paint. High humidity levels or cooler temperatures can significantly slow down the drying process. If you’re painting in a humid environment or during colder months, it may be necessary to leave the tape on for a longer period to ensure the paint has completely dried and adhered to the surface.
The complexity of the paint job should also be considered when determining how long to leave the tape on. If your project involves multiple layers of paint or intricate designs, it’s generally recommended to remove the tape sooner rather than later. This is because waiting too long can result in the tape bonding to the paint, making it difficult to remove without peeling off the painted surface.
Furthermore, it’s important to assess the adhesive quality of the painter’s tape being used. Some painter’s tapes are specifically designed to be left on for extended periods without leaving residue or damaging the surface when removed. However, if you’re using a standard painter’s tape, it’s generally recommended to remove it within a few days to a week to ensure easy removal and prevent any potential damage.
Professional painters typically recommend removing painter’s tape within 24 to 48 hours for most painting projects. This timeframe allows the paint to dry and set without the risk of sticking to the tape. However, it’s always best to refer to the specific drying time recommendations of the paint manufacturer and adjust accordingly based on environmental conditions and the complexity of the paint job.
By carefully considering these factors and following the appropriate guidelines, you can ensure that you leave the painter’s tape on for the optimal amount of time to achieve clean lines, prevent paint bleed, and minimize any potential damage to the surface.
Remove painter’s tape when the paint is dry to the touch but not fully cured. This will prevent the tape from peeling off the paint when removed.
Factors to consider when deciding when to remove painter’s tape
Deciding when to remove painter’s tape can be a crucial step in achieving a professional and flawless paint job. While the recommended timeframe for tape removal is typically within 24 to 48 hours, several factors should be considered to make an informed decision.
1. Type and drying time of the paint: The type of paint being used plays a significant role in determining when to remove the tape. Different paints have varying drying times, so it’s important to follow the manufacturer’s instructions. Typically, water-based or latex paints have a shorter drying time compared to oil-based paints. It’s crucial to allow the paint sufficient time to dry and cure before removing the tape to avoid smudging or peeling.
2. Environmental conditions: The surrounding environment can affect the drying time of paint. Factors such as temperature and humidity can impact how quickly the paint sets. Higher humidity levels and cooler temperatures can prolong the drying process. If painting in humid conditions or during colder months, it may be necessary to leave the tape on for a longer duration to ensure the paint has fully dried and adhered to the surface.
3. Complexity of the paint job: Consider the complexity and intricacy of the painting project. If the project involves multiple layers of paint, such as blending different colors or creating unique designs, it’s advisable to remove the tape sooner rather than later. Waiting too long may result in the tape bonding with the paint, making it difficult to remove without damaging the underlying layers.
4. Adhesive quality of the tape: The adhesive quality of the painter’s tape itself is an important consideration. Some painter’s tapes are specifically designed for extended use and are easier to remove, while others may leave residue or cause damage if left on for too long. It’s essential to choose a high-quality painter’s tape suitable for the surface and project requirements. If using a standard painter’s tape, it is generally recommended to remove it within a few days to a week to ensure easy removal without affecting the paint job.
5. Personal preference and risk tolerance: Ultimately, the decision of when to remove the painter’s tape can vary based on personal preference and risk tolerance. Some individuals may prefer to remove the tape earlier to prevent any potential damage or adhesive residue, while others may choose to leave it on for a slightly longer duration to ensure the paint has fully set and cured. It’s important to assess the specific circumstances and consult any additional guidelines provided by the paint manufacturer or professional painters.
By carefully considering these factors, you can make an informed decision about when to remove painter’s tape that is most suitable for your specific painting project. Taking these factors into account will help you achieve crisp lines, prevent paint bleed, and ensure a clean and professional finish.
Professional tips for removing painter’s tape
After completing a painting project, removing painter’s tape is the final step to reveal the clean lines and sharp edges that contribute to a professional finish. While removing the tape may seem straightforward, there are some professional tips and techniques to ensure a seamless removal process and avoid any damage to the painted surface.
Here are some professional tips for removing painter’s tape:
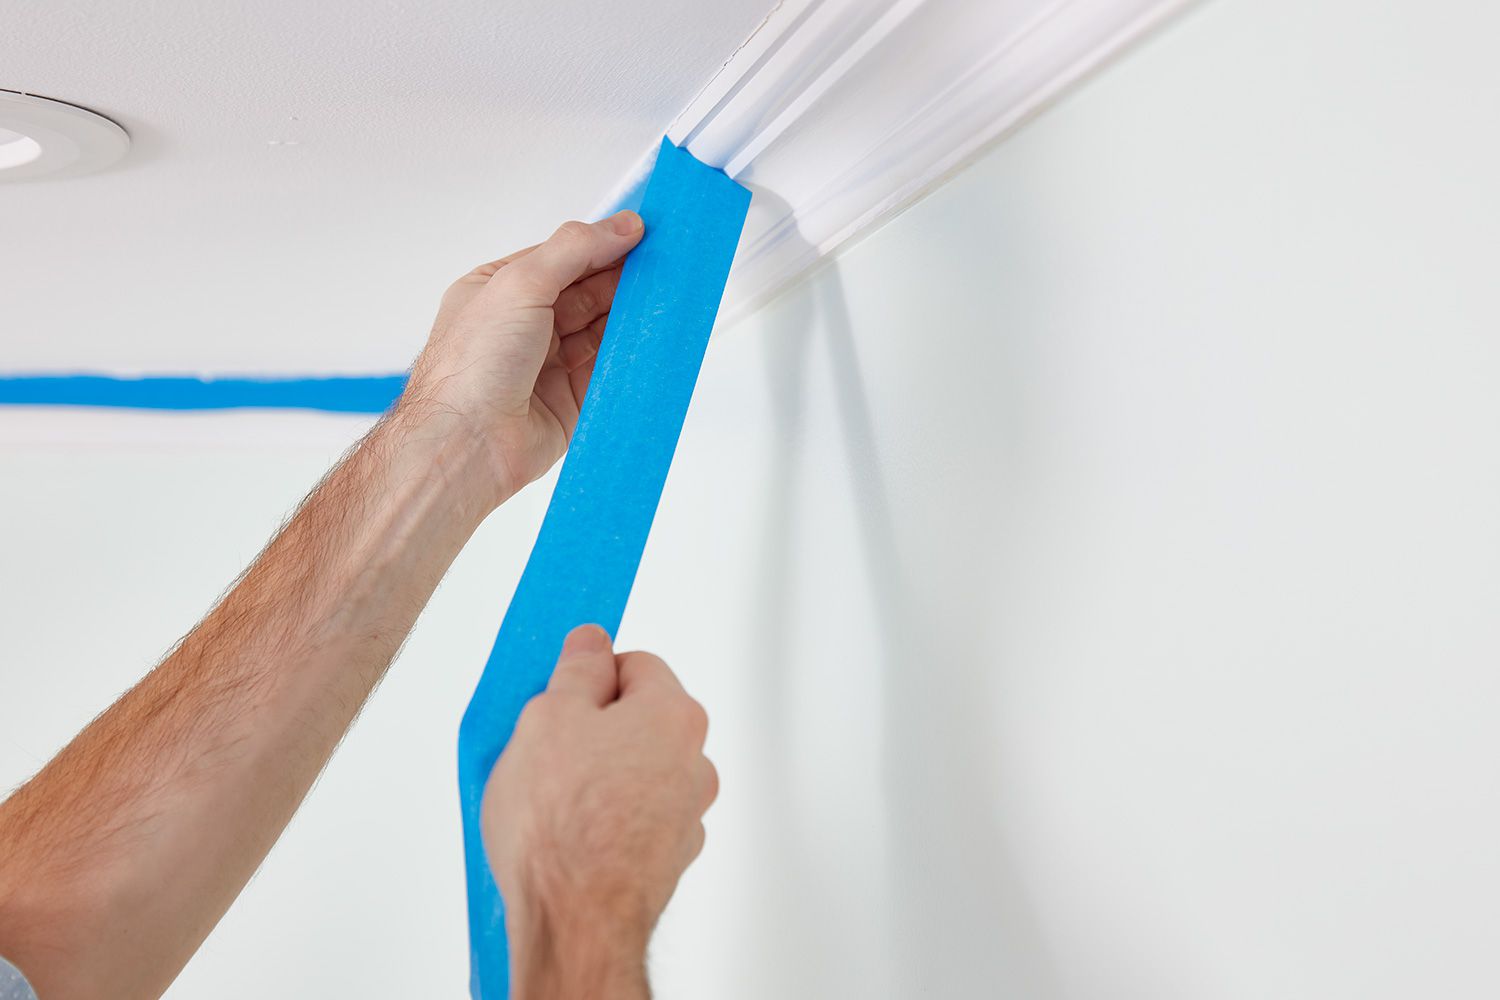
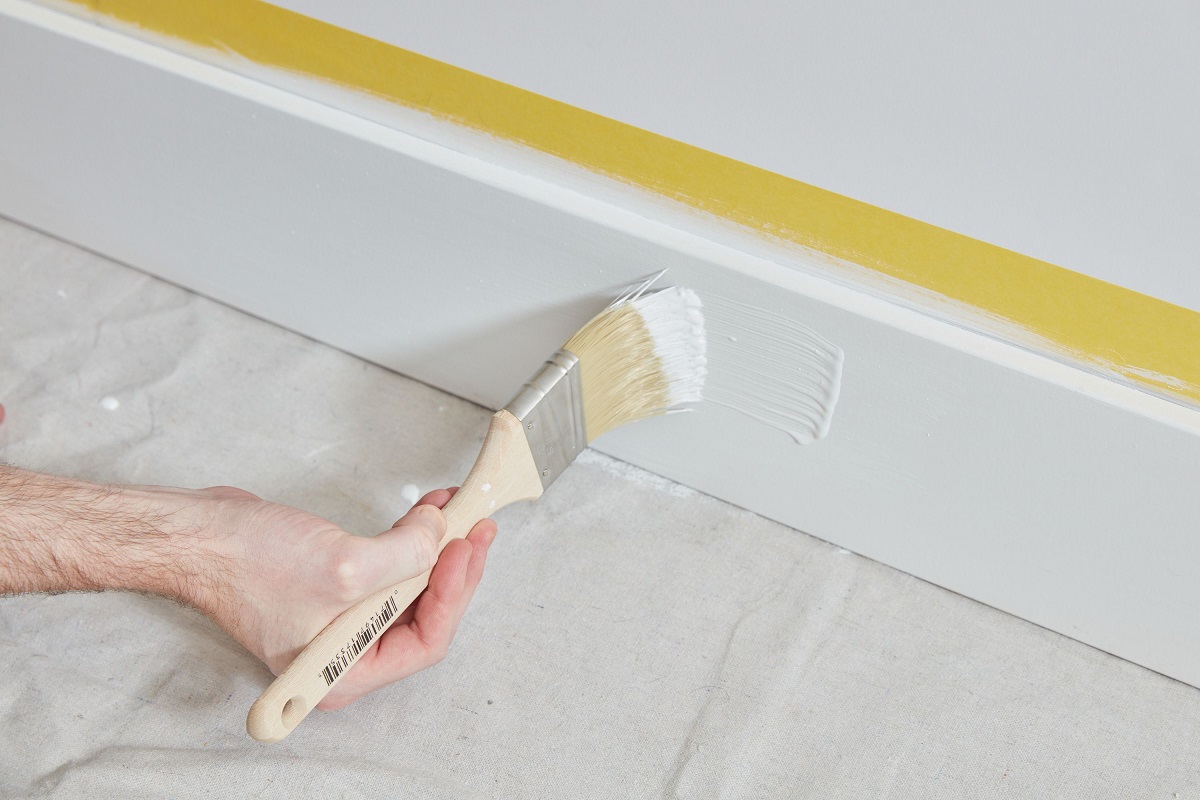
1. Remove the tape at a 45-degree angle: When peeling off the painter’s tape, do it at a 45-degree angle to the surface. This technique helps to minimize the risk of the paint lifting or peeling off along with the tape. The 45-degree angle allows for a clean break between the tape and the painted surface, resulting in sharp paint lines.
2. Remove the tape slowly and evenly: Take your time when removing the tape to ensure an even and controlled process. Pulling the tape too quickly can cause the paint to rip or chip. Slowly peel off the tape, keeping it parallel to the surface, and apply gentle tension as you progress along the tape line.
3. Remove the tape while the paint is still slightly wet: It’s generally recommended to remove painter’s tape while the paint is still slightly wet. This helps prevent the paint from bonding with the tape and tearing upon removal. However, make sure the paint is not too wet that it smears or smudges when the tape is taken off.
4. Use a utility knife for stubborn edges: In some cases, the tape may leave behind small pieces or edges that are difficult to remove. If this happens, use a sharp utility knife to carefully score along the edge of the tape before peeling it off. Be cautious not to cut into the painted surface, and always use a new blade to ensure clean cuts.
5. Apply heat to stubborn adhesive residue: If you encounter stubborn adhesive residue from the tape, you can use gentle heat to soften it. A hairdryer or heat gun on low heat can help loosen the adhesive, making it easier to remove. Be careful not to use too much heat or hold it too close to the surface to prevent any damage.
6. Inspect for any touch-ups: Once the tape is completely removed, carefully inspect the painted surface for any imperfections or areas that may require touch-ups. Look for any paint smudges, bleed-through, or uneven lines. If necessary, use a small brush or a touch-up roller to fix any flaws and maintain the professional appearance of the paint job.
Remember, each project may have specific considerations, so adjust these tips accordingly to suit your particular needs. Additionally, always refer to the instructions provided by the tape manufacturer and follow any specific guidelines recommended by the paint manufacturer.
By following these professional tips for removing painter’s tape, you can achieve clean paint lines, avoid any damage to the painted surface, and showcase the professional-looking finish that you’ve worked so hard to achieve.
Conclusion
Painter’s tape is an essential tool in the world of interior design, aiding in creating clean and sharp paint lines and protecting surfaces from accidental paint spills or smudges. Knowing when to remove painter’s tape is crucial to achieving a professional and flawless finish for your painting projects.
Several factors must be considered when deciding when to remove painter’s tape. These include the type and drying time of the paint, environmental conditions, complexity of the paint job, and the adhesive quality of the tape itself. Taking these factors into account ensures that the tape is removed at the optimal time, preventing any paint bleed or damage to the surface.
Professional tips for removing painter’s tape include peeling it off at a 45-degree angle, removing it slowly and evenly while the paint is still slightly wet, using a utility knife for stubborn edges, applying heat to soften adhesive residue, and inspecting the painted surface for any touch-ups needed.
By following these professional techniques and guidelines, you can achieve crisp and precise paint lines, maintain the integrity of the paint job, and showcase a professional-looking finish for your interior design projects.
Remember, always refer to the recommendations and instructions provided by the tape and paint manufacturers for specific guidelines and drying times. With the right approach and attention to detail, you can confidently remove painter’s tape and unveil a stunningly flawless and professional paint job.
Frequently Asked Questions about When Should You Remove Painter's Tape? Professionals Explain
Was this page helpful?
At Storables.com, we guarantee accurate and reliable information. Our content, validated by Expert Board Contributors, is crafted following stringent Editorial Policies. We're committed to providing you with well-researched, expert-backed insights for all your informational needs.


0 thoughts on “When Should You Remove Painter’s Tape? Professionals Explain”