Home>Interior Design>12 Interior Painting Tips: From Professional Painters
Interior Design
12 Interior Painting Tips: From Professional Painters
Modified: October 20, 2024
Get professional tips and advice on interior painting from experienced painters. Learn all about interior design and the best techniques to achieve stunning results.
(Many of the links in this article redirect to a specific reviewed product. Your purchase of these products through affiliate links helps to generate commission for Storables.com, at no extra cost. Learn more)
Introduction
When it comes to transforming the look and feel of a home, few things make a bigger impact than a fresh coat of paint. Whether you’re updating your living room, sprucing up your kitchen, or giving your bedroom a makeover, interior painting can breathe new life into any space. However, tackling a painting project can be daunting, especially if you’re not familiar with the process or if you’re working with limited time and budget.
In this article, we’ll share 12 interior painting tips from professional painters to help you achieve beautiful and long-lasting results. These tips will not only help you save time and money but also ensure that your paint job looks professional and enhances the overall aesthetic of your home.
From selecting the right paint and prepping the walls to using the right tools and techniques, we’ll cover everything you need to know to succeed with your interior painting project. So, let’s dive in and discover the secrets to achieving a flawless and stunning paint job!
Key Takeaways:
- Choose high-quality paint, prep walls thoroughly, and use the right tools for a professional finish that transforms your home’s interior with ease.
- Patience is key! Take your time, follow the proper order, and ventilate the room for a successful and enjoyable interior painting project.
Tip 1: Choose the Right Paint
Before you start your interior painting project, it’s essential to choose the right paint for your needs. Consider factors such as the purpose of the room, the lighting conditions, and your desired finish to ensure you make an informed decision.
Firstly, decide between oil-based and water-based paint. Oil-based paint is known for its durability and smooth finish, making it ideal for high-traffic areas such as hallways and kitchens. However, it has a longer drying time and emits strong odors, so proper ventilation is crucial when using it. On the other hand, water-based paint dries faster, has low odor, and is easier to clean up, making it a popular choice for most interior spaces.
Next, consider the paint finish. Glossy finishes, like satin or semi-gloss, are more resistant to stains and moisture, making them suitable for kitchens and bathrooms. Flat or matte finishes, on the other hand, are perfect for hiding imperfections but are less resistant to wear and tear. Eggshell finishes strike a balance between durability and hiding imperfections, making them a versatile option for many rooms.
Lastly, don’t forget to consider color. Light colors can make a small room appear larger and brighter, while dark colors can add depth and create a cozy ambiance. Take into account the existing color scheme and the mood you want to evoke in the room when selecting a color.
When shopping for paint, opt for high-quality brands that offer good coverage and durability. It may be tempting to go for cheaper options, but investing in quality paint will save you time and effort in the long run. Consult with experts at your local paint store to guide you in choosing the right paint for your specific project.
Tip 2: Prep the Walls Properly
Properly preparing your walls before painting is vital to ensure a smooth and professional-looking finish. Taking the time to prep will also help the paint adhere better, prolonging the life of your paint job. Here are some essential steps to follow:
- Clean the walls: Start by removing any dirt, dust, or grease from the walls. Use a mild detergent mixed with warm water and a sponge or rag to wipe down the walls. Pay special attention to areas like the kitchen, where grease may have built up.
- Repair any imperfections: Inspect the walls for any holes, cracks, or dents. Fill these imperfections with a spackling compound and use a putty knife to smooth it out. Once dry, sand the patched areas to create a smooth surface.
- Sand the walls: Even if there are no major imperfections, it’s recommended to lightly sand the walls to remove any roughness and promote better paint adhesion. Use a sanding block or sandpaper and work in a circular motion, being careful not to over-sand and damage the wall surface.
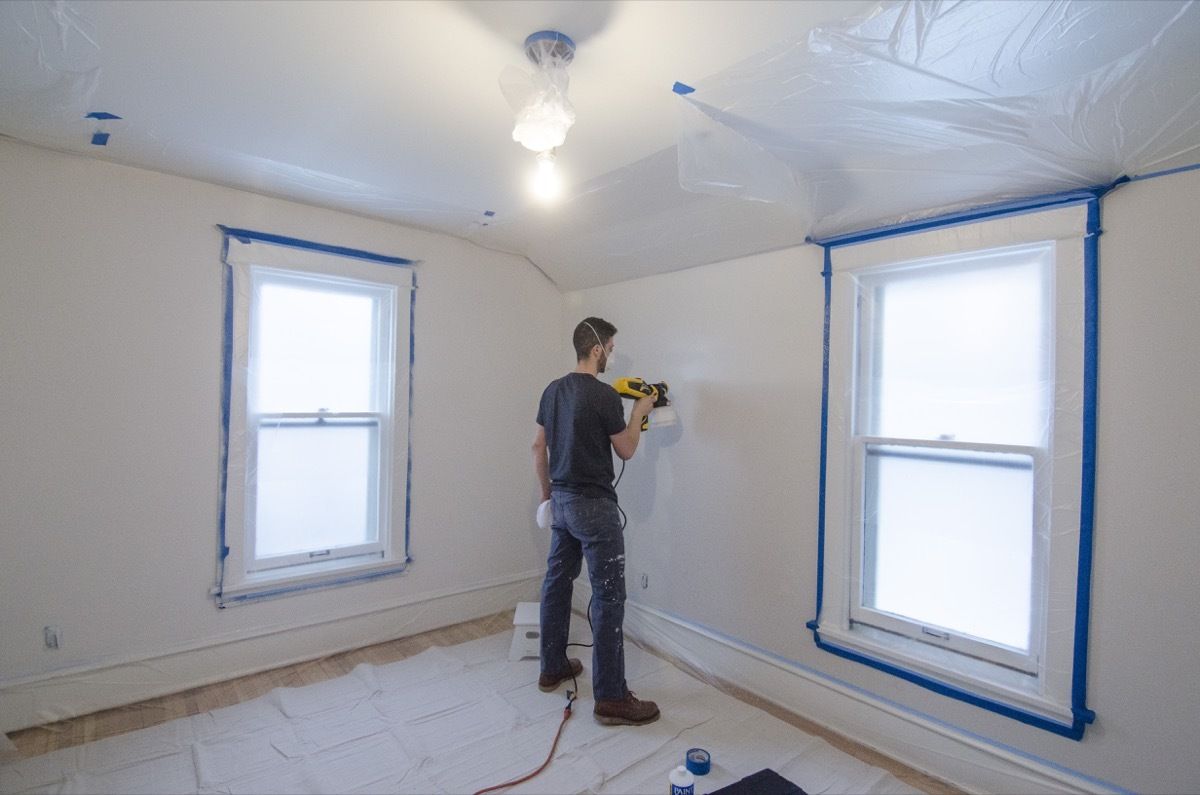
- Protect adjacent surfaces: Cover the floors, furniture, and any fixtures with drop cloths or plastic sheets to prevent any accidental paint splatters or spills.
- Prime the walls: Applying a coat of primer before painting is essential, especially when dealing with patched areas or when changing wall colors dramatically. Primer helps seal the wall surface, promotes better paint adhesion, and ensures a consistent paint finish. Use a roller or brush to apply the primer, following the manufacturer’s instructions.
By prepping your walls properly, you’re creating a clean and smooth canvas for your paint job. This will help the paint adhere better, result in a more professional finish, and extend the longevity of your painted walls.
Tip 3: Use High-Quality Brushes and Rollers
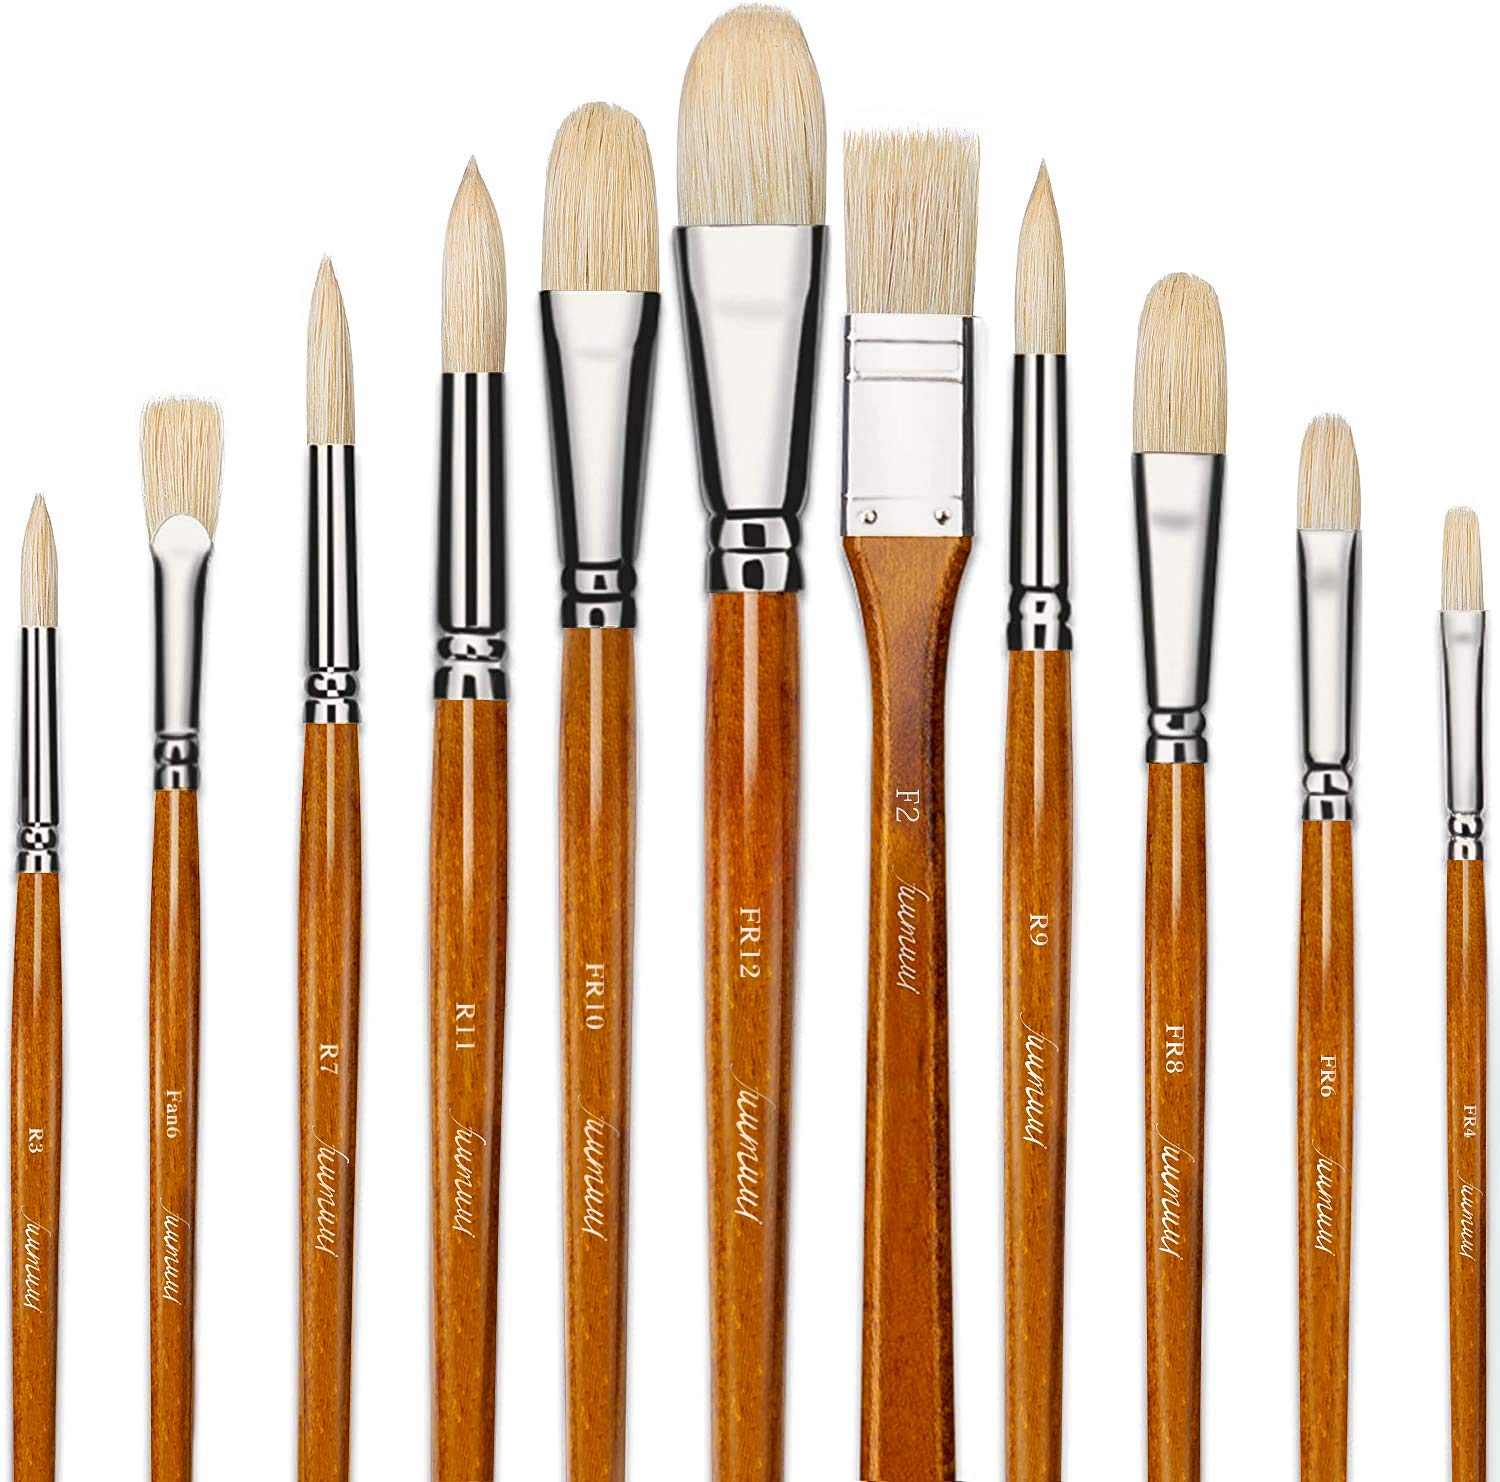
The quality of your painting tools can greatly impact the final result of your interior painting project. Investing in high-quality brushes and rollers will not only make the painting process smoother but also ensure a more professional-looking finish. Here’s what to consider:
When it comes to brushes, choose ones with dense bristles made from high-quality materials like nylon or polyester. These brushes hold more paint and provide better coverage, resulting in smoother and more even brush strokes. Look for brushes with flagged or tipped bristles, as they can create a smoother finish and minimize visible brush marks.
Rollers are another essential tool for interior painting. Opt for rollers with a synthetic material or a blend of synthetic and natural fibers. These types of rollers hold more paint, distribute it evenly, and provide better coverage. The size of the roller nap, or thickness, is also important. For smooth surfaces, use a roller with a shorter nap (around ⅜ inch), while rougher surfaces may require a longer nap (¾ inch or more) to ensure proper coverage.
It’s worth investing in a high-quality roller frame that has a sturdy handle and a comfortable grip. Look for frames with a secure roller attachment to avoid any wobbling or slipping during the painting process.
Remember to clean and properly care for your brushes and rollers after each use. Rinse them thoroughly with water or the appropriate cleaning solution, depending on the type of paint you used. Remove excess water or solvents and store brushes and rollers in a clean and dry place to maintain their shape and prolong their lifespan.
Using high-quality brushes and rollers will not only make your painting process more efficient but also ensure that your finished walls have a smooth, professional-looking finish.
Tip 4: Prime Before Painting
Priming the walls before painting is a crucial step that should not be skipped. Applying a coat of primer helps create a smooth and even surface, enhances paint adhesion, and improves the overall durability of your paint job. Here’s why priming is important:
1. Covers Stains and Discoloration: Priming is especially beneficial when you’re painting over previously painted walls with stains, watermarks, or discoloration. The primer acts as a barrier, preventing these blemishes from bleeding through the new paint and ensuring a clean and uniform color.
2. Helps Achieve True Color: A primer provides a neutral base for paint colors, allowing them to appear in their true form without being affected by the underlying wall color. This is particularly important when painting with light or vibrant shades.
3. Improves Paint Adhesion: Priming creates a surface that allows the paint to bond better with the wall, leading to a longer-lasting and more durable finish. This is especially crucial for surfaces that are glossy or non-porous, as they tend to repel paint.
4. Increases Paint Coverage: Applying primer before painting can help reduce the number of paint coats needed to achieve full coverage. This can save you time, effort, and money.
It’s important to choose the right type of primer for your specific project. If you’re painting over a previously painted surface, a general-purpose primer will suffice. However, if you’re dealing with surfaces that are stained, such as those with water or smoke damage, consider using a stain-blocking primer to ensure that the stains do not show through the new paint.
Before applying the primer, make sure that the walls are clean, dry, and properly prepped. Use a brush or roller to apply the primer in even strokes, following the manufacturer’s instructions regarding drying time and the number of coats needed. Once the primer is completely dry, you can proceed with painting your desired color.
By taking the time to prime your walls before painting, you’ll ensure a smoother and more long-lasting paint job, while also covering any stains, enhancing color accuracy, and improving paint adhesion.
Tip 5: Use a Roller for Large Areas
When it comes to painting large areas, such as walls or ceilings, using a roller is the most efficient and effective method. Rollers allow for quick coverage and a smooth finish, making them the go-to tool for painting expansive surfaces. Here’s why using a roller is beneficial:
1. Quick and Efficient: With a roller, you can cover large areas much faster than with a brush. The roller’s wide surface allows for more paint to be applied at once, saving you time and effort during the painting process.
2. Provides Even Coverage: Rollers distribute paint evenly across the surface, resulting in a consistent and smooth finish. The roller’s texture also helps to reduce visible brush strokes, creating a seamless look.
3. Works Well with Flat Surfaces: Rollers are particularly well-suited for flat or slightly textured surfaces, such as walls and ceilings. The roller’s nap, or thickness, can be chosen based on the texture of the surface, ensuring optimal coverage and adherence.
When using a roller, it’s important to choose the right size and nap length for the job. For larger areas, opt for a roller with a wide diameter (9 inches or more) for more efficient coverage. The nap length will depend on the texture of the surface. For smooth surfaces, use a shorter nap (around ⅜ inch), while rougher surfaces may require a longer nap (¾ inch or more) to ensure proper paint application.
Here are some tips for using a roller effectively:
- Start by loading the roller with paint by dipping it into a paint tray or using a roller grid. Make sure to distribute the paint evenly across the roller’s surface.
- Begin rolling in a “W” or “M” pattern to evenly spread the paint across the wall or ceiling. Apply light pressure and maintain a consistent speed for a more uniform finish.
- Avoid overloading the roller with paint, as this can lead to drips and uneven coverage. Reload the roller as needed to maintain a smooth application.
- Overlap each roller stroke slightly to ensure complete coverage and to blend the paint seamlessly.
- To avoid visible lines or “lap marks,” roll from ceiling to floor or from one edge to another, overlapping each pass of the roller slightly.
- Use a brush along the edges and corners that the roller cannot reach, known as “cutting in,” for a precise and professional finish.
Using a roller for large areas not only saves you time but also ensures a smooth and even paint application. With the right roller size and technique, you can achieve professional results and transform your interior spaces with ease.
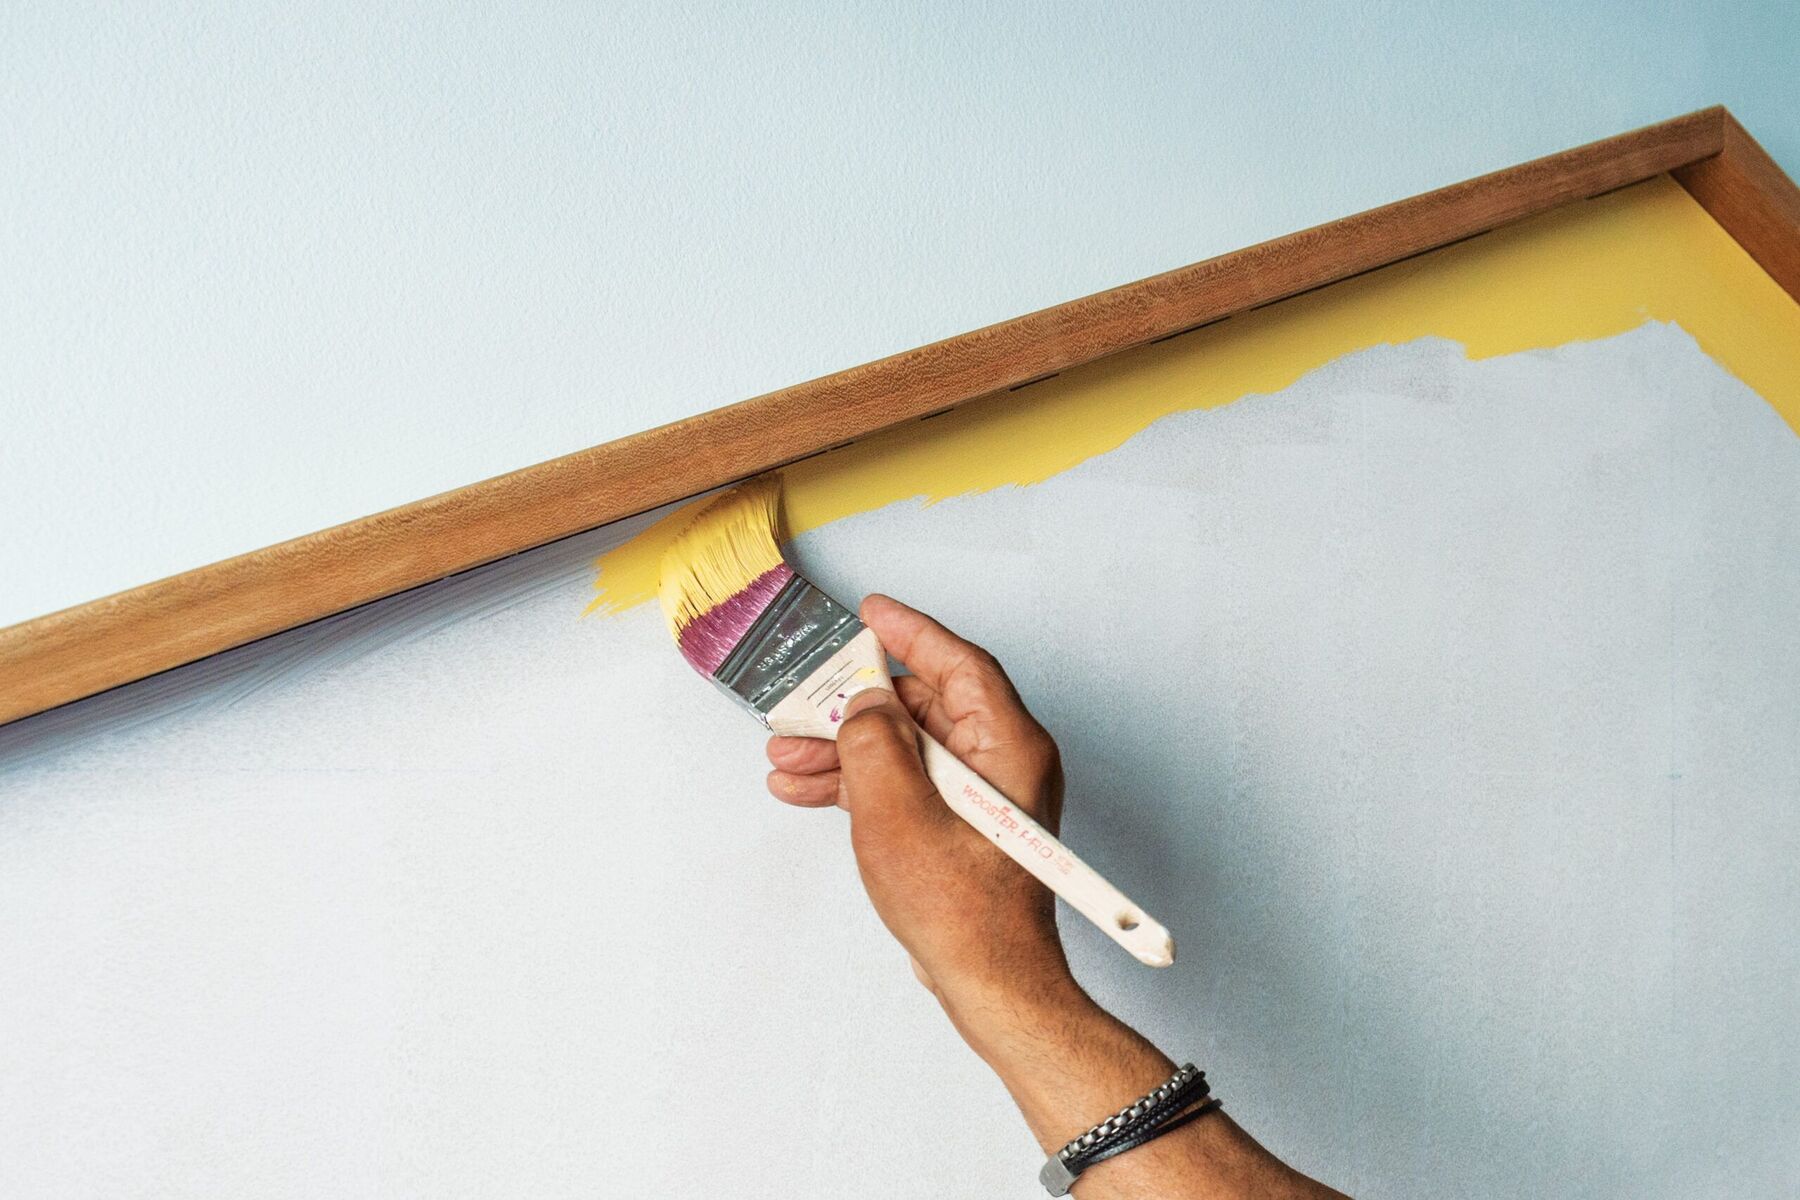
Tip 6: Cut in Before Rolling
When painting a room, it’s important to cut in before using a roller. “Cutting in” refers to the process of carefully painting along the edges, corners, and trim of a wall with a brush, creating a clean and precise boundary for the roller to follow. This technique ensures a professional-looking finish and helps you achieve a more polished result. Here’s why cutting in is essential:
1. Achieves Clean Edges: Cutting in allows you to paint along the edges where the wall meets the ceiling, floor, corners, and trim. This creates crisp and clean lines, giving your paint job a neater and more finished appearance.
2. Covers Nooks and Crannies: Brushes can easily navigate tight spots and intricate details that rollers cannot reach. By cutting in, you ensure that every nook and cranny of the room is covered with paint, leaving no visible gaps or unpainted areas.
3. Avoids Roller Marks on Edges: Using a roller to paint along edges can sometimes result in unintentional roller marks or accidental smudges. Cutting in with a brush first allows you to carefully paint the edges before rolling, preventing any unsightly marks on the final finish.
To master the cutting-in technique, follow these steps:
- Use a high-quality angled brush with fine bristles, as it provides better control and precision for creating clean lines.
- Dip the brush into the paint, only covering about one-third of the bristle length to prevent overloading and dripping.
- Start cutting in at a corner or edge, and work your way around the room in small sections.
- Hold the brush at a slight angle and use controlled strokes to paint along the edges, creating a straight line.
- Be patient and take your time to paint carefully and avoid smearing or smudging the adjacent surfaces.
- Use a steady hand or consider using painter’s tape along more challenging edges for added precision.
- After painting along the edges, allow the paint to dry before using a roller on the larger areas of the wall.
By cutting in before using a roller, you’ll achieve sharp and defined edges, ensuring a professional and polished finish for your interior painting project.
When painting a room, start with the ceiling and work your way down to avoid any drips or splatters on your freshly painted walls.
Tip 7: Paint in the Right Order
When tackling an interior painting project, it’s important to paint in the right order to ensure efficiency, proper coverage, and a seamless finish. By following a systematic approach, you can minimize mistakes and achieve professional results. Here’s the recommended order for painting different elements in a room:
- Ceiling: Start by painting the ceiling first. Use a roller or a brush, depending on the specific requirements of the ceiling surface. Apply even strokes and work in small sections to ensure an even and consistent finish.
- Walls: Once the ceiling is dry, move on to painting the walls. Use a roller for large areas and a brush for corners, edges, and cut-in areas. Start from the top of the wall and work your way down in sections, applying the paint in even strokes.
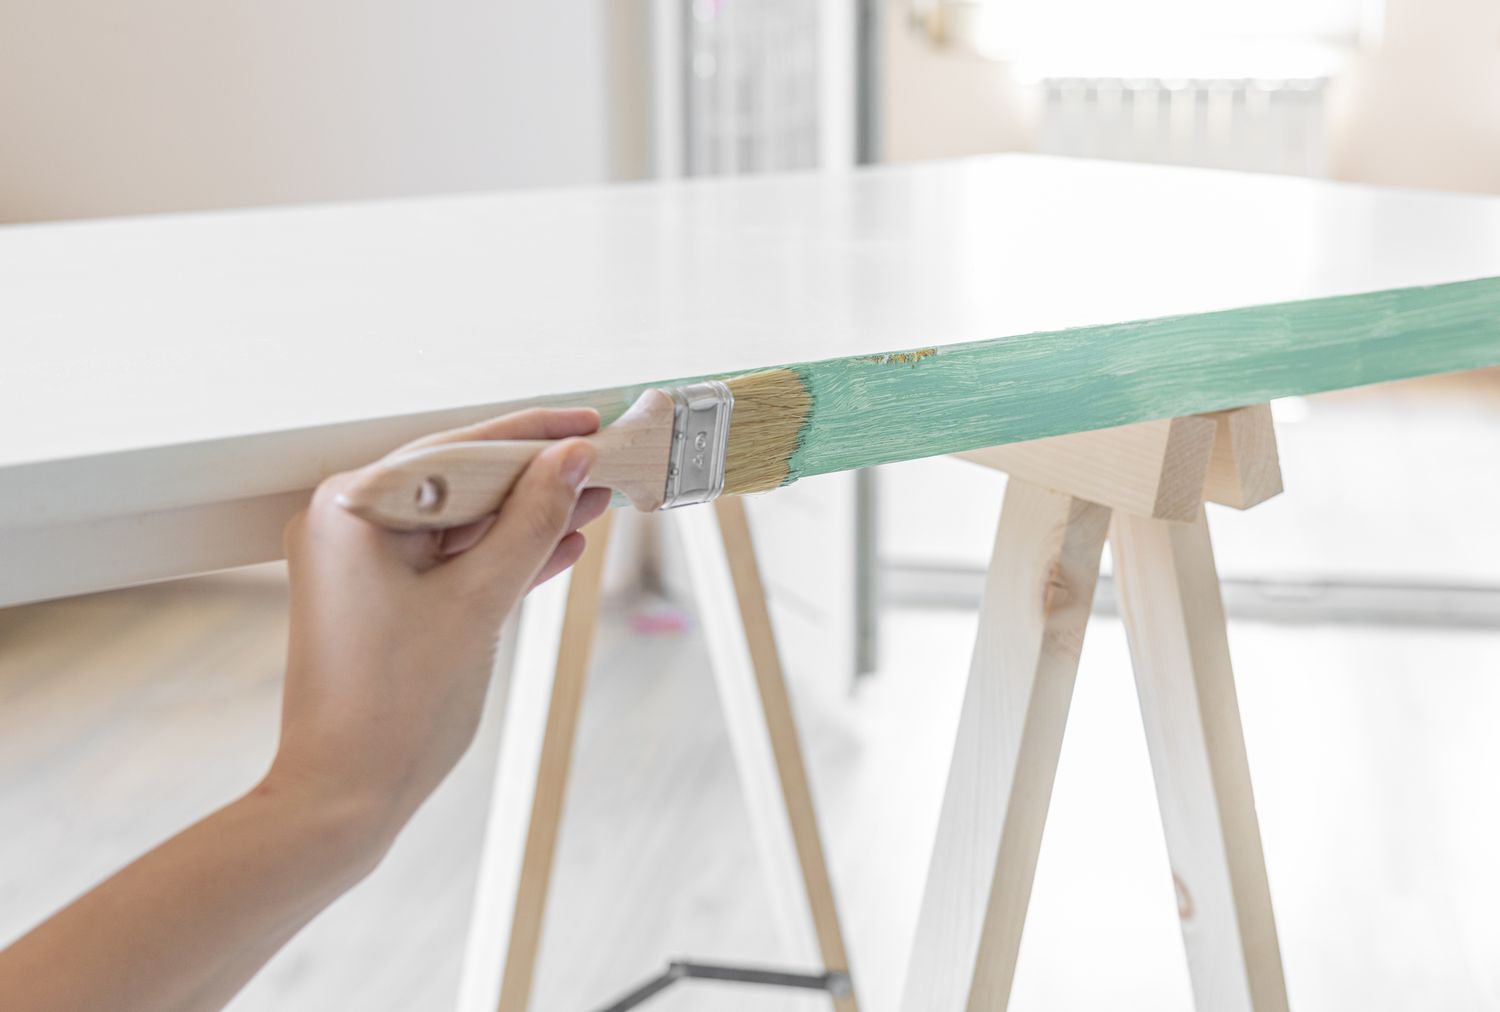
- Trim and Moldings: After the walls have dried, proceed to paint the trim, baseboards, door frames, and any other moldings in the room. Use a brush for precise application, ensuring a clean and defined edge against the painted walls.
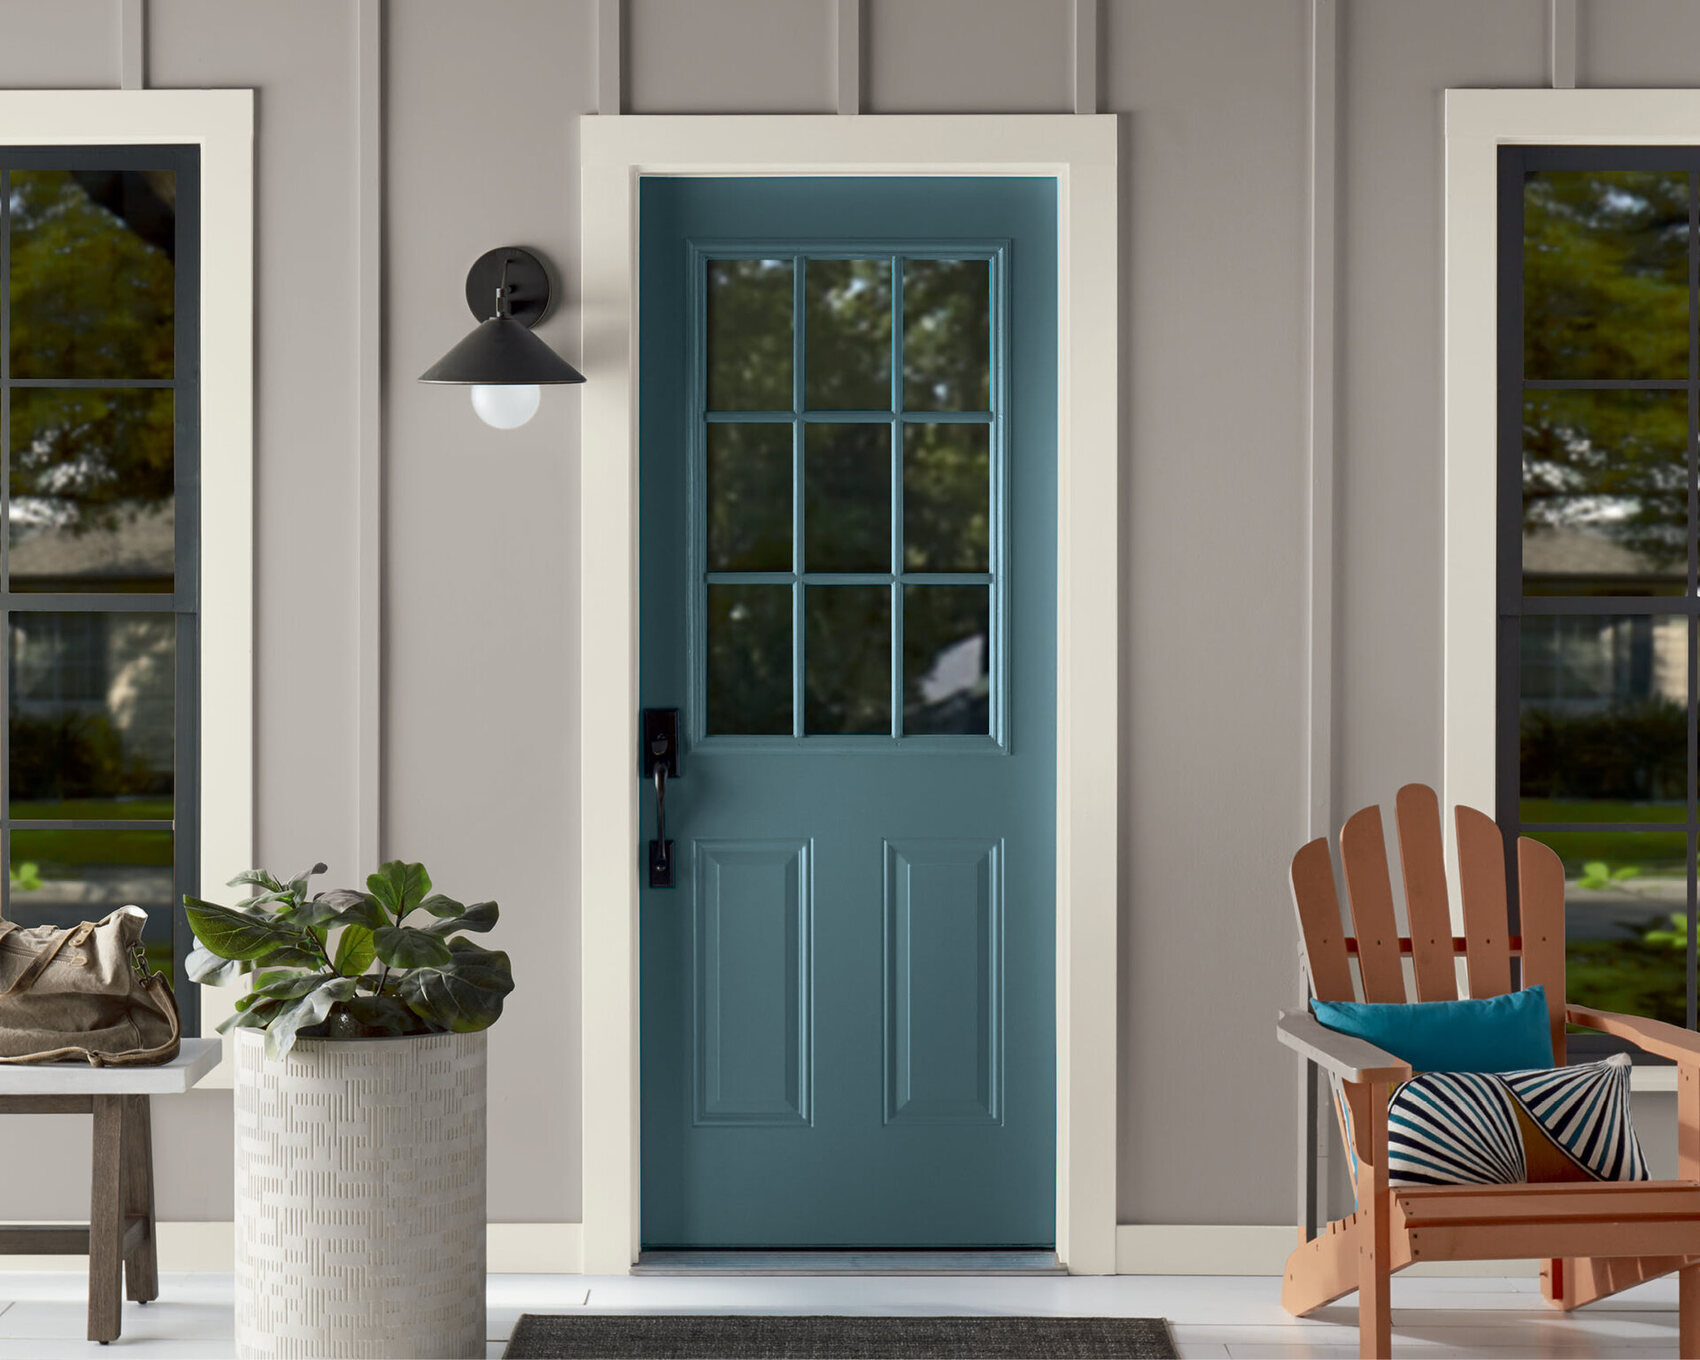
- Doors: Next, paint the doors, using a brush or roller depending on the type of door and desired finish. Start with the panels, working from top to bottom, and then move on to the stiles and rails. Allow each coat to dry before applying additional coats for better coverage.
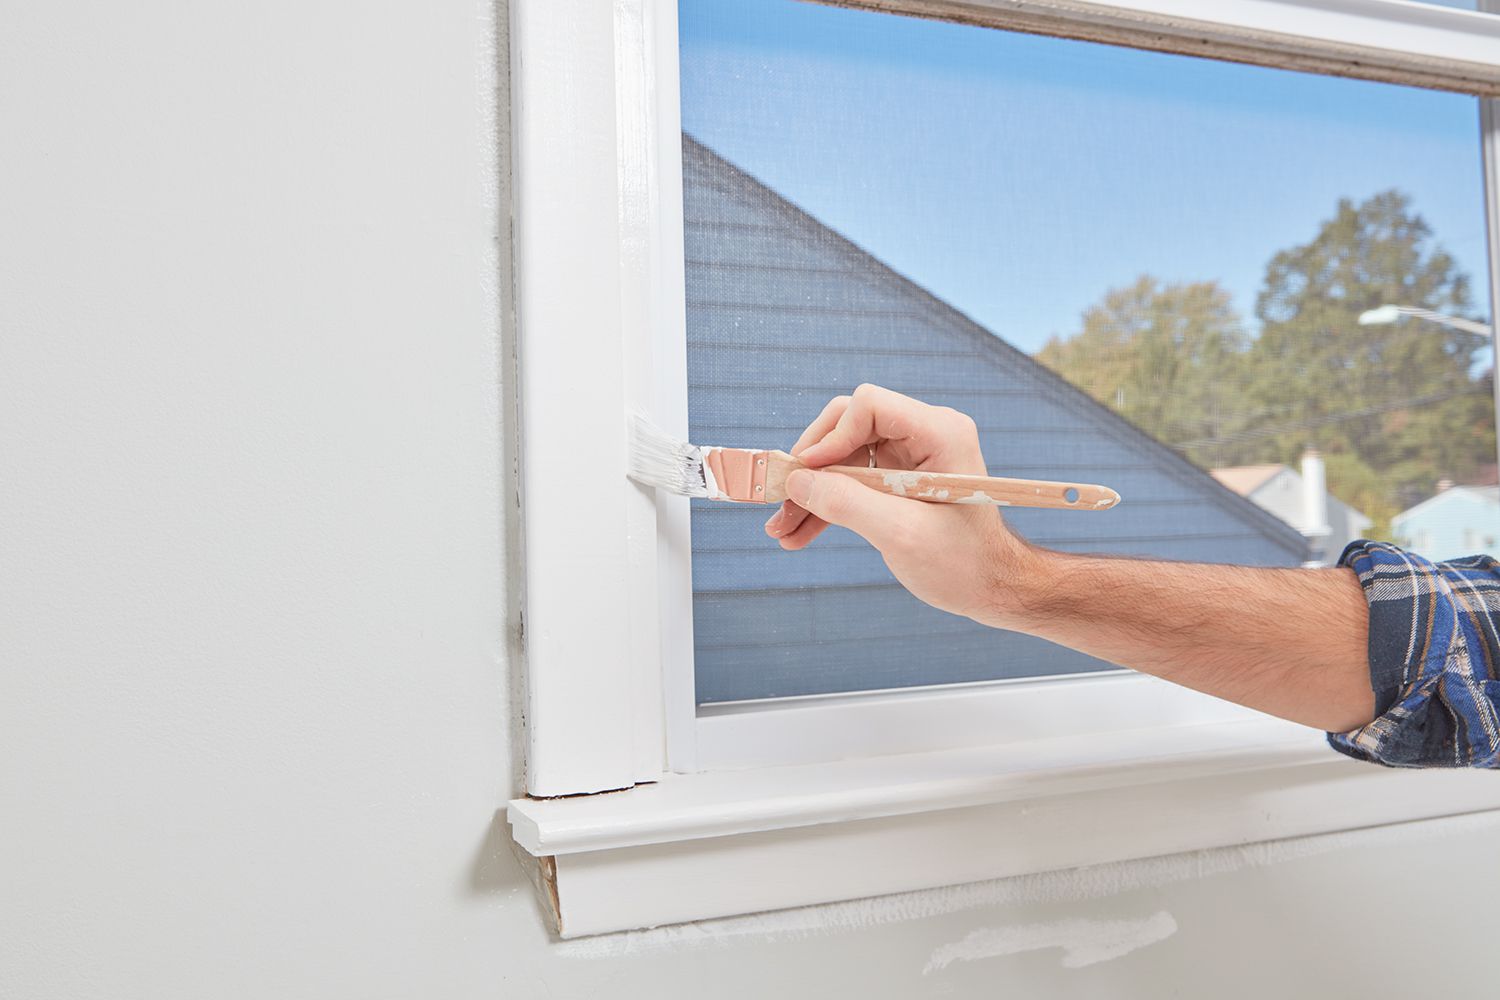
- Windows: Finally, paint the windowsills, frames, and any other window trim. Use a brush for detailed areas and a roller for larger surfaces. Take care to protect the glass with painter’s tape or a scraping tool to avoid getting paint on it.
By following this order of painting, you can work systematically and avoid potential mishaps, such as accidentally smudging recently painted surfaces or interrupting the drying process. It’s important to allow each painted element to dry thoroughly before moving on to the next one.
Remember to use caution and protect surfaces that have already been painted to maintain a clean and professional finish. Additionally, consider the direction of natural light in the room and adjust your painting order accordingly, starting with the areas that receive less direct sunlight to give them more time to dry.
By painting in the right order, you can achieve efficient and seamless results, transforming your interior spaces with a professional touch.
Tip 8: Don’t Forget the Ceiling
When planning an interior painting project, it’s essential not to overlook the ceiling. While it may be tempting to focus solely on the walls and other visible surfaces, a freshly painted ceiling can have a significant impact on the overall look and feel of the room. Here are some reasons why you shouldn’t forget to paint the ceiling:
1. Enhances the Room’s Appearance: A clean and freshly painted ceiling can brighten up the entire space, making it look more polished and inviting. It can also help tie the room together and complement the colors on the walls and other elements.
2. Covers Stains and Discoloration: Ceilings are often prone to stains from water leaks, smoke, or aging. Painting the ceiling can help cover these unsightly marks and create a clean and consistent surface, adding to the overall aesthetic of the room.
3. Reflects Light: A fresh coat of paint on the ceiling can help reflect natural and artificial light, making the room appear brighter and more spacious. This is especially beneficial in rooms with limited natural light or those that feel cramped.
4. Consistency in Finish: By painting the walls and ceiling with the same type of paint and finish, you can achieve a cohesive and uniform appearance throughout the entire space. This creates a sense of harmony and balance in the room’s design.
When painting the ceiling, consider the following tips:
- Prepare the ceiling by cleaning it thoroughly to remove any dust, dirt, or cobwebs. Use a broom or vacuum with a soft brush attachment to gently clean the surface.
- Securely cover the floors, furniture, and any fixtures with drop cloths or plastic sheets to protect them from paint splatters.
- Use a paint roller with an extension pole for easy reach and apply the paint in even, overlapping strokes. Start from one corner and work your way across the ceiling, using long, smooth movements.
- If you’re dealing with a textured ceiling, opt for a roller with a thicker nap to ensure proper paint application and coverage. Rollers with a nap length of ¾ inch or more are recommended for textured surfaces.
- While a flat or matte finish is commonly used for ceilings, you can choose a slight sheen like satin or eggshell for a more reflective effect and easier cleaning.
- Allow the painted ceiling to dry completely before moving on to other areas or applying additional coats, if necessary.
Painting the ceiling can elevate the overall aesthetic of a room and create a finished and cohesive look. Don’t forget to give this often-neglected surface the attention it deserves for a truly transformative interior painting project.
Tip 9: Use Thin Coats
When it comes to achieving a professional-looking paint job, it’s important to apply paint in thin coats rather than thick layers. Using thin coats has several advantages and can lead to a smoother, more even finish. Here’s why it’s beneficial to apply paint in thin coats:
1. Better Coverage: Thin coats of paint allow for better coverage and ensure that the color is evenly distributed across the surface. It helps to avoid thick patches or streaks that can occur when using too much paint at once.
2. Fewer Drips and Runs: Thick paint layers are more likely to drip or run, resulting in uneven and messy finishes. Thin coats dry more quickly and are less prone to these issues, allowing you to achieve a cleaner and more professional appearance.
3. Faster Drying Time: Applying thin coats of paint allows each layer to dry faster. This means you can move on to the next coat or the next area sooner, reducing overall painting time and allowing you to complete the project more efficiently.
4. Minimizes Brush or Roller Marks: Thick layers of paint can leave behind visible brush or roller marks, especially when the paint starts to dry. By using thin coats, you can reduce the likelihood of these marks and achieve a more seamless and smooth finish.
Here are some tips for applying paint in thin coats:
- Start with a well-mixed paint that has a smooth consistency. This will make it easier to spread evenly across the surface.
- Load the brush or roller with a moderate amount of paint, ensuring that it is evenly distributed and not overloaded.
- Apply the paint using light pressure and smooth, even strokes. Avoid pressing too hard or applying excessive pressure, as it can result in the paint becoming uneven or streaky.
- If necessary, apply a second or third thin coat once the previous coat has dried to achieve the desired opacity and coverage.
- Allow each coat of paint to dry fully before applying additional coats or before moving on to the next painting step. This will help prevent smudging or marring the previous layers.
By using thin coats of paint, you can achieve a professional and flawless finish. It’s better to build up the color gradually with multiple thin coats than to apply thick layers that can lead to uneven and unattractive results.
Tip 10: Properly Ventilate the Room
Proper ventilation is crucial when undertaking an interior painting project. It not only ensures the safety and comfort of those in the space but also aids in the drying process and helps to minimize the presence of strong odors. Here are some essential tips for effectively ventilating the room:
1. Open Windows and Doors: Before you begin painting, open windows and doors to create a cross breeze and promote air circulation. This allows fresh air to enter the room and helps to remove any fumes or odors from the paint and other products used during the painting process.
2. Use Fans: Utilize fans in the room to improve air circulation. Position fans strategically to direct air towards open windows or doors, helping to draw out the fumes and encourage faster drying. Ceiling fans can also be helpful in facilitating air movement in the room.
3. Use Exhaust Fans: If the room has an exhaust fan in the ceiling or bathroom, turn it on during and after painting to help remove fumes and aid in ventilation. Make sure the fan is functioning properly and vented to the outside to ensure the effective removal of paint odors and airborne particles.
4. Portable Air Purifiers: Consider using portable air purifiers or air filtration systems to help remove paint fumes and odors from the indoor air. These devices effectively trap and filter airborne particles, providing cleaner air for everyone in the room.
5. Close Off Adjacent Rooms: If possible, close off adjacent rooms during the painting process to prevent the spread of paint fumes. This helps minimize the exposure of the rest of the house to strong odors and allows for more effective ventilation in the immediate painting area.
6. Follow Manufacturers’ Instructions: Different paint products may have specific instructions regarding ventilation and curing time. It’s important to read and follow the recommendations provided by the paint manufacturer to ensure proper ventilation and the best results.
Proper ventilation not only helps to protect the health and comfort of those in the room, but it also aids in achieving a successful paint job. By allowing fresh air to circulate and ensuring effective removal of fumes and odors, you can create a safer and more pleasant painting environment.
Tip 11: Clean Up Properly
Properly cleaning up after an interior painting project is essential to maintain the longevity of your tools, keep your space tidy, and ensure a smooth transition back to normalcy. Here are some important guidelines for cleaning up after painting:
- Dispose of Paint-Soaked Materials: Properly dispose of paint-soaked materials such as rags, paper towels, or paint trays. These materials can pose a fire hazard if left unattended. Check with your local waste disposal facility to determine the proper method for disposing of these items.
- Clean the Brushes and Rollers: Thoroughly clean your brushes and rollers to remove any leftover paint. Start by scraping off excess paint back into the can and then wash the tools using warm soapy water. Rinse them until the water runs clear, and use a brush comb or your fingers to remove any remaining paint from the bristles. Allow them to air dry completely before storing.
- Store Paint Properly: Seal the paint cans tightly to prevent air from entering and drying out the paint. Store them in a cool and dry area, away from direct sunlight and extreme temperature fluctuations. Properly labeling the paint cans with the color, room, and date of use can help with future touch-ups.
- Clean Paint Splatters: If you notice any paint splatters or spills on surfaces such as floors, windows, or furniture, attend to them promptly. Use a damp cloth or sponge to gently blot the paint, avoiding excessive rubbing that could spread the stain. For stubborn stains, it may be necessary to use a mild soap or paint remover recommended for the specific surface.
- Remove Painter’s Tape: If you used painter’s tape to protect certain areas, remove it carefully and at a 45-degree angle. This will help ensure clean and crisp edges without damaging the freshly painted surfaces. Dispose of the tape properly.
- Restore the Room: Once everything is clean and dry, return furniture, decorations, and other items to their original positions. Take the time to inspect the room and ensure that everything is back in place and in good condition.
By following these clean-up steps, you can maintain the lifespan of your painting tools, keep your surroundings tidy, and restore your space to its pre-painting state. Proper clean-up not only makes future painting projects easier but also allows you to enjoy the results of your hard work in a clutter-free environment.
Tip 12: Take Your Time and Be Patient
When it comes to interior painting, one of the most important tips is to take your time and be patient throughout the entire process. Rushing or cutting corners can lead to subpar results and frustration. Here’s why it’s crucial to be patient:
1. Prep Work is Key: Properly preparing the walls, cleaning the surfaces, and applying primer sets the foundation for a successful paint job. Rushing through these steps can result in uneven surfaces, poor adhesion, and other issues that may affect the final result.
2. Quality over Speed: Prioritize quality over speed. Applying multiple thin coats, allowing sufficient drying time between coats, and taking care with brushwork and cutting in will yield a more professional and pleasing finish.
3. Avoid Drips and Runs: By being patient, you can prevent drips or runs that may occur with rushed painting techniques. Take your time to load the roller or brush with the right amount of paint and apply it in smooth, even strokes. This helps to create a uniform coating and minimize the need for touch-ups.
4. Allow for Proper Drying Time: Each coat of paint needs adequate time to dry before applying the next one or before moving furniture or other items back into the room. Rushing this process can result in surface imperfections, smudges, or paint transfer.
5. Attention to Detail: Patience allows you to pay attention to the small details, ensuring clean lines, crisp edges, and thorough coverage. Taking the time to properly cut in along corners and edges, as well as around trim and windows, enhances the overall professional look of the room.
6. Enjoy the Process: Painting can be a therapeutic and enjoyable activity. Take the time to appreciate the transformation unfolding before your eyes and enjoy the satisfaction of creating a fresh new look for your space.
Remember, painting requires precision and care. Taking your time and being patient throughout the process will result in a more satisfying and professional outcome. Keep in mind that good things take time, and the extra effort you put in will be reflected in the beauty and longevity of your interior paint job.
Conclusion
Interior painting is a transformative process that can breathe new life into your home. By following these 12 tips from professional painters, you can tackle your painting project with confidence and achieve beautiful, long-lasting results.
Start by choosing the right paint for your specific needs, considering factors such as the room’s purpose, lighting, and desired finish. Properly prepare the walls by cleaning, repairing imperfections, and applying primer for a smooth and even surface.
Invest in high-quality brushes and rollers to ensure a professional finish. Use a roller for large areas and cut in with a brush along edges and corners before rolling for precise and clean lines.
Remember the importance of painting in the right order, starting with the ceiling, then moving on to the walls, trim, doors, and windows. Don’t neglect the ceiling, as a freshly painted ceiling can enhance the overall appearance of the room.
Apply paint in thin coats for better coverage, faster drying time, and a smoother finish. Properly ventilate the room during and after painting to ensure a safe and comfortable environment, and clean up properly to maintain the longevity of your tools and keep your space tidy.
Above all, take your time and be patient throughout the painting process. Rushing can lead to mistakes and subpar results. Enjoy the journey and appreciate the transformation happening in your space.
With these tips in mind, you are now equipped to embark on your interior painting adventure. Remember that practice makes perfect, so don’t be discouraged if it takes a bit of time and effort to master the techniques. Soon enough, you’ll be able to confidently paint your way to a more beautiful and vibrant home.
Frequently Asked Questions about 12 Interior Painting Tips: From Professional Painters
Was this page helpful?
At Storables.com, we guarantee accurate and reliable information. Our content, validated by Expert Board Contributors, is crafted following stringent Editorial Policies. We're committed to providing you with well-researched, expert-backed insights for all your informational needs.


0 thoughts on “12 Interior Painting Tips: From Professional Painters”