Home>Others>Eco-Friendly Products>How To Make A Wooden Compost Bin

Eco-Friendly Products
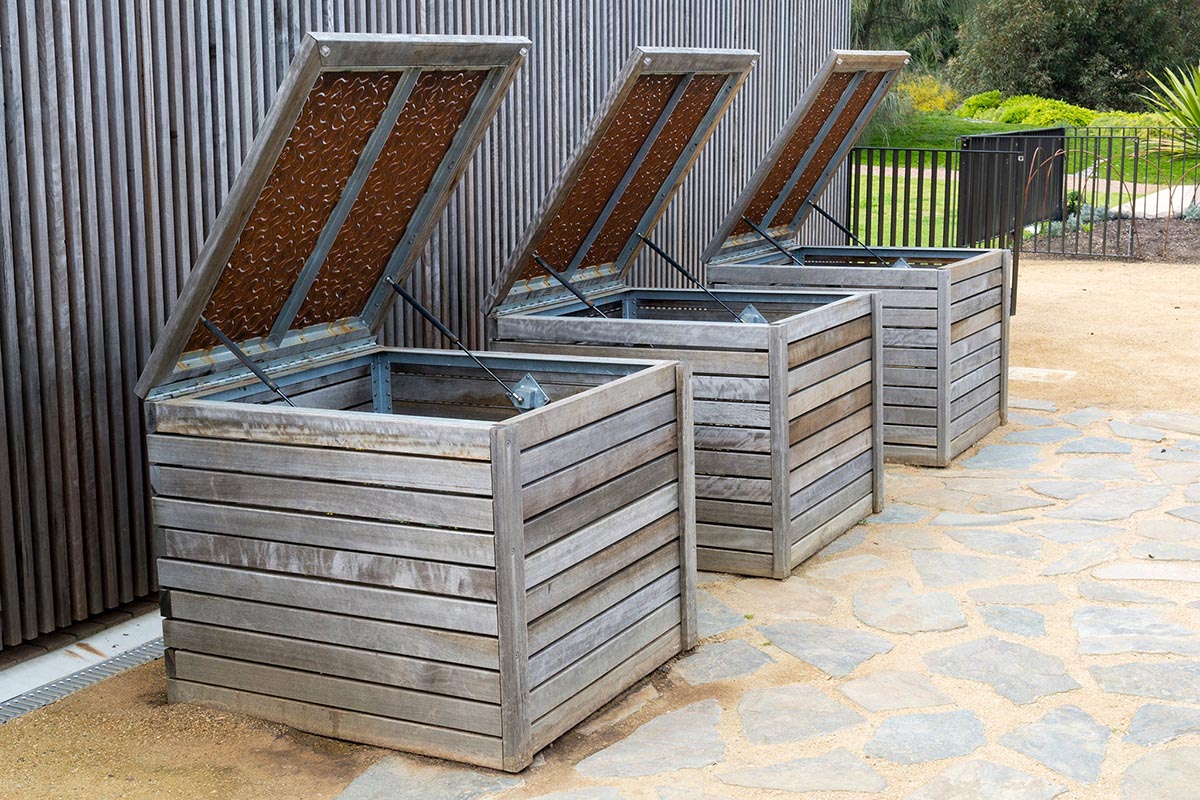
How To Make A Wooden Compost Bin
Modified: January 14, 2024
Learn how to create an eco-friendly wooden compost bin for your garden with our easy step-by-step guide. Reduce waste and create nutrient-rich soil for your plants.
(Many of the links in this article redirect to a specific reviewed product. Your purchase of these products through affiliate links helps to generate commission for Storables.com, at no extra cost. Learn more)
**
Introduction
**
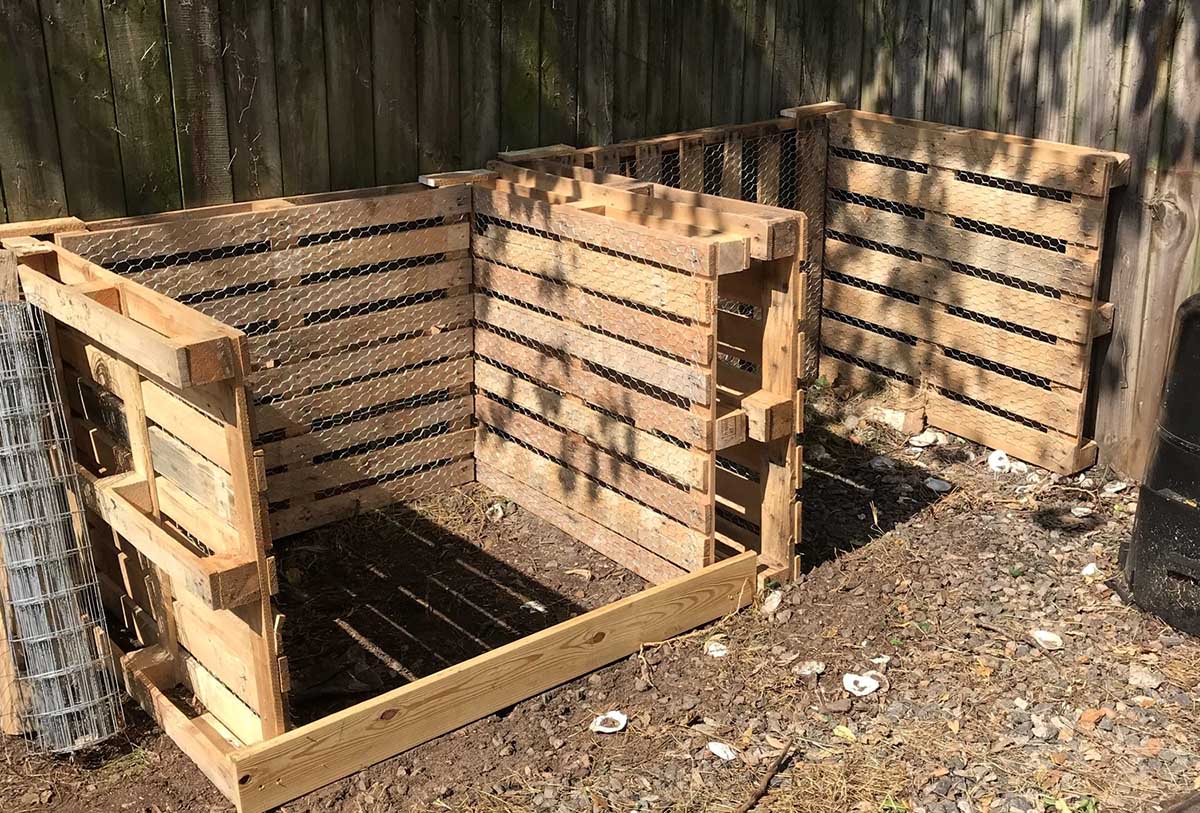
Welcome to the world of sustainable living! Composting is a fantastic way to reduce waste and create nutrient-rich soil for your garden. In this guide, we'll walk you through the process of building your very own wooden compost bin. Not only is this project environmentally friendly, but it also provides a hands-on way to connect with nature and embrace DIY craftsmanship.
By constructing a compost bin from wood, you're taking a step towards minimizing your environmental impact while reaping the benefits of a thriving garden. This project allows you to repurpose materials, reduce landfill waste, and cultivate a deeper understanding of the natural cycle of decomposition and renewal.
As we delve into the step-by-step instructions, you'll discover how straightforward and rewarding it can be to create a compost bin tailored to your specific needs and space. Whether you're a seasoned woodworker or a novice looking for a new project, this guide will equip you with the knowledge and confidence to embark on this eco-friendly endeavor.
So, roll up your sleeves, gather your materials, and let's embark on this enriching journey of sustainability and self-sufficiency. Get ready to transform ordinary wood into a valuable resource for your garden and the planet!
**
Key Takeaways:
- Building a wooden compost bin empowers you to reduce waste, connect with nature, and cultivate nutrient-rich soil for a thriving garden, all while minimizing your environmental impact.
- By embracing DIY craftsmanship and sustainable living, you can create a practical and impactful solution that contributes to a greener, more vibrant future, one compost bin at a time.
Read more: How To Make A Home Compost Bin
Materials Needed
**
Before diving into the construction process, it's essential to gather all the necessary materials. Here's what you'll need to build your wooden compost bin:
- Pressure-treated lumber: This will serve as the primary material for the compost bin. Opt for durable, weather-resistant wood to ensure the longevity of your creation.
- Galvanized screws: These rust-resistant screws are ideal for outdoor projects and will help secure the wooden components of the compost bin.
- Hinges and a latch: These will be used to attach the lid securely and allow for easy access when adding or removing compost materials.
- Mesh or hardware cloth: This material will be used to create air vents, promoting proper airflow within the compost bin.
- Wood stain or sealant: Applying a protective finish will help shield the wood from the elements, prolonging its lifespan.
- Tools for cutting and assembling wood: This includes a saw, drill, screwdriver, and measuring tape.
- Protective gear: Safety goggles, work gloves, and a dust mask are essential for your well-being during the construction process.
By ensuring you have all the required materials on hand, you can streamline the construction process and minimize interruptions. With these items in your arsenal, you're ready to embark on this eco-friendly woodworking adventure.
**
Tools Required
**
Equipping yourself with the right tools is crucial for the successful construction of a wooden compost bin. Here are the essential tools you'll need for this project:
- Saw: A reliable saw, such as a circular saw or handsaw, will be essential for cutting the lumber to the required dimensions.
- Drill: A power drill with a set of drill bits will facilitate the assembly process by creating guide holes and securing screws.
- Screwdriver: Both a manual and/or electric screwdriver will be necessary for driving the screws into the wood.
- Measuring tape: Accurate measurements are key to ensuring the components fit together seamlessly, making a measuring tape indispensable.
- Safety goggles: Protecting your eyes from wood chips and debris is vital, so a pair of safety goggles is a must.
- Work gloves: Handling lumber and screws can be rough on the hands, so a sturdy pair of work gloves will provide the necessary protection.
- Dust mask: Especially when cutting and sanding wood, a dust mask will help prevent inhalation of sawdust and particles.
By having these tools at your disposal, you'll be well-prepared to tackle each step of the construction process with confidence and efficiency. Ensuring that your workspace is equipped with these tools will set the stage for a smooth and enjoyable woodworking experience.
**
Step 1: Cutting the Wood
**
The initial phase of constructing your wooden compost bin involves cutting the pressure-treated lumber to the appropriate dimensions. This step is crucial for ensuring that the components fit together seamlessly, laying the foundation for a sturdy and functional structure. Here's a breakdown of the key elements to consider during this stage:
- Measure twice, cut once: Before making any cuts, carefully measure and mark the lumber according to the specifications outlined in your compost bin design. Double-checking your measurements will help minimize errors and ensure precision.
- Use the right saw: Depending on the thickness of the lumber and your comfort level with different saws, select the most suitable tool for the job. A circular saw is ideal for straight cuts, while a handsaw offers more control for intricate or angled cuts.
- Prioritize safety: Always wear protective gear, including safety goggles and work gloves, when operating a saw. Additionally, using a dust mask will help safeguard your respiratory health from sawdust and wood particles.
- Smooth the edges: After cutting the wood, use sandpaper to smooth any rough edges or surfaces. This will enhance the overall appearance and safety of your compost bin.
By carefully executing this step, you'll set the stage for a seamless assembly process, ensuring that the wooden components align perfectly to form a durable and visually appealing compost bin.
**
Step 2: Assembling the Sides
**
With the lumber cut to size, it’s time to begin assembling the sides of your wooden compost bin. This step is where the individual components start to take shape and form the structure of the bin. Here’s a guide to navigating this pivotal stage of the construction process:
- Arrange the pieces: Lay out the cut lumber according to the design specifications, ensuring that each piece is positioned correctly before proceeding with assembly.
- Pre-drill guide holes: Using a drill with an appropriate bit, create guide holes in the wood to prevent splitting when driving in the screws. This step is especially important when working with pressure-treated lumber.
- Secure the sides: With the guide holes in place, use galvanized screws to attach the sides of the compost bin together. Work methodically and ensure that each screw is driven in securely to create a stable framework.
- Check for squareness: As you progress, periodically check that the corners are square and the sides are aligned properly. This attention to detail will contribute to the overall structural integrity of the compost bin.
By methodically assembling the sides of the compost bin, you’ll witness the transformation of individual pieces of wood into a cohesive and robust enclosure for your composting materials. This stage marks a significant milestone in the construction process, bringing you one step closer to a fully functional and aesthetically pleasing compost bin.
**
Read more: How To Make An Outdoor Compost Bin
Step 3: Attaching the Base
**
As you progress with the construction of your wooden compost bin, the next crucial step involves attaching the base to the assembled sides. This foundational element provides stability and support for the composting materials, serving as a fundamental component of the structure. Here’s how to effectively execute this stage of the assembly process:
- Position the base: Place the cut base piece in position at the bottom of the assembled sides, ensuring a snug and flush fit.
- Secure the base: Utilize galvanized screws to firmly attach the base to the sides of the compost bin, reinforcing the structural integrity of the entire assembly.
- Ensure stability: As you fasten the base, verify that it is level and securely affixed to the sides, promoting stability and durability for the compost bin.
- Consider drainage: If your compost bin will be placed directly on the ground, it’s beneficial to incorporate drainage holes in the base to facilitate proper airflow and moisture management within the composting materials.
By successfully completing this step, you’ll establish a solid foundation for your wooden compost bin, ensuring that it is well-equipped to contain and nurture the organic materials that will soon transform into nutrient-rich compost for your garden.
**
When building a wooden compost bin, make sure to use untreated wood to avoid chemicals leaching into the compost. Also, consider adding a hinged lid for easy access and ventilation.
Step 4: Adding the Front Panel
**
With the base securely attached, the next step in constructing your wooden compost bin involves adding the front panel. This component not only contributes to the structural integrity of the bin but also facilitates convenient access for depositing and turning the composting materials. Here’s a detailed guide to completing this essential stage of the assembly process:
- Position the front panel: Align the cut front panel with the remaining open side of the compost bin, ensuring that it fits snugly within the framework.
- Secure the panel: Use galvanized screws to attach the front panel to the assembled sides and base, ensuring a secure and durable connection.
- Install a gate or door (optional): If desired, you can incorporate a hinged gate or door within the front panel to enable easy access for managing the compost materials. This feature enhances the functionality of the compost bin and simplifies the process of turning and harvesting the compost.
- Consider ventilation: To promote airflow and optimize the composting process, you may choose to incorporate small gaps or perforations in the front panel, allowing for adequate ventilation within the bin.
By completing this step with precision and attention to detail, you’ll finalize the structural framework of the compost bin, creating a functional and accessible enclosure for your composting endeavors.
**
Step 5: Installing the Lid
**
As you near the completion of your wooden compost bin, the installation of the lid is a pivotal step that adds the finishing touch to the structure. The lid serves multiple essential functions, including regulating moisture levels, deterring pests, and providing a convenient access point for adding composting materials. Here’s how to effectively install the lid, ensuring that it complements the functionality and aesthetics of the compost bin:
- Select the appropriate hinges: Choose durable and weather-resistant hinges that are suitable for outdoor use, as they will support the weight of the lid and endure exposure to the elements.
- Attach the hinges: Position the lid on the back edge of the compost bin and affix the hinges to secure it in place. Ensure that the lid opens and closes smoothly, allowing for easy access to the interior of the bin.
- Incorporate a latch or fastener: To keep the lid securely closed and prevent it from being dislodged by wind or wildlife, consider adding a latch or fastener to the front of the bin.
- Optimize ventilation: If desired, you can integrate small gaps or vents in the lid to facilitate airflow and maintain optimal conditions for the composting process.
By thoughtfully executing this step, you’ll add a functional and visually appealing element to your compost bin, enhancing its overall effectiveness and contributing to a seamless composting experience.
**
Step 6: Adding Air Vents
**
Introducing air vents to your wooden compost bin is a key consideration that can significantly impact the composting process. Proper ventilation is essential for promoting the decomposition of organic materials and maintaining optimal conditions within the bin. Here’s a comprehensive guide to adding air vents to your compost bin:
- Strategically position the vents: Determine the ideal locations for incorporating air vents, ensuring that they are distributed evenly to facilitate consistent airflow throughout the composting materials.
- Choose the appropriate materials: Opt for mesh or hardware cloth that is durable and resistant to corrosion, as it will be exposed to moisture and outdoor elements.
- Size and quantity: Cut the mesh into appropriately sized pieces and affix them to the compost bin using galvanized screws or staples. Ensure that the vents are adequately sized to promote airflow without compromising the containment of the composting materials.
- Promote functionality and aesthetics: While prioritizing functionality, consider the visual impact of the air vents and their integration into the overall design of the compost bin.
By conscientiously incorporating air vents into your compost bin, you’ll create an environment that fosters the decomposition of organic matter, ultimately yielding nutrient-rich compost for your gardening endeavors.
**
Step 7: Finishing Touches
**
As you approach the final stage of constructing your wooden compost bin, it’s time to add the finishing touches that will enhance its functionality, durability, and visual appeal. This step encompasses various considerations that contribute to the overall quality and effectiveness of the composting structure. Here’s a detailed guide to completing the finishing touches on your compost bin:
- Apply a protective finish: Consider treating the exterior surfaces of the compost bin with a wood stain or sealant to safeguard it against moisture, UV exposure, and general wear and tear. This protective layer will extend the lifespan of the wood and maintain the bin’s aesthetic appeal.
- Inspect for protruding screws or rough edges: Conduct a thorough inspection of the compost bin, ensuring that all screws are countersunk and any rough edges or splinters are smoothed out to prevent potential hazards and ensure a polished finish.
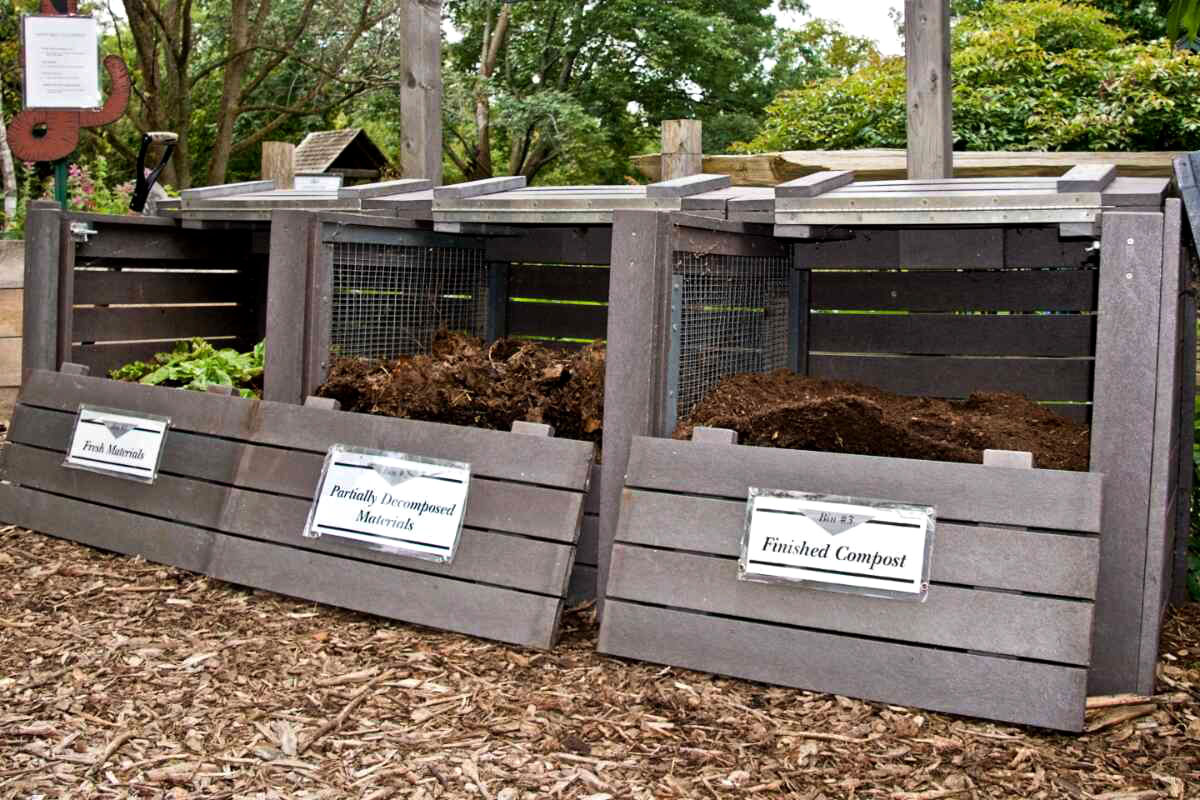
- Personalize and label: Consider adding a personalized touch to your compost bin, such as a decorative sign or label indicating its purpose and contents. This not only adds a charming element to the structure but also serves as a practical identifier.
- Optimize placement: Select an optimal location for the compost bin within your outdoor space, taking into account factors such as sunlight exposure, proximity to the garden, and ease of access for depositing and harvesting compost materials.
By attending to these finishing touches, you’ll elevate the functionality and aesthetic appeal of your wooden compost bin, culminating in a well-crafted and purposeful addition to your sustainable living practices.
**
Conclusion
**
Congratulations on successfully completing the construction of your very own wooden compost bin! By embarking on this eco-friendly DIY project, you’ve not only demonstrated a commitment to sustainability but also equipped yourself with a valuable tool for nurturing your garden and reducing organic waste. As you reflect on the journey of crafting this essential component of sustainable living, consider the following key takeaways:
- Environmental impact: Through the utilization of repurposed materials and the reduction of landfill waste, your compost bin embodies the principles of environmental responsibility and resourcefulness.
- Connection to nature: Engaging in hands-on construction and composting activities fosters a deeper connection to the natural world, promoting an appreciation for the cycles of growth and renewal.
- Sustainable gardening: With your compost bin in place, you’re poised to harness the transformative power of composting, enriching your garden with nutrient-dense soil and fostering healthy, thriving plant life.
- Empowerment through DIY: By undertaking this project, you’ve demonstrated the capability to create practical and impactful solutions through do-it-yourself craftsmanship, empowering yourself to contribute to a more sustainable lifestyle.
As you integrate your new compost bin into your gardening routine, take pride in the positive impact it represents and the potential it holds for sustainable practices. Embrace the ongoing journey of composting and sustainable living, knowing that each contribution, no matter how small, plays a meaningful role in preserving our planet for future generations.
So, as you peer into the future of your garden, envision the flourishing plants, vibrant blooms, and bountiful harvests that will be nourished by the rich compost generated within the confines of your meticulously crafted wooden compost bin. Your commitment to sustainability and self-sufficiency is a testament to the positive change that can be enacted through individual actions. Here’s to a greener, more vibrant future, cultivated one compost bin at a time!
Frequently Asked Questions about How To Make A Wooden Compost Bin
Was this page helpful?
At Storables.com, we guarantee accurate and reliable information. Our content, validated by Expert Board Contributors, is crafted following stringent Editorial Policies. We're committed to providing you with well-researched, expert-backed insights for all your informational needs.




0 thoughts on “How To Make A Wooden Compost Bin”