Home>Renovation & DIY>Home Renovation Guides>How To Build A Sunroom
Home Renovation Guides
How To Build A Sunroom
Modified: February 17, 2024
Learn the step-by-step process of building a sunroom with our comprehensive home renovation guide. Get expert tips and advice for your sunroom project. Start transforming your home today!
(Many of the links in this article redirect to a specific reviewed product. Your purchase of these products through affiliate links helps to generate commission for Storables.com, at no extra cost. Learn more)
Introduction
So, you've decided to add a sunroom to your home. Congratulations! This exciting project will not only enhance the aesthetics of your living space but also increase the value of your property. A sunroom provides a tranquil retreat where you can bask in natural light and enjoy the beauty of the outdoors without stepping outside. Whether you envision it as a cozy reading nook, a vibrant garden room, or a versatile entertainment area, building a sunroom requires careful planning, attention to detail, and a touch of creativity.
In this comprehensive guide, we will walk you through the step-by-step process of building your dream sunroom. From obtaining permits to selecting the perfect location, from framing the structure to adding the finishing touches, we've got you covered. By the end of this journey, you will be equipped with the knowledge and confidence to embark on this rewarding home improvement project. So, grab your favorite beverage, find a comfortable spot, and let's dive into the exciting world of sunroom construction!
Key Takeaways:
- Planning and permits are crucial for building a sunroom. Consider the purpose, consult professionals, and obtain permits to ensure legal compliance and a successful project.
- Carefully select the location and design elements of your sunroom. Consider natural light, views, accessibility, and functionality to create a tranquil and functional space that complements your home.
Read more: How To Build A Sunroom On A Patio
Step 1: Planning and Permits
Before you start building your sunroom, it’s crucial to lay a solid foundation through meticulous planning and obtaining the necessary permits. Begin by envisioning the purpose of your sunroom. Will it serve as a peaceful sanctuary for relaxation, a vibrant space for indoor gardening, or an entertainment hub for gatherings with family and friends? Understanding your goals will guide the entire planning process.
Next, assess the architectural and structural feasibility of adding a sunroom to your home. Consider consulting with a professional architect or contractor to ensure that your vision aligns with the structural integrity of your property. Once you have a clear idea of the design and layout, it’s time to delve into the permitting process.
Permit requirements vary by location, so it’s essential to research and comply with local building codes and regulations. Contact your local building department to obtain the necessary permits for constructing a sunroom. This typically involves submitting detailed plans, including structural drawings and specifications, to ensure compliance with safety and zoning regulations.
While navigating the permitting process may seem daunting, it’s a critical step that ensures your sunroom meets all legal and safety standards. Skipping this step can result in costly fines and complications down the road. By obtaining the required permits, you can proceed with confidence, knowing that your sunroom will be a legally sound and secure addition to your home.
Once you’ve secured the permits, you can move on to the next exciting phase: selecting the perfect location for your sunroom. This pivotal decision will significantly influence the ambiance and functionality of your new space.
Step 2: Choosing the Right Location
When it comes to building a sunroom, the location is more than just a physical placement; it’s about creating an inviting space that seamlessly integrates with your lifestyle and the surrounding environment. As you embark on this step, consider the following factors to ensure you select the perfect spot for your sunroom:
- Orientation: Assess the orientation of your home and the path of the sun throughout the day. Ideally, you want your sunroom to receive ample natural light without being exposed to harsh glare or extreme heat. Consider the positioning of the sunroom in relation to the sunrise and sunset to optimize natural lighting and energy efficiency.
- Views: Take advantage of scenic views and natural landscapes when choosing the location for your sunroom. Whether it’s a lush garden, a serene lake, or a picturesque backyard, incorporating captivating views will enhance the ambiance and create a tranquil retreat within your home.
- Accessibility: Evaluate the accessibility of the location from the main living areas of your home. A well-placed sunroom should seamlessly connect with the existing interior spaces, providing easy access and fluid transition for occupants and guests.
- Functional Considerations: Consider the intended use of your sunroom when selecting the location. If it’s designed for year-round enjoyment, proximity to essential amenities such as bathrooms and kitchen facilities is crucial. Additionally, factor in privacy and noise levels to create a comfortable and functional space.
By carefully considering these aspects, you can identify the optimal location that aligns with your vision for the sunroom. Once you’ve chosen the perfect spot, it’s time to delve into the design and layout phase, where you’ll bring your vision to life through thoughtful planning and creativity.
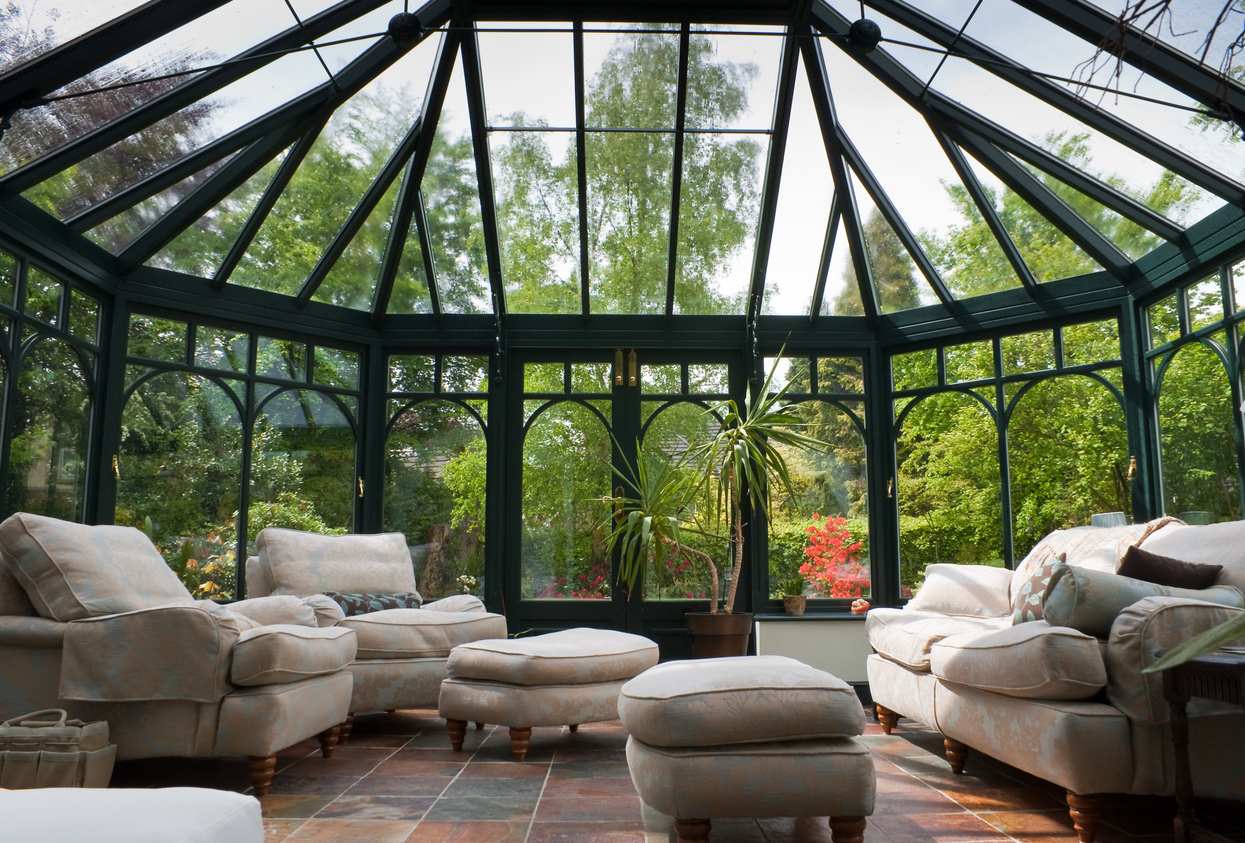
Step 3: Design and Layout
Embarking on the design and layout phase of building your sunroom is an exhilarating step that allows you to unleash your creativity and tailor the space to your unique preferences. Whether you prefer a sleek modern design, a rustic retreat, or a charming conservatory, the design and layout phase sets the stage for bringing your vision to life.
Begin by considering the architectural style of your home and how you want the sunroom to complement its existing structure. This harmonious integration can range from seamlessly blending with the home’s aesthetic to creating a striking contrast that adds visual interest. Take into account the materials, colors, and architectural details that will tie the sunroom to the overall design of your home.
Next, contemplate the layout and functionality of the sunroom. Will it serve as a multi-functional space for relaxation, dining, and entertaining, or will it be tailored to a specific purpose? Factor in the furniture placement, traffic flow, and spatial organization to optimize comfort and usability. If you envision incorporating indoor plants, a reading nook, or a dining area, this is the stage to conceptualize the arrangement of these elements.
Furthermore, consider the incorporation of sustainable and energy-efficient features in the design, such as insulated glass, passive solar heating, and natural ventilation. These considerations not only contribute to a more environmentally conscious space but also enhance the comfort and livability of your sunroom throughout the year.
As you delve into the design and layout phase, don’t hesitate to seek inspiration from architectural magazines, online platforms, and home improvement resources. Visualizing your ideal sunroom and incorporating elements that resonate with your personal style will result in a space that truly reflects your vision and enhances your home’s livability. With the design and layout meticulously planned, you’re ready to move forward to the foundational elements of your sunroom.
Step 4: Foundation and Flooring
As you transition to the foundational elements of your sunroom, the focus shifts to creating a stable and secure base that will support the structure and provide a comfortable flooring surface. The foundation and flooring phase is a critical step in ensuring the longevity and structural integrity of your sunroom.
When it comes to the foundation, you have several options to consider, including a traditional concrete slab, a raised deck-style foundation, or a pier-and-beam foundation. Each option offers distinct advantages, and the choice may depend on factors such as soil conditions, local building codes, and personal preferences. Consulting with a structural engineer or contractor can provide valuable insights into selecting the most suitable foundation for your sunroom.
Once the foundation is in place, attention turns to selecting the ideal flooring material. The flooring of your sunroom should strike a balance between durability, aesthetic appeal, and functionality. Popular choices for sunroom flooring include ceramic tile, luxury vinyl planks, hardwood, and engineered wood. Consider factors such as moisture resistance, ease of maintenance, and compatibility with radiant heating systems, if applicable, when choosing the flooring material.
Additionally, the flooring should seamlessly integrate with the overall design scheme of your sunroom, complementing the aesthetic and enhancing the visual appeal of the space. Whether you opt for a classic hardwood floor for a warm and inviting ambiance or sleek, contemporary tiles for a modern touch, the flooring sets the tone for the entire room.
As you navigate the foundation and flooring phase, it’s essential to prioritize quality and craftsmanship to ensure a solid and visually appealing base for your sunroom. With the foundation and flooring in place, you’re ready to advance to the next stage: framing and roofing, where the structural framework of your sunroom takes shape.
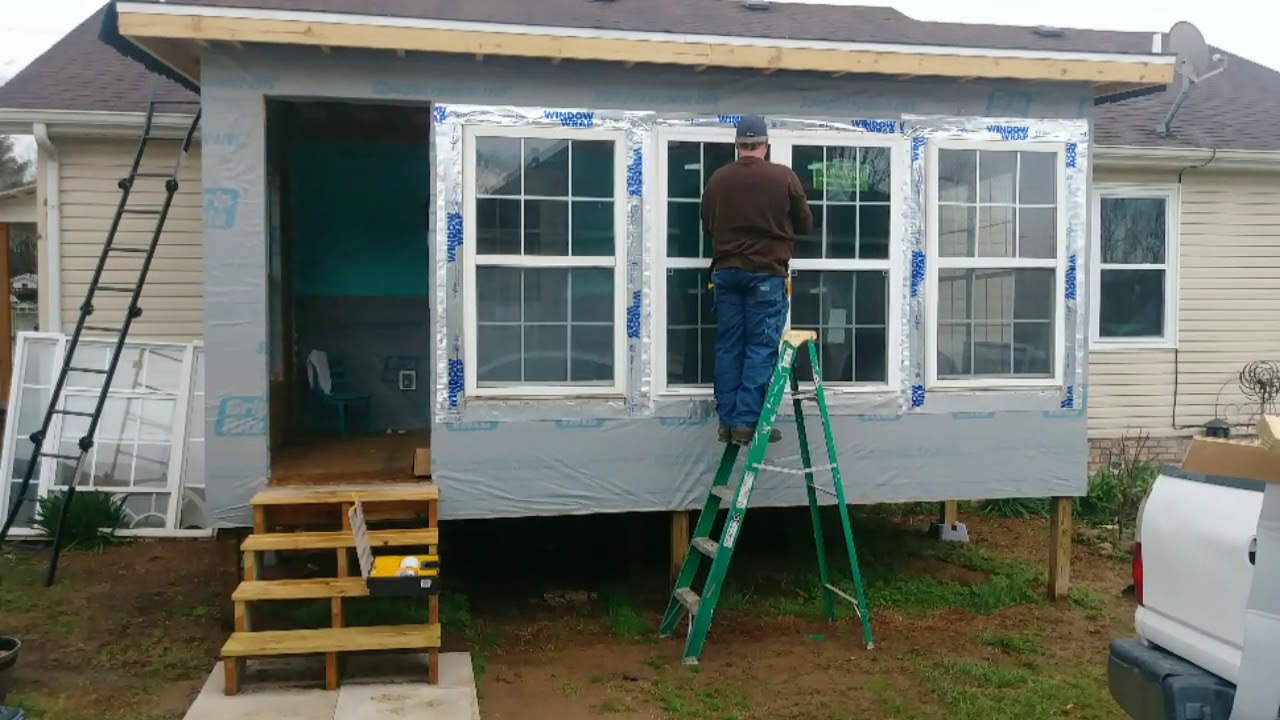
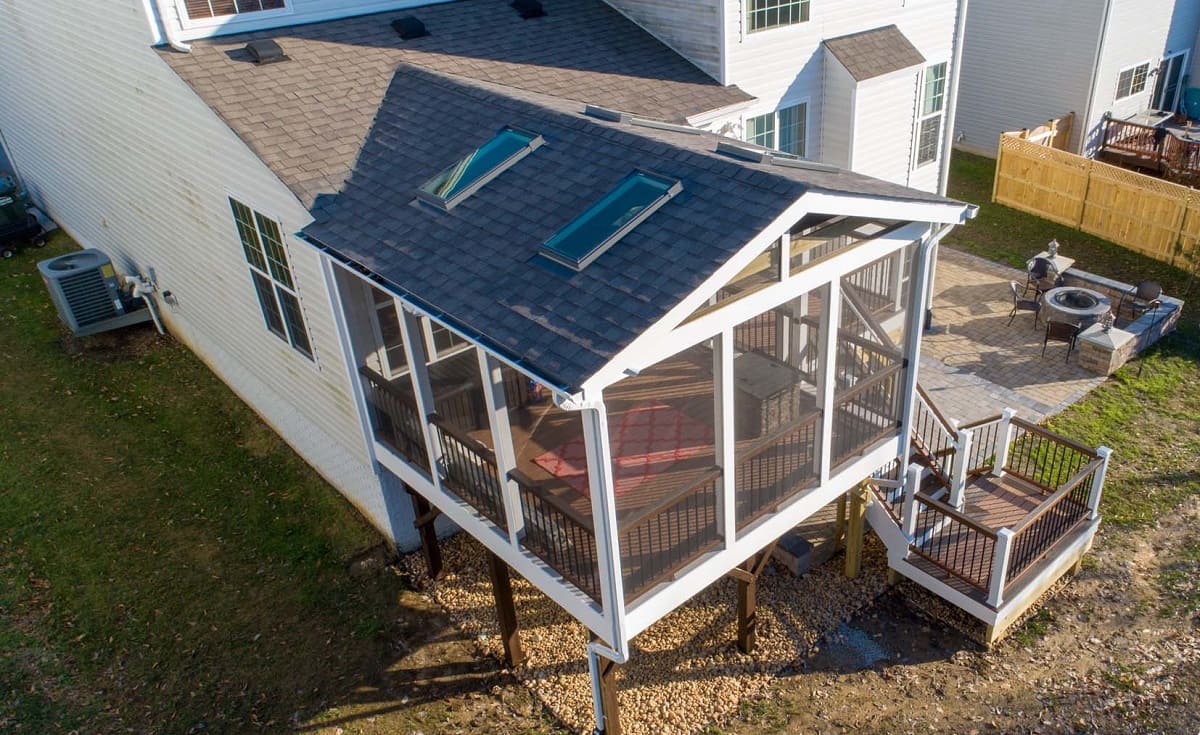
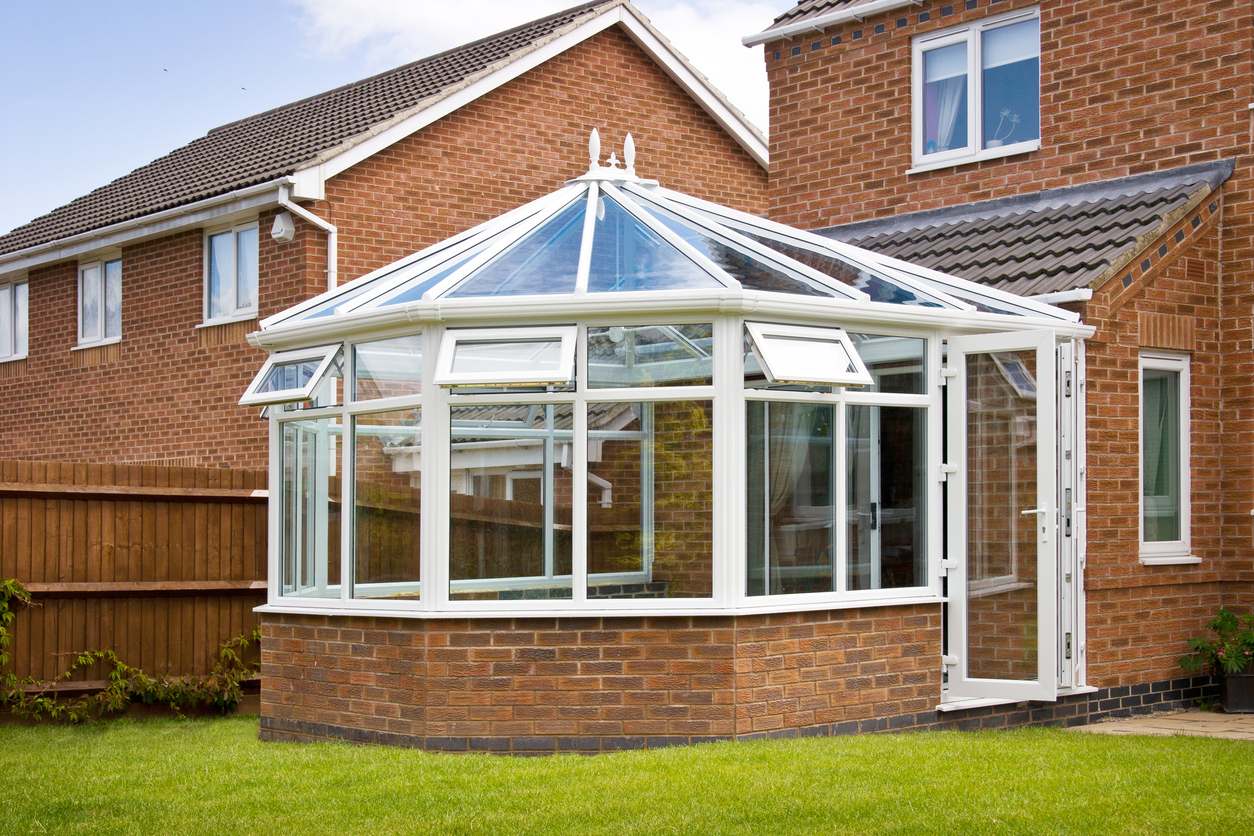
Step 5: Framing and Roofing
As you progress to the framing and roofing phase of building your sunroom, the structural elements of the space begin to take form, laying the groundwork for its architectural integrity and weather resistance. This phase involves the meticulous construction of the framework and the installation of a durable, weatherproof roof to protect your sunroom from the elements.
The framing process entails erecting the structural skeleton of the sunroom, which includes the walls, support beams, and any desired architectural features such as skylights or vaulted ceilings. Depending on the design and complexity of your sunroom, this phase may involve working with skilled carpenters and contractors to ensure precise and sturdy construction.
Once the framing is in place, the focus shifts to the roofing, a crucial element that safeguards your sunroom from rain, snow, and harsh sunlight. When selecting a roofing material, consider options such as shingles, metal roofing, or translucent polycarbonate panels, each offering distinct advantages in terms of durability, aesthetics, and insulation properties. The choice of roofing material should align with the overall design and functionality of your sunroom while providing long-lasting protection against the elements.
Moreover, the roofing design should facilitate proper drainage and ventilation to prevent moisture buildup and ensure a comfortable indoor environment. Attention to detail during the roofing installation is essential to safeguard the structural integrity of your sunroom and provide peace of mind, knowing that it is built to withstand diverse weather conditions.
Throughout the framing and roofing phase, adherence to building codes and industry standards is paramount to guarantee the safety and longevity of your sunroom. By working with experienced professionals and utilizing high-quality materials, you can ensure that your sunroom’s structural framework and roofing system are expertly crafted and designed to endure the test of time.
With the framing and roofing components securely in place, your sunroom begins to take shape as a protected and inviting space, setting the stage for the next phase: installing windows and doors to seamlessly blend the indoors with the outdoors.
When building a sunroom, make sure to use energy-efficient windows to maximize natural light and minimize heat loss. This will help keep the sunroom comfortable year-round.
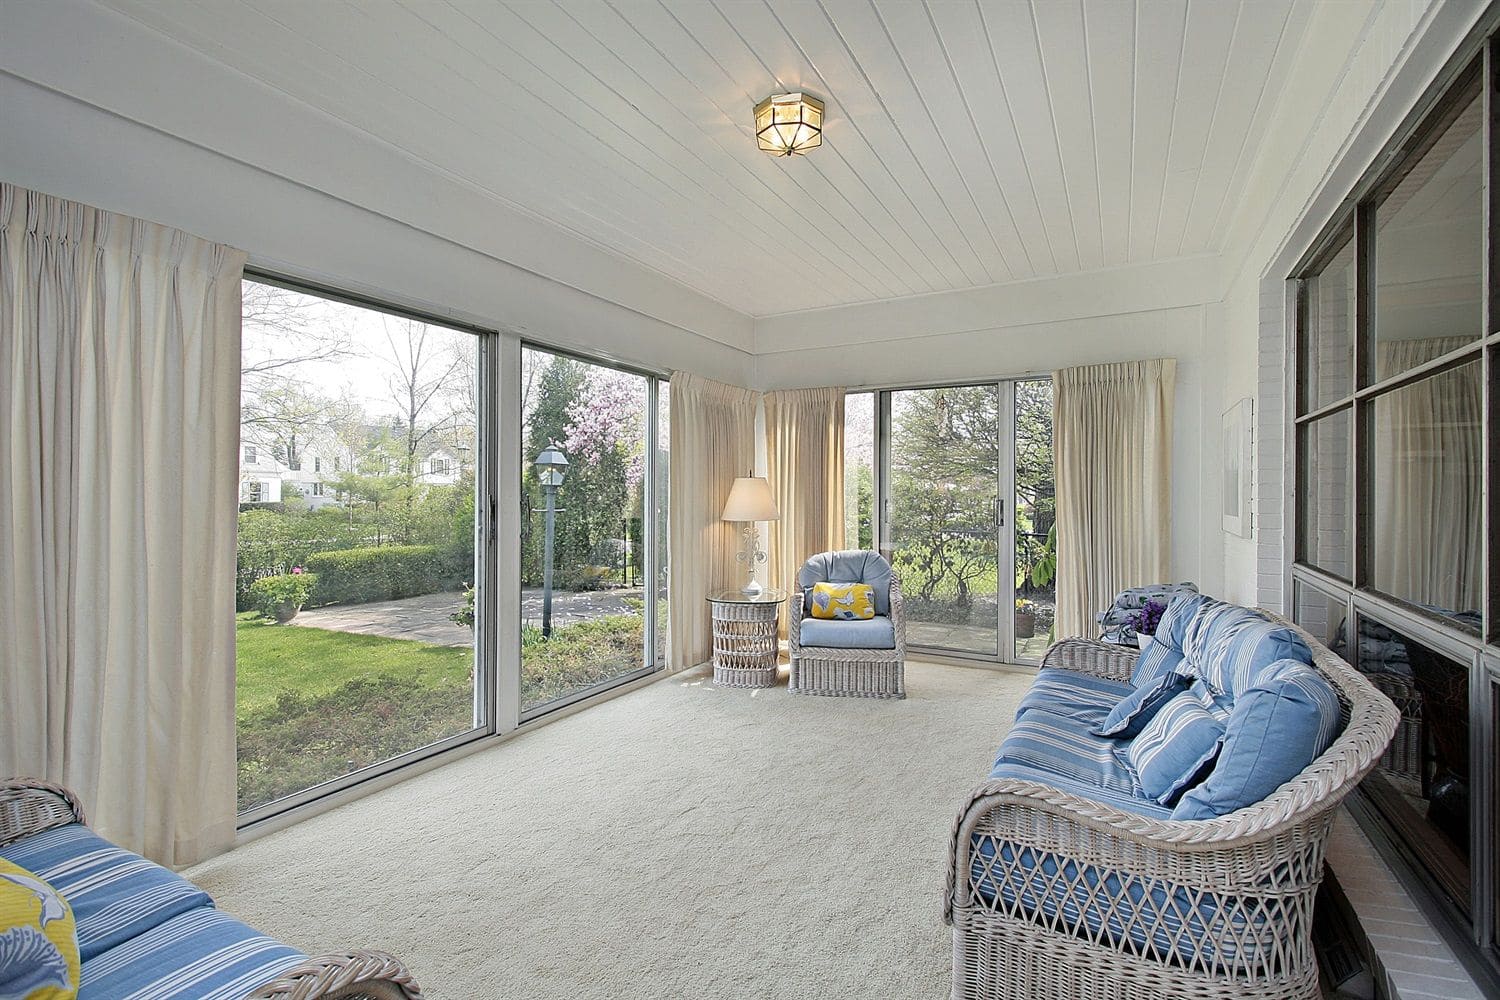
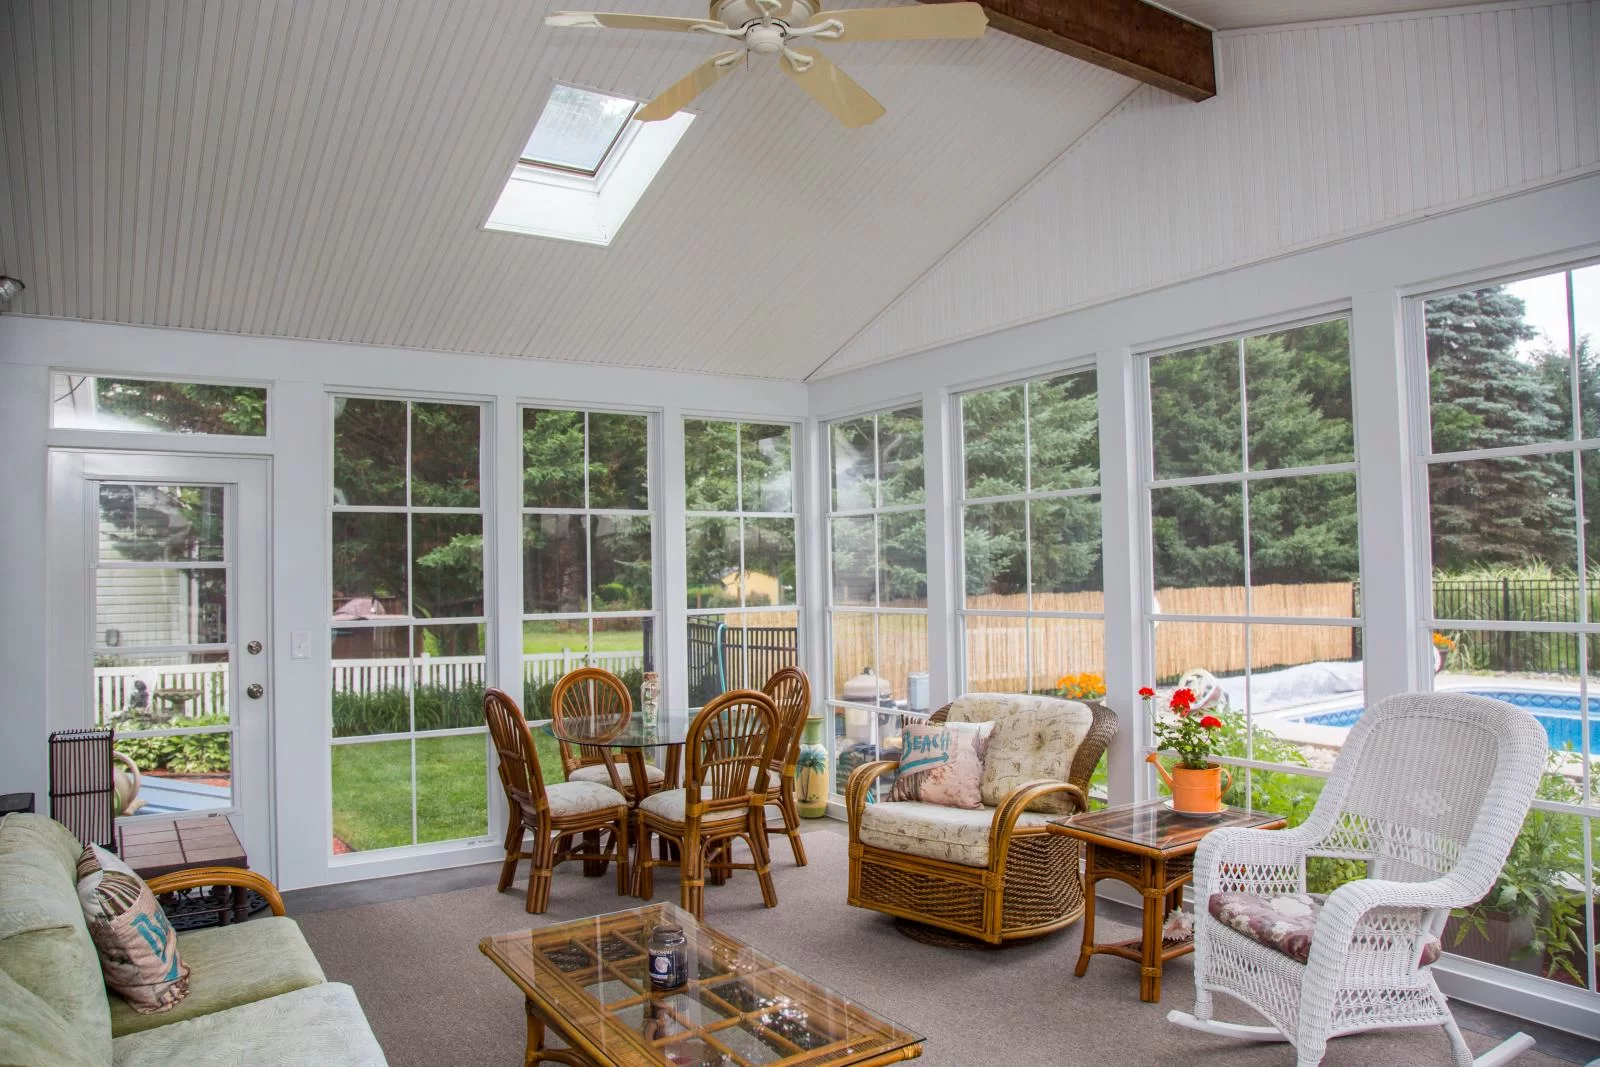
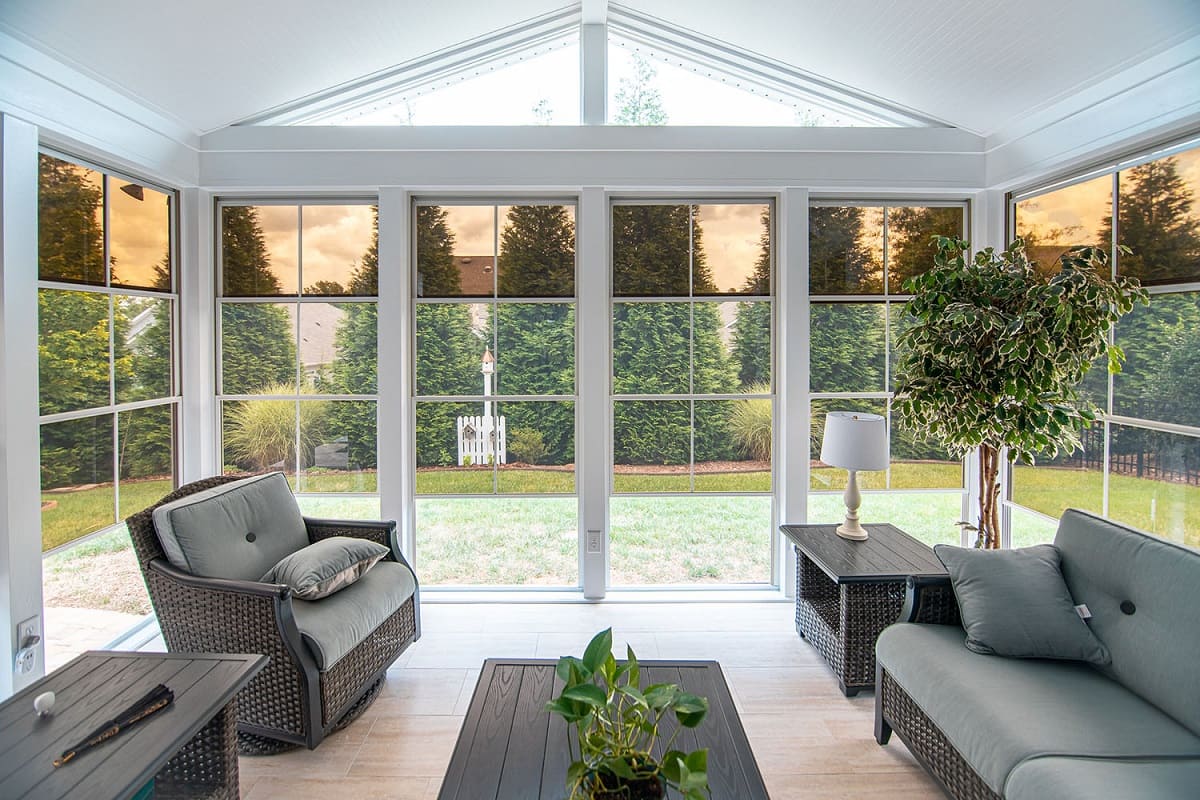
Step 6: Windows and Doors
As you embark on the installation of windows and doors for your sunroom, you are poised to infuse the space with natural light, ventilation, and a seamless connection to the outdoor environment. This phase is pivotal in creating a bright, inviting atmosphere while enhancing the visual and functional aspects of your sunroom.
When selecting windows for your sunroom, consider factors such as energy efficiency, insulation, and the desired aesthetic appeal. Options range from expansive floor-to-ceiling windows that maximize natural light and panoramic views to operable windows that promote airflow and ventilation. Additionally, incorporating insulated glass or low-emissivity (Low-E) coatings can optimize energy efficiency and comfort, allowing your sunroom to be enjoyed year-round.
Similarly, the choice of doors plays a crucial role in the functionality and aesthetic charm of your sunroom. Whether you opt for sliding glass doors that seamlessly connect the indoor and outdoor spaces or French doors that exude timeless elegance, the selection should align with your lifestyle and design preferences. Consider features such as weatherstripping, multi-point locking systems, and thermal performance to ensure that your sunroom remains secure and well-insulated.
Furthermore, the placement and orientation of windows and doors should be carefully planned to maximize natural light, cross ventilation, and visual appeal. Strategic positioning can enhance the sense of openness and create a harmonious transition between the interior and exterior, blurring the boundaries between your living space and the surrounding natural beauty.
As the windows and doors are expertly installed, your sunroom begins to emerge as a luminous and welcoming retreat, capturing the essence of indoor-outdoor living. With the space now enveloped in natural light and framed by expansive views, you’re ready to move on to the next phase: addressing the electrical and lighting requirements to illuminate and electrify your sunroom oasis.
Step 7: Electrical and Lighting
As you delve into the realm of electrical and lighting installation for your sunroom, the focus shifts to creating a well-lit and functional space that accommodates your diverse lighting needs while seamlessly integrating with the electrical infrastructure of your home. This phase is instrumental in enhancing the ambiance, convenience, and versatility of your sunroom.
Begin by mapping out the electrical layout, considering the placement of outlets, switches, and fixtures to accommodate your intended use of the sunroom. Whether you envision a cozy reading nook, a vibrant entertainment area, or a tranquil garden room, strategically positioned outlets and switches will facilitate the seamless operation of lighting, electronics, and other electrical devices.
When selecting lighting fixtures, explore a diverse range of options to suit the character and functionality of your sunroom. From recessed LED lights that offer energy efficiency and a sleek aesthetic to decorative pendant lights that add a touch of elegance and personality, the choice of fixtures can significantly impact the overall ambiance and visual appeal of the space.
Furthermore, consider incorporating dimmer switches and smart lighting controls to tailor the lighting intensity and create versatile lighting scenarios to suit various activities and moods. This level of control allows you to transform your sunroom from a brightly illuminated space for social gatherings to a softly lit sanctuary for relaxation, all at the touch of a button.
Additionally, if you plan to incorporate ceiling fans, audiovisual systems, or other electrical amenities in your sunroom, this phase provides an opportunity to seamlessly integrate these elements into the electrical design, ensuring a cohesive and efficient setup.
By meticulously addressing the electrical and lighting requirements, your sunroom evolves into a well-appointed and inviting space, ready to cater to your diverse needs and preferences. With the lighting and electrical infrastructure in place, you’re prepared to move forward to the next phase: insulating and installing HVAC systems to optimize comfort and energy efficiency in your sunroom oasis.
Step 8: Insulation and HVAC
As you venture into the realm of insulation and HVAC installation for your sunroom, the focus shifts to creating a comfortable and energy-efficient environment that can be enjoyed throughout the changing seasons. This phase is pivotal in ensuring thermal comfort, humidity control, and energy efficiency within your sunroom oasis.
Effective insulation is essential to regulate indoor temperatures and minimize heat loss or gain, contributing to a comfortable and consistent climate within your sunroom. Depending on the design and location of your sunroom, options for insulation may include fiberglass batts, spray foam, or rigid foam insulation. Properly insulating the walls, ceiling, and flooring helps maintain a comfortable indoor temperature and reduces energy consumption for heating and cooling.
Moreover, attention to air sealing and moisture control is crucial to prevent drafts, moisture buildup, and the potential for mold or mildew. By ensuring a well-sealed and insulated envelope, you create a controlled environment that promotes comfort and protects your sunroom from the effects of external weather conditions.
Simultaneously, the integration of heating, ventilation, and air conditioning (HVAC) systems plays a critical role in maintaining a comfortable and climate-controlled environment. Depending on your climate and the intended use of your sunroom, options for HVAC may include ductless mini-split systems, radiant floor heating, or integrated HVAC extensions from your existing home system. Properly sizing and positioning the HVAC components ensures efficient and uniform heating and cooling throughout the space.
Furthermore, the incorporation of operable windows, skylights, and ceiling fans can complement the HVAC system, providing natural ventilation and additional thermal comfort options. This combination of mechanical and natural ventilation allows you to customize the airflow and temperature within your sunroom, enhancing comfort and livability.
By meticulously addressing the insulation and HVAC requirements, your sunroom evolves into a well-insulated and climate-controlled retreat, offering a seamless transition between indoor comfort and outdoor beauty. With the insulation and HVAC systems in place, you’re poised to advance to the next phase: adding the finishing touches to the interior of your sunroom oasis.
Read more: How To Turn A Patio Into A Sunroom
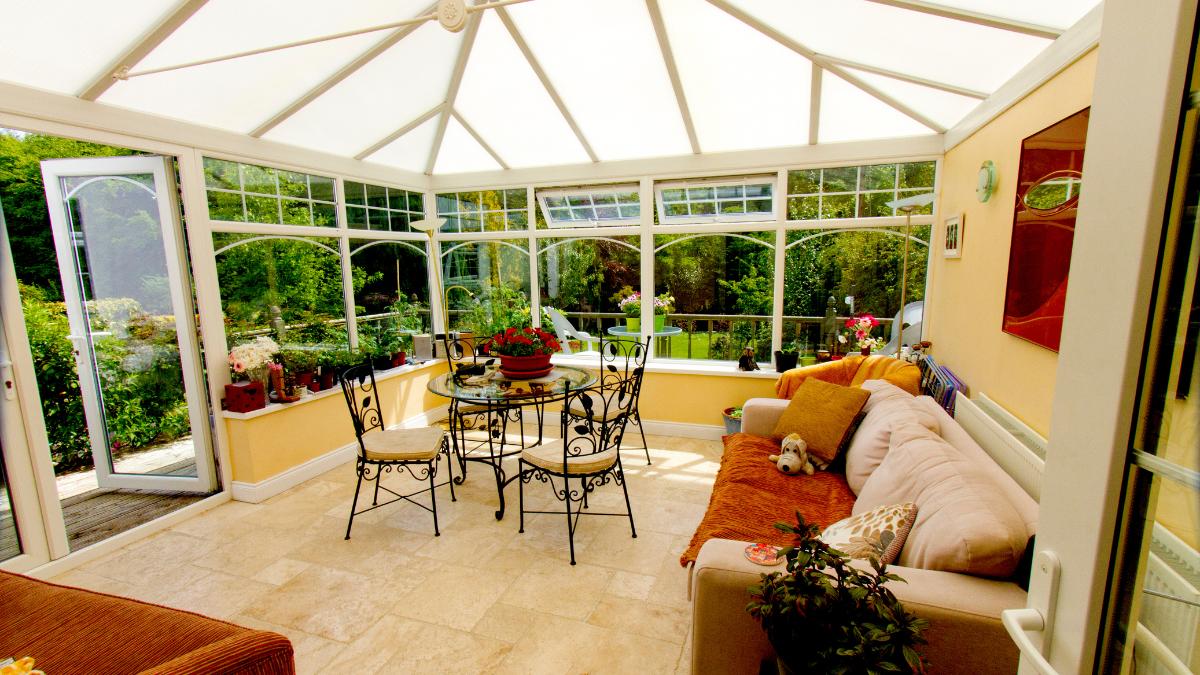
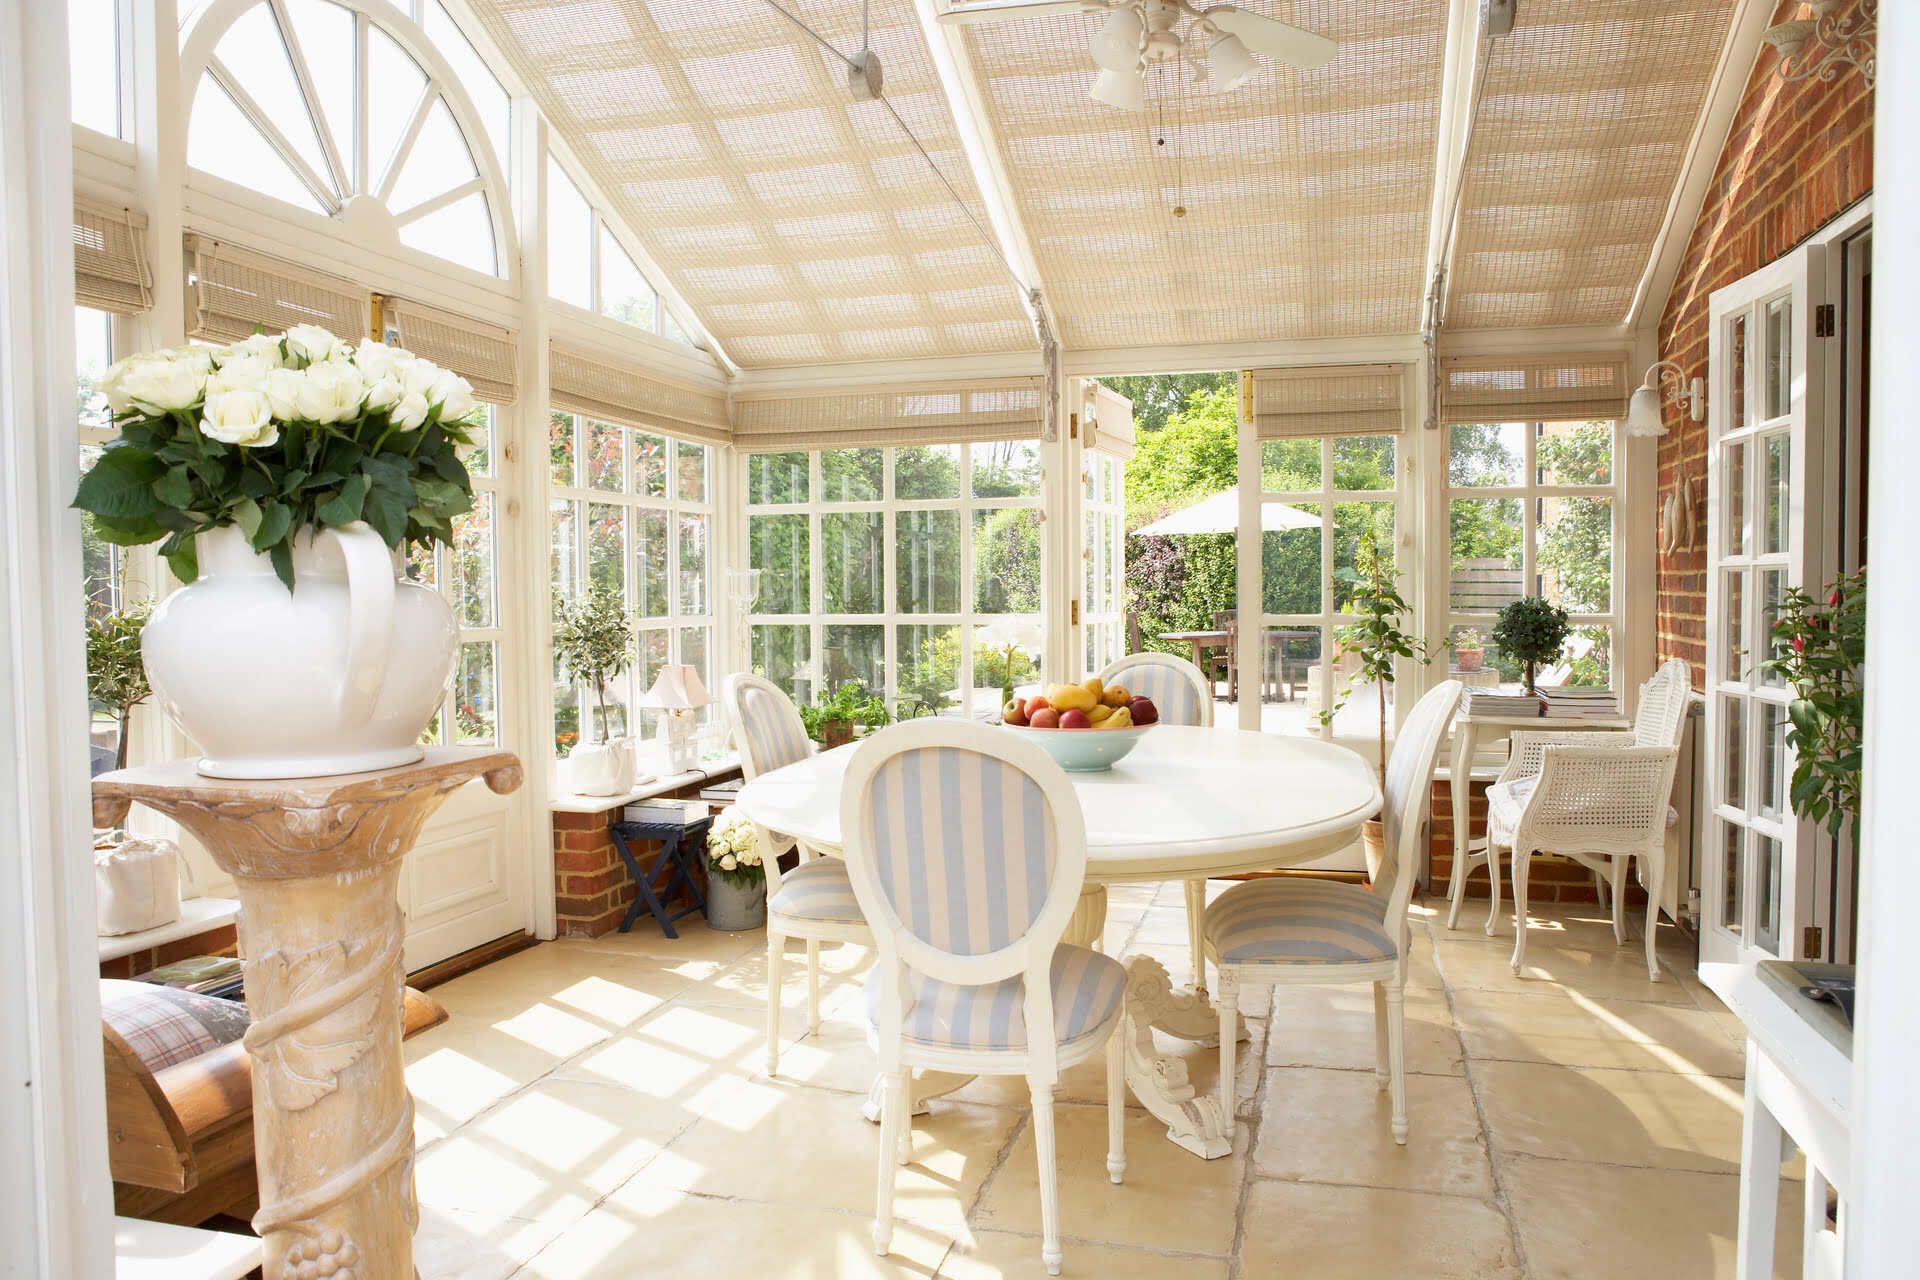
Step 9: Interior Finishing
As you approach the phase of interior finishing for your sunroom, the focus shifts to adding the final touches that will infuse the space with personality, comfort, and style. This phase provides an opportunity to transform your sunroom into a welcoming and visually captivating retreat that reflects your unique taste and complements the overall design of your home.
Begin by selecting the interior finishes that align with the desired ambiance of your sunroom. Consider options such as paint colors, trim details, and ceiling treatments that harmonize with the architectural style and color palette of the space. Whether you opt for crisp, neutral tones that evoke a sense of serenity or vibrant hues that energize the atmosphere, the choice of paint and finishes sets the tone for the entire room.
Furthermore, explore flooring options that not only enhance the aesthetic appeal of your sunroom but also offer durability and ease of maintenance. Whether you prefer the timeless charm of hardwood, the versatility of luxury vinyl planks, or the natural beauty of stone or tile, the flooring should complement the design scheme while providing a comfortable and functional surface for your sunroom activities.
Consider incorporating decorative elements such as window treatments, area rugs, and indoor plants to add texture, visual interest, and a touch of greenery to the space. These details can soften the architectural lines, introduce warmth, and create a cozy, inviting atmosphere within your sunroom.
Moreover, the selection of furniture and furnishings is pivotal in creating a comfortable and functional living space. Whether you envision a cozy seating area for relaxation, a dining nook for intimate gatherings, or versatile furnishings that accommodate various activities, the arrangement and style of furniture should cater to your lifestyle and enhance the usability of the sunroom.
By thoughtfully curating the interior finishes and furnishings, your sunroom evolves into a captivating and inviting retreat, ready to accommodate your diverse needs and provide a seamless connection to the outdoors. With the interior finishing in place, you’re prepared to progress to the final phase: adding the exterior finishing touches to complete your sunroom oasis.
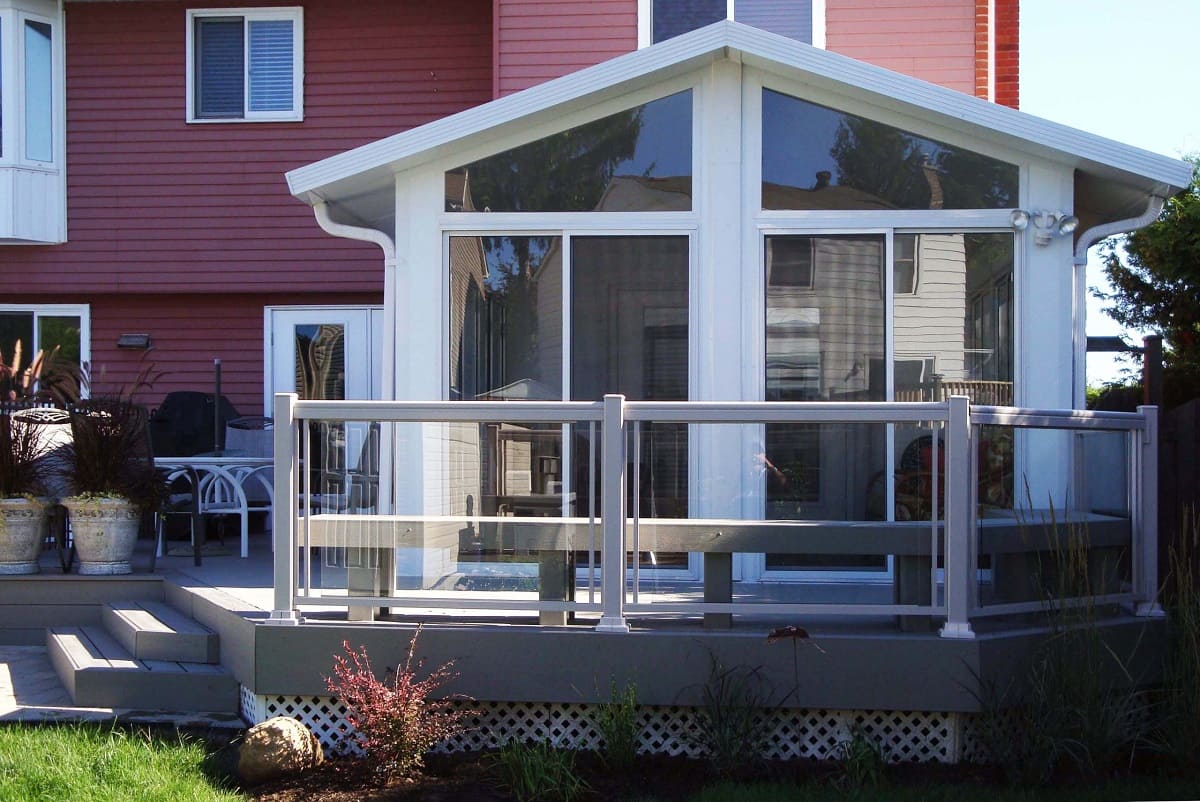
Step 10: Exterior Finishing
As you approach the final phase of exterior finishing for your sunroom, the focus shifts to enhancing the visual appeal, weather resistance, and seamless integration of your sunroom with the surrounding outdoor space. This phase provides an opportunity to elevate the exterior aesthetics and functionality of your sunroom, creating a harmonious transition between your indoor sanctuary and the natural beauty beyond.
Begin by evaluating the exterior materials and finishes that will complement the architectural style of your home while withstanding the elements. Whether you opt for siding, stucco, stone veneer, or a combination of materials, the exterior finish should blend seamlessly with the existing facade of your home and contribute to the overall curb appeal.
Furthermore, attention to details such as trim, moldings, and architectural accents can add character and visual interest to the exterior of your sunroom. These elements provide an opportunity to customize the design, create focal points, and infuse the exterior with charm and personality.
Consider the incorporation of outdoor lighting fixtures, pathways, and landscaping elements to accentuate the beauty of your sunroom and extend its functionality into the outdoor environment. Strategically placed lighting not only enhances the nighttime ambiance but also adds a layer of security and safety to the exterior surroundings.
Moreover, the addition of outdoor amenities such as a patio, deck, or pergola can expand the functionality of your sunroom, providing an inviting outdoor retreat that seamlessly connects with the indoor living space. These exterior features create a cohesive and versatile environment for relaxation, entertainment, and enjoyment of the natural surroundings.
By meticulously addressing the exterior finishing touches, your sunroom emerges as a captivating and seamlessly integrated extension of your home, offering a tranquil retreat that celebrates the beauty of indoor-outdoor living. With the exterior finishing in place, your sunroom oasis is ready to be enjoyed and admired, representing the culmination of meticulous planning, craftsmanship, and creativity.
Congratulations on completing the journey of building your dream sunroom. May it bring you years of joy, relaxation, and cherished moments in the embrace of natural light and outdoor beauty.
Conclusion
Congratulations on reaching the completion of your sunroom construction journey! You have embarked on a transformative process that has not only expanded your living space but has also enriched your home with a sanctuary that celebrates the beauty of indoor-outdoor living. Building a sunroom is a testament to your vision, creativity, and commitment to enhancing the comfort and livability of your home.
Throughout this comprehensive guide, you have navigated through the meticulous planning, precise construction, and thoughtful design considerations that culminate in the creation of a sunroom oasis. From obtaining permits and selecting the perfect location to framing the structure and adding the finishing touches, you have demonstrated dedication and attention to detail in every phase of the construction process.
Your sunroom now stands as a luminous retreat, capturing the essence of natural light, panoramic views, and a seamless connection to the outdoors. It is a space where you can unwind, entertain, and immerse yourself in the beauty of every season, all within the comfort of your home.
As you bask in the tranquility and versatility of your sunroom, may it become a cherished haven where you create lasting memories, find inspiration, and savor the simple joys of life. Whether it’s a quiet morning coffee, a lively gathering with loved ones, or a peaceful retreat with a good book, your sunroom is a reflection of your lifestyle and a testament to the art of blending indoor comfort with outdoor splendor.
As you enjoy the fruits of your labor, may your sunroom serve as a constant reminder of the transformative power of home improvement projects and the joy of creating a space that resonates with your unique style and preferences. Your dedication to crafting a sunroom that embodies comfort, beauty, and functionality is a testament to the value of thoughtful design and construction in enhancing the quality of your living environment.
Thank you for embarking on this rewarding journey of creating your dream sunroom. May it bring you endless moments of relaxation, inspiration, and connection with the natural world, enriching your home and your life for years to come.
Frequently Asked Questions about How To Build A Sunroom
Was this page helpful?
At Storables.com, we guarantee accurate and reliable information. Our content, validated by Expert Board Contributors, is crafted following stringent Editorial Policies. We're committed to providing you with well-researched, expert-backed insights for all your informational needs.


0 thoughts on “How To Build A Sunroom”