Articles
How To Frame A Roof
Modified: October 18, 2024
Learn how to frame a roof with our informative articles. Get step-by-step instructions and expert tips for a successful roof framing project.
(Many of the links in this article redirect to a specific reviewed product. Your purchase of these products through affiliate links helps to generate commission for Storables.com, at no extra cost. Learn more)
Introduction
Welcome to the fascinating world of roof framing! Whether you are a DIY enthusiast or a professional contractor, knowing how to frame a roof is a valuable skill that can come in handy for various construction projects. From building a new home to adding an extension or even constructing a shed, understanding the principles of roof framing is crucial for ensuring a structurally sound and visually appealing result.
In this comprehensive guide, we will take you through the step-by-step process of framing a roof. From planning and preparation to installing the final roof covering, you will gain the knowledge and confidence to tackle your own roof framing projects.
Before we dive into the practical aspects of roof framing, it’s essential to emphasize the importance of safety. Roof work can be hazardous, so it’s crucial to follow proper safety precautions and use appropriate protective gear. If you are unsure or uncomfortable with any aspect of the process, it’s always wise to consult with a professional.
Now, let’s get started with the planning and preparation phase of framing your roof.
Key Takeaways:
- Proper planning, precise measurements, and diligent installation are crucial for a successful roof framing project. Always prioritize safety and consult professionals when in doubt to ensure a structurally sound and aesthetically appealing roof.
- Ventilation and insulation play vital roles in maintaining an energy-efficient and comfortable roof space. Properly installed ventilation and insulation help regulate temperature, control moisture, and reduce energy consumption for heating and cooling.
Read more: How To Frame Porch Roof
Planning and Preparation
Before you begin framing a roof, careful planning and preparation are essential for a successful project. Taking the time to gather the necessary tools and materials, understanding the project’s requirements, and considering any permits or building codes will set you up for a smooth construction process.
The first step in planning is to determine the design and style of the roof you want to build. Consider factors such as the architectural style of the building, local climate conditions, and any specific requirements or preferences you may have. This will help you decide on the roof pitch, shape, and overall appearance.
Next, it’s important to ensure that your project complies with local building codes and regulations. Research the specific requirements for your area, including any permits or inspections that may be necessary. Consulting with an architect or building inspector can provide valuable guidance in this regard.
Once you have a clear idea of the design and have confirmed the compliance with building codes, it’s time to gather the necessary tools and materials. Common tools for roof framing include a framing square, circular saw, power drill, hammer, level, tape measure, and a variety of hand tools. Ensure that you have all the required tools in good working condition before you begin.
In terms of materials, you will need lumber for the framing components, such as rafters, joists, and ridge boards. The specific requirements will depend on your project and the design of the roof. It’s crucial to use high-quality lumber that is suitable for structural purposes and has been properly treated to withstand the elements.
Before you start purchasing materials, develop a detailed material list based on your roof design and measurements. This will prevent unnecessary delays and additional trips to the hardware store during the construction process. Don’t forget to include additional materials such as roofing underlayment, roof covering, flashing, and any required insulation and ventilation components.
Lastly, allocate sufficient time and manpower for the project. Roof framing is a labor-intensive task, and it’s important to have enough hands on deck to ensure efficient progress. Consider enlisting the help of friends or family members or hiring experienced laborers if needed.
With thorough planning and preparation, you are now ready to move on to the next phase: calculating the roof pitch and size.
Calculating Roof Pitch and Size
When framing a roof, one of the first steps is to calculate the roof pitch and size. The roof pitch refers to the steepness or slope of the roof, while the roof size determines the overall dimensions and surface area of the roof.
The roof pitch is typically specified as a ratio or angle and is essential for determining the appropriate dimensions and angles of the roof framing components. There are a few methods you can use to calculate the roof pitch:
- The Ratio Method: This method involves determining the rise and run of the roof. The rise is the vertical distance from the top of the ridge to the highest point of the roof, while the run is the horizontal distance from the outside edge of the wall to the top of the ridge. The roof pitch ratio is then calculated by dividing the rise by the run. For example, if the rise is 8 feet and the run is 12 feet, the roof pitch ratio would be 8:12 or 8/12.
- The Angle Method: This method involves using a protractor or angle-finding tool to measure the angle of the roof slope directly. The angle is typically presented in degrees, such as 30 degrees, 45 degrees, etc.
- The Pitch Board Method: This method involves creating a pitch board, which is a simple wooden board with markings for various roof pitches. By aligning the board with the roof slope, you can visually determine the roof pitch.
Once you have calculated the roof pitch, you can determine the roof size by measuring the length and width of the building’s exterior walls. Add any desired overhangs or eaves to these measurements to get the final dimensions of the roof surface area.
Calculating the roof pitch and size is crucial as it directly influences the length, angle, and spacing of the roof framing components, such as the rafters and joists. Having accurate measurements will ensure a precise and structurally sound roof frame.
It’s important to note that different roof pitch angles may require different building techniques, materials, and considerations. Steeper roof pitches may require additional bracing or special installation methods, while flat or low-slope roofs may necessitate different types of roofing materials or drainage systems.
In the next section, we will delve into determining the lengths of the rafters, a crucial step in framing a roof.
Determining Rafter Lengths
Once you have calculated the roof pitch and size, the next step in framing a roof is determining the lengths of the rafters. Rafters are the sloping structural members that form the framework of the roof and support the roof covering.
To determine the length of the rafters, you will need to consider the span, overhang, and pitch of the roof. The span refers to the distance between the exterior walls that the rafters will span across. The overhang is the extension of the rafters beyond the exterior walls, providing protection and a visually pleasing eave effect. The pitch is the slope or steepness of the roof.
There are several methods you can use to calculate rafter lengths:
- The Pythagorean Theorem Method: This method involves using the Pythagorean theorem (a² + b² = c²) to calculate the rafter length. The horizontal distance (a) is the span of the roof, the vertical distance (b) is the rise of the roof (obtained from the roof pitch measurement), and the rafter length (c) is calculated using the theorem. This method works well for roofs with a consistent pitch.
- Online Rafter Length Calculator: Various online tools and calculators are available that can simplify the process of determining rafter lengths. These calculators typically require you to input the span, pitch, and desired overhang, and they will provide you with the accurate rafter lengths.
- Manual Calculation: For those who prefer a more hands-on approach, manual calculations can be done using trigonometric functions. By using sine, cosine, or tangent functions, you can calculate the rafter length based on the roof pitch and span. However, this method requires a strong understanding of trigonometry.
Remember to account for any additional roof framing components such as ridge boards, ceiling joists, or collar ties, which may affect the lengths of the rafters. These components provide additional support and stability to the roof structure.
Once you have determined the rafter lengths, it’s important to cut each rafter accurately to ensure a precise fit and a strong roof framework. Use a circular saw or a handsaw to make clean, straight cuts, and double-check your measurements before making any cuts.
Now that you have calculated the rafter lengths, you are ready to move on to the next phase: laying out and cutting the rafters.
Laying Out and Cutting Rafters
After determining the lengths of the rafters, the next step in framing a roof is laying out and cutting the rafters. This process involves marking and preparing the individual rafters for installation.
Before you begin, it’s important to gather all the necessary tools and materials. You will need a framing square, a measuring tape, a pencil, a circular saw or handsaw, and safety equipment such as safety glasses and work gloves.
To lay out the rafters, start by marking the top plate of the wall at the end where the first rafter will be installed. Measure the distance in from the end of the wall equal to the length of the rafter overhang, and make a mark. Repeat this process for the other end of the wall.
Next, using a framing square, position the long side (blade) of the square along the top plate and align the short side (tongue) with the mark you made for the rafter overhang. This will give you the proper angle for the bird’s mouth cut, which is the notch in the rafter that sits on top of the wall plate.
Mark the position of the bird’s mouth cut on the rafter by tracing the outline of the framing square onto the rafter. Additionally, mark the plumb cut at the top end of the rafter, which will determine the angle at which the rafter meets the ridge board or ridge beam.
Once you have marked the bird’s mouth and plumb cut, you can proceed to cut the rafters. Use a circular saw or handsaw to carefully follow the marked lines and make clean, precise cuts. Take caution to ensure your cuts are accurate, as any inaccuracies can affect the overall stability and integrity of the roof frame.
Continue this process for each rafter, laying them out and cutting them according to the specified measurements and angles. As you progress, double-check your measurements and cuts to ensure consistently accurate results.
It’s also important to mark each rafter with its corresponding position along the roof span. This will help you easily identify where each rafter will be installed during the construction process.
Once all the rafters have been laid out and cut, you are ready to move on to the next step: installing the ridge board and ceiling joists.
Remember to always prioritize safety during this process by wearing appropriate protective gear and using caution when operating power tools.
Read more: How To Frame A Shed Dormer Roof
Installing Ridge Board and Ceiling Joists
After laying out and cutting the rafters, the next step in framing a roof is installing the ridge board and ceiling joists. These components play a critical role in providing structural support and stability to the roof.
The ridge board is a horizontal beam that runs along the peak of the roof, connecting the upper ends of the rafters. It serves as a central point of support and helps distribute the weight of the roof evenly. The length and size of the ridge board will depend on the dimensions and design of the roof.
To install the ridge board, place it on edge along the top of the rafters. Make sure it aligns properly with the peak of the roof and extends evenly on both sides. Use joist hangers or framing nails to securely attach the ridge board to each rafter.
Once the ridge board is in place, you can proceed to install the ceiling joists. Ceiling joists are horizontal beams that run perpendicular to the rafters and provide support for the ceiling and any additional loads such as insulation or drywall. The spacing and size of the ceiling joists will depend on the span of the roof and any specific building codes or regulations.
To install the ceiling joists, measure and cut each joist to the appropriate length. Position the joists across the top of the rafters, evenly spaced and parallel to each other. Securely attach the joists to the rafters using joist hangers or framing nails.
It’s important to ensure that the ridge board and ceiling joists are level and properly aligned. Use a level and straight edge to check for any deviations and make adjustments as needed before securing each component.
Adding collar ties or rafter ties between opposing rafters can provide additional strength and stability to the roof frame. These horizontal beams are typically installed higher up on the rafters and help prevent the roof from spreading or sagging.
As you progress with the installation of the ridge board and ceiling joists, double-check your measurements and connections to ensure they are secure and properly aligned. This will help ensure a solid and reliably framed roof structure.
With the ridge board and ceiling joists in place, you are now ready to move on to the next step: installing the rafters.
Remember to prioritize safety during this process by using appropriate protective equipment and following proper construction practices.
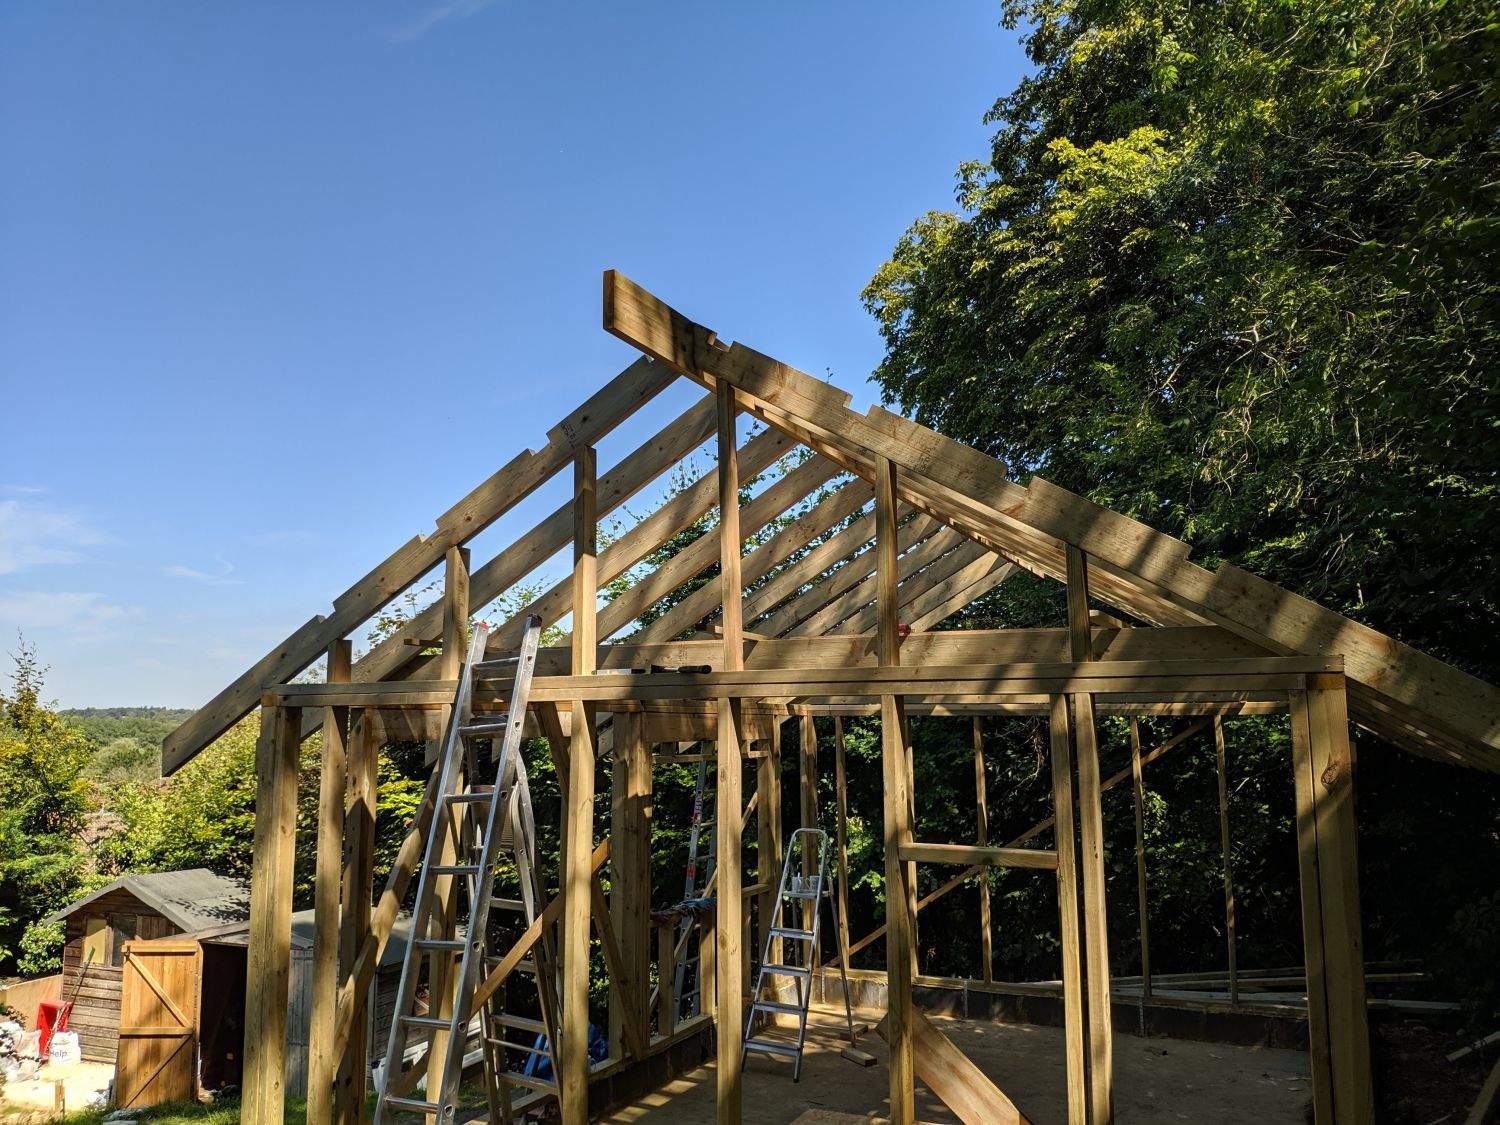
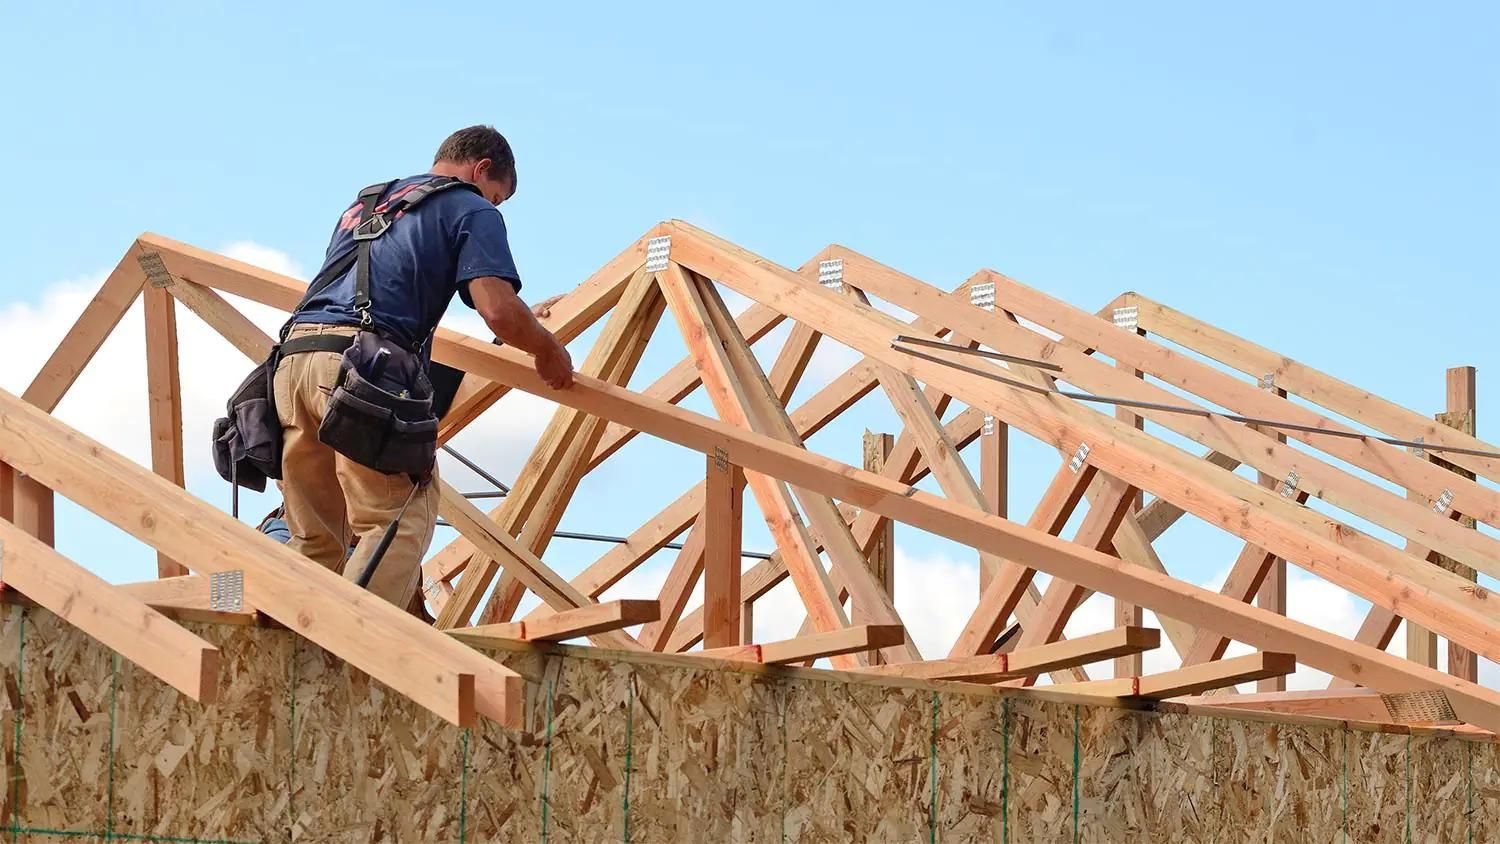
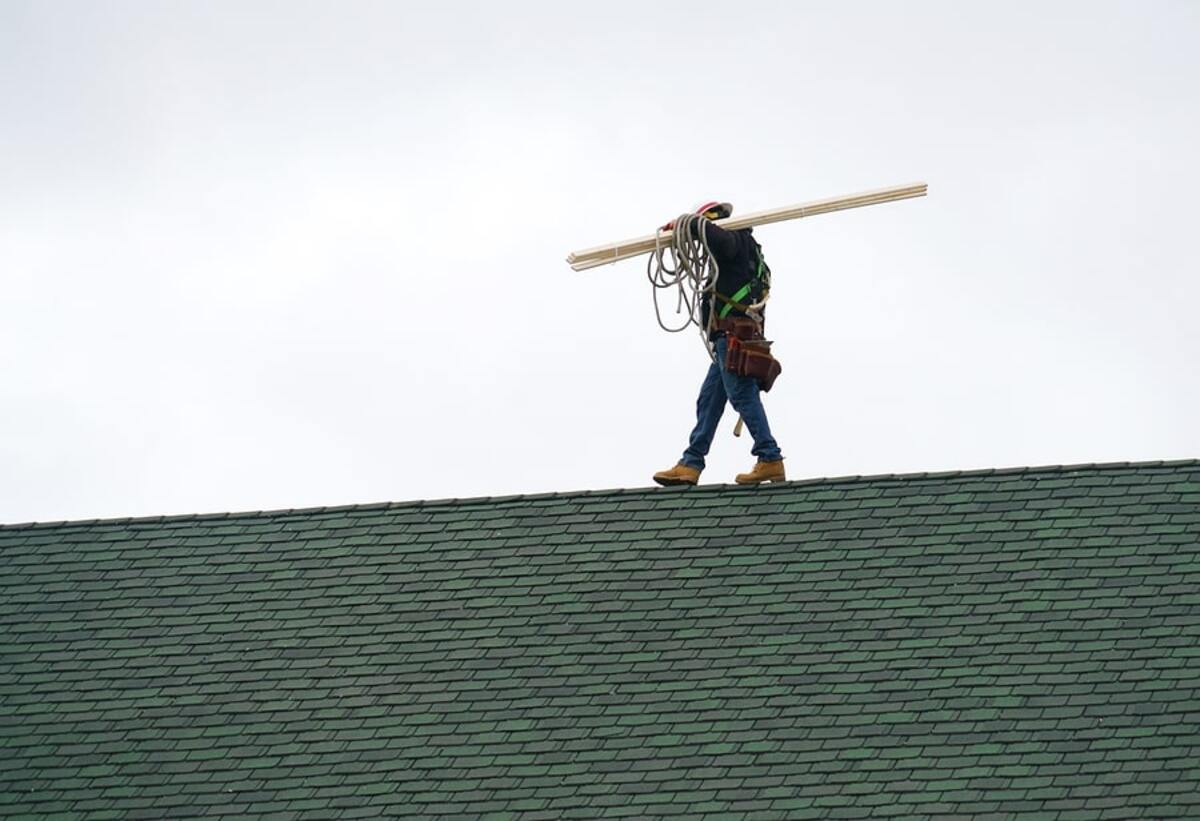
Installing Rafters
With the ridge board and ceiling joists in position, it’s time to install the rafters – the sloping structural members that form the framework of the roof.
The process of installing rafters involves carefully positioning and securing each rafter onto the wall plates and connecting them to the ridge board and ceiling joists.
Begin by positioning the first rafter at one end of the wall, ensuring it aligns with the layout marks made during the previous steps. The bird’s mouth cut should rest securely on the wall plate, while the top end of the rafter should meet the ridge board.
Secure the first rafter in place using nails or structural screws. For added stability, consider using metal rafter connectors or hurricane straps to reinforce the connection points between the rafters and other framing members.
Next, continue installing the remaining rafters at regular intervals along the wall, following the layout marks and maintaining a consistent spacing. Double-check the alignment and plumbness of each rafter as you go, using a level to ensure they are correctly positioned.
If your roof design includes a hip or valley, special care must be taken when installing rafters in these areas. Hip rafters are diagonal rafters that extend from the corners of the building to the ridge, while valley rafters run along the intersection of two sloping roof sections. Consult a structural engineer or experienced contractor for guidance on properly installing hip and valley rafters.
As you install each rafter, it’s important to secure them to the ridge board and ceiling joists. Secure the lower end of each rafter to the wall plate using metal connectors or framing nails, ensuring a secure and stable connection.
Throughout the installation process, regularly check the alignment and symmetry of the rafters to ensure a balanced and level roof frame. Properly aligned rafters will contribute to the overall strength and stability of the roof structure.
When all the rafters are installed, double-check for any gaps or inconsistencies between the rafters and the ridge board, wall plates, and other framing components. Make any necessary adjustments to ensure a tight and secure fit.
Remember to follow local building codes and regulations regarding the placement and installation of rafters. These codes are in place to ensure the safety and structural integrity of the roof.
With the rafters securely in place, you are now ready to move on to the next step: attaching the roof sheathing.
Always prioritize safety during the installation process by wearing appropriate protective gear and using caution when working at height.
When framing a roof, make sure to accurately measure and cut the rafters to ensure a proper fit and support for the roof structure. Double check all measurements before making any cuts.
Attaching Roof Sheathing
After installing the rafters, the next step in framing a roof is attaching the roof sheathing. Roof sheathing refers to the panels or boards that cover the rafters and provide a solid base for the roof covering material.
Roof sheathing comes in various materials, including plywood or oriented strand board (OSB). The thickness and specific type of sheathing will depend on local building codes, design considerations, and personal preferences.
Before beginning the sheathing installation, it’s important to prepare the roof surface. Ensure that the rafters are clean, free of debris, and properly aligned. Check for any protruding nails or sharp edges that could damage the sheathing panels.
Start by measuring and cutting the sheathing panels to fit the roof dimensions. Begin at one end of the roof and work your way across, overlapping the panels as necessary to create a continuous, solid surface.
Position the first panel on the lowest edge of the roof, with one edge flush against the exterior wall. Leave a small gap between the edge of the panel and the wall to allow for expansion. Use galvanized roofing nails to secure the panel to the rafters, placing nails approximately 6 inches apart along the edges and 12 inches apart in the field of the panel.
Continue installing the remaining sheathing panels, ensuring that each panel is securely attached to the rafters. Stagger the seams between the panels for added strength and stability, and use construction adhesive or adhesive-backed flashing strips to seal the gaps between the panels.
It’s important to maintain a consistent nailing pattern and ensure that the sheathing is flush with the edges of the rafters. This will contribute to a level and even roof surface.
As you work your way up the roof, make any necessary adjustments, such as cutting openings for vents or skylights. Use a jigsaw or circular saw with a fine-toothed blade to make precise cuts, following the layout and measurements carefully.
Once all the sheathing panels are installed, inspect the roof surface for any loose or uneven sections. Tighten any loose nails or screws and make any necessary repairs to ensure a solid and secure sheathing base.
Attaching the roof sheathing is a critical step in the roof framing process, as it provides the foundation for the roof covering material. A properly installed and secured sheathing will contribute to the overall structural integrity and longevity of the roof.
With the roof sheathing securely in place, you are now ready to move on to the next step: adding the roofing underlayment.
Remember to prioritize safety throughout the installation process by wearing appropriate protective gear and using caution when working at heights.
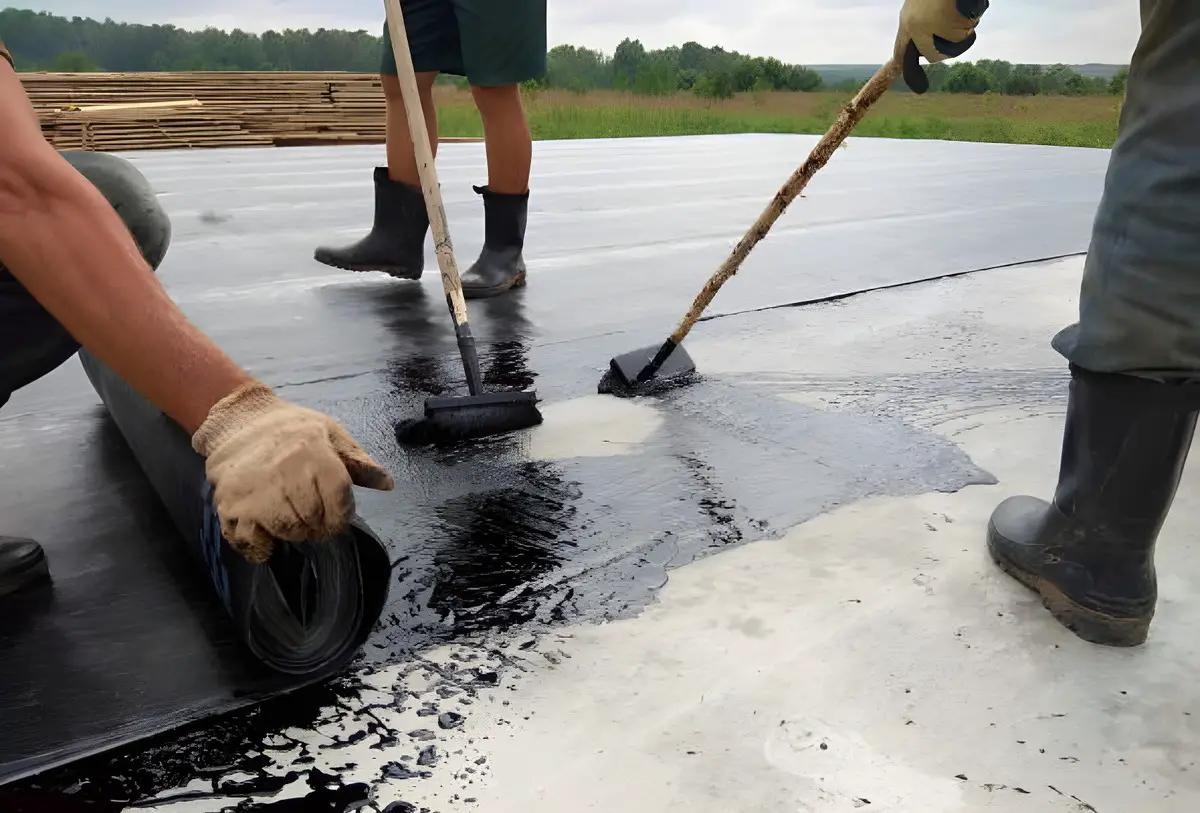
Adding Roofing Underlayment
After attaching the roof sheathing, the next step in framing a roof is adding the roofing underlayment. Roofing underlayment is a protective layer that is installed over the sheathing and acts as an additional barrier against moisture, wind, and other elements.
There are different types of roofing underlayment available, including felt paper (also known as roofing felt) and synthetic underlayment. Felt paper is a traditional option that provides good protection, while synthetic underlayment offers enhanced durability and performance.
To begin, unroll the underlayment along the bottom edge of the roof, starting at one end. Ensure that the underlayment extends beyond the eaves and overlaps the roof sheathing. Leave a small gap between the edge of the underlayment and the fascia board to allow for water runoff.
Secure the underlayment to the roof sheathing using roofing nails or staples, placing them according to the specifications provided by the manufacturer. Typically, nails or staples are placed every 6 to 12 inches along the edges and 18 to 24 inches apart in the field of the underlayment.
Overlap each subsequent row of underlayment over the previous row, typically by about six inches, to ensure proper water drainage. This will create a shingling effect that prevents water from penetrating between the underlayment layers.
As you progress up the roof, continue unrolling and securing the underlayment until the entire roof surface is covered. Trim off any excess underlayment as needed.
Pay attention to areas such as valleys, ridges, and penetrations, as they require special attention. Properly seal these areas with additional underlayment or flashing to ensure they are watertight and protected from potential leaks.
Roofing underlayment serves as a secondary layer of defense against moisture, providing an added level of protection beneath the final roof covering material. It acts as a safeguard against leaks, ice dams, and wind-driven rain.
Once the underlayment is installed, inspect the roof surface for any gaps, tears, or inconsistencies. Make any necessary repairs or adjustments to ensure a complete underlayment coverage that will effectively protect your roof.
With the underlayment in place, you are now ready to move on to the next step: installing the roof covering material.
Remember to prioritize safety during the installation process, by wearing appropriate protective gear and using caution when working at heights.
Read more: How Do You Frame A Gable Roof?
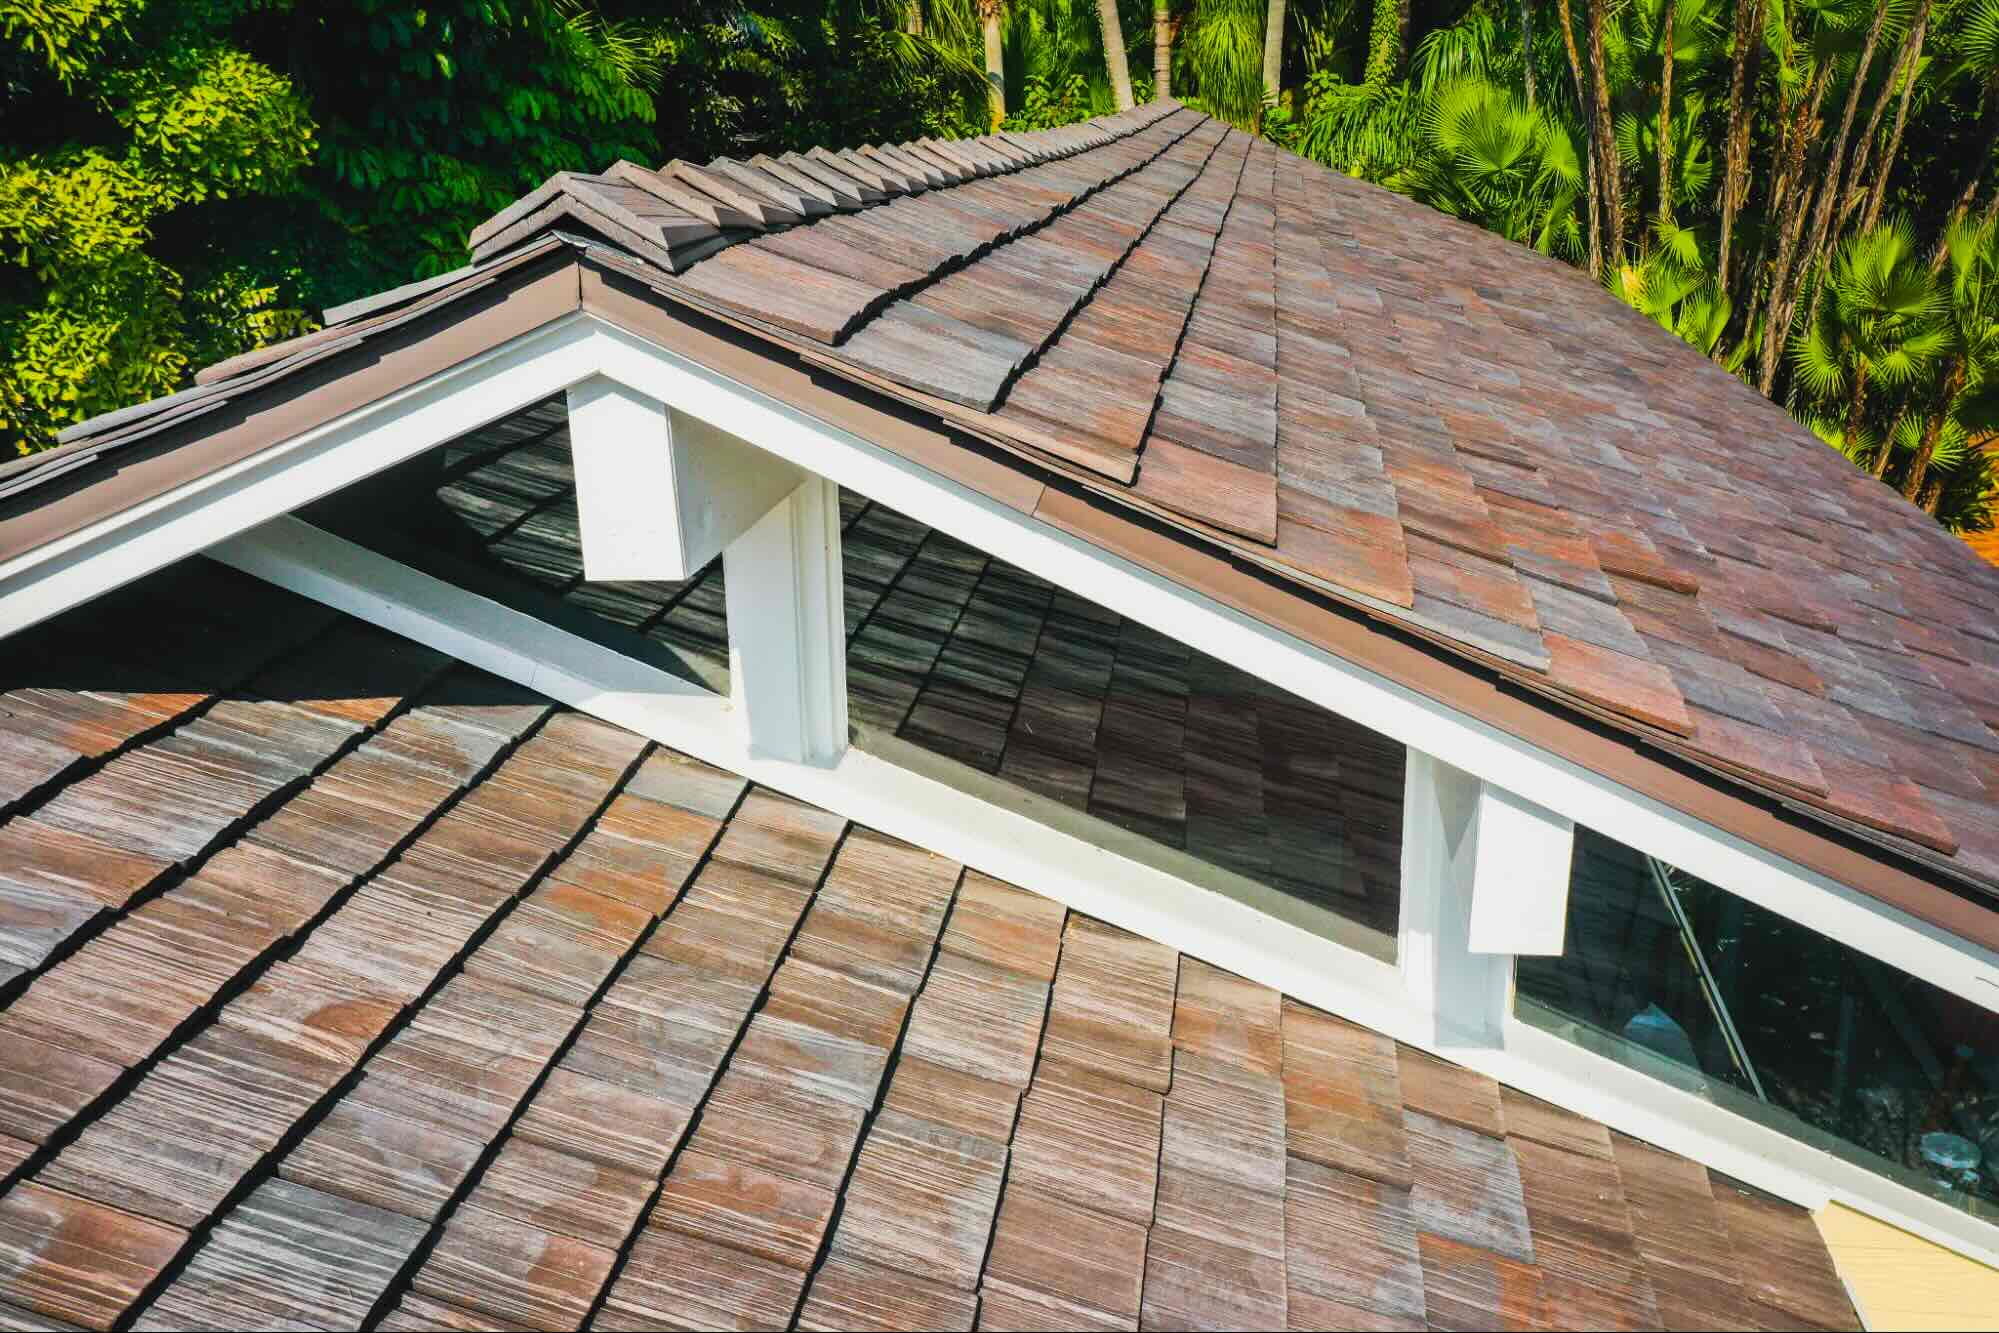
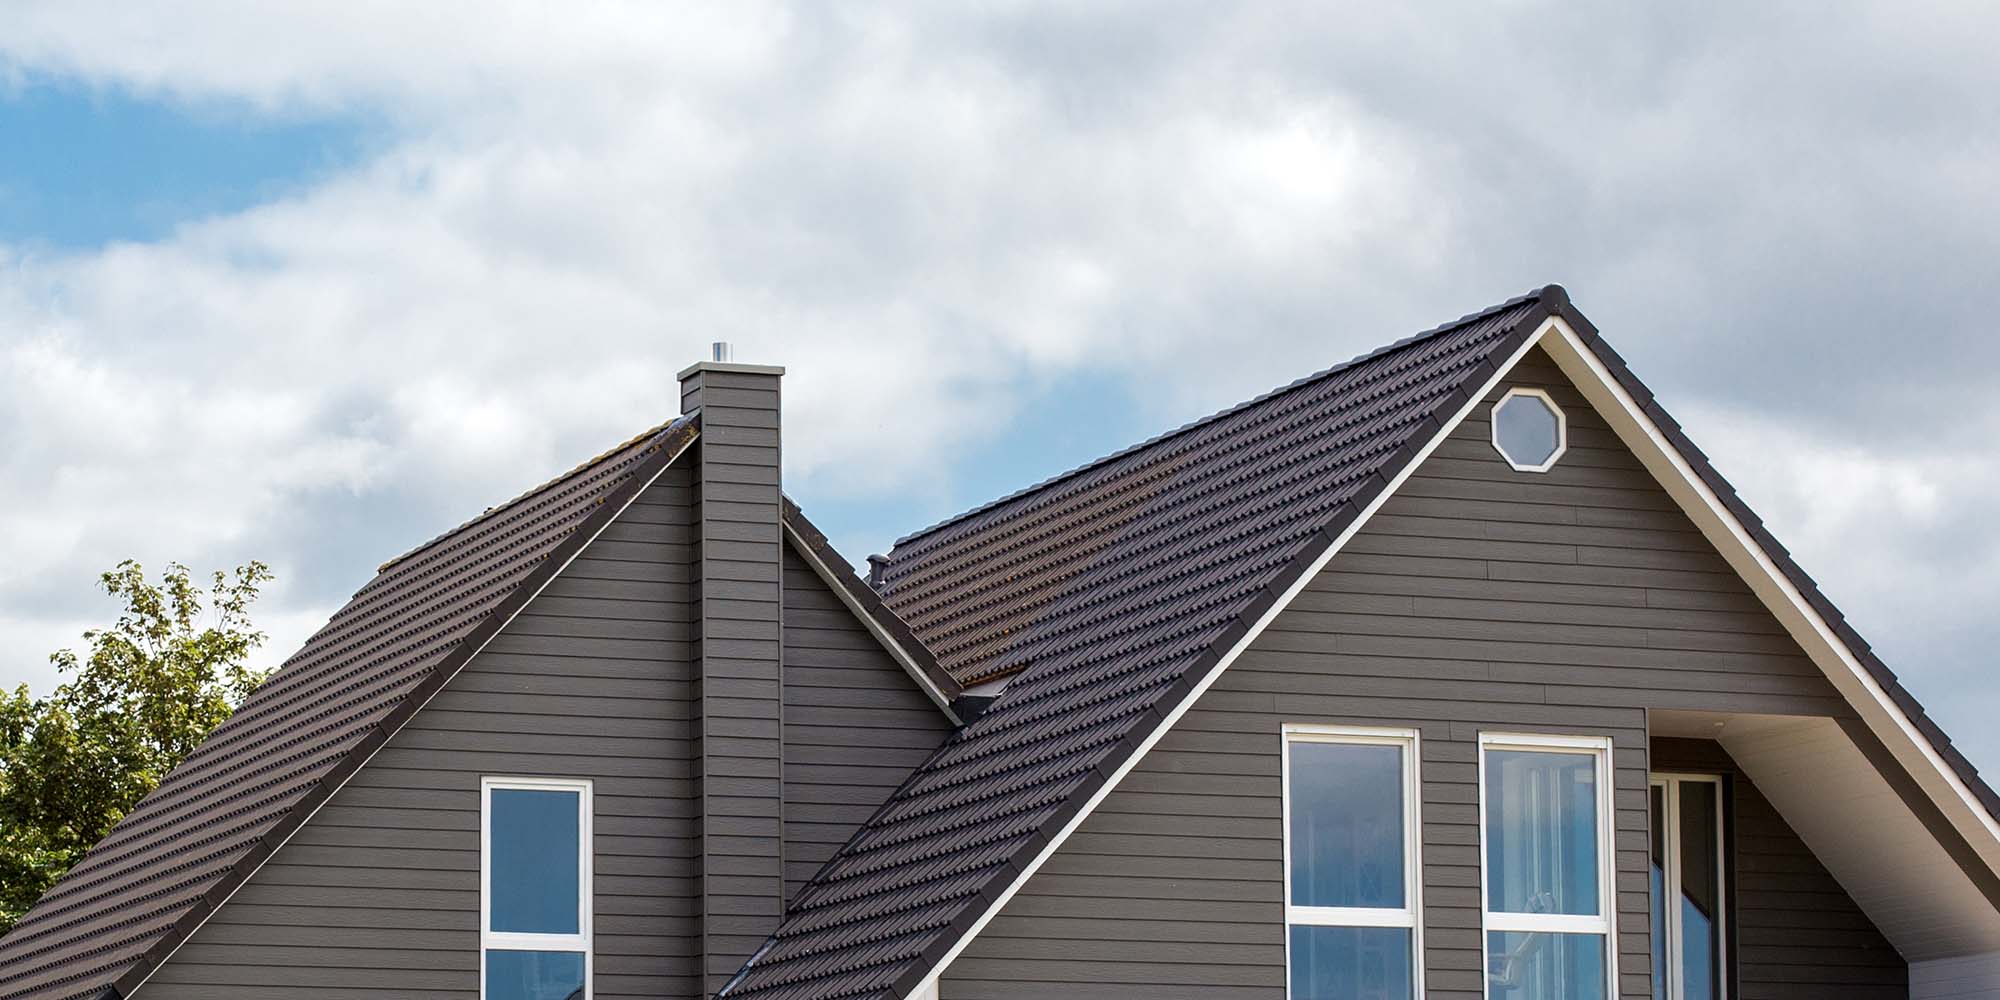
Installing Roof Covering
After adding the roofing underlayment, the next crucial step in framing a roof is installing the roof covering material. The roof covering not only provides the aesthetic appearance of the roof but also serves as the primary defense against weather elements such as rain, snow, and wind.
There are various types of roof covering materials available, including asphalt shingles, metal roofing, clay or concrete tiles, and wood shingles or shakes. The choice of material will depend on factors such as budget, climate, architectural style, and personal preferences.
To install the roof covering, start at the bottom edge of the roof and work your way upward. Begin by applying the starter strip, a specialized strip of roofing material that provides a secure foundation for the first row of shingles or tiles.
Place the first row of shingles or tiles along the starter strip, ensuring they are straight and aligned with the roof edge. Follow the manufacturer’s instructions for proper overlapping and spacing, as these may vary depending on the specific roofing material being used.
Secure the shingles or tiles to the roof sheathing using roofing nails or screws, placing them as recommended by the manufacturer. Take care to penetrate the roofing material without damaging the underlying layers or compromising the waterproofing properties.
As you continue installing the roof covering, work row by row, ensuring proper alignment, overlapping, and maintaining consistent spacing. Trim shingles or tiles as needed to fit around roof features such as vents, chimneys, or skylights, using appropriate cutting tools.
Pay close attention to areas such as valleys and ridges, as these require special attention. Install specialized flashing or ridge caps to provide extra protection and ensure proper water runoff.
Throughout the installation process, regularly step back and inspect your work to ensure a uniform and visually appealing roof. Check for any loose or improperly secured shingles or tiles and make any necessary adjustments or repairs.
Proper installation of the roof covering is essential for its longevity and durability. It not only provides protection against the elements but also enhances the overall aesthetics of the building.
Once the roof covering is installed, perform a final inspection to ensure that all areas are properly covered and that the roof is watertight. This will provide peace of mind and ensure the long-term performance of your roof.
With the roof covering successfully installed, you have now completed the major steps in framing a roof. The next steps may involve framing roof openings, adding ventilation and insulation, and completing any additional finishing touches.
Remember to prioritize safety during the installation process by wearing appropriate protective gear and using caution when working at heights. Consult with professionals if you are unsure about any aspect of the installation.
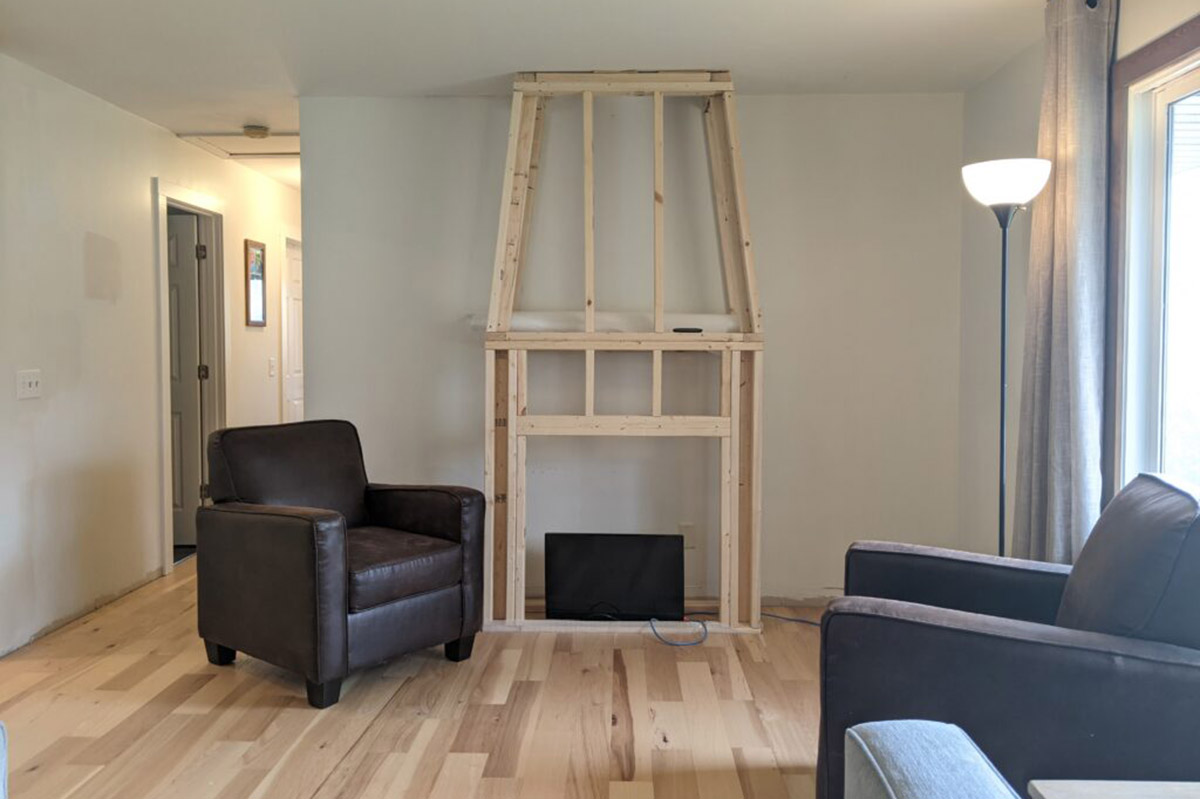
Framing Roof Openings
When framing a roof, one important step is framing roof openings such as skylights, chimneys, or roof vents. These openings require careful planning and precise framing to ensure proper support, weatherproofing, and integration with the overall roof structure.
Before beginning the framing process, it’s essential to consult the manufacturer’s instructions for the specific opening you are framing. Different types of openings may have unique requirements and specifications regarding size, clearance, and framing methods.
To frame a roof opening, start by accurately measuring the dimensions of the opening and transferring those measurements onto the roof sheathing. Use a saw or reciprocating saw to carefully cut out the marked area, taking care to maintain straight and precise cuts.
Install framing around the perimeter of the opening according to the manufacturer’s guidelines. This framing provides structural support and helps create a weatherproof barrier. Use pressure-treated lumber or other suitable materials that are resistant to moisture and rot.
Next, install headers across the top of the opening to distribute the load and provide additional support for the roof structure. The size and type of header will depend on the specific requirements of the opening and local building codes.
Ensure that the header is level and properly secured to the surrounding framing members, such as the rafters or ceiling joists. Use appropriate fastening methods, such as nails or screws, to ensure a secure and solid connection.
Once the framing and headers are in place, add additional framing and bracing as necessary to provide further support and stability. This may involve adding cripple studs or jack rafters depending on the specific opening and structural requirements.
Seal and weatherproof the framing around the roof opening using appropriate flashing materials. Flashing helps prevent water infiltration and ensures a watertight seal. Follow manufacturer recommendations and best construction practices to properly install and integrate flashing with the surrounding roof covering.
After framing and weatherproofing the opening, double-check the alignment, levelness, and plumbness of the framing. Make any necessary adjustments to ensure a proper fit and alignment with the overall roof structure.
Completing the framing of roof openings requires attention to detail and adherence to specific guidelines. Properly framed roof openings will ensure a seamless integration, added structural integrity, and weather resistance for the roof.
With the roof openings properly framed, the next steps may involve adding ventilation and insulation to the roof space to optimize energy efficiency and comfort.
Remember to prioritize safety throughout the framing process by wearing protective gear and following best construction practices. Consult with professionals if you are unsure about any aspect of framing roof openings.
Adding Ventilation and Insulation
After framing the roof, an important step in the construction process is adding ventilation and insulation. Proper ventilation and insulation play crucial roles in maintaining a comfortable, energy-efficient, and durable roof space.
Ventilation is essential for regulating temperature, controlling moisture, and promoting air circulation within the roof space. It helps prevent the build-up of condensation, which can lead to mold growth and structural damage. Additionally, adequate ventilation can help extend the lifespan of the roof covering material.
There are two main types of roof ventilation: intake vents and exhaust vents. Intake vents allow fresh air to enter the roof space from outside, while exhaust vents expel stale air and moisture. Proper placement and sizing of these vents help create a balanced airflow system.
Intake vents are typically installed at the soffits or eaves of the roof. They can take the form of vents, such as soffit vents or continuous soffit vents, which are installed along the underside of the roof overhang. These vents allow cool, fresh air to enter the roof space.
Exhaust vents, on the other hand, are typically installed near the peak of the roof. Roof ridge vents, static vents, or turbine vents are common types of exhaust vents that allow warm, moist air to escape from the roof space.
Ensure proper ventilation by calculating the required ventilation area based on the size of the roof space and local building codes. Consult with roofing professionals or building inspectors for specific requirements and recommendations.
In addition to ventilation, insulation is crucial for maintaining energy efficiency and preventing heat loss or gain in the home. Insulation helps regulate indoor temperatures, reduces energy consumption, and enhances overall comfort.
Insulation materials, such as fiberglass batts or rolls, cellulose, or spray foam, are installed in the roof space to create a thermal barrier. The specific type and amount of insulation will depend on climate conditions, local building codes, and personal preferences.
Insulation is typically installed between the rafters or ceiling joists, depending on the style of the roof and construction of the home. Ensure a proper air seal to prevent thermal bridging and air leakage by sealing gaps and using appropriate insulation materials.
Proper ventilation and insulation work together to provide an energy-efficient and comfortable roof space. They help maintain a consistent indoor temperature, prevent moisture-related issues, and reduce energy consumption for heating and cooling.
With ventilation and insulation in place, it’s important to periodically inspect and maintain them to ensure optimal performance. Clean vents, remove debris, and check the condition of insulation to keep them functioning effectively.
Remember to prioritize safety by using appropriate protective gear and following local building codes and manufacturer instructions during the installation of ventilation and insulation.
Once ventilation and insulation are complete, you are one step closer to finalizing the roof construction process.
Conclusion
Congratulations! You have now reached the conclusion of this comprehensive guide on how to frame a roof. By following the step-by-step process outlined in this article, you have gained valuable insights into the planning, preparation, and execution of a roof framing project.
Framing a roof is a complex task that requires careful consideration, attention to detail, and adherence to local building codes and regulations. It is a critical part of the overall construction process, as the roof provides protection and structural integrity to a building.
Throughout the journey of framing a roof, you’ve learned about calculating roof pitch and size, determining rafter lengths, laying out and cutting rafters, installing the ridge board and ceiling joists, attaching roof sheathing, adding roofing underlayment, installing the roof covering, framing roof openings, and incorporating ventilation and insulation.
By incorporating best practices and prioritizing safety, you have taken significant steps towards ensuring a structurally sound and aesthetically appealing roof. Remember, always consult professionals or building inspectors when in doubt or facing challenges during the process.
As you have experienced, proper planning, accurate measurements, precise cuts, and diligent installation are essential elements for a successful roof framing project. It’s also worth noting that each roof framing project is unique, so it’s important to consider individual factors like local climate, architectural style, and personal preferences.
With a well-constructed roof, you can enjoy the benefits of a durable, weather-resistant, and energy-efficient structure. A sound roof not only enhances the aesthetic appeal of a building but also protects it from the elements, keeping it safe and secure for years to come.
We hope that this guide has equipped you with the knowledge and confidence to tackle your own roof framing projects. Happy framing, and may your future roof constructions be successful!
Frequently Asked Questions about How To Frame A Roof
Was this page helpful?
At Storables.com, we guarantee accurate and reliable information. Our content, validated by Expert Board Contributors, is crafted following stringent Editorial Policies. We're committed to providing you with well-researched, expert-backed insights for all your informational needs.


0 thoughts on “How To Frame A Roof”