Home>Renovation & DIY>Tools & Equipment>How To Clean Paint Brushes With Oil-Based Paint
Tools & Equipment
How To Clean Paint Brushes With Oil-Based Paint
Modified: August 16, 2024
Learn how to effectively clean paint brushes used with oil-based paint using the right tools and equipment. Keep your brushes in top condition for your next project.
(Many of the links in this article redirect to a specific reviewed product. Your purchase of these products through affiliate links helps to generate commission for Storables.com, at no extra cost. Learn more)
Introduction
Oil-based paints are known for their durability and rich color, making them a popular choice for many DIY projects and professional applications. However, cleaning paint brushes used with oil-based paint can be a challenging task. Unlike water-based paints, oil-based paints require special care and cleaning techniques to maintain the quality of the brushes. In this guide, we will walk you through the step-by-step process of effectively cleaning paint brushes that have been used with oil-based paint. By following these instructions, you can prolong the life of your paint brushes and ensure that they remain in top condition for future projects.
Key Takeaways:
- Properly cleaning oil-based paint brushes prolongs their lifespan and ensures smooth, precise paint application for future projects. Remember to handle paint thinner with caution and dispose of it properly.
- To clean oil-based paint brushes, remove excess paint, use paint thinner, wash with soap and water, and rinse and dry thoroughly. This process maintains brush quality and extends usability.
Materials Needed
Before starting the cleaning process, it’s essential to gather the necessary materials. Here’s what you’ll need:
- Used oil-based paint brushes
- Paint thinner or mineral spirits
- Mild dish soap
- Warm water
- Container for paint thinner
- Old rag or paper towels
- Protective gloves
- Eye protection (goggles)
Having these materials on hand will ensure that you can effectively clean your oil-based paint brushes without damaging them or risking exposure to potentially harmful substances.
Step 1: Remove Excess Paint
Before beginning the cleaning process, it’s important to remove as much excess paint from the brushes as possible. This can be done by gently scraping the bristles against the edge of the paint can or a sturdy surface. You can also use a putty knife or a brush comb to loosen and remove the dried paint from the bristles. By removing the excess paint, you’ll make the cleaning process more effective and prevent the paint from hardening further into the bristles.
It’s important to handle the brushes with care during this step to avoid bending or damaging the bristles. Once you’ve removed as much excess paint as possible, you can proceed to the next step in the cleaning process.
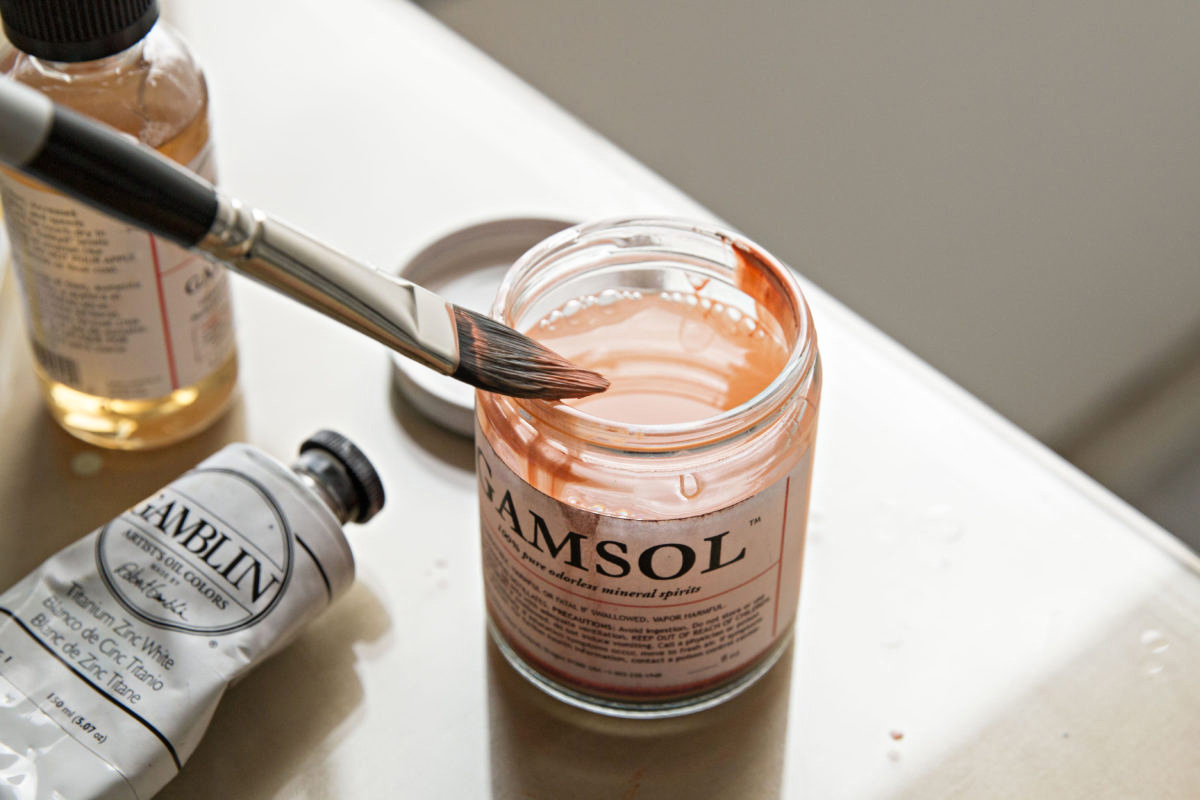
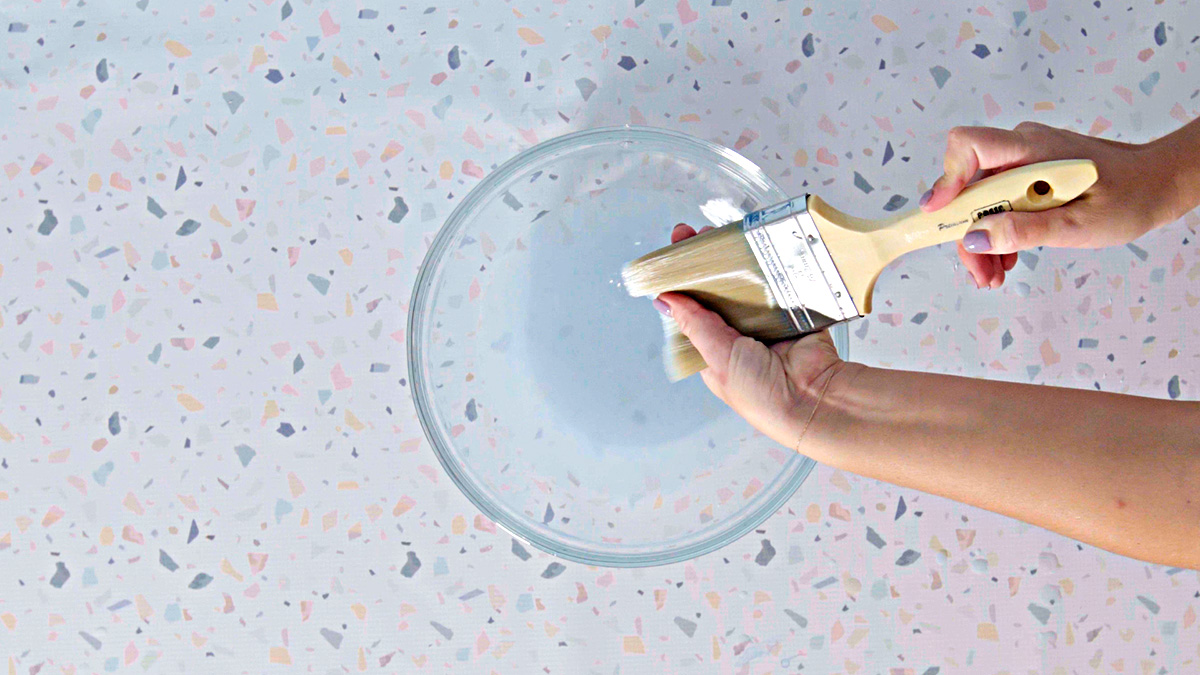
Step 2: Clean with Paint Thinner
After removing the excess paint, the next step is to clean the brushes with paint thinner or mineral spirits. It’s important to perform this step in a well-ventilated area, such as outdoors or in a properly ventilated room, to minimize exposure to fumes. Additionally, wearing protective gloves and eye protection is recommended when working with paint thinner.
Start by pouring a small amount of paint thinner into a container. Dip the bristles of the paint brush into the paint thinner, allowing the solvent to penetrate the bristles and break down the remaining paint. Gently swirl the brush in the paint thinner, ensuring that the solvent reaches the base of the bristles where the paint may be deeply embedded.
As the paint thinner loosens the remaining paint, you may notice the color of the paint transferring into the solvent. This indicates that the cleaning process is effectively removing the oil-based paint from the bristles. Depending on the amount of paint buildup, you may need to repeat this process with fresh paint thinner until the bristles appear clean and the solvent remains clear.
Once the bristles are free of paint, carefully remove the brush from the paint thinner and gently shake off any excess solvent. It’s important to handle the brush carefully at this stage to prevent splattering or spilling of the paint thinner.
After cleaning the brushes with paint thinner, it’s crucial to dispose of the used solvent properly according to local regulations. Store any remaining paint thinner in a tightly sealed container for future use or disposal.
To clean paint brushes with oil-based paint, first wipe off excess paint with a rag. Then, soak the brush in mineral spirits or paint thinner for a few hours. Finally, wash the brush with soap and warm water.
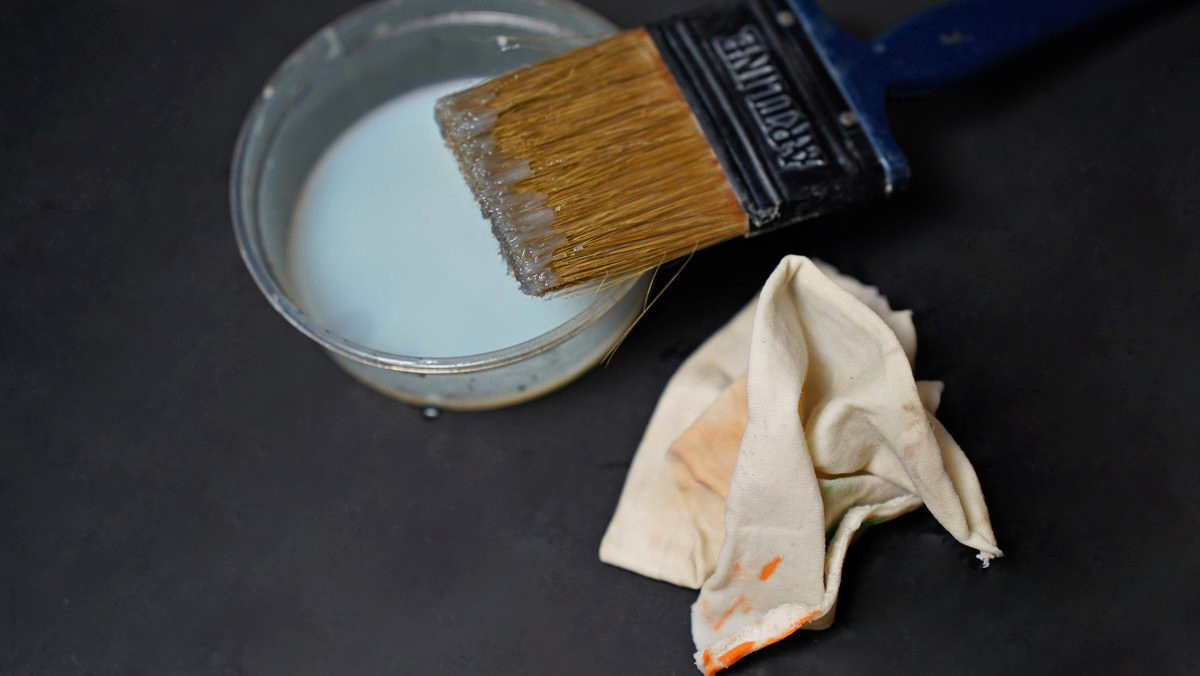
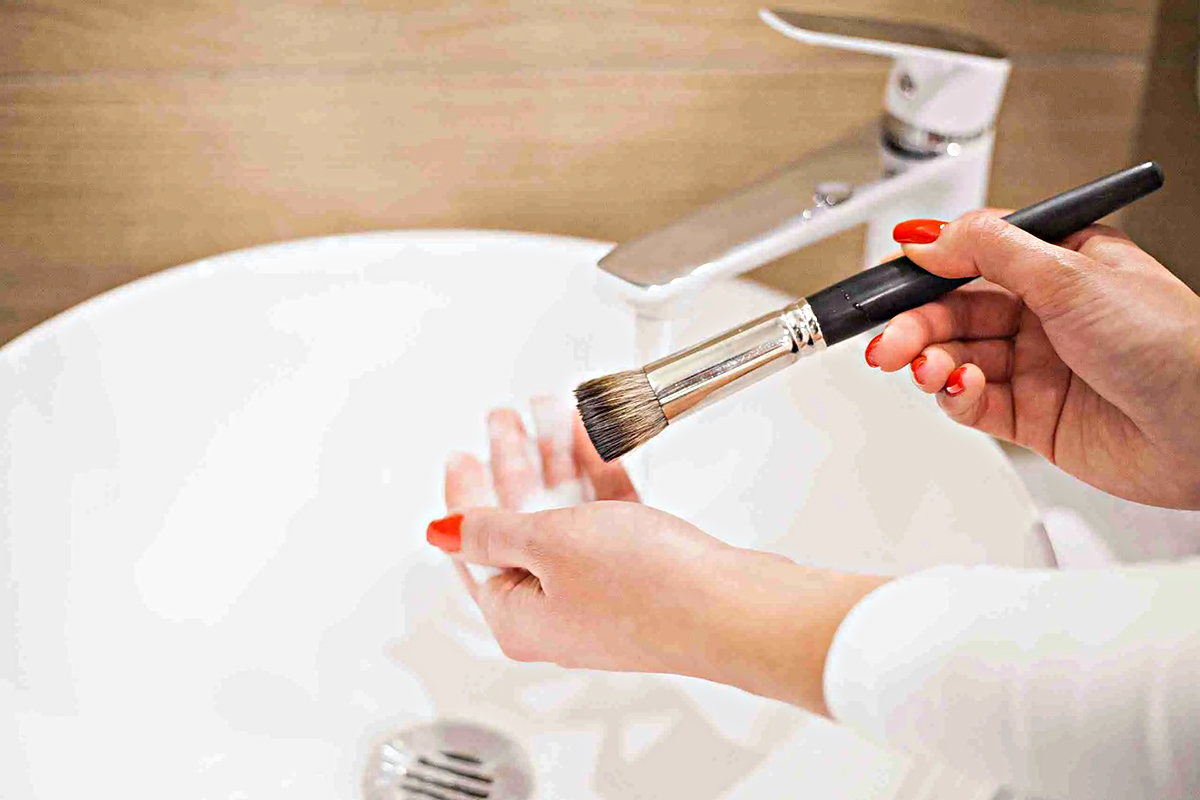
Step 3: Wash with Soap and Water
Once the oil-based paint has been effectively removed using paint thinner, the next step is to wash the brushes with soap and water to eliminate any remaining solvent and paint residue. This step helps ensure that the brushes are thoroughly cleaned and ready for future use.
Begin by dispensing a small amount of mild dish soap onto the bristles of the paint brush. Gently massage the soap into the bristles, working it through the entire brush to create a lather. This helps to further break down any lingering paint particles and remove the residual paint thinner.
After thoroughly lathering the bristles with soap, hold the brush under warm running water. Continue to massage the bristles, allowing the water to rinse away the soap, paint residue, and any remaining paint thinner. It’s important to pay attention to the base of the bristles, ensuring that all traces of paint and solvent are fully removed.
Repeat the lathering and rinsing process as needed until the water runs clear, indicating that the brushes are free of paint and soap residue. This thorough rinsing is crucial to prevent any leftover paint or solvent from affecting the quality of future paint applications.
Once the brushes are clean, gently squeeze the bristles to remove excess water. Avoid twisting or pulling on the bristles, as this can cause damage to the brush shape. Use an old rag or paper towels to blot and absorb any remaining moisture from the bristles.
After washing the brushes with soap and water, it’s important to allow them to air dry completely before storing or using them for future painting projects. Proper drying helps maintain the shape and integrity of the bristles, ensuring that the brushes remain in optimal condition.
Read more: How To Clean Enamel Paint Brushes
Step 4: Rinse and Dry
After washing the brushes with soap and water, the final step is to thoroughly rinse and dry them to ensure that they are completely clean and ready for future use. Proper rinsing and drying help maintain the quality and shape of the bristles, prolonging the life of the paint brushes.
To begin the rinsing process, hold the clean brushes under warm running water. Gently comb through the bristles with your fingers, ensuring that all traces of soap and residual paint are rinsed away. Continue rinsing until the water runs clear, indicating that the brushes are free of any remaining cleaning agents.
Once the brushes are thoroughly rinsed, gently squeeze the bristles to remove excess water. Avoid twisting or pulling on the bristles, as this can cause damage to the brush shape. Use an old rag or paper towels to blot and absorb any remaining moisture from the bristles. It’s important to ensure that the brushes are not dripping wet before proceeding to the drying stage.
After removing excess water, reshape the bristles with your fingers to restore their original form. Ensure that the bristles are evenly aligned and free of any tangles or clumps. This step is crucial for maintaining the effectiveness and precision of the brushes during future painting tasks.
Once the bristles are reshaped, place the brushes in a well-ventilated area to air dry completely. It’s important to position the brushes with the bristles pointing downward to allow any remaining moisture to drip away from the ferrule and handle. Avoid placing the brushes upright, as this can lead to water collecting at the base of the bristles, potentially causing damage to the brush over time.
Depending on the ambient humidity and air circulation, the drying process may take several hours to complete. It’s essential to allow the brushes to dry naturally, avoiding the use of heat sources or direct sunlight, which can cause the bristles to become brittle or misshapen.
Once the brushes are completely dry, gently fluff the bristles with your fingers to ensure that they are soft, pliable, and free of any remaining stiffness. Inspect the brushes to confirm that they are thoroughly dry before storing them in a clean, dry location for future use.
Conclusion
Cleaning paint brushes used with oil-based paint requires attention to detail and a systematic approach to ensure that the brushes are effectively cleaned and maintained for future use. By following the step-by-step process outlined in this guide, you can preserve the quality of your paint brushes and extend their lifespan, ultimately saving time and money on replacements.
Remember to handle paint thinner and other cleaning agents with caution, ensuring proper ventilation and the use of protective gear to minimize exposure to potentially harmful fumes and substances. Additionally, proper disposal of used paint thinner is essential to protect the environment and comply with local regulations.
Regular maintenance and cleaning of paint brushes not only prolong their usability but also contribute to the quality of your painting projects. Clean brushes ensure smooth and precise application of paint, resulting in professional-looking finishes and enhanced durability.
By incorporating these cleaning techniques into your painting routine, you can maintain the performance and longevity of your oil-based paint brushes, allowing you to tackle future projects with confidence and efficiency.
With the knowledge and skills to effectively clean oil-based paint brushes, you can continue to unleash your creativity and achieve outstanding results in your painting endeavors.
Frequently Asked Questions about How To Clean Paint Brushes With Oil-Based Paint
Was this page helpful?
At Storables.com, we guarantee accurate and reliable information. Our content, validated by Expert Board Contributors, is crafted following stringent Editorial Policies. We're committed to providing you with well-researched, expert-backed insights for all your informational needs.

0 thoughts on “How To Clean Paint Brushes With Oil-Based Paint”