Home>Interior Design>How To Paint Baseboards: According To Professional Painters
Interior Design
How To Paint Baseboards: According To Professional Painters
Modified: September 1, 2024
Learn how to paint baseboards like a pro with expert interior designers. Improve your interior design skills with our step-by-step guide.
(Many of the links in this article redirect to a specific reviewed product. Your purchase of these products through affiliate links helps to generate commission for Storables.com, at no extra cost. Learn more)
How to Paint Baseboards: According to Professional Painters
Painting baseboards can be a simple yet effective way to give your home a fresh and updated look. However, achieving professional results requires proper techniques and attention to detail. In this article, we will share valuable tips from professional painters on how to paint baseboards like a pro.
Key Takeaways:
- Achieve flawless baseboards by following professional painters’ tips on choosing the right tools, preparing the surface, applying primer, painting with care, and completing the final touches.
- Elevate your space with beautifully painted baseboards using high-quality tools, proper preparation, precise painting techniques, and attention to detail as recommended by professional painters.
Choosing the Right Tools and Materials
Before you begin painting your baseboards, it’s essential to gather the necessary tools and materials. Here are some items that professional painters recommend:
- Paintbrushes: Use high-quality brushes that are appropriate for the size of your baseboards.
- Paint rollers: Rollers can be helpful for larger and smoother surfaces.
- Painter’s tape: Use painter’s tape to protect adjacent surfaces from unwanted paint drips.
- Drop cloths: Lay down drop cloths to protect your flooring from paint splatters.
- Sandpaper: Use sandpaper to smooth out any rough areas on the baseboards before painting.
- Primer: Applying a primer will help the paint adhere better and provide a uniform finish.
- Paint: Choose a high-quality paint that is suitable for trim or baseboards.
Preparing the Baseboards for Painting
Proper preparation is essential for a successful paint job. Follow these steps to prepare your baseboards:
- Cleaning the baseboards: Remove any dust, dirt, or grime from the surface using a damp cloth or mild cleaning solution.
- Removing old paint or stains: If your baseboards have existing paint or stains, use a paint scraper or sandpaper to remove them.
- Sanding the surface: Lightly sand the baseboards to create a smooth and even surface for the paint to adhere to.
- Filling in cracks or nail holes: Use wood filler to patch any cracks or holes in the baseboards. Sand the filled areas once dry.
- Taping off adjacent surfaces: Apply painter’s tape along the edges of the baseboards and adjacent walls or flooring to protect them from paint splatters.
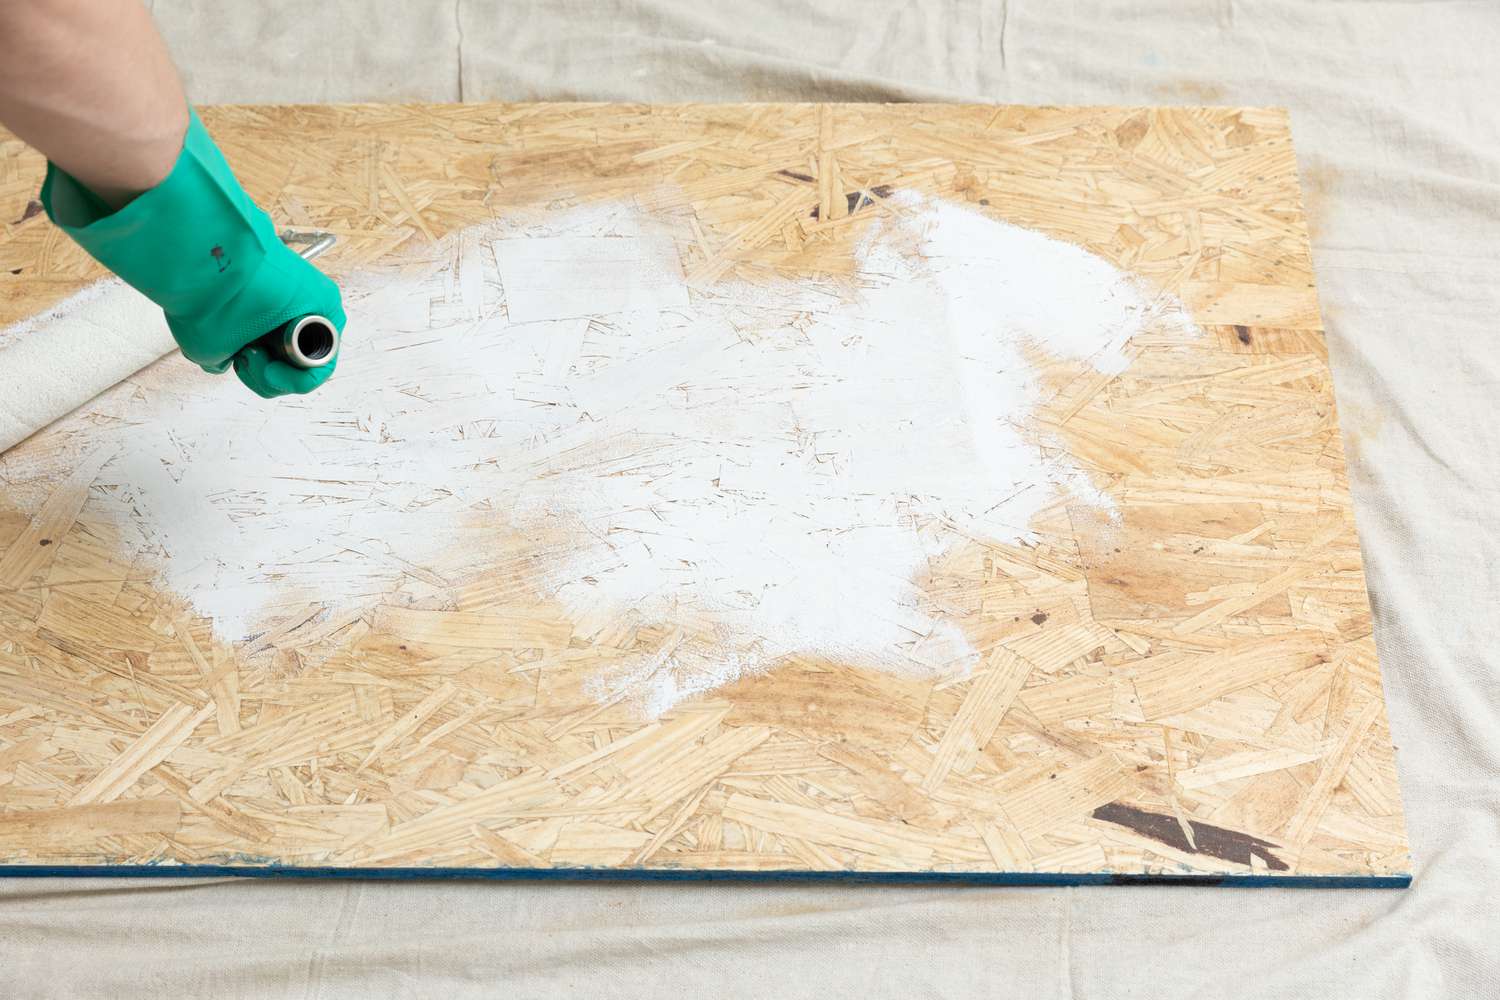
Applying Primer to the Baseboards
Priming the baseboards will help the paint adhere better and ensure a long-lasting finish. Follow these steps to apply primer:
- Selecting the appropriate primer: Choose a primer that is specifically formulated for wood or trim surfaces.
- Preparing the primer: Stir the primer thoroughly to ensure an even consistency.
- Applying the primer to the baseboards: Use a brush or roller to apply a thin and even coat of primer to the baseboards. Allow it to dry completely before painting.
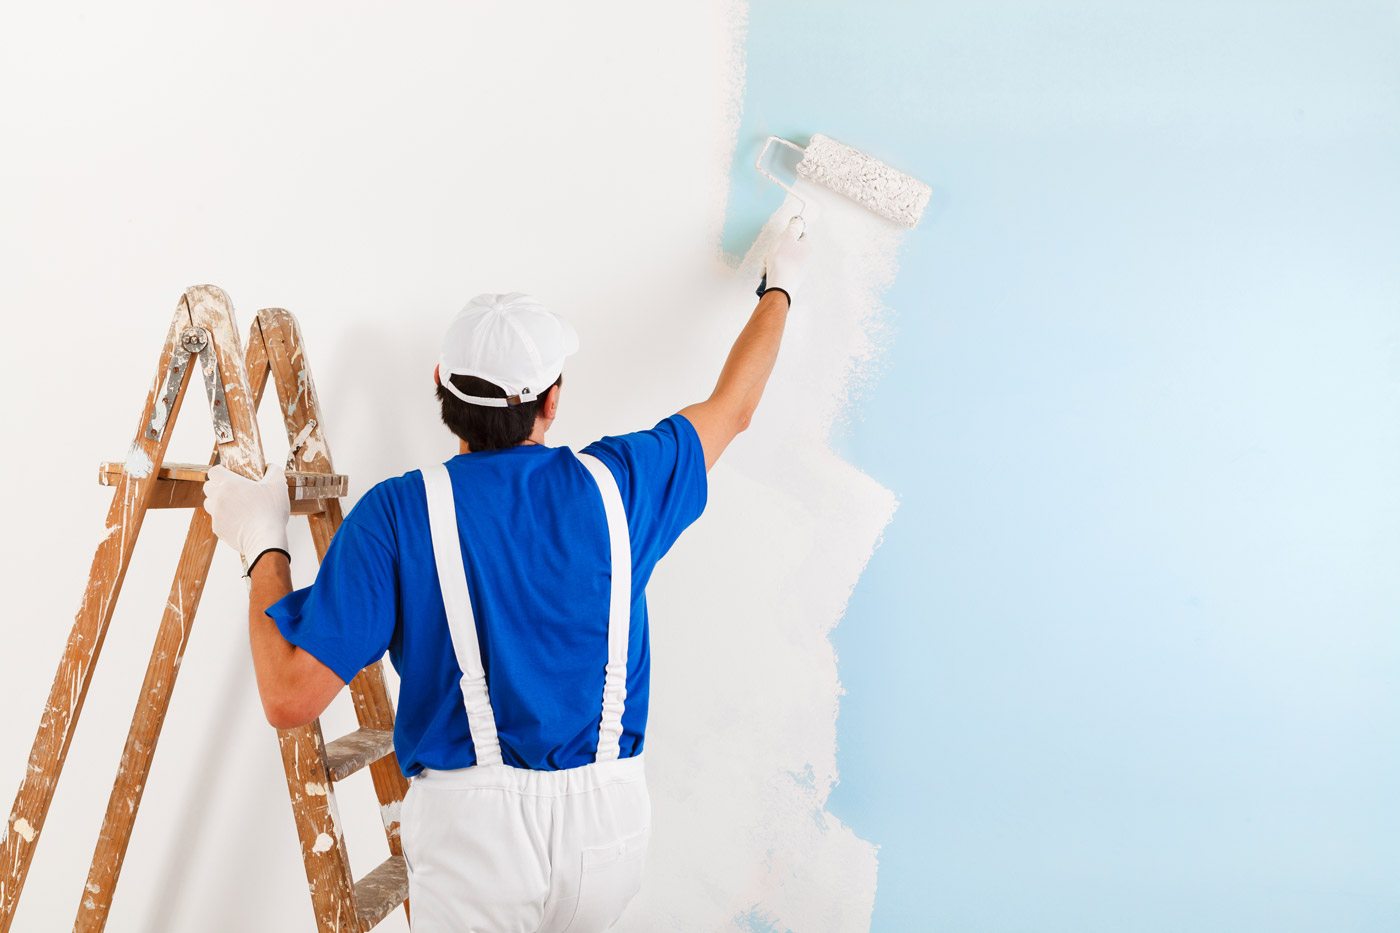
Painting the Baseboards
Now that you have prepared the baseboards and applied primer, it’s time to paint. Follow these steps for a professional-looking finish:
- Choosing the paint color: Select a paint color that complements your room’s decor and style.
- Mixing the paint properly: Stir the paint thoroughly to ensure an even consistency.
- Applying the paint to the baseboards: Use a brush or roller to apply a thin and even coat of paint to the baseboards. Work in small sections, starting from one end and moving towards the other.
- Applying multiple coats if necessary: Allow each coat to dry completely before applying another. Apply as many coats as needed to achieve the desired coverage.
- Achieving a smooth and even finish: Use smooth and even strokes while painting to avoid brush marks or roller lines. Blend each section carefully to create a seamless look.
Removing Painter’s Tape and Cleaning Up
Once the paint has dried, it’s time to remove the painter’s tape and clean up the work area. Follow these steps:
- Removing the painter’s tape carefully: Slowly peel off the painter’s tape at a 45-degree angle to ensure a clean edge.
- Inspecting for any touch-ups needed: Examine the painted baseboards for any touch-ups or areas that may require additional coats.
- Cleaning up the work area: Dispose of the drop cloths and clean any paint spills or splatters. Return furniture and decor to their original positions.
- Storing leftover paint and materials: Properly seal and store any leftover paint and materials for future touch-ups or projects.
By following these tips and techniques from professional painters, you can achieve beautiful and flawless baseboards that elevate the overall look of your space. Remember to take your time, be patient, and pay attention to detail for the best results.
Happy painting!
How to Paint Baseboards: According to Professional Painters
Introduction:
Painting baseboards is a simple yet effective way to transform the appearance of a room. Whether you want to refresh your living space or prepare it for a new style, painting baseboards can make a significant impact. However, to achieve professional-looking results, it’s essential to follow the right techniques and use the proper tools. In this article, we will provide you with valuable insights from professional painters on how to paint baseboards like a pro.
Professional painters understand the importance of proper preparation, choosing the right materials, and attention to detail when painting baseboards. They have experience with different types of baseboards, finishes, and paint colors, allowing them to deliver seamless and impressive results. By following their recommendations, you can achieve a flawless finish and elevate the overall look of your space.
In this guide, we will cover everything from choosing the right tools and materials to preparing the baseboards for painting, applying primer and paint, and finally, removing painter’s tape and cleaning up. Each step is crucial for achieving professional results, so be sure to follow the instructions carefully.
Before you start painting, gather all the necessary tools and materials. You will need paintbrushes, paint rollers, painter’s tape, drop cloths, sandpaper, primer, and high-quality paint. It is important to choose the appropriate tools and materials for your specific baseboards to ensure a smooth and even finish.
Proper preparation is the key to success. Before painting, clean the baseboards thoroughly and remove any old paint or stains. Sand the surface to create a smooth texture and fill in any cracks or nail holes. Take your time to tape off adjacent surfaces to protect them from unwanted paint splatters.
Once the baseboards are prepared, it’s time to apply primer. Primer helps the paint adhere better and ensures a consistent and long-lasting finish. Choose a primer that is suitable for trim or wood surfaces, and apply it evenly to the baseboards using a brush or roller.
After the primer has dried, it’s time to apply the paint. Select a high-quality paint color that complements your room’s decor. Stir the paint thoroughly and apply it in thin and even coats to achieve the desired coverage. Allow each coat to dry completely before applying another, and use smooth strokes to avoid brush marks or roller lines.
Finally, once the paint has dried, carefully remove the painter’s tape at a 45-degree angle to achieve clean and sharp edges. Inspect the painted baseboards for any touch-ups or additional coats needed. Clean up the work area by disposing of drop cloths and properly storing any leftover paint and materials for future touch-ups.
By following these professional tips and techniques, you can confidently paint your baseboards and transform the look and feel of your space. So, let’s dive in and learn how to paint baseboards like a pro!
Key Takeaways:
- Achieve flawless baseboards by following professional painters’ tips on choosing the right tools, preparing the surface, applying primer, painting with care, and completing the final touches.
- Elevate your space with beautifully painted baseboards using high-quality tools, proper preparation, precise painting techniques, and attention to detail as recommended by professional painters.
Choosing the Right Tools and Materials
When it comes to painting baseboards, using the right tools and materials is crucial for achieving professional results. Here is a list of essential items you will need:
Paintbrushes:
High-quality paintbrushes are a must-have for painting baseboards. Look for brushes with synthetic bristles that are suitable for your baseboard size. It’s recommended to have a smaller brush for intricate areas and a larger one for broader surfaces.
Paint rollers:
While brushes work well for precise painting, paint rollers are ideal for larger and smoother surfaces. They allow for faster coverage and can provide a more even finish. Choose a roller that is appropriate for the size of your baseboards.
Painter’s tape:
Painter’s tape is an essential tool for achieving clean and sharp lines between the baseboards and adjacent surfaces. Use high-quality painter’s tape to mask off areas that you don’t want to be painted. Ensure the tape is firmly pressed down to prevent paint bleed-through.
Drop cloths:
Protect your flooring and furniture from paint splatters and drips by using drop cloths. Lay them down to cover the entire area where you’ll be painting. Choose heavy-duty drop cloths to prevent any paint seepage.
Sandpaper:
Preparing the surface of your baseboards is key to achieving a smooth and professional finish. Sandpaper helps remove any rough areas and imperfections on the wood. Use medium or fine-grit sandpaper to lightly sand the baseboards before painting.
Primer:
Applying a primer before painting is highly recommended, especially if you’re painting over stained or bare wood. Primer helps the paint adhere better and creates a uniform base for the paint. Choose a primer that is specifically designed for baseboards or trim.
Paint:
Choosing the right paint is essential for achieving a long-lasting and professional-looking finish. Opt for a high-quality paint that is specifically formulated for trim or baseboards. Consider the type of baseboard material and the desired sheen (such as satin or semi-gloss) when selecting the paint. Discuss with a professional at a paint store to get the best advice.
By using these tools and materials, you can ensure that you have everything you need to paint your baseboards like a pro. Remember to choose high-quality products that are suitable for your specific project. Investing in the right tools and materials will make a significant difference in the final result.
Preparing the Baseboards for Painting
Before you start painting your baseboards, it’s important to properly prepare the surface. This ensures that the paint adheres well and provides a smooth and flawless finish. Here are the steps involved in preparing the baseboards for painting:
Cleaning the Baseboards:
Start by cleaning the baseboards to remove any dust, dirt, or grime that may have accumulated over time. Use a damp cloth or a mild cleaning solution to wipe down the surface. Make sure the baseboards are completely dry before moving on to the next step.
Removing Old Paint or Stains:
If your baseboards have old paint or stains, it’s important to remove them before painting. You can use a paint scraper or sandpaper to gently scrape off the old paint or stain. Be careful not to damage the baseboards while doing this. If the baseboards have multiple layers of paint, you may need to use a chemical paint stripper for effective removal.
Sanding the Surface:
After removing the old paint or stains, it’s important to sand the surface of the baseboards. Sanding helps to smooth out any rough areas, imperfections, or uneven surfaces. Use medium or fine-grit sandpaper and sand in the direction of the wood grain. This helps to create a smooth and even surface for the paint to adhere to.
Filling in Cracks or Nail Holes:
Inspect the baseboards for any cracks or nail holes. Use a wood filler or putty that matches the color and type of your baseboards to fill in these imperfections. Apply the filler with a putty knife, ensuring it is level with the surface. Once the filler is dry, sand it lightly to ensure a seamless transition between the filled areas and the rest of the baseboard.
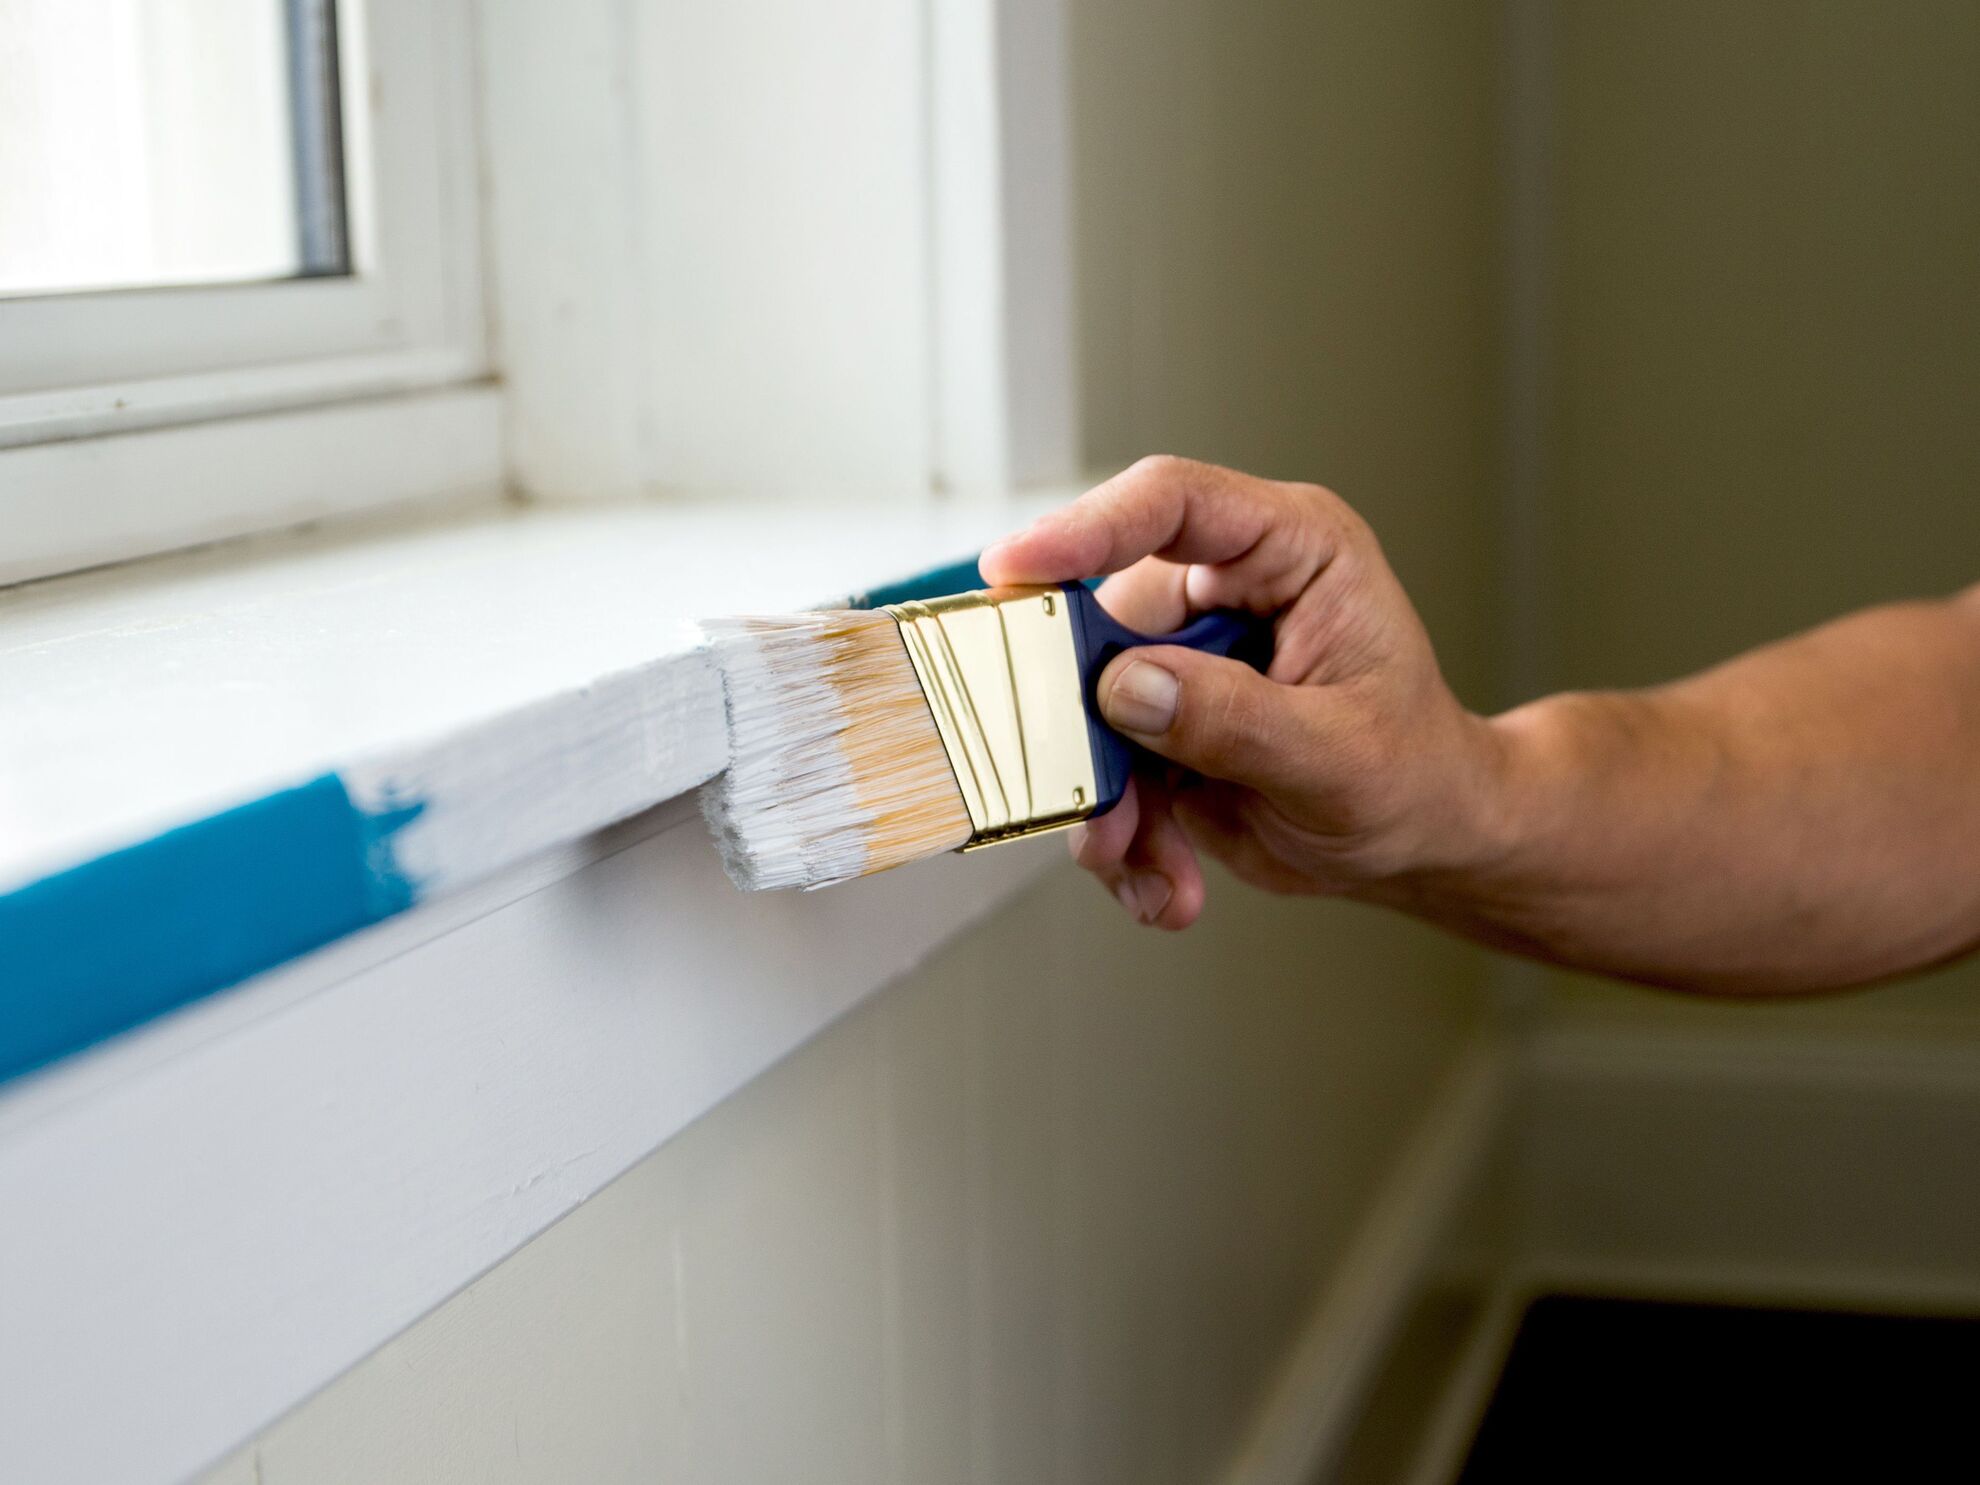
Taping off Adjacent Surfaces:
To protect adjacent surfaces, such as walls or flooring, from accidental paint splatters or drips, it’s important to apply painter’s tape. Carefully apply the tape along the edges of the baseboards where they meet the adjacent surfaces. Ensure that the tape is firmly pressed down to create a clean edge when the paint is applied. This will help you achieve sharp lines and prevent any unwanted paint smudges.
By following these steps and properly preparing the baseboards before painting, you will ensure a smooth and professional-looking finish. Taking the time to clean, remove old paint, sand, fill in cracks, and tape off adjacent surfaces will help you achieve the best results and make your baseboards look brand new.
Applying Primer to the Baseboards
Priming the baseboards is a crucial step that helps improve the adhesion of the paint and ensures a more durable and long-lasting finish. By applying primer first, you create a smooth and uniform surface for the paint to adhere to. Here is a step-by-step guide on how to apply primer to your baseboards:
Selecting the Appropriate Primer:
There are different types of primers available, so it’s important to choose the appropriate one for your baseboards. Look for a primer specifically designed for trim or wood surfaces. This will ensure that the primer is formulated to provide optimal adhesion and coverage.
Preparing the Primer:
Before applying the primer, it’s important to prepare it according to the manufacturer’s instructions. Typically, this involves stirring the primer thoroughly to ensure that any settled pigments are mixed well. Follow the instructions on the primer can or container to ensure the best results.
Applying the Primer to the Baseboards:
Using a paintbrush or a paint roller, apply a thin and even coat of primer to the baseboards. If using a brush, start from the top of the baseboard and work your way downward in smooth strokes. If using a roller, apply the primer in the same manner, working from one end of the baseboard to the other.
Be sure to cover the entire surface of the baseboard with a smooth and consistent coat of primer. Pay attention to any details or intricate areas, ensuring that they are adequately covered. Take your time and ensure that the primer is applied evenly, avoiding any drips or excess build-up.
Allowing the Primer to Dry:
Once you have applied the primer, allow it to dry completely before proceeding with the painting process. The drying time may vary depending on the specific primer you are using, so refer to the manufacturer’s instructions for guidance. It’s essential to wait for the primer to dry fully to ensure proper adhesion and to prevent any complications when applying the paint.
During the drying process, make sure the baseboards are kept free from any dirt, dust, or debris that could potentially mar the smooth finish. Avoid touching or placing objects on the primed baseboards until they are completely dry.
By applying primer to your baseboards, you create a solid foundation for the paint, ensuring better coverage and longevity. Taking the time to select the appropriate primer, preparing it properly, applying it evenly, and allowing it to dry will significantly enhance the final results of your painted baseboards.
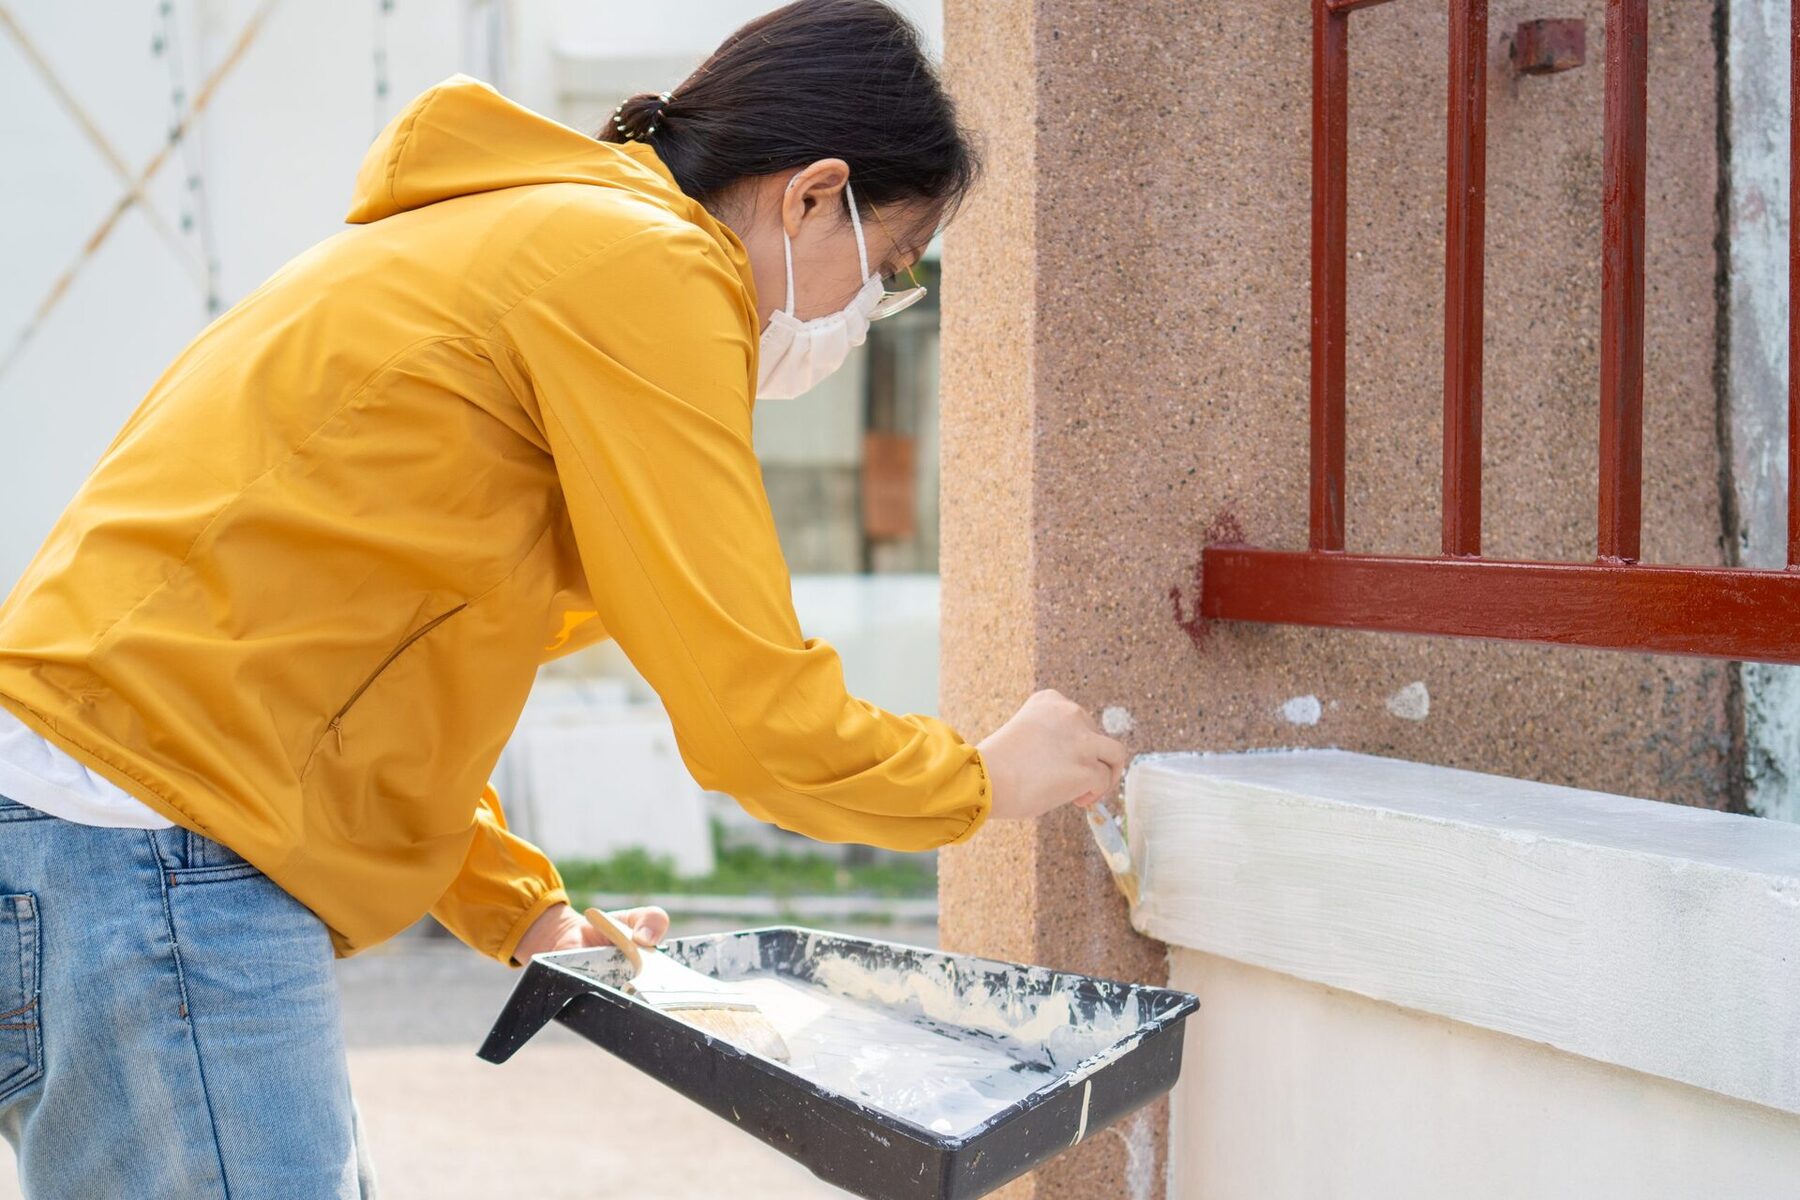
Painting the Baseboards
Now that you have prepared the baseboards by cleaning, sanding, and applying primer, it’s time to paint them. Painting the baseboards requires careful attention to detail and proper technique to achieve a professional-looking finish. Let’s go through the essential steps of painting your baseboards:
Choosing the Paint Color:
Selecting the right paint color for your baseboards is an important decision. Consider the overall style and color scheme of the room. Opt for a color that complements the walls, flooring, and other elements in the space. It’s often recommended to choose a color that is in contrast to the walls to create visual interest and enhance the architectural features of the baseboards.
Mixing the Paint Properly:
Before you start painting, it’s crucial to mix the paint thoroughly. Ensure that the paint pigments are well-blended by stirring the paint can with a paint stirrer or shaking it if instructed by the manufacturer. Mixing the paint properly will help achieve a consistent color and ensure an even application.
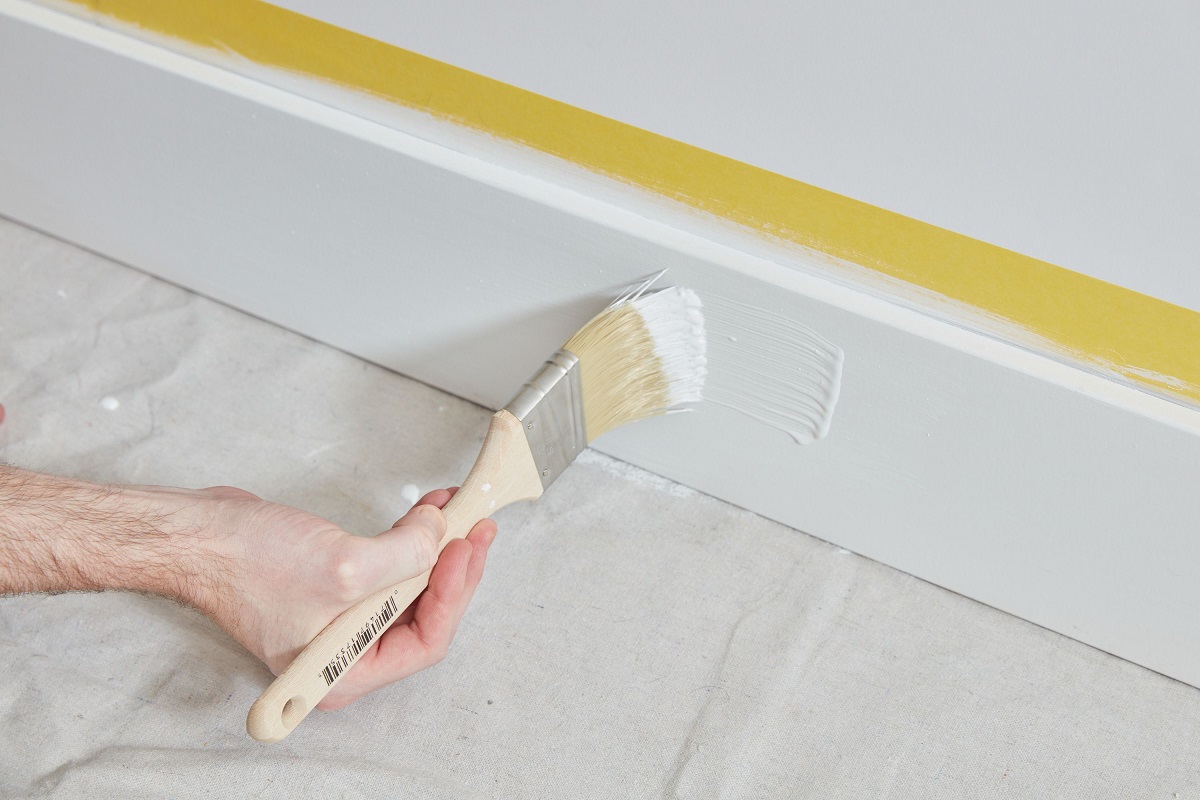
Applying the Paint to the Baseboards:
Start by dipping your paintbrush into the paint, removing any excess on the rim of the paint can. Apply the paint to the baseboards using smooth, even strokes. Work in small sections, starting from one end of the baseboard and moving towards the other. When using a brush, use long, vertical strokes for a more uniform finish. If using a mini roller or bristle brush, apply the paint in a smooth back-and-forth motion.
Applying Multiple Coats if Necessary:
Depending on the color and coverage desired, you may need to apply multiple coats of paint. Be sure to allow each coat to dry completely before applying the next one. This will help achieve a consistent and vibrant color. Apply subsequent coats in the same manner as the first, using smooth and even strokes.
Achieving a Smooth and Even Finish:
To achieve a smooth and professional-looking finish, use long and even strokes while painting the baseboards. Avoid excessive brushing or rolling, as it can create visible brush marks or roller lines. Pay attention to any drips or excess paint, making sure to smooth them out immediately. If necessary, lightly sand between coats to remove any imperfections and create a smoother surface.
As you paint, step back occasionally to inspect the baseboards from a distance. This will help you identify any areas that may need touch-ups or additional coats for complete coverage. Take your time and be patient, as achieving a smooth and even finish requires attention to detail.
By following these steps, you can paint your baseboards with confidence and achieve a professional-looking result. Choosing the right paint color, mixing the paint properly, applying it evenly, and applying multiple coats when needed will ensure that your baseboards look beautifully refreshed and enhance the overall aesthetic of your space.
Removing Painter’s Tape and Cleaning Up
Once you have finished painting the baseboards, it’s time to remove the painter’s tape and clean up the work area. This final step ensures a polished and professional finish. Here’s what you need to do:
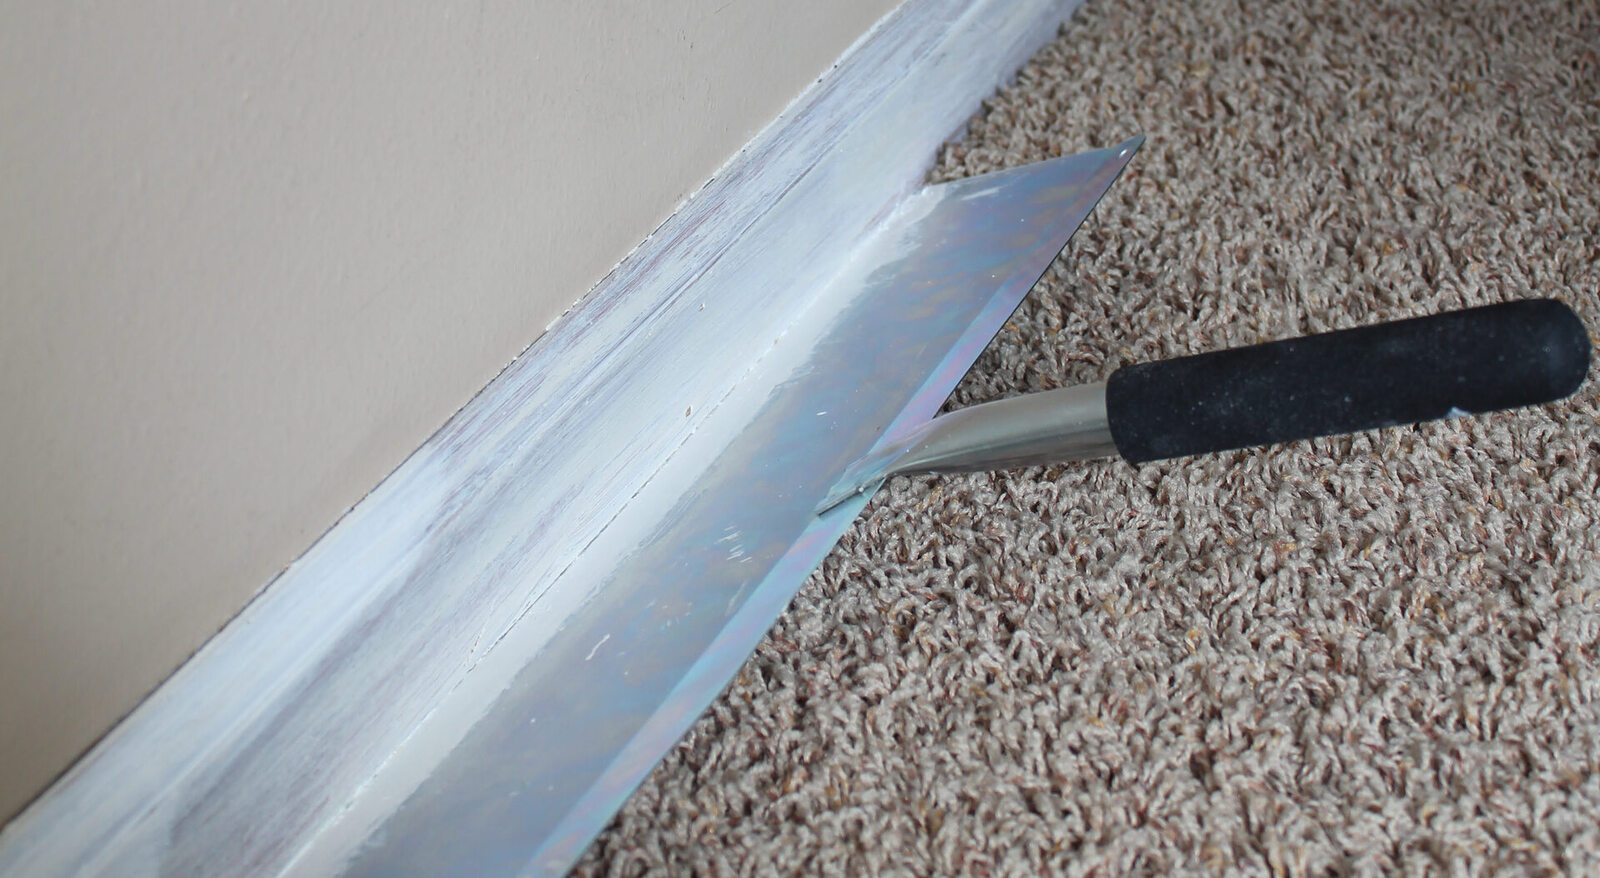
Removing the Painter’s Tape Carefully:
Start by removing the painter’s tape carefully. Do this while the paint is still slightly wet or tacky to prevent any peeling or damage to the freshly painted baseboards. Hold the tape at a 45-degree angle and slowly peel it off, pulling away from the painted surface. Be cautious and gentle to avoid any accidental smudging or chipping of the paint.
Inspecting for Any Touch-Ups Needed:
Once the painter’s tape is removed, carefully inspect the baseboards for any areas that may need touch-ups. Look for any missed spots, uneven lines, or paint drips. Use a small brush or a cotton swab to fix any imperfections by carefully applying touch-up paint. This step ensures a flawless and professional finish.
Cleaning Up the Work Area:
After completing the painting process, it’s important to clean up the work area. Remove any remaining drop cloths and dispose of them properly. Check the flooring and surrounding surfaces for any paint drips or spills. Use a damp cloth or sponge to clean these areas promptly. Make sure to clean your brushes, rollers, and any other tools used in the painting process according to the manufacturer’s instructions.
Storing Leftover Paint and Materials:
If you have any leftover paint, it’s essential to store it properly for future touch-ups or projects. Make sure the paint can is tightly sealed to prevent air exposure, which can cause the paint to dry out. Store the paint in a cool and dry place, away from extreme temperatures. Label the paint can with the color, date, and room it was used in for easy reference.
Additionally, consider storing any remaining materials, such as brushes, rollers, and drop cloths, for future use. Clean them thoroughly before storing to maintain their quality and longevity. Properly storing leftover paint and materials will ensure that you are prepared for future touch-ups or painting projects.
By removing the painter’s tape carefully, inspecting for any touch-ups, cleaning up the work area, and storing leftover paint and materials properly, you can complete your baseboard painting project with a professional and clean result. These final steps add the finishing touch to your hard work and leave you with beautifully painted baseboards that enhance the overall appearance of your space.
Conclusion
Painting baseboards may seem like a straightforward task, but if you want professional-looking results, it’s important to follow the right techniques and use the proper tools. By incorporating the advice of professional painters, you can achieve flawless and polished baseboards that elevate the overall look of your space.
Begin by choosing the right tools and materials, such as high-quality paintbrushes, rollers, painter’s tape, drop cloths, sandpaper, primer, and paint. These tools will ensure smooth application and long-lasting results. Proper preparation is crucial, so thoroughly clean the baseboards, remove old paint or stains, sand the surface, fill in any cracks or holes, and tape off adjacent surfaces to protect them.
Applying primer is a vital step in creating a solid foundation for the paint. Select the appropriate primer, prepare it correctly, and apply it evenly to the baseboards. Allow the primer to dry completely before proceeding to the painting process.
When painting the baseboards, choose a paint color that complements your room’s decor and mix it properly to achieve a consistent color. Apply the paint using smooth and even strokes, and consider applying multiple coats if necessary for optimal coverage. Strive for a smooth and professional finish.
After completing the painting, carefully remove the painter’s tape while the paint is still slightly wet. Inspect the baseboards for any touch-ups needed and fix any imperfections. Clean up the work area by removing drop cloths and cleaning any paint spills or drips. Properly store any leftover paint and materials for future use.
In conclusion, following the tips and techniques provided by professional painters will help you successfully paint your baseboards like a pro. By choosing the right tools and materials, properly preparing the surface, applying primer, painting with care, and completing the final touches, you can achieve flawless baseboards that enhance the overall aesthetic of your space.
Remember to take your time, be patient, and pay attention to detail. With a little effort and the guidance of professional painters, you can transform your baseboards and create a fresh and updated look in your home.
Frequently Asked Questions about How To Paint Baseboards: According To Professional Painters
Was this page helpful?
At Storables.com, we guarantee accurate and reliable information. Our content, validated by Expert Board Contributors, is crafted following stringent Editorial Policies. We're committed to providing you with well-researched, expert-backed insights for all your informational needs.

0 thoughts on “How To Paint Baseboards: According To Professional Painters”