Home>Renovation & DIY>Tools & Equipment>How To Clean Paint Brushes With A Septic System
Tools & Equipment
How To Clean Paint Brushes With A Septic System
Modified: October 20, 2024
Learn how to properly clean paint brushes without damaging your septic system. Discover the best tools and equipment for the job.
(Many of the links in this article redirect to a specific reviewed product. Your purchase of these products through affiliate links helps to generate commission for Storables.com, at no extra cost. Learn more)
Introduction
Whether you’re a professional painter or a DIY enthusiast, cleaning paint brushes is an essential task that should never be overlooked. Not only does proper cleaning extend the lifespan of your brushes, but it also ensures that you achieve optimal results in your painting projects. However, if you have a septic system in your home, it’s important to be mindful of the cleaning products and methods you use to avoid any potential damage to the system.
A septic system is a vital component of any home’s wastewater management system. It consists of a septic tank, which acts as a holding tank for wastewater, and a drain field, where wastewater is treated and naturally filtered back into the ground. Septic systems are sensitive to certain chemicals and excessive amounts of water, and using the wrong cleaning products can disrupt the delicate balance of bacteria that aid in the breakdown of solid waste.
In this article, we will guide you through the process of cleaning paint brushes while keeping in mind the limitations of a septic system. By following these steps, you can maintain the integrity of your septic system and keep your paint brushes in great condition for future use.
Key Takeaways:
- Properly cleaning paint brushes with septic system-friendly materials and methods ensures optimal brush longevity and protects the delicate balance of beneficial bacteria in the septic tank.
- Thoroughly cleaning, rinsing, and properly drying paint brushes not only maintains their condition but also prevents potential harm to the septic system, promoting environmental responsibility.
Read more: How To Clean Enamel Paint Brushes
Understanding Your Septic System
Before diving into the specifics of cleaning paint brushes with a septic system in mind, it’s crucial to have a basic understanding of how these systems work. A septic system is designed to effectively treat and filter household wastewater, providing a safe and efficient way to dispose of it.
The main components of a septic system are the septic tank and the drain field. The septic tank is a large underground container made of concrete, fiberglass, or plastic. It receives all the wastewater from your home, including from toilets, sinks, showers, and washing machines. Inside the tank, the solid waste settles to the bottom, forming a layer of sludge, while the liquid waste, known as effluent, floats to the top. Bacteria in the tank break down the organic matter in the sludge.
Once the liquid waste is separated, it flows into the drain field, which is a series of perforated pipes buried in the ground. The effluent is distributed through these pipes and is naturally filtered as it seeps into the soil, where beneficial bacteria continue the decomposition process. Ultimately, the filtered water is returned to the groundwater system.
It’s important to note that septic systems rely on the presence of beneficial bacteria to efficiently break down the waste. These bacteria are responsible for digesting the organic matter, including the fats, oils, and grease that can accumulate in the septic tank.
With this understanding, it becomes clear why it’s crucial to be mindful of the products and methods used in cleaning paint brushes. Certain chemicals and excessive amounts of water can disrupt the balance of bacteria in the septic tank and potentially harm the overall functioning of the system.
Importance of Properly Cleaning Paint Brushes
Properly cleaning paint brushes is not only essential for maintaining their longevity but also crucial for achieving high-quality results in your painting projects. Neglecting to clean your brushes can lead to clogged bristles, improper paint application, and a decreased lifespan of your brushes. Additionally, it can result in wasted paint and extra expenses as you’ll need to purchase new brushes more frequently.
When you don’t clean your paint brushes properly, the residual paint can harden and accumulate in the bristles, making them stiff and less effective for future use. As a result, you may find it challenging to achieve smooth and even paint coverage, which can affect the overall aesthetic of your finished project. Proper cleaning ensures that your brushes remain in optimal condition and ready for use whenever inspiration strikes.
Moreover, cleaning paint brushes is an environmentally responsible practice. By removing leftover paint from the brushes, you prevent it from being washed down the drain or disposed of improperly, potentially harming aquatic life and polluting water sources. Taking care of your brushes and properly disposing of paint waste demonstrates your commitment to both your craft and the environment.
When it comes to cleaning paint brushes with a septic system, the importance is twofold. First, using the wrong cleaning products or excessive amounts of water can disrupt the delicate balance of bacteria in your septic tank, leading to potential issues with your system’s functioning. Second, allowing paint to enter your septic system can cause clogs and hinder the natural breakdown process. Therefore, it’s crucial to adopt proper cleaning practices that safeguard both your paint brushes and your septic system.
Materials Needed for Cleaning Paint Brushes
Before you start cleaning your paint brushes with a septic system in mind, gather the following materials:
- Lukewarm Water: Lukewarm water is gentle enough to clean the paint brushes without causing damage to the bristles or the septic system. Avoid using hot water, as it can soften the glue that holds the bristles together.
- Mild Dish Soap: Choose a mild dish soap that is septic-system-friendly and free from harsh chemicals. This will effectively remove paint residues from the brushes without compromising the functioning of the septic system.
- Small Container: Use a small container, such as a jar or a bowl, to hold the cleaning solution. Make sure it’s deep enough to fully submerge the bristles of your paint brushes.
- Old Towels or Paper Towels: Have some old towels or paper towels handy to wipe the excess paint off the brushes and to absorb moisture during the cleaning process.
- Protective Gloves: It’s always a good idea to wear protective gloves while handling paint and cleaning solutions. This will protect your hands from irritants and help keep your skin clean.
- Disposable Gloves (Optional): If you want an extra layer of protection or if you are concerned about the cleaning solution affecting your skin, disposable gloves can be used over your protective gloves.
- Brush Comb or Brush Cleaner (Optional): A brush comb or brush cleaner can be useful to remove stubborn paint residues from the bristles. Consider using one if you have a lot of built-up paint on your brushes.
By gathering these materials beforehand, you’ll have everything you need to effectively clean your paint brushes without compromising your septic system’s integrity.
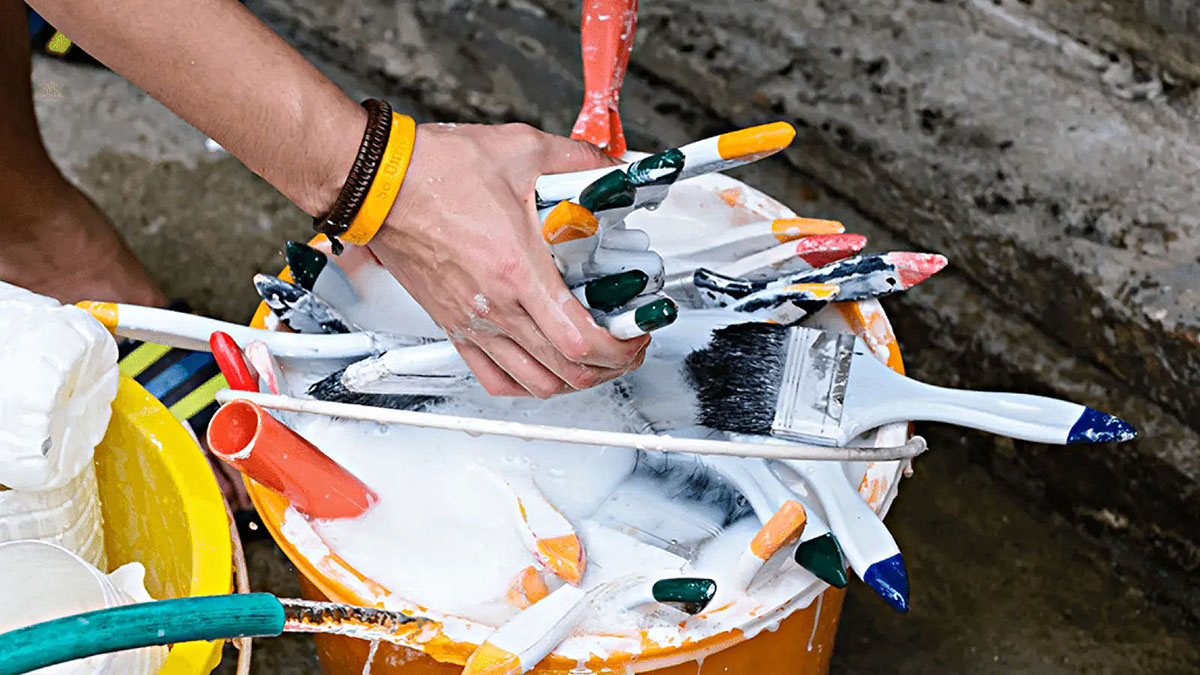
Step 1: Removing Excess Paint
The first step in cleaning your paint brushes is to remove the excess paint from the bristles. This ensures that you’re working with a minimal amount of paint residue and makes the cleaning process easier and more effective.
Here are a few methods you can use to remove excess paint from your brushes:
- Scraping: Use a brush comb or the edge of a putty knife to gently scrape off any excess paint from the bristles. Be careful not to apply too much pressure, as this can damage the bristles. Repeat this process until most of the paint has been removed.
- Wiping: Take an old towel or paper towel and gently wipe the brush bristles to remove any remaining paint. You can fold the towel or paper towel and pinch the bristles between your fingers to help remove the paint. Continue wiping until the towel comes away nearly clean.
- Brushing: If there’s still some paint residue left on the bristles, you can use a brush comb or your fingers to gently brush the bristles. This helps to loosen and remove any remaining paint particles. Be sure to brush in the direction of the bristles to avoid damaging them.
Remember to be gentle while removing excess paint to avoid damaging the bristles. Once you have successfully removed as much paint as possible, you can move on to the next step of the cleaning process.
To clean paint brushes with a septic system, use a brush comb to remove excess paint, then wash with a small amount of biodegradable soap and warm water in a bucket. Avoid using harsh chemicals or solvents that can harm the septic system.
Read more: How To Clean Foam Paint Brushes
Step 2: Preparing the Cleaning Solution
After removing the excess paint from your brushes, the next step is to prepare a cleaning solution that is safe for both your paint brushes and your septic system.
Here’s how you can prepare a septic system-friendly cleaning solution:
- Fill a container: Take a small container, such as a jar or a bowl, and fill it with lukewarm water. The container should be deep enough to fully submerge the bristles of your paint brushes.
- Add mild dish soap: Add a few drops of mild dish soap to the lukewarm water. Be sure to choose a dish soap that is septic-system-friendly and free from harsh chemicals. This will ensure that you’re using a gentle yet effective cleaner for your brushes.
- Mix the solution: Gently stir the water and dish soap together to create a soapy solution. Avoid creating excessive suds, as they can be difficult to rinse off later.
It’s important to note that you should only use a mild dish soap for your cleaning solution. Avoid using harsh chemicals, solvents, or any product that could potentially harm your paint brushes or disrupt the functioning of your septic system. Stick to gentle dish soaps that are environmentally friendly and safe for septic systems.
By preparing a septic system-friendly cleaning solution, you’ll ensure that your paint brushes are effectively cleaned without causing any harm to your septic system.
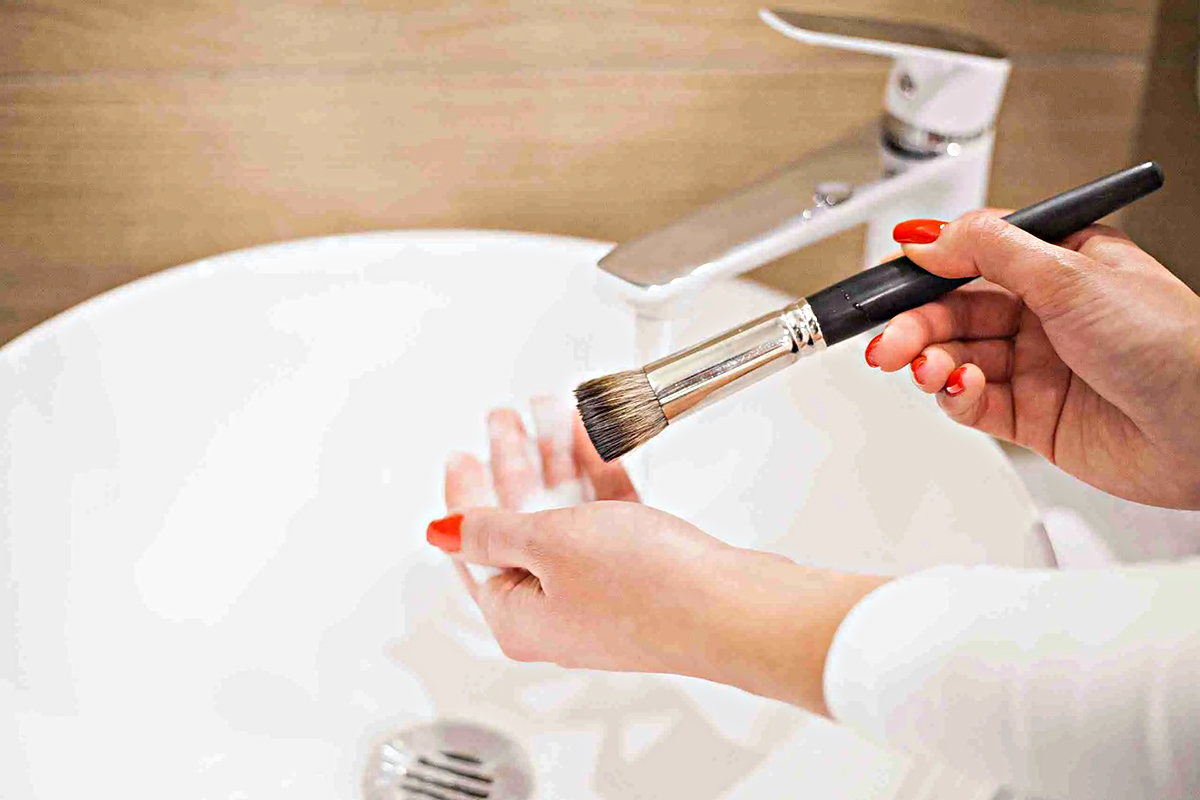
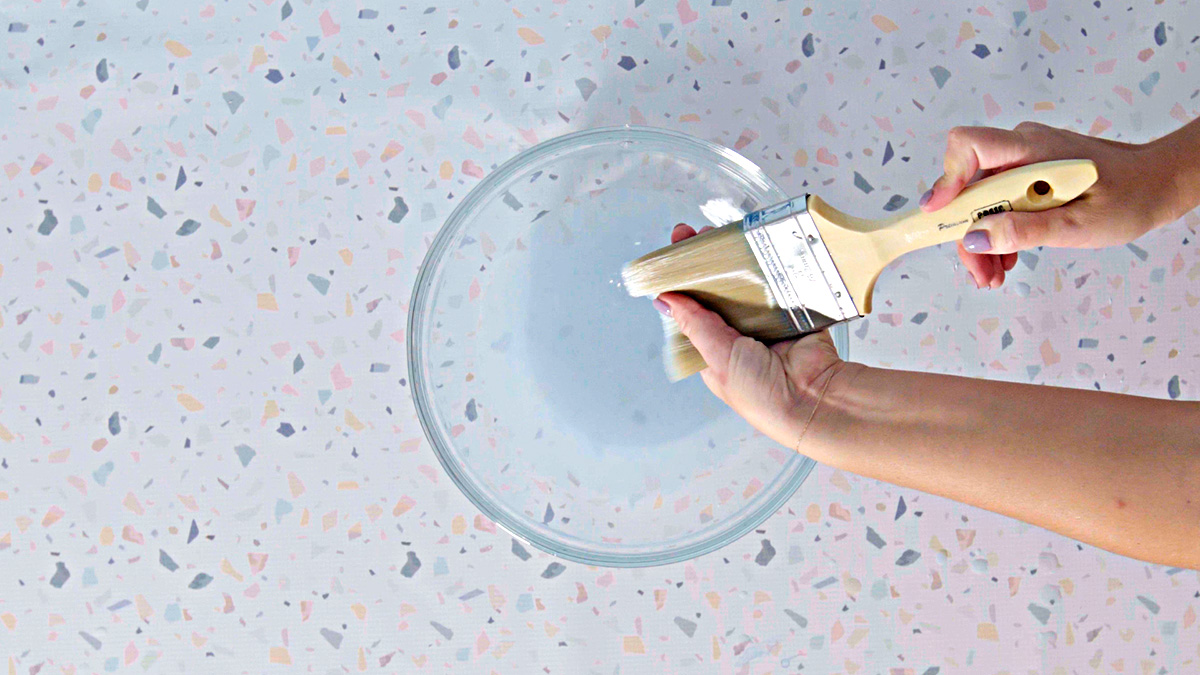
Step 3: Cleaning the Paint Brushes
Now that you have prepared the cleaning solution, it’s time to clean your paint brushes thoroughly. Follow these steps to ensure that your brushes are effectively cleaned while being mindful of your septic system:
- Submerge the brushes: Dip the paint brushes into the cleaning solution, making sure that the bristles are fully submerged. Gently swirl the brushes in the solution to allow the soapy water to penetrate and loosen any remaining paint.
- Gently agitate the bristles: After submerging the brushes, use your fingers or a brush comb to gently agitate the bristles. This helps to dislodge any trapped paint particles and allows the cleaning solution to reach all areas of the brush. Be careful not to press too hard, as this can damage the bristles or dislodge them from the brush handle.
- Continue swirling and agitating: Continue swirling the brushes in the cleaning solution and gently agitating the bristles for a few minutes. This allows the soapy water to dissolve and lift any remaining paint from the brush fibers.
- Check the water: Periodically check the water in the container to see if it has become discolored. If the water looks murky or has a significant amount of paint residue, empty the container and prepare a fresh batch of cleaning solution. This ensures that you’re effectively cleaning the brushes and preventing any paint from entering your septic system.
- Repeat the process if necessary: If your brushes still have paint residue or if the water in the container is consistently dirty, you may need to repeat the cleaning process. Empty the container, rinse the brushes, and prepare a new cleaning solution. Then, repeat the steps of submerging, swirling, and agitating the brushes until they are clean and the water remains clear.
Remember, the goal is to thoroughly clean the brushes without using excessive water or harsh chemicals that can harm your septic system. By following these steps and being patient, you can effectively remove paint residue from your brushes while minimizing any impact on your septic system.
Step 4: Rinsing the Paint Brushes
After cleaning the paint brushes with the soapy solution, the next step is to rinse them to remove any remaining cleaning agent, paint particles, and soap residue. Follow these steps to effectively rinse your brushes while keeping your septic system in mind:
- Fill a clean container with lukewarm water: Take a clean container, such as a jar or a bowl, and fill it with lukewarm water. The container should be deep enough to fully submerge the bristles of your paint brushes.
- Submerge the brushes in the water: Dip the cleaned brushes into the container filled with clean lukewarm water. Swirl the brushes gently to ensure that all the soap residue and remaining paint particles are rinsed out.
- Repeat the swirling process: Swirl the brushes in the water and agitate the bristles gently to dislodge any remaining residue. This step will help to ensure that your brushes are thoroughly rinsed and free from any cleaning agent or paint that could potentially harm your septic system.
- Change the water if necessary: If the water in the container becomes discolored or contains visible paint residue after rinsing multiple brushes, it’s best to discard the water and fill the container with fresh, clean lukewarm water. This step ensures that the brushes are rinsed with clean water without reintroducing any paint or cleaning agent into the mix.
- Continue rinsing until the water runs clear: Keep rinsing and swirling the brushes in the clean water until the water runs clear. This indicates that all the soap residue and paint particles have been successfully rinsed out, leaving your brushes clean and ready for the next use.
Rinsing your paint brushes thoroughly is crucial to remove any traces of cleaning agent and paint residue, ensuring that the brushes are clean and free from any substances that could potentially harm your septic system. By following these steps, you can achieve a thorough rinse while maintaining the integrity of your brushes and septic system.
Step 5: Drying and Storing the Paint Brushes
Once you have successfully rinsed your paint brushes, the final step is to properly dry and store them. Proper drying and storage practices will ensure that your brushes remain in excellent condition for future use. Follow these steps to complete the process:
- Gently shake off excess water: After rinsing, gently shake the paint brushes to remove any excess water. Be careful not to slap or hit the brushes against a hard surface, as this can damage the bristles. Instead, lightly flick your wrist to remove the water droplets.
- Blot with a towel: Take a clean towel or paper towel and gently blot the bristles to absorb any remaining moisture. This will help speed up the drying process and prevent water from accumulating at the base of the brush, which can cause damage over time.
- Reshape the bristles: Use your fingers or a brush comb to reshape the bristles while they are still damp. Gently comb through the bristles, starting from the base and working your way to the tips. This will help maintain the shape and structure of the brush during the drying process.
- Choose an appropriate drying area: Find a well-ventilated area where you can hang or lay the brushes to dry. Avoid placing them in direct sunlight, as this can cause the bristles to become brittle and damage the handles. Ideally, choose a location where the brushes can air dry naturally without any heat sources nearby.
- Hang or lay the brushes to dry: Depending on the type of brushes you have, you can either hang them or lay them flat to dry. If you hang the brushes, use a clip or a hook to suspend them from the handle. If you lay them flat, place them on a clean surface or a towel, making sure that the bristles are not touching any surfaces that may alter their shape.
- Avoid storing brushes bristle-side down: When storing your paint brushes, make sure to store them with the bristles facing up. Storing brushes bristle-side down can cause the bristles to bend or become misshapen over time.
- Store them in a protected area: Once your brushes are completely dry, store them in a clean and protected area. You can use a brush holder, a brush roll, or even a plastic bag to keep them safe from dust or damage.
By following these steps, you can ensure that your paint brushes are properly dried and stored, ready for your next painting project. By taking the time to care for your brushes, you’ll prolong their lifespan and ensure that they remain in excellent condition for years to come.
Read more: How To Clean Urethane Paint Brushes
Conclusion
Cleaning paint brushes is an essential task for any painter, but it becomes even more important when you have a septic system in your home. By following the proper steps and using septic system-friendly materials, you can clean your brushes effectively while keeping your septic system functioning optimally.
Understanding your septic system and its delicate balance of beneficial bacteria is the first step in ensuring that you choose the right cleaning methods and materials. Harsh chemicals and excessive water usage can disrupt the bacteria and potentially cause damage to your system. By using mild dish soap, lukewarm water, and being mindful of the amount of water used, you can clean your paint brushes without compromising your septic system’s integrity.
Properly cleaning your paint brushes offers numerous benefits. It extends the lifespan of your brushes, ensuring that they remain in optimal condition for future use. Thorough cleaning also allows for better paint application, resulting in professional-looking results in your painting projects. Additionally, it is an environmentally responsible practice, preventing paint residues from polluting water sources and harming aquatic life.
Remember to remove excess paint from your brushes before cleaning them, prepare a septic system-friendly cleaning solution, and follow the steps of cleaning, rinsing, and drying your brushes thoroughly. By implementing these steps, you’ll ensure that your paint brushes are clean, well-maintained, and ready for your next creative endeavor.
By being conscious of your septic system and following the proper cleaning techniques, you can enjoy the satisfaction of clean and well-preserved paint brushes while keeping your home’s wastewater management system in top shape. So, the next time you finish a painting project, don’t forget to take the time to clean your brushes with your septic system in mind—it’s a small effort that goes a long way.
Frequently Asked Questions about How To Clean Paint Brushes With A Septic System
Was this page helpful?
At Storables.com, we guarantee accurate and reliable information. Our content, validated by Expert Board Contributors, is crafted following stringent Editorial Policies. We're committed to providing you with well-researched, expert-backed insights for all your informational needs.


0 thoughts on “How To Clean Paint Brushes With A Septic System”