Home>Storage Ideas>Kitchen Storage>How To Clean A Burnt Pot: 5 Tricks Professionals Use
Kitchen Storage
How To Clean A Burnt Pot: 5 Tricks Professionals Use
Modified: January 5, 2024
Learn professional tricks to clean burnt pots with these 5 kitchen storage ideas. Say goodbye to stubborn stains and restore your pots to their former glory.
(Many of the links in this article redirect to a specific reviewed product. Your purchase of these products through affiliate links helps to generate commission for Storables.com, at no extra cost. Learn more)
Introduction
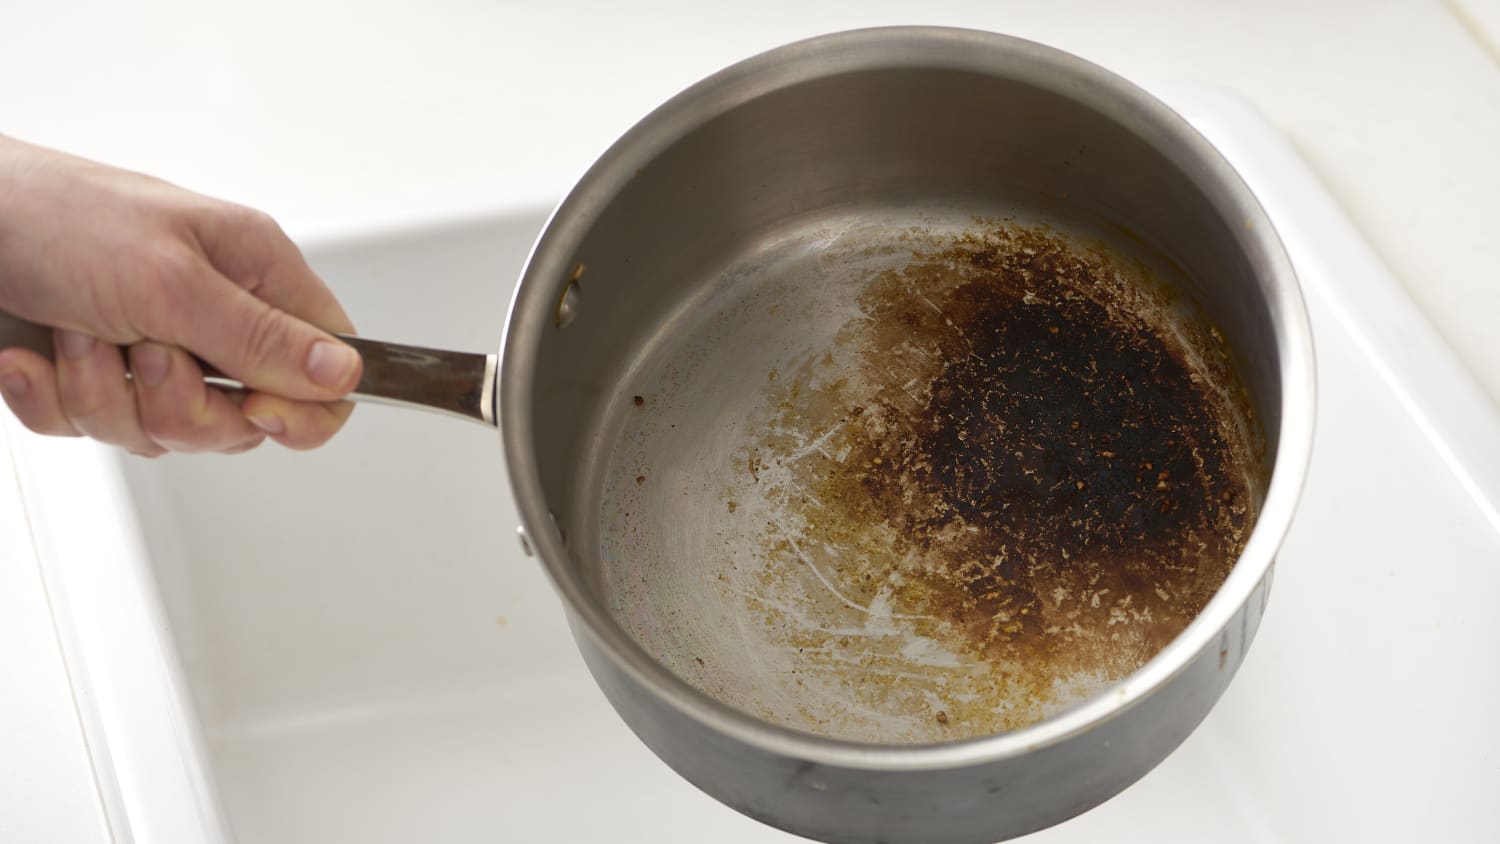
Welcome to our guide on how to clean a burnt pot! We all know the frustration of accidentally leaving a pot on the stove for too long or forgetting to stir while cooking, resulting in a burnt and stubborn residue that seems impossible to remove. However, with the right tricks and techniques, you can restore your burnt pot to its former glory and make it shine again.
Not only does a burnt pot look unsightly, but it can also affect the taste of your future dishes if the burnt residue is not thoroughly removed. While it may seem like a daunting task, cleaning a burnt pot doesn’t have to be a challenge. In this article, we will share five tricks that professionals use to clean burnt pots effectively.
Before we dive into the tricks, it’s essential to gather the necessary materials. You will need common household items such as baking soda, vinegar, salt, lemon juice, dish soap, and cream of tartar. Additionally, having a non-abrasive sponge or scrub brush and a wooden or plastic spatula will aid in the cleaning process.
Now, let’s explore each of these tricks in detail and learn how to clean a burnt pot like a pro!
Key Takeaways:
- Say goodbye to burnt pot nightmares with these 5 professional tricks using everyday household items like baking soda, vinegar, salt, lemon juice, and dish soap. Tackle tough stains and restore your pots to their former glory!
- From natural solutions like salt and lemon juice to the power of commercial cleaners, you have a range of effective options to banish burnt residue and make your pots shine again. Don’t let burnt pots ruin your cooking experience – try these tricks today!
Trick 1: Baking Soda and Vinegar
Baking soda and vinegar are two powerful ingredients that can work wonders when it comes to cleaning a burnt pot. Baking soda acts as a gentle abrasive that helps loosen tough stains, while vinegar’s acidic properties break down grease and grime.
To begin, fill the burnt pot with hot water until the burnt areas are submerged. Add half a cup of baking soda to the water and stir to dissolve it. Let the pot soak for about 30 minutes to loosen the burnt residue.
Once the soaking time is complete, drain the water and observe if the burnt areas have loosened. If there are still stubborn spots, sprinkle baking soda directly onto the remaining residue. Next, pour enough vinegar into the pot to create a fizzing reaction. The fizzing action indicates that the mixture is working to break down the burnt residue.
Use a non-abrasive sponge or scrub brush to scrub the pot gently, focusing on the burnt areas. The combination of baking soda and vinegar should make the scrubbing process easier. Rinse the pot thoroughly with water and inspect if any burnt residue remains.
If needed, repeat the process by applying baking soda directly onto the remaining stubborn spots and adding vinegar to create a fizzing reaction. Scrub again and rinse well to ensure all the burnt residue is removed.
Tips for effective cleaning:
- Make sure to use enough baking soda and vinegar to create a sufficient amount of cleaning mixture.
- Allow the pot to soak for a longer period, if necessary, to loosen tough burnt residue.
- Use a non-abrasive sponge or scrub brush to avoid scratching the pot’s surface.
- Rinse the pot thoroughly after cleaning to remove any residue from the baking soda and vinegar.
With the baking soda and vinegar trick, you can tackle burnt pots with ease and achieve a sparkling clean result. Let’s move on to the next trick: salt and lemon juice!
Key Takeaways:
- Say goodbye to burnt pot nightmares with these 5 professional tricks using everyday household items like baking soda, vinegar, salt, lemon juice, and dish soap. Tackle tough stains and restore your pots to their former glory!
- From natural solutions like salt and lemon juice to the power of commercial cleaners, you have a range of effective options to banish burnt residue and make your pots shine again. Don’t let burnt pots ruin your cooking experience – try these tricks today!
Trick 1: Baking Soda and Vinegar
– Materials needed
To clean a burnt pot using baking soda and vinegar, you will need the following materials:
- Hot water
- Baking soda
- Vinegar
- Non-abrasive sponge or scrub brush
These materials are readily available in most households, making this cleaning trick accessible and affordable.
Hot water is essential to help loosen the burnt residue and prepare the pot for cleaning. It is recommended to fill the pot with enough hot water to submerge the burnt areas.
Baking soda acts as a gentle abrasive and helps in removing tough stains. It is a versatile cleaning agent that is effective for various cleaning tasks around the house.
Vinegar is an acidic liquid that is known for its cleaning properties. It helps break down grease and grime, making it easier to remove burnt residue from the pot.
A non-abrasive sponge or a scrub brush is needed to gently scrub the pot without damaging its surface. It is important to choose a sponge or brush specifically designed for non-stick surfaces to prevent scratches or further damage.
By gathering these materials, you will have everything you need to successfully clean a burnt pot using the baking soda and vinegar trick.
Now that you have the necessary materials, let’s move on to the step-by-step instructions for using baking soda and vinegar to clean a burnt pot.
Key Takeaways:
- Say goodbye to burnt pot nightmares with these 5 professional tricks using everyday household items like baking soda, vinegar, salt, lemon juice, and dish soap. Tackle tough stains and restore your pots to their former glory!
- From natural solutions like salt and lemon juice to the power of commercial cleaners, you have a range of effective options to banish burnt residue and make your pots shine again. Don’t let burnt pots ruin your cooking experience – try these tricks today!
Trick 1: Baking Soda and Vinegar
Read more: How To Clean Burnt Glass
– Step-by-step instructions
Follow these step-by-step instructions to effectively clean a burnt pot using baking soda and vinegar:
- Fill the burnt pot with hot water until the burnt areas are fully submerged.
- Add half a cup of baking soda to the water and stir to dissolve it. Let the pot soak for approximately 30 minutes to loosen the burnt residue.
- After the soaking time, drain the water and check if the burnt areas have loosened. If there are still stubborn spots, sprinkle baking soda directly onto the remaining residue.
- Pour enough vinegar into the pot to create a fizzing reaction with the baking soda. The fizzing action indicates that the mixture is working to break down the burnt residue.
- Use a non-abrasive sponge or scrub brush to gently scrub the pot, focusing on the burnt areas. The combination of baking soda and vinegar helps in loosening the residue, making the scrubbing process easier.
- Rinse the pot thoroughly with water to remove the baking soda and vinegar mixture. Inspect if any burnt residue remains.
- If needed, repeat the process by applying baking soda directly onto the remaining stubborn spots and adding vinegar to create a fizzing reaction. Scrub again and rinse well to ensure all the burnt residue is removed.
- Once the pot is clean, wash it with dish soap and rinse it again to remove any traces of the cleaning mixture.
- Dry the pot completely before storing or using it again.
Following these step-by-step instructions will help you effectively clean a burnt pot using baking soda and vinegar. Remember to be patient and thorough in the cleaning process to ensure the best results.
Now that you’ve mastered the first trick, let’s move on to the next method: cleaning a burnt pot using salt and lemon juice.
Key Takeaways:
- Say goodbye to burnt pot nightmares with these 5 professional tricks using everyday household items like baking soda, vinegar, salt, lemon juice, and dish soap. Tackle tough stains and restore your pots to their former glory!
- From natural solutions like salt and lemon juice to the power of commercial cleaners, you have a range of effective options to banish burnt residue and make your pots shine again. Don’t let burnt pots ruin your cooking experience – try these tricks today!
Trick 1: Baking Soda and Vinegar
– Tips for effective cleaning
Here are some tips to ensure effective cleaning when using baking soda and vinegar to clean a burnt pot:
- Make sure to use enough baking soda and vinegar to create a sufficient amount of cleaning mixture. This will help in breaking down the burnt residue effectively.
- Allow the pot to soak for a longer period if necessary. The longer soaking time will help in loosening tough burnt residue, making it easier to scrub off.
- Use a non-abrasive sponge or scrub brush to avoid scratching the pot’s surface. Scrub gently in circular motions, focusing on the burnt areas. Applying too much pressure or using abrasive materials can damage the pot’s finish.
- Rinse the pot thoroughly after cleaning to remove any residue from the baking soda and vinegar. Residual cleaning agents can affect the taste of your future dishes if not completely rinsed off.
- If there are still stubborn burnt spots after the initial cleaning, repeat the process by applying baking soda directly onto the remaining residue and adding vinegar to create a fizzing reaction. This additional step will further help in breaking down the stubborn residue.
- For pots with non-stick surfaces, be cautious not to use abrasive materials or harsh cleaners that can damage the non-stick coating. Baking soda and vinegar are gentle enough to be used on non-stick surfaces.
- Once the pot is clean, wash it with dish soap and rinse thoroughly to remove any traces of the cleaning mixture. This will ensure that the pot is ready for use again without any lingering cleaning agents.
- Allow the pot to dry completely before storing it. Moisture trapped in the pot can promote the growth of mold and bacteria.
By following these tips, you can achieve the best results when using the baking soda and vinegar method to clean a burnt pot. Now you’re ready to move on to the next trick: cleaning with salt and lemon juice!
Trick 2: Salt and Lemon Juice
If you’re looking for a natural and citrusy solution to clean a burnt pot, look no further than salt and lemon juice. This combination not only helps remove burnt residue but also leaves behind a fresh and pleasant scent.
To begin, sprinkle a thick layer of salt onto the burnt areas of the pot. The coarse texture of the salt acts as a gentle abrasive, helping to loosen the burnt residue. Make sure to cover all the affected areas evenly.
Next, cut a lemon in half and squeeze the juice directly onto the salt. The acidic nature of the lemon juice works effectively to break down grease and grime. The combination of salt and lemon juice creates a powerful cleaning paste.
Take one half of the lemon and use it to scrub the pot, applying gentle pressure. The juice and salt mixture will work together to lift the burnt residue. Continue scrubbing until all the burnt areas are covered and the residue starts to come off.
If needed, add more salt or lemon juice to the pot as you scrub, ensuring the paste remains moist and effective. The citric acid in the lemon juice helps in brightening the pot’s surface, leaving it looking clean and refreshed.
Once all the burnt residue is removed, rinse the pot thoroughly with water to remove any excess salt and lemon juice. Inspect the pot to ensure it is completely clean and free from any residue.
Tips for effective cleaning:
- Use coarse salt, such as kosher salt or sea salt, for better scrubbing action.
- Gently scrub the pot with the lemon half to avoid scratching the pot’s surface. The combination of salt and lemon juice should do most of the cleaning work.
- Rinse the pot thoroughly after cleaning to remove any remaining salt and lemon juice. This will prevent any tangy or salty flavors from transferring to your future dishes.
- If necessary, repeat the process to ensure all the burnt residue is removed.
Using salt and lemon juice is a simple and natural method to tackle a burnt pot. Now, let’s move on to the step-by-step instructions for this trick!
Trick 2: Salt and Lemon Juice
– Materials needed
To clean a burnt pot using salt and lemon juice, you will need the following materials:
- Salt (coarse salt, such as kosher salt or sea salt, is recommended)
- Lemon(s)
- Water
- Non-abrasive sponge or scrub brush
These materials are readily available in most households and offer a natural alternative for cleaning burned pots.
Salt acts as an abrasive agent that helps to scrub away the burnt residue without scratching the pot’s surface. Coarse salt, such as kosher salt or sea salt, works best for this purpose.
Lemons contain citric acid, which is effective in breaking down grease and grime. The acidic nature of lemon juice helps in brightening the pot’s surface and leaving a fresh scent.
Water is necessary for rinsing the pot and removing any remaining salt and lemon juice after cleaning.
A non-abrasive sponge or scrub brush is needed to gently scrub the pot without causing any damage. Choose a sponge or brush specifically designed for non-stick surfaces if your pot has a non-stick coating.
By gathering these materials, you will have everything you need to successfully clean a burnt pot using salt and lemon juice.
Now that you have the necessary materials, let’s move on to the step-by-step instructions for using salt and lemon juice to clean a burnt pot.
Trick 2: Salt and Lemon Juice
Read more: How To Clean Burnt Glass
– Step-by-step instructions
Follow these step-by-step instructions to effectively clean a burnt pot using salt and lemon juice:
- Sprinkle a thick layer of salt onto the burnt areas of the pot. Make sure to cover all the affected areas evenly.
- Cut a lemon in half and squeeze the juice directly onto the salt. The acidic nature of the lemon juice helps to break down grease and grime.
- Take one half of the lemon and use it to scrub the pot, applying gentle pressure. The combination of salt and lemon juice acts as a cleaning paste, lifting the burnt residue.
- If needed, add more salt or lemon juice to the pot as you scrub, ensuring the paste remains moist and effective. Continue scrubbing until all the burnt areas are covered and the residue starts to come off.
- Rinse the pot thoroughly with water to remove any excess salt and lemon juice. Inspect the pot to ensure it is completely clean and free from any residue.
After following these steps, your pot should be clean and free from burnt residue. The salt and lemon juice combination provides a natural and effective cleaning solution.
Remember, it is important to be gentle while scrubbing to avoid scratching the pot’s surface. The abrasive action of the salt and the acidity of the lemon juice will do most of the cleaning work.
Now that you’ve successfully cleaned your pot using salt and lemon juice, let’s move on to the next trick: cleaning with boiling water and dish soap.
Trick 2: Salt and Lemon Juice
– Tips for effective cleaning
Here are some tips to ensure effective cleaning when using salt and lemon juice to clean a burnt pot:
- Use coarse salt, such as kosher salt or sea salt, for better scrubbing action. The coarse texture of the salt helps to remove the burnt residue without scratching the pot’s surface.
- Gently scrub the pot with the lemon half to avoid causing any damage. The combination of salt and lemon juice should do most of the cleaning work.
- If the burnt residue is particularly stubborn, let the salt and lemon juice mixture sit on the affected areas for a few minutes before scrubbing. This allows the acidic properties of lemon juice to further break down the residue.
- Rinse the pot thoroughly with water after cleaning to remove any remaining salt and lemon juice. This will prevent any lingering flavors or scents from affecting your future cooking.
- If needed, repeat the process by applying more salt and lemon juice to any remaining stubborn spots. Continue scrubbing until the pot is completely clean.
- For pots with non-stick surfaces, make sure to use a non-abrasive sponge or scrub brush. Abrasive materials can damage the non-stick coating.
- After cleaning, wash the pot with dish soap and rinse it thoroughly to remove any remaining residue. This will ensure that the pot is ready for use again.
- Allow the pot to dry completely before storing it. This prevents any moisture from promoting the growth of mold or bacteria.
By following these tips, you can effectively clean a burnt pot using salt and lemon juice. This natural cleaning method is not only effective but also leaves your pot smelling fresh and clean.
Now that you’re familiar with the tips, you’re ready to tackle burnt pots using the salt and lemon juice trick. Let’s move on to the next method: cleaning with boiling water and dish soap.
Trick 3: Boiling Water and Dish Soap
When it comes to cleaning a burnt pot, sometimes the simplest methods can be the most effective. One such method is using boiling water and dish soap. This combination helps to loosen and lift stubborn burnt residue, making it easier to clean.
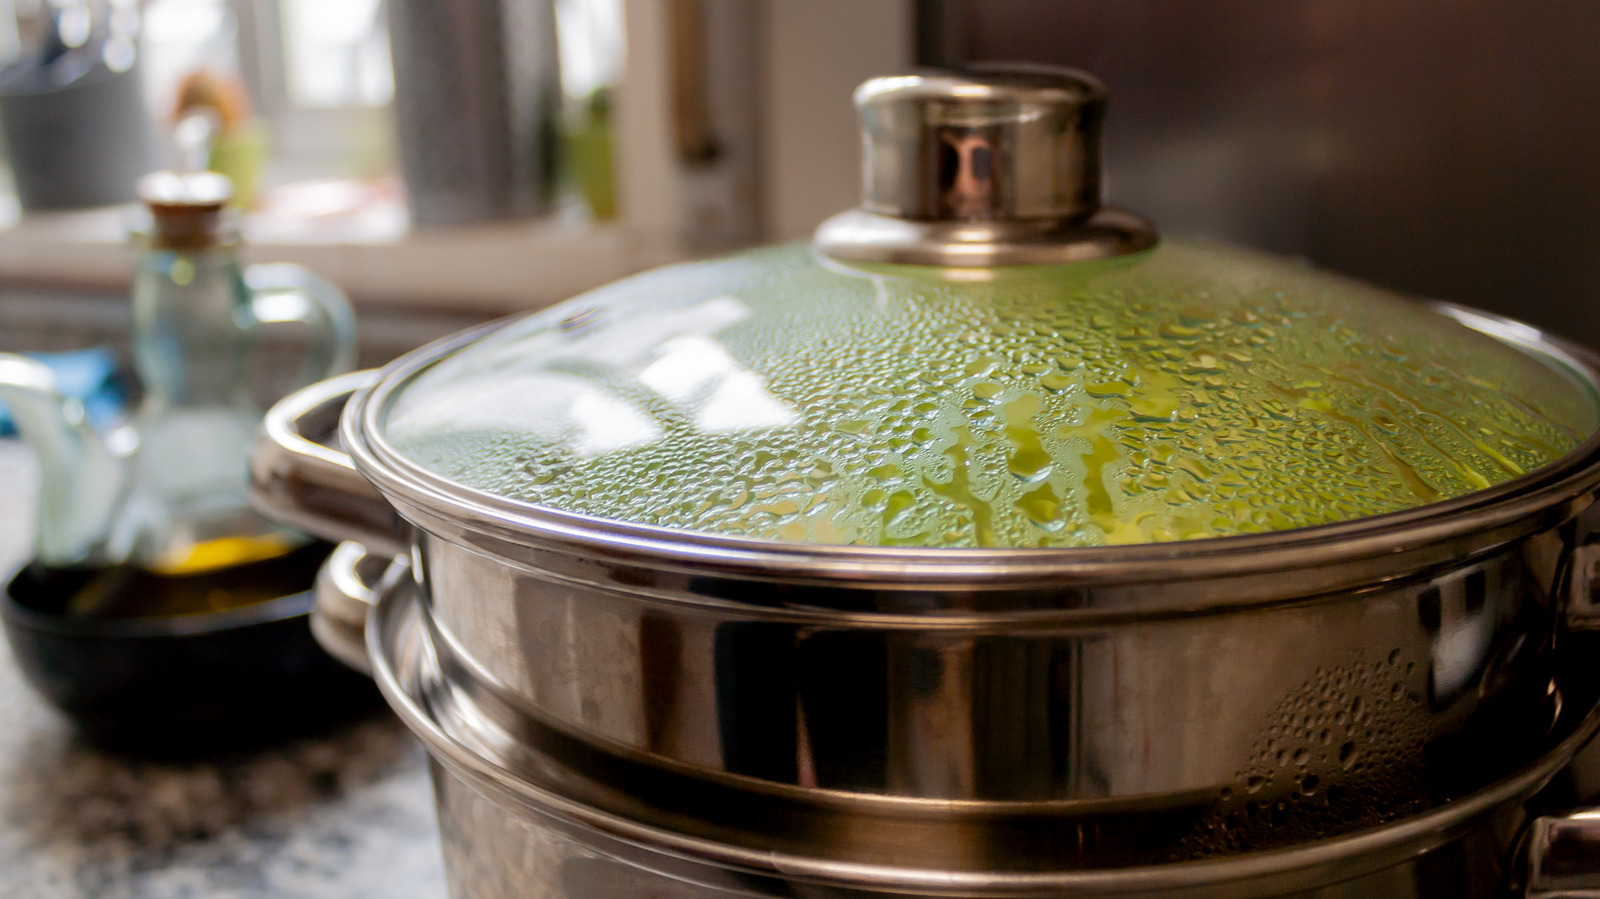
To begin, fill the burnt pot with enough water to cover the burnt areas. Place the pot on the stove and bring the water to a boil. Let it boil for a few minutes to help loosen the burnt residue.
Once the water has reached a rolling boil, remove the pot from the heat and add a generous amount of dish soap. The dish soap will work to break down grease and grime, making it easier to remove the burnt residue.
Using a wooden or plastic spatula, gently scrape the bottom and sides of the pot to loosen any burnt particles. The hot water and dish soap mixture should help in lifting the residue, making it easier to remove.
After scraping, let the pot sit for a few minutes to allow the soapy water to continue working on the burnt residue. This will further loosen the residue and make it easier to clean.
Next, drain the soapy water and use a non-abrasive sponge or scrub brush to scrub the pot. Focus on the areas with burnt residue, applying gentle pressure to remove any remaining stains.
Rinse the pot thoroughly with water to remove any soapy residue. Inspect the pot to ensure all the burnt residue has been successfully removed.
Tips for effective cleaning:
- Make sure to use enough water to cover the burnt areas of the pot. A sufficient amount of water will help in loosening the burnt residue more effectively.
- When scraping the pot, use a wooden or plastic spatula to avoid scratching the pot’s surface.
- Allow the soapy water to sit in the pot for a few minutes before scrubbing. This gives the dish soap time to break down the burnt residue.
- Rinse the pot thoroughly to remove any remaining dish soap residue. This will prevent any soapy flavors from transferring to your future dishes.
- If needed, repeat the process by boiling water and adding more dish soap to stubborn spots. Continue scrubbing until the pot is clean.
With boiling water and dish soap, you can effectively remove burnt residue from your pot. Now, let’s move on to the step-by-step instructions for this cleaning trick!
Trick 3: Boiling Water and Dish Soap
– Materials needed
To clean a burnt pot using boiling water and dish soap, you will need the following materials:
- Water
- Dish soap
- Wooden or plastic spatula
- Non-abrasive sponge or scrub brush
These materials are commonly found in most households, making this cleaning trick easily accessible and convenient.
Water is necessary for boiling and creating a hot, steamy environment that helps to loosen burnt residue. Be sure to use enough water to cover the burnt areas of the pot.
Dish soap is a powerful cleaning agent that works to break down grease and grime. It helps to remove burnt residue and make the cleaning process easier.
A wooden or plastic spatula is required to gently scrape the bottom and sides of the pot. This spatula will help in loosening the burnt particles without causing any damage to the pot’s surface.
A non-abrasive sponge or scrub brush is needed to scrub the pot and remove any remaining burnt residue. Choose a sponge or brush specifically designed for non-stick surfaces if your pot has a non-stick coating.
By gathering these materials, you will have everything you need to successfully clean a burnt pot using boiling water and dish soap.
Now that you have the necessary materials, let’s move on to the step-by-step instructions for using boiling water and dish soap to clean a burnt pot.
Trick 3: Boiling Water and Dish Soap
Read more: How To Clean Burnt Glass
– Step-by-step instructions
Follow these step-by-step instructions to effectively clean a burnt pot using boiling water and dish soap:
- Fill the burnt pot with enough water to cover the burnt areas.
- Place the pot on the stove and bring the water to a boil. Let it boil for a few minutes to help loosen the burnt residue.
- Once the water has reached a rolling boil, remove the pot from the heat and add a generous amount of dish soap. The dish soap will work to break down grease and grime.
- Use a wooden or plastic spatula to gently scrape the bottom and sides of the pot. The hot water and dish soap mixture should help in lifting the burnt residue.
- After scraping, let the pot sit for a few minutes to allow the soapy water to continue working on the burnt residue.
- Drain the soapy water from the pot.
- Use a non-abrasive sponge or scrub brush to scrub the pot, focusing on the areas with burnt residue. Apply gentle pressure to remove any remaining stains.
- Rinse the pot thoroughly with water to remove any soapy residue.
- Inspect the pot to ensure all the burnt residue has been successfully removed.
By following these steps, you can effectively clean a burnt pot using boiling water and dish soap. The hot water and dish soap combination works together to loosen and lift stubborn burnt residue, making it easier to clean.
Remember to be gentle while scraping and scrubbing to avoid damaging the pot’s surface. With this simple yet effective method, you can revive your burnt pot and have it looking clean and shiny once again.
Now that you’ve successfully cleaned your pot using boiling water and dish soap, let’s move on to the next trick: cleaning with cream of tartar.
Trick 3: Boiling Water and Dish Soap
– Tips for effective cleaning
Here are some tips to ensure effective cleaning when using boiling water and dish soap to clean a burnt pot:
- Use enough water to cover the burnt areas of the pot. Sufficient water will create a hot, steamy environment that helps in loosening the burnt residue.
- Let the water boil for a few minutes before adding dish soap. Boiling water helps in softening and loosening the burnt residue.
- Add a generous amount of dish soap to the boiling water. The dish soap works to break down grease and grime, making it easier to remove the burnt residue.
- Use a wooden or plastic spatula to gently scrape the bottom and sides of the pot. Be cautious not to use metal utensils, as they can scratch the pot’s surface.
- Allow the soapy water to sit in the pot for a few minutes before draining. This will give the dish soap time to work on the burnt residue and make it easier to clean.
- When scrubbing the pot, use a non-abrasive sponge or scrub brush. These tools will help in removing any remaining burnt residue without damaging the pot’s surface.
- Rinse the pot thoroughly with water to remove any soapy residue. This will ensure that no soapy flavors transfer to your future cooking.
- If necessary, repeat the process by boiling water and adding more dish soap to stubborn areas. Continue scrubbing until the pot is clean.
By following these tips, you can effectively clean a burnt pot using boiling water and dish soap. This method is simple yet effective, and it requires minimal effort to achieve great results.
Now that you’re familiar with the tips, you’re ready to try the boiling water and dish soap trick to clean your burnt pot. Let’s move on to the next method: cleaning with cream of tartar!
Trick 4: Cream of Tartar
When it comes to cleaning a burnt pot, cream of tartar is a handy ingredient that can effectively remove stubborn residue. Cream of tartar, also known as potassium bitartrate, works as a gentle abrasive and stain remover, making it an excellent choice for tackling tough burnt stains.
To use cream of tartar to clean a burnt pot, here’s what you need to do:
1. Mix equal parts of cream of tartar and water to create a paste. The amount of paste you create will depend on the size of your pot and the extent of the burnt residue.
2. Apply the paste directly to the burnt areas of the pot. Spread it evenly, ensuring that the affected areas are completely covered with the paste.
3. Let the paste sit on the pot for about 30 minutes. This will allow the cream of tartar to penetrate the burnt residue and loosen it from the surface.
4. After the allotted time, use a non-abrasive sponge or scrub brush to gently scrub the pot. The cream of tartar paste acts as a mild abrasive, helping to lift the burnt residue without scratching the pot’s surface.
5. Rinse the pot thoroughly with water to remove any remaining paste and residue. Inspect the pot to ensure all the burnt stains are effectively removed.
6. If necessary, repeat the process for stubborn or heavily burnt areas. Apply another layer of the cream of tartar paste, let it sit, and gently scrub again until the pot is clean.
Tips for effective cleaning:
– Test the cream of tartar paste on a small, inconspicuous area of the pot before applying it to the entire burnt area. This will ensure that the paste does not cause any discoloration or damage to the pot’s surface.
– For best results, start cleaning the burnt pot as soon as possible. The longer the burnt residue sits on the surface, the more challenging it can be to remove.
– Use a non-abrasive sponge or scrub brush to avoid scratching or damaging the pot’s surface. Be gentle while scrubbing to prevent any further damage.
– If you don’t have cream of tartar on hand, you can also try mixing baking soda with water to create a paste. Baking soda also has mild abrasive properties and can help in removing burnt stains.
By following these instructions and tips, you can effectively use cream of tartar to clean your burnt pot and restore it to its former glory. Now, let’s move on to the final trick: using a commercial cleaner.
Trick 4: Cream of Tartar
– Materials needed
To clean a burnt pot using cream of tartar, you will need the following materials:
- Cream of tartar
- Water
- Non-abrasive sponge or scrub brush
These materials are readily available and can be easily found in most kitchens or supermarkets.
Cream of tartar, also known as potassium bitartrate, is the key ingredient for this cleaning trick. It is a natural product that is commonly used in baking and cooking.
Water is necessary to mix with the cream of tartar to create a paste. The amount of water needed will depend on the desired consistency of the paste and the extent of the burnt residue.
A non-abrasive sponge or scrub brush is required to gently scrub the pot. Using a non-abrasive tool is important to avoid scratching or damaging the pot’s surface.
By gathering these materials, you will have everything you need to successfully clean a burnt pot using cream of tartar.
Now that you have the necessary materials, let’s move on to the step-by-step instructions for using cream of tartar to clean a burnt pot.
Trick 4: Cream of Tartar
Read more: How To Clean Burnt Glass
– Step-by-step instructions
Follow these step-by-step instructions to effectively clean a burnt pot using cream of tartar:
- Mix equal parts of cream of tartar and water to create a paste. The amount of paste you create will depend on the size of your pot and the extent of the burnt residue.
- Apply the cream of tartar paste directly to the burnt areas of the pot. Spread it evenly, ensuring that the affected areas are completely covered with the paste.
- Let the paste sit on the pot for about 30 minutes. This will allow the cream of tartar to penetrate the burnt residue and loosen it from the surface.
- After the allotted time, use a non-abrasive sponge or scrub brush to gently scrub the pot. The cream of tartar paste acts as a mild abrasive, helping to lift the burnt residue without scratching the pot’s surface.
- Rinse the pot thoroughly with water to remove any remaining paste and residue. Inspect the pot to ensure all the burnt stains are effectively removed.
- If necessary, repeat the process for stubborn or heavily burnt areas. Apply another layer of the cream of tartar paste, let it sit, and gently scrub again until the pot is clean.
Following these step-by-step instructions will help you effectively use cream of tartar to clean your burnt pot. The cream of tartar paste acts as a gentle abrasive and stain remover, assisting in breaking down and lifting the burnt residue.
Remember to be gentle while scrubbing to avoid scratching or damaging the pot’s surface. Cream of tartar is natural, safe, and effective for cleaning most types of pots.
Now that you’ve successfully cleaned your pot using cream of tartar, let’s move on to the final trick: using a commercial cleaner, which can be a great option for tough burnt stains or heavily soiled pots.
Trick 4: Cream of Tartar
– Tips for effective cleaning
Here are some tips to ensure effective cleaning when using cream of tartar to clean a burnt pot:
- Make sure to mix equal parts of cream of tartar and water to create a paste. This will ensure the right consistency for effective cleaning.
- Apply the cream of tartar paste directly to the burnt areas of the pot, making sure to cover all the affected spots evenly. The paste needs to make direct contact with the burnt residue for optimal cleaning.
- Allow the cream of tartar paste to sit on the pot for about 30 minutes. This gives it time to penetrate the burnt residue and loosen it from the surface. If the burnt stains are particularly stubborn, you can let the paste sit for a longer period.
- Use a non-abrasive sponge or scrub brush to gently scrub the pot. Avoid using abrasive materials or harsh scrubbers, as they can potentially damage the pot’s surface. The cream of tartar paste will serve as a mild abrasive that helps in lifting the burnt residue without scratching.
- Rinse the pot thoroughly with water after scrubbing to remove any remaining residue and the cream of tartar paste. This will ensure that no residue or taste is left behind from the cleaning process.
- If needed, repeat the process for stubborn or heavily burnt areas. Apply another layer of the cream of tartar paste, let it sit, and gently scrub again until the pot is clean.
- Be patient and thorough in the cleaning process. Depending on the severity of the burnt residue, it may take multiple attempts or some extra scrubbing to achieve the desired results.
- After cleaning, dry the pot completely before storing or using it again. Moisture can promote the growth of mold or bacteria.
By implementing these tips, you can effectively use cream of tartar to clean your burnt pot. The mild abrasive properties of cream of tartar, combined with its stain-removing qualities, make it an excellent choice for tackling tough burnt stains.
Now that you’re familiar with the tips, you’re ready to try the cream of tartar trick to clean your burnt pot. Let’s move on to the final method: using a commercial cleaner.
Trick 5: Commercial Cleaner
When dealing with heavily burnt and stubborn residue that is resistant to homemade cleaning solutions, a commercial cleaner can be a powerful ally. Commercial cleaners are specifically formulated to tackle tough stains and burnt-on food, making them an effective option for deep-cleaning your burnt pot.
Here’s how you can use a commercial cleaner to clean your burnt pot:
1. Read the instructions: Before using a commercial cleaner, carefully read and follow the manufacturer’s instructions. Each cleaner may have specific guidelines regarding usage and dilution ratios.
2. Apply the cleaner: Apply the commercial cleaner directly to the burnt areas of the pot. Make sure to cover the affected spots thoroughly. If the cleaner is concentrated, dilute it according to the instructions provided.
3. Let it sit: Allow the commercial cleaner to sit for the recommended time specified on the product label. This allows the cleaner to penetrate and break down the burnt residue.
4. Scrub and clean: After the allotted time, use a non-abrasive sponge or scrub brush to scrub the pot. Focus on the burnt areas, applying gentle pressure. The commercial cleaner will help in loosening the burnt residue, making it easier to remove.
5. Rinse thoroughly: Once you have scrubbed the pot, rinse it thoroughly with water to remove any remaining commercial cleaner residue. Make sure to rinse multiple times to ensure all traces of the cleaner are removed.
6. Inspect and repeat if necessary: Inspect the pot to ensure all the burnt residue has been effectively removed. If there are still stubborn spots or if the burnt residue persists, you may need to repeat the process or try a different commercial cleaner.
Tips for effective cleaning:
– When using a commercial cleaner, always wear protective gloves and follow safety precautions as indicated on the product label.
– Choose a commercial cleaner specifically designed for kitchen use and suitable for your pot’s material. Different materials may require different cleaners.
– If possible, opt for environmentally friendly or non-toxic commercial cleaners to minimize environmental impact and potential health risks.
– Follow the manufacturer’s instructions carefully, including any recommendations for ventilation or proper disposal of the cleaning solution.
– Use a non-abrasive sponge or scrub brush to avoid scratching the pot’s surface while scrubbing.
– Test the commercial cleaner on a small, inconspicuous area of the pot before applying it to the entire burnt area. This helps ensure compatibility with the pot’s material.
Commercial cleaners can be a convenient option when dealing with stubborn burnt residue. However, always use caution and follow instructions to ensure safe and effective cleaning. Carrying out a patch test and wearing protective gloves are important steps to protect your skin and health.
With the right commercial cleaner and proper cleaning technique, you’ll be able to restore your burnt pot to its original shine and cleanliness.
Trick 5: Commercial Cleaner
– Materials needed
To clean a burnt pot using a commercial cleaner, you will need the following materials:
- Commercial cleaner suitable for pots and pans
- Non-abrasive sponge or scrub brush
- Protective gloves (optional but recommended)
- Water
These materials are commonly available and can be easily found at supermarkets or stores specializing in household cleaning products.
A commercial cleaner suitable for pots and pans is the key ingredient for this cleaning trick. Choose a cleaner that is specifically designed for burnt-on food or tough stains. Read the labels and follow the manufacturer’s instructions for proper usage.
A non-abrasive sponge or scrub brush is needed to scrub the pot after applying the commercial cleaner. This will help in loosening the burnt residue without damaging the pot’s surface. Make sure to choose a tool that is suitable for the material of your pot.
Protective gloves are optional but recommended when working with commercial cleaners. They can help protect your hands from any potential irritation or reactions caused by the ingredients in the cleaner.
Water is essential for rinsing the pot after cleaning to remove any residual cleaner and debris.
By gathering these materials, you will have everything you need to successfully clean a burnt pot using a commercial cleaner.
Now that you have the necessary materials, let’s move on to the step-by-step instructions for using a commercial cleaner to clean a burnt pot.
Trick 5: Commercial Cleaner
Read more: How To Clean Burnt Glass
– Step-by-step instructions
Follow these step-by-step instructions to effectively clean a burnt pot using a commercial cleaner:
- Read and follow the manufacturer’s instructions: Begin by carefully reading and understanding the instructions provided by the manufacturer of the commercial cleaner. Adhere to any safety precautions and usage guidelines specified.
- Apply the commercial cleaner: Apply the commercial cleaner directly to the burnt areas of the pot. Make sure to cover the affected spots thoroughly. If the cleaner is concentrated, consider diluting it according to the instructions provided.
- Let the cleaner work: Allow the commercial cleaner to sit on the pot for the recommended time specified on the product label. This gives the cleaner sufficient time to penetrate and break down the burnt residue effectively.
- Scrub the pot: Take a non-abrasive sponge or scrub brush and gently scrub the pot, focusing on the areas with burnt residue. Apply moderate pressure and use circular or back-and-forth motions to help dislodge the residue.
- Rinse thoroughly: Once you have scrubbed the pot, thoroughly rinse it with water to remove any remaining residue and the commercial cleaner. Ensure that you rinse multiple times to ensure all traces of the cleaner are removed.
- Inspect the pot: After rinsing, inspect the pot to ensure all the burnt residue has been effectively removed. If there are any stubborn spots or if the burnt residue persists, you may need to repeat the process or try a different commercial cleaner.
By following these steps, you can effectively use a commercial cleaner to clean your burnt pot. The specific instructions may vary depending on the product, so be sure to refer to the manufacturer’s guidelines.
Remember to exercise caution and follow any safety precautions mentioned on the product label. Depending on the severity of the burnt residue, you may need to adjust the cleaning time or repeat the process for optimal results.
Now that you’ve successfully cleaned your pot using a commercial cleaner, your pot should be restored to its original cleanliness. With a little help from this powerful cleaning solution, your pot will be ready to use for your next culinary adventure!
Trick 5: Commercial Cleaner
– Tips for effective cleaning
Here are some tips to ensure effective cleaning when using a commercial cleaner to clean a burnt pot:
- Read the instructions: Carefully read and follow the manufacturer’s instructions for the specific commercial cleaner you are using. Adhering to the guidelines provided will help you achieve the best results.
- Choose the right cleaner: Select a commercial cleaner that is specifically formulated for cleaning pots and pans or removing tough stains. Different cleaners may have varying concentrations and purposes, so choose one that suits your needs.
- Test a small area first: Before applying the commercial cleaner to the entire burnt area of the pot, test it on a small, inconspicuous spot to ensure compatibility with the pot’s material and to check for any adverse reactions.
- Protect your hands: Consider wearing protective gloves while using the commercial cleaner. This will help protect your hands from any potential skin irritation or allergies caused by the ingredients in the cleaner.
- Scrub gently: Use a non-abrasive sponge or scrub brush to scrub the pot. Avoid using abrasive materials or harsh scrubbers that could scratch or damage the pot’s surface. Apply moderate pressure and scrub gently, especially on delicate surfaces.
- Rinse thoroughly: After scrubbing with the commercial cleaner, rinse the pot thoroughly with water. Make sure to rinse multiple times to ensure that all traces of the cleaner, as well as burnt residue, are completely removed.
- Inspect and repeat if necessary: Inspect the pot after cleaning to ensure all the burnt residue has been effectively removed. If stubborn spots persist, consider repeating the cleaning process or trying a different commercial cleaner.
- Follow safety guidelines: Follow any safety precautions mentioned on the product label, such as proper ventilation or usage in well-ventilated areas. Some commercial cleaners may contain strong chemicals, so it’s important to handle them with care.
By following these tips, you can ensure a safe and effective cleaning experience when using a commercial cleaner to clean your burnt pot. Commercial cleaners are designed to tackle tough stains, but it’s important to use them properly and exercise caution.
Now that you’re familiar with the tips, you’re ready to confidently use a commercial cleaner to tackle even the most stubborn burnt residue on your pot. Enjoy a sparkling clean pot ready for your next cooking adventure!
Conclusion
Cleaning a burnt pot may seem like a daunting task, but with the right tricks and techniques, you can easily restore your pot to its former glory. We have explored five effective methods that professionals use to clean burnt pots:
- Baking Soda and Vinegar: A powerful combination that helps to break down burnt residue.
- Salt and Lemon Juice: A natural and citrusy solution that lifts burnt stains and leaves a fresh scent.
- Boiling Water and Dish Soap: A simple method that utilizes the power of heat and dish soap to loosen and remove burnt residue.
- Cream of Tartar: A gentle abrasive that effectively lifts stubborn burnt stains.
- Commercial Cleaner: A powerful option for heavily burnt pots and tough stains.
Each method has its own set of materials and step-by-step instructions, ensuring that you can choose the method that suits your preferences and the available resources. Additionally, we have provided valuable tips to make your cleaning process even more effective and efficient.
Remember to exercise caution, follow the instructions of each method, and choose the appropriate cleaning solution based on the material of your pot. Safety should always be a priority when cleaning with any solution, especially commercial cleaners.
By applying these techniques and tips, you can bid farewell to those pesky burnt stains and enjoy a clean and gleaming pot once again. The next time you accidentally leave your pot on the stove a little too long, you’ll know exactly how to tackle the burnt residue with confidence.
So, roll up your sleeves, gather the necessary materials, and showcase your cleaning prowess as you bring your burnt pot back to life. Happy cleaning!
Frequently Asked Questions about How To Clean A Burnt Pot: 5 Tricks Professionals Use
Was this page helpful?
At Storables.com, we guarantee accurate and reliable information. Our content, validated by Expert Board Contributors, is crafted following stringent Editorial Policies. We're committed to providing you with well-researched, expert-backed insights for all your informational needs.


0 thoughts on “How To Clean A Burnt Pot: 5 Tricks Professionals Use”