Home>Storage Ideas>Kitchen Storage>How To Clean A Slow Cooker, Including Tough Stuck-On Stains

Kitchen Storage
How To Clean A Slow Cooker, Including Tough Stuck-On Stains
Modified: August 26, 2024
Learn how to effectively clean your slow cooker and remove tough stuck-on stains with these kitchen storage ideas.
(Many of the links in this article redirect to a specific reviewed product. Your purchase of these products through affiliate links helps to generate commission for Storables.com, at no extra cost. Learn more)
Introduction
Welcome to our comprehensive guide on how to clean a slow cooker, including those tough stuck-on stains. Slow cookers are a fantastic kitchen appliance for convenient and delicious meals, but over time, they can accumulate food residue and stains that can be challenging to remove. However, with the right techniques and a little bit of effort, you can keep your slow cooker looking and functioning its best.
Before we dive into the cleaning process, it’s essential to ensure your safety. Always make sure that your slow cooker is unplugged and cooled down before starting the cleaning process. This will prevent any accidents and protect you from potential burns.
Now, let’s get started on cleaning your slow cooker and restoring it to its original sparkling condition.
Key Takeaways:
- Keep your slow cooker sparkling by following safety precautions, soaking, using baking soda paste, vinegar solution, and scrubbing with a soft sponge. Don’t forget to clean the lid and handles for a thorough clean.
- Maintain your slow cooker’s longevity by following essential maintenance tips, such as using non-scratch utensils, inspecting the power cord, and storing it in a cool, dry place. Prioritize safety and regular cleaning for optimal performance.
Safety Precautions
When it comes to cleaning your slow cooker, it’s important to prioritize safety. By following these precautions, you can ensure a safe and effective cleaning process:
- Always unplug your slow cooker and let it cool down before cleaning. This will prevent any risk of electrical shock or burns.
- Handle the slow cooker with care, as it can be heavy and become hot during cooking. Use oven mitts or heat-resistant gloves to protect your hands while cleaning.
- Never immerse the base of the slow cooker in water or any other liquid. The base contains electrical components and should only be wiped clean with a damp cloth.
- Take extra caution when handling the ceramic insert of the slow cooker, as it can be fragile and prone to cracking or breaking. Avoid any sudden impacts or drastic temperature changes.
- Avoid using abrasive cleaners, metal scouring pads, or sharp utensils that can scratch or damage the surface of the slow cooker.
- Keep cleaning solutions and materials out of reach of children and pets to prevent accidental ingestion or exposure to harmful chemicals.
- If you encounter any issues or have questions regarding the cleaning process, consult the manufacturer’s instructions or contact their customer support for guidance.
By following these safety precautions, you can clean your slow cooker effectively without compromising your own well-being.
Removing Any Remaining Food
Before you can start cleaning your slow cooker, it’s important to remove any remaining food or residue. Follow these steps to ensure a thorough clean:
- Allow the slow cooker to cool down completely. This will make it easier to handle and reduce the risk of burns.
- Remove the ceramic insert from the slow cooker. Take caution as it may still be hot or heavy. Place it on a heat-resistant surface or a kitchen towel.
- Gently scrape off any food residue using a soft spatula or a plastic utensil. Be careful not to scratch the surface of the ceramic insert.
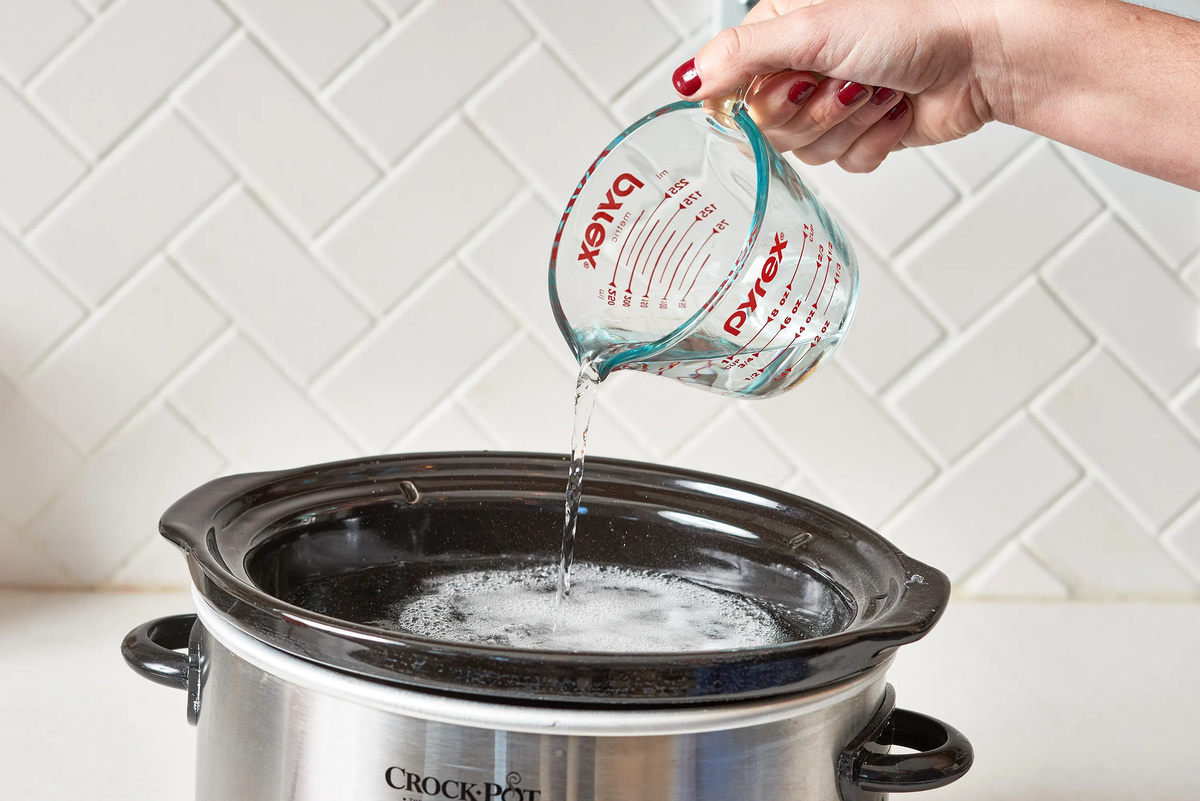
- If there are stubborn bits of food that won’t come off, pour some warm water into the slow cooker and let it sit for a few minutes. This will help loosen the stuck-on food.
- Dispose of the water and food particles from the slow cooker’s base. Wipe it clean with a damp cloth or sponge.
Once you have removed any remaining food, you can move on to the next steps in the cleaning process. These initial steps will ensure that no leftover food or debris interferes with the effectiveness of your cleaning methods.
Soaking the Slow Cooker
After removing any remaining food, the next step in cleaning your slow cooker is to soak the ceramic insert. Soaking helps to loosen stubborn stains and make them easier to remove. Here’s how to do it:
- Fill the sink or a large basin with warm water. Ensure that there is enough water to fully submerge the ceramic insert.
- Add a few drops of mild dish soap or a small amount of baking soda to the water. These gentle cleansers will help break down grease and grime.
- Place the ceramic insert in the water, making sure it is completely submerged. If necessary, use a heavy object, such as a plate, to keep it under the water.
- Let the slow cooker soak for at least 30 minutes or up to a few hours, depending on the severity of the stains. This soaking period allows the water and cleaning solution to penetrate and loosen the residue.
- While the slow cooker is soaking, you can take this time to clean the lid and handles separately. Follow the manufacturer’s instructions for these specific parts, as they may not be suitable for soaking.
After the soaking period, you are ready to tackle the cleaning process. Soaking the slow cooker helps to soften and loosen any remaining stains, making them easier to remove with the following cleaning methods.
Using Baking Soda Paste
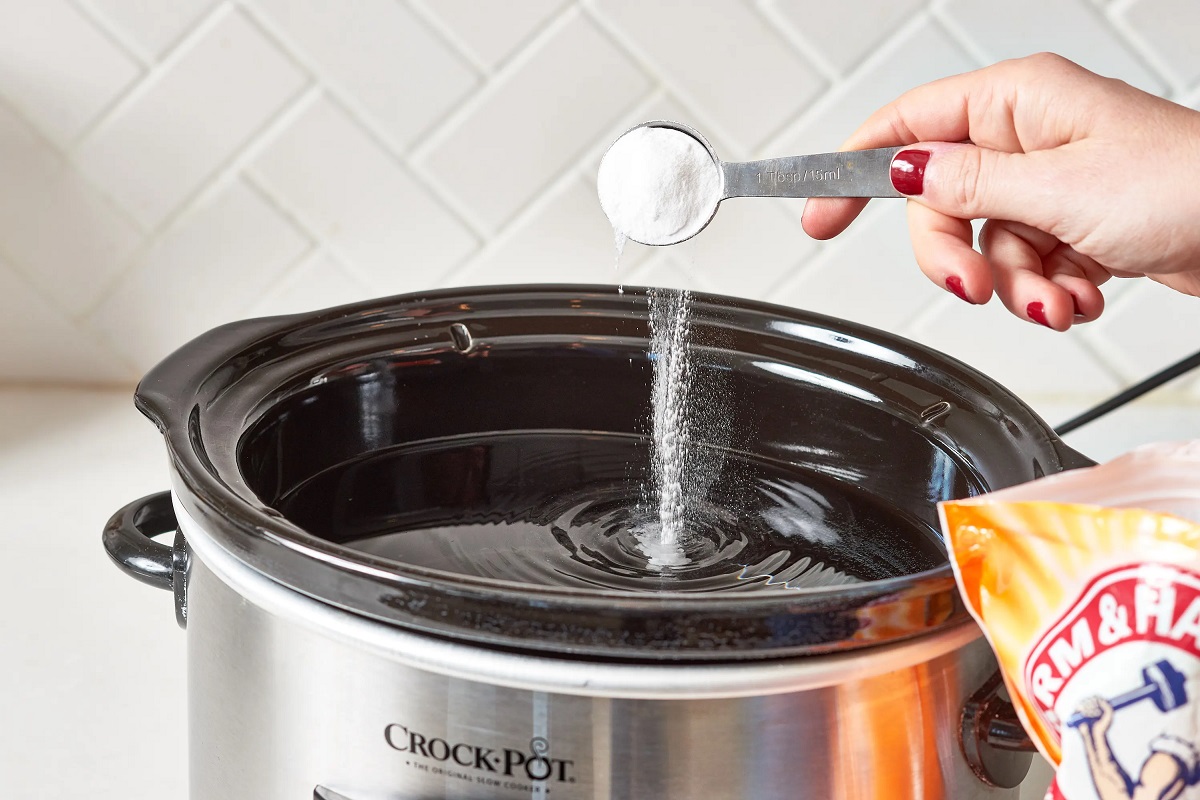
Baking soda is a versatile and effective cleaning agent that can help remove tough stains and odors from your slow cooker. Creating a baking soda paste will allow you to target specific areas that require extra cleaning attention. Here’s how to make and use a baking soda paste:
- In a small bowl, combine a few tablespoons of baking soda with enough water to create a thick, spreadable paste.
- Apply the baking soda paste onto the stained areas of the ceramic insert. Focus on any stubborn stains or areas with dried-on food residue.
- Allow the baking soda paste to sit for 15-20 minutes. This will give it time to work its magic and break down the stains.
- Using a soft sponge or cloth, gently scrub the baking soda paste into the stained areas. Apply a bit of pressure to encourage the paste to lift the stains.
- Rinse the ceramic insert thoroughly with warm water to remove any residue from the baking soda paste.
- Inspect the slow cooker for any remaining stains. If necessary, repeat the process until all stains are removed.
Baking soda is a gentle and natural cleaner, making it safe to use on the ceramic insert without risking any damage. It works by acting as a mild abrasive and a natural deodorizer, leaving your slow cooker fresh and clean.
Now that you’ve tackled the stains with baking soda paste, let’s move on to the next step in the cleaning process: using a vinegar solution.
Read more: How To Fix Tough Meat In Slow Cooker
Cleaning with Vinegar Solution
Vinegar is another powerful natural cleaning agent that can help dissolve stains and remove odors from your slow cooker. Its acidic properties make it effective at breaking down stubborn stains and residue. Follow these steps to clean your slow cooker with a vinegar solution:
- Pour equal parts white vinegar and water into the ceramic insert. The amount will depend on the size of your slow cooker, but aim to fill it about halfway.
- Place the ceramic insert back into the slow cooker base, ensuring that the vinegar solution covers the stained areas.
- Turn on the slow cooker and let the vinegar solution heat up on the low heat setting for 1-2 hours. The heat will help activate the cleaning properties of the vinegar.
- After the heating process, turn off the slow cooker and carefully remove the ceramic insert. Dispose of the vinegar solution.
- Rinse the ceramic insert thoroughly with warm water to remove any lingering vinegar smell.
Vinegar is known for its strong odor, but don’t worry, the smell will dissipate once the slow cooker dries. This natural cleaning method is effective at removing stains, grease, and odors, leaving your slow cooker fresh and ready for use. If any stubborn stains persist, you can move on to the next step: scrubbing with a soft sponge or cloth.
To clean a slow cooker, make a paste of baking soda and water, apply it to the stuck-on stains, and let it sit for a few hours. Then scrub with a non-abrasive sponge to remove the stains.
Scrubbing with a Soft Sponge or Cloth
Scrubbing the ceramic insert of your slow cooker with a soft sponge or cloth is an essential step to remove any remaining residue and stains. Here’s how you can effectively clean your slow cooker using this method:
- Wet a soft sponge or cloth with warm water, ensuring it is not dripping wet.
- Gently scrub the ceramic insert using circular motions, paying extra attention to any stained areas or spots with stubborn residue.
- Apply a small amount of mild dish soap to the sponge or cloth if necessary. This can help break down grease and grime.
- Avoid using abrasive scrubbers or brushes that can scratch the surface of the ceramic. Stick to softer materials to prevent any damage.
- Rinse the ceramic insert thoroughly with warm water to remove any soap residue.
- Inspect the slow cooker for any remaining stains or residue. If needed, repeat the scrubbing process until the ceramic is clean and free of any stubborn spots.
Scrubbing with a soft sponge or cloth allows you to target specific areas and apply a gentle amount of pressure to lift stains and residue. This method is safe and effective for most slow cooker models, ensuring a thorough clean without damaging the ceramic surface. However, if you have stubborn stuck-on stains, we have a specific method for tackling them in the next step.
Removing Tough Stuck-On Stains
If you’re dealing with stubborn, stuck-on stains in your slow cooker, don’t worry. There are a few methods you can try to tackle those difficult spots. Here’s how to remove tough stuck-on stains:
- Fill the ceramic insert with warm water, covering the stained areas. Add a few drops of dish soap.
- Place the ceramic insert back into the slow cooker base and turn it on low heat for about 1 hour. This will help loosen the stuck-on stains.
- After an hour, carefully remove the ceramic insert and empty the soapy water.
- Mix equal parts baking soda and warm water to create a paste.
- Apply the baking soda paste directly onto the stubborn stains. Let it sit for 15-20 minutes to break down the residue.
- Using a soft sponge or cloth, scrub the stains gently. Apply some pressure to lift the stuck-on residue.
- Rinse the ceramic insert thoroughly with warm water to remove any baking soda residue.
- If the stains persist, mix equal parts vinegar and water, and soak the stained areas for a few hours or overnight. This will help further break down the difficult stains.
- Scrub the stained areas once again with a soft sponge or cloth.
- Rinse the ceramic insert thoroughly to remove any vinegar smell.
With patience and persistence, these methods should help loosen and remove even the toughest stuck-on stains in your slow cooker. Remember to avoid using harsh or abrasive materials that can scratch the surface and cause damage.
Now that you have tackled those stubborn stains, let’s move on to cleaning the lid and handles of your slow cooker.
Cleaning the Lid and Handles
When cleaning your slow cooker, it’s important not to overlook the lid and handles. These areas can accumulate grease, food residue, and fingerprints. Here’s how you can effectively clean the lid and handles of your slow cooker:
- Remove the lid from the slow cooker and inspect it for any visible dirt or stains.
- If the lid is dishwasher safe, follow the manufacturer’s instructions for cleaning it in the dishwasher. This is the easiest and most convenient method for cleaning the lid.
- If the lid is not dishwasher safe, wash it in warm, soapy water using a soft sponge or cloth.
- If there are stubborn stains or greasy residue on the lid, apply a small amount of dish soap directly onto the stains and gently scrub with a soft sponge or cloth.
- Rinse the lid thoroughly with warm water to remove any soap residue.
- Dry the lid with a clean towel or allow it to air dry before placing it back on the slow cooker.
- For the handles, wipe them down with a damp cloth soaked in warm, soapy water.
- Pay attention to any crevices or corners where food or grime may accumulate.
- Rinse the handles with warm water and dry them thoroughly to prevent any potential rusting.
Cleaning the lid and handles of your slow cooker will not only help keep them looking clean and presentable but also prevent any cross-contamination of flavors in your future meals.
With the lid and handles cleaned, it’s time to move on to the final steps of the cleaning process: the final rinse and drying.
Final Rinse and Drying
Once you have completed the cleaning process for your slow cooker, it’s essential to give it a final rinse and ensure that it is thoroughly dried before storage or future use. Follow these steps for the final rinse and drying:
- Rinse the ceramic insert, lid, and handles with warm water to remove any remaining cleaning solution, residue, or odor.
- Inspect the slow cooker for any missed spots or stains. If necessary, spot clean those areas using a soft sponge or cloth.
- Thoroughly dry the ceramic insert, lid, and handles with a clean towel. Ensure there is no residual moisture left on any of the surfaces.
- If you prefer, you can also allow the slow cooker and its components to air dry completely before storing them.
- Before storing, ensure that the slow cooker and all its parts, including the lid and handles, are completely dry. Moisture can encourage the growth of mold or mildew if stored while still damp.
By taking the time to give your slow cooker a final rinse and thorough drying, you will prevent any lingering moisture that could lead to unpleasant odors or potential damage.
Now that your slow cooker is clean, dry, and ready to go, let’s discuss some maintenance tips to help keep it in excellent condition for years to come.
Maintenance Tips
Keeping your slow cooker in good condition goes beyond just cleaning it after each use. Here are some essential maintenance tips to ensure the longevity and optimal performance of your slow cooker:
- Read and follow the manufacturer’s instructions for your specific slow cooker model. This will help you understand any specific cleaning or maintenance requirements.
- Regularly check the power cord and plug for any signs of wear or damage. If you notice any issues, discontinue use and contact the manufacturer for repairs or replacement.
- Store your slow cooker in a cool, dry place to prevent any moisture or humidity from causing damage or mold growth.
- Avoid using metal utensils or abrasive cleaning tools that can scratch the surface of the ceramic insert. Opt for non-scratch utensils and soft sponges or cloths for cleaning.
- Consider using slow cooker liners or parchment paper liners for easy cleanup and to prevent food residue from sticking to the ceramic insert.
- Regularly inspect and clean the exterior of your slow cooker, including the control panel and knobs, using a damp cloth or sponge.
- If your slow cooker has removable parts, such as the lid or handles, clean them regularly to prevent buildup of grease or residue.
- Avoid immersing the base of the slow cooker in water or exposing it to excessive moisture. Instead, wipe it clean with a damp cloth.
- Follow recommended cooking times and temperature settings for different recipes to ensure the safe and proper functioning of your slow cooker.
- When not in use, cover the ceramic insert or store it separately to protect it from dust or damage.
By following these maintenance tips, you can prolong the life of your slow cooker and ensure that it continues to provide delicious meals for years to come.
With these comprehensive instructions on how to clean a slow cooker, including tough stuck-on stains, you are now equipped to keep your kitchen appliance looking its best and functioning optimally. Remember to prioritize safety during the cleaning process and take care of your slow cooker with regular maintenance. Happy cooking!
Frequently Asked Questions about How To Clean A Slow Cooker, Including Tough Stuck-On Stains
Was this page helpful?
At Storables.com, we guarantee accurate and reliable information. Our content, validated by Expert Board Contributors, is crafted following stringent Editorial Policies. We're committed to providing you with well-researched, expert-backed insights for all your informational needs.


0 thoughts on “How To Clean A Slow Cooker, Including Tough Stuck-On Stains”