Home>Storage Ideas>Kitchen Storage>How To Clean A Pizza Stone To Remove Stuck-On Food And Stains

Kitchen Storage
How To Clean A Pizza Stone To Remove Stuck-On Food And Stains
Modified: August 27, 2024
Looking for kitchen storage ideas? Learn how to clean a pizza stone and remove stuck-on food and stains for a fresh and pristine cooking surface.
(Many of the links in this article redirect to a specific reviewed product. Your purchase of these products through affiliate links helps to generate commission for Storables.com, at no extra cost. Learn more)
Introduction
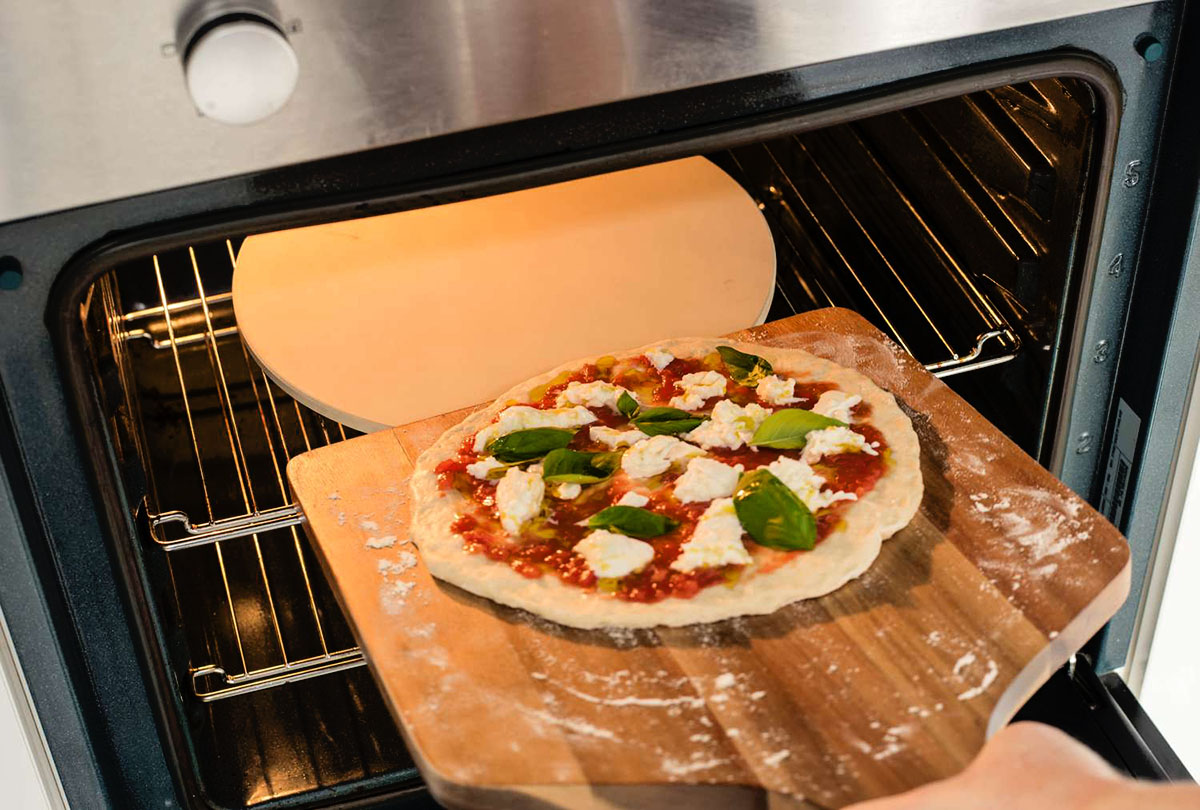
A pizza stone is a kitchen tool that many cooking enthusiasts swear by. It helps to create a crispy and evenly cooked crust, giving your homemade pizzas that authentic pizzeria taste. However, over time, the pizza stone can accumulate stuck-on food and stubborn stains from repeated use. Not only can this affect the taste of your pizzas, but it can also impact the lifespan and performance of the pizza stone.
Properly cleaning a pizza stone is essential to maintain its functionality and ensure that it continues to produce delicious results. In this article, we will guide you through the process of cleaning a pizza stone to remove stuck-on food and stains. By following these steps, you can enjoy the benefits of a clean and well-maintained pizza stone for years to come.
Before diving into the cleaning process, let’s take a moment to highlight the importance of maintaining a clean pizza stone.
Key Takeaways:
- Properly cleaning a pizza stone is crucial for maintaining its functionality, preventing uneven cooking, and extending its lifespan. Regular maintenance ensures delicious homemade pizzas and a healthy cooking environment.
- By following the step-by-step cleaning process and proper drying and storage techniques, you can maintain the performance and longevity of your pizza stone, ensuring many more delicious homemade pizzas in the future.
Importance of Cleaning a Pizza Stone
Cleaning a pizza stone is not just about aesthetics; it is crucial for a few reasons. Firstly, proper cleaning ensures the removal of any residual food particles or grease that may have accumulated on the surface. This prevents any unpleasant smells or flavors from transferring onto your future pizzas. Additionally, a clean pizza stone helps to prevent the build-up of carbonized residue, which can affect the stone’s ability to conduct heat evenly. This means that without regular cleaning, your pizzas may end up unevenly cooked, with some areas undercooked and others burnt.
Regular cleaning also helps to prolong the lifespan of the pizza stone. As you use the stone for baking pizzas, it absorbs moisture from the dough, which can lead to the formation of mold or mildew if not cleaned properly. The presence of mold or mildew not only affects the quality of your pizzas but also poses health risks. By cleaning your pizza stone after each use, you can prevent the growth of mold and maintain a healthy cooking environment.
Furthermore, neglecting to clean your pizza stone can cause it to become brittle and crack over time. The high heat of the oven combined with the residual food particles or burnt-on stains can weaken the stone’s structure. By regularly cleaning and maintaining your pizza stone, you can extend its durability and ensure that it remains in excellent condition.
Now that we understand the importance of cleaning a pizza stone, let’s gather the materials needed to tackle this task.
Materials Needed
Before you begin the cleaning process, it’s important to gather the necessary materials. Fortunately, the items required for cleaning a pizza stone are readily available and easy to obtain.
Here’s a list of materials you’ll need:
- A pizza stone
- A nylon bristle brush or scraper
- Warm water
- Dish soap
- Baking soda
- A soft cloth or sponge
- Paper towels or a clean dish towel
Most of these materials are likely to be already present in your kitchen, making the cleaning process convenient and accessible.
Now that you have the necessary materials at hand, let’s dive into the step-by-step process of cleaning a pizza stone to remove stuck-on food and stains.
Step 1: Cooling the Pizza Stone
The first step in cleaning a pizza stone is to allow it to cool completely. It is essential to ensure that the stone has cooled down after being used in a high-temperature oven. Attempting to clean a hot pizza stone can not only result in burns but can also damage the stone itself.
Once you have removed the pizza from the stone and turned off the oven, give the stone ample time to cool down naturally. It is recommended to wait at least an hour before proceeding with the cleaning process. This will ensure that the stone reaches room temperature and is safe to handle.
While the pizza stone is cooling, you can prepare for the next step by gathering your cleaning materials, including a nylon bristle brush or scraper, warm water, dish soap, baking soda, a soft cloth or sponge, and paper towels or a clean dish towel.
Now that the pizza stone is cool and the materials are ready, let’s move on to step two, which involves scraping off any excess food particles.
Step 2: Scraping off Excess Food
Once your pizza stone has cooled down, it’s time to remove any excess food particles that may be stuck on its surface. To do this, you can use a nylon bristle brush or scraper specifically designed for cleaning kitchen surfaces.
Gently run the brush or scraper over the surface of the pizza stone to loosen and remove any loose food particles. Be careful not to apply too much pressure or use any sharp objects that could potentially scratch or damage the stone.
If there are stubborn food remnants that are difficult to remove, you can lightly dampen the surface of the stone with warm water. This will help to soften the residue and make it easier to scrape off. However, be cautious not to saturate the stone with water, as excessive moisture can be detrimental to the stone’s integrity.
Continue scraping until you have removed as much of the excess food as possible. At this stage, the goal is to eliminate any large debris or visible remnants from the stone’s surface.
Once you have completed this step, it’s time to move on to the gentle cleaning process using warm water.
To clean a pizza stone, start by scraping off any stuck-on food with a plastic scraper. Then, use a damp cloth to wipe the surface and let it air dry completely before using it again. Avoid using soap or soaking the stone, as it can absorb the flavors and odors.
Read more: How To Remove Stuck Faucet Handle
Step 3: Gentle Cleaning with Warm Water
After removing the excess food particles, it’s time to give your pizza stone a gentle cleaning using warm water. This step helps to remove any remaining residue and prepares the stone for a deeper cleaning in the next steps.
To start, fill a basin or sink with warm water, ensuring that the water is not too hot to handle. Submerge the pizza stone in the water, allowing it to soak for a few minutes. This will help to loosen any stubborn residue and make it easier to clean.
Next, take a soft cloth or sponge and dampen it with the warm water. Gently wipe the surface of the pizza stone, paying close attention to areas with visible stains or build-up. Use circular motions and continue to wipe until the surface feels clean to the touch.
If needed, you can add a small amount of dish soap to the warm water to create a mild cleaning solution. However, be cautious not to use too much soap, as it can leave a residue on the pizza stone. A few drops should be sufficient to aid in the cleaning process.
Continue wiping the stone with the soapy water until you are satisfied with the cleanliness. As you clean, periodically rinse the cloth or sponge to remove any residue and prevent cross-contamination.
Once you have thoroughly cleaned the pizza stone with warm water, it’s time to tackle any stubborn stains or stuck-on residue using baking soda.
Step 4: Removing Stubborn Stains with Baking Soda
If you have stubborn stains or stuck-on residue on your pizza stone, using baking soda can help to effectively remove them without causing any damage.
To begin, create a paste by mixing equal parts of baking soda and water in a small bowl. The paste should have a thick but spreadable consistency.
Once the paste is ready, apply it directly to the stained areas of the pizza stone. Use a gentle scrubbing motion with a soft cloth or sponge to work the paste into the stains. The mildly abrasive nature of the baking soda helps to lift the stains while being gentle enough not to scratch the stone’s surface.
Allow the baking soda paste to sit on the stains for about 10 to 15 minutes. This gives it time to penetrate and loosen the stubborn residue.
After the paste has had sufficient time to work its magic, use a damp cloth or sponge to gently wipe away the paste and rinse the area with warm water. Continue this process until you have removed all traces of the baking soda paste and the stains have disappeared.
If there are still some persistent stains remaining, you can repeat the process by reapplying the baking soda paste and letting it sit for a bit longer before scrubbing again. However, exercise caution not to scrub too vigorously to avoid damaging the pizza stone.
Now that you’ve successfully removed stubborn stains, it’s time to proceed to the final step – the last cleaning with warm water.
Step 5: Final Cleaning with Warm Water
After removing stubborn stains with baking soda, it’s important to give your pizza stone a final cleaning to ensure that all residue and cleaning agents are thoroughly rinsed away. This step ensures that your pizza stone is ready for future use without leaving behind any unwanted odors or flavors.
Start by rinsing the pizza stone under warm running water. Use your hands or a soft cloth to gently rub the surface and ensure all baking soda residue is washed away. Take your time to make sure all areas are thoroughly rinsed.
Next, fill a basin or sink with warm water, similar to the previous steps. Submerge the pizza stone in the water, allowing it to soak for a few minutes. This final soak helps to remove any traces of cleaning agents and ensures a clean and fresh surface.
Once the stone has soaked, use a soft cloth or sponge to wipe the surface again, gently removing any remaining dirt or residue. Pay extra attention to any areas that had stubborn stains during the previous step.
Continue to rinse and wipe the pizza stone until the water runs clear and you are confident that all cleaning agents have been removed.
Lastly, pat dry the pizza stone using paper towels or a clean dish towel. Absorb as much water as possible to prevent any moisture from seeping into the stone and causing damage. Leave the pizza stone to air dry completely before storing or using it again. It is important to ensure the stone is completely dry to avoid the growth of mold or mildew.
With the final cleaning complete, your pizza stone is now fresh, clean, and ready for your next pizza-making adventure.
Step 6: Drying and Storing the Pizza Stone
After thoroughly cleaning your pizza stone, it’s crucial to properly dry and store it to maintain its quality and extend its lifespan. Proper drying and storage techniques will help prevent any damage or contamination, ensuring that your pizza stone remains in excellent condition for years to come.
Begin by ensuring that the pizza stone is completely dry before storing it. Use a clean dish towel or paper towels to absorb any remaining moisture. Gently pat the surface of the stone, paying special attention to the edges and any crevices where water may have collected.
Once the stone is dry, allow it to air dry for a few hours in a well-ventilated area. This will ensure that all moisture has evaporated from the stone, preventing the growth of mold or mildew.
Once the pizza stone is completely dry, it’s time to store it properly. It is best to store the pizza stone in a clean and dry environment. If possible, place it in a protective sleeve or wrap it in a clean cloth to shield it from dust or scratches.
When storing the pizza stone, make sure to keep it in a location where it won’t be subjected to extreme temperature changes or potential impact. Avoid stacking heavy objects on top of the stone, as this can lead to cracking or breakage.
It’s also important to note that pizza stones can be quite heavy, so when storing, ensure that it is placed in a sturdy and secure location to avoid accidents or potential damage.
By following these proper drying and storage steps, you can ensure that your pizza stone remains in optimal condition and ready for your next culinary creation.
Congratulations! You have successfully cleaned your pizza stone and learned how to properly dry and store it. With these tips, you can maintain the performance and longevity of your pizza stone, ensuring many more delicious homemade pizzas in the future.
Read more: How To Remove A Picture Stuck To Glass
Conclusion
Cleaning a pizza stone is an essential part of maintaining its functionality and ensuring the best tasting pizzas. By following the steps outlined in this guide, you can effectively remove stuck-on food and stubborn stains, prolonging the life of your pizza stone and enhancing its performance.
Remember to always allow the pizza stone to cool completely before starting the cleaning process. Scraping off excess food particles, followed by a gentle cleaning with warm water, helps to remove any remaining residue. If stubborn stains persist, using a baking soda paste can effectively lift them without causing damage.
After the cleaning process is complete, give the pizza stone a final rinse with warm water to ensure the removal of any cleaning agents. Then, thoroughly dry the stone before storing it in a clean and dry location. Proper drying and storage techniques help prevent damage and contamination, extending the lifespan of your pizza stone.
Regular cleaning and maintenance of your pizza stone not only ensure delicious pizzas with crispy crusts but also help to prevent the build-up of residue and the growth of mold or mildew. By incorporating these cleaning habits into your pizza-making routine, you can enjoy the benefits of a clean and well-maintained pizza stone with every use.
So, the next time you indulge in a homemade pizza extravaganza, don’t forget to give your pizza stone some love and attention. With proper cleaning and care, your trusty pizza stone will continue to be your go-to kitchen tool for mouthwatering homemade pizzas for years to come.
Frequently Asked Questions about How To Clean A Pizza Stone To Remove Stuck-On Food And Stains
Was this page helpful?
At Storables.com, we guarantee accurate and reliable information. Our content, validated by Expert Board Contributors, is crafted following stringent Editorial Policies. We're committed to providing you with well-researched, expert-backed insights for all your informational needs.


0 thoughts on “How To Clean A Pizza Stone To Remove Stuck-On Food And Stains”