Home>Storage Ideas>Kitchen Storage>How To Clean An Air Fryer
Kitchen Storage
How To Clean An Air Fryer
Modified: August 16, 2024
Learn how to clean your air fryer like a pro with these simple kitchen storage ideas. Keep your appliance spotless and ready for delicious, healthy meals.
(Many of the links in this article redirect to a specific reviewed product. Your purchase of these products through affiliate links helps to generate commission for Storables.com, at no extra cost. Learn more)
Introduction
Welcome to this guide on how to clean an air fryer! Air fryers have gained tremendous popularity in recent years due to their ability to cook delicious, crispy foods with minimal oil. However, like any kitchen appliance, they require regular cleaning to ensure optimal performance and longevity.
Keeping your air fryer clean not only ensures that you’re preparing healthy and flavorful meals but also prevents the accumulation of grease and food residue, which can affect the taste of future dishes. Additionally, maintaining a clean air fryer reduces the risk of smoke and unpleasant odors during cooking.
In this article, we’ll walk you through the step-by-step process of cleaning an air fryer. Before we dive into the cleaning instructions, though, let’s cover some important safety precautions that you should keep in mind.
Key Takeaways:
- Regularly cleaning your air fryer ensures safe, efficient, and flavorful cooking. Follow the step-by-step process to maintain a pristine appliance and enjoy delicious, crispy meals for years to come.
- Prioritize safety, use gentle cleaning methods, and test functionality after cleaning to keep your air fryer in top condition. A well-maintained appliance delivers consistent cooking results and longevity.
Read more: How Clean Is Toilet Water
Safety Precautions
Before you start cleaning your air fryer, it’s crucial to prioritize your safety. Follow these safety precautions to ensure a smooth and accident-free cleaning process:
- Always unplug the air fryer before cleaning. This eliminates the risk of electric shock and allows you to handle the appliance safely.
- Avoid submerging the main unit or power cord in water. The heating element and electrical components can be damaged if they come into contact with water.
- Allow the air fryer to cool down completely before cleaning. Cleaning a hot air fryer can lead to burns or other injuries. It’s best to wait for at least 30 minutes after cooking before starting the cleaning process.
- Handle the basket and other removable parts with caution. The air fryer accessories can be sharp and hot, so use oven mitts or kitchen gloves to protect your hands during and after cooking.
- Read the manufacturer’s cleaning instructions specific to your air fryer. Different brands and models may have slightly different cleaning requirements, so it’s essential to consult the user manual for detailed guidelines.
- Use mild detergent or dish soap when cleaning the air fryer. Harsh chemicals or abrasive cleaners can damage the non-stick coating and other surfaces of the appliance.
- Keep the air vent and other openings clear of obstructions. It’s crucial for proper air circulation during cooking and helps prevent overheating. Regularly check for any clogs or debris and remove them carefully.
- Never immerse the heating element in water. The heating element is a sensitive component that can be damaged if it gets wet. Clean it using a soft brush or cloth, following the manufacturer’s instructions.
By following these safety precautions, you can ensure your well-being and avoid any mishaps while cleaning your air fryer. Now that we’ve covered the safety aspects, let’s move on to the step-by-step cleaning process.
Step 1: Unplug the Air Fryer
Before you begin cleaning your air fryer, the first and most important step is to unplug it from the power source. This ensures your safety and prevents any accidents while handling the appliance.
By disconnecting the air fryer from the electrical outlet, you eliminate the risk of electric shock. It’s crucial to remember that even when the air fryer is turned off, there may still be residual electric current flowing through the appliance.
To unplug the air fryer, locate the power cord and gently pull it from the wall socket or power strip. Make sure the cord is fully disconnected and placed safely away from any water sources or areas where it could get tangled.
By taking this precautionary measure, you can confidently proceed with the cleaning process knowing that the air fryer is completely powered off and disconnected from any electrical source. This step sets the foundation for a safe and efficient cleaning experience.
Now that you’ve responsibly unplugged your air fryer, you’re ready to move on to the next step: removing and cleaning the basket. Let’s continue our journey to a sparkling clean air fryer!
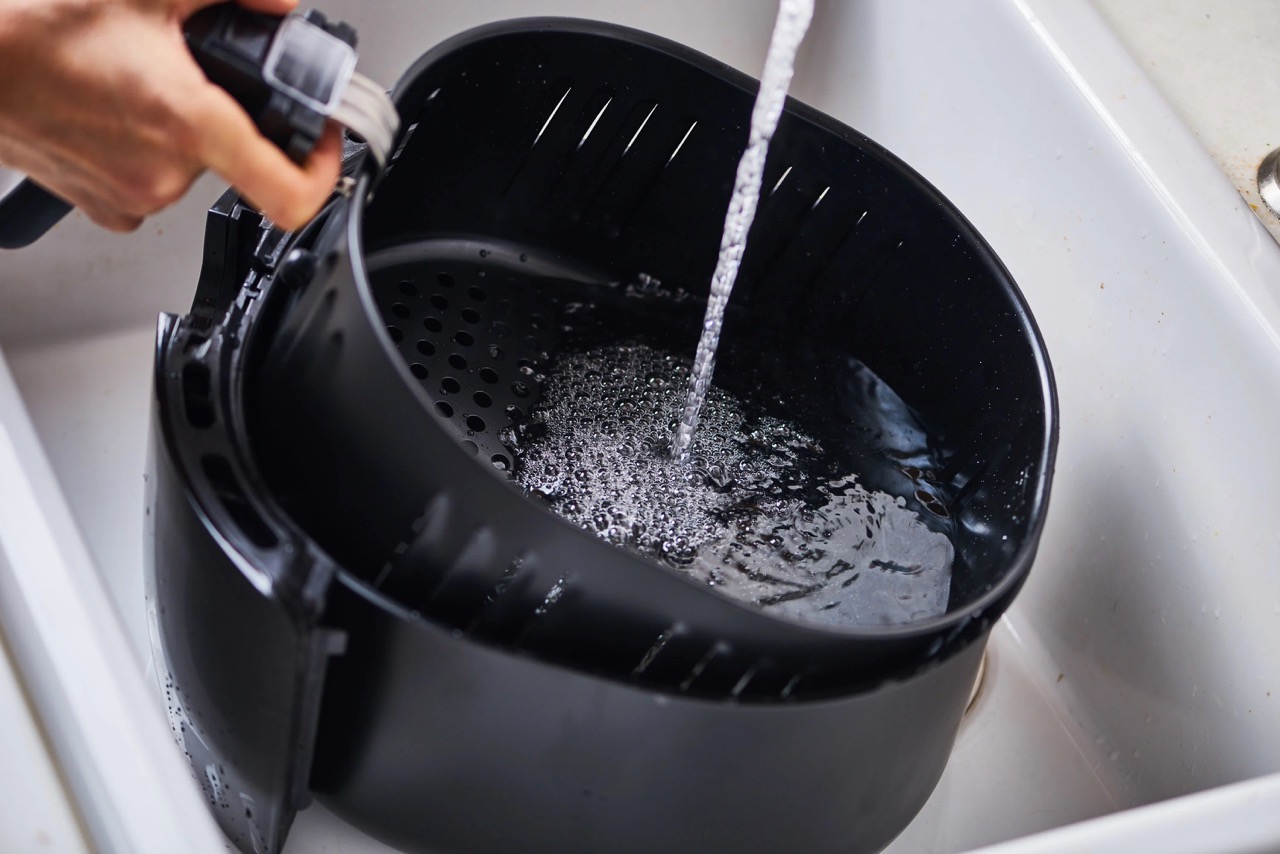
Step 2: Remove and Clean the Basket
Once your air fryer is safely unplugged, it’s time to remove and clean the basket. The basket is where you place your food during cooking, and it can accumulate grease, crumbs, and food residue over time.
To remove the basket, locate the release button or handle on the front of the air fryer. Gently push or pull the button or handle, and the basket should easily slide out from the main unit.
Place the basket in your sink or on a stable surface to prevent any spills or mess. If your air fryer has a non-stick coating, avoid using harsh scrub brushes or abrasive cleaning tools that can damage the surface. Instead, opt for a soft sponge or non-abrasive cloth.
Prepare a mixture of warm water and mild dish soap or gentle detergent. Dip the sponge or cloth into the soapy water and start scrubbing the basket. Pay extra attention to any stuck-on food particles or grease spots.
Rinse the basket thoroughly with warm water to remove any soap residue. Ensure all surfaces are clean and free from any debris. If the basket is dishwasher-safe, you can also place it on the top rack of your dishwasher for a convenient cleaning option.
After rinsing, towel-dry the basket or let it air dry completely before reassembling it with the air fryer. Moisture left on the basket can affect the performance of the air fryer and potentially lead to rust or other issues.
Now that you’ve cleaned the basket, it’s time to move on to the next step: wiping the interior of the air fryer. Let’s continue our journey to a sparkling clean air fryer!
Step 3: Wipe the Interior with a Damp Cloth
After you’ve cleaned the basket, it’s time to focus on the interior of the air fryer. This step will help remove any residual grease or food particles that may have accumulated during the cooking process.
First, ensure that the air fryer is still unplugged and cooled down. This will prevent any accidents or burns while cleaning the interior. Take a slightly damp cloth or sponge and gently wipe the interior surfaces of the air fryer.
Pay close attention to areas that are prone to oil splatter or food buildup, such as the sides, the bottom, and the heating element (if accessible). If there are stubborn stains or greasy spots, you can add a small amount of mild dish soap to the damp cloth to help loosen and remove them.
Avoid using excessive water on the cloth as this can seep into the electrical components and damage the air fryer. Also, remember to be gentle while wiping to avoid scratching the interior surfaces.
If your air fryer has a removable heating element, make sure to clean it carefully using the manufacturer-recommended method. Some heating elements can be wiped clean with a damp cloth, while others may require more specific cleaning instructions.
Once you’ve thoroughly wiped the interior of the air fryer, use a clean, dry cloth to remove any excess moisture. Ensure that the interior is completely dry before moving on to the next step.
Now that you’ve cleaned the interior of the air fryer, it’s time to give the exterior a thorough cleaning. Let’s continue our journey to a sparkling clean air fryer!
To clean an air fryer, unplug it and let it cool. Remove the basket and tray, then wash with hot soapy water. Use a non-abrasive sponge to avoid damaging the non-stick coating. Wipe the inside and outside with a damp cloth.
Read more: How To Clean Aluminum Ladder
Step 4: Clean the Exterior of the Air Fryer
Now that you’ve taken care of the interior, it’s time to give the exterior of your air fryer some attention. Over time, the exterior can accumulate grease, fingerprints, and other dirt, detracting from its overall appearance.
Start by unplugging the air fryer and allowing it to cool down if it’s still warm. This will prevent any accidental burns while cleaning.
Dampen a cloth or sponge with warm water and a mild dish soap or gentle detergent. Gently wipe the exterior surfaces of the air fryer, including the sides, top, and control panel. Pay extra attention to areas with stubborn stains or grease buildup.
Avoid using excessive water or allowing water to enter any openings on the air fryer. It’s important to keep the electrical components of the appliance dry and protected.
If there are any hard-to-reach areas or grooves, you can use a soft brush or toothbrush to gently scrub and remove any dirt or residue. Be careful not to apply too much pressure to avoid scratching or damaging the surface of the air fryer.
Once you’ve cleaned the exterior, use a clean, dry cloth to thoroughly dry all surfaces. This will prevent any water spots or streaks from forming.
Finally, take a moment to admire your newly cleaned air fryer, now looking fresh and spotless. Cleaning the exterior not only enhances the appearance of the appliance but also helps in maintaining its longevity.
With the exterior now sparkling clean, it’s time to move on to the next step: cleaning the heating element (if accessible). Let’s continue our journey to a fully rejuvenated air fryer!
Step 5: Clean the Heating Element (if accessible)
Depending on the design of your air fryer, you may have access to the heating element for cleaning. The heating element is responsible for generating the heat needed for cooking, and it can accumulate grease and food particles over time.
Before proceeding with cleaning the heating element, ensure that the air fryer is unplugged and completely cooled down. This will prevent any potential burns or accidents during the cleaning process.
If your air fryer has a removable heating element, carefully detach it according to the manufacturer’s instructions or user manual. Once removed, use a soft brush or cloth to gently scrub away any residue or buildup on the heating element.
Take extra care not to use excessive force or apply water directly to the heating element. It’s important to avoid damaging the element or getting it wet, as this could impact its functionality and safety.
If there is excessive grease or stubborn stains on the heating element, you can create a paste using baking soda and water. Apply this paste to the affected areas and let it sit for a few minutes to loosen the grime. Then, gently scrub it away with a soft brush or cloth.
For air fryers with an inaccessible heating element, simply wipe the surrounding area as best as you can using a damp cloth. Be cautious not to dislodge or damage any components during the cleaning process.
Once you’ve thoroughly cleaned the heating element or the surrounding area, ensure it is completely dry before reassembling the air fryer.
Cleaning the heating element, if accessible, helps to maintain its efficiency and ensures that the air fryer continues to cook food evenly and effectively.
Now that you’ve taken care of the heating element (if applicable), it’s time to reassemble the air fryer and move on to the next step. Let’s keep up the great work!
Step 6: Reassemble the Air Fryer
Now that you’ve completed the cleaning process for the various components of your air fryer, it’s time to reassemble the appliance. Reassembling the air fryer properly is crucial to ensure its correct functioning and safety during future use.
Start by ensuring that all parts are completely dry. Wipe down the exterior and interior surfaces once again to remove any remaining moisture.
Begin by carefully placing the cleaned basket back into the air fryer. Align it properly with the grooves or slots and push it in until it is securely in place.
If there are any additional removable accessories, such as grilling racks or skewers, reattach them following the manufacturer’s instructions.
If you had removed the heating element, reinsert it according to the manufacturer’s guidelines. Take care to align it properly and ensure it is secure.
Check that all the buttons, knobs, and control panel are functioning as they should be. Inspect the air vent and other openings to ensure they are clear of any obstructions.
Ensure that the power cord is positioned away from any water sources or potential hazards. It should be neatly tucked away and not tangled.
Once you are satisfied that everything is correctly reassembled and in its proper place, you can proceed to the final step: plugging in and testing the air fryer.
By following these reassembly steps, you are ensuring that your air fryer is ready to be used again for delicious and healthy cooking!
Now that you’ve successfully reassembled the air fryer, let’s move on to the last step: plugging it in and testing its functionality. We’re almost done!
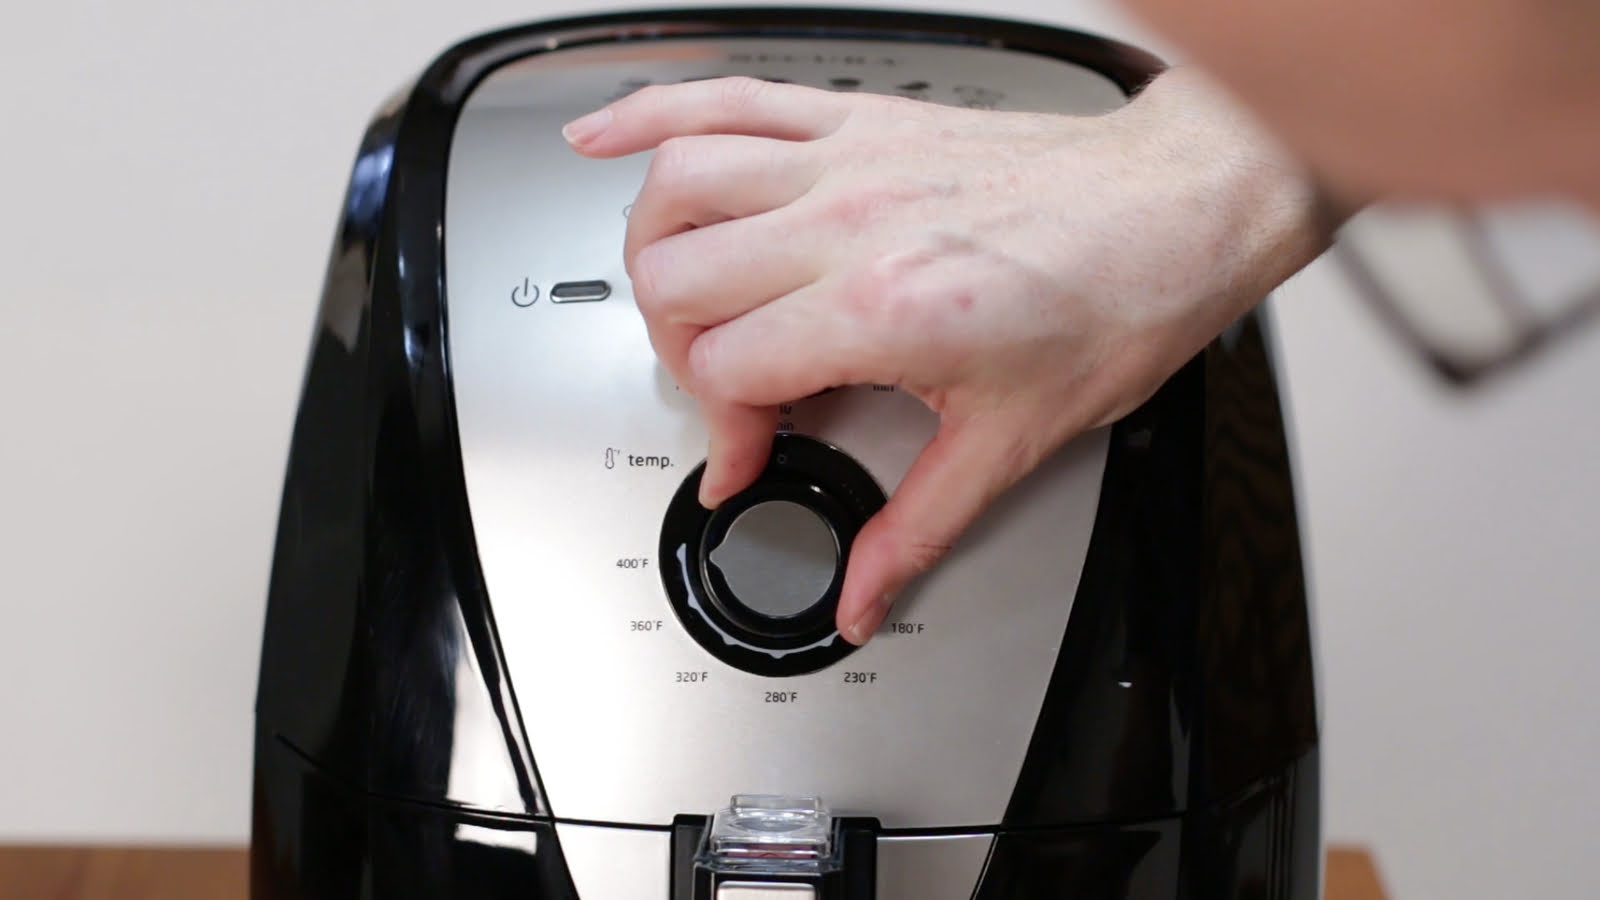
Step 7: Plug in and Test the Air Fryer
After completing the cleaning and reassembly process, the final step is to plug in and test your air fryer. This step ensures that everything is functioning properly and ready for your next cooking adventure.
First, double-check that the air fryer is in a safe and stable location, away from any flammable materials or water sources. Ensure that the power cord is not tangled or in a position where it can be tripped over.
Next, plug the air fryer back into the electrical outlet. Make sure the plug is inserted securely and fits snugly into the socket.
Once the air fryer is plugged in, refer to the manufacturer’s manual for any specific instructions or preheating recommendations for your model.
Turn on the air fryer and select the desired temperature and cooking time for a short test run. This will allow you to ensure that the air fryer is heating up properly and that the control panel is responsive.
During the test run, listen for any unusual noises or smells. Your air fryer should operate quietly and without any unpleasant odors. If you notice anything unusual, refer to the user manual or contact the manufacturer for assistance.
Once the test run is complete, carefully unplug the air fryer and allow it to cool down before storing it or using it for actual cooking.
Congratulations! You have successfully cleaned, reassembled, and tested your air fryer. Now, you can confidently enjoy all the benefits of this versatile kitchen appliance without any concerns about cleanliness or performance.
Remember to regularly clean your air fryer to maintain its efficiency, prolong its lifespan, and ensure the best cooking results. By incorporating this cleaning routine into your kitchen maintenance, you’ll continue to enjoy delicious and healthy meals for years to come!
Thank you for following this guide on how to clean an air fryer. Happy cooking!
Read more: How To Clean Toto Toilet
Conclusion
Cleaning your air fryer is an essential part of maintaining its performance and ensuring delicious and healthy cooking results. By following the steps outlined in this guide, you can keep your air fryer in pristine condition and extend its lifespan.
Remember to always prioritize safety by unplugging the appliance and allowing it to cool before cleaning. Take care when handling removable parts, such as the basket and heating element, and use mild dish soap or gentle detergents to avoid damaging the non-stick coating.
Regularly wiping the interior and exterior of the air fryer, ensuring proper ventilation, and cleaning the heating element (if accessible) will help prevent the buildup of grease, food particles, and unpleasant odors.
Reassembling the air fryer correctly and testing its functionality after cleaning ensures that it is ready for great cooking experiences. By following these steps, you can maintain a clean and efficient air fryer that consistently delivers delicious and crispy meals.
Now that you are equipped with the knowledge of how to clean an air fryer, go ahead and enjoy the benefits of this versatile kitchen appliance. Create your favorite dishes with confidence, knowing that you are cooking in a clean and well-maintained air fryer.
Don’t forget to consult the manufacturer’s instructions and guidelines specific to your air fryer model for any additional cleaning advice or recommendations. These instructions will provide valuable insights to help you care for your specific appliance effectively.
Thank you for reading this comprehensive guide on how to clean an air fryer. We hope that these steps have been helpful in ensuring the cleanliness and optimal performance of your air fryer. Happy and healthy cooking!
Frequently Asked Questions about How To Clean An Air Fryer
Was this page helpful?
At Storables.com, we guarantee accurate and reliable information. Our content, validated by Expert Board Contributors, is crafted following stringent Editorial Policies. We're committed to providing you with well-researched, expert-backed insights for all your informational needs.


0 thoughts on “How To Clean An Air Fryer”