Articles
How To Start An Air Fryer
Modified: January 19, 2024
Looking for articles on how to start an air fryer? Check out our comprehensive guide for step-by-step instructions and tips to get you cooking in no time!
(Many of the links in this article redirect to a specific reviewed product. Your purchase of these products through affiliate links helps to generate commission for Storables.com, at no extra cost. Learn more)
Introduction
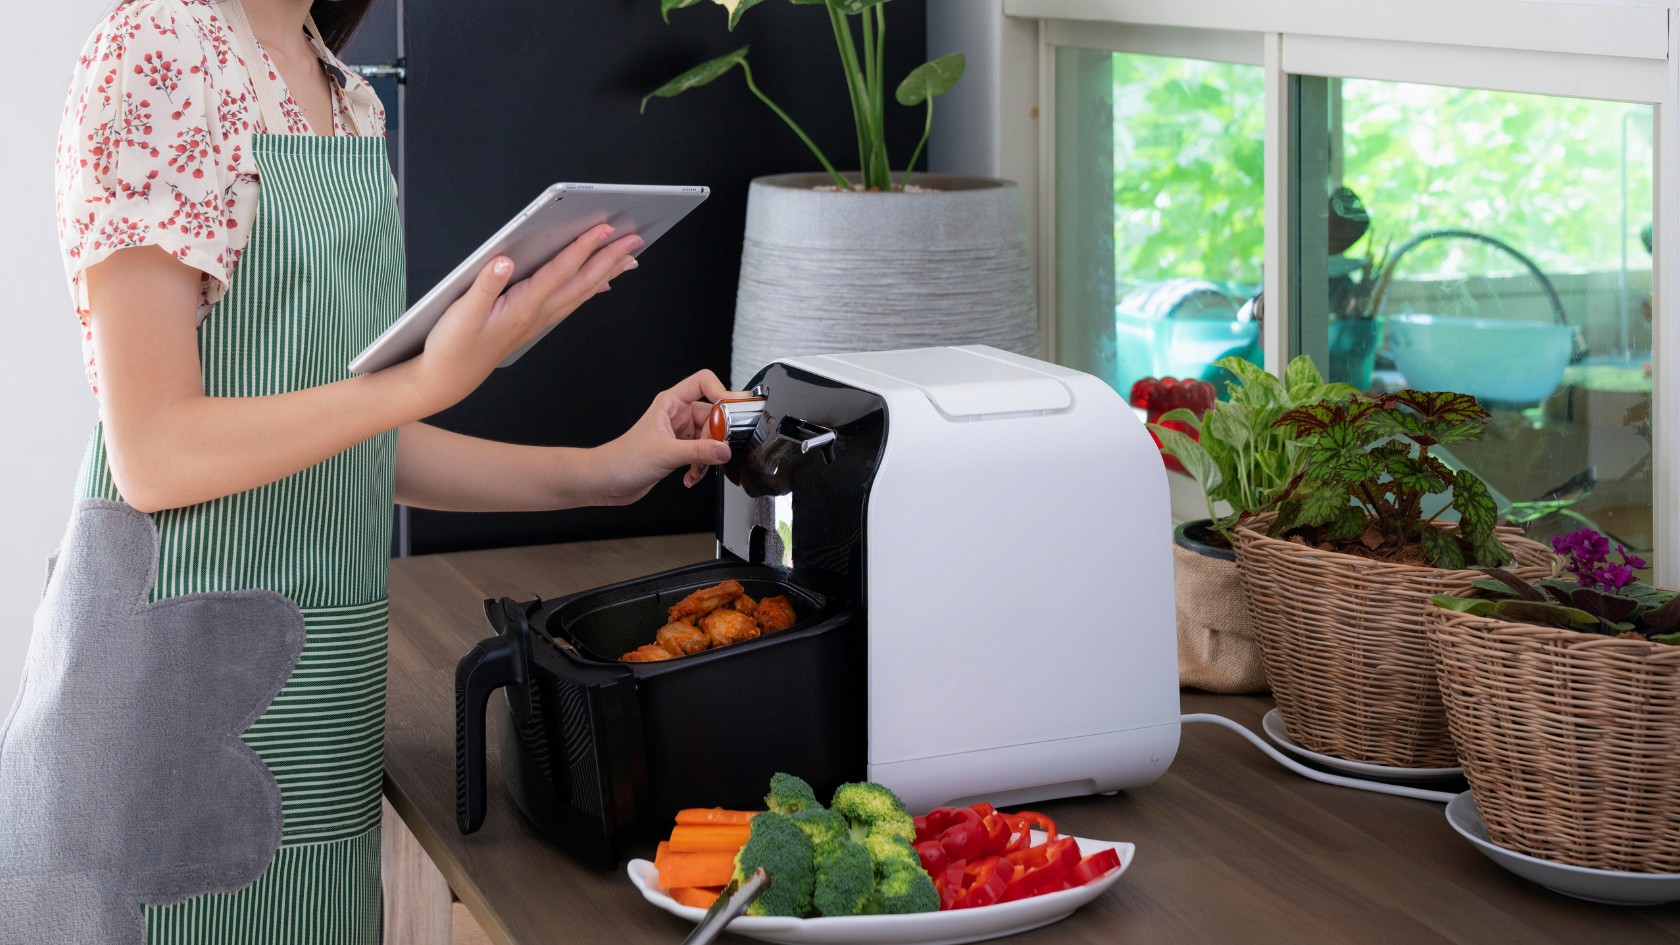
Welcome to the world of air frying! If you’re looking for a way to cook healthier meals without sacrificing taste and flavor, then an air fryer may be just what you need. Air fryers have become increasingly popular in recent years, thanks to their ability to create crispy and delicious dishes using little to no oil.
But starting out with an air fryer can be a bit overwhelming if you’re not familiar with how it works. Don’t worry, though, because in this article, we will guide you through the basics of using an air fryer, from prepping it to cleaning and maintenance.
Before we dive into the nitty-gritty details, let’s first understand what an air fryer is and how it differs from traditional frying methods. An air fryer is a kitchen appliance that uses rapid air circulation and a heating coil to cook food. Unlike deep frying or pan frying, which requires a significant amount of oil, air fryers use convection cooking to produce crispy and golden results.
Many people appreciate air fryers for their ability to reduce oil consumption, resulting in healthier meals that still retain that satisfying crunch. With an air fryer, you can enjoy your favorite fried foods with fewer calories and less guilt.
So, whether you’re a seasoned cook or just starting out in the kitchen, learning how to use an air fryer will open up a whole new world of delicious possibilities. From crispy fries and juicy chicken wings to roasted vegetables and even desserts, an air fryer can do it all.
In the next sections, we will walk you through the step-by-step process of using an air fryer, from preparing it for cooking to cleaning up afterwards. By the end of this article, you’ll have all the knowledge and confidence you need to start air frying like a pro.
Key Takeaways:
- Air fryers offer a healthier alternative to traditional frying methods, allowing you to cook crispy and delicious meals with little to no oil. With precise temperature control, they deliver evenly cooked and flavorful dishes.
- Proper preparation, choosing the right cooking oil, preheating, setting cooking time and temperature, and safely removing and cleaning the air fryer are essential steps to master air frying. Enjoy guilt-free, flavorful meals with this versatile kitchen appliance!
Read more: How To Start Ryobi Chain Saw
The Basics of Air Fryers
Before we get into the specific steps of using an air fryer, let’s take a moment to understand the basic components and features of this versatile kitchen appliance.
An air fryer typically consists of the following parts:
- Heating element: The heating element is responsible for generating the heat needed to cook the food.
- Fan: The fan circulates hot air inside the air fryer, ensuring even cooking and crispy results.
- Cooking chamber: This is where you place the food you want to cook. It can vary in size, with different air fryers offering different cooking capacities.
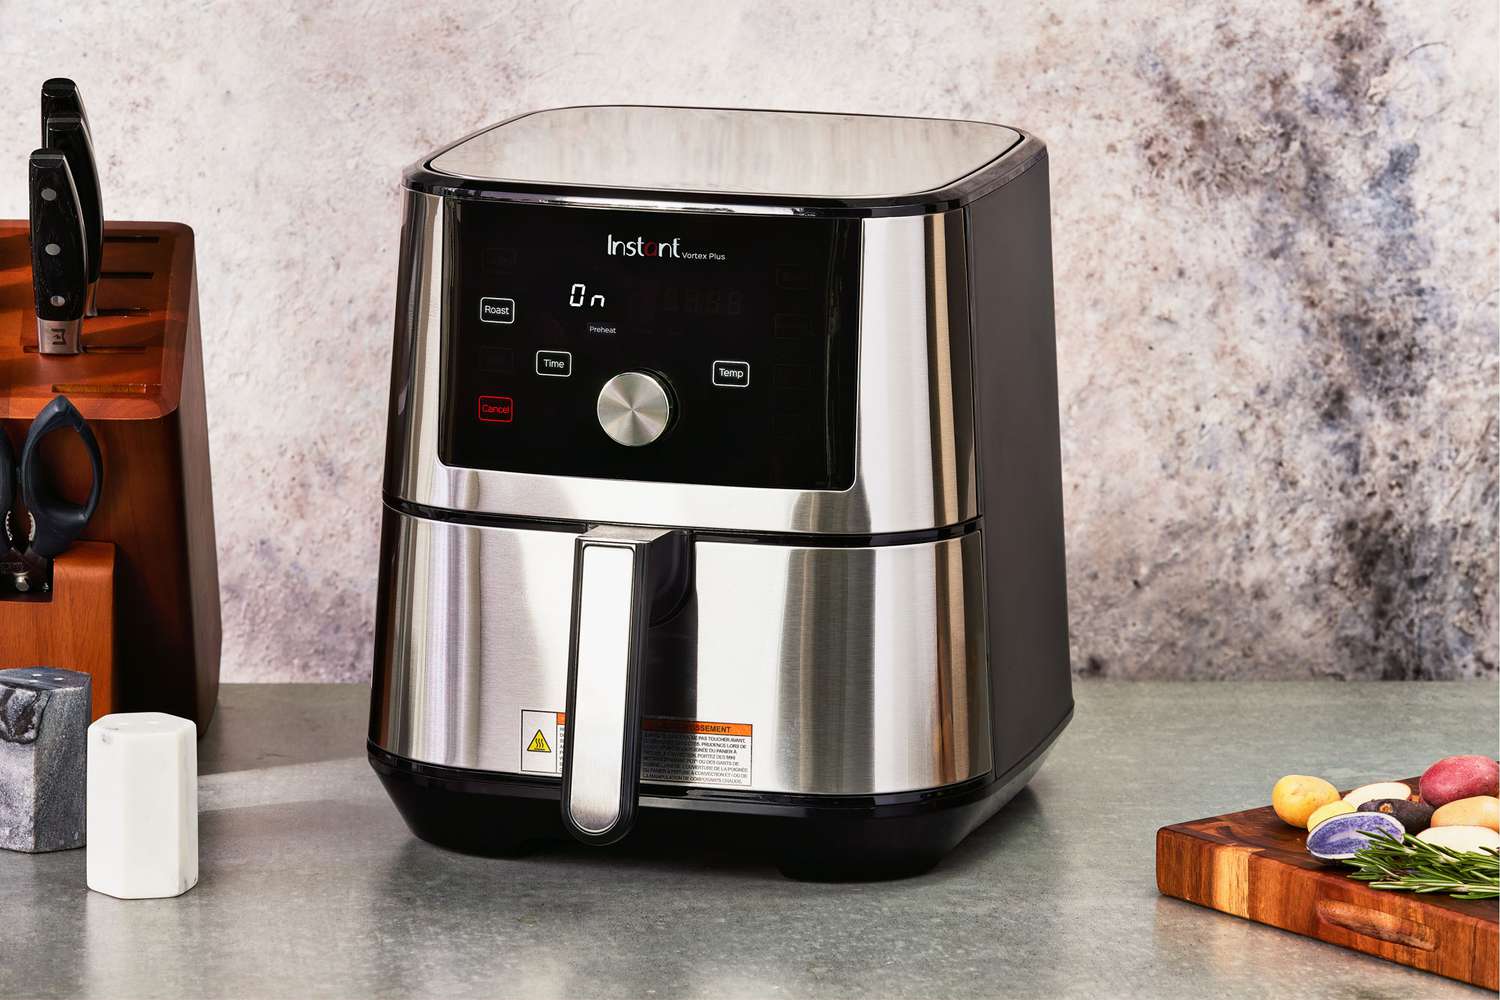
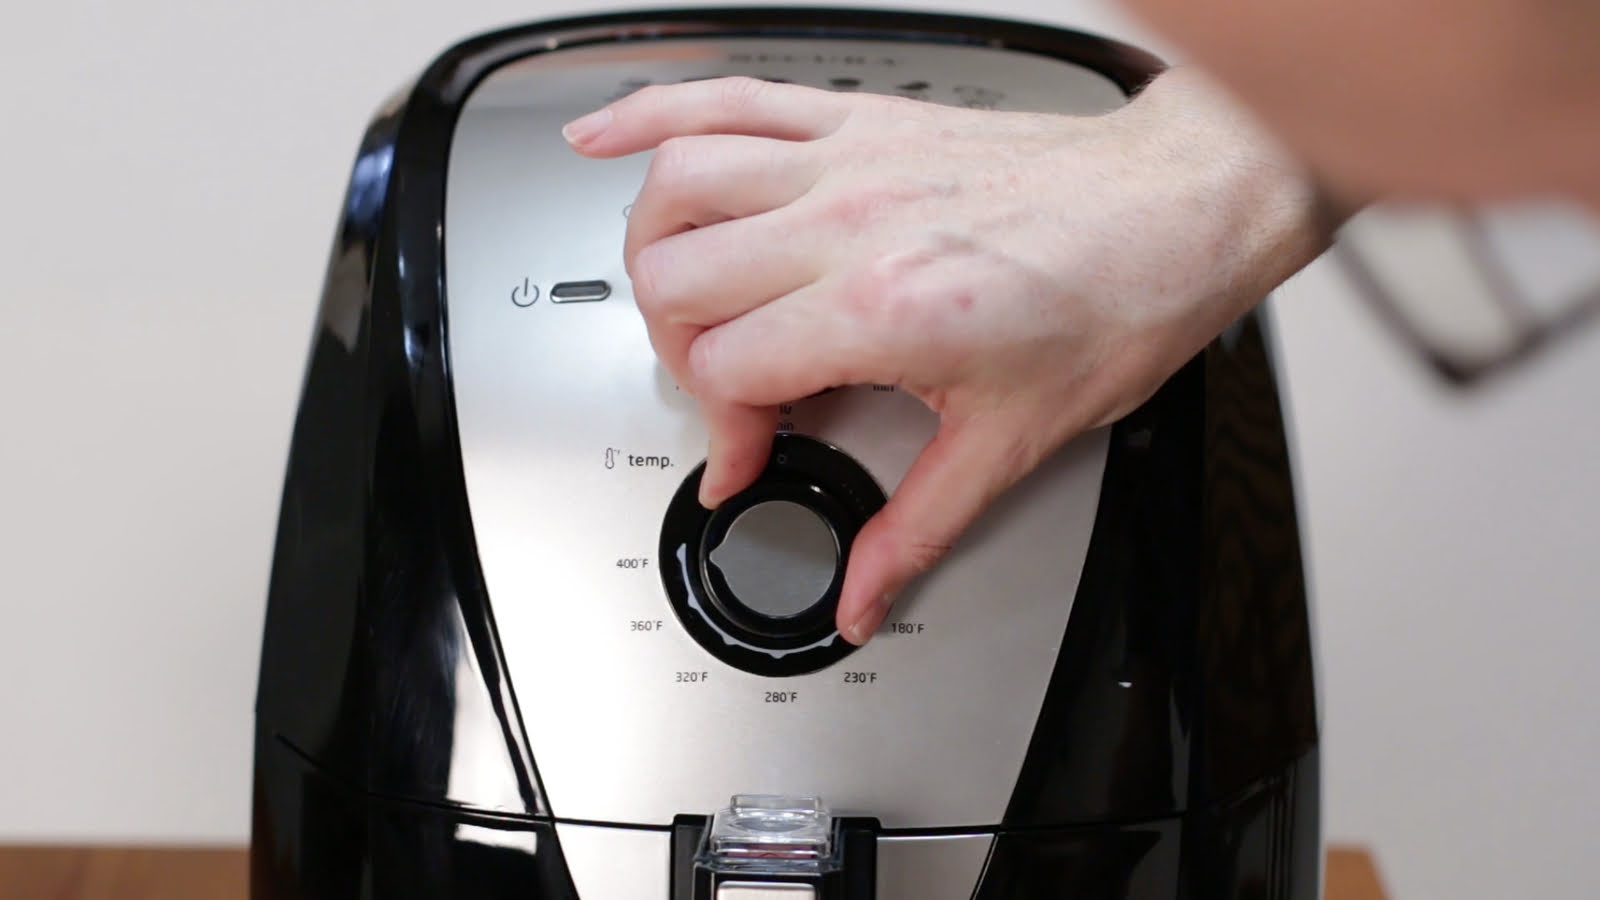
- Control panel: The control panel allows you to set the cooking time and temperature, as well as select specific cooking modes or presets.
- Removable basket or tray: The food is placed in a removable basket or tray, which is then inserted into the cooking chamber. This makes it easy to transfer the cooked food to a serving plate.
Now that you’re familiar with the basic components of an air fryer, let’s explore some key features and settings that you’ll commonly come across:
- Temperature control: Most air fryers allow you to adjust the cooking temperature, usually ranging from 180°C (350°F) to 200°C (400°F). The specific temperature required will depend on the recipe and the type of food you’re cooking.
- Cooking time: Air fryers typically offer adjustable cooking times, which can range from a few minutes to over half an hour. The cooking time will vary depending on the size and thickness of the food, as well as the desired level of doneness.
- Pre-set functions: Some air fryers come with pre-set functions or cooking modes for specific types of food, such as fries, chicken, fish, or desserts. These pre-set functions optimize the cooking time and temperature for the best results.
- Timer: The timer allows you to set a specific cooking duration. Once the timer reaches zero, the air fryer will automatically switch off or enter a standby mode.
- Auto-shutoff: Many air fryers have a safety feature that automatically shuts off the appliance when the cooking time is up. This prevents overcooking or burning of the food.
Now that you have a good understanding of the basic components and features of an air fryer, you’re ready to start using it. In the next sections, we’ll guide you step-by-step through the process of preparing your air fryer, choosing the right cooking oil, setting the cooking time and temperature, and much more. Get ready to unleash the culinary possibilities of your air fryer!
Step 1: Preparing Your Air Fryer
Before you start cooking with your air fryer, it’s important to properly prepare and set up the appliance. Here are the key steps to follow:
- Read the instruction manual: Begin by reading the instruction manual that came with your air fryer. This will provide you with specific information about your appliance, including any special features, recommended usage guidelines, and safety precautions.
- Find a suitable location: Choose a stable and well-ventilated surface for your air fryer. Avoid placing it near flammable objects, such as curtains or paper towels. Make sure there is enough space around the air fryer to allow for proper air circulation.
- Inspect the appliance: Before using your air fryer, inspect it for any signs of damage or defects. Check the power cord for any fraying or exposed wires. If you notice any issues, contact the manufacturer for assistance.
- Remove packaging and accessories: Remove any protective packaging or stickers from the air fryer. Take out all the accessories that come with your air fryer, such as the cooking basket or tray, and wash them with warm soapy water. Allow them to dry completely before using.
- Preheat the air fryer: Some air fryers require preheating before cooking. Check the instruction manual to see if preheating is necessary for your specific model. If preheating is required, set the temperature to the recommended level and allow the air fryer to preheat for a few minutes.
- Clean the cooking chamber: Use a damp cloth or sponge to wipe the inner walls and bottom of the cooking chamber. Make sure to remove any food particles or residue from previous use to prevent smoke or unpleasant odors during cooking.
By following these preparation steps, you ensure that your air fryer is in proper working condition and ready to deliver optimal cooking results. Once your air fryer is prepared, it’s time to move on to the next step: choosing the right cooking oil.
Step 2: Choosing the Right Cooking Oil
When using an air fryer, choosing the right cooking oil is essential for achieving the best results. While traditional frying methods require a large amount of oil, air frying allows you to use significantly less oil, making it a healthier cooking option.
Here are some tips on selecting the right cooking oil for your air fryer:
- Consider the smoke point: The smoke point is the temperature at which an oil starts to smoke and break down. It’s important to choose an oil with a high smoke point to prevent it from burning and releasing harmful compounds. Good options for air frying include avocado oil, peanut oil, and canola oil, which have high smoke points.
- Avoid oils with strong flavors: Some oils, such as extra virgin olive oil or sesame oil, have distinct flavors that may overpower the taste of your food. Opt for neutral-tasting oils that won’t interfere with the flavors of your ingredients.
- Use oils with a high concentration of unsaturated fats: Unsaturated fats are considered healthier than saturated fats. Oils like canola oil, avocado oil, or sunflower oil are good choices as they contain higher amounts of unsaturated fats.
- Use a spray bottle: If you want to minimize oil usage even further, you can use a spray bottle filled with your chosen cooking oil. This allows you to lightly coat your food with oil without submerging it.
It’s important to note that you should use oil sparingly when air frying. A light coating is usually sufficient to achieve crispy and delicious results. Experiment with different oils and find what works best for your taste preferences and dietary needs.
Now that you’ve chosen the right cooking oil, it’s time to move on to the next step: preheating the air fryer. Preheating is often recommended to ensure even cooking and optimal results, so let’s dive into it in the next section.
Step 3: Preheating the Air Fryer
Preheating your air fryer is an important step to ensure that the food cooks evenly and achieves the desired crispiness. While not all air fryers require preheating, it’s a good practice to follow to enhance your cooking results.
Here’s how to preheat your air fryer:
- Check the manufacturer’s instructions: Refer to the instruction manual that came with your air fryer to determine if preheating is necessary and to find the recommended preheating temperature.
- Turn on the air fryer: Plug in your air fryer and set the temperature to the recommended preheating level. Typically, this will be around 5 minutes at 180°C (350°F).
- Allow the air fryer to preheat: Wait for the air fryer to reach the desired temperature. Most models have a preheating indicator light that will turn off or change color once preheating is complete.
Preheating your air fryer ensures that the cooking chamber reaches the desired temperature before you start cooking your food. This helps to achieve consistent results and ensures that your food is cooked evenly.
During the preheating process, you can take the opportunity to prepare your ingredients, such as by cleaning and seasoning your food or arranging them in the air fryer basket. This way, you’ll be ready to start cooking as soon as the preheating is complete.
Keep in mind that the preheating time may vary depending on the model and size of your air fryer. It’s always a good idea to consult the manufacturer’s instructions for specific guidance.
Now that your air fryer is preheated and ready to go, it’s time to move on to the next step: setting the cooking time and temperature. This step is crucial for determining the cooking duration and achieving the perfect level of doneness, so let’s explore it in the next section.
Read more: How To Start Ryobi Weed Wacker
Step 4: Setting the Cooking Time and Temperature
Setting the correct cooking time and temperature is crucial in ensuring that your food is cooked to perfection in the air fryer. The cooking time and temperature will vary depending on the recipe and the type of food you’re preparing.
Follow these steps to set the cooking time and temperature on your air fryer:
- Refer to the recipe or cooking instructions: If you’re following a specific recipe, check the recommended cooking time and temperature. If you don’t have a recipe, you can make a general guideline by referring to similar recipes or using the suggested cooking times provided by the air fryer manufacturer.
- Preheat (if required): If your air fryer requires preheating, make sure it has reached the desired temperature before proceeding.
- Set the temperature: Select the appropriate cooking temperature for your food. Most air fryers allow you to adjust the temperature using the control panel or buttons. Common temperature ranges for air frying are between 180°C (350°F) and 200°C (400°F).
- Set the cooking time: Use the control panel to set the cooking time indicated in the recipe or your estimation. Adjust the timer according to the type and thickness of the food. Keep in mind that smaller and thinner foods will require less time to cook, while larger or thicker foods may need additional time.
It’s important to note that the recommended cooking times and temperatures are just guidelines. Factors such as the size and thickness of the food, as well as personal preferences for doneness, may require adjustments to achieve the desired results. It’s a good practice to check the food periodically during the cooking process and make adjustments if necessary.
You may also find that different recipes call for different temperature settings, depending on the desired outcome. For example, higher temperatures are often used for achieving a crispy exterior, while lower temperatures are suitable for delicate foods or when you want to slow cook ingredients.
Once you’ve set the cooking time and temperature, you’re ready to move on to the next step: placing the food in the air fryer basket. We’ll cover this in detail in the following section.
Preheat your air fryer before adding food to ensure even cooking and crispy results. This can help reduce overall cooking time and improve the texture of your food.
Step 5: Placing Food in the Air Fryer Basket
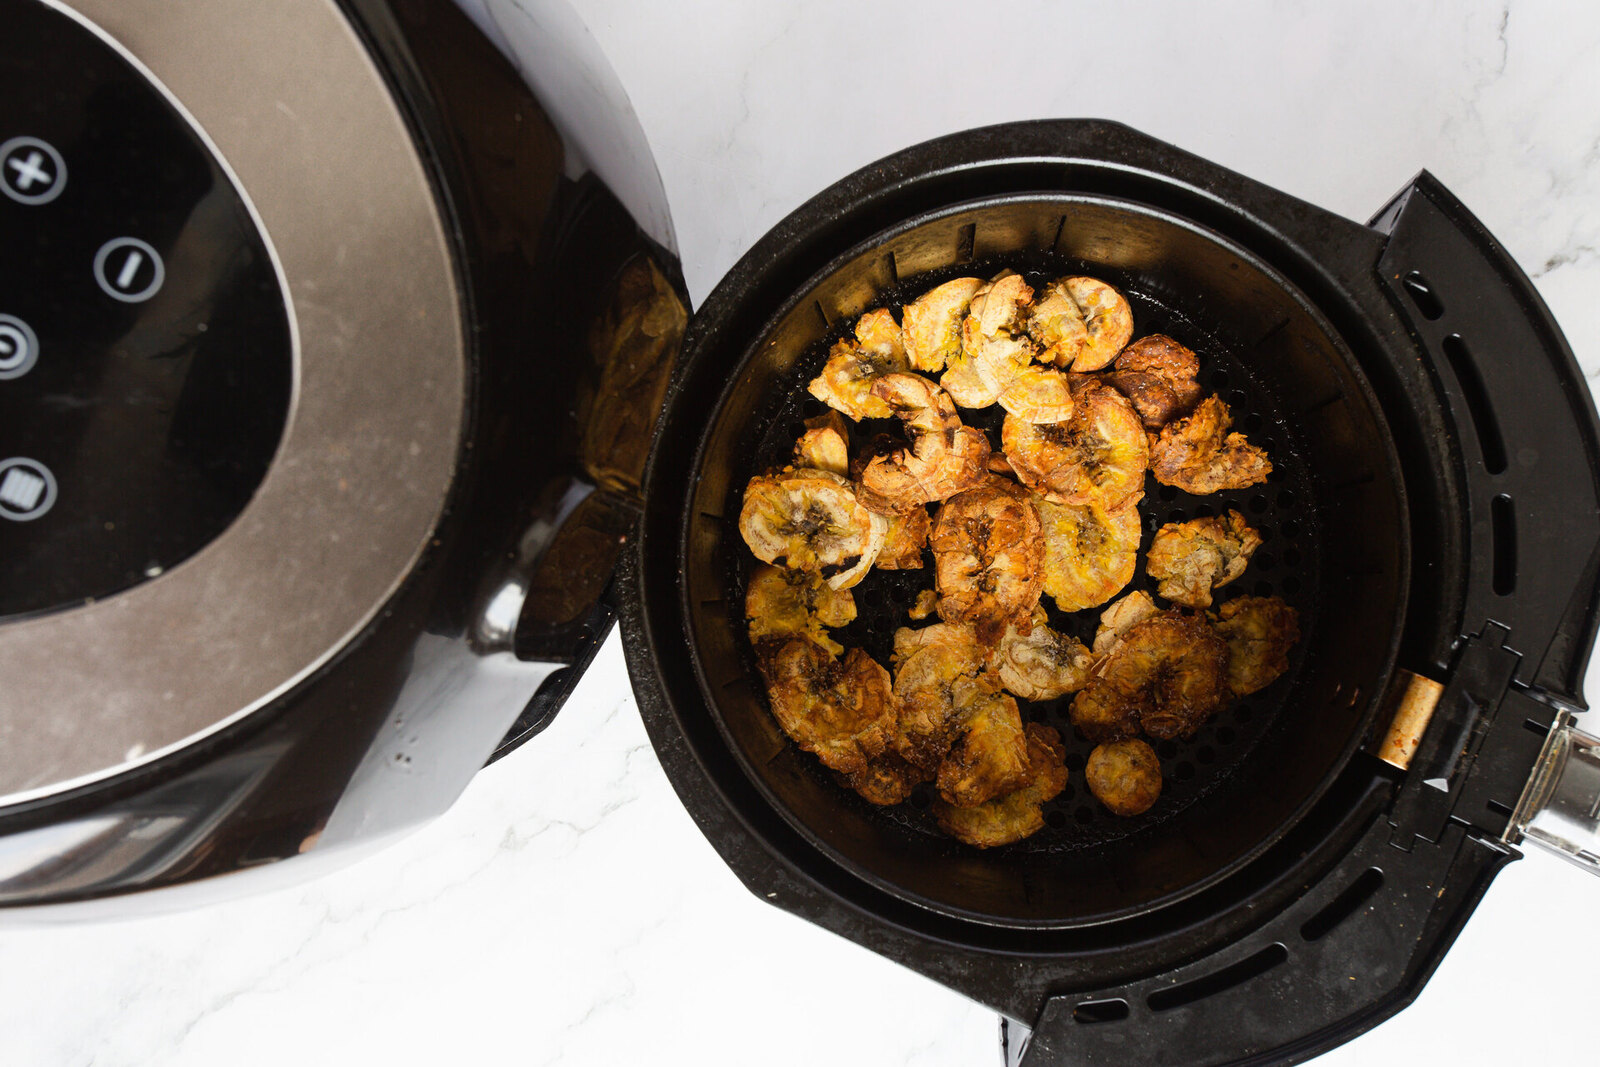
Now that you have set the cooking time and temperature, it’s time to place your food in the air fryer basket. Properly arranging the food ensures that it cooks evenly and allows for maximum air circulation, resulting in a perfectly cooked and crispy outcome.
- Prep your food: Before placing your food in the air fryer basket, make sure it is properly prepared. This may involve seasoning, marinating, or coating the food with breadcrumbs or spices, depending on the recipe and your preferences.
- Avoid overcrowding: To ensure even cooking, it’s important not to overcrowd the air fryer basket. Leave some space between the food items so that hot air can circulate around them. Overcrowding can lead to uneven cooking and a loss of crispiness.
- Arrange food in a single layer: Arrange the food in a single layer in the basket. This allows for better air circulation and even cooking. If you have more food than can fit in a single layer, it’s best to cook it in batches rather than stacking the food on top of each other.
- Don’t forget to shake or flip: Some foods, such as french fries or chicken wings, may benefit from being shaken or flipped halfway through the cooking process. This helps to ensure that all sides are evenly cooked and crispy. Consult your recipe or use your judgment to determine if flipping or shaking is necessary.
Keep in mind that different foods may require different cooking times and techniques. For example, delicate foods like fish fillets may require a gentler touch and shorter cooking time, while denser foods like chicken thighs may need a longer cooking duration. It’s always a good idea to consult recipes or cooking guides for specific food items.
Once your food is arranged in the air fryer basket, you’re ready to start the cooking process. The next step involves cooking the food and monitoring its progress, which we will explore in detail in the following section.
Step 6: Cooking and Checking Progress
Now that your food is placed in the air fryer basket, it’s time to start the cooking process. During this step, you’ll need to monitor the cooking progress to ensure that your food is cooked to perfection.
- Start the cooking: Close the air fryer basket and set the timer to the desired cooking time. The air fryer will start circulating hot air around the food, cooking it to a crispy and delicious finish.
- Monitor the progress: Keep an eye on your food as it cooks. You can observe the progress through the air fryer’s transparent lid or by briefly opening the basket if your model allows it. Check for desired color, crispness, and doneness.
- Rotate or flip the food (if necessary): Depending on the recipe and food item, you may need to rotate or flip the food halfway through the cooking process. This helps to ensure that all sides are evenly cooked and crisped. If flipping is necessary, use tongs or a spatula to carefully flip the food and return it to the air fryer.
- Make adjustments if needed: If you find that your food is cooking too quickly or not browning enough, you can make adjustments. Lower the temperature slightly or reduce the cooking time. Alternatively, if the food requires more crispiness, increase the temperature or cooking time. It may take some trial and error to find the perfect settings for your specific air fryer and desired outcome.
Remember that cooking times can vary depending on the type and thickness of the food, as well as personal preferences for doneness. It’s important to periodically check the food’s progress and make adjustments as needed to achieve the desired results.
While your food is cooking, you can also take advantage of the air fryer’s ability to cook multiple items simultaneously. If you have a multi-layer rack accessory, you can cook different foods at the same time, as long as they have similar cooking times and temperature requirements.
Now that your food is cooking to perfection, it’s time to move on to the next step: flipping or shaking the food (if required). This step helps to ensure even cooking and maximum crispiness, and we’ll guide you through it in the following section.
Step 7: Flipping/Shaking the Food (if required)
Depending on the recipe and the type of food you’re cooking, you may need to flip or shake the food during the cooking process to ensure even cooking and achieve maximum crispiness. This step is particularly important for foods like french fries, chicken wings, or breaded items.
Here’s how to flip or shake the food in your air fryer:
- Refer to the recipe or cooking instructions: Check if the recipe or cooking instructions indicate the need to flip or shake the food during cooking. Some recipes may specify the exact timing for flipping or shaking, while others may provide a visual cue or suggest checking the food for desired crispness.
- Open the air fryer basket: If your air fryer allows it, open the basket carefully during the cooking process. Be cautious of the hot air and use tongs or a spatula to flip or shake the food.
- Flip the food: If the recipe calls for flipping, use tongs or a spatula to carefully turn each piece of food over. Ensure that all sides are exposed to the hot air for even browning and crispiness.
- Shake the basket: For foods like french fries or breaded items, giving the basket a gentle shake can help to redistribute the food and ensure even cooking. This helps to prevent sticking and promotes overall crispness.
- Close the basket and continue cooking: Once you have flipped or shaken the food, close the air fryer basket and continue cooking according to the recipe’s instructions or the remaining cooking time.
It’s important to follow the recipe or your judgement when deciding whether to flip or shake the food. Not all recipes or food items require this step, so use your best judgement and consider the texture and appearance of the food as it cooks.
Keep in mind that frequent opening of the air fryer basket can lead to a loss in heat and an increase in cooking time. It’s best to limit the number of times you open the basket to avoid disrupting the cooking process.
With the flipping or shaking step completed, you’re now in the final stretch of the cooking process. The next step involves removing the food from the air fryer, a crucial moment where you need to exercise caution to avoid burns or accidents. Let’s dive into it in the following section.
Read more: How To Start A Craftsman Pressure Washer
Step 8: Removing the Food from the Air Fryer
As your food finishes cooking in the air fryer, it’s important to safely and properly remove it from the appliance. This step ensures that your food remains intact and that you can enjoy the fruits of your air frying labor without any mishaps.
Follow these steps to safely remove the food from the air fryer:
- Use oven mitts or heat-resistant gloves: Air fryers can become very hot during the cooking process, so it’s essential to protect your hands with oven mitts or heat-resistant gloves before handling the appliance.
- Open the air fryer basket: Carefully open the air fryer basket, taking caution not to touch the hot surfaces. Use tongs or a spatula to lift the food out of the basket, ensuring that any excess oil or drippings drain back into the basket.
- Transfer the food to a serving plate: Place the cooked food on a serving plate or dish. You may want to use a slotted spatula or tongs to drain any excess oil that may have accumulated during cooking.
- Allow the food to cool: Before serving or consuming the food, allow it to cool for a few minutes. This allows the food to settle and ensures that you won’t burn your mouth by biting into something too hot.
- Repeat the process (if cooking in batches): If you have more food to cook, repeat the cooking and removal process with the remaining ingredients. It’s best to cook in batches to avoid overcrowding the air fryer and to ensure that each batch receives even and thorough cooking.
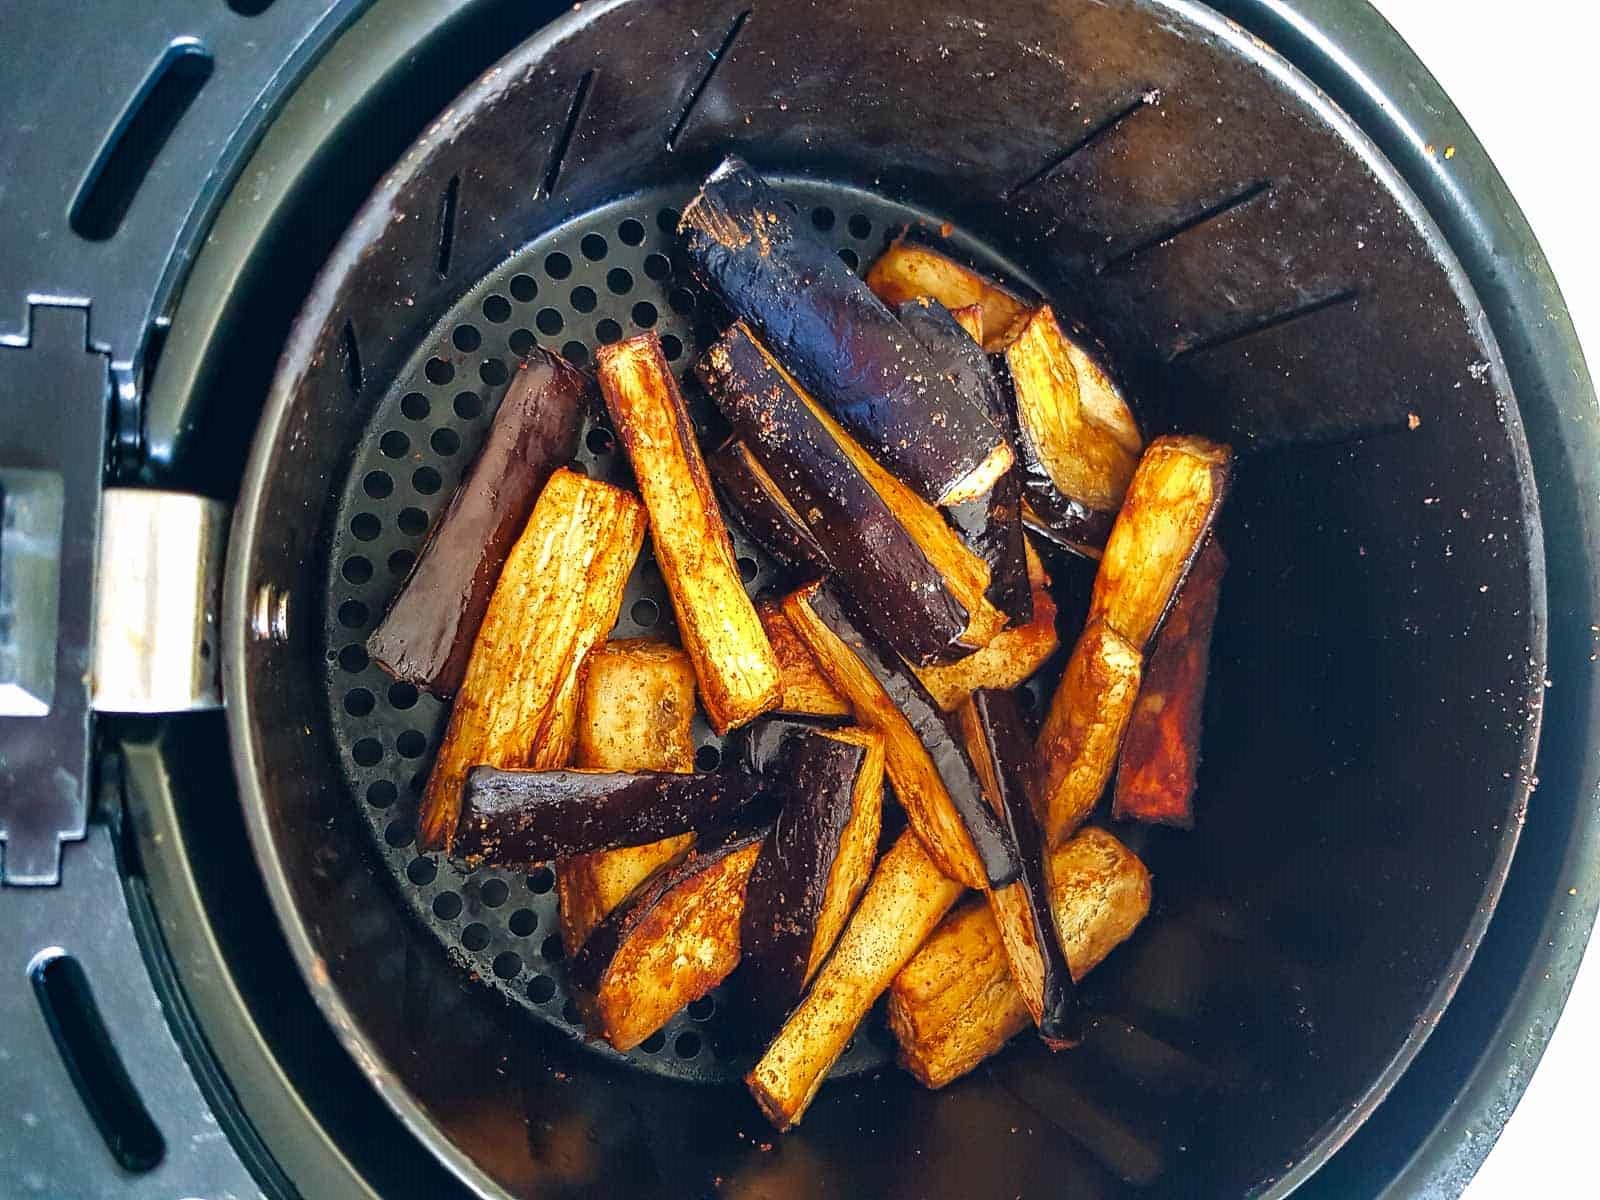
Once you have successfully removed the food from the air fryer, you can proceed to enjoy your deliciously crispy creations. Whether it’s golden-brown fries, juicy chicken, or perfectly roasted vegetables, the possibilities with your air fryer are endless.
With the food removed, there’s only one step left: cleaning and maintaining your air fryer. This is a crucial step to ensure the longevity and effectiveness of your appliance, so let’s explore it in the final section.
Step 9: Cleaning and Maintenance
After enjoying a delicious meal prepared with your air fryer, it’s essential to properly clean and maintain the appliance. Regular cleaning not only keeps your air fryer in optimal condition but also ensures that your food is cooked in a hygienic environment. Here’s how to clean and maintain your air fryer:
- Unplug the air fryer: Before starting the cleaning process, make sure the air fryer is unplugged and completely cooled down. This is for your safety and to avoid any potential electrical accidents.
- Remove accessories: Take out the removable parts of the air fryer, such as the cooking basket or tray. Depending on the model, these parts are usually dishwasher safe, but it’s recommended to consult the instruction manual for specific cleaning instructions from the manufacturer.
- Wash the accessories: Wash the removable parts with warm soapy water or place them in the dishwasher if they are dishwasher safe. Use a non-abrasive sponge or brush to remove any food residue. Make sure to dry the accessories thoroughly before reassembling them.
- Clean the interior: Use a damp cloth or sponge to clean the interior of the air fryer. Wipe away any oil or food remnants, paying attention to any hard-to-reach areas. Avoid using abrasive cleaners or submerging the appliance in water.
- Wipe the exterior: Clean the exterior of the air fryer with a damp cloth or sponge. Pay particular attention to any control panels or buttons to remove any food residue or spills.
- Check the heating coil: Over time, the heating coil of the air fryer may collect grease or residue. Using a brush or a damp cloth, gently clean the heating coil to remove any build-up. Ensure that the air fryer is completely dry before plugging it in again.
- Store the air fryer: Once the appliance is clean and dry, reassemble the removable parts and store them in a cool and dry place. Keep the cord neatly and securely wrapped to prevent any damage.
- Follow maintenance guidelines: Regularly refer to the instruction manual for any specific maintenance guidelines provided by the manufacturer. This may include tips on filter replacement or additional steps for long-term maintenance.
By following these cleaning and maintenance practices, you’ll keep your air fryer in top condition, ensuring many more delicious meals in the future.
With that, you’ve completed all the necessary steps to use, clean, and maintain your air fryer. Congratulations! You are now equipped with the knowledge and skills to air fry a wide variety of tasty and healthy meals.
Remember to always read the instruction manual provided with your specific air fryer model and to experiment with different recipes and cooking techniques to make the most of your air frying experience. Enjoy your culinary adventures with your air fryer, and happy cooking!
Conclusion
Congratulations on completing our comprehensive guide to using an air fryer! By now, you should have a solid understanding of the basics of air fryers, as well as the step-by-step process of preparing, cooking, and cleaning with this versatile kitchen appliance.
An air fryer offers a healthier alternative to traditional frying methods, allowing you to cook crispy and delicious meals with little to no oil. With its rapid air circulation and precise temperature control, an air fryer can deliver evenly cooked and flavorful dishes.
Throughout this guide, we explored important steps, such as preparing the air fryer, choosing the right cooking oil, preheating the appliance, setting the cooking time and temperature, placing the food in the air fryer basket, and flipping or shaking the food if necessary. We also emphasized the importance of safely removing the food from the air fryer and properly cleaning and maintaining the appliance for long-term use.
Remember to consult the instruction manual that comes with your specific air fryer model, as it may provide additional guidance and specific features unique to your appliance.
With your new knowledge and skills, you can now confidently embark on air frying delicious recipes ranging from crispy chicken wings and roasted vegetables to guilt-free desserts.
Thank you for joining us on this air frying journey. We hope you enjoy your culinary adventures with your air fryer and create many memorable meals for yourself, your family, and your friends. Happy air frying!
Frequently Asked Questions about How To Start An Air Fryer
Was this page helpful?
At Storables.com, we guarantee accurate and reliable information. Our content, validated by Expert Board Contributors, is crafted following stringent Editorial Policies. We're committed to providing you with well-researched, expert-backed insights for all your informational needs.


0 thoughts on “How To Start An Air Fryer”