Home> Vinyl Siding Installation

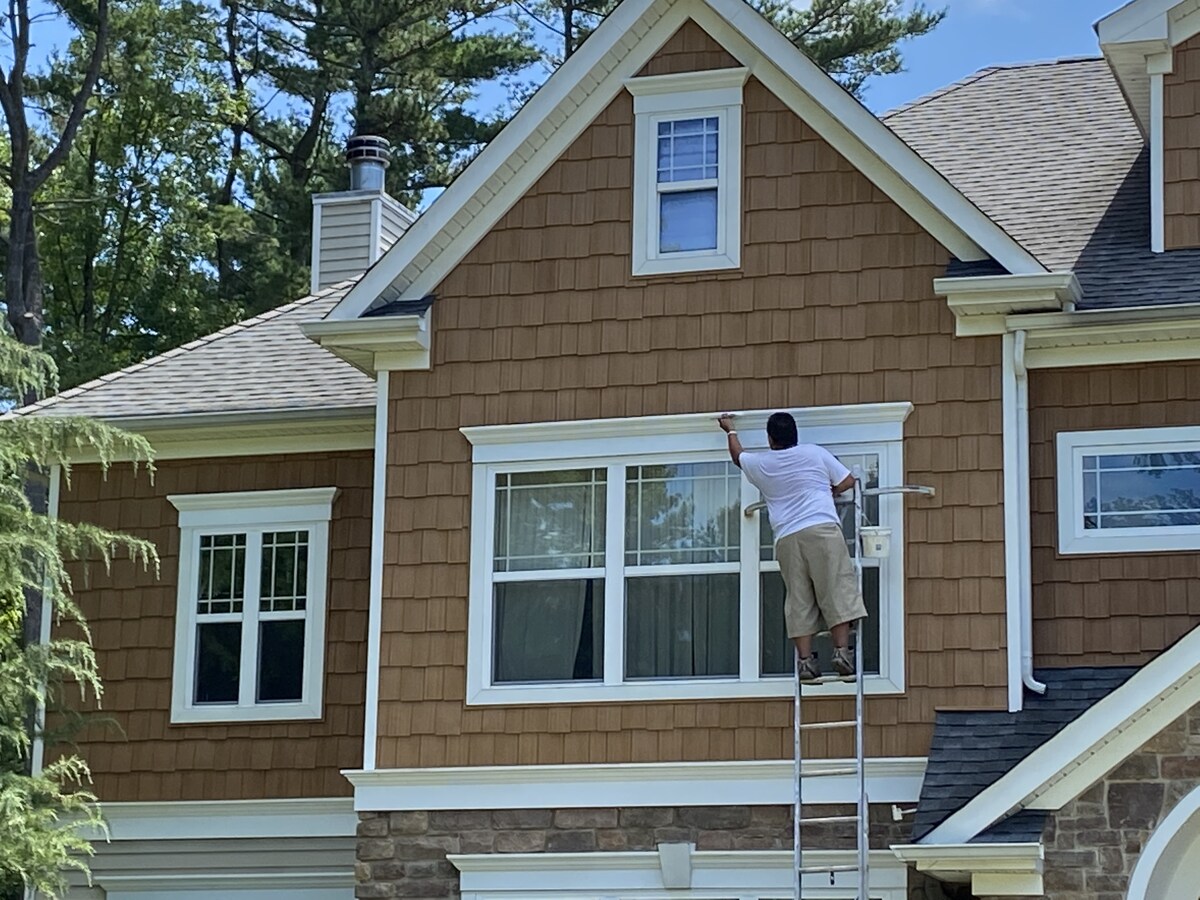
Revamp Your Home with Flawless Vinyl Siding Installation!

November 9, 2023

Upgrade your home’s exterior with our expert vinyl siding installation services. Enjoy a flawless transformation for a stunning and durable finish!

What Goes Under Vinyl Siding

What Goes Under Vinyl Siding

By: Samuel Turner • Articles

Read More
What Is Behind Siding On A House

What Is Behind Siding On A House

By: James Anderson • Articles

Read More
What Is J Channel For Siding

What Is J Channel For Siding

By: Isabella Mitchell • Articles

Read More
How Much Overlap On Vinyl Siding

How Much Overlap On Vinyl Siding

By: William Harrison • Articles

Read More
How To Install Vinyl Cedar Shake Siding

How To Install Vinyl Cedar Shake Siding

By: Benjamin Parker • Articles

Read More
How To Drill Into Vinyl Siding

How To Drill Into Vinyl Siding

By: Chloe Davis • Articles

Read More
How To Mount Security Camera On Vinyl Siding

How To Mount Security Camera On Vinyl Siding

By: William Harrison • Articles

Read More
How To Fix Warped Siding

How To Fix Warped Siding

By: Amelia Brooks • Articles

Read More

Introduction to Vinyl Siding

Vinyl Siding is an exterior cladding material used predominantly in residential buildings. It’s a popular choice for homeowners due to its durability, versatility, and ease of installation. Made from PVC (polyvinyl chloride), Vinyl siding is molded into specific shapes to mimic natural materials such as wooden clapboards or stone. It comes in a variety of styles, textures, and colors, thus offering limitless design possibilities.

The importance of vinyl siding is tied to its functional benefits. Besides providing an aesthetically pleasing exterior, it also serves as a protective layer. Vinyl siding shields the house from harsh weather conditions such as rain, snow, wind, and extreme heat or cold, effectively helping to maintain the structural integrity of the home. The installation process for vinyl siding involves a few steps that follow the preparation of the exterior surface, including measuring and cutting the siding, fitting and securing it into place.

Key Takeaways:

  • Proper underlayment for vinyl siding enhances energy efficiency, moisture protection, and durability. It reduces heat transfer, prevents water damage, and provides structural support, ensuring a long-lasting and efficient siding system.
  • Selecting the right underlayment based on climate, local codes, and budget is crucial. Professional guidance and proper installation techniques are essential for maximizing the benefits of vinyl siding underlayment.

Advantages of Vinyl Siding

One significant advantage of vinyl siding is its durability. Vinyl is resistant to common environmental threats like humidity, insects, rot, and extreme weather. Thus, it is a long-lasting option that requires minimal maintenance over the years. With proper care, vinyl siding can last up to 60 years or more.

Another advantage is the ease of maintenance. Unlike other materials that may require frequent painting or treatment, vinyl siding can be easily cleaned with a mild soap and water solution from time to time. It also does not need to be painted or stained regularly as its color is inherent in the material itself. This feature makes it a cost-effective choice in the long run.

The initial cost of vinyl siding installation is also comparatively lower than other materials. The costs can further be offset due to its longevity and minimal maintenance requirements, proving it to be a cost-effective solution for many homeowners.

Types of Vinyl Siding

Dutch Lap Siding

Dutch Lap Siding is a type of vinyl siding distinguished by its decorative groove at the top of each panel. This style is known for its traditional, hand-carved appearance, adding a unique aesthetic appeal to any home’s exterior.

Clapboard Siding

This style mimics the look of traditional wooden siding, with long, horizontal planks installed overlapping each other. Clapboard siding is popular for its timeless, classic appeal and the warm, homey feel it brings to a house’s exterior.

Cedar Shake Siding

For homeowners looking for a more rustic appeal, they may opt for Cedar Shake Siding. This vinyl siding type resembles the look of natural cedar shakes, often used in historic and coastal homes. Additionally, its installation process is quite straightforward, as detailed in this guide.

Materials Needed for Vinyl Siding Installation

Before you start installing vinyl siding, it’s important to have the right tools and materials. Some of the essential tools needed include a utility knife, level, hammer, tape measure, and a chalk line. A few other specialty tools that might prove helpful are a snap lock punch, nail slot punch, and unlocking tool for adjustments and repairs.

As for the types of vinyl siding panels, your choice hugely depends on the aesthetic you want to achieve. Common options include the aforementioned Dutch Lap Siding, Clapboard Siding, and Cedar Shake Siding, but there are numerous other styles available as well. The quantity of panels required will depend on the measurements of your house.

The additional installation hardware required includes nails for attaching the siding, starter strips to create a level base at the bottom of the wall, and corner posts for finishing off the corners. Understanding materials such as what goes under vinyl siding is also crucial as referenced in this article.

Preparing for Vinyl Siding Installation

Preparation is a key component to ensure a successful vinyl siding installation process. Begin by inspecting the installation area. Try to identify any potential problems such as damaged sheathing, mold, or insect infestations. Handle these issues before beginning, as they could disrupt your vinyl siding installation.

For potential problem areas, consider consulting a professional to determine the best course of action. This could include repairs or improvements to ensure the overall durability of your vinyl siding.

When preparing the surface, it should first be cleaned to remove any dirt, debris, or loose paint. A flat, dry surface is crucial for the vinyl siding to be installed properly. Some types of homes may require a house wrap or insulating foam to provide an additional weather-resistant barrier. Follow the manufacturer’s instructions in this regard.

How to Measure and Estimate Materials

To calculate the amount of siding you will need, you should first measure your house accurately. Begin by measuring the height and width of each wall, then multiply these numbers to find the area. For gables, you will need to measure the width at the base and the height at its peak, and multiply, then divide by two. Add up all the areas to get the total square footage.

The amount of vinyl siding you will need can then be calculated by dividing the total square footage by the coverage area of one piece of siding. This is also a good time to measure for other materials such as j-channel and corner posts.

When purchasing vinyl siding, have an accurate estimate of the quantity needed, taking into account potential mistakes or damages. Knowledge of how many pieces of vinyl siding is in a box, as detailed in this article, can aid in the calculation. Always consider buying around 10% more than your estimates to account for cutting and fitting margins.

Installing the Starter Strips

The installation of the vinyl siding begins with the starter strip. These strips create a level base from where you can start siding upwards. To install, simply align the top of the starter strip with the chalk line that was marked during the preparation stage.

Once positioned, you can then nail the starter strip to the side of the house. Using roofing nails is often advised as they have wide heads that better hold the siding in place. Be careful not to drive the nail completely. There should be a little play to allow for expansion and contraction of the siding due to weather changes.

Correct Placement and Positioning

The correct placement and positioning of the starter strip is essential for a smooth installation process. Starter strips should be installed at the lowest point of the house where siding is to be placed. The top of the starter strip should align with the level line marked from the lowest corner of the structure.

Installing the Corner Posts

Once the starter strips have been installed, you can move on to the corner posts. These posts are important as they provide a neat, finished look to the corners of your house and also give a starting and ending point for your wall panels.

Begin by measuring the height of the wall and cut the corner post to fit. Allow an extra inch for the nailing hem. The corner post should then be positioned at the corner of the house and levelled. Once placed, secure using nails. Make sure that nails are placed in the center of the nailing slot and don’t hammer them in too tightly. Corner posts should hang, not be tightly fitted.

Potential issues can arise during the installation of these corner posts. One such problem can be the corner posts not being level. A handy guide on how to replace vinyl siding corner posts can be found in this article.

How to Install J-Channel Around Windows and Doors

J-channel is used to edgewise terminate the siding panels and soffit panels in areas such as windows and doors. Its function is to provide a fully finished look.

To install, first measure the width and length of your window or door, then cut the J-channel to fit. Install the under-sill trim on horizontal windows and doors, and over-sill trim on vertical windows and doors. Slot the siding into place, ensuring it is anchored in the J-channel. Always leave room for expansion.

J-channel installation issues can often arise, such as the siding not fitting smoothly or the ends not meeting up properly. In such cases, you might need to trim the siding a little bit to ensure it fits perfectly.

How to Install Vinyl Siding Panels

The first step in installing vinyl siding panels is to determine the type of siding you’re working with. There are two main types: vertical and horizontal. The method of installation for each varies slightly.

Vertical vinyl siding, such as board and batten, is installed from the bottom up. The first piece of siding should be secured to the bottom of the wall with nails, ensuring the nails are placed in the center of the nailing slots. The following pieces are then lapped over the proceeding one with a standard overlap of one inch.

For horizontal vinyl siding, such as clapboard or dutch lap, installation is also started from the bottom of the wall. Each successive piece of siding is then installed from left to right, ensuring the pieces overlap to prevent water seepage.

Approach for Horizontal Vinyl Siding Installation

When installing horizontal vinyl siding, it’s crucial to ensure each piece is level before securing it in place. Additionally, the seams between the siding panels should be staggered between rows to prevent creating a visible pattern. For a comprehensive guide on installing vinyl cedar shake siding, click here.

Cutting Vinyl Siding

Cutting vinyl siding is a straightforward process, but it does require care and the right tools. Angle grinders and circular saws with a suitable blade can be used to cut full-size pieces to the correct length, but vinyl siding shears are perfect for smaller, more specific cuts.

Remember, when cutting vinyl siding, you should always cut the finished side up and be mindful of the fact that vinyl can shatter if it’s too cold. Therefore, cutting vinyl siding in extreme cold is discouraged.

Safety Precautions When Cutting

Always use safety glasses and gloves when cutting vinyl siding. Never reach across a running saw, and pay attention to where your hands are in relation to the blade. Check out this step-by-step guide on how to drill into vinyl siding safely.

Attaching Vinyl Siding

After cutting the vinyl siding to the appropriate size, the next step is to attach it to the house. This is usually done with nails but can also be done with screws, especially on longer pieces where additional support is needed.

All nails or screws should be placed in the center of the nailing slot and should not be driven in all the way, but rather left about 1/32” proud. This method allows the vinyl to move as it expands and contracts with temperature changes, preventing cracking and warping.

Common Pitfalls in Vinyl Siding Attachment

One common mistake during vinyl siding attachment is driving the nails or screws too tight. This can cause the vinyl siding to warp or buckle, particularly when exposed to heat. Another issue that might come up is inadequate overlaps, which can lead to water seepage behind the panels. For more information on proper overlapping techniques, you can visit here.

Nailing Vinyl Siding

Nailing vinyl siding in place is crucial for a successful installation. The nails need not be driven into the siding too tightly. Instead, they should be fastened loosely enough to allow for the sidings’ expansion and contraction due to temperature changes. This technique prevents warping, waviness or buckling of the siding.

A fundamental aspect to keep in mind is nail spacing. Depending on the size of the panel, the spacing could range from 8 to 16 inches. To meet industry standards, you may want to consult this useful guide on how many nails to use per square of vinyl siding.

Common Errors When Nailing

One of the common errors when nailing is leaving the nails too loose, causing the siding to detach or sag. Conversely, driving the nails too tight can lead to warping, so it’s essential to strike a balance. It’s also important to use appropriate nails, typically aluminum, or galvanized roofing nails, that will resist rusting.

How to Overlap Vinyl Siding

A key step in installing vinyl siding is overlapping, where one piece is placed over another to create a liner barrier, preventing water and wind penetration. The degree to which the siding should be overlapped largely depends on the type of siding and its exposure to the elements, typically ranging anywhere from 1 to 1.5 inches.

While overlapping, ensure that the upper piece covers the lower piece, always shingling from bottom to top. This design ensures that any water runoff will flow externally and not infiltrate the wall. For more on overlapping vinyl siding, you can check out this guide.

Steps for Effective Overlapping

When overlapping, start from the lower corner, then extend the first panel about an inch beyond the corner. Then, overlap the next panel over the extended inch, ensuring that the nail is placed within the top nailing hem to secure the overlap. Moreover, stagger the overlapping sections to prevent water leakage and create a more visually appealing exterior.

Installing Soffit and Fascia

The soffit and fascia are integral parts of the vinyl siding process. Not only do they add an aesthetically pleasing look to the corners of your house, but they also play a crucial role in venting moisture from attics and the cavity behind the siding panels, reducing the risk of mold and water damage.

Start by measuring and cutting the soffit panels to fit between the wall and the fascia board, ensuring that it remains level. Attach them to the underside of the roof overhang. Next, install the fascia panel by attaching it to the fascia board with nails.

Common Soffit and Fascia Installation Problems

Like any other aspect of vinyl siding installation, certain problems may arise when installing soffit and fascia. The most common issue is incorrect measurements, resulting in the soffit not fitting well between the wall and the fascia board. Avoid this by double-checking your measurements before cutting.

Maintaining Vinyl Siding

Maintenance is key to preserve the freshness of your vinyl siding, extending its lifespan while keeping its appearance new. Cleaning should be done yearly using a soft brush or cloth, gentle cleaning solution, and a water hose. Avoid using harsh chemicals or pressure washers, which can damage the vinyl.

Minor damages like cracks, holes or loose panels can be remedied promptly to prevent further damage. For instructions on how to replace a damaged piece, refer to this detailed guide on how to replace a piece of vinyl siding.

When to Seek Professional Help

The need for professional help might arise for intricate tasks or when damages become substantial. It is advisable to hire a professional if you notice extensive damage, warping, bulging or if the siding has come apart at the seams. Remember, proactive maintenance costs are often lower than reactive repairs.

Cost to Install Vinyl Siding

Cost is an important factor to consider when installing vinyl siding. Depending on the size of your house, the cost of materials and labor could range from $3,000 to $16,000. However, vinyl siding proves to be more cost-effective in the long run due to its durability and low maintenance requirements.

To understand the cost breakdown, including labor and material costs, and additional factors that could influence the cost, you can visit this informative guide.

Material Cost Breakdown

The cost of materials alone for vinyl siding could range from $1 to $8 per square foot, depending on the type and quality of the vinyl. Factors such as the brand, style, thickness and texture can influence the price. Additionally, the cost of other necessary materials like nails, trim, soffit and fascia should be considered.

Finding Professional Installers

Finding a reliable professional installer for your vinyl siding could make or break the success of your project. Therefore, it’s crucial to do a thorough background check, read reviews, and ask for references before deciding. For guidance on where to find reliable vinyl siding installers near you, consider exploring this handy resource.

What to Look for in a Contractor

Look for a contractor with a proven track record, positive customer reviews, and preferably one who specializes in vinyl siding installations. They should be licensed and insured to cover potential damages. Also, a good contractor should be able to provide a detailed estimate and timeline for the project and answer all your questions to your satisfaction.

Steps for Hiring a Contractor

Start by researching and creating a shortlist of potential contractors. Next, request and compare quotes while checking references and reviews. Once you’ve chosen a contractor, you should sign a detailed contract outlining the project scope, costs, timeline, and terms of payment. Keep communication lines open and monitor the progress of the project to ensure satisfaction.

Make sure to install a moisture barrier, such as house wrap or felt paper, underneath vinyl siding to protect against water infiltration and to improve energy efficiency.

Conclusion: Benefits of Vinyl Siding Installation

Installing vinyl siding on your home exterior is a worthwhile investment that brings several benefits. Aside from its undeniable charm and modern appeal, vinyl siding offers remarkable durability, standing up well to varying weather conditions. It doesn’t rot, warp, or succumb to pests. It also offers energy efficiency as most vinyl sidings today come with a layer of insulation.

Moreover, it is low maintenance, needing only an annual wash to keep it looking as good as new. Its ease of installation makes it a favorite choice among homeowners, with the possibility for DIY if professional help is not an option. However, it is crucial to follow the installation steps correctly for optimal results.

In terms of cost, vinyl siding is one of the most affordable options in the market. While prices vary depending on several factors like region, house size, and vinyl type, you’re sure to find an option that suits every budget. To guide you in purchasing your vinyl siding, here’s a useful link on where to purchase vinyl siding.

Reiteration of Installation Steps

From preparation, including taking measurements, estimating materials, preparing the surface, installing starter strip and corner posts, to fitting panels, attaching and nailing, – each step should be carefully executed. For complex areas like doors and windows, J-channels are used. The installation concludes with the setup of soffit and fascia.

Encouragement to Start the Project

With the benefits and the step-by-step installation guide provided, you now have the foundation to kick start your vinyl siding project. Whether you go the DIY route or hire professionals, you are a step closer to enhancing your home aesthetic and functionality.

Final Thoughts

Investing in vinyl siding is making a commitment towards a beautiful, durable, and low-maintenance home exterior. As it significantly enhances your home’s curb appeal and adds to its resale value, the effort is certainly justified.

Remember, proper installation is crucial to realize the full benefits of vinyl siding. Make sure to incorporate a careful installation approach, taking care to prepare surfaces, attach and nail properly, and deal with overlaps effectively. Don’t forget to ensure regular maintenance post-installation. Should you encounter complex issues, don’t hesitate to seek professional help.

As you embark on this home improvement journey, remember that patience, precision, and an attention to detail are your trusted companions. Good luck! You’ve got this!