Articles
How To Mount Security Camera On Vinyl Siding
Modified: May 6, 2024
Learn the step-by-step process of mounting security cameras on vinyl siding with our informative articles. Enhance your home's security today!
(Many of the links in this article redirect to a specific reviewed product. Your purchase of these products through affiliate links helps to generate commission for Storables.com, at no extra cost. Learn more)
Introduction
Welcome to our guide on how to mount a security camera on vinyl siding. Security cameras are an essential component of any home security system, providing surveillance and peace of mind for homeowners. However, knowing how to properly mount a security camera on vinyl siding can be a challenge, as the material requires special considerations to ensure a secure and long-lasting installation.
In this guide, we will walk you through the step-by-step process of mounting a security camera on vinyl siding. We will cover everything from gathering the necessary tools and materials to adjusting and testing the camera positioning. Whether you’re a DIY enthusiast or a homeowner looking to enhance your home security, this guide will provide you with the knowledge and confidence to install a security camera on your vinyl siding.
Before we dive into the steps, it’s important to note that safety should always be a priority. If you’re uncomfortable working at heights or with electrical wiring, it’s recommended to hire a professional installer to ensure a safe and proper installation.
Now, let’s get started with gathering the necessary tools and materials for the installation.
Key Takeaways:
- Properly mounting a security camera on vinyl siding requires careful consideration of location, preparation of the siding, and selection of the appropriate mounting method to ensure a secure and effective installation.
- Managing the camera’s wires, adjusting and testing the camera positioning, and performing final checks and troubleshooting are essential steps to ensure a successful and reliable security camera installation on vinyl siding.
Read more: How To Mount To Vinyl Siding
Step 1: Gather the necessary tools and materials
Before you begin the installation process, it’s important to gather all the necessary tools and materials. This will ensure a smooth and efficient installation without any unnecessary interruptions. Here’s a list of the tools and materials you will need:
- Security camera: Choose a camera that suits your specific needs, such as a wired or wireless camera, with or without night vision capabilities.
- Mounting bracket: This is the device that attaches the camera to the vinyl siding. Make sure to choose a bracket that is compatible with your camera model and provides a secure and stable mount.
- Power drill: You will need a drill to create holes for the mounting bracket and any necessary wiring.
- Drill bits: Depending on the mounting bracket and camera, you may need specific drill bit sizes to create the appropriate size holes.
- Screws or fasteners: These will be used to secure the mounting bracket to the vinyl siding. Make sure to choose screws or fasteners that are appropriate for exterior use and can withstand the elements.
- Screwdriver or drill bit adapter: You will need a tool to tighten the screws or fasteners securely.
- Level: A level will help ensure that the camera is properly aligned and straight during installation.
- Tape measure: You will need a tape measure to measure the distance between mounting points and ensure proper positioning.
- Cable management solutions: Depending on the camera and your wiring needs, you may require cable clips, zip ties, or conduit to keep the wires organized and hidden.
- Protective equipment: Safety should always be a priority, so consider wearing gloves, safety goggles, and protective clothing during the installation process.
Once you have gathered all the necessary tools and materials, you’re ready to move on to the next step: determining the location for mounting the security camera.
Step 2: Determine the location for mounting the security camera
Choosing the right location to mount your security camera is crucial for maximizing its effectiveness. Here are some factors to consider when determining the ideal location:
- Line of sight: Ensure that the camera has a clear line of sight to the area you want to monitor. Obstructions such as trees, walls, or other structures can hinder the camera’s view and compromise its effectiveness.
- Coverage area: Identify the specific areas you want the camera to capture and monitor. This can include entry points, driveways, windows, or any other vulnerable areas of your property.
- Height: Mount the camera at a height that provides optimal coverage and reduces the risk of vandalism or tampering. Generally, a height of 9 to 10 feet is recommended.
- Accessibility: Consider the accessibility of the camera for maintenance and adjustments. You’ll want to ensure that the camera can be easily reached when needed.
- Power source: If you’re using a wired camera, ensure that there is a nearby power source for connection. If you’re using a wireless camera, check the range and signal strength to ensure a reliable connection to your recording device.
- Weatherproofing: Make sure the chosen location provides adequate protection for the camera from rain, wind, and other harsh weather conditions. Look for areas with natural cover or consider installing a housing or protective cover for added protection.
Once you have identified the most suitable location, use a pencil or piece of tape to mark the spot for the mounting bracket. This will serve as a guide during the installation process. Keep in mind that it’s a good idea to have multiple mounting locations in case you need to adjust or change the camera’s position in the future.
Now that you have determined the location, it’s time to prepare the vinyl siding for installation. This will ensure a secure and stable mounting surface for your security camera.
Step 3: Prepare the vinyl siding for installation
Proper preparation of the vinyl siding is essential to ensure a stable and secure installation of your security camera. Here are the steps to prepare the vinyl siding:
- Inspect the siding: Begin by inspecting the vinyl siding for any damage or issues that may affect the installation. Check for cracks, loose pieces, or signs of deterioration. It’s important to address any issues before proceeding with the installation.
- Clean the siding: Use a mild detergent and a soft brush or cloth to clean the area where the camera will be mounted. Remove any dirt, dust, or debris that may interfere with the adhesion of the mounting bracket.
- Measure and mark the installation area: Use a tape measure to measure the distance between the marked spot for the mounting bracket and any nearby features such as windows, door frames, or corners. This will help ensure that the camera is properly positioned and centered.
- Identify the studs: Locate the studs behind the vinyl siding. You can use a stud finder or tap gently on the siding to identify the stud’s location. Mark the area where the studs are positioned as they will provide additional support for the mounting bracket.
Once you have prepared the vinyl siding, you are ready to choose the appropriate mounting method for your security camera. This will depend on various factors such as the weight of the camera, the location, and your personal preferences. In the next step, we’ll guide you through the process of selecting the right mounting method.
Step 4: Choose the appropriate mounting method
When it comes to mounting a security camera on vinyl siding, there are a few different methods you can choose from. The choice of mounting method will depend on various factors, including the weight of the camera, the location, and your personal preferences. Here are some common mounting methods:
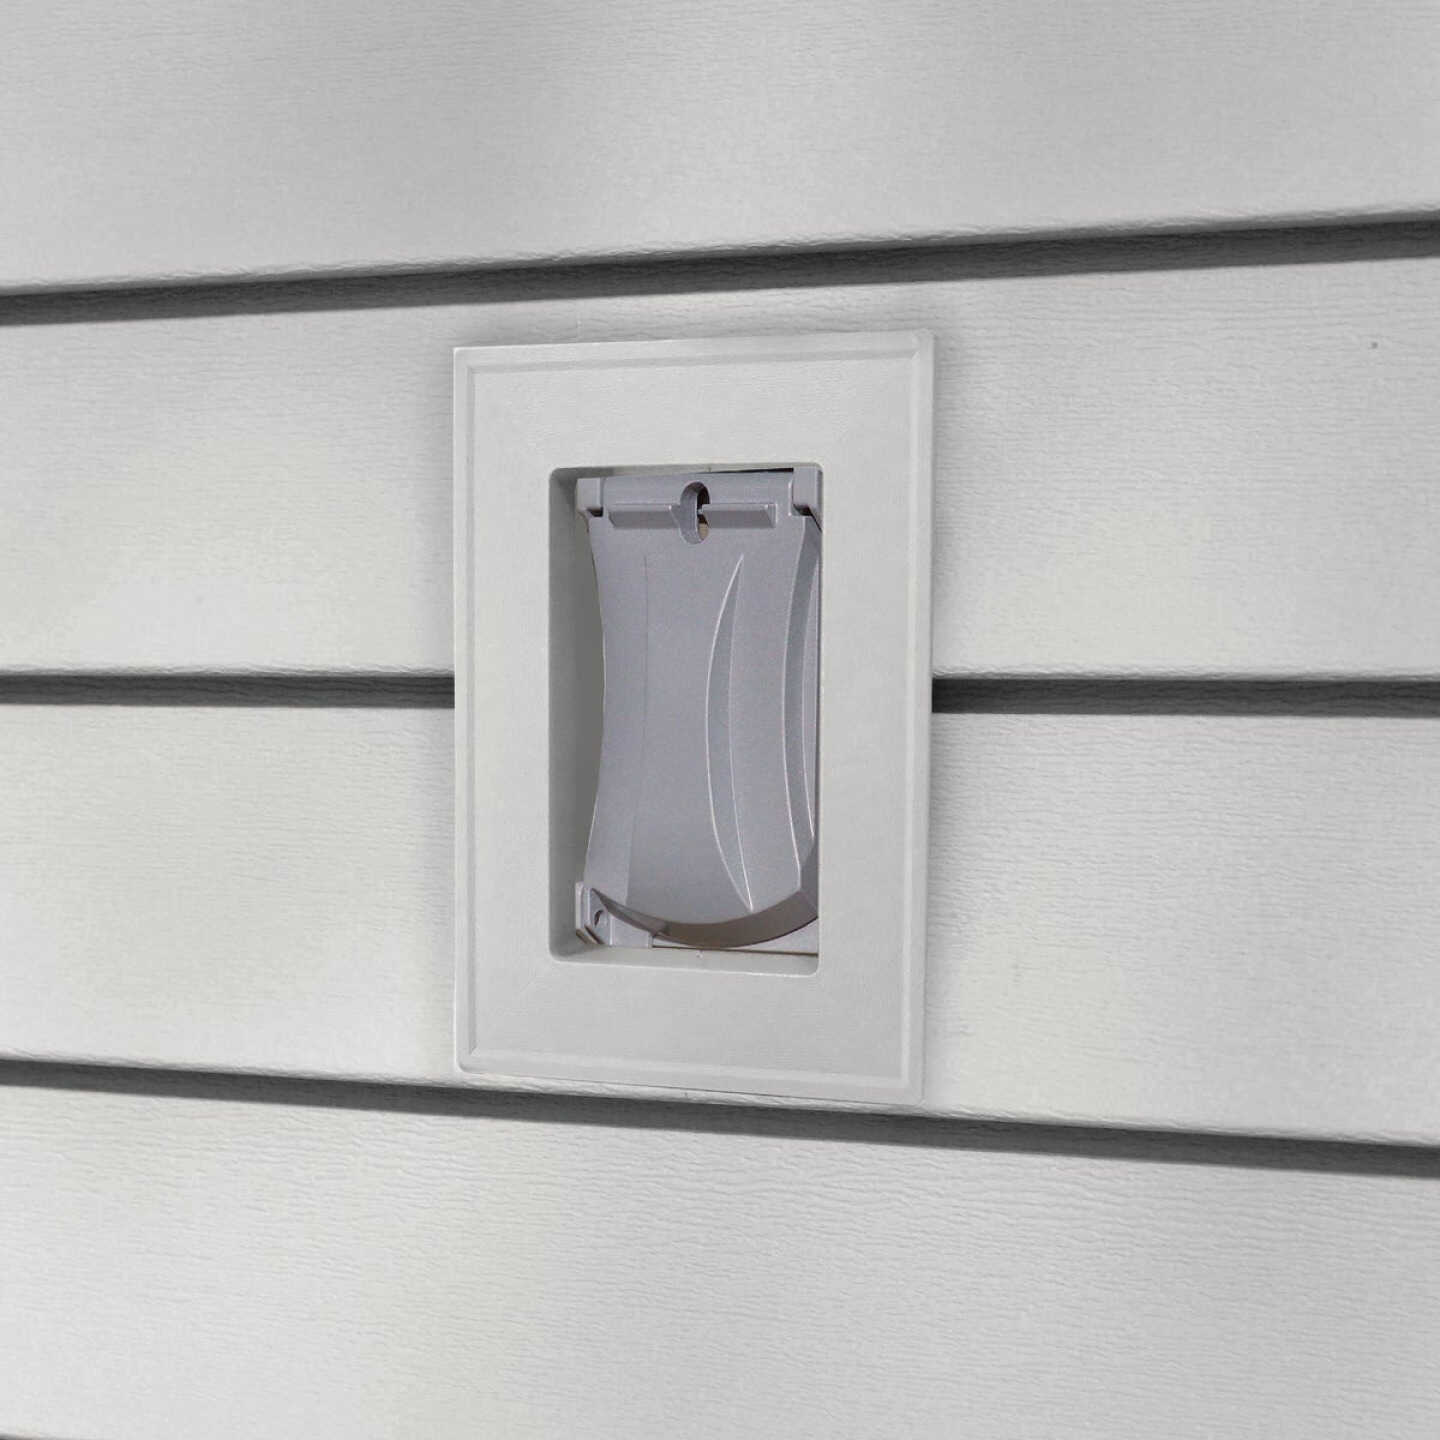
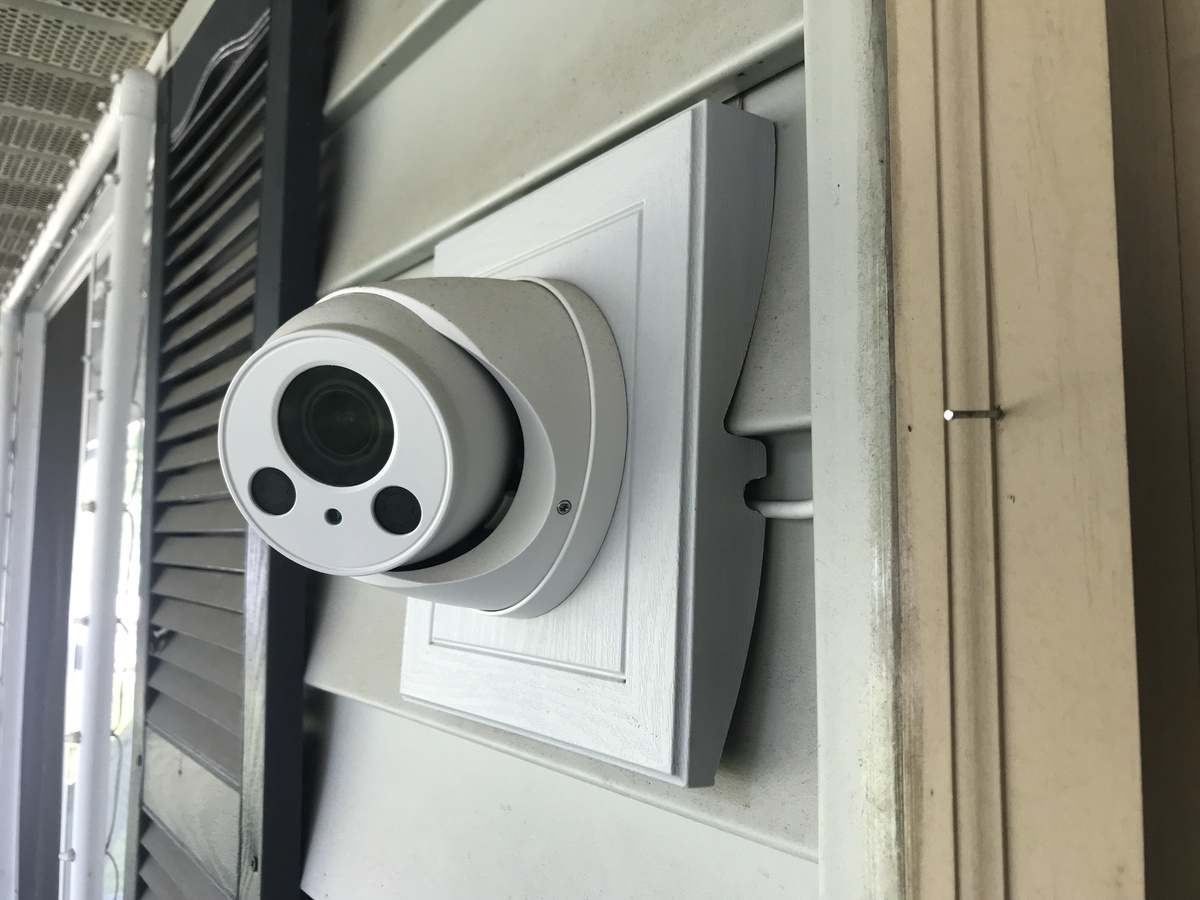
- Brick Clips or Vinyl Siding Hooks: These are specially designed clips or hooks that attach to the vinyl siding without causing any damage. They typically have a hook or clip that can hold the camera or mounting bracket securely. This method is ideal for lightweight cameras or if you want a temporary or semi-permanent mounting solution.
- Mounting Blocks: Mounting blocks are rectangular-shaped panels that are installed over the vinyl siding. They provide a flat and stable surface for mounting the camera or mounting bracket. This method is suitable for larger and heavier cameras that require a more secure and permanent installation.
- Drilling and Screwing: If you prefer a more permanent and secure mounting method, you can drill holes through the vinyl siding and into the wall behind it. Use screws or anchors designed for exterior use to attach the camera or mounting bracket to the wall. This method provides a strong and stable mount, but it may cause damage to the vinyl siding.
Consider the weight of your camera, the desired level of security, and the impact on the vinyl siding when choosing the appropriate mounting method. It’s also important to follow the manufacturer’s instructions and guidelines for your specific camera model.
Once you have determined the mounting method, it’s time to proceed with the installation of the mounting bracket. In the next step, we will guide you through the process of installing the mounting bracket securely onto the vinyl siding.
Read more: How To Mount TV To Vinyl Siding
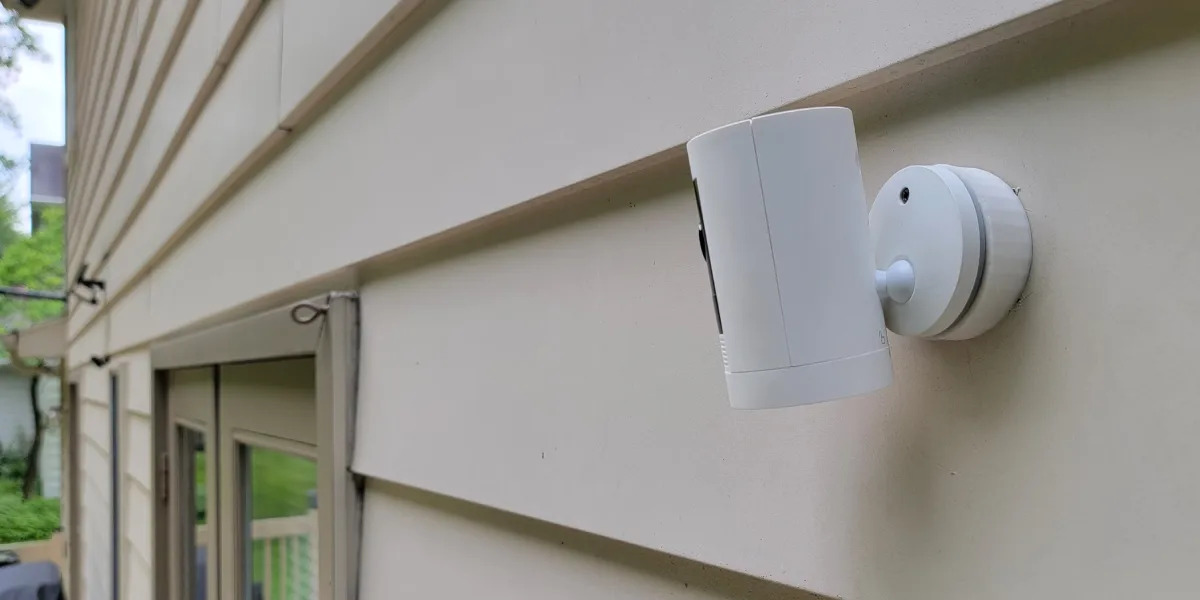
Step 5: Install the mounting bracket
Installing the mounting bracket is a crucial step in securely mounting your security camera on vinyl siding. The mounting bracket serves as the foundation for attaching the camera and ensuring stability. Here’s how you can install the mounting bracket:
- Position the bracket: Hold the mounting bracket against the vinyl siding at the marked installation area. Ensure that it is level and aligned with any nearby features, such as windows or door frames. This will help ensure a straight and professional-looking installation.
- Mark the mounting holes: Use a pencil or marker to mark the location of the mounting holes on the vinyl siding. These holes will be used to attach the bracket to the siding.
- Pre-drill holes: Using a power drill and the appropriate-sized drill bit, pre-drill holes at the marked locations on the vinyl siding. Make sure to drill straight and avoid applying excessive pressure to prevent damage to the siding.
- Attach the bracket: Line up the mounting holes on the bracket with the pre-drilled holes on the vinyl siding. Insert screws or fasteners through the bracket and into the pre-drilled holes. Use a screwdriver or drill bit adapter to tighten the screws securely.
- Check stability: Once the bracket is attached, give it a gentle tug to ensure that it is securely mounted and doesn’t move or slide. If it feels loose, tighten the screws further or consider using larger screws for added stability.
By following these steps, you will have successfully installed the mounting bracket onto the vinyl siding. The bracket will provide a solid and secure base for attaching your security camera in the next step.
Now that the mounting bracket is in place, it’s time to move on to the next step: securely mounting the security camera.
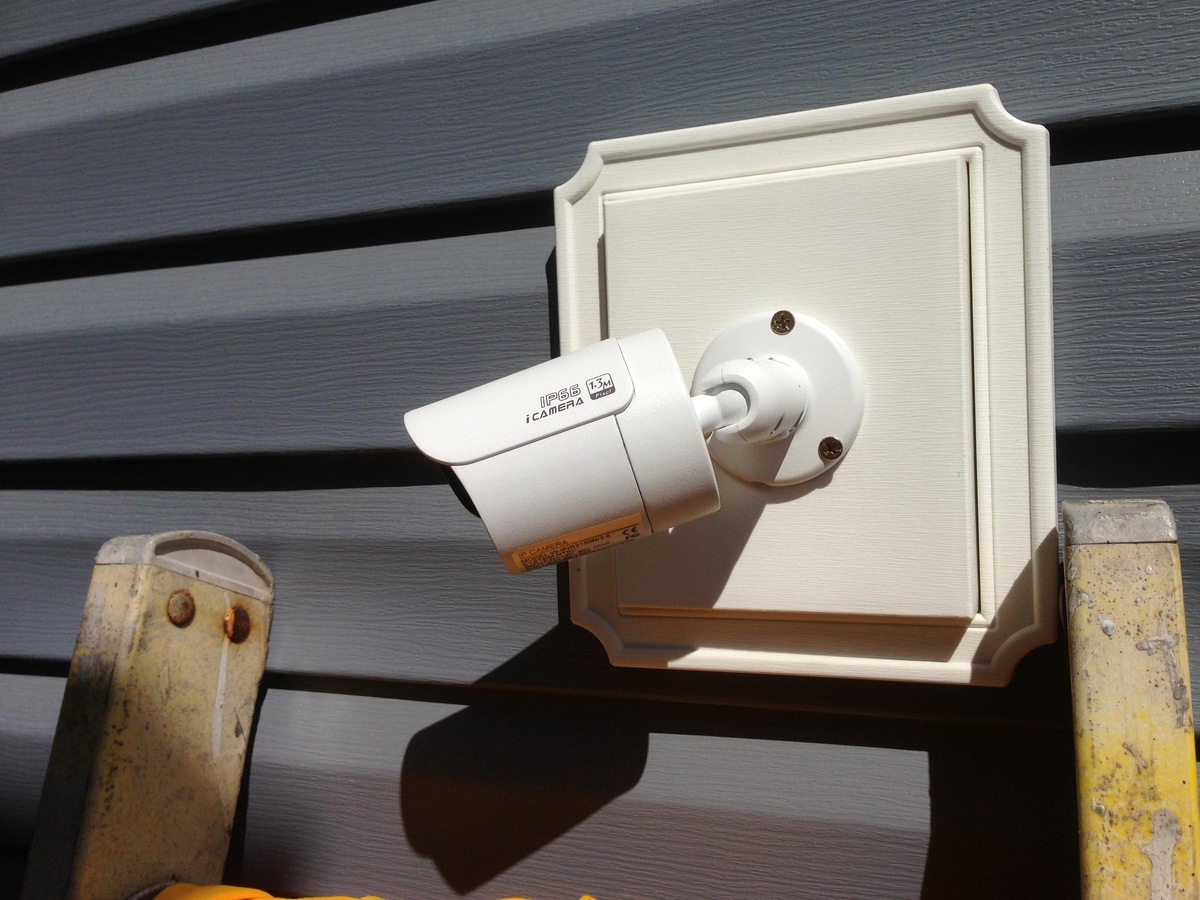
When mounting a security camera on vinyl siding, use a mounting kit specifically designed for siding. Make sure to drill into the studs for a secure installation.
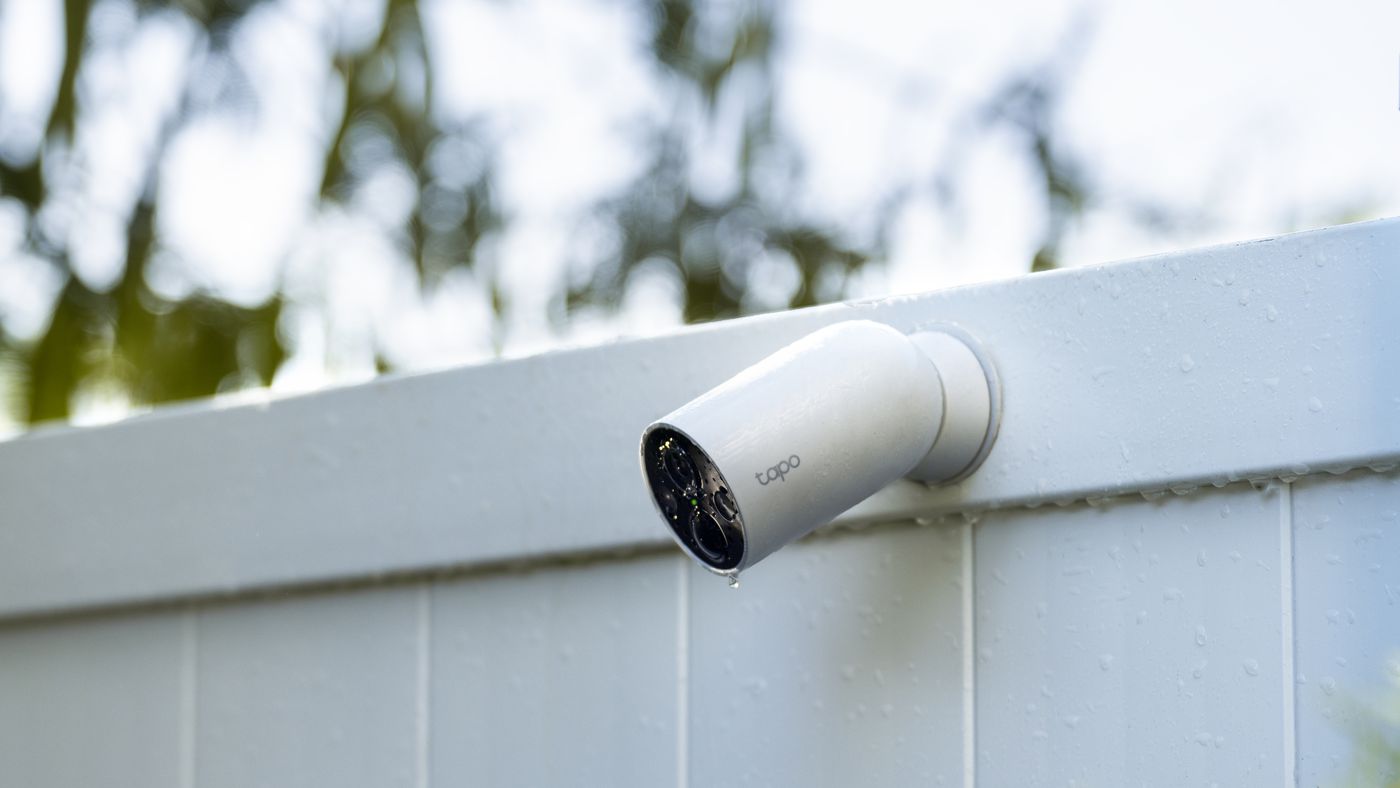
Step 6: Securely mount the security camera
Now that you have installed the mounting bracket, it’s time to securely mount your security camera onto the vinyl siding. Follow these steps to ensure a stable and successful installation:
- Position the camera: Place the camera onto the mounting bracket, aligning the screw holes on the camera with the corresponding holes on the bracket. Ensure that the camera is level and facing the desired direction for optimal surveillance coverage.
- Insert screws or fasteners: Once the camera is in position, insert screws or fasteners through the screw holes on the camera and into the corresponding holes on the mounting bracket. Use a screwdriver or drill bit adapter to tighten the screws securely, but be careful not to overtighten and damage the camera or bracket.
- Check the stability: Give the camera a gentle tug to ensure it is securely mounted and doesn’t move or wobble. If it feels loose, double-check the tightness of the screws or fasteners. You may need to readjust the positioning or tighten them further for added stability.
- Test the camera’s functionality: Before proceeding, it’s important to test the camera’s functionality. Connect the camera to your recording device or monitor and check the video feed. Adjust the camera angle and settings if necessary to ensure optimal coverage and clarity.
By following these steps, you will have successfully mounted your security camera onto the vinyl siding. Ensure that the camera is securely attached and positioned to provide an effective surveillance solution for your property.
Now that the camera is securely mounted, it’s time to move on to the next step: adjusting and testing the camera positioning for optimal performance.
Step 7: Adjust and test the camera positioning
Properly positioning your security camera is crucial for capturing the desired surveillance footage effectively. Follow these steps to adjust and test the camera positioning:
- Camera angle: Adjust the camera angle to ensure it captures the desired area effectively. Tilt the camera up, down, or sideways as needed to optimize the field of view and coverage. Use a level to ensure the camera is straight and not tilted at an angle.
- Zoom and focus: If your camera has zoom and focus capabilities, adjust them accordingly for clear and focused footage. Zoom in to capture specific areas of interest or zoom out for a wider view. Use the focus function to ensure sharp and detailed images.
- Testing the camera view: Activate the camera and observe the live footage on your recording device or monitor. Check for any blind spots or areas that are not adequately covered. Make adjustments to the camera angle or positioning if necessary to ensure comprehensive surveillance coverage.
- Night vision testing: If your camera has night vision capabilities, test them in low-light conditions to ensure optimal performance. Check for the clarity and visibility of the footage captured in low-light or dark environments.
- Make adjustments if needed: After assessing the camera’s performance, make any necessary adjustments to the angle, zoom, or focus. Fine-tuning the camera positioning will help ensure that it covers the desired areas effectively and maximizes the quality of the surveillance footage.
By carefully adjusting and testing the camera positioning, you can ensure that your security camera provides clear and comprehensive surveillance coverage of your property. It’s important to periodically check and readjust the camera as needed to accommodate changes in your security needs or environmental conditions.
Now that you have adjusted and tested the camera positioning, it’s time to move on to the next step: managing the camera’s wires for a clean and organized installation.
Step 8: Manage the camera’s wires
Properly managing and organizing the wires of your security camera is essential for a clean and tidy installation. Follow these steps to effectively manage the camera’s wires:
- Plan the wire route: Before securing the wires, plan the route they will take from the camera to the recording device or power source. Consider the most discreet and least obtrusive path that keeps the wires hidden and protected.
- Use cable clips or conduit: Secure the wires along the planned route using cable clips or conduit. Cable clips can be attached to the siding or nearby structures to keep the wires neatly in place. Conduit can be used for a more professional and discreet appearance, as it encloses the wires within a protective sleeve.
- Secure the connections: Ensure that all connections between the camera, power source, and recording device are secure. Use appropriate connectors or wire nuts to secure the electrical connections, and ensure that they are protected from the elements.
- Hide the wires: If possible, hide the exposed wires behind objects like gutters, downspouts, or nearby vegetation. This will help minimize their visibility and create a cleaner installation.
- Test the connections: Once all the wires are managed and secured, test the camera’s functionality again to ensure that the connections are properly working. Check for any issues like loose connections or interference that may affect the camera’s performance.
Properly managing the camera’s wires not only enhances the aesthetics of the installation but also helps protect the wires from damage and ensures reliable performance. It is important to follow electrical safety guidelines and consider consulting a professional if you are unsure about handling electrical connections.
Now that you have effectively managed the camera’s wires, it’s time for the final checks and troubleshooting before completing the installation.
Step 9: Final checks and troubleshooting
Before completing the installation of your security camera on vinyl siding, it’s important to perform some final checks and troubleshooting to ensure everything is in proper working order. Follow these steps for the final checks:
- Check the camera’s field of view: Stand in different areas of the monitored space and confirm that the camera adequately covers the desired areas. Look for any blind spots or areas that may require adjustments in camera positioning.
- Test the camera’s functionality: Activate the camera and review the live footage on your recording device or monitor once again. Check for clear images, proper focus, and the absence of any technical issues like flickering or interference.
- Adjust camera settings if necessary: If you notice any deficiencies in image quality or performance, make adjustments to the camera’s settings. This may include tweaking the exposure, brightness, or contrast settings to optimize the footage.
- Perform a weatherproofing check: Ensure that the camera, mounting bracket, and connections are properly weatherproofed. Check for any gaps or exposed areas where moisture could enter and potentially damage the equipment.
- Inspect the mounting bracket and screws: Double-check the tightness of the mounting bracket and screws to ensure they are securely fastened. Loose brackets or screws can result in an unstable camera position or even a complete detachment.
- Test the camera’s night vision: If your camera has night vision capabilities, test them in low-light conditions once again. Verify that the camera provides adequate visibility and clarity in nighttime environments.
If you encounter any issues during the final checks, here are some troubleshooting steps you can follow:
- Check the power source: Ensure that the camera is receiving power from the designated power source. Confirm that the power supply is functioning properly and that all connections are secure.
- Verify the recording device: Test the connection between the camera and the recording device or monitor. Confirm that the recording device is receiving the camera’s feed and that the settings are configured correctly.
- Inspect the wiring: Check all the wiring connections to ensure they are properly connected and not damaged in any way. Replace any faulty wires or connectors if necessary.
- Contact technical support: If you are unable to resolve any issues through troubleshooting, consult the camera’s manufacturer or technical support for further assistance and guidance.
By performing these final checks and troubleshooting steps, you can ensure that your security camera installation on vinyl siding is complete and ready to provide reliable surveillance for your property.
Congratulations! You have successfully mounted a security camera on vinyl siding. With proper installation and maintenance, your security camera will provide you with peace of mind and enhanced home security.
Remember to periodically inspect and clean the camera, check the wiring connections, and adjust the settings as needed to ensure continued optimal performance.
Conclusion
Mounting a security camera on vinyl siding can be a challenging task, but with the right tools, knowledge, and careful execution, it is completely achievable. By following the step-by-step guide outlined in this article, you are now equipped with the necessary information to install a security camera on your vinyl siding with confidence.
We began by gathering the necessary tools and materials, ensuring that you have everything you need to complete the installation smoothly. Next, we discussed the importance of determining the ideal location for mounting the camera, considering factors such as line of sight, coverage area, and accessibility.
Preparing the vinyl siding for installation was the next crucial step, involving inspection, cleaning, and marking the installation area. We then delved into the different mounting methods available, such as brick clips, mounting blocks, and drilling and screwing, allowing you to choose the one most suitable for your camera and preferences.
After installing the mounting bracket securely onto the vinyl siding, we moved on to mounting the camera itself. We emphasized the importance of positioning it correctly, adjusting the angle, and testing its functionality to ensure proper surveillance coverage.
Managing the camera’s wires was another important aspect we covered, focusing on planning the wire route, using cable clips or conduit for organization, and testing the connections for reliability.
Finally, we concluded with the final checks and troubleshooting steps, ensuring that the camera’s field of view, functionality, and weatherproofing were all in order. We provided troubleshooting tips and encouraged reaching out to technical support when necessary.
By successfully completing these steps, you have not only installed a security camera on your vinyl siding but also improved the overall security of your home. Remember to periodically check and maintain the camera, adjust settings as needed, and ensure a consistent power supply for optimal performance.
With your newly installed security camera, you can now have peace of mind, knowing that you have taken proactive steps to protect your property and loved ones. Stay vigilant, stay safe, and enjoy the enhanced security that your security camera brings.
Now that you've mastered mounting security cameras on vinyl siding, why not dive deeper into making your home both stylish and secure? If you're considering a facade update, our article on the latest trends in vinyl siding offers eye-catching options that promise durability and curb appeal. For those focused on safety, our insightful piece on the essentials of home security provides practical advice to keep your living space protected. Both guides are filled with tips that are easy to follow and sure to make a significant difference.
Frequently Asked Questions about How To Mount Security Camera On Vinyl Siding
Was this page helpful?
At Storables.com, we guarantee accurate and reliable information. Our content, validated by Expert Board Contributors, is crafted following stringent Editorial Policies. We're committed to providing you with well-researched, expert-backed insights for all your informational needs.


0 thoughts on “How To Mount Security Camera On Vinyl Siding”