Articles
Black And Decker Handy Steamer How To Use
Modified: May 6, 2024
Learn how to use the Black And Decker Handy Steamer with our informative articles. Discover tips, tricks, and step-by-step instructions for efficient steaming.
(Many of the links in this article redirect to a specific reviewed product. Your purchase of these products through affiliate links helps to generate commission for Storables.com, at no extra cost. Learn more)
Introduction to the Black And Decker Handy Steamer
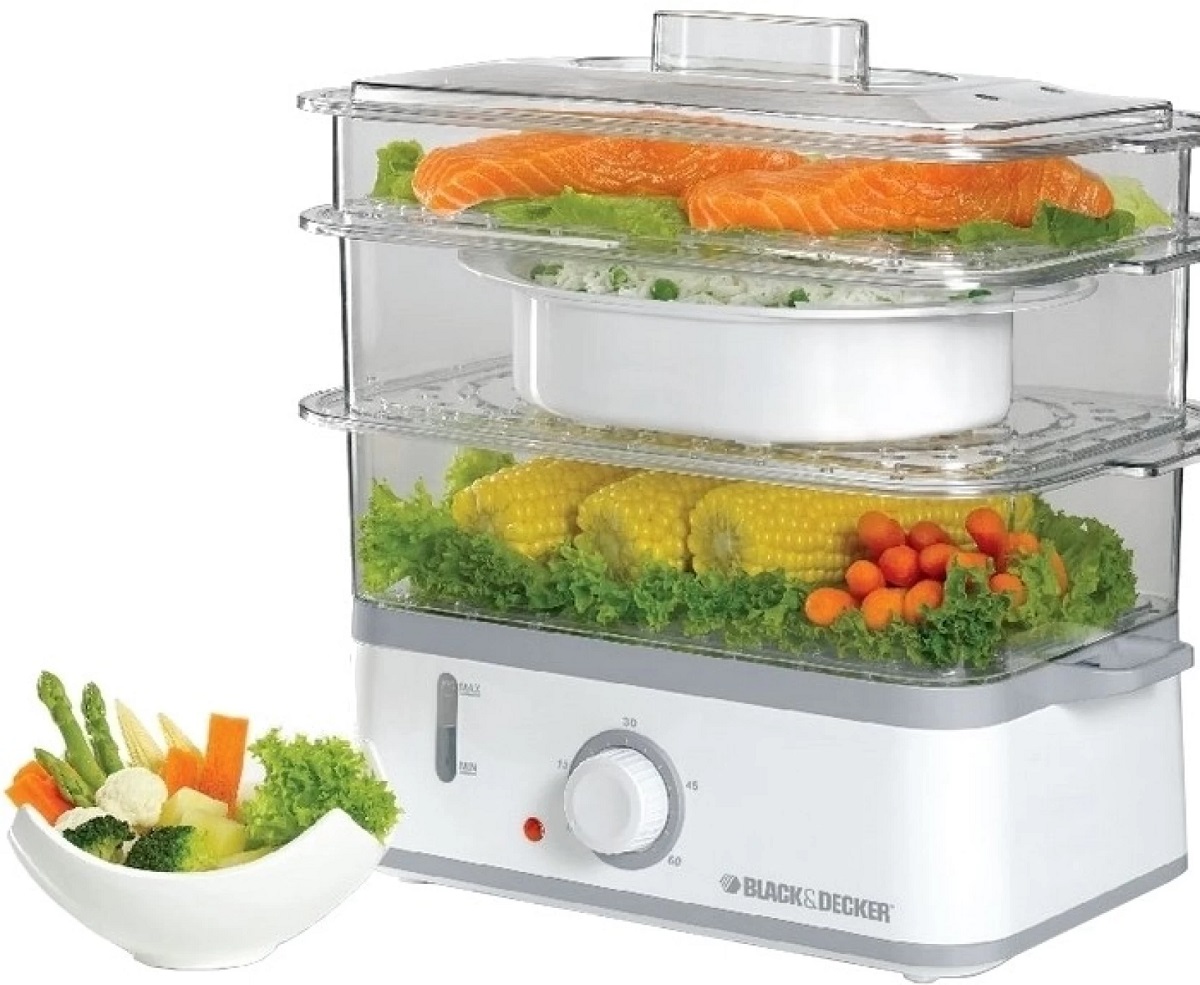
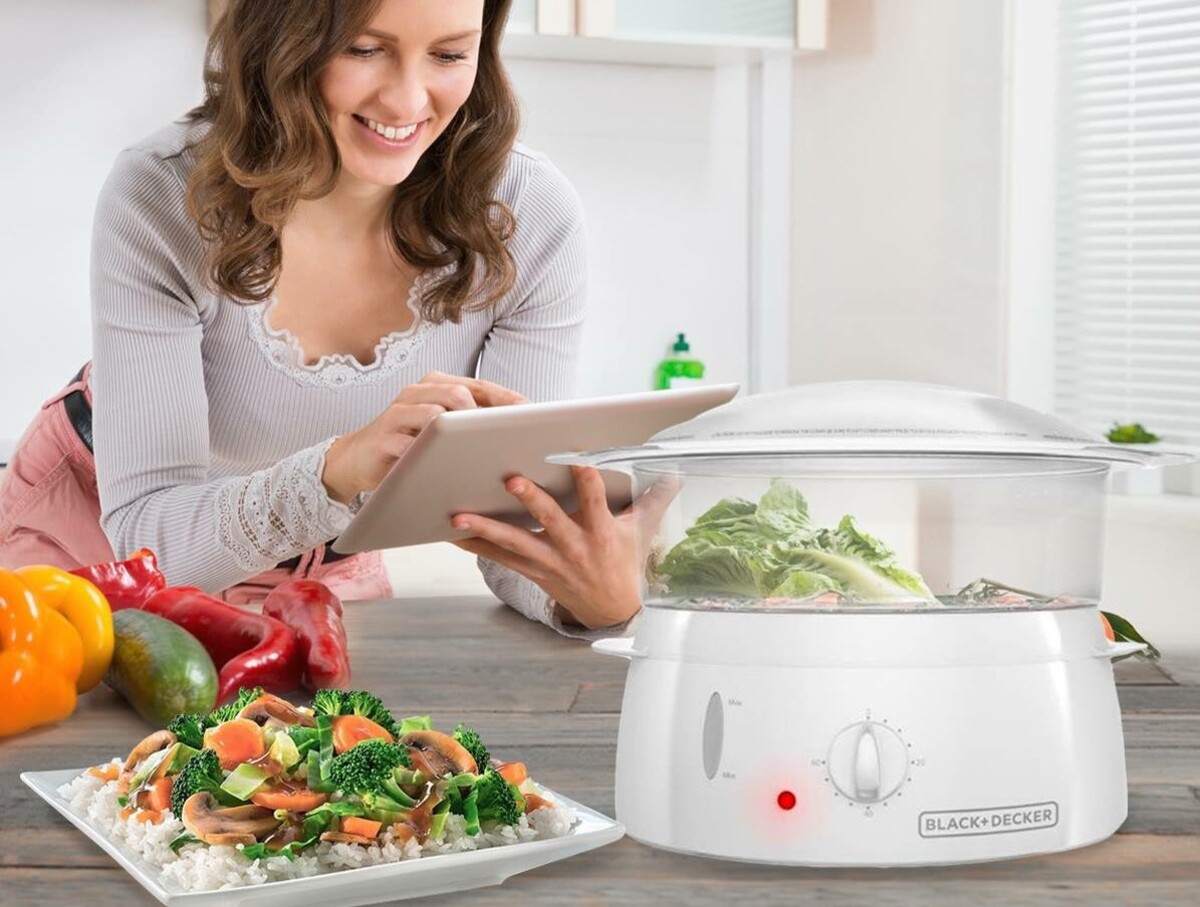
The Black And Decker Handy Steamer is a versatile kitchen appliance that allows you to steam cook a variety of foods. Steaming is a healthy and convenient cooking method that helps to retain the nutrients and flavors of the ingredients. Whether you are steaming vegetables, seafood, or even grains, the Black And Decker Handy Steamer is designed to make the process quick and hassle-free.
With its compact and user-friendly design, the Handy Steamer is perfect for small kitchens or for those who want a convenient way to prepare meals without the need for multiple pots and pans. This steamer features separate steaming bowls, allowing you to cook different foods simultaneously. It also comes with a unique steaming guide that provides recommended cooking times for various ingredients, ensuring that you achieve perfect results every time.
The Handy Steamer offers several advantages over traditional cooking methods. Unlike boiling or frying, steaming requires minimal oil, making it a healthier option for those conscious about their calorie intake. The gentle and even heat distribution of steam helps to preserve the natural colors, flavors, and textures of the food, resulting in dishes that are not only nutritious but also visually appealing.
Additionally, the Black And Decker Handy Steamer is equipped with safety features such as an automatic shut-off function and a visible water level indicator, ensuring that your cooking experience is both safe and efficient. The removable steaming bowls and components are dishwasher safe, making cleanup a breeze.
Whether you are a novice cook looking to incorporate healthier cooking methods into your routine or a seasoned chef looking for a versatile appliance to expand your culinary repertoire, the Black And Decker Handy Steamer is an excellent addition to your kitchen. In the following sections, we will guide you through the process of setting up, using, and maintaining your steamer, so you can start enjoying the benefits of steamed food in no time.
Key Takeaways:
- Enjoy hassle-free and healthy cooking with the Black And Decker Handy Steamer, perfect for novice cooks and seasoned chefs alike. Its versatile design and safety features make steaming a breeze for a variety of dishes.
- Maximize the potential of your Black And Decker Handy Steamer with tips for efficient steaming, from preparing and filling to checking doneness and troubleshooting common issues. Elevate your cooking experience with flavorful, nutritious meals.
Unpacking and assembling the steamer
When you first receive your Black And Decker Handy Steamer, carefully unpack the contents of the box and ensure that all the components are present. The package should contain the main steaming unit, steaming bowls, a drip tray, a rice bowl, a steaming guide, and the instruction manual.
To assemble the steamer, start by placing the main steaming unit on a stable and heat-resistant surface. Make sure it is placed away from walls or any flammable materials to prevent accidents. Next, stack the steaming bowls on top of the main unit, starting with the lower bowl and adding the higher bowls as needed, depending on the amount of food you plan to steam.
Once the steaming bowls are in place, insert the drip tray into the designated slot at the bottom of the steamer. The drip tray collects any excess liquid or condensation that may accumulate during the steaming process, preventing it from dripping onto your countertop.
If you plan to steam rice, insert the rice bowl into one of the steaming bowls. The rice bowl is designed to hold and steam grains, providing you with a convenient way to cook rice alongside your main dishes.
Before using the steamer for the first time, it is recommended to wash all the components with warm soapy water. This ensures that any manufacturing residue or dust is removed, providing you with a clean and hygienic cooking surface.
Now that your Black And Decker Handy Steamer is unpacked and assembled, you are ready to move on to the next steps of preparing and using the steamer. In the following sections, we will guide you through the process of preparing the steamer for use, filling the water reservoir, adding food to the steaming bowls, and selecting the appropriate steaming time and settings.
Preparing the steamer for use
Before you start steaming your food, it’s important to ensure that the Black And Decker Handy Steamer is properly prepared for use. Follow these steps to prepare your steamer:
- Place the steamer on a stable and heat-resistant surface. Ensure that there is enough clearance around the steamer to allow for proper ventilation.
- Check that the water reservoir is empty. The water reservoir is located in the base of the steamer and is used to generate steam.
- Inspect the steaming bowls and make sure they are clean and dry. Remove any excess water or debris that may have accumulated during cleaning.
- Ensure that the drip tray is securely in place at the bottom of the steamer. The drip tray collects any excess liquid and prevents it from dripping onto your countertop.
- Make sure that the steaming guide and the instruction manual are easily accessible. The steaming guide provides recommended cooking times for various ingredients, while the instruction manual contains important safety and usage information.
Once you have completed these steps, your Black And Decker Handy Steamer is ready to be filled with water and for the steaming process to begin. In the following sections, we will guide you through the process of filling the water reservoir, adding food to the steaming bowls, and selecting the appropriate steaming time and settings.
Filling the water reservoir
One of the key components of the Black And Decker Handy Steamer is the water reservoir, which is responsible for generating the steam that cooks your food. Here’s how you can properly fill the water reservoir:
- First, ensure that the steamer is unplugged and the unit is cool to the touch.
- Locate the water reservoir, which is usually located at the base of the steamer.
- Depending on the model, the water reservoir may have a fill indicator inside. Check the fill indicator to see the maximum level of water that can be added.
- Using a clean jug or a measuring cup, carefully pour water into the reservoir until it reaches the desired level. Be mindful not to exceed the maximum fill line.
- Once the water is added, ensure that the water reservoir cap is securely closed to prevent any leaks or steam from escaping.
It is important to use clean, cold tap water for filling the reservoir. Avoid using distilled water or any flavored or infused waters, as they may affect the steaming process or leave residue on the steamer components.
Before using the steamer, double-check that the water reservoir is properly filled and securely closed. This will ensure that there is enough water to generate steam throughout the cooking process. In the following sections, we will guide you through the process of adding food to the steaming bowls and selecting the appropriate steaming time and settings for your desired dishes.
Adding food to the steaming bowls
Now that you have properly filled the water reservoir of your Black And Decker Handy Steamer, it’s time to add the food you wish to steam. Follow these steps to add food to the steaming bowls:
- Identify the steaming bowls that you will be using for each specific ingredient. Take note of the different capacities of the bowls to ensure that you add the appropriate amount of food.
- If necessary, cut the food into smaller, evenly-sized pieces for more efficient and even cooking.
- Open the steaming bowls one at a time and place the desired amount of food inside. Make sure to distribute the food evenly across the bowl, allowing steam to circulate around each piece.
- If you are steaming different ingredients in separate bowls, consider the cooking time required for each. You may need to stagger the placement of the bowls in the steamer, adding ingredients that require a longer cooking time first.
- Once you have added the food to the steaming bowls, close the lids securely. The lids help to trap the steam, ensuring that the food cooks thoroughly and evenly.
When adding food to the steaming bowls, be mindful not to overcrowd the bowls. Overcrowding can prevent the steam from circulating properly, resulting in unevenly cooked food. If you have a large amount of food to steam, consider using multiple steaming bowls or steaming in batches.
Now that your food is added to the steaming bowls, you are ready to move on to the next step: selecting the appropriate steaming time and settings. In the following sections, we will guide you through choosing the optimal steaming time and settings for your desired dishes, as well as starting the steaming process.
Read also: 14 Best Black And Decker Steamer for 2024
Selecting the appropriate steaming time and settings
The Black And Decker Handy Steamer provides you with the flexibility to adjust the steaming time and settings based on the type and quantity of food you are cooking. Here’s how you can select the appropriate steaming time and settings:
- Refer to the steaming guide that came with your steamer. The steaming guide provides recommended steaming times for various ingredients, ensuring that you achieve optimal results.
- If your desired food item is not listed in the steaming guide, you can use a general rule of thumb. Vegetables usually require around 5-10 minutes to steam, while seafood and meats may require longer cooking times depending on their thickness.
- Consider the size of the food pieces and the number of steaming bowls being used. Larger food pieces or multiple steaming bowls may require longer steaming times to ensure thorough cooking.
- Some steamers come with preset steaming settings for specific food types, such as seafood, vegetables, or grains. If your steamer has these settings, consult the instruction manual to determine the appropriate setting for your desired dish.
- Keep in mind that personal preferences for doneness may vary, so you have the flexibility to adjust the steaming time according to your taste preferences. If you prefer your vegetables to be crisper or softer, for example, you can decrease or increase the steaming time accordingly.
Once you have determined the appropriate steaming time, set the timer according to your selected time. Some steamers have built-in timers, while others may require you to use a separate kitchen timer or rely on your watch/clock.
Now that you have selected the appropriate steaming time and settings, you are ready to move on to the next step: starting the steaming process. In the following section, we will guide you through how to start the steaming process and ensure that your food is cooked to perfection.
When using the Black and Decker Handy Steamer, make sure to fill the water reservoir to the appropriate level indicated in the user manual to ensure proper steaming and avoid damaging the unit.
Starting the steaming process
With the Black And Decker Handy Steamer properly set up, food added to the steaming bowls, and the appropriate steaming time and settings selected, it’s time to start the steaming process. Follow these steps to begin steaming your food:
- Make sure that the steamer is securely plugged into a power outlet. Double-check that the power cord is placed in a safe position, away from any potential hazards.
- Ensure that the steam vent on the lid of the steamer is fully open. This allows the steam to escape and circulate properly, ensuring effective cooking.
- Set the timer to the previously selected steaming time. If your steamer has a preset timer function, simply adjust it accordingly.
- Press the power button to start the steaming process. The steamer will begin to heat up, and you will soon see steam being generated inside the steaming bowls.
- As the steaming process continues, you may notice condensation forming on the inside of the lid. This is normal and indicates that the steam is effectively cooking your food.
- Avoid opening the lid frequently during the steaming process, as this can cause a loss in steam and result in longer cooking times. Only open the lid to check the doneness of the food if necessary.
During the steaming process, ensure that the area surrounding the steamer is well-ventilated. Steam can generate heat and moisture, so it’s important to have proper airflow to prevent any buildup of condensation in your kitchen.
Once the set steaming time has elapsed, the timer will sound or the steamer may automatically shut off, depending on the model. At this point, it’s time to check the doneness of your food and prepare to remove it from the steamer.
In the next section, we will guide you through checking the doneness of the food and safely removing it from the steamer.
Checking the doneness of the food
Checking the doneness of the food is an essential step in ensuring that it is cooked to your desired level of doneness. Here’s how you can check if your steamed food is cooked to perfection:
- Before opening the lid, ensure that the steamer is unplugged and that the steam vent has been closed to prevent any steam from escaping.
- Using oven mitts or kitchen tongs, carefully open the lid of the steamer. Be cautious of the hot steam that may escape when opening the lid.
- Inspect the food visually to determine if it appears cooked. Vegetables should be tender yet still slightly crisp, while seafood and meats should be opaque and cooked through.
- If you are uncertain about the doneness of the food, use a fork or a skewer to gently poke the thickest part of the food. It should penetrate easily with no resistance.
- For foods that require a specific internal temperature to be considered done, use a food thermometer to check the temperature. Refer to a food safety guide for the appropriate temperatures for different types of food.
Remember that the cooking time can vary depending on factors such as the size of the food pieces and the type of ingredient being cooked. It is always better to slightly undercook the food rather than overcook it, as you can always return it to the steamer for additional cooking if needed.
If the food is not cooked to your desired doneness, simply close the lid and continue steaming for additional time. Be mindful of the total cooking time to avoid overcooking and ensure that you achieve the perfect balance of texture and flavor.
Once you are satisfied with the doneness of the food, it’s time to safely remove it from the steamer. In the next section, we will guide you through the process of removing the steamed food from the steamer.
Removing the steamed food from the steamer
After confirming that your steamed food is cooked to your desired doneness, it’s time to remove it from the Black And Decker Handy Steamer. Follow these steps to safely remove your steamed food:
- First, ensure that the steamer is unplugged and turned off. This will prevent any accidental burns or injuries while handling the steamed food.
- Using oven mitts or heat-resistant gloves, carefully open the lid of the steamer. Be cautious of the hot steam that may still be inside the steaming bowls.
- Using kitchen tongs or a heat-resistant utensil, carefully remove the steaming bowls one by one. Place them on a heat-resistant surface, such as a trivet or a heatproof countertop.
- Allow the steaming bowls to cool down for a few minutes before handling them further. This will prevent any accidental burns caused by hot surfaces.
- Using appropriate utensils, such as a slotted spoon or a spatula, carefully transfer the steamed food from the steaming bowls onto serving plates or bowls.
- Be mindful of any excess liquid that may have accumulated during the steaming process. You can either discard the excess liquid or use it as a flavorful sauce or broth for your dish.
It’s important to handle the steamed food with care to maintain its integrity and presentation. Avoid squeezing or smashing the food, especially delicate items like seafood or tender vegetables.
Once the food is transferred to the serving plates or bowls, it’s ready to be enjoyed. Serve the steamed food while it’s still hot, as this is when the flavors and textures are at their best.
Now that you have successfully removed the steamed food from the steamer, it’s time to clean and maintain your Black And Decker Handy Steamer. In the following section, we will guide you through the process of cleaning and maintaining your steamer.
Read more: How To Use Black and Decker Coffee Machine
Cleaning and maintenance of the steamer
Proper cleaning and maintenance of your Black And Decker Handy Steamer are essential to ensure its longevity, performance, and hygiene. Follow these steps to clean and maintain your steamer:
- Before cleaning the steamer, ensure that it is unplugged and completely cool to the touch. This will prevent any potential injuries or accidents.
- Disassemble the steaming bowls, drip tray, and any other removable parts. Refer to the instruction manual to ensure you disassemble the steamer correctly.
- Wash the removable parts, such as the steaming bowls and drip tray, with warm soapy water. You can also use a non-abrasive dishwashing liquid for stubborn food residue.
- Rinse the parts thoroughly with clean water to remove any soap residue. Ensure that no soapy water remains, as this can affect the taste of your food.
- If the steaming bowls or other parts have stubborn stains, you can soak them in a mixture of warm water and white vinegar. This will help to loosen and dissolve the stains.
- Use a soft brush or sponge to gently scrub the steamer’s components, especially around any hard-to-reach areas or crevices. Be careful not to scratch or damage the surface.
- Wipe the main steaming unit with a damp cloth to remove any dirt or spills. Do not immerse the main unit in water or submerge it in any cleaning solutions.
- Allow all the parts to air dry completely before reassembling the steamer. Ensure that no moisture remains, as this can promote the growth of bacteria or affect the performance of the steamer.
- Once dry, reassemble all the parts and store the steamer in a clean, dry place. Avoid stacking the steaming bowls directly on top of each other to prevent any potential damage.
- Regularly check the power cord and plug for any signs of damage or wear. If any issues are detected, discontinue use and contact the manufacturer for assistance or to arrange for repairs.
It is recommended to clean the steamer after each use to prevent any buildup of food residue or odors. By maintaining proper cleanliness and hygiene, you can ensure that your steamer continues to deliver delicious and healthy meals.
Now that you know how to clean and maintain your steamer, we will address some common troubleshooting issues in the next section.
Troubleshooting common issues
Although the Black And Decker Handy Steamer is a reliable and user-friendly appliance, you may encounter some common issues during its use. Here are a few troubleshooting tips for addressing these issues:
- Steamer not turning on: Ensure that the steamer is properly plugged into a functioning power outlet. Check if the power cord is securely connected to the steamer and there are no visible damages. If the issue persists, contact the manufacturer for further assistance.
- Insufficient steam: If the steamer is not generating enough steam, first check the water level in the reservoir. Ensure that it is filled to the appropriate level. If the water level is adequate, there may be a blockage in the steam vents. Use a small brush or a toothpick to gently clear any obstructions. If the problem continues, consult the instruction manual or contact customer support.
- Uneven cooking: If you find that certain parts of your food are not cooking evenly, ensure that the food pieces are evenly distributed in the steaming bowls. Avoid overcrowding the bowls, as this can hinder proper steam circulation. Additionally, consider resizing or cutting the food pieces to ensure uniform cooking.
- Condensation or leakage: It is normal for condensation to form on the inside of the steamer’s lid during the cooking process. However, if there is excessive condensation or leakage, ensure that the lid is securely closed and the steam vents are not blocked. Excess liquid may also indicate overfilling of the steaming bowls or a faulty seal. Adjust the food quantity or check for any damaged gaskets or seals that may need to be replaced.
- Unpleasant odors: If you notice any unpleasant odors coming from the steamer, it may be due to leftover food residue or insufficient cleaning. Ensure that you thoroughly clean all the components after each use, including the steam vents and the main unit. Using a mixture of white vinegar and water to steam for a short period can also help eliminate odors.
If you encounter any other issues with your Black And Decker Handy Steamer that are not mentioned here, refer to the instruction manual or contact the manufacturer’s customer support for further assistance. They will be able to provide specific troubleshooting advice based on your model’s features and specifications.
By addressing these common issues, you can ensure optimal performance and an enjoyable steaming experience with your Black And Decker Handy Steamer.
Now that we have covered troubleshooting, let’s conclude with some final tips for efficient steaming in the next section.
Conclusion and tips for efficient steaming
The Black And Decker Handy Steamer is a versatile and convenient kitchen appliance that allows you to enjoy the benefits of healthy and flavorful steamed dishes. By following the steps outlined in this article, you can utilize your steamer to its full potential. Here’s a recap of the key points we’ve covered:
1. Unpacking: Carefully unpack and assemble the steamer, ensuring all components are present.
2. Preparing: Place the steamer on a stable surface, fill the water reservoir, and ensure the steaming bowls are clean and dry.
3. Filling: Add water to the reservoir, following the recommended levels, and ensure the reservoir cap is securely closed.
4. Adding food: Place the desired food in the steaming bowls, distributing it evenly for efficient cooking.
5. Selecting time and settings: Refer to the steaming guide or general cooking times, consider the food size and quantity, and adjust the steaming time accordingly.
6. Starting the steaming process: Plug in the steamer, open the steam vent, set the timer, and press the power button to begin steaming.
7. Checking doneness: Use visual cues, gentle poking, or a food thermometer to ensure your food is cooked to your desired level of doneness.
8. Removing food: Carefully open the lid, use heat-resistant gloves or tongs to remove the steaming bowls, and transfer the food to serving plates or bowls.
9. Cleaning and maintenance: Disassemble the steamer, wash the removable parts, wipe the main unit, and store the steamer properly for future use.
To ensure efficient and successful steaming, here are some additional tips:
- Choose fresh and high-quality ingredients for the best results.
- Cut the food into uniform sizes to ensure even cooking.
- Avoid overcrowding the steaming bowls to allow proper steam circulation.
- Follow the recommended cooking times but adjust as per personal preferences.
- Experiment with different spices, herbs, and seasonings to enhance the flavor of the steamed dishes.
- Take advantage of the versatile nature of your steamer by trying different food combinations and recipes.
- Regularly clean and maintain your steamer to ensure its longevity and performance.
By following these tips and guidelines, you can unlock the full potential of your Black And Decker Handy Steamer and enjoy delicious, nutritious, and hassle-free steam-cooked meals. Happy steaming!
Now that you've mastered using your Black and Decker Handy Steamer, why not broaden your kitchen skills even further? Dive into our latest guide on choosing the perfect hand mixer from Black and Decker, ensuring you have all the right tools for any culinary challenge. Also, if you're curious about healthier cooking methods, our detailed instructions on steam cooking chicken will show you how to keep flavors intact while cutting back on oils. Both resources are packed with practical advice to help you cook like a pro!
Frequently Asked Questions about Black And Decker Handy Steamer How To Use
Was this page helpful?
At Storables.com, we guarantee accurate and reliable information. Our content, validated by Expert Board Contributors, is crafted following stringent Editorial Policies. We're committed to providing you with well-researched, expert-backed insights for all your informational needs.


0 thoughts on “Black And Decker Handy Steamer How To Use”