Home>Articles>How Do You Make Yogurt In An Electric Pressure Cooker
Articles
How Do You Make Yogurt In An Electric Pressure Cooker
Modified: January 5, 2024
Learn how to make delicious homemade yogurt using an electric pressure cooker. Our step-by-step articles guide you through the process for a tasty and nutritious treat.
(Many of the links in this article redirect to a specific reviewed product. Your purchase of these products through affiliate links helps to generate commission for Storables.com, at no extra cost. Learn more)
Introduction
Making homemade yogurt is a nutritious and delicious way to enjoy this popular dairy product. While traditional yogurt-making methods require time-consuming steps and monitoring, using an electric pressure cooker can simplify the process and yield consistent results. In this article, we will explore the benefits of making yogurt in an electric pressure cooker, guide you through the necessary steps, and provide troubleshooting tips to ensure your yogurt turns out perfect every time.
Yogurt is a versatile ingredient that can be enjoyed on its own, used as a base for smoothies and dressings, or incorporated into a variety of recipes. By making your own yogurt at home, you have complete control over the ingredients, flavors, and texture, allowing you to customize your yogurt to suit your taste and dietary preferences. Plus, homemade yogurt is free from any artificial additives or preservatives, making it a healthier alternative to store-bought options.
Another advantage of using an electric pressure cooker for yogurt-making is the time-efficiency. Typically, the yogurt-making process involves heating the milk, cooling it to the desired temperature, adding a starter culture, and incubating the mixture at a specific temperature for several hours. With an electric pressure cooker, you can simplify and speed up these steps, making it a convenient option for busy individuals.
Moreover, electric pressure cookers offer precise temperature control, ensuring optimal conditions for the yogurt to ferment. The consistent temperature and sealed environment of the pressure cooker allow the beneficial bacteria to thrive and transform the milk into creamy, tangy yogurt. This controlled environment also reduces the risk of contamination, giving you peace of mind when consuming your homemade yogurt.
Whether you are a seasoned yogurt-maker or a beginner looking to explore the world of homemade dairy, making yogurt in an electric pressure cooker is a rewarding and accessible process. In the following sections, we will walk you through the ingredients, preparation steps, cooking process, and final steps to strain, flavor, and store your delicious homemade yogurt. Let’s dive in!
Key Takeaways:
- Making yogurt in an electric pressure cooker offers time efficiency, consistent results, and customizable flavors, providing a practical and rewarding approach to enjoying homemade yogurt.
- Properly preparing the electric pressure cooker, selecting quality ingredients, and following precise cooking and cooling steps are essential for successful homemade yogurt.
Benefits of Making Yogurt in an Electric Pressure Cooker
Making yogurt in an electric pressure cooker offers several advantages over traditional methods. Here are some of the key benefits:
- Time Efficiency: One of the biggest advantages of using an electric pressure cooker to make yogurt is the time-saving aspect. The pressure cooker allows you to heat the milk quickly and maintain a consistent temperature throughout the fermentation process, reducing the overall time required. This is especially beneficial for busy individuals who want to enjoy homemade yogurt without spending hours in the kitchen.
- Consistent Results: Electric pressure cookers provide precise temperature control, ensuring that the yogurt ferments at the optimal temperature. This consistency translates to reliable and consistent results with each batch of yogurt you make. Say goodbye to inconsistent textures and flavors that can be encountered with traditional methods.
- Convenience: Making yogurt in an electric pressure cooker is a hassle-free process. You don’t need to constantly monitor the temperature or worry about stirring the mixture. The pressure cooker takes care of these aspects, allowing you to set it and forget it until your yogurt is ready.
- Sealed Environment: Pressure cookers create a sealed environment that prevents contaminants from entering the yogurt mixture. This reduces the risk of unwanted bacteria or molds affecting the fermentation process. The sealed environment also ensures that the yogurt remains fresh for longer.
- Customizable Flavors: When making yogurt in an electric pressure cooker, you have the freedom to experiment with different flavors and add-ins. Whether you prefer plain, fruit-infused, or even savory yogurt, the pressure cooker allows you to easily incorporate your desired ingredients during the fermentation process.
- Cost Savings: Making yogurt at home using an electric pressure cooker is a cost-effective option. The ingredients required are simple and affordable, and you can make a large batch of yogurt for a fraction of the cost of store-bought alternatives. This not only helps you save money but also reduces plastic waste from packaging.
With these benefits in mind, it’s clear that making yogurt in an electric pressure cooker is a practical and rewarding approach. Not only does it save time and effort, but it also allows you to enjoy homemade yogurt with consistent results and the freedom to customize flavors to your liking. So why not give it a try and experience the joy of homemade yogurt right in your own kitchen?
Choosing the Right Ingredients
When it comes to making yogurt in an electric pressure cooker, selecting the right ingredients is essential for achieving a delicious and creamy end result. Here’s what you need to consider:
- Milk: Start with high-quality milk to make your yogurt. You can use any type of milk, including whole milk, low-fat milk, or plant-based alternatives like almond milk or soy milk. Keep in mind that different types of milk will yield different textures and flavors in the final yogurt.
- Starter Culture: To kickstart the fermentation process, you need a starter culture or yogurt culture. This can be store-bought plain yogurt that contains live active cultures, or you can use freeze-dried yogurt cultures that are specifically formulated for yogurt-making. Look for a starter culture that contains strains of bacteria like Lactobacillus bulgaricus and Streptococcus thermophilus for the best results.
- Sweeteners and Flavorings (optional): If you prefer sweeter yogurt, you can add sweeteners like honey, maple syrup, or sugar to the milk before fermenting. You can also flavor your yogurt by incorporating extracts like vanilla or adding fruit preserves, fresh fruits, or even spices like cinnamon or cocoa powder.
- Probiotic Supplements (optional): To enhance the nutritional content of your homemade yogurt, you can consider adding probiotic supplements. These supplements contain beneficial bacteria strains that can promote gut health and boost the probiotic content of your yogurt.
It’s important to note that using quality ingredients will ultimately impact the taste and texture of your homemade yogurt. Opt for organic milk and natural sweeteners whenever possible, as they can enhance the overall flavor profile of the yogurt.
Additionally, ensure that your starter culture or yogurt culture is fresh and active, as this will play a significant role in the fermentation process. If using store-bought yogurt as a starter, check the expiration date and choose a high-quality brand with live active cultures.
By carefully selecting the right ingredients and paying attention to their quality, you can set the foundation for a delicious batch of homemade yogurt in your electric pressure cooker. Experiment with different combinations and flavors to find your preferred taste, and get ready to indulge in a creamy, wholesome treat.
Preparing the Electric Pressure Cooker
Before you start making yogurt in your electric pressure cooker, it’s important to properly prepare the appliance to ensure optimal results. Follow these steps to get your pressure cooker ready:
- Clean the Pressure Cooker: Begin by thoroughly cleaning the pressure cooker, including the pot, lid, and rubber gasket. Remove any odors or residue from previous cooking by washing with mild soap and warm water. Rinse well and allow it to air dry completely.
- Test the Sealing Ring: Check the sealing ring or gasket to ensure it is properly seated and free of damage. This ring is essential for creating a tight seal and maintaining the pressure during cooking. If it’s worn out or damaged, replace it with a new one to prevent any leaks during the yogurt-making process.
- Set up the Trivet: Most electric pressure cookers come with a metal trivet or rack. Place this trivet at the bottom of the pressure cooker pot. The trivet will elevate the yogurt containers off the direct heat and prevent them from touching the bottom of the pot.
- Add Water: To create a gentle and even heat for the yogurt to ferment, you’ll need to add water to the pressure cooker. The amount of water will depend on your specific pressure cooker model, so refer to the manufacturer’s instructions. Usually, adding around 1 to 2 cups of water is sufficient.
- Place the Pot and Lid: Once the trivet and water are in place, carefully insert the pot back into the pressure cooker base. Ensure that it is securely seated. Then, place the lid on top and lock it into position. Double-check that the pressure release valve is closed.
- Preheat the Pressure Cooker: Preheating the pressure cooker is an important step to ensure a consistent temperature for the fermentation process. Turn on the pressure cooker and select the “Sauté” or “Yogurt” function, depending on your model. Allow the pressure cooker to preheat for a few minutes until it reaches the desired temperature for your yogurt recipe.
By properly preparing your electric pressure cooker, you create a clean and controlled environment for yogurt-making. This step ensures that the yogurt ferments evenly and achieves the desired texture and flavor. With your pressure cooker prepped and ready to go, you’re now one step closer to enjoying creamy homemade yogurt.
Cooking the Yogurt
Once your electric pressure cooker is prepared, it’s time to begin the cooking process to transform the milk into creamy and tangy yogurt. Follow these steps:
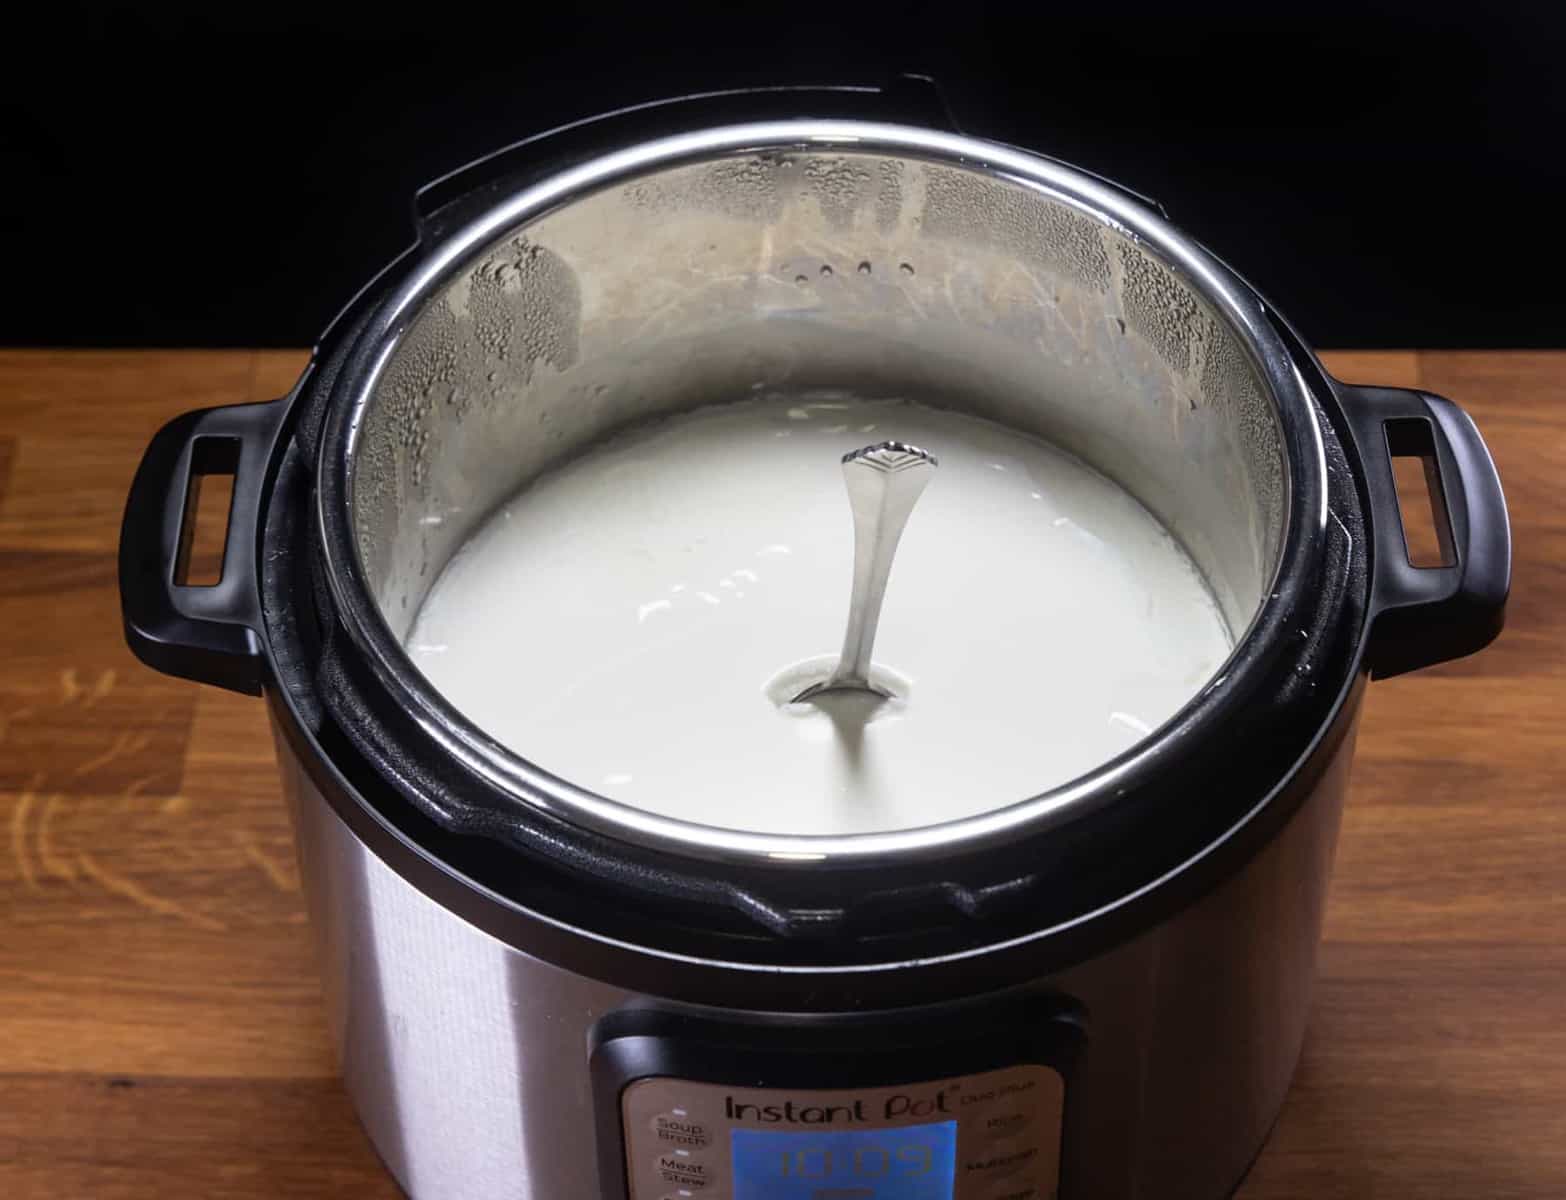
- Pour the Milk: Start by pouring the desired amount of milk into the clean and dry pressure cooker pot. The quantity of milk will depend on the capacity of your pressure cooker and the amount of yogurt you want to make.
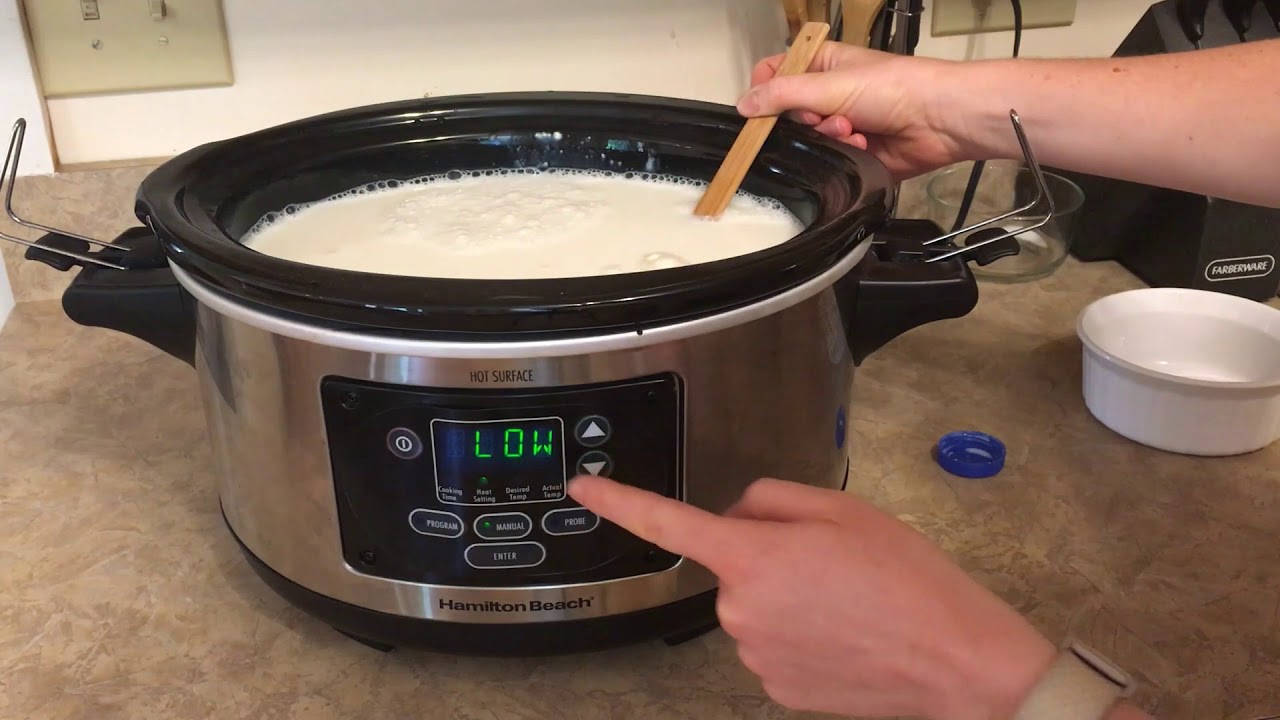
- Heat the Milk: Close the lid of the pressure cooker and make sure the pressure release valve is in the sealed position. Select the “Yogurt” function on your pressure cooker, or set it to “Manual” mode and adjust the temperature to “Low.” The milk will heat and come to the desired temperature for yogurt-making, usually around 180°F (82°C).
- Stabilize the Temperature: Once the milk reaches the desired temperature, keep it at that temperature for about 5 minutes. This helps to ensure that any harmful bacteria are killed off and creates a favorable environment for the yogurt culture to thrive.
- Cool the Milk: After stabilizing the temperature, remove the pot from the pressure cooker and let the milk cool down to around 110°F (43°C). This can take roughly 1 to 2 hours. You can use a kitchen thermometer to monitor the temperature or rely on your judgment if you’re familiar with the process.
- Add the Starter Culture: Once the milk has cooled to the desired temperature, it’s time to add the starter culture. This can be a small amount of store-bought plain yogurt containing live active cultures or freeze-dried yogurt cultures. Mix the starter culture into the milk gently and thoroughly to ensure even distribution.
- Return to the Pressure Cooker: Place the pot back into the pressure cooker and close the lid. Select the “Yogurt” function again or set it to “Manual” mode and adjust the temperature to maintain around 105°F (40°C). This is the ideal temperature for the yogurt to ferment and set.
- Incubation Time: Allow the yogurt to incubate in the pressure cooker for at least 6 to 8 hours, or as specified in your recipe. The longer the incubation time, the tangier the yogurt will become. Keep in mind that the ambient temperature and the starter culture used can also affect the fermentation time.
During the incubation period, it’s important to avoid disturbing the pressure cooker to maintain a consistent temperature. This means refraining from opening the lid or moving the pressure cooker unnecessarily. The pressure cooker will ensure a stable and warm environment for the yogurt to develop its characteristic texture and flavor.
Once the desired incubation time is complete, congratulations! You have successfully transformed the milk into yogurt inside your electric pressure cooker. The next steps involve straining and cooling the yogurt to achieve the desired consistency and flavor.
When making yogurt in an electric pressure cooker, be sure to use a high-quality yogurt starter culture for the best results. This will help ensure that your yogurt turns out creamy and delicious.
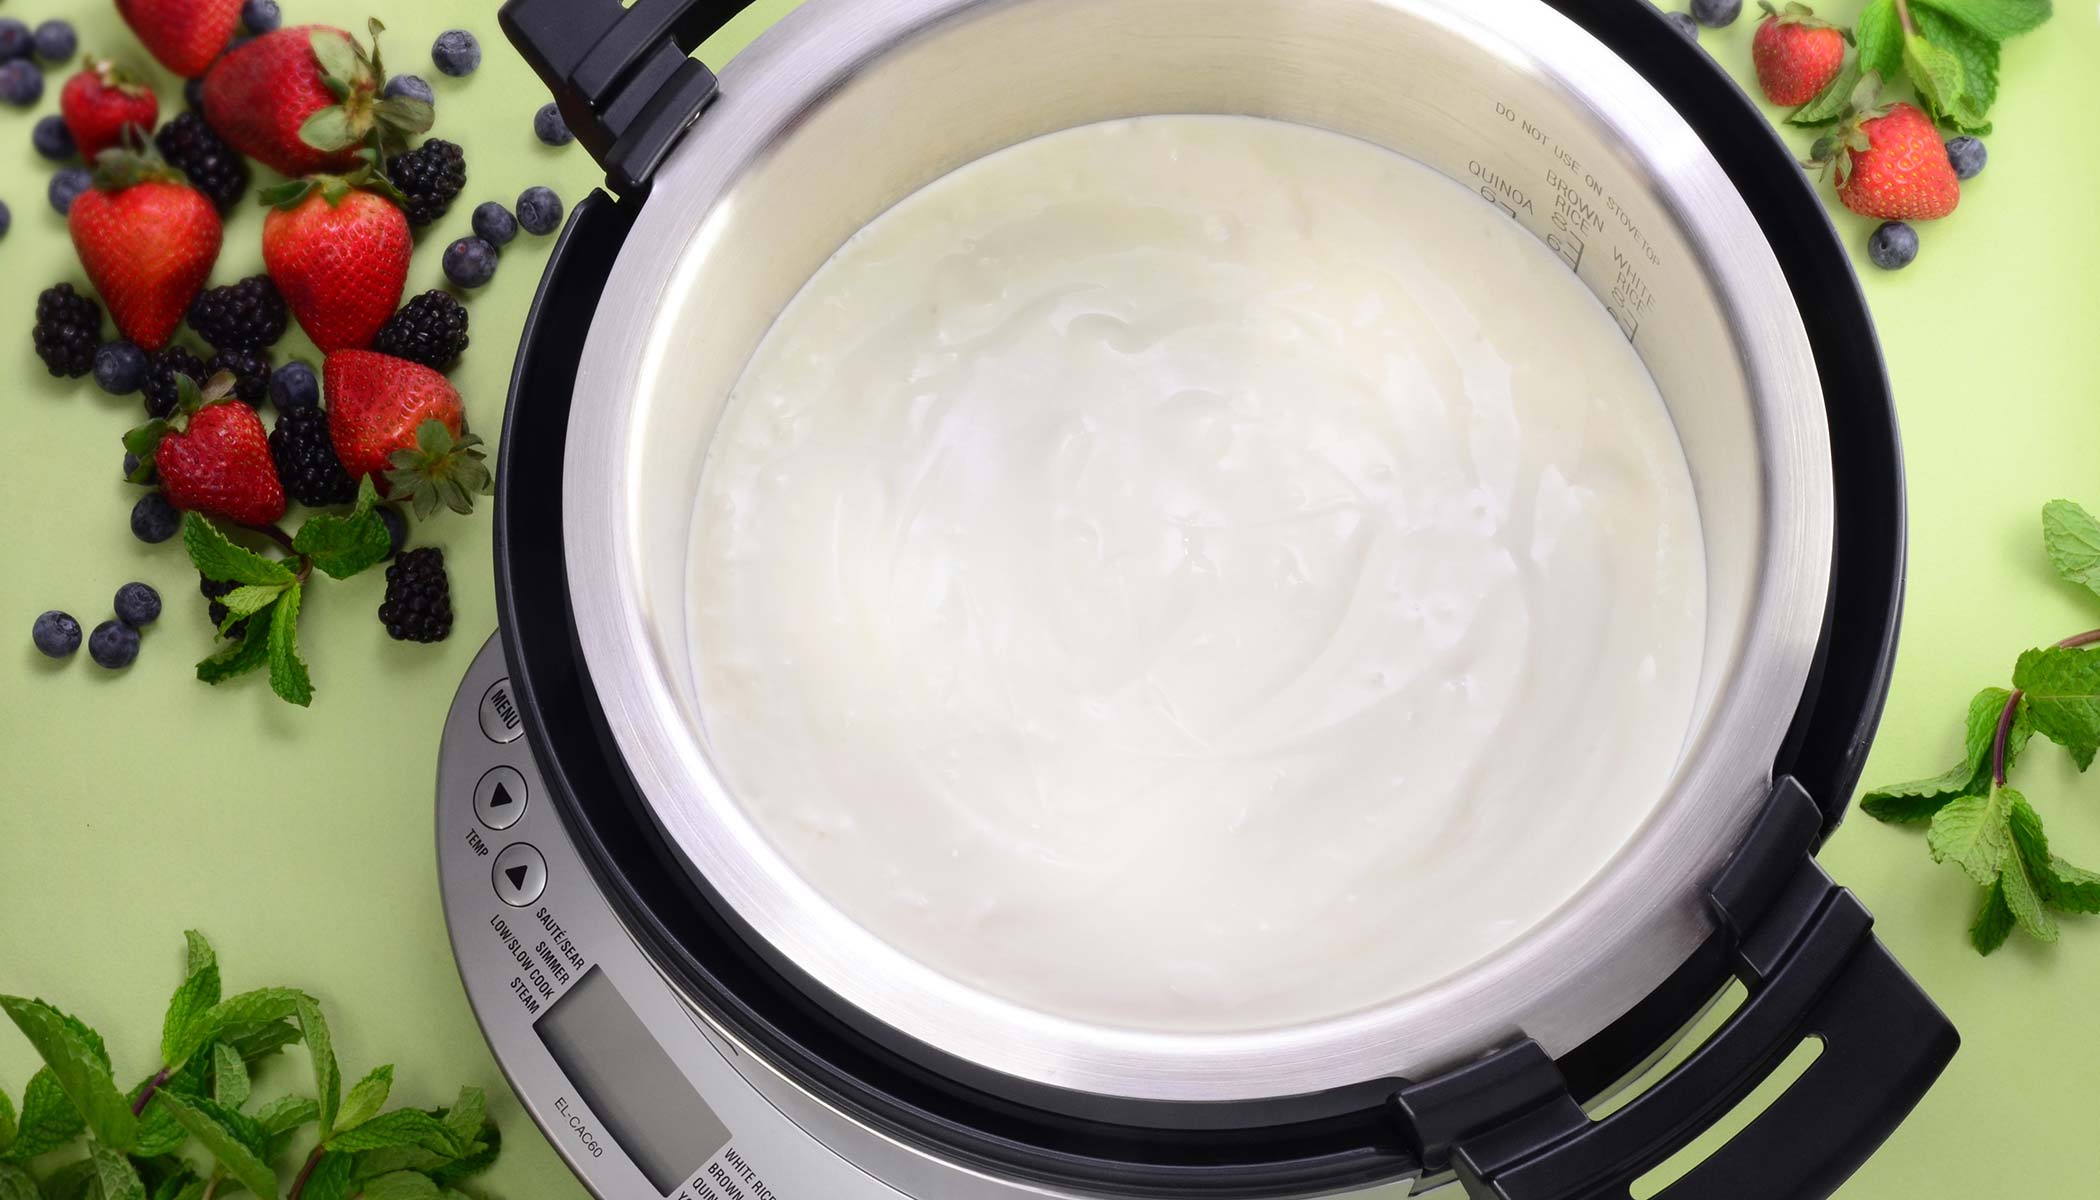
Straining and Cooling the Yogurt
After the yogurt has finished incubating in the electric pressure cooker, it’s time to strain and cool it to achieve the desired thickness and texture. Follow these steps:
- Optional: Strain the Yogurt: If you prefer a thicker and creamier yogurt, you can strain it to remove the excess whey. Line a fine-mesh sieve or colander with cheesecloth or a coffee filter and place it over a bowl. Carefully pour the yogurt into the lined sieve and allow it to strain for 1 to 2 hours, or until you reach the desired consistency. The longer you strain, the thicker the yogurt will become.
- Cool the Yogurt: After straining, transfer the yogurt to a clean container or individual serving jars if desired. Allow the yogurt to cool at room temperature for about 30 minutes, then cover the container(s) with a lid or plastic wrap and place them in the refrigerator. Let the yogurt chill and set fully for at least 4 hours or overnight. Cooling the yogurt helps it to firm up and develop its characteristic flavor.
- Save the Whey (Optional): If you decide to strain the yogurt, you’ll be left with whey, which is the liquid that separates from the yogurt. This whey is packed with nutrients and can be used in a variety of ways. You can use it in smoothies, as a marinade for meat, or even in baking to add moisture and nutrition to your recipes.
- Enjoy Your Homemade Yogurt: Once the yogurt has chilled and set, it’s ready to be enjoyed. Serve it plain, or add your favorite toppings such as fresh fruit, granola, nuts, or honey. The possibilities are endless! Remember to reserve a small amount of the yogurt as a starter for your next batch.
By straining the yogurt, you can achieve a Greek-style or strained yogurt consistency, which is thicker and creamier. If you prefer a thinner consistency, you can skip the straining step and go straight to cooling the yogurt.
Now that you have strained and cooled your homemade yogurt, it’s time to add some flavorings and store it for future enjoyment.
Flavoring and Storing the Yogurt
Now that you have your homemade yogurt ready, it’s time to add some flavor and store it properly to maintain its freshness. Follow these steps:
- Optional: Add Flavorings: If you prefer flavored yogurt, you can add your choice of sweeteners, fruit purees, extracts, or spices to the yogurt. Mix in your desired flavorings gently, ensuring they are evenly distributed. Experiment with different combinations and quantities to create your own unique yogurt flavors.
- Portion the Yogurt: Depending on your preference, you can portion the yogurt into individual serving containers or keep it in a larger container. This makes it convenient for grab-and-go snacks or for portion control. Ensure that the containers are clean and airtight to maintain the freshness of the yogurt.
- Label and Date: If you are making multiple batches or want to keep track of the yogurt’s freshness, label the containers with the date of preparation. Yogurt is generally at its best within 1 to 2 weeks of being made, so it’s helpful to know when it was made.
- Store in the Refrigerator: Place the containers of yogurt in the refrigerator and let them chill for a few hours before consuming. Refrigeration helps the flavors to meld and the yogurt to develop its desired consistency. Always keep the yogurt refrigerated to maintain its freshness and to prevent any spoilage.
- Consume and Enjoy: Homemade yogurt is at its best when enjoyed fresh, so try to consume it within 1 to 2 weeks of its preparation. Serve it as a wholesome breakfast, a creamy snack, or incorporate it into recipes that call for yogurt as an ingredient.
- Save a Starter: Remember to set aside a small amount of the finished yogurt as a starter for your next batch. This way, you won’t need to rely on store-bought yogurt for future batches. You can store the starter in a small container and freeze it until you’re ready to use it.
Properly flavoring and storing your homemade yogurt will ensure that it stays fresh and delicious for longer. Customizing the flavors allows you to create a wide variety of taste experiences, from tangy and fruity to rich and indulgent. Feel free to experiment with different flavors to suit your taste preferences and enjoy the versatility of your homemade yogurt.
By following these steps, you can confidently make yogurt in your electric pressure cooker and enjoy the satisfaction of creating a nutritious and flavorful dairy delight from scratch. So go ahead and savor the creamy goodness of your homemade yogurt!
Troubleshooting Tips
While making yogurt in an electric pressure cooker is relatively straightforward, you may encounter a few challenges along the way. Here are some troubleshooting tips to help you overcome common issues:
- Thin or Runny Yogurt: If your yogurt turns out thinner than desired, it could be due to insufficient incubation time or low fermentation temperature. Ensure that you incubate the yogurt for the recommended time, and make sure the pressure cooker maintains the proper temperature. You can also strain the yogurt for a thicker consistency.
- Grainy Texture: If your yogurt has a grainy texture, it may be due to uneven heat or overstraining. Make sure your pressure cooker maintains a consistent temperature throughout the incubation process. Avoid excessive straining that can result in the separation of proteins, leading to a grainy texture.
- Foul Odor or Off-putting Taste: A foul odor or off-putting taste in your yogurt usually indicates contamination. Ensure that all utensils, containers, and equipment used are thoroughly cleaned and sanitized before starting the yogurt-making process. If the issue persists, consider using a new starter culture or yogurt culture.
- No Thickening: If your yogurt doesn’t thicken even after the recommended incubation time, the bacteria in the starter culture may be inactive or weak. Ensure you’re using a fresh and active starter culture containing live active cultures. You can also try increasing the incubation time or adjusting the fermentation temperature slightly higher.
- Curdling or Separation: If your yogurt curdles or separates, it could be due to overheating the milk or adding the starter culture when the milk is too hot. Make sure to cool the milk to the appropriate temperature (around 110°F/43°C) before adding the starter culture. Avoid over-stirring the mixture, as this can also cause curdling.
- Watery Layer on Top: If you notice a watery layer on top of your yogurt, it may be due to inadequate straining or insufficient incubation time. Ensure that you strain the yogurt long enough to remove excess moisture, and extend the incubation time if necessary to allow the yogurt to thicken further.
Remember, troubleshooting is a normal part of the yogurt-making process, and it may take a few attempts to achieve the desired results. Don’t get discouraged and keep experimenting with different techniques and adjustments to find what works best for you.
By addressing these common issues, you’ll be able to troubleshoot and overcome any challenges you may encounter while making yogurt in your electric pressure cooker. With practice and patience, you’ll soon master the art of homemade yogurt and enjoy the delicious rewards!
Conclusion
Congratulations! You have now learned how to make yogurt in an electric pressure cooker. With its time-saving benefits, precise temperature control, and convenience, making homemade yogurt has never been easier. By choosing the right ingredients, preparing the pressure cooker, cooking the yogurt, and following the steps to strain, cool, flavor, and store your yogurt, you can enjoy the wholesome goodness and endless flavor possibilities right at home.
Remember, practice makes perfect, and don’t be discouraged by any initial challenges you may encounter. Adjusting the incubation time, fermentation temperature, or even the type of starter culture used can help you achieve your desired yogurt consistency and flavor. With time, you will become more familiar with the process and be able to experiment with different variations and flavors to suit your taste.
Making yogurt in an electric pressure cooker allows you to take control of your yogurt-making journey. You can avoid the artificial additives and preservatives found in store-bought options and customize your yogurt to match your dietary preferences and flavor preferences. The result is a homemade yogurt that is not only delicious but also nutritious, offering a host of health benefits and introducing beneficial probiotics into your diet.
So why not take the plunge into the world of homemade yogurt with your electric pressure cooker? Enjoy the satisfaction of creating a wholesome and versatile dairy delight for yourself and your loved ones. Experiment with flavors, try out different toppings and mix-ins, and most importantly, have fun throughout the process.
Now it’s time to get started! Gather your ingredients, prep your electric pressure cooker, and embark on your yogurt-making adventure. Whether you’re a seasoned yogurt enthusiast or a beginner venturing into the world of homemade dairy, the joy of making your own yogurt awaits. Enjoy the creamy and tangy goodness that homemade yogurt brings and savor every spoonful of this delightful treat!
Frequently Asked Questions about How Do You Make Yogurt In An Electric Pressure Cooker
Was this page helpful?
At Storables.com, we guarantee accurate and reliable information. Our content, validated by Expert Board Contributors, is crafted following stringent Editorial Policies. We're committed to providing you with well-researched, expert-backed insights for all your informational needs.


0 thoughts on “How Do You Make Yogurt In An Electric Pressure Cooker”