Articles
How Hard Is It To Remove A Chimney
Modified: February 27, 2024
Looking for articles about how hard it is to remove a chimney? Discover expert insights and tips from our comprehensive guide.
(Many of the links in this article redirect to a specific reviewed product. Your purchase of these products through affiliate links helps to generate commission for Storables.com, at no extra cost. Learn more)
Introduction
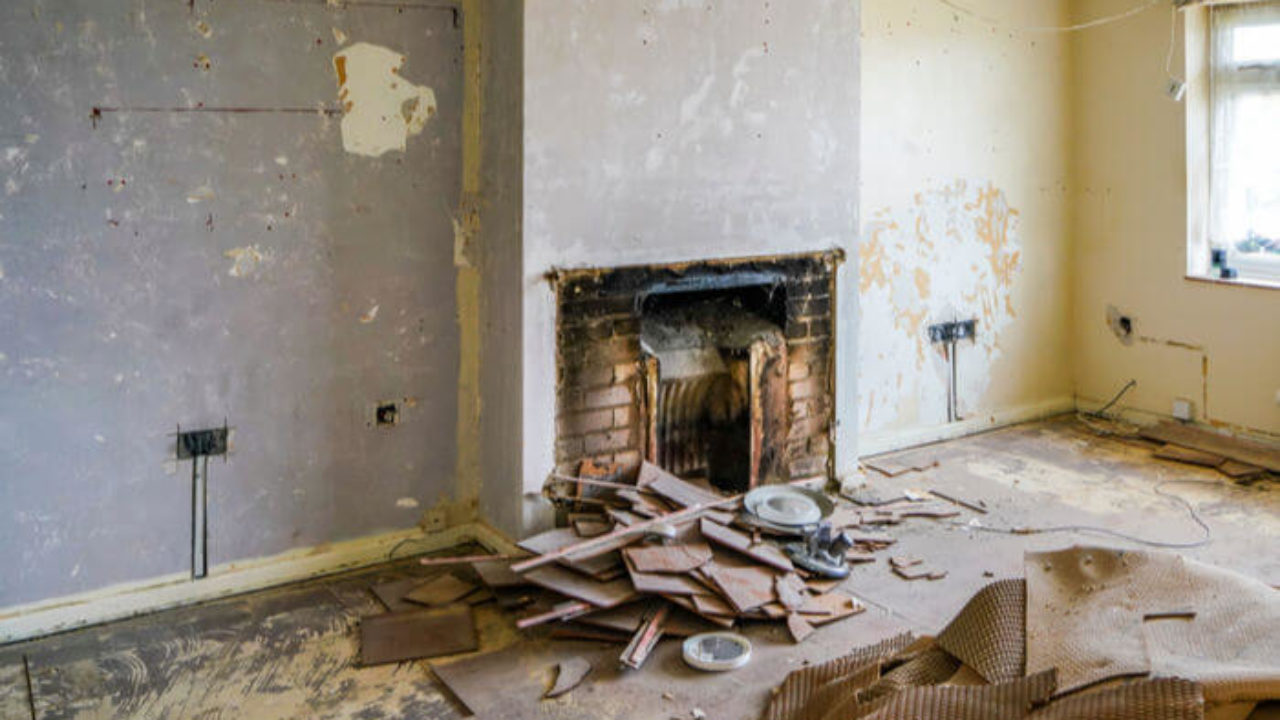
Removing a chimney from a property can be a challenging and complex task that requires careful planning, proper equipment, and adherence to safety protocols. Whether you’re looking to renovate your home, improve energy efficiency, or eliminate a source of potential damage, understanding the process of chimney removal is essential.
Before embarking on the chimney removal journey, it’s important to consider various factors such as the structural impact, necessary permits, and the expertise required to complete the project safely. This article will guide you through the step-by-step process of removing a chimney and provide insights on the preparation, safety measures, and potential challenges that may arise.
It is worth noting that chimney removal should never be attempted as a DIY project without the appropriate knowledge and experience. Hiring a professional contractor or chimney specialist is highly recommended to ensure the task is completed safely and efficiently.
Now, let’s dive into the factors you need to consider before removing a chimney.
Key Takeaways:
- Chimney removal is a complex process that requires careful planning, safety measures, and professional assistance. Prioritizing safety, obtaining permits, and assessing structural impact are crucial steps to ensure a successful project.
- Proper preparation, including disconnecting utilities, removing the chimney stack, and repairing surrounding walls, is essential for a smooth chimney removal process. Safety, compliance with regulations, and professional guidance are paramount throughout the project.
Read more: How Much Is It To Remove A Chimney
Factors to Consider
Before proceeding with chimney removal, it’s crucial to evaluate several factors that can influence the process. These factors include the chimney’s condition, its impact on the property structure, and any necessary permits or inspections required. Let’s delve deeper into each of these considerations:
- Chimney Condition: Assessing the condition of the chimney is essential. If the chimney is in poor shape, showing signs of significant deterioration or damage, removal may be the best option. However, if the chimney is structurally sound and only requires minor repairs, it might be more cost-effective to address those repairs rather than full removal.
- Structural Impact: Removing a chimney can have an impact on the structural integrity of the building. Chimneys often provide support to neighboring walls or act as a brace against wind and roof uplift. Before removing the chimney, it’s necessary to consult with a structural engineer or architect to ensure that removing the chimney will not compromise the stability of the building.
- Permits and Inspections: Local building codes may require permits and inspections before chimney removal. It’s important to check with your municipality’s building department to determine the specific requirements. Failure to obtain the necessary permits and inspections can result in legal consequences and complications when selling the property in the future.
In addition to these considerations, it’s also important to think about the potential cost of chimney removal. The complexity of the project and any necessary repairs or modifications to the surrounding areas should be factored into your budget. Consulting with a professional chimney removal specialist can provide you with an accurate estimate of the costs involved.
Now that we’ve explored the factors to consider, let’s move on to the preparation and safety measures needed before starting the chimney removal process.
Preparation and Safety Measures
Before undertaking the chimney removal process, it’s crucial to properly prepare and prioritize safety measures. This involves gathering the necessary tools and equipment, ensuring personal protective equipment (PPE) is available and worn, and taking precautions to prevent damage to surrounding structures and minimize risks. Here are some key steps to take:
- Gather the tools and equipment: You’ll need a variety of tools to safely remove a chimney, including a hammer, chisel, reciprocating saw, pry bar, scaffolding, and safety harness. It’s essential to have the proper equipment on hand before starting the removal process.
- Wear protective gear: Personal protective equipment (PPE) such as safety goggles, gloves, a hard hat, and a dust mask should be worn at all times during the removal process. This will help protect against potential hazards such as flying debris, dust, and falling objects.
- Secure the work area: Before starting, clear the area around the chimney and ensure there are no loose objects or obstacles that could cause tripping or falling hazards. Use caution tape or barriers to prevent access to the work area and inform others of the ongoing project.
- Stabilize the chimney: If the chimney is unstable or at risk of collapsing, additional support must be provided before removal. This may involve bracing or shoring up the chimney stack to ensure a safe and controlled removal process.
- Protect adjacent surfaces: Cover nearby surfaces, such as roofs and walls, with protective materials to prevent damage during the chimney removal. Use plywood or tarps to shield vulnerable areas from falling debris or accidental damage.
Remember, safety should always be the top priority when removing a chimney. If you’re unsure about any aspect of the process, it’s highly recommended to seek professional assistance to ensure the safe and successful removal of the chimney.
Now that we have discussed the importance of preparation and safety measures, let’s move on to the step-by-step process of removing a chimney.
Step 1: Obtain necessary permits and inspections
Before starting the chimney removal process, it’s crucial to comply with local building codes and regulations. This involves obtaining the necessary permits and scheduling inspections to ensure that the project is carried out within the legal framework. Here’s what you need to do:
- Research local requirements: Begin by researching the specific permits and inspections required for chimney removal in your area. Contact your local building department or visit their website to obtain the necessary information. Each jurisdiction may have different rules and regulations, so it’s important to familiarize yourself with the specific requirements.
- Submit permit application: Fill out the permit application form, providing all the required details about the chimney removal project. This may include information such as the chimney’s dimensions, planned removal method, and the scope of work. Pay any required fees associated with the permit application.
- Schedule inspections: Once the permit application is approved, you’ll typically need to schedule inspections at certain stages of the chimney removal process. This ensures that the work is being done safely and in compliance with the building codes. The specific inspection requirements can vary, but common stages for inspections include securing the work area, reinforcing structural support, and completing the removal itself.
- Complete inspections: When the scheduled inspection dates arrive, make sure that the work area is accessible and that all necessary safety measures have been taken. The inspector will assess the work, ensuring that it meets the building codes and regulations. If any issues are identified, you’ll be notified and may need to rectify them before proceeding.
- Obtain final approval: Once the inspections are successfully completed and any necessary adjustments have been made, you can obtain the final approval from the building department. This indicates that the chimney removal has been done in compliance with the regulations and can provide peace of mind when it comes to the legal aspects of the project.
By obtaining the necessary permits and inspections, you ensure that the chimney removal is done in a safe and legal manner. It’s important to keep documentation of all permits, inspections, and approvals for future reference or potential resale of the property.
Now that the permits and inspections are in order, let’s move on to assessing the structural impact of chimney removal in Step 2.
Step 2: Assess the structural impact
Before proceeding with chimney removal, it’s essential to assess the structural impact it will have on the building. Chimneys often provide support to neighboring walls and contribute to the stability of the structure. Removing a chimney without proper structural considerations may lead to structural instability and potential damage. Here’s how to assess the structural impact:
- Consult a structural engineer or architect: Engaging the expertise of a structural engineer or architect is crucial in evaluating the impact of chimney removal on the building’s structure. They will assess the load-bearing capacity of the chimney, identify any potential load transfers, and recommend appropriate measures to ensure structural integrity.
- Evaluate the chimney’s role: Determine the purpose served by the chimney. Does it provide structural support to other parts of the building? Does it act as a brace against wind or roof uplift? Understanding the role the chimney plays in the overall structure is vital in assessing the impact its removal will have.
- Develop a plan for load redistribution: Based on the assessment by the structural engineer or architect, a plan should be created to redistribute any loads that the chimney was supporting. This may involve reinforcing nearby walls or installing additional support structures to ensure the stability of the building.
- Consider potential structural modifications: In some cases, removing a chimney may require making modifications to the surrounding structure. This can include installing steel beams, adding supporting columns, or modifying the framing to maintain structural integrity. Consult with the structural engineer or architect to determine the necessary modifications.
- Implement recommended structural measures: Once the assessment is complete and a plan is in place, it’s crucial to implement the recommended structural measures before proceeding with chimney removal. This ensures that the building’s structural integrity is maintained throughout the project.
Assessing the structural impact is a crucial step in chimney removal to avoid any potential risks or damage to the building. Hiring a professional structural engineer or architect is highly recommended to ensure an accurate assessment and appropriate measures are taken.
Now that the structural impact has been evaluated, let’s move on to Step 3: Disconnecting utilities.
Read more: How To Remove Bees From Chimney
Step 3: Disconnect utilities
Before proceeding with the actual removal of the chimney, it’s important to disconnect any utilities that are connected to or pass through the chimney. This ensures safety and prevents any damage to the utilities during the removal process. Here’s how to disconnect the utilities:
- Gas lines: If your chimney is connected to a gas appliance, such as a fireplace or stove, it’s crucial to turn off the gas supply and disconnect the gas lines. Contact a licensed plumber or gas technician to safely disconnect and cap off the gas lines.
- Electrical wires: Check if there are any electrical wires or conduits running through the chimney. If so, consult a qualified electrician to disconnect and reroute the electrical wiring. This will prevent any electrical hazards during the chimney removal process.
- Ventilation ducts: In some cases, the chimney may be used as a ventilation duct for appliances such as exhaust fans or HVAC systems. Ensure that these ducts are rerouted or properly sealed before removing the chimney to maintain proper ventilation in the building.
- Water lines: If the chimney is connected to water sources, such as a boiler or water heater, it’s crucial to turn off the water supply and disconnect the water lines. Consult a plumber to safely disconnect and cap off the water lines to prevent any water damage during the removal process.
- Notify utility service providers: It’s important to inform your utility service providers about the chimney removal project. This ensures that they are aware of any necessary changes or reconnections that need to be made once the chimney removal is complete.
Disconnecting the utilities before removing the chimney is essential to prevent accidents, damages, and interruptions to essential services. Always consult professionals, such as licensed plumbers or electricians, for safe and proper disconnection procedures.
Now that the utilities have been disconnected, let’s move on to Step 4: Removing the chimney stack.
Before attempting to remove a chimney, it’s important to consult with a professional to assess the structural implications and potential hazards. It’s a complex and labor-intensive process that requires careful planning and expertise.
Step 4: Remove the chimney stack
Now that you’ve taken the necessary steps to prepare and ensure safety, it’s time to start the process of removing the chimney stack. This step involves dismantling the chimney brick by brick and carefully removing the debris. Here’s a breakdown of the process:
- Set up scaffolding: Before starting the removal, set up scaffolding around the chimney to provide a stable platform for the workers. Ensure that the scaffolding is properly secured and complies with safety regulations.
- Begin at the top: Start the removal process from the top of the chimney stack. Use a hammer and chisel to carefully remove the mortar holding the bricks together. Take caution while working with the bricks to avoid any damage or injury.
- Dismantle layer by layer: Working in a methodical manner, remove the bricks layer by layer. Use a reciprocating saw or pry bar when necessary to assist in the process. Ensure that each layer is properly dismantled before moving to the next.
- Dispose of debris: As the chimney stack is being dismantled, have a plan in place for disposing of the debris. Rent a dumpster or arrange for a waste removal service to ensure proper and legal disposal of the materials.
- Keep the area clean: Continuously clean the work area as you progress in the removal process. This helps maintain a safe and organized environment and minimizes the risk of injury from slipping or tripping on debris.
- Inspect for hidden hazards: While removing the chimney stack, carefully inspect for any hidden hazards, such as hidden electrical wires or structural issues. If you encounter any unexpected challenges, consult a professional for guidance.
Throughout the removal process, it’s important to prioritize safety and follow proper techniques. Take breaks when needed, stay hydrated, and wear appropriate personal protective equipment (PPE) to protect against dust and debris.
Once the chimney stack has been completely removed, you can move on to the next step, which is patching or restoring the roof and ceiling in Step 5.
Step 5: Patch or restore roof and ceiling
After successfully removing the chimney stack, it’s time to focus on patching or restoring the areas of the roof and ceiling that were impacted by the chimney’s removal. This step ensures that the structural integrity of the building is maintained and that any potential water damage is avoided. Here’s how to proceed:
- Assess the roof: Start by assessing the condition of the roof in the area where the chimney used to be. Check for any damage or gaps in the roofing material. If there are any issues, consider hiring a professional roofer to make the necessary repairs or patch any holes.
- Replace damaged roofing materials: If there are damaged or deteriorated roofing materials, such as shingles or tiles, remove them and replace them with new ones. This ensures that the roof remains watertight and protected from the elements.
- Repair the ceiling: Inside the building, inspect the ceiling for any damage caused by the removal process. Patch any holes or cracks in the ceiling using joint compound and sanding the surface for a smooth finish. Repaint the ceiling, if necessary, to match the surrounding area.
- Seal the roof penetration: Remember to seal the area where the chimney stack used to penetrate the roof. This can be done using appropriate roofing materials such as flashing or sealant. Ensure that the area is properly sealed to prevent any water leaks in the future.
- Inspect for any remaining structural issues: Take the opportunity to inspect the surrounding walls and structure for any potential damage or structural issues that may have been concealed by the chimney. If there are any concerns, consult a professional to assess and address the situation accordingly.
Completing this step ensures that the roof and ceiling are properly patched, restored, and protected after the chimney removal. Hiring professionals, such as roofers or contractors, may be necessary for complex repairs or if you’re unsure about your abilities to perform the tasks.
Once the roof and ceiling have been addressed, we can move on to Step 6: Repair or modify surrounding walls.
Step 6: Repair or modify surrounding walls
After removing the chimney stack and patching the roof and ceiling, it’s important to focus on repairing or modifying the surrounding walls. This step ensures that the area around the former chimney is properly restored, both in terms of aesthetics and functionality. Here’s how to proceed:
- Assess the condition of the walls: Begin by assessing the condition of the walls around the chimney. Look for any cracks, holes, or other damage that may have occurred during the chimney removal process. Take note of any areas that require repair or modification.
- Repair damaged walls: If there are any cracks or holes in the walls, repair them using an appropriate method. Depending on the severity of the damage, this may involve patching the walls with joint compound, applying new plaster, or replacing sections of damaged drywall. Ensure that the repaired areas blend seamlessly with the surrounding walls.
- Modify the walls (if necessary): In some cases, removing a chimney may create an opportunity to modify the surrounding walls to better suit your needs or design preferences. This can involve removing or relocating electrical outlets or switches, adding new insulation, or creating openings for windows or doors. Consult with a professional contractor or carpenter to ensure that the modifications are done safely and in accordance with building codes.
- Finish the walls: Once any necessary repairs or modifications are complete, finish the walls to match the existing décor. This may involve applying paint or wallpaper, installing new trim or molding, or any other finishing touches that are desired for a cohesive look.
By addressing the condition of the surrounding walls and making any necessary repairs or modifications, you ensure that the area around the former chimney is restored and blends seamlessly with the rest of the space.
Now that the walls have been repaired or modified, let’s move on to Step 7: Clean up and disposal of debris.
Read more: How To Remove A Hard-Wired Smoke Detector
Step 7: Clean up and disposal of debris
After completing the chimney removal project and making necessary repairs and modifications, it’s time to focus on the final step: cleaning up the work area and properly disposing of any debris. This ensures a safe and tidy environment and allows you to enjoy the results of your chimney removal project. Here’s how to proceed:
- Remove leftover debris: Start by clearing the work area of any remaining debris, including bricks, mortar, and other materials from the chimney stack. Use proper safety equipment, such as gloves and goggles, when handling the debris. Load the debris into a designated disposal container, such as a dumpster or waste bag.
- Dispose of debris properly: Ensure that the debris is disposed of in accordance with local regulations. Contact your local waste management or recycling facility to determine the proper disposal methods for the materials removed during the chimney removal. This may involve arranging for a waste pickup or bringing the debris to a designated facility.
- Clean the work area: Thoroughly clean the work area, removing any dust, dirt, or construction residue. Sweep or vacuum the floors, wipe down surfaces, and ensure that the area is free from any hazards or obstructions. This will ensure a safe and clean environment once the project is complete.
- Inspect the surrounding area: Take a moment to inspect the surrounding areas outside and inside the building. Check for any collateral damage or mess that may have occurred during the chimney removal process. Address any issues promptly and make any necessary repairs or touch-ups.
- Organize tools and equipment: Finally, properly organize and store any tools, equipment, and materials that were used during the chimney removal. This ensures that they are readily available for future projects and helps maintain a tidy and organized workspace.
By thoroughly cleaning up and properly disposing of the debris, you leave the area in a safe and presentable condition. This final step completes the chimney removal process and allows you to fully enjoy the transformed space.
With Step 7 complete, you have successfully removed the chimney and completed the necessary steps to ensure safety, structural integrity, and aesthetics. Congratulations on your chimney removal project!
Note: If you’re not confident in your abilities to remove a chimney or if the project involves complex structural considerations, it is strongly recommended to seek professional assistance from experienced chimney removal specialists or contractors.
Wrap up the article by summarizing the key steps and emphasizing the importance of safety and professional assistance when needed.
Conclusion
Removing a chimney from a property is a complex and challenging task that requires careful planning, adherence to safety measures, and consideration of various factors. Throughout the chimney removal process, it is important to prioritize safety, comply with local regulations, and seek professional assistance when needed.
We started by discussing the factors to consider before removing a chimney, such as evaluating its condition, assessing the structural impact, and obtaining necessary permits and inspections. Proper preparation and safety measures were highlighted as essential to ensure a smooth and safe removal process.
The step-by-step guide provided a comprehensive overview of the chimney removal process. From disconnecting utilities to removing the chimney stack, patching or restoring the roof and ceiling, repairing or modifying surrounding walls, and finally, cleaning up and disposing of debris, each step was described to ensure a successful and well-executed project.
Throughout the entire process, safety should always be paramount. Wearing appropriate personal protective equipment (PPE), consulting professionals for structural assessments, hiring licensed plumbers or electricians for utility disconnection, and using proper tools and techniques are crucial to ensure a safe working environment.
While this article has provided a comprehensive guide for chimney removal, it is worth emphasizing that chimney removal should not be attempted as a DIY project without the necessary knowledge, experience, and expertise. Hiring a professional contractor or chimney specialist is highly recommended to ensure the task is completed safely, efficiently, and in compliance with local building codes.
By following the steps outlined in this article, you can successfully remove a chimney from your property, improving energy efficiency, renovating your home, or addressing potential sources of damage. Remember, proper planning, preparation, and professional guidance are key to a successful chimney removal project.
Now that you’re equipped with the knowledge and understanding of the chimney removal process, you can embark on this transformative endeavor with confidence, knowing that you have the necessary information to make informed decisions and create your desired results.
Good luck with your chimney removal project!
Frequently Asked Questions about How Hard Is It To Remove A Chimney
Was this page helpful?
At Storables.com, we guarantee accurate and reliable information. Our content, validated by Expert Board Contributors, is crafted following stringent Editorial Policies. We're committed to providing you with well-researched, expert-backed insights for all your informational needs.


0 thoughts on “How Hard Is It To Remove A Chimney”