Articles
How To Disconnect Water Line From Ice Maker
Modified: August 27, 2024
Learn how to disconnect the water line from your ice maker with our helpful articles. Ensure a smooth removal process without any damage.
(Many of the links in this article redirect to a specific reviewed product. Your purchase of these products through affiliate links helps to generate commission for Storables.com, at no extra cost. Learn more)
Introduction
Disconnecting the water line from an ice maker is a task that may be required for various reasons. Whether you’re replacing your ice maker, performing maintenance, or simply need to disconnect it temporarily for a remodeling project, following the proper steps will ensure a smooth and hassle-free process.
Having the right tools and materials on hand, as well as understanding the necessary steps, is crucial to successfully disconnecting the water line. This article will provide a step-by-step guide to help you through the process, ensuring that you can disconnect the water line from your ice maker with ease.
Before you start, make sure to turn off the power to your ice maker and the water supply valve. This will ensure your safety and prevent any potential water leaks while you’re disconnecting the water line.
Now, let’s gather the necessary tools and materials to get started!
Key Takeaways:
- Safely disconnect and cap off your ice maker’s water line using an adjustable wrench, Teflon tape, and a plastic cap to prevent leaks and ensure a hassle-free reconnection in the future.
- Prioritize safety by shutting off the water supply and unplugging the ice maker before disconnecting the water line, and consider whether to reconnect or remove the ice maker based on your needs.
Read more: How To Unclog Water Line To Ice Maker
Tools and Materials Needed
Before beginning the process of disconnecting the water line from your ice maker, it’s important to gather all the necessary tools and materials. This will help ensure a smooth and efficient process. Here is a list of the tools and materials you’ll need:
- Adjustable wrench
- Bucket or towel
- Plastic cap or plug
- Teflon tape
- Bucket or container to catch water (optional)
An adjustable wrench is essential for loosening and tightening the connections. It allows you to have a secure grip and apply the necessary force to disconnect the water line. Make sure you have a wrench that fits the size of the water line connection.
A bucket or towel will come in handy to catch any water that may leak during the disconnection process. This will help prevent any potential mess and make the process cleaner and more organized.
You’ll also need a plastic cap or plug to seal the end of the water line once it’s disconnected from the ice maker. This will prevent any water from leaking out and ensure that your plumbing system functions properly.
Teflon tape is a useful material for creating a tight seal when reconnecting the water line. Applying a few wraps of Teflon tape to the threaded connections will help prevent leaks and ensure a secure connection.
Lastly, having a bucket or container to catch water is optional but can be helpful in case there’s any residual water left in the line. This will prevent water from spilling onto the floor and make the cleanup process easier.
With these tools and materials on hand, you’re now ready to proceed with disconnecting the water line from your ice maker.
Step 1: Gather the Required Supplies
Before you begin disconnecting the water line from your ice maker, it’s essential to gather all the required supplies. Having everything at hand will ensure a smooth and efficient process. Here’s what you’ll need:
- Adjustable wrench
- Bucket or towels
- Plastic cap or plug
- Teflon tape
- Bucket or container to catch water (optional)
First, grab your adjustable wrench, which will be necessary for loosening and tightening the connections. Make sure you have the right size wrench to fit the water line connection securely.
Next, have a bucket or towels ready. This will help catch any water that may leak during the disconnection process and prevent a mess. Place the bucket or towels strategically around the area to ensure any water is contained.
Make sure you have a plastic cap or plug on hand to seal the end of the water line. This is crucial to prevent any water from leaking out of the disconnected line and ensure your plumbing system functions properly.
Additionally, grab some Teflon tape, which is used to create a tight seal when reconnecting the water line. Wrapping a few layers of Teflon tape around the threaded connections will help prevent leaks and ensure a secure connection.
Lastly, consider having a bucket or container available to catch any water that may be trapped in the line. While this step is optional, it can be beneficial in case there’s residual water, minimizing any mess and simplifying the cleanup process.
By gathering all these supplies before you start, you’ll be prepared for a smooth and successful disconnection of the water line from your ice maker. Proceed to the next step to shut off the water supply.
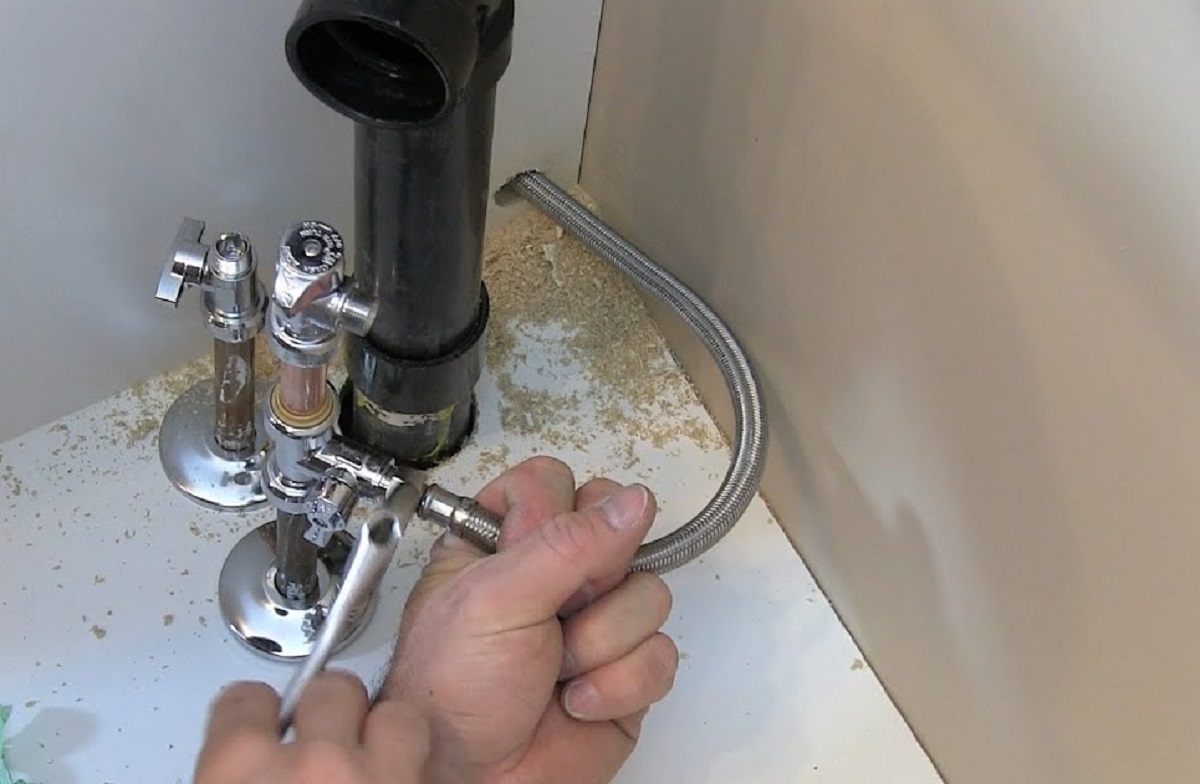
Step 2: Shut off the Water Supply
Before you can safely disconnect the water line from your ice maker, it’s crucial to shut off the water supply. This will prevent any water from flowing and ensure a smooth disconnection process. Follow these steps to shut off the water supply:
- Locate the water supply valve: The water supply valve is typically located behind the refrigerator or under the sink. It may be connected to a pipe or flexible tubing.
- Close the water supply valve: Turn the valve clockwise to shut off the water supply. If the valve is difficult to turn, use an adjustable wrench for extra leverage.
- Verify the water supply is shut off: To confirm that the water supply is fully shut off, attempt to dispense water from the refrigerator or check any nearby faucets. If no water comes out, then the supply is successfully shut off.
By shutting off the water supply, you prevent any potential leaks or water damage when disconnecting the water line from the ice maker.
Once the water supply is shut off, you’re ready to proceed to the next step – unplugging the ice maker. This step ensures that the ice maker is safely disconnected from the power source, minimizing the risk of any electrical accidents or damage.
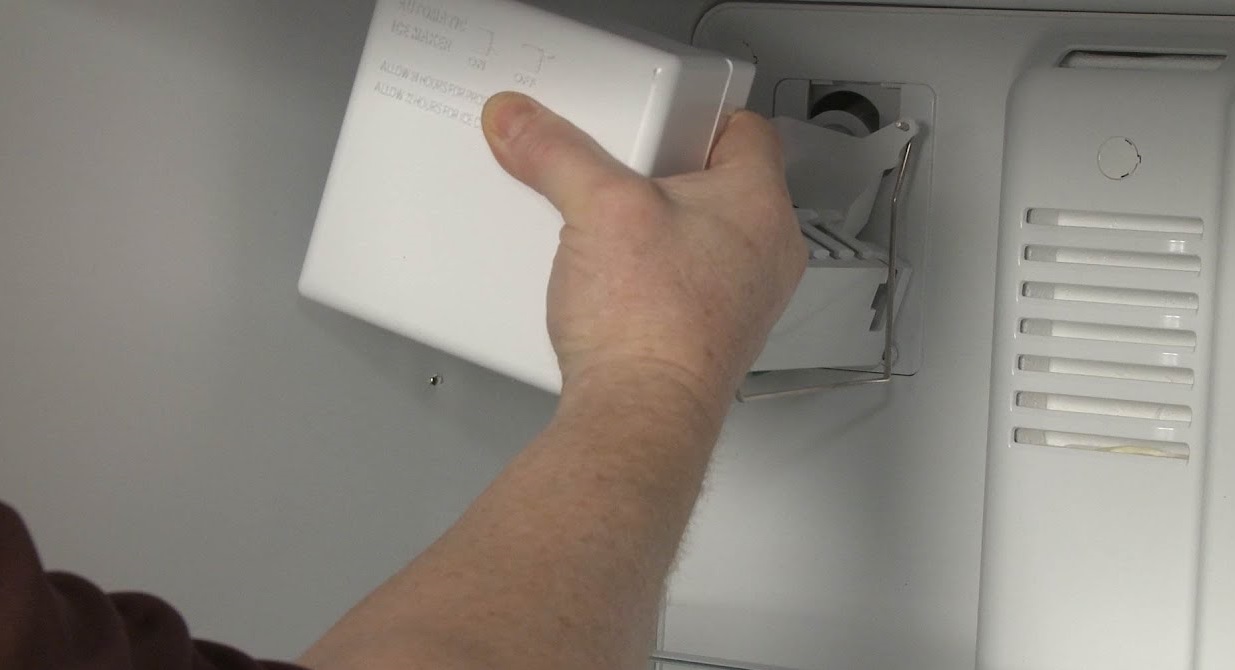
Step 3: Unplug the Ice Maker
Before proceeding with disconnecting the water line from the ice maker, it’s important to unplug the ice maker from the power source. This step ensures your safety and prevents any potential electrical accidents or damage. Follow these steps to unplug the ice maker:
- Locate the power cord: The power cord is usually located at the back or bottom of the ice maker. It may be plugged into a nearby outlet.
- Gently unplug the power cord: Firmly grasp the power cord near the end and gently pull it out of the outlet. Avoid pulling on the cord itself, as this can damage the cord or the outlet.
- Double-check the disconnection: Ensure that the power cord is completely disconnected from the outlet and there are no loose connections.
By unplugging the ice maker, you eliminate the risk of electrical shock or damage while working on disconnecting the water line. Always prioritize safety when dealing with any electrical appliances.
Once the ice maker is safely unplugged, you can proceed to the next step – disconnecting the water line from the ice maker. This step involves loosening and removing the water line connection, so make sure you have all the necessary tools and materials nearby.
Read more: How To Replace Ice Maker Water Line
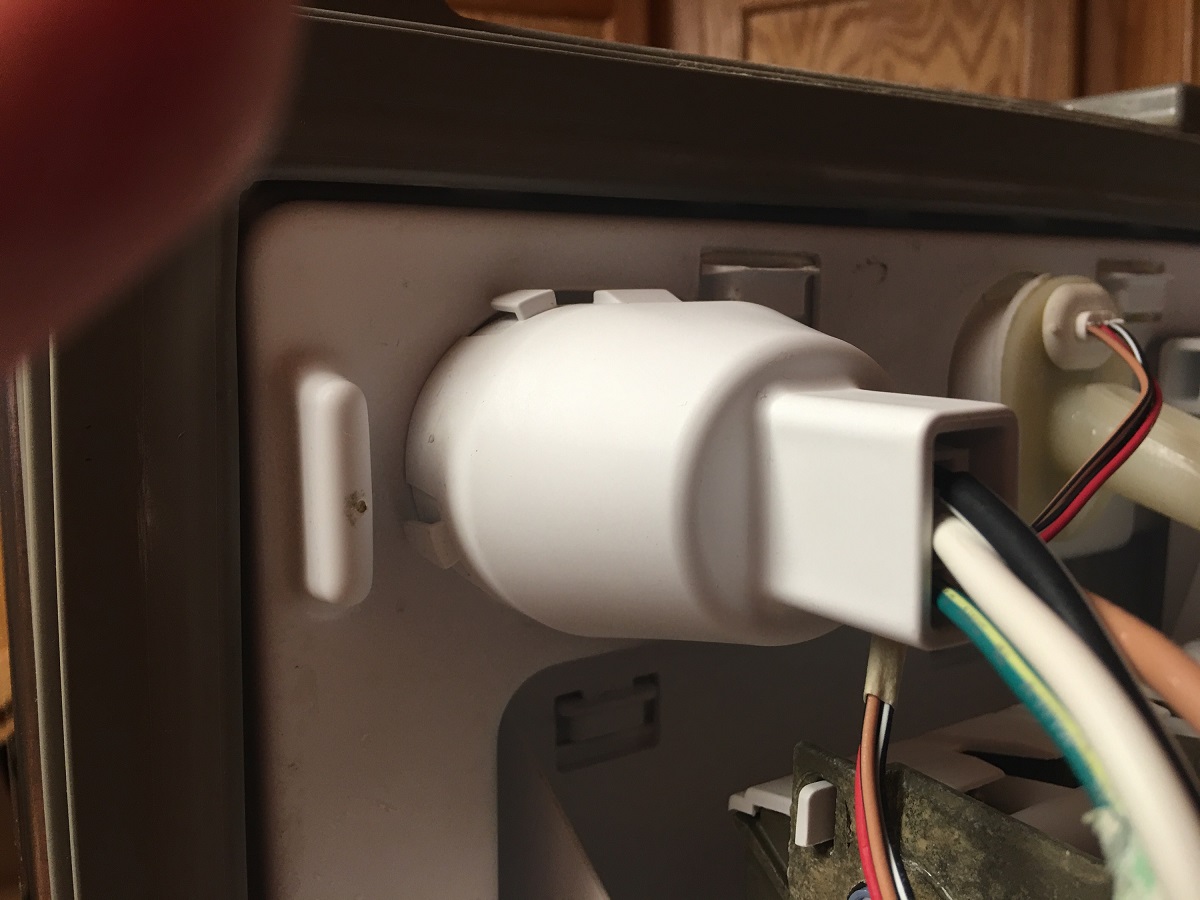
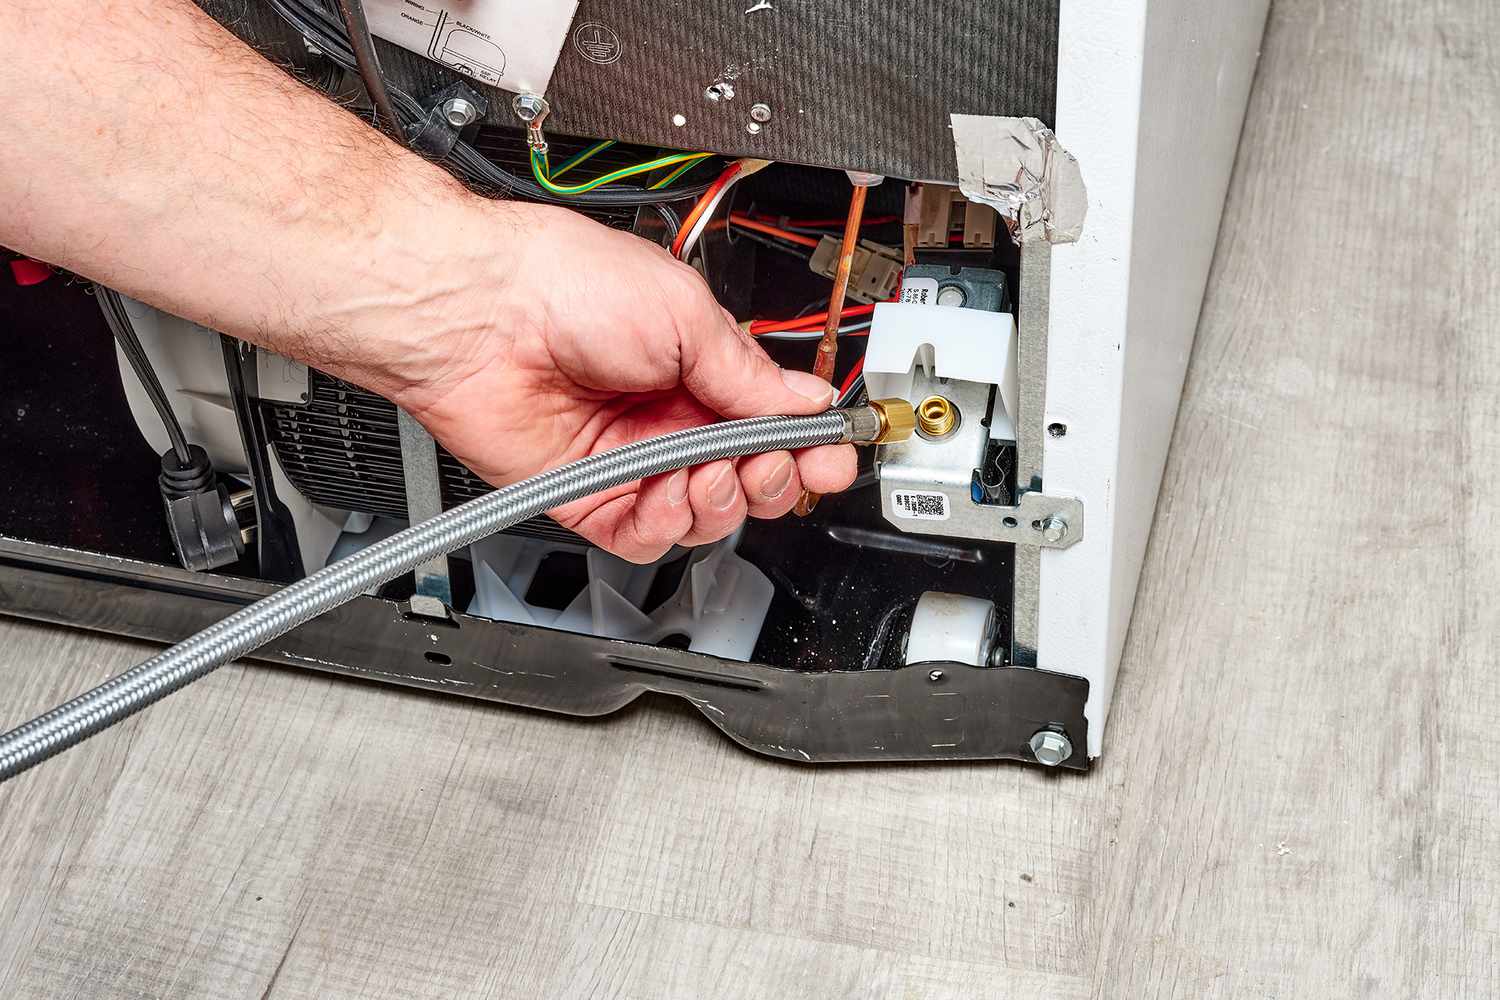
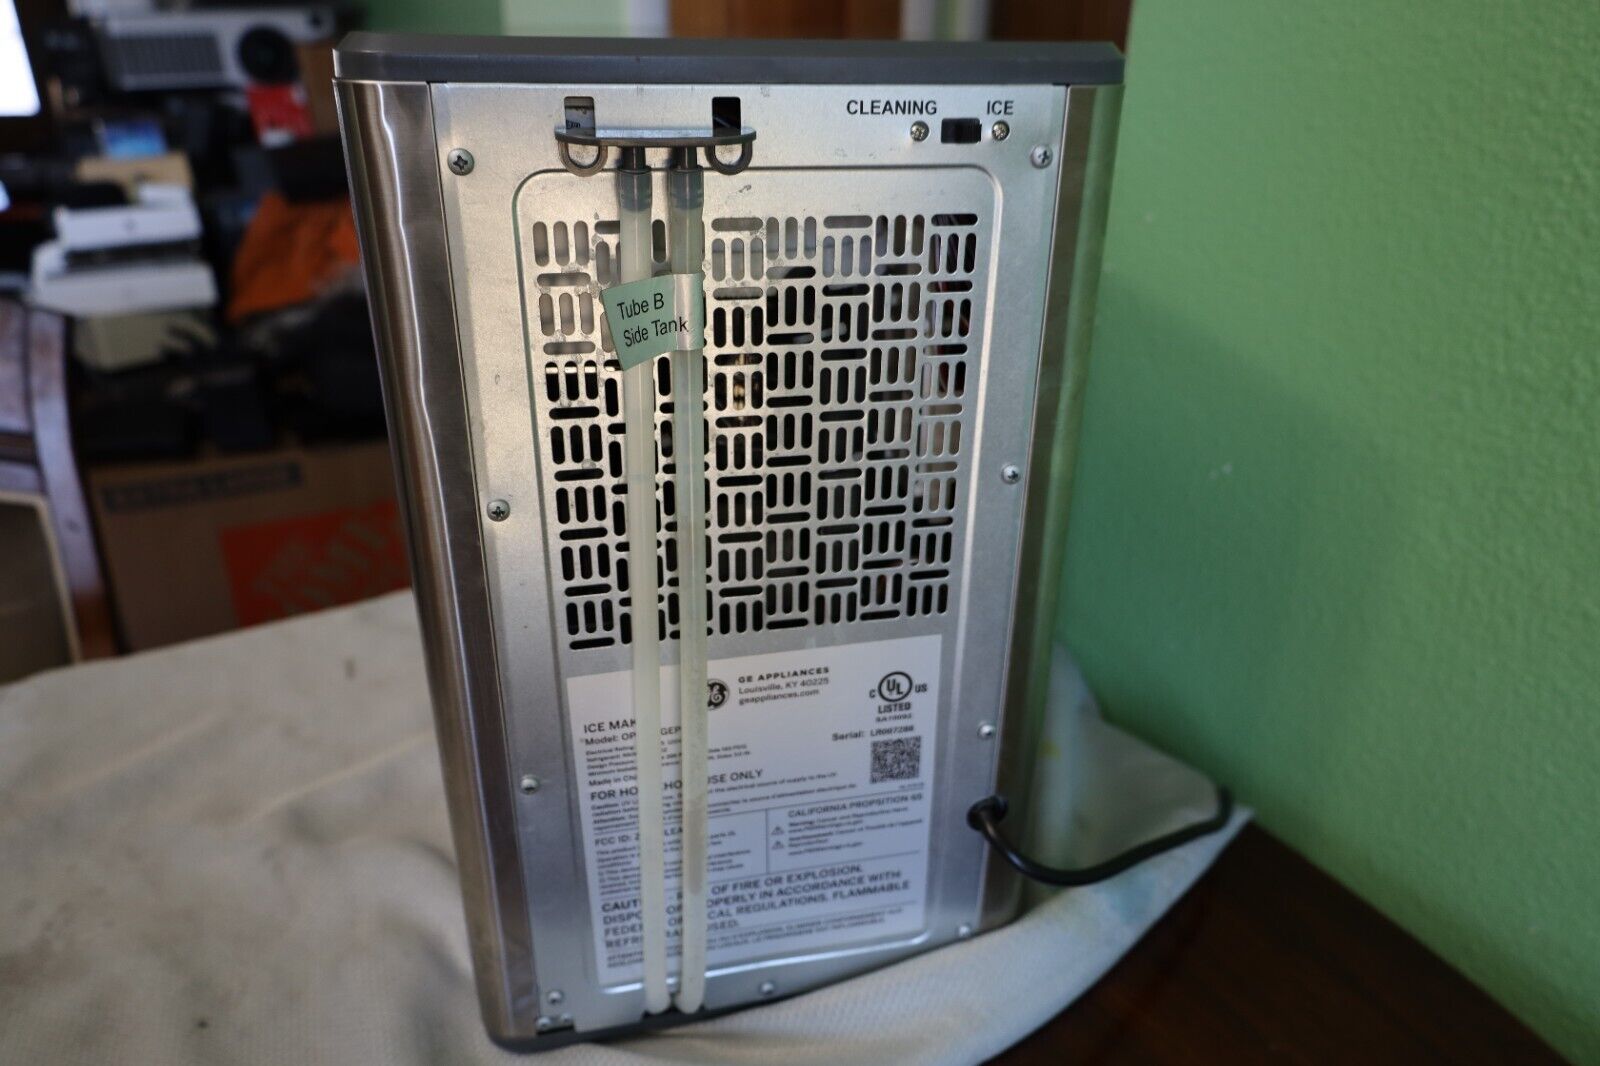
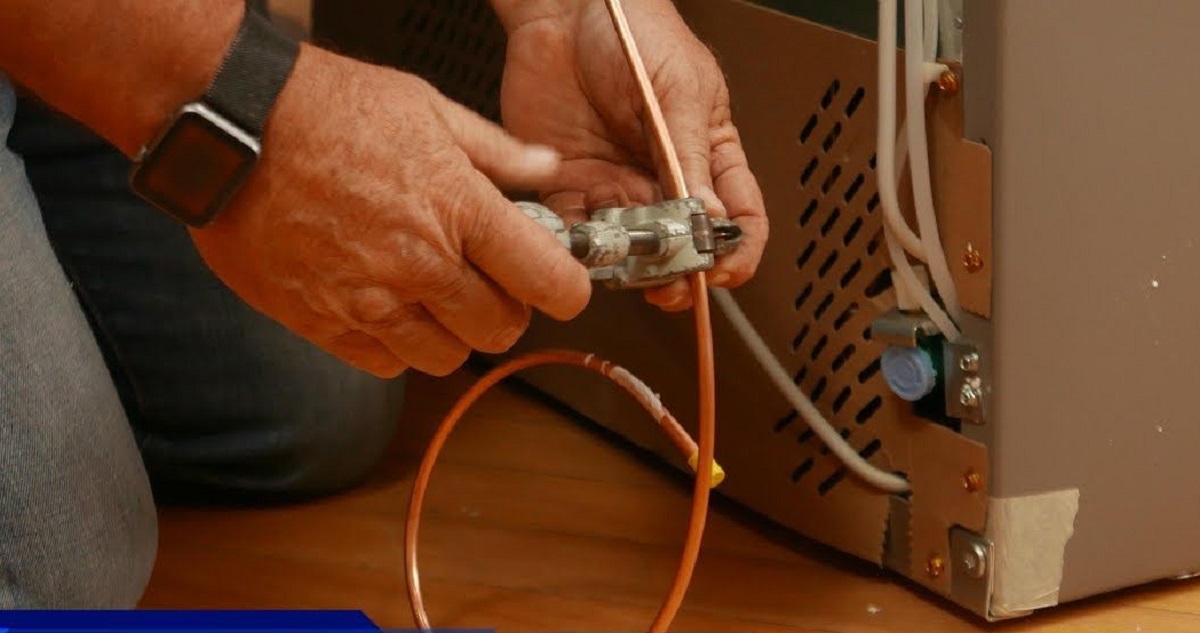
Step 4: Disconnect the Water Line from the Ice Maker
Now that you’ve shut off the water supply and unplugged the ice maker, you can proceed with disconnecting the water line. Follow these steps to safely disconnect the water line from the ice maker:
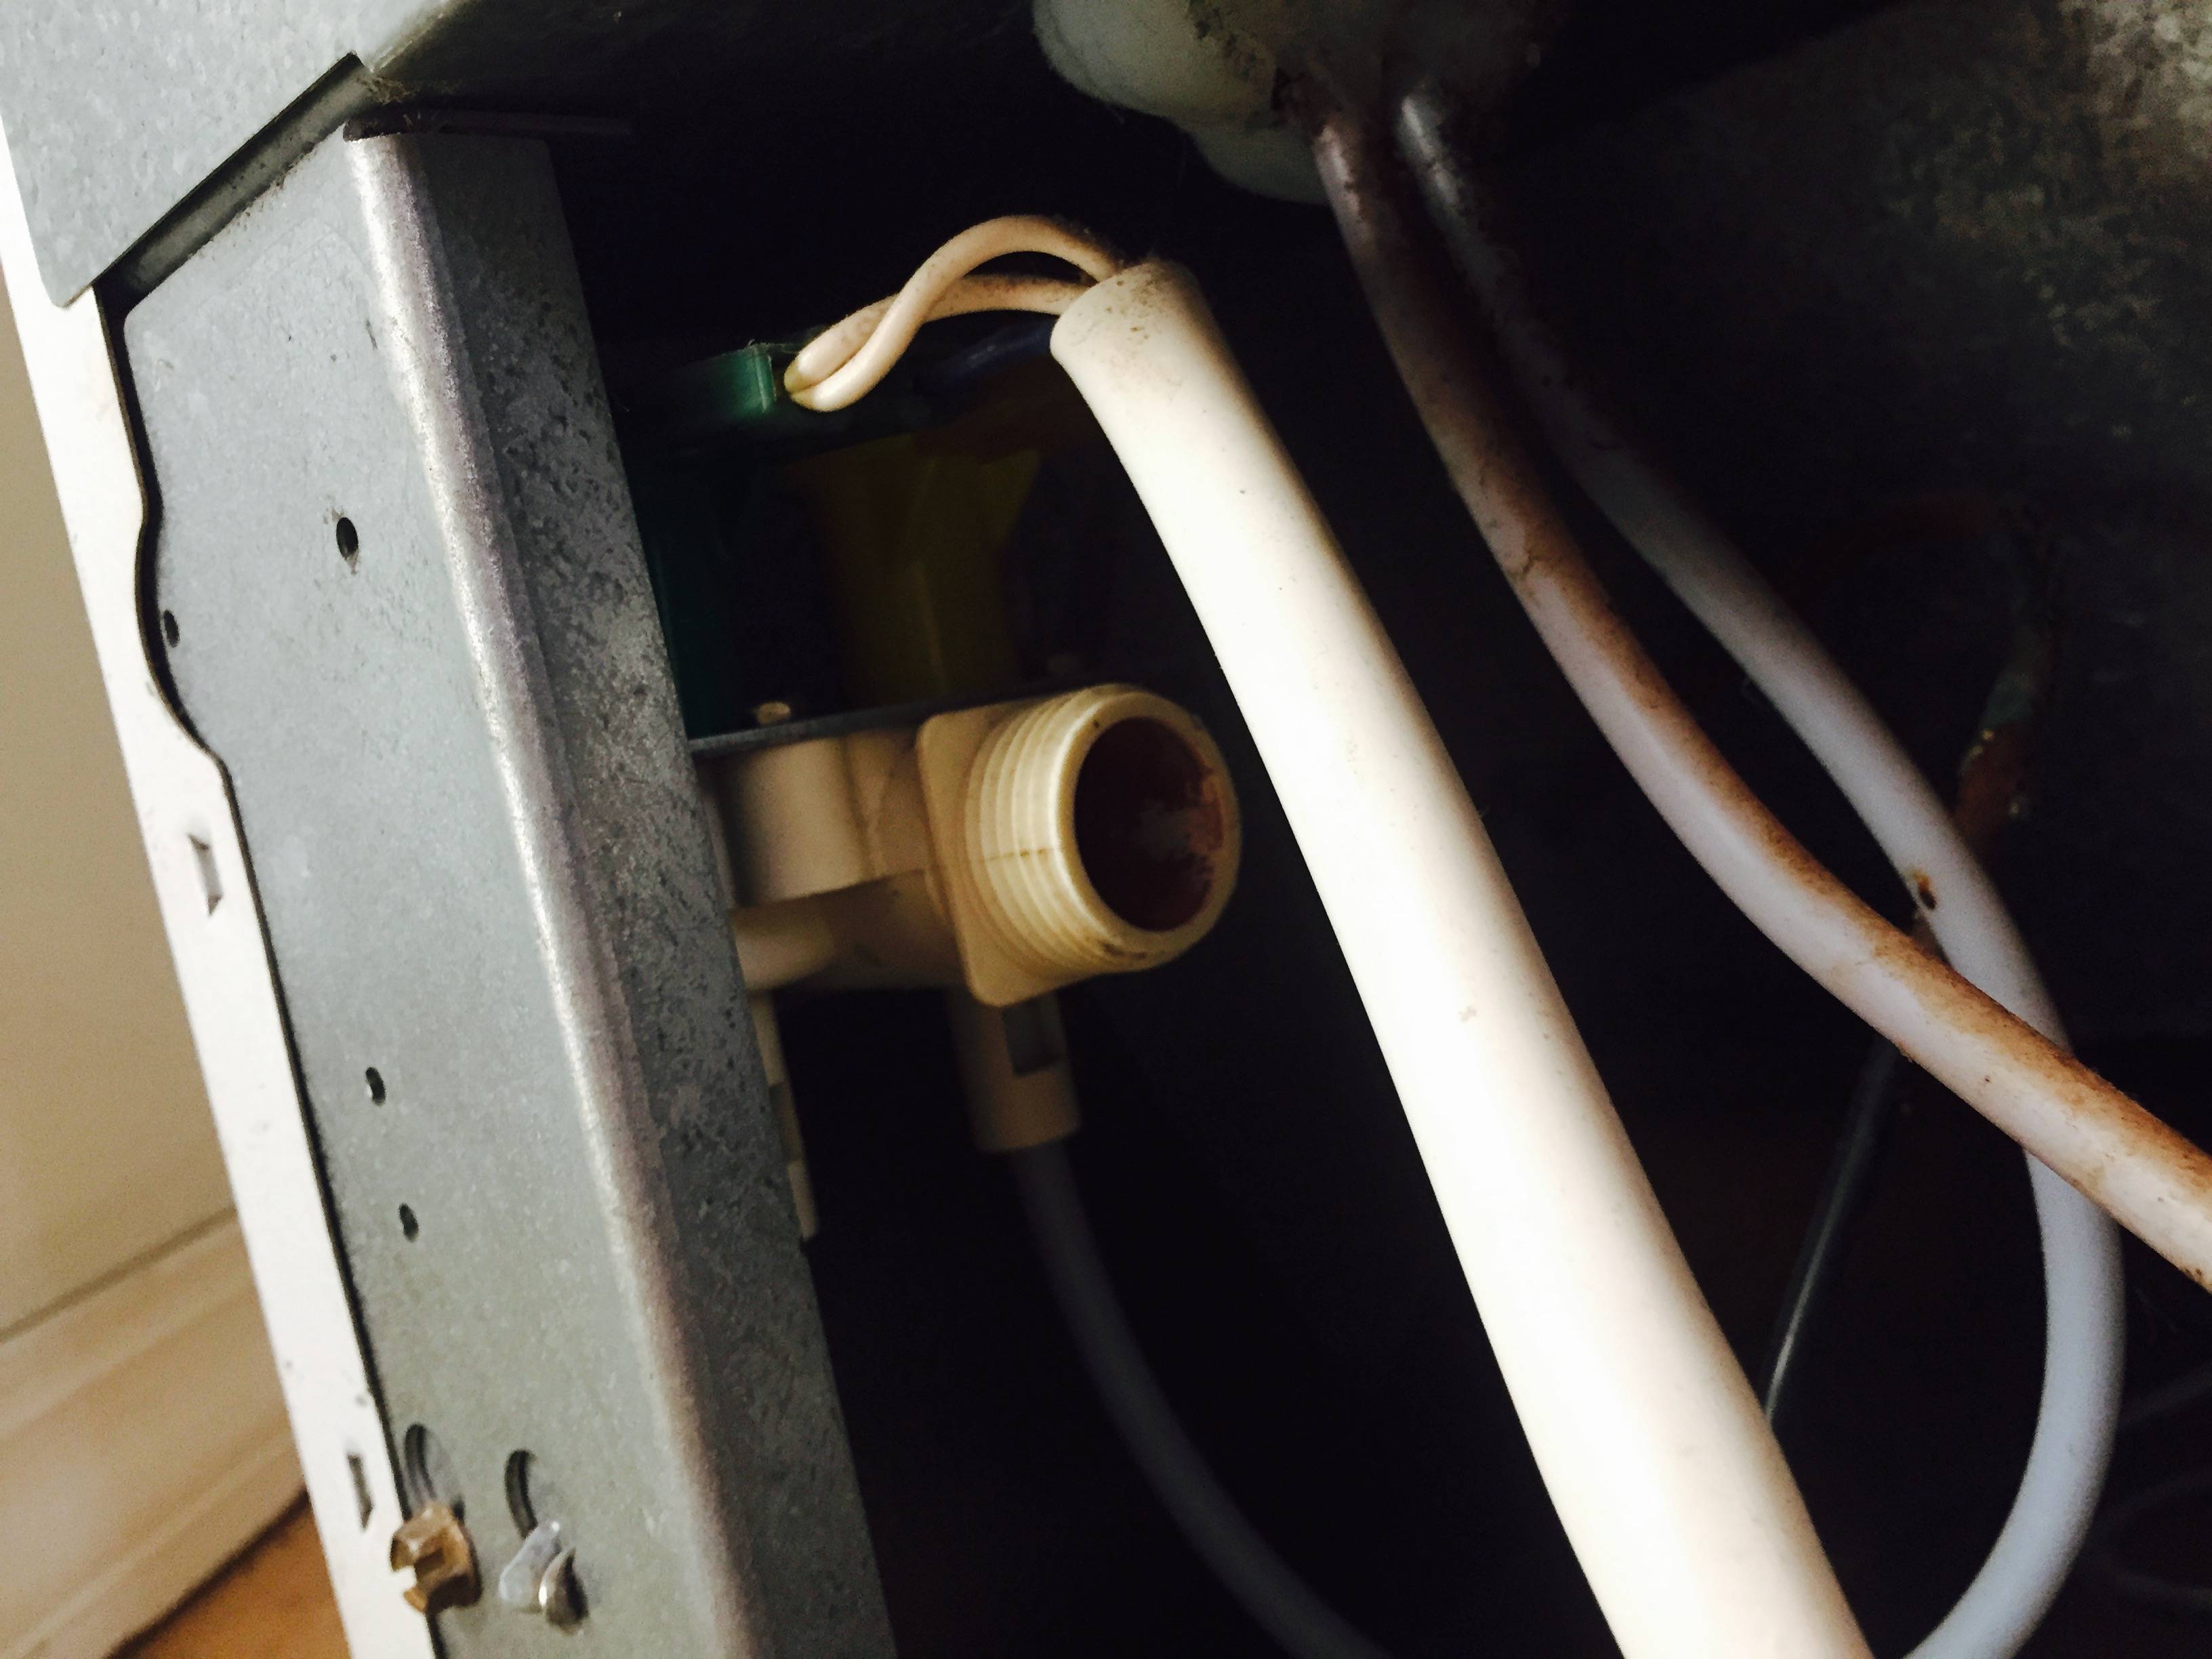
- Locate the water line connection: The water line connection is typically located at the back of the ice maker or at the inlet valve.
- Use an adjustable wrench: Take your adjustable wrench and place it securely around the threaded nut of the water line connection.
- Turn counterclockwise to loosen: Using the adjustable wrench, turn the nut counterclockwise to loosen it. Apply gentle pressure as needed to loosen the connection.
- Continue loosening by hand: Once the nut is loose, you can typically turn it the rest of the way by hand. Continue to rotate it counterclockwise until it is completely detached from the ice maker.
- Allow any excess water to drain: As you disconnect the water line, there may be some residual water left in the line. Take a bucket or container, and position it below the disconnected end of the water line to catch any dripping water.
By following these steps, you can safely and effectively disconnect the water line from the ice maker. Remember to take your time and be cautious when handling the equipment.
Now that the water line is disconnected, you’ll need to cap off the end of the water line to prevent any water from leaking out. This will be covered in the next step.
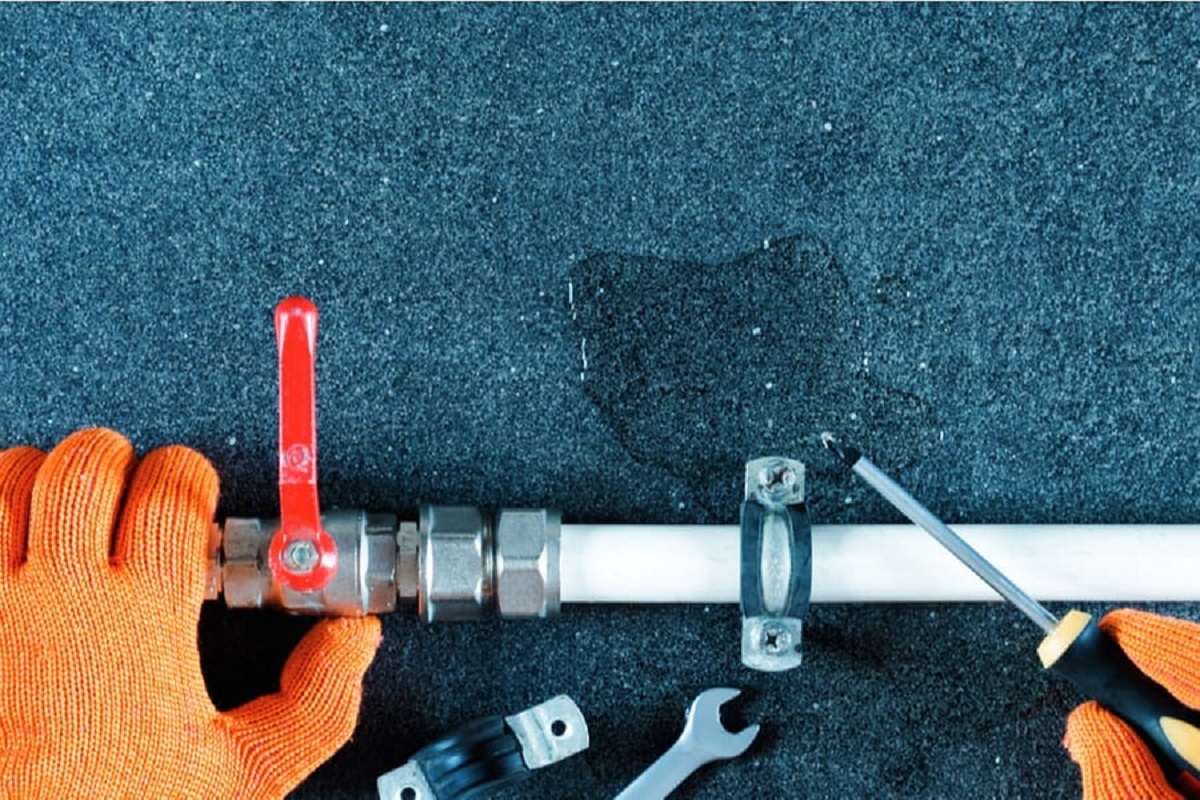
Step 5: Cap off the Water Line
After disconnecting the water line from the ice maker, it’s important to cap off the end of the line to prevent any water from leaking out. Follow these steps to cap off the water line:
- Inspect the end of the water line: Take a moment to inspect the end of the water line that you disconnected from the ice maker. Ensure that the end is clean and free from any debris or residue.
- Apply Teflon tape (optional): If desired, you can wrap a few layers of Teflon tape around the threaded end of the water line. This will provide an added layer of sealing and prevent any potential leaks.
- Use a plastic cap or plug: Place a plastic cap or plug onto the end of the water line. Ensure that it fits securely and tightly over the threaded end. This will completely seal the end of the line.
- Tighten the cap or plug: If using a cap with a threaded end, twist it clockwise to securely tighten it onto the water line. If using a plug, push it firmly into place until it is snug.
By capping off the water line, you prevent any water from leaking out and ensure that your plumbing system remains intact. It also allows for a hassle-free reconnection in the future, should you decide to reconnect the ice maker.
With the water line properly capped off, it’s important to clean and inspect the connections to ensure everything is in good condition. This will be covered in the next step.
To disconnect the water line from the ice maker, first turn off the water supply. Then, use a wrench to loosen the compression nut and gently pull the water line out. Be sure to have a towel or bucket ready to catch any excess water.
Step 6: Clean and Inspect the Connections
After capping off the water line, it’s essential to clean and inspect the connections to ensure they are in good condition. This step will help maintain the integrity of your plumbing system and prevent any potential issues. Follow these steps to clean and inspect the connections:
- Wipe down the connections: Use a clean cloth or paper towel dampened with warm water to wipe down the connections where the water line was previously attached. This will remove any dirt, grime, or residue that may have accumulated over time.
- Inspect for damage or leaks: Carefully examine the connections for any signs of damage, such as cracks, corrosion, or leaks. If you notice any issues, it’s important to address them before reattaching the water line.
- Apply Teflon tape (optional): If the connections appear to be in good condition and there are no signs of leaks, you can choose to apply a few wraps of Teflon tape to the threaded connections. This will provide added sealing and help prevent any potential leaks in the future.
- Ensure a proper fit: Before reconnecting the water line, make sure the threads on both the ice maker and the water line are clean and free from any debris. This will ensure a proper and secure fit when reattaching the water line.
By cleaning and inspecting the connections, you can identify any potential issues and address them promptly. This will help maintain the functionality and efficiency of your ice maker and plumbing system.
Next, you’ll have the option to either reconnect or remove the ice maker depending on your needs. This will be covered in the next step.
Step 7: Reconnect or Remove the Ice Maker (optional)
At this stage, you have the choice to either reconnect the ice maker or remove it completely, depending on your needs. Follow these steps based on your decision:
Read more: How To Disconnect A Refrigerator Water Line
If you choose to reconnect the ice maker:
- Align the water line connection: Position the water line connection on the ice maker with the threaded end of the water line.
- Hand-tighten the connection: Twist the connection clockwise by hand to ensure a snug fit. Use an adjustable wrench if needed, but be careful not to overtighten, as this can cause damage to the connection.
- Check for leaks: Once the connection is tightened, turn on the water supply and observe the connection for any signs of leaks. If you notice any leaks, immediately tighten the connection further or seek assistance to address the issue.
Reconnecting the ice maker allows you to restore its functionality without hassle, provided that the water line and ice maker are in good condition.
If you choose to remove the ice maker:
- Disconnect any remaining electrical connections: If there are any electrical connections between the ice maker and the refrigerator, carefully disconnect them.
- Detach the mounting brackets or screws: Depending on the model, you may need to remove the ice maker by detaching the mounting brackets or screws that secure it to the refrigerator.
- Gently slide out the ice maker: Slowly slide the ice maker out of its position, ensuring that no water or debris falls into the refrigerator.
- Store or dispose of the ice maker: If you no longer need the ice maker, store it in a safe place for future use. Alternatively, dispose of it properly according to local regulations.
Removing the ice maker provides you with the opportunity to free up space or make way for a new ice maker or different equipment in your kitchen.
Now that you’ve decided whether to reconnect or remove the ice maker, it’s time to move on to the next step – turning on the water supply.
Step 8: Turn on the Water Supply
After completing the necessary steps for disconnecting or removing the ice maker, it’s time to turn on the water supply. Follow these steps to safely restore the water flow:
- Locate the shut-off valve: Locate the water shut-off valve that you previously closed to disconnect the water line. It may be located behind the refrigerator or under the sink.
- Open the shut-off valve: Turn the shut-off valve counterclockwise to fully open it and restore the water flow.
- Verify the water flow: Check for any leaks or drips around the newly connected or capped off water line. Ensure that the water flows smoothly and there are no signs of leaks.
- Inspect the connections: Once the water supply is turned on, inspect the connections to ensure they are secure and tightly sealed. Address any leaks or loose connections immediately.
- Test the ice maker (if reconnected): If you chose to reconnect the ice maker, plug it back into the power source and wait for it to start producing ice. Check that the ice maker is functioning properly.
By turning on the water supply, you can enjoy the use of your ice maker once again or ensure that your plumbing system is functioning correctly if you removed it.
Remember to keep an eye out for any signs of leaks or other issues even after turning on the water supply. Promptly address any problems to prevent water damage or other complications.
Congratulations! You have successfully disconnected, capped off, and reconnected or removed the water line from your ice maker. Following these steps ensures a smooth process and helps maintain the integrity of your plumbing system.
Now you can enjoy the flexibility of working on your ice maker or proceeding with your remodeling project, knowing that you have the knowledge and skills to disconnect and reconnect the water line as needed.
If you have any concerns or difficulty with these steps, it’s always wise to consult a professional plumber for assistance.
Wrap up the article with a concluding paragraph to summarize the steps and emphasize the importance of safety and attention to detail.
Conclusion
Disconnecting the water line from an ice maker may seem like a daunting task, but by following the right steps and having the necessary tools and materials, the process becomes much simpler. This article has provided a comprehensive guide to help you successfully disconnect the water line from your ice maker.
From gathering the required supplies to turning on the water supply, each step has been carefully outlined to ensure a smooth and efficient disconnection process. By shutting off the water supply and unplugging the ice maker, you prioritize safety and minimize the risk of any accidents or damage. The steps of disconnecting the water line, capping off the end, and cleaning and inspecting the connections are crucial to maintaining the functionality of your plumbing system.
Depending on your needs, you have the option to either reconnect or remove the ice maker altogether. Reconnecting the ice maker allows you to restore its functionality, while removing it frees up space or prepares for a new ice maker or equipment installation.
Throughout the process, it’s important to pay attention to detail, inspect for any damage or leaks, and properly secure the connections. By following these steps and exercising caution, you can successfully disconnect and reconnect the water line from your ice maker without any complications.
Remember, if you ever feel uncertain or encounter any difficulties, it’s always advisable to consult a professional plumber for assistance. Prioritizing safety and being meticulous in your approach will ensure a successful disconnection and reconnection process.
Now that you’re equipped with the knowledge and confidence to disconnect the water line from your ice maker, you can tackle any necessary maintenance, replacements, or remodeling projects with ease. Enjoy the convenience of being able to work on your ice maker without any worries, knowing that you have the skills to handle the task effectively.
Now that you’ve mastered disconnecting your ice maker's water line, why stop there? Keep your kitchen appliances in top shape by learning to fix common problems with our guide on ice maker repair. Don’t forget regular upkeep; our article on refrigerator maintenance provides essential tips for keeping your ice maker clean and functioning efficiently. Thinking of upgrading? Our instructions on water line installation make setting up a new ice maker straightforward and hassle-free. Dive into these articles to ensure your ice maker always produces crisp, refreshing ice.
Frequently Asked Questions about How To Disconnect Water Line From Ice Maker
Was this page helpful?
At Storables.com, we guarantee accurate and reliable information. Our content, validated by Expert Board Contributors, is crafted following stringent Editorial Policies. We're committed to providing you with well-researched, expert-backed insights for all your informational needs.

0 thoughts on “How To Disconnect Water Line From Ice Maker”