Articles
How Long To Cook Apple Butter On Stove Top
Modified: August 20, 2024
Learn how to make delicious apple butter on your stove top. Discover the perfect cooking time and method in this informative articles.
(Many of the links in this article redirect to a specific reviewed product. Your purchase of these products through affiliate links helps to generate commission for Storables.com, at no extra cost. Learn more)
Introduction
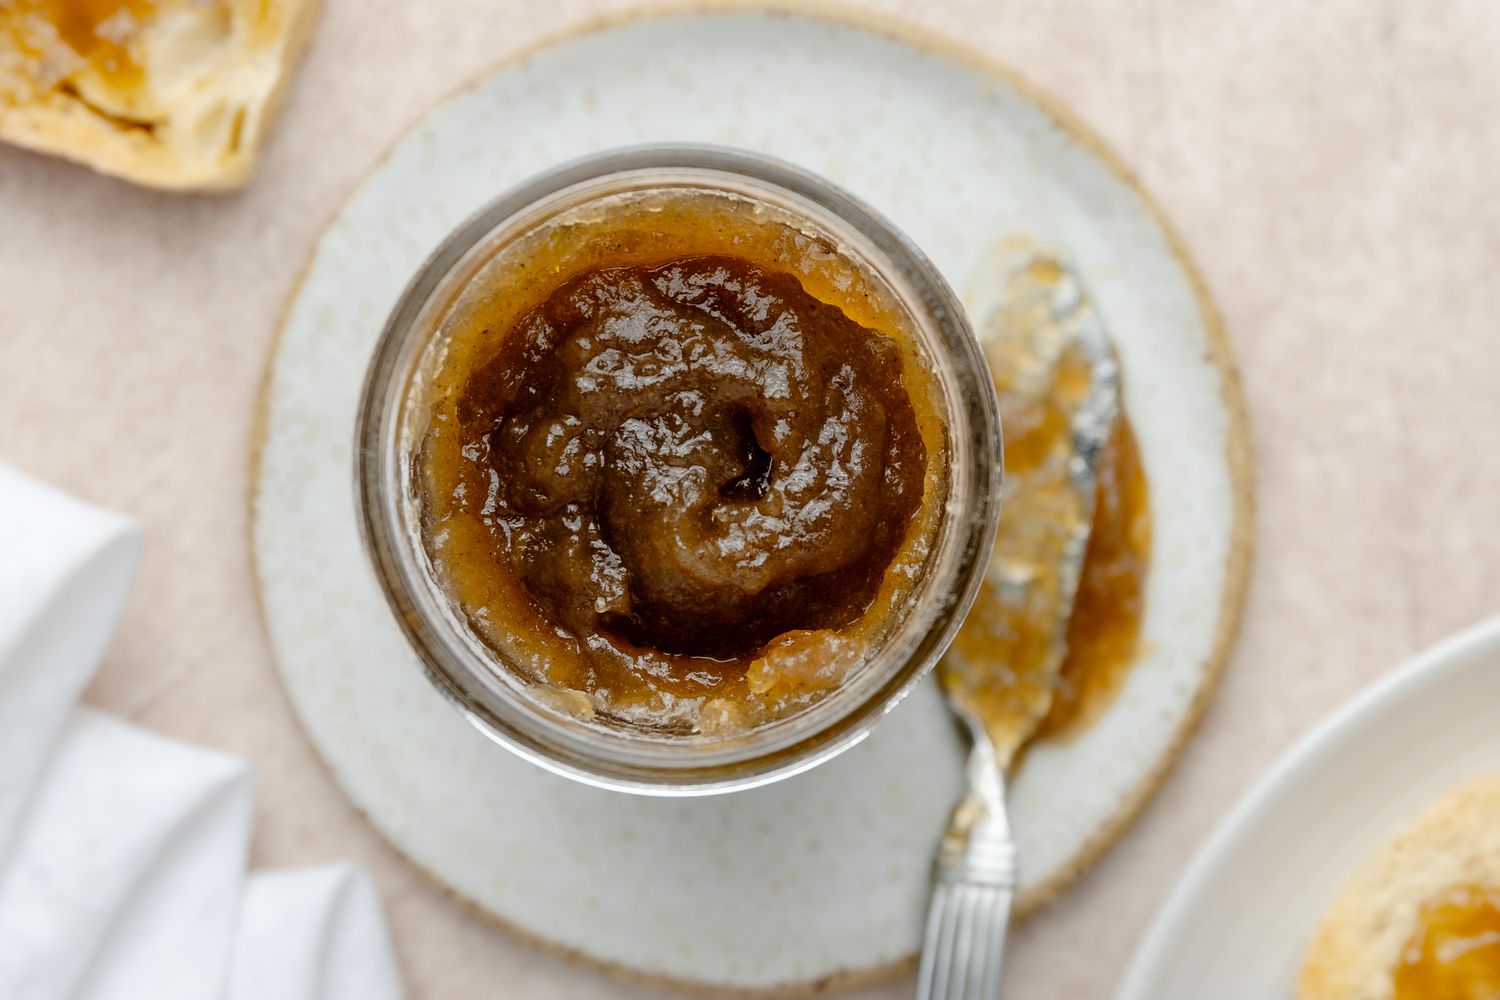
Welcome to the delicious world of apple butter! If you’re an apple lover, chances are you’ve come across this delectable spread before. Apple butter is a smooth and velvety condiment that is made by slow-cooking apples with spices and sweetener until it reaches a rich and luscious consistency.
While most people think of apple butter as something store-bought, making it from scratch on your stovetop is surprisingly simple and rewarding. Not only will you be able to control the sweetness and spice levels, but the aroma that fills your kitchen as the apples cook down is simply heavenly.
In this article, we will take you through the step-by-step process of making apple butter on your stovetop. From selecting the perfect apples to testing for doneness, we will cover all the important details to ensure your apple butter turns out perfectly every time.
So, grab a pen and paper, put on your apron, and get ready to embark on a culinary adventure as we guide you through the art of making homemade apple butter on your stovetop.
Key Takeaways:
- Making apple butter on the stovetop is a rewarding culinary adventure that allows you to control sweetness and spice levels, resulting in a velvety, flavorful spread perfect for a variety of dishes.
- Selecting the right apples, preparing them properly, and taking the time to cook them down to a smooth consistency are crucial steps in creating homemade apple butter that can be enjoyed for weeks to come.
Read more: How Long To Perk Coffee On The Stove Top
What is Apple Butter?
Before we dive into the process of making apple butter, let’s first understand what exactly it is. Apple butter is a type of fruit spread that is created by cooking apples with sugar and spices until they break down and thicken into a smooth and velvety consistency.
Apple butter has a rich and intense flavor, deepened by the slow cooking process. It has a distinct taste that is both sweet and tangy, with warm undertones of spices like cinnamon, nutmeg, and cloves. The texture is smooth and spreadable, making it the perfect addition to toast, pancakes, muffins, and so much more.
Despite its name, apple butter does not contain any dairy butter. The “butter” in the name refers to its smooth and velvety texture. It originated in the United States during colonial times as a way to preserve apples, as the slow-cooking process helps to extend its shelf life.
Apple butter is incredibly versatile and can be used in a variety of recipes. From incorporating it into baked goods like apple butter cookies or bread to using it as a topping for oatmeal or yogurt, the possibilities are endless.
Now that we have a better understanding of what apple butter is, let’s move on to the next step – selecting the right apples to create this tasty spread.
Selecting the Right Apples
When it comes to making apple butter, choosing the right kind of apples is key. Different apple varieties have different levels of sweetness, tartness, and texture, which can greatly influence the flavor and consistency of your apple butter.
While there is no one-size-fits-all answer to which apples are best for apple butter, there are a few key characteristics to consider when selecting your apples:
- Sweetness: Apples with a naturally sweet flavor will lend a pleasant and well-balanced sweetness to your apple butter. Varieties like Gala, Fuji, and Honeycrisp are known for their sweetness and are great options.
- Tartness: Some tartness is desirable in apple butter to balance out the sweetness. Apples like Granny Smith, Northern Spy, and Jonathan have a tart flavor that can add a pleasant tang to your spread.
- Texture: Apples that break down easily when cooked will result in a smoother apple butter. Varieties like McIntosh, Cortland, and Rome Beauty have a soft texture that makes them ideal for apple butter.
It’s also worth noting that a combination of apple varieties can often result in a more complex and well-rounded flavor profile for your apple butter. Don’t be afraid to experiment and mix different types of apples to find the perfect blend for your taste.
Once you’ve decided on the apple varieties you want to use, it’s time to move on to the next step – preparing the apples for cooking.
Preparing the Apples
Now that you’ve selected the perfect apples for your apple butter, it’s time to prepare them for cooking. Properly preparing the apples will ensure that they cook evenly and break down easily, resulting in a smooth and velvety apple butter.
Here’s how you can prepare the apples:
- Wash and peel: Start by rinsing the apples under cold water to remove any dirt or residue. Then, use a vegetable peeler or a paring knife to peel the skins off the apples. Peeling the apples will help create a smoother texture in the final apple butter.
- Core and slice: Once the apples are peeled, use a sturdy knife or an apple corer to remove the cores. You can then slice the apples into small, uniform pieces. The size of the apple slices will determine how long it takes for them to cook down.
- Remove seeds: Some apple varieties may have seeds that you’ll want to remove before cooking. Cut the slices in half and use a small knife or spoon to scoop out any visible seeds or seed clusters.
- Lemon juice: To prevent the apple slices from browning, you can toss them with a bit of lemon juice. Lemon juice acts as a natural anti-oxidant and will help maintain the vibrant color of the apples as they cook.
Once you’ve prepared the apples, they are ready to be cooked down into delicious apple butter. The cooking process is where the magic happens, as the apples slowly break down and release their flavors. But we’ll save that step for the next section – cooking the apples.
Cooking the Apples
Now that you have prepped your apples, it’s time to start cooking them down into a smooth and flavorful apple butter. This step is where the delicious aromas will fill your kitchen and your apples will begin to transform into a luscious spread.
Here’s how you can cook the apples:
- Stovetop pot: Select a large, heavy-bottomed pot or Dutch oven for cooking the apples. The pot should be big enough to hold all of the apple slices comfortably while allowing room for stirring.
- Heat and add apples: Set the pot over medium heat and add the prepared apple slices. Stir them gently to ensure they are evenly distributed in the pot.
- Simmer: Cover the pot and let the apples simmer over low to medium heat for about 30-40 minutes. Stir occasionally to prevent the apples from sticking to the bottom of the pot.
- Break down the apples: As the apples cook, they will begin to soften and break down. You can use a potato masher or a wooden spoon to gently mash the apples against the side of the pot. This will help break them down into a smoother texture.
- Cooking time: The cooking time will vary depending on the type and size of the apples, as well as the desired consistency of your apple butter. Continue to cook the apples until they are soft and easily mashable.
Remember, the key to cooking the apples is to do it slowly and gently. This will help develop the flavors and ensure a smoother texture in the final apple butter. Once the apples are cooked down, it’s time to move on to the next step – adding spices and sweetener.
Cook apple butter on the stove top for 1-2 hours, stirring frequently to prevent burning. The longer you cook it, the thicker and more concentrated the flavor will be.
Read more: How Long To Cook Cod On Stove Top
Adding Spices and Sweetener
Now that your apples have cooked down into a soft and flavorful mixture, it’s time to elevate the taste of your apple butter by adding spices and sweetener. This step will enhance the aroma and depth of flavor, making your apple butter irresistible.
Here’s how you can add spices and sweetener to your apple butter:
- Spices: The classic spices used in apple butter are cinnamon, nutmeg, and cloves. These spices add warmth and complexity to the flavor profile. Start by adding 1-2 teaspoons of ground cinnamon, 1/2 teaspoon of ground nutmeg, and a pinch of ground cloves. Adjust the amount to your taste preferences. You can also experiment with other spices like allspice or ginger for a unique twist.
- Sweetener: Adding sweetener is optional depending on the sweetness of your apples and your personal preference. Traditional sweeteners used in apple butter include granulated sugar, brown sugar, or honey. Start by adding 1/4 cup of sweetener and adjust according to your desired level of sweetness. Keep in mind that the apple butter will become sweeter as it continues to cook down.
- Stirring and incorporating: Stir the spices and sweetener into the cooked apples until well incorporated. Continue to simmer the mixture over low heat, stirring occasionally, to allow the flavors to meld together.
At this point, your apple butter will start to develop a beautiful aroma and a rich, luscious color. But we’re not done yet! The next step is crucial to achieving the perfect consistency – simmering the apple butter.
Simmering the Apple Butter
Simmering is the final step in the process of making apple butter, where the mixture thickens and develops its signature smooth and velvety texture. This step requires patience and attention, as you want to avoid scorching or burning the apple butter.
Here’s how you can simmer the apple butter to perfection:
- Reduce the heat: Lower the heat to the lowest setting and continue to cook the apple butter uncovered. This will allow the excess liquid to evaporate and the mixture to thicken.
- Stirring frequently: Stir the apple butter frequently to prevent it from sticking to the bottom of the pot. This will ensure even heat distribution and prevent any burnt bits from spoiling the flavor.
- Simmering time: The simmering time can vary depending on the desired thickness of your apple butter. It can take anywhere from 1 to 3 hours for the apple butter to reach the desired consistency. Keep in mind that the longer you simmer, the thicker the apple butter will become.
- Texture test: To check if your apple butter is done, take a small amount on a spoon and let it cool slightly. It should be thick enough to spread and hold its shape without being too runny. If it’s too thick, you can add a little apple juice or water and continue simmering until desired consistency is reached.
Remember, patience is key during this step. The longer you simmer, the more intensified the flavors will become. Allow the apple butter to cool slightly before testing for the final consistency.
Congratulations! You’ve successfully simmered your apple butter to perfection. Now it’s time to take it off the heat and move on to the next step – testing for doneness.
Testing for Doneness
Testing for doneness is an important step in making apple butter to ensure that it has reached the desired thickness and consistency. Proper testing will prevent you from undercooking or overcooking your apple butter.
Here’s how you can test your apple butter for doneness:
- Plate test: Take a small plate and place a spoonful of apple butter on it. Let it cool for a few moments. If the apple butter holds its shape without spreading too much, and a slight indentation remains when you run your finger through it, then it is likely done. It should have a spreadable consistency without being overly runny.
- Cooking time: If the apple butter is not yet to your desired thickness, continue simmering it for a bit longer. Remember that the apple butter will thicken slightly as it cools, so don’t overcook it or it may become too thick.
Once you’re satisfied with the thickness and consistency of your apple butter, it’s time to remove it from the heat and move on to the final steps – cooling and storing.
Before we conclude, let’s recap the journey so far. You’ve selected the right apples, prepared them, cooked them down with spices and sweetener, simmered to perfection, and tested for doneness. Now, let’s see how to properly cool and store your homemade apple butter.
Cooling and Storing Apple Butter
After successfully cooking and testing your apple butter, it’s time to cool it down and store it properly to preserve its freshness and flavor. Proper cooling and storage will ensure that your homemade apple butter can be enjoyed for weeks to come.
Follow these steps to cool and store your apple butter:
- Cooling: Remove the pot from the heat and let the apple butter cool to room temperature. This will allow the flavors to meld and the apple butter to thicken slightly.
- Jar sterilization: Before transferring the apple butter into storage jars, make sure the jars and lids are thoroughly cleaned and sterilized. You can do this by washing them with hot, soapy water or running them through a dishwasher cycle.
- Fill the jars: Spoon the cooled apple butter into the sterilized jars, leaving about 1/4 inch of headspace at the top of each jar. This will allow for expansion during freezing or refrigeration.
- Seal the jars: Ensure that the rims of the jars are clean and dry before placing the lids on top. Secure the lids tightly to create a proper seal.
- Storage options: There are two main storage options for apple butter:
- Refrigeration: If you plan to consume the apple butter within a couple of weeks, store it in the refrigerator. It will keep for up to 2 weeks when refrigerated.
- Freezing: For longer-term storage, apple butter can be frozen. Use freezer-safe containers or jars, leaving some headspace for expansion. When properly stored, apple butter can be kept in the freezer for up to 6 months.
Remember to label each jar with the date of preparation to keep track of its freshness.
Now that your apple butter is properly cooled and stored, you can enjoy it on toast, biscuits, pancakes, or any way you prefer!
With these tips and techniques, you are ready to embark on your apple butter-making journey. It’s a wonderful way to savor the flavors of the season and create a delightful homemade treat. So grab your pots, gather some fresh apples, and start cooking up a batch of delicious apple butter on your stovetop!
Happy cooking and enjoy your homemade apple butter!
Read more: How Long To Cook Shrimp On Stove Top
Conclusion
Congratulations! You have successfully learned how to make apple butter on your stovetop. From selecting the right apples to simmering them down with spices and sweetener, you have embarked on a culinary adventure that has resulted in a delicious and versatile spread.
By following the steps outlined in this article, you have gained the knowledge and confidence to create your own homemade apple butter. The process of making apple butter on the stove may take time and patience, but the end result is a velvety and flavorful condiment that will elevate your meals and treats.
Remember, the key to crafting the perfect apple butter lies in selecting high-quality apples, preparing them properly, and taking the time to cook them down to a smooth consistency. Add your favorite spices and sweetener to customize the flavor to your liking.
Once your apple butter has reached its desired thickness and passed the doneness test, ensure you allow it to cool and then transfer it to sterilized jars for proper storage. Whether you choose to refrigerate it for short-term use or freeze it for long-term preservation, your homemade apple butter will keep its fresh and delightful flavors for weeks to come.
Now it’s time to enjoy the fruits of your labor! Spread your apple butter on toast, swirl it into yogurt, use it as a filling in pastries, or get creative with your own culinary creations. The possibilities are endless, and your homemade apple butter is sure to impress family and friends.
Thank you for joining us on this flavorful journey of making apple butter on the stovetop. We hope this article has inspired you to embrace the joy of homemade condiments and explore the world of cooking with apples. Happy cooking and savor every spoonful of your delicious apple butter!
Frequently Asked Questions about How Long To Cook Apple Butter On Stove Top
Was this page helpful?
At Storables.com, we guarantee accurate and reliable information. Our content, validated by Expert Board Contributors, is crafted following stringent Editorial Policies. We're committed to providing you with well-researched, expert-backed insights for all your informational needs.


0 thoughts on “How Long To Cook Apple Butter On Stove Top”