Articles
Why Is My Kegerator Not Pouring
Modified: August 27, 2024
Discover articles answering the question, "Why is my kegerator not pouring?" Find troubleshooting tips and solutions to common kegerator pouring issues.
(Many of the links in this article redirect to a specific reviewed product. Your purchase of these products through affiliate links helps to generate commission for Storables.com, at no extra cost. Learn more)
Introduction
A kegerator is a popular appliance among beer enthusiasts that allows you to serve draft beer at home, just like in a bar or pub. It combines a keg of beer with a refrigeration system, ensuring that your beer is always cool and ready to pour. However, it can be frustrating when your kegerator is not pouring properly. There could be several reasons why this happens, and understanding these issues can help you troubleshoot and fix the problem.
In this article, we will explore the common reasons why your kegerator might not be pouring correctly. We will discuss potential solutions to help you troubleshoot and resolve these issues, ensuring you can enjoy a perfect pour every time.
Key Takeaways:
- Troubleshoot kegerator pouring issues by adjusting temperature, CO2 pressure, and cleaning lines. Regular maintenance ensures a perfect pour every time, keeping your beer flowing smoothly and deliciously.
- Address kegerator pouring problems by testing and replacing faulty regulators, adjusting beer line length and diameter, and maintaining optimal temperature and CO2 pressure. Keep your kegerator in top pouring condition for a refreshing beer experience.
Read more: Why Is My Kegerator All Foam
Understanding the Kegerator
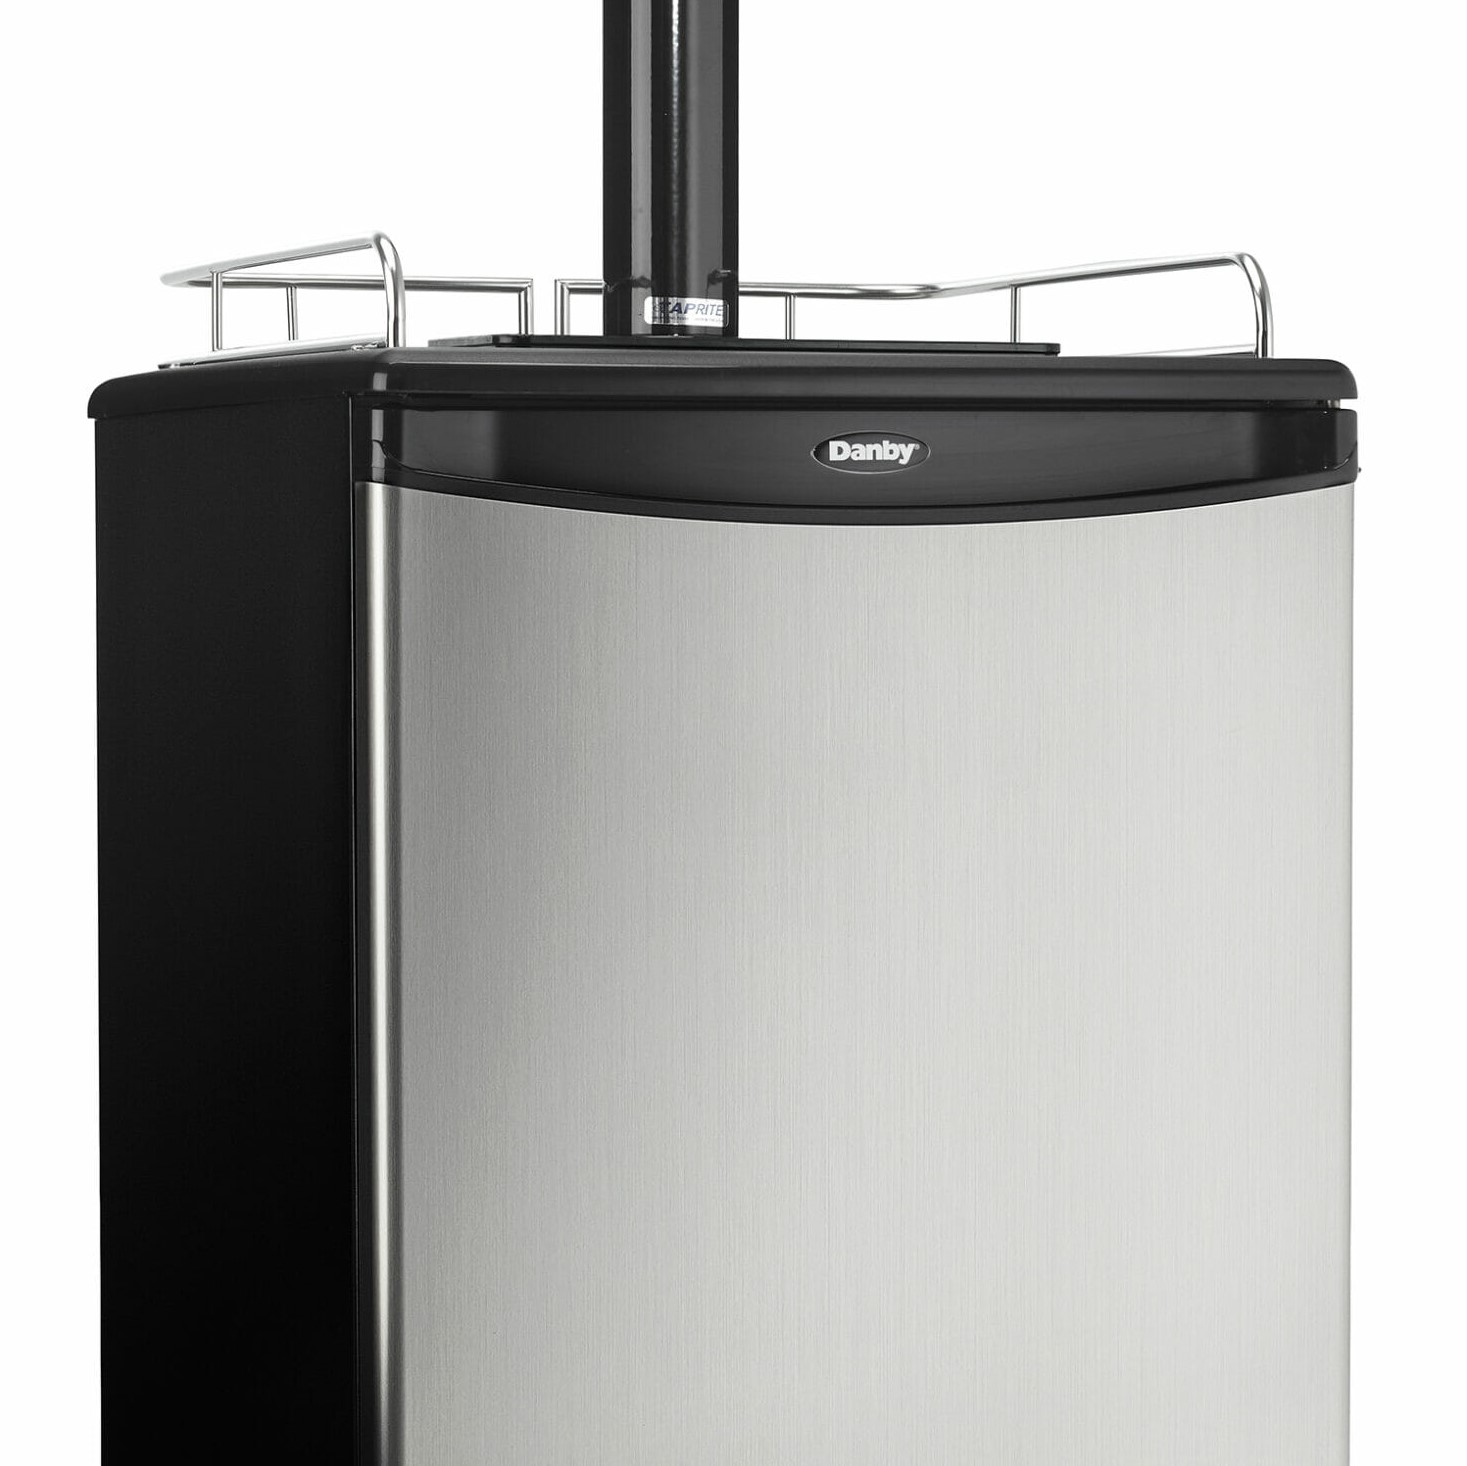
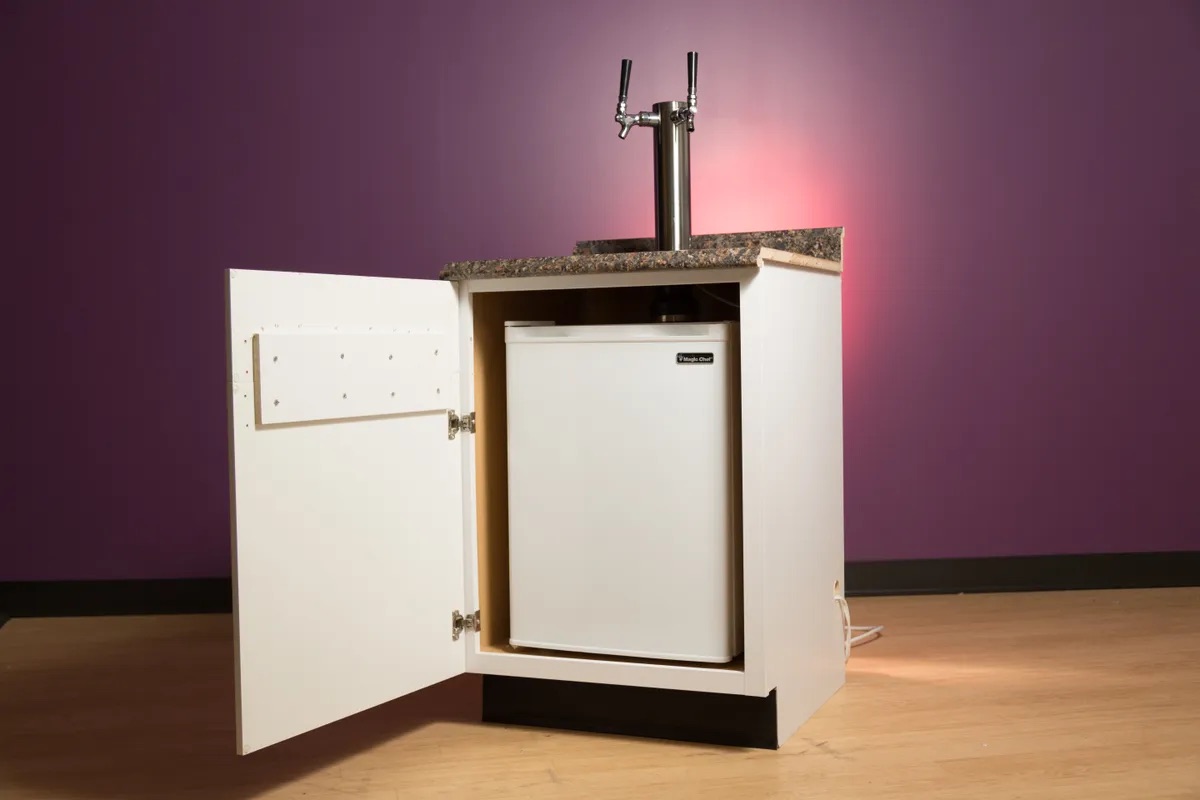
Before we dive into the reasons why your kegerator may be experiencing pouring issues, let’s first gain a basic understanding of how a kegerator works. Essentially, a kegerator is a refrigeration unit specifically designed to store and dispense beer. It consists of a refrigeration system, a container to hold the keg, a regulator to control the CO2 pressure, and a dispensing system with faucets and beer lines.
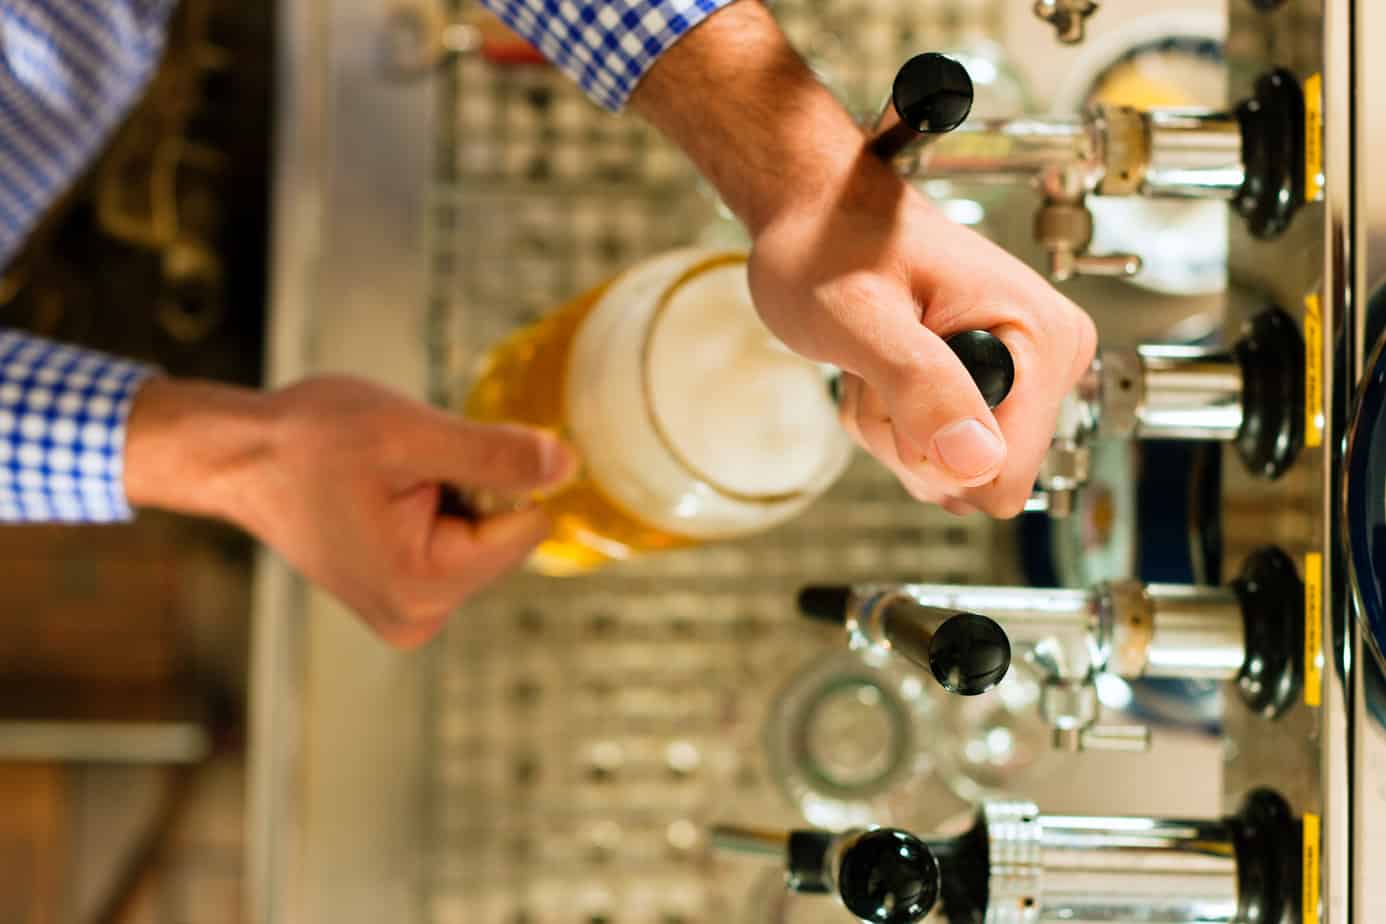
When you install a keg in the kegerator and set the desired temperature, the refrigeration system works to keep the beer cold. The keg is pressurized with CO2 gas that is regulated by the CO2 regulator. This pressure forces the beer out of the keg and through the beer lines, eventually reaching the faucet where it is poured into a glass.
It’s important to note that kegerators come in different sizes, styles, and configurations. Some kegerators are designed for home use and can accommodate one or two kegs, while others are larger and used in commercial establishments. The components of a kegerator may also differ slightly depending on the model and brand.
Now that we have a basic understanding of how a kegerator works, let’s explore the common reasons why your kegerator may be experiencing pouring issues.
Common Reasons for Kegerator Pouring Issues
When your kegerator is not pouring properly, it can be frustrating and disappointing. There are several potential reasons for this issue, and understanding them will help you identify and resolve the problem. Here are some common reasons why your kegerator may be experiencing pouring issues:
- Improper Temperature Settings: The temperature of your beer is crucial for a perfect pour. If the kegerator is too warm or too cold, it can affect the carbonation and cause issues with pouring. Improper temperature settings can result in either foamy or flat beer.
- Incorrect CO2 Pressure: The CO2 pressure in the keg needs to be properly adjusted to achieve the desired carbonation level. If the pressure is too low, the beer will pour slowly or inconsistently. On the other hand, if the pressure is too high, it can lead to excessive foaming and wasted beer.
- Clogged Lines or Faucets: Over time, beer residue and sediment can build up in the beer lines and faucets, causing blockages. This can restrict the flow of beer and result in slow or uneven pouring. It’s essential to regularly clean and clear the lines and faucets to prevent clogs.
- Faulty Regulator: The regulator controls the CO2 pressure going into the keg. If the regulator is faulty or malfunctioning, it can lead to inconsistent pressure and pouring issues. A damaged or worn-out regulator may need to be replaced to ensure a proper pour.
- Beer Line Length and Diameter: The length and diameter of the beer lines play a crucial role in maintaining the right pressure and flow of beer. If the lines are too short or narrow, it can cause excessive foaming. Conversely, if the lines are too long or wide, it can result in slow pouring or flat beer.
These are just a few of the common reasons why your kegerator may be experiencing pouring issues. Now that we have identified these potential issues, let’s move on to the troubleshooting steps to help you fix the problem.
Improper Temperature Settings
One of the most common reasons for kegerator pouring issues is improper temperature settings. The temperature of the beer plays a crucial role in achieving the perfect pour. If the kegerator is either too warm or too cold, it can affect the carbonation and result in foamy or flat beer.
To ensure proper temperature settings, follow these steps:
- Check the thermostat: Locate the thermostat or temperature control dial of your kegerator. Depending on the model, it might be inside or outside the unit. Adjust the temperature to the recommended setting for the specific type of beer you are serving. Lager beers typically require temperatures between 36 and 40 degrees Fahrenheit, while ales may need slightly higher temperatures ranging from 40 to 45 degrees Fahrenheit.
- Allow for temperature stabilization: After adjusting the temperature, wait for at least 24 hours to allow the kegerator to stabilize at the desired temperature. This ensures that the beer inside the keg reaches the ideal temperature for pouring.
- Regularly monitor the temperature: Use a reliable thermometer to monitor the temperature inside the kegerator. Check the temperature periodically to ensure it remains consistent. Fluctuations in temperature can impact the carbonation and pouring quality of the beer.
- Consider insulation: If you find that the temperature inside the kegerator varies significantly, especially during hot or cold weather conditions, you may need to insulate the unit. Use insulation materials such as foam or insulation blankets to minimize temperature fluctuations and maintain a consistent temperature.
By properly adjusting and maintaining the temperature settings of your kegerator, you can ensure that your beer pours smoothly and with the right amount of carbonation.
Incorrect CO2 Pressure
Another common reason for kegerator pouring issues is incorrect CO2 pressure. The CO2 pressure plays a vital role in maintaining the right carbonation level and ensuring a consistent pour. If the pressure is too low or too high, it can lead to problems such as slow pouring, excessive foaming, or flat beer.
To address this issue, follow these troubleshooting steps:
- Check the CO2 tank level: Ensure that the CO2 tank is not empty or close to running out. If the tank is low on pressure, it may not provide adequate CO2 flow to maintain the desired pressure in the keg, resulting in pouring issues.
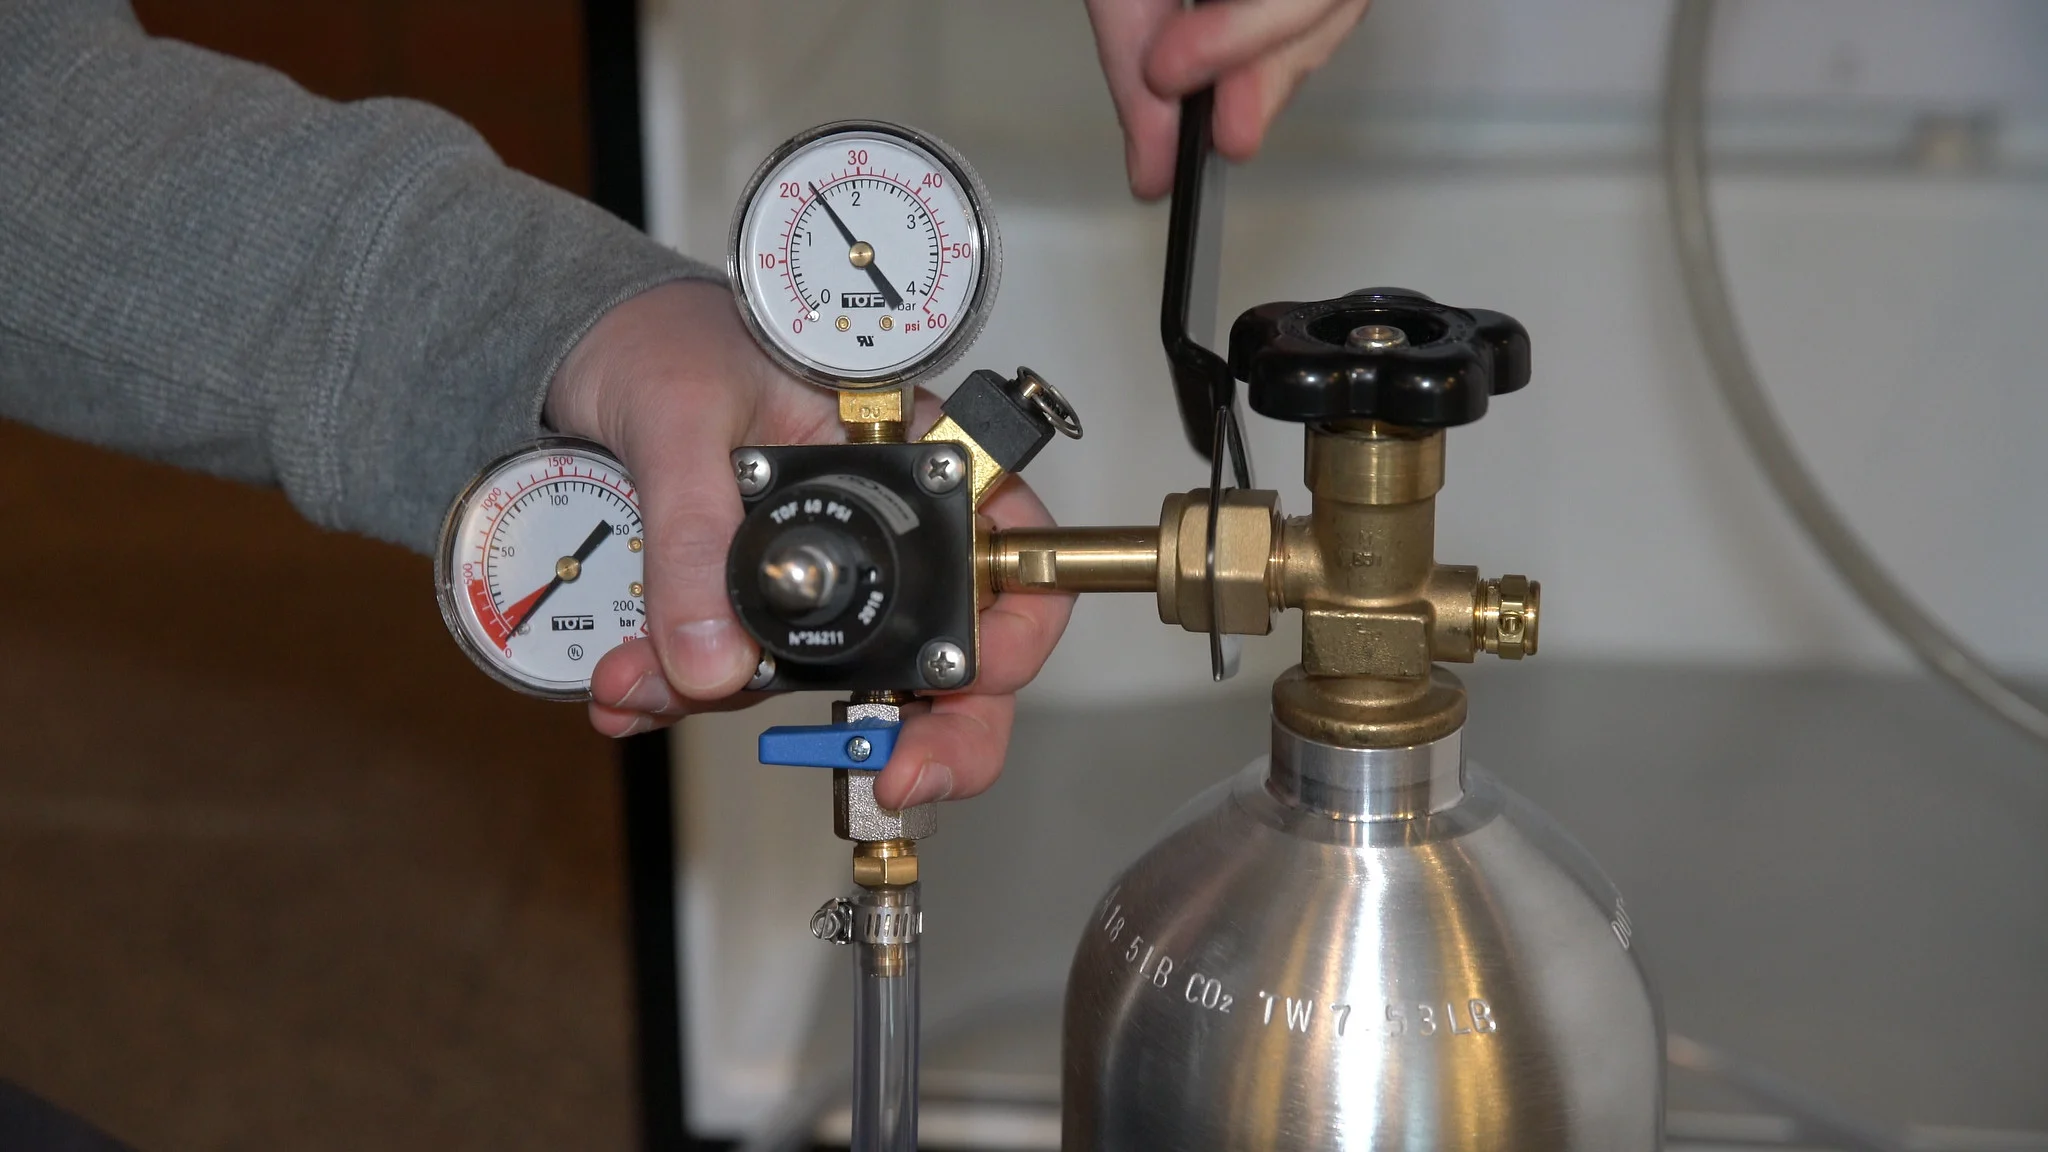
- Inspect the CO2 regulator: Examine the CO2 regulator to ensure it is functioning correctly. Check for any visible damages or signs of wear and tear. Additionally, make sure that the regulator is properly connected to the CO2 tank and the keg. If you notice any issues, consider replacing the regulator.
- Adjust the CO2 pressure: Use the adjustment knob on the CO2 regulator to increase or decrease the pressure as needed. Refer to the manufacturer’s guidelines or consult a brewing expert for the recommended pressure settings for the specific type of beer you are serving. Gradually make adjustments and monitor the pouring quality to find the optimal pressure level.
- Balance the CO2 system: Achieving a balanced CO2 system ensures that the pressure inside the keg matches the resistance of the beer lines, resulting in a smooth pour. If you are experiencing excessive foaming or slow pouring, consider balancing the system by adjusting the length and diameter of the beer lines. Consult the kegerator’s manual or seek guidance from a professional to perform this adjustment correctly.
By ensuring that the CO2 pressure is properly regulated and adjusted, you can resolve pouring issues and enjoy a well-carbonated and consistent beer flow from your kegerator.
Read more: Why Is The Kegerator Making My Beer Flat?
Clogged Lines or Faucets
When your kegerator is not pouring properly, one possible cause could be clogged lines or faucets. Over time, beer residue, yeast, and other sediments can build up in the beer lines and faucets, obstructing the flow and resulting in slow or uneven pouring.
To address clogged lines or faucets, follow these troubleshooting steps:
- Disconnect and clean the beer lines: Start by disconnecting the beer lines from both the keg and the faucet. Rinse them with warm water to remove any loose debris. Then, use a cleaning brush or a cleaning solution specifically designed for beer lines to thoroughly clean the inside of the lines. Pay attention to any visible clogs or buildup, and scrub them away gently.
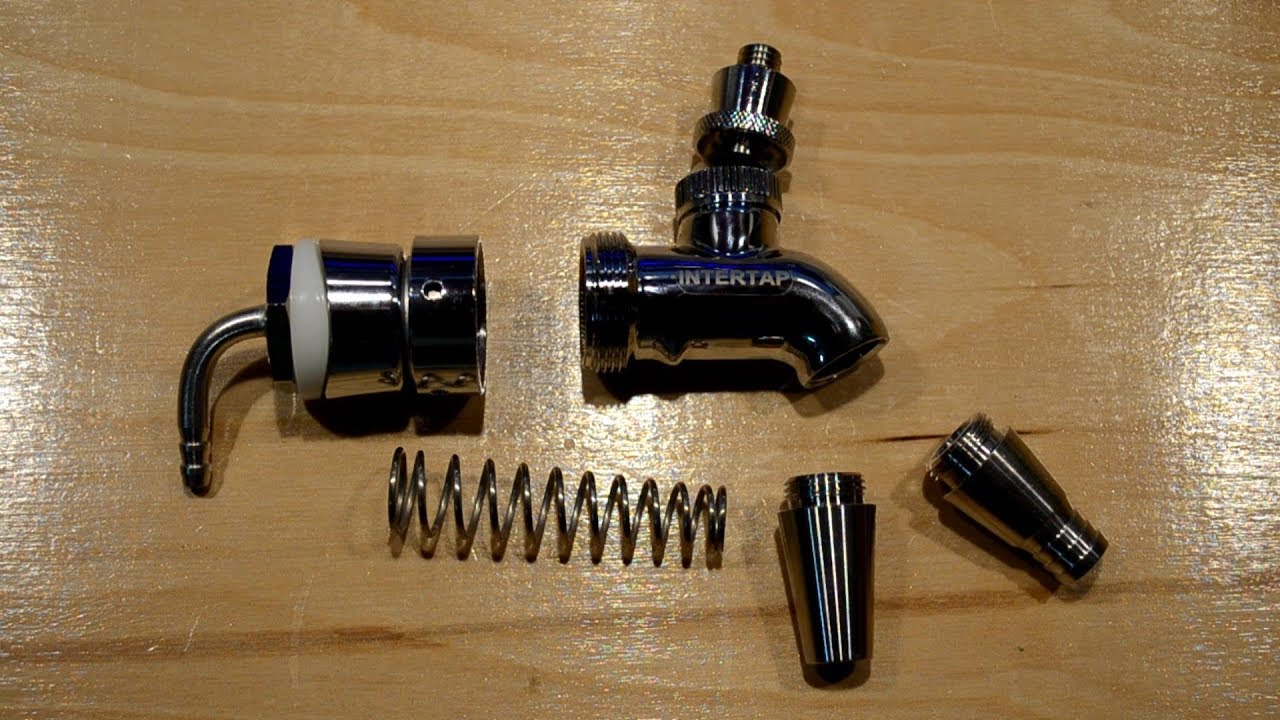
- Clean the faucets: Remove the faucet from the kegerator. Disassemble the faucet and soak its parts in a cleaning solution. Use a faucet brush to clean any residue or clogs that may be present. Rinse all the parts with clean water and reassemble the faucet once they are fully dry.
- Flush the lines: After cleaning the beer lines and faucets, reconnect them to the keg and faucet. Run a cleaning solution or a sanitizing solution through the lines to flush out any remaining debris or bacteria. Follow the instructions provided by the cleaning solution manufacturer for the appropriate dilution and flushing process.
- Rinse with clean water: After flushing with a cleaning solution, rinse the lines thoroughly with clean water to remove any residue or leftover cleaning solution. This step is essential to ensure that no cleaning agents remain in the lines, which could affect the taste or quality of the beer.
- Regular maintenance: To prevent clogs in the future, establish a regular cleaning and maintenance schedule for your kegerator. Clean the lines and faucets every few months or as recommended by the manufacturer. Additionally, make sure to keep the keg storage area clean and free from any debris that could potentially contaminate the lines.
By regularly cleaning and clearing the beer lines and faucets, you can eliminate blockages and ensure a smooth and consistent pour from your kegerator.
Faulty Regulator
A faulty regulator can also contribute to pouring issues with your kegerator. The regulator is responsible for controlling the CO2 pressure going into the keg, ensuring the proper carbonation and flow of the beer. If the regulator is damaged or malfunctioning, it can result in inconsistent pressure and pouring problems.
To troubleshoot a faulty regulator, follow these steps:
- Check for visible damages: Inspect the regulator for any visible damages or signs of wear and tear. Look for cracks, dents, or loose connections. If you notice any issues, it may indicate a faulty regulator that needs to be replaced.
- Test the gauge readings: Use a pressure gauge to test the accuracy of the readings on the regulator. Connect the gauge to the regulator and compare the reading with the desired pressure setting. If the gauge reading is significantly different from the set pressure or fluctuates inconsistently, it indicates a problem with the regulator.
- Seek professional assistance: If you are unsure about diagnosing or repairing the regulator yourself, it is best to seek professional assistance. Contact the manufacturer, a local kegerator technician, or a brewing supply store to discuss the issue and determine the best course of action. They can guide you on whether the regulator can be repaired or if it needs to be replaced entirely.
- Replace the faulty regulator: If the regulator is indeed faulty and cannot be repaired, it is necessary to replace it. Purchase a new regulator that is compatible with your kegerator model and follow the manufacturer’s instructions for installation.
- Perform a pressure test: After installing the new regulator, perform a pressure test to ensure it is working correctly. Adjust the pressure setting to the appropriate level for the beer you are serving and monitor the pouring quality. The new regulator should provide a consistent and controlled flow of CO2 for a perfect pour.
By identifying and addressing any issues with a faulty regulator, you can restore the proper functionality of your kegerator and enjoy a consistent and smooth pouring experience.
Beer Line Length and Diameter
The length and diameter of the beer lines in your kegerator play a significant role in maintaining the appropriate pressure and flow of the beer. If the lines are too short or narrow, it can cause excessive foaming. Conversely, if the lines are too long or wide, it can result in slow pouring or flat beer. Therefore, it’s essential to assess and adjust the beer line length and diameter to achieve optimal pouring conditions.
To troubleshoot beer line length and diameter issues, consider the following:
- Check the recommended specifications: Consult the kegerator’s manual or contact the manufacturer to determine the recommended beer line length and diameter for your specific model. Different kegerators have varying requirements, so it’s important to verify the appropriate specifications.
- Assess the current line length and diameter: Measure the length and diameter of your existing beer lines. Compare these measurements with the recommended specifications. If the lines are significantly longer or wider than recommended, it may lead to pouring issues.
- Adjust the line length: If the beer lines are too long, consider shortening them to the optimal length. Excessively long lines can cause pressure drops and result in slow pouring. Use clean tubing cutters to trim the lines to the desired length. Ensure the cut is clean and straight to maintain a proper seal.
- Evaluate the line diameter: If the beer lines are too narrow or wide, it can impact the pressure and flow of the beer. Adjusting the line diameter may involve replacing the existing lines with new ones of the appropriate size. Consult an expert or a brewing supply store to determine the correct diameter for your specific kegerator model.
- Balance the system: After making adjustments to the beer line length and diameter, it is crucial to balance the CO2 system accordingly. This involves adjusting the CO2 pressure to ensure it matches the resistance of the beer lines. Properly balanced systems will deliver a consistent pour without excessive foaming or slow flow.
By assessing and adjusting the beer line length and diameter to match the recommended specifications for your kegerator, you can ensure a smooth and optimal pouring experience, with the right amount of carbonation and flow.
Check the CO2 tank to ensure it is not empty or leaking. Also, make sure the beer lines are not clogged or frozen. If the issue persists, consider checking the regulator and the keg connections for any leaks.
Troubleshooting Steps for Kegerator Pouring Issues
Experiencing pouring issues with your kegerator can be frustrating, but fear not! By following these troubleshooting steps, you can diagnose and resolve the problem, ensuring that you can enjoy a perfect pour every time.
- Check the temperature settings: Improper temperature settings can impact the carbonation and pouring quality of your beer. Verify that the temperature in the kegerator is set to the recommended range for the type of beer you are serving, and allow time for the kegerator to stabilize at the desired temperature.
- Inspect the CO2 pressure: Incorrect CO2 pressure can lead to inconsistent pouring. Make sure the CO2 tank is not empty or low on pressure. Check the regulator for any damages or wear and adjust the pressure to the recommended level for your beer type.
- Examine the lines and faucets: Clogged lines or faucets can obstruct the flow of beer. Disconnect and clean the beer lines, faucets, and other components to remove any residue or blockages. Flush the lines with a cleaning solution and rinse them thoroughly.
- Test the regulator: A faulty regulator can cause pouring issues. Check for any visible damages and test the accuracy of the pressure readings. If the regulator is faulty, consider replacing it to ensure proper CO2 pressure control.
- Assess the beer line length and diameter: Improper beer line length or diameter can affect the pressure and flow of beer. Measure the lines and compare them to the recommended specifications. Adjust the length or diameter as needed to achieve optimal pouring conditions.
- Perform a pressure test: After making any adjustments or repairs, perform a pressure test to ensure the kegerator is delivering consistent and controlled CO2 flow. Adjust the pressure as necessary to achieve the desired pour.
By systematically going through these troubleshooting steps, you can identify and resolve the specific issue causing pouring problems with your kegerator. Remember, it’s important to take your time and be patient during the troubleshooting process to ensure an accurate diagnosis and effective solution.
Read more: Why Pour Salt Down Sink
Solution 1: Check and Adjust the Temperature Settings
One of the first steps in troubleshooting kegerator pouring issues is to check and adjust the temperature settings. The temperature of your beer plays a crucial role in achieving the perfect pour. If the kegerator is too warm or too cold, it can impact the carbonation and result in foamy or flat beer.
To check and adjust the temperature settings, follow these steps:
- Locate the thermostat: Find the thermostat or temperature control dial of your kegerator. It is usually located inside the unit or accessible from the back.
- Reference the recommended temperature: Check the recommended temperature range for the specific type of beer you are serving. Lager beers typically require temperatures between 36 and 40 degrees Fahrenheit, while ales may need slightly higher temperatures ranging from 40 to 45 degrees Fahrenheit.
- Adjust the temperature: Turn the control dial to adjust the temperature setting. Gradually make adjustments if needed, rather than making drastic changes all at once. This allows the kegerator to adapt to the new temperature gradually.
- Allow for temperature stabilization: After adjusting the temperature, give the kegerator time to stabilize. The temperature inside the unit may take several hours to reach the new setting and stabilize. Avoid opening the kegerator frequently during this period to maintain a consistent temperature.
- Monitor and make further adjustments if necessary: Use a reliable thermometer to monitor the temperature inside the kegerator. Check it periodically to ensure it remains within the recommended range. If you find that the temperature is still not ideal, continue making small adjustments until you achieve the desired pouring conditions.
By checking and adjusting the temperature settings of your kegerator, you can ensure that your beer pours smoothly with the right amount of carbonation. Remember to take your time and allow the kegerator to stabilize after making any changes to the temperature settings.
Solution 2: Verify and Adjust the CO2 Pressure
Another solution to address kegerator pouring issues is to verify and adjust the CO2 pressure. The CO2 pressure is crucial in maintaining the proper carbonation level and ensuring a consistent flow of beer. Incorrect CO2 pressure can result in slow pouring, excessive foaming, or flat beer.
To verify and adjust the CO2 pressure, follow these steps:
- Check the CO2 tank level: Ensure that the CO2 tank is not empty or running low on pressure. Verify that there is sufficient gas available to provide the necessary pressure for pouring.
- Examine the regulator: Inspect the CO2 regulator for any visible damages, leaks, or signs of wear and tear. Make sure that the regulator is properly connected to both the CO2 tank and the keg.
- Test the pressure: Use a pressure gauge to test the accuracy of the CO2 pressure reading. Attach the gauge to the regulator and compare the reading with the recommended pressure setting for the specific type of beer you are serving. Adjust the pressure as needed using the adjustment knob on the regulator.
- Monitor the pouring: After making adjustments to the CO2 pressure, observe the pouring quality. If the beer is still pouring too slowly or excessively foaming, further adjustments may be necessary.
- Balance the CO2 system: To achieve optimal pouring conditions, it’s important to balance the CO2 system. This involves adjusting the pressure to match the resistance of the beer lines. If necessary, consult the kegerator’s manual or seek guidance from a professional to perform this adjustment correctly.
By verifying and adjusting the CO2 pressure, you can ensure a consistent and controlled flow of beer from your kegerator. Remember to regularly monitor and maintain the CO2 tank to prevent running out of gas during important gatherings or events.
Solution 3: Clean and Clear the Lines and Faucets
Solution 3 to resolve pouring issues with your kegerator involves cleaning and clearing the lines and faucets. Over time, beer residue, yeast, and other sediments can accumulate in the beer lines and faucets, obstructing the flow and resulting in slow or uneven pouring.
To clean and clear the lines and faucets, follow these steps:
- Disconnect the beer lines and faucets: Start by disconnecting the beer lines from both the keg and the faucet. This will allow you to work on them more easily.
- Rinse the lines with warm water: Rinse the beer lines with warm water to remove any loose debris or residue. Use a gentle flow of water to flush out any particles that may be inside the lines.
- Clean the lines with a cleaning solution: Use a cleaning solution specifically designed for beer lines to thoroughly clean the inside of the lines. Follow the instructions provided by the cleaning solution manufacturer for the appropriate dilution and cleaning process.
- Clean the faucets: Disassemble the faucets and soak the parts in a cleaning solution. Use a brush or sponge to clean any residue or clogs that may be present. Rinse all the parts thoroughly with clean water and reassemble the faucets once they are fully dry.
- Flush the lines: After cleaning the lines and faucets, connect the lines back to the keg and faucet. Run a cleaning solution or a sanitizing solution through the lines to flush out any remaining debris or bacteria. Follow the instructions provided by the cleaning solution manufacturer for the appropriate flushing process.
- Rinse with clean water: After flushing with the cleaning solution, rinse the lines thoroughly with clean water to remove any residue or leftover cleaning solution. This step is essential to ensure that no cleaning agents remain in the lines, which could affect the taste or quality of the beer.
By regularly cleaning and clearing the lines and faucets of your kegerator, you can prevent any buildup or blockages that can affect the pouring quality. Make sure to establish a schedule for cleaning and maintenance to keep the lines and faucets in optimal condition.
Solution 4: Test and Replace the Faulty Regulator
When dealing with kegerator pouring issues, a faulty regulator can be a potential culprit. The regulator is responsible for controlling the CO2 pressure going into the keg, which affects the carbonation level and flow of beer. If the regulator is damaged or malfunctioning, it can result in inconsistent pressure and pouring problems.
To address this issue, follow these steps to test and potentially replace the faulty regulator:
- Inspect the regulator: Begin by carefully examining the regulator for any visible damages, leaks, or signs of wear and tear. Common issues may include cracked or broken components, loose connections, or worn-out seals.
- Perform a pressure test: Use a pressure gauge to test the accuracy of the regulator’s pressure readings. Connect the gauge to the regulator and compare the reading with the set pressure. If the gauge reading significantly deviates from the set pressure or fluctuates inconsistently, it indicates a problem with the regulator.
- Check for leaks: Test for any leaks in the regulator by applying a soapy water solution to the connections and components. If you notice any bubbling or foaming, it indicates a leak that needs to be addressed.
- Consult a professional: If you are unfamiliar with regulator repairs, it is advisable to seek assistance from a professional. Contact the kegerator manufacturer, a local kegerator technician, or a brewing supply store for guidance on troubleshooting or replacing the regulator.
- Replace the regulator if necessary: If the regulator is indeed faulty and cannot be repaired, it will need to be replaced. Ensure that you purchase a regulator that is compatible with your kegerator model and follow the manufacturer’s instructions for installation.
- Perform a test pour: After installing the new regulator, perform a test pour to ensure that the pressure is properly regulated. Adjust the pressure setting to the recommended level for the type of beer you are serving and monitor the pouring quality. The new regulator should provide a consistent and controlled flow of CO2 for a perfect pour.
By testing and, if necessary, replacing a faulty regulator, you can restore proper functionality to your kegerator and ensure a consistent pouring experience.
Read more: Why Pour Bleach Down Your Sink At Night
Solution 5: Assess and Adjust Beer Line Length and Diameter
When facing pouring issues with your kegerator, it is important to assess and adjust the beer line length and diameter. The length and diameter of the beer lines play a crucial role in maintaining the appropriate pressure and flow of beer. If the lines are not properly sized, it can result in excessive foaming, slow pouring, or flat beer.
To address this issue, follow these steps to assess and adjust the beer line length and diameter:
- Check the recommended specifications: Consult the kegerator manual or contact the manufacturer to determine the recommended beer line length and diameter for your specific model. These specifications are often based on factors such as the type of beer being served and the CO2 pressure being used.
- Measure the current line length and diameter: Use a measuring tape or ruler to measure the length and diameter of your existing beer lines. Compare these measurements to the recommended specifications. If the lines are significantly longer or wider than recommended, it may be contributing to the pouring issues.
- Adjust the line length: If the beer lines are too long, you may need to adjust them to the proper length. Excessively long lines can cause pressure drops, resulting in slow pouring. Use clean tubing cutters to trim the lines to the appropriate length. Make straight, clean cuts to maintain a proper seal when reconnecting them.
- Evaluate the line diameter: The diameter of the beer lines also affects the pressure and flow of the beer. If the lines are too narrow or wide, it can impact the pouring quality. Consider replacing the existing lines with new ones of the recommended diameter. Consult an expert or a brewing supply store to determine the correct diameter for your specific kegerator model.
- Balance the system: After adjusting the beer line length and diameter, it is crucial to balance the CO2 system. This involves adjusting the CO2 pressure to match the resistance of the beer lines. If necessary, consult the kegerator’s manual or seek guidance from a professional to perform this adjustment correctly.
By assessing and adjusting the beer line length and diameter according to the recommended specifications, you can ensure an optimal pouring experience with the right amount of carbonation and a smooth flow of beer from your kegerator.
Conclusion
Pouring issues with your kegerator can be frustrating, but by utilizing the troubleshooting steps and solutions provided in this article, you can effectively diagnose and address the problem. Understanding the kegerator’s components and common issues is key to resolving pouring problems and ensuring a perfect pour every time.
We explored several common reasons for kegerator pouring issues, including improper temperature settings, incorrect CO2 pressure, clogged lines or faucets, faulty regulators, and beer line length and diameter mismatches. Each of these issues requires specific attention and adjustments to ensure optimal pouring conditions.
By checking and adjusting the temperature settings, verifying and adjusting the CO2 pressure, cleaning and clearing the lines and faucets, testing and replacing a faulty regulator, and assessing and adjusting the beer line length and diameter, you can successfully troubleshoot and resolve pouring issues with your kegerator.
Remember, regular maintenance and cleaning are essential to prevent future pouring problems. Establish a routine cleaning schedule for the lines and faucets, monitor the CO2 tank level, and perform proper temperature and pressure checks to maintain the optimal conditions for your kegerator.
With these troubleshooting steps and solutions in your arsenal, you can overcome pouring issues and enjoy a refreshing, perfectly poured beer from your kegerator. Cheers!
Frequently Asked Questions about Why Is My Kegerator Not Pouring
Was this page helpful?
At Storables.com, we guarantee accurate and reliable information. Our content, validated by Expert Board Contributors, is crafted following stringent Editorial Policies. We're committed to providing you with well-researched, expert-backed insights for all your informational needs.


0 thoughts on “Why Is My Kegerator Not Pouring”