Home>Articles>How To Carve A Custom Outdoor Sign With Hand Tools
Articles
How To Carve A Custom Outdoor Sign With Hand Tools
Modified: December 7, 2023
Learn how to create stunning custom outdoor signs using only hand tools with our informative articles. Step-by-step guides and expert tips for carving your own unique designs.
(Many of the links in this article redirect to a specific reviewed product. Your purchase of these products through affiliate links helps to generate commission for Storables.com, at no extra cost. Learn more)
Introduction
Welcome to the world of custom sign carving! If you’re looking to add a personal touch to your outdoor space, creating a custom sign with hand tools is a perfect project to embark on. Not only will it showcase your creativity and craftsmanship, but it will also add a unique and inviting touch to your home or business.
Carving a custom outdoor sign may seem like a daunting task, but with the right guidance and tools, it can be an enjoyable and rewarding experience. In this article, we will guide you through the step-by-step process of carving a custom outdoor sign using hand tools. From choosing the right wood to applying the finishing touches, we’ve got you covered.
So, let’s roll up our sleeves, grab our tools, and unleash our creativity as we embark on this exciting sign carving journey!
Key Takeaways:
- Embrace the art of custom outdoor sign carving by choosing durable wood, gathering essential hand tools, and bringing your design to life with patience and precision. Let your creativity shine as you embark on this rewarding journey!
- Transform rough wood into a polished masterpiece by fine carving intricate details, sanding and smoothing the sign, and applying a protective finish. Install your handcrafted creation with pride, adding a unique and welcoming touch to your outdoor space.
Read more: How To Carve Wood With Hand Tools
Choosing the Right Wood
Choosing the right wood is an essential step in carving a custom outdoor sign. The type of wood you select will not only affect the overall appearance of the sign but also its durability and ability to withstand outdoor elements.
When it comes to outdoor signs, you’ll want to choose a wood that is known for its durability and weather resistance. Cedar, redwood, and teak are popular choices due to their natural resistance to rot and insect damage. These woods also have a beautiful grain pattern that adds character to the sign.
It’s important to consider the size and thickness of the sign when selecting the wood. Thicker boards will provide more stability and longevity, especially if the sign is exposed to harsh weather conditions.
Additionally, take into account the availability and cost of the wood. If you have a specific budget, consider using reclaimed or salvaged wood, which can give your sign a rustic and unique look.
Before making your final decision, it’s a good idea to consult with your local wood supplier or a woodworking expert who can provide guidance based on your specific needs and preferences.
Once you’ve chosen the right wood for your outdoor sign, it’s time to gather the necessary tools to bring your design to life.
Gathering the Necessary Tools
Before you begin carving your custom outdoor sign, it’s essential to gather all the necessary tools. While there are many tools available for sign carving, we’ll focus on the basic hand tools you’ll need to get started:
- Carving Knife: A high-quality carving knife is the backbone of any sign carving project. Look for a knife with a sharp and durable blade.
- Chisels: Chisels come in various sizes and shapes, and are used to remove larger sections of wood and create clean, precise cuts.
- Gouges: Gouges have a curved cutting edge and are ideal for creating curved lines and details in your sign.
- Mallet or Hammer: A mallet or hammer is used to strike the carving tools and create deep cuts or remove larger sections of wood.
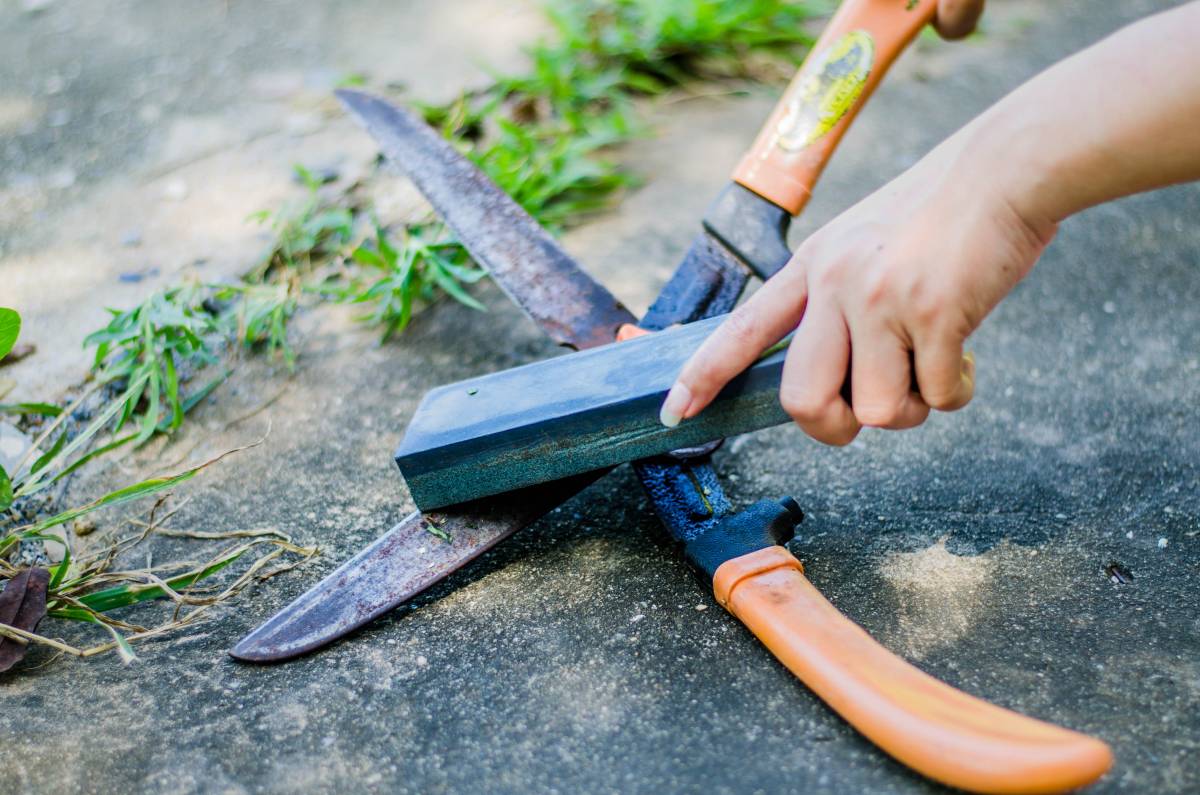
- Sharpening Supplies: Keeping your carving tools sharp is crucial for achieving clean and crisp carvings. Invest in a sharpening stone or honing guide to maintain the sharpness of your tools.
- Sanding Tools: Sandpaper or sanding blocks will be required for smoothing out rough edges and surfaces of the sign.
- Protective Gear: To ensure your safety, wear goggles to protect your eyes from flying wood chips, a dust mask to prevent inhalation of fine particles, and gloves to protect your hands.
While these are the basic tools you’ll need, depending on the complexity of your design, you may also require specialized carving tools such as veiners, V-gouges, or fishtail gouges.
It’s always a good idea to invest in high-quality tools that will not only make the carving process more enjoyable but also ensure accurate and precise results. Research reputable carving tool brands and read reviews to make informed purchasing decisions.
With your tools in hand, it’s time to move on to the next step: sketching out your design.
Sketching the Design
Before you start carving your custom outdoor sign, it’s important to have a clear vision of the design you want to create. Sketching out your design beforehand will help you plan out the layout and ensure that all the elements are proportionate.
Begin by gathering reference materials or inspiration images to guide your design. This could include typography styles, decorative elements, or logos that you want to incorporate into the sign.
Next, select the size and shape of your sign. Consider the available space and where the sign will be installed to determine the appropriate dimensions.
With a pencil and a piece of paper, start sketching out your design. Begin with the main text or focal point of the sign and then add any additional elements or decorations around it. Take your time and experiment with different layouts and arrangements until you’re satisfied with the overall design.
Remember that the design should be suitable for the size and shape of the sign. Avoid overcrowding the space and ensure that the text and images are legible from a distance.
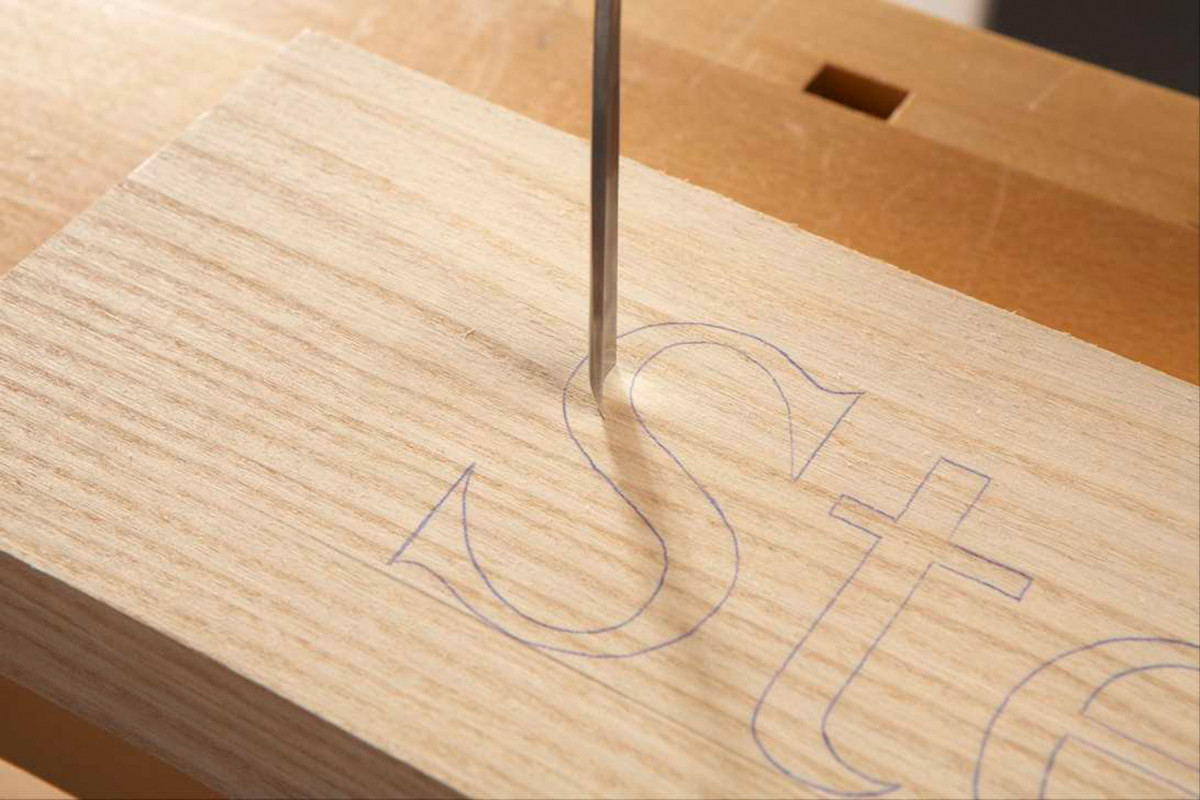
Once you’ve finalized the sketch, you can transfer the design onto the wood using transfer paper or by drawing directly onto the surface. Use a light touch to avoid pressing too hard, as it may leave permanent marks on the wood.
Having a well-defined design sketched out on the wood will serve as a guide when you start carving and will help prevent errors or inconsistencies in your work.
Now that the design is ready, it’s time to move on to the next step and begin carving the base shape of the sign.
Creating the Base Shape
Now that you have your design sketched onto the wood, it’s time to start carving the base shape of your custom outdoor sign. This step involves removing excess wood and establishing the overall shape of the sign.
Begin by securing the wood firmly in place using clamps or a vise to prevent any movement during the carving process. This will ensure stability and safety while you work.
Using a carving knife or a chisel, start by removing the wood around the outer edges of the design. Take your time and make careful, controlled cuts to gradually shape the sign according to your sketch.
Work from the outside towards the center of the design, removing wood in small sections at a time. This will help maintain control and prevent any accidental damage to the design itself.
As you carve, continuously refer back to your sketch to ensure that you are staying true to the desired shape and dimensions. It can be helpful to periodically step back and assess your progress from a distance to get a better sense of the overall shape.
Once you have achieved the basic shape of the sign, it’s time to move on to the next step: rough carving the design.
Remember to take breaks as needed and avoid rushing through this process. Carving the base shape requires patience and precision, so be sure to enjoy the journey!
Read more: How To Carve A Wooden Bowl With Hand Tools
Rough Carving the Design
Now that you have created the base shape of your custom outdoor sign, it’s time to bring your design to life by rough carving the details. This step involves removing larger sections of wood to establish the main features and contours of your design.
Starting with the main elements of your design, such as letters or focal points, use a carving knife or chisels to begin shaping and defining the details. Make controlled and deliberate cuts to remove excess wood, working gradually towards the desired depth and shape.
It’s important to maintain a steady hand and to work with the natural grain of the wood. This will help prevent any splintering or unintended damage to the design.
As you rough carve the design, periodically step back and assess your progress. This will allow you to make adjustments and ensure that the proportions and overall look of the design are accurate.
Remember that rough carving is about establishing the basic shapes and features. It’s not essential to achieve perfection at this stage, as you will refine and add more intricate details later on in the process.
Continue working through the design, focusing on one area at a time, until you have rough carved all the main elements. Take your time and enjoy the process, as this stage of carving can be both challenging and rewarding.
Once you are satisfied with the rough carving, it’s time to move on to the next step: fine carving the details.
Stay tuned, as we’ll explore the art of fine carving and adding intricate details to your custom outdoor sign!
When carving a custom outdoor sign with hand tools, make sure to choose a durable wood such as cedar or redwood to withstand outdoor elements. These woods are naturally resistant to rot and decay, making them ideal for outdoor use.
Fine Carving the Details
Now that you have rough carved the main elements of your custom outdoor sign, it’s time to focus on the finer details. Fine carving is where the true artistry and intricacy of the design come to life.
Start by using smaller carving tools such as gouges, veiners, or V-gouges to refine the edges, add texture, and create the smaller details of your design. Take your time and work with precision, making careful and controlled cuts to enhance the overall appearance.
Pay attention to the depth of each cut and make sure the transitions between different elements are smooth and seamless. This will give your design a polished and professional look.
As you fine carve the details, refer back to your sketch and any reference materials you may have to ensure accuracy and consistency. This will help you maintain the intended proportions and overall aesthetic of the sign.
Work patiently and methodically, moving from one section to another until you have carved all the desired details. Take breaks as needed to rest your hands and to assess your progress from different angles to ensure that the design looks cohesive from all perspectives.
Remember that fine carving is a delicate process that requires skill and attention to detail. Don’t rush through this step and allow yourself to fully immerse in the artistry of the carving.
Once you are satisfied with the level of detail on your sign, it’s time to move on to the next step: sanding and smoothing.
Stay tuned as we explore techniques for achieving a smooth and polished finish on your custom outdoor sign!
Sanding and Smoothing the Sign
After fine carving the details of your custom outdoor sign, it’s time to shift your focus towards achieving a smooth and polished finish. Sanding and smoothing the sign will not only enhance its overall appearance, but it will also ensure a comfortable and professional-looking result.
Start by gathering a variety of sandpaper grits, ranging from coarse to fine. Begin with a coarser grit sandpaper, such as 80 or 100, and gradually work your way up to finer grits like 220 or 320.
Using a sanding block or your hand, sand the entire surface of the sign in gentle circular motions. Pay extra attention to the areas where you have carved, ensuring that all rough edges and surfaces are smoothed out.
As you progress through the sandpaper grits, you’ll notice that the wood becomes smoother and any imperfections or tool marks gradually disappear. Be patient and take your time with each grit to achieve the desired level of smoothness.
Make sure to remove any dust or debris from the sign after sanding with each grit. This will prevent particles from getting stuck in the wood and affecting the overall finish.
Once you’ve finished sanding with the finer grits, you can further enhance the smoothness by using fine abrasive pads or steel wool. These will help give the sign a satin-like finish and ensure that there are no rough or uneven areas left.
After sanding and smoothing the sign, wipe it down with a clean cloth to remove any leftover dust. Take a moment to admire your handiwork and appreciate the transformation from rough wood to a polished piece of art.
Now that the sign is smooth and ready for the final touches, it’s time to move on to the next step: applying a protective finish.
Join us as we explore different finishing options that will not only protect your sign but also enhance its natural beauty!
Applying a Protective Finish
After sanding and smoothing your custom outdoor sign, it’s important to apply a protective finish to ensure its longevity and durability against the elements. A protective finish will not only enhance the natural beauty of the wood but also provide a barrier against moisture, UV rays, and other potential damage.
There are various types of finishes available, each with its own unique characteristics and application methods. Here are a few popular options to consider:
- Clear Varnish or Polyurethane: These finishes provide a clear, glossy coating that enhances the natural grain of the wood. They are easy to apply and offer excellent protection against moisture and UV rays.
- Exterior Paint: If you prefer a bold and vibrant look for your sign, consider using an exterior paint. Choose a paint specifically formulated for outdoor use to ensure durability and resistance to fading.
- Wood Stain: If you want to preserve the natural color of the wood while still providing protection, a wood stain is a great option. Stains come in a variety of shades and can enhance the beauty of the wood grain.
- Outdoor Oil: For a more natural and subtle finish, outdoor oils such as teak oil or linseed oil can be applied. These oils penetrate the wood, provide a protective layer, and bring out the rich tones of the wood.
Before applying any finish, ensure that the sign is clean and free of dust. Follow the manufacturer’s instructions for the specific finish you have selected, as application methods may vary.
Using a brush or a clean cloth, apply the finish evenly onto the sign, following the direction of the wood grain. Allow the first coat to dry completely and then assess if additional coats are needed for desired coverage and protection.
Once the finish has fully dried, inspect the sign for any irregularities or missed spots. Touch up as necessary and allow the final coat to cure according to the manufacturer’s instructions.
With the protective finish applied, your custom outdoor sign is now ready to withstand the elements and maintain its beauty for years to come.
Coming up next, we’ll explore the final step: installing your custom outdoor sign and showcasing your artistic creation!
Read also: 14 Amazing Wood Carving Hand Tools for 2025
Installing the Sign
Now that you have completed the carving and finishing process for your custom outdoor sign, it’s time to install it in its designated location. Proper installation will ensure that your sign is secure, visible, and adds a charming touch to your outdoor space.
Before installing the sign, consider the following factors:
- Location: Choose a prominent location where the sign will be easily visible to visitors. Take into account factors such as height, lighting, and the surrounding landscape.
- Mounting Method: Depending on the size and weight of your sign, you may need different mounting methods. Options include attaching the sign to a post, fence, wall, or hanging it from chains or brackets.
- Hardware: Select the appropriate hardware for installation, such as screws, nails, brackets, or hooks. Ensure that the hardware is suitable for outdoor use to prevent rusting or deterioration.
Once you have determined the ideal location and mounting method, follow these steps for installation:
- Prepare the Surface: If you’re attaching the sign to a wall or post, ensure that the surface is clean and free of debris. Use a level to make sure the surface is straight and align the sign accordingly.
- Mark the Mounting Points: Use a pencil or marker to mark the spots where you’ll attach the hardware or make holes for screws. Double-check the alignment and measurements before proceeding.
- Attach the Hardware: Depending on the mounting method, carefully attach the hardware to the sign or the surface. Use the appropriate tools and ensure that the hardware is securely fastened.
- Hang or Secure the Sign: Lift and hang the sign onto the mounted hardware or align it with the holes you’ve made. If necessary, use a level to adjust the sign to ensure it is straight and aligned correctly.
- Secure the Sign: Once the sign is in the desired position, use the appropriate tools to securely fasten it to the mounting hardware. Check that the sign is firmly in place and won’t wobble or shake.
Finally, step back and admire your completed custom outdoor sign. Take a moment to appreciate the craftsmanship and creativity that went into creating this personalized addition to your outdoor space.
Congratulations! You have successfully carved, finished, and installed your custom outdoor sign. It’s now ready to welcome guests, customers, or anyone who passes by with its charm and uniqueness.
Remember to periodically clean and maintain your sign to preserve its appearance and ensure its longevity. With proper care, your custom outdoor sign will continue to be a beautiful focal point for years to come.
Thank you for joining us on this sign carving journey. We hope you enjoyed the process and take pride in showcasing your artistic creation!
Conclusion
Carving a custom outdoor sign with hand tools is not only a creative endeavor but also a fulfilling and rewarding experience. From choosing the right wood to installing the finished sign, every step of the process allows you to express your creativity and showcase your craftsmanship.
By selecting the right wood, gathering the necessary tools, and sketching out your design, you set the foundation for a successful project. Carving the base shape and then rough carving the details bring your design to life, while fine carving the intricate details adds depth and artistry to the sign.
Through sanding and smoothing, the sign transforms from a rough piece of wood into a polished work of art. Applying a protective finish ensures that your sign can withstand the outdoor elements and maintain its beauty for years to come.
Finally, the installation process allows you to proudly display your custom outdoor sign in the perfect spot, creating a unique and welcoming touch to your outdoor space.
Remember, carving a custom outdoor sign requires patience, precision, and passion. Take your time, enjoy the journey, and embrace the imperfections that make your sign truly one-of-a-kind.
We hope this article has provided you with valuable insights and guidance in carving your own custom outdoor sign. Whether you’re adding a personal touch to your home or showcasing your business, your handcrafted sign will surely make a lasting impression.
Now, go ahead and unleash your creativity, gather your tools, and embark on the exciting journey of carving your very own custom outdoor sign. Enjoy the process, and may your sign bring joy and beauty to all who pass by.
Frequently Asked Questions about How To Carve A Custom Outdoor Sign With Hand Tools
Was this page helpful?
At Storables.com, we guarantee accurate and reliable information. Our content, validated by Expert Board Contributors, is crafted following stringent Editorial Policies. We're committed to providing you with well-researched, expert-backed insights for all your informational needs.


0 thoughts on “How To Carve A Custom Outdoor Sign With Hand Tools”