Articles
How To Carve Wood With Hand Tools
Modified: August 28, 2024
Learn the art of wood carving with hand tools through our collection of informative articles. Discover techniques and tips for creating beautiful wood sculptures.
(Many of the links in this article redirect to a specific reviewed product. Your purchase of these products through affiliate links helps to generate commission for Storables.com, at no extra cost. Learn more)
Introduction
Wood carving is a timeless craft that allows you to bring out the beauty and artistry hidden within a block of wood. It is a creative and satisfying hobby that offers a sense of accomplishment and creates stunning decorative pieces and functional objects. While power tools can certainly speed up the carving process, there is a distinct joy and connection to the craft that comes with using hand tools.
In this article, we will guide you through the process of carving wood with hand tools. From choosing the right tools to adding intricate details, we will cover the essential techniques and safety precautions necessary to create beautiful and unique wooden creations.
Whether you are a beginner or have some experience with woodworking, carving with hand tools can be a fulfilling and rewarding endeavor. It allows you to work at your own pace, feel the textures of the wood, and develop a deeper understanding of the material.
So, let’s dive in and explore the world of hand tool wood carving together!
Key Takeaways:
- Embrace the timeless art of wood carving with hand tools, from selecting the right tools and wood to mastering carving techniques. Enjoy the journey of creativity and self-expression while prioritizing safety and tool maintenance.
- Transform simple blocks of wood into stunning works of art by honing your carving skills, adding intricate details, and finishing with care. Let your creativity flourish while respecting the tradition and craftsmanship of wood carving.
Read also: 14 Amazing Wood Carving Hand Tools for 2025
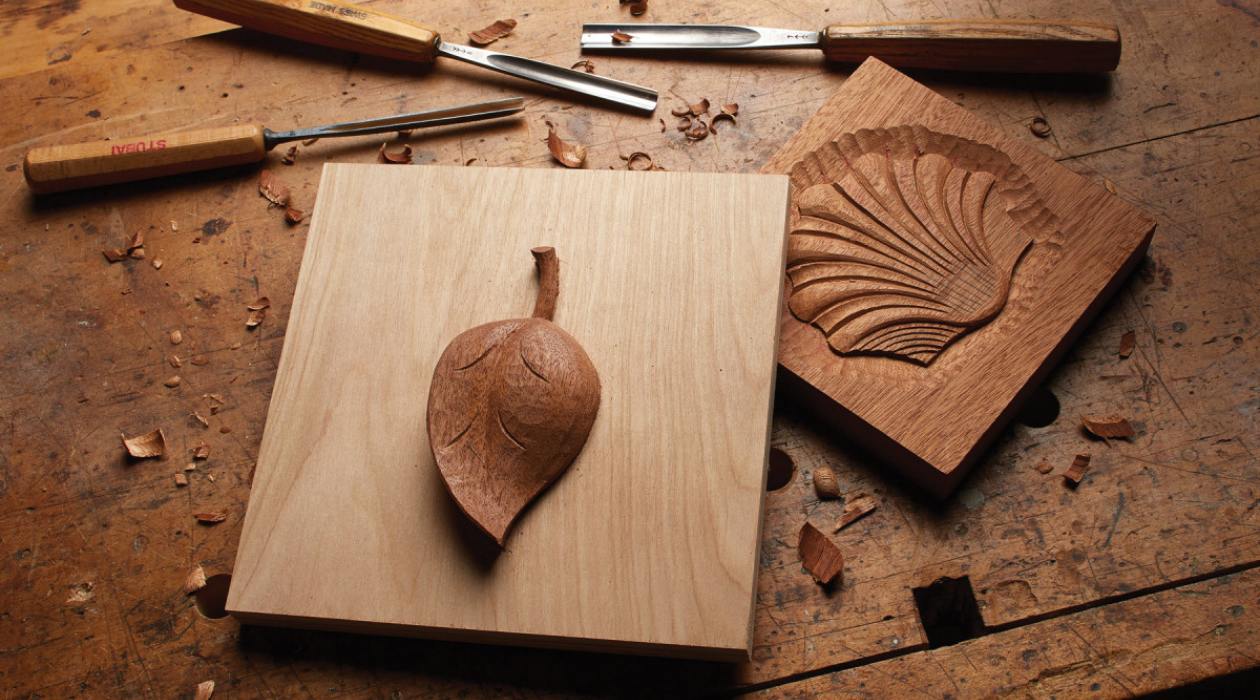
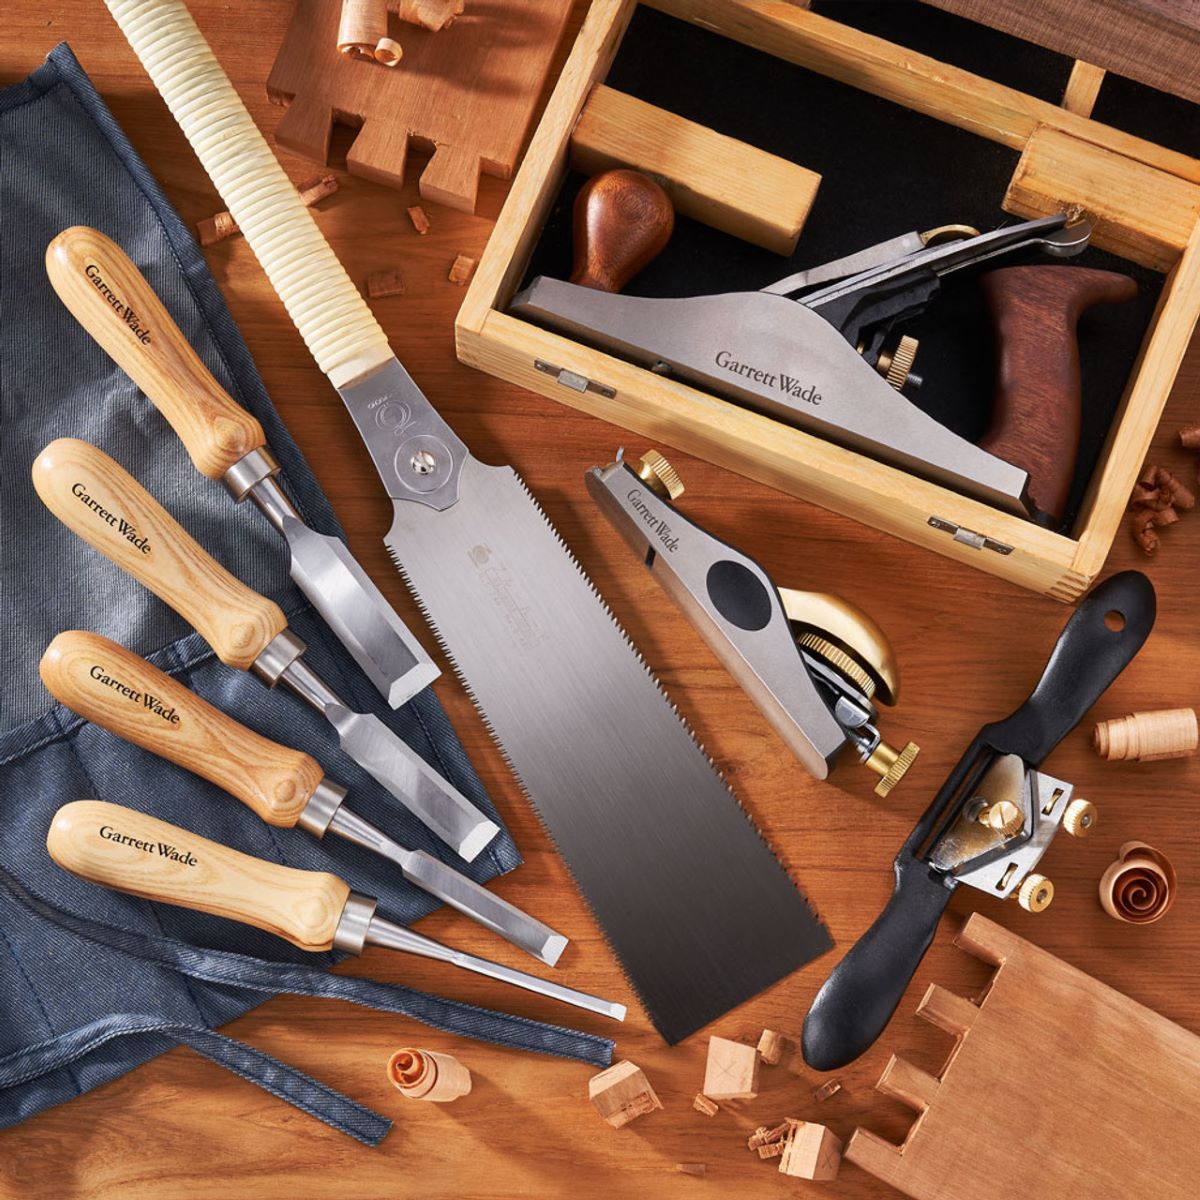
Choosing the Right Tools
When it comes to wood carving, having the right tools can make all the difference in the final outcome of your project. Each tool serves a specific purpose and understanding their characteristics will help you select the best ones for your carving needs.
Here are some essential hand tools you’ll need for wood carving:
- Carving Knives: Carving knives are versatile tools that come in various shapes and sizes. They have sharp, narrow blades and are perfect for making precise cuts and intricate details.
- Gouges: Gouges have U-shaped or V-shaped blades and are used for scooping out wood to create rounded or concave shapes. They come in different sweeps and sizes, allowing you to achieve different depths and curves in your carvings.
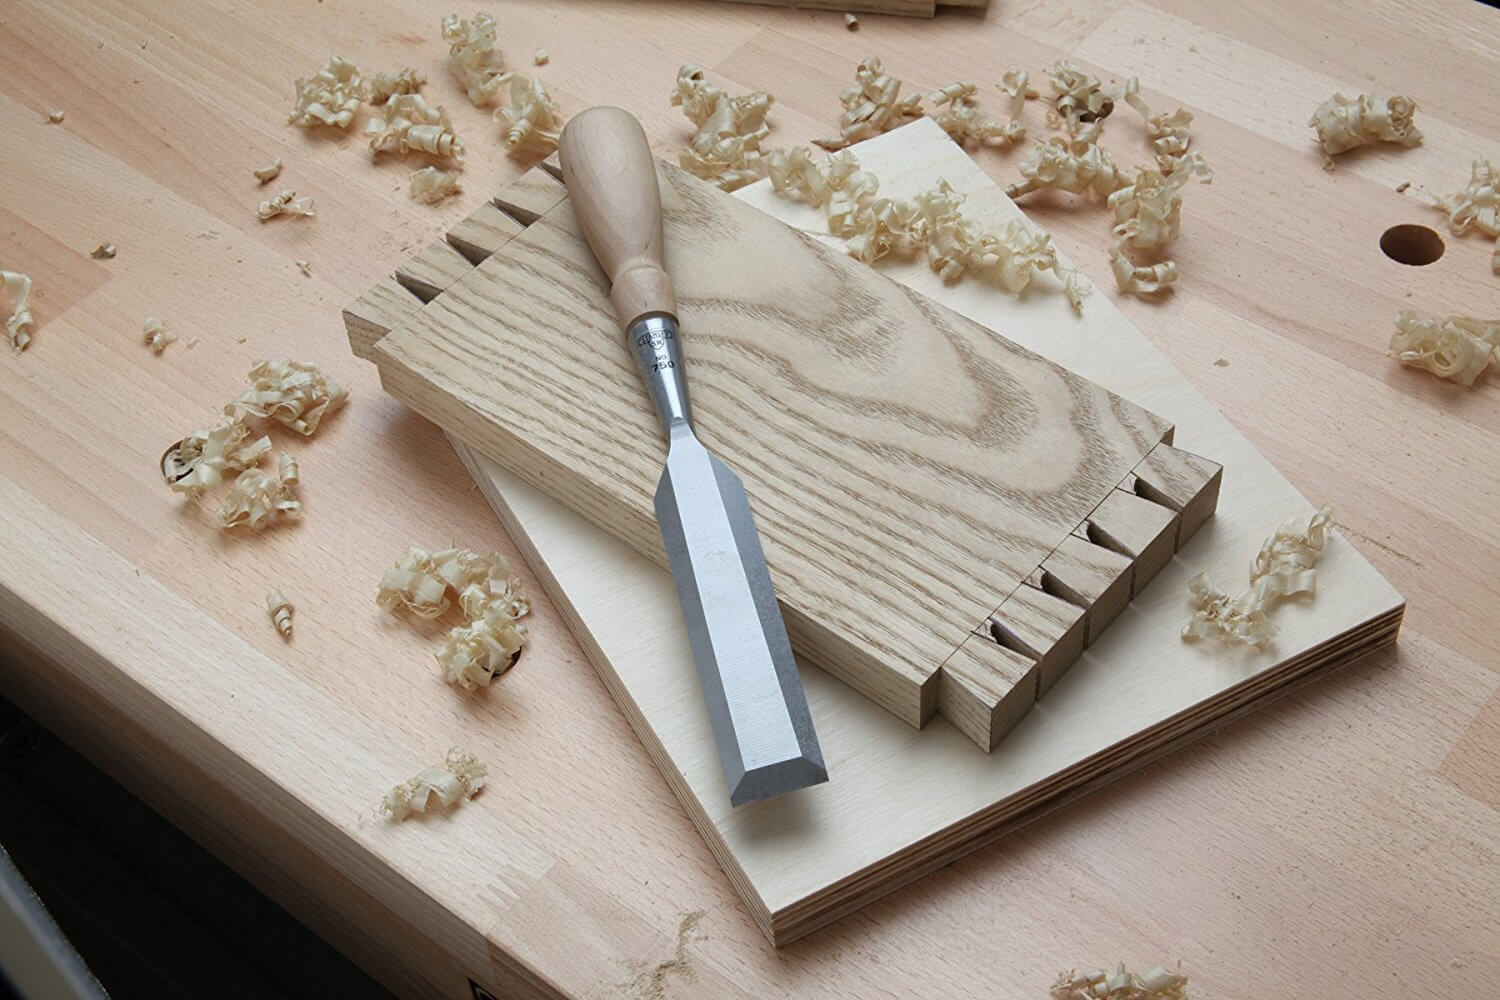
- Chisels: Chisels have flat, beveled blades and are ideal for making straight cuts, smoothing surfaces, and creating clean edges. They come in different widths to accommodate various carving needs.
- V-Tools: V-tools have a V-shaped blade and are commonly used for carving decorative lines, fine details, and creating textures.
When selecting your tools, ensure that they are made from high-quality materials, such as carbon steel or high-speed steel, to ensure durability and sharpness. It’s also important to consider the size and weight of the tools, as they should feel comfortable and balanced in your hand.
Investing in a good set of beginner’s carving tools or building your own collection gradually can give you the necessary variety to tackle different carving projects.
In addition to the basic tools mentioned above, there are other tools that can expand your carving capabilities, such as mallets for extra force, riffler files for refining shapes, and coping saws for removing larger sections of wood. As you gain experience and explore more complex carving projects, you can gradually add these specialized tools to your collection.
Remember, choosing the right tools is crucial for achieving clean and precise cuts, and it’s always better to start with a few high-quality tools rather than a large number of low-quality ones.
Selecting Wood for Carving
Choosing the right type of wood is essential for a successful carving project. Different woods possess varying hardness, texture, and grain patterns, each offering unique characteristics that can greatly impact the carving process and final result.
Here are some popular wood choices for carving:
- Basswood: Basswood is a softwood that is widely favored by wood carvers. It is easy to work with due to its soft texture and fine grain, making it ideal for beginners. Basswood is known for its ability to hold intricate details and provide a smooth carving experience.
- Butternut: Butternut, also known as white walnut, is a hardwood that is slightly softer than other hardwoods. It has a light brown color and a straight grain, making it easy to carve and yielding beautiful results.
- Maple: Maple is a hardwood that is known for its strength and durability. It has a fine and even texture, and its pale color allows for intricate detailing. Maple can be more challenging to carve due to its density, but it is well-suited for creating lasting and intricate pieces.
- Cherry: Cherry is a hardwood that has a rich reddish-brown color and a smooth grain. It carves well and can showcase intricate details. Cherrywood develops a beautiful patina over time, giving your carvings a unique and aged look.
When selecting wood for carving, choose pieces that are free from knots, cracks, and defects. It’s important to inspect the wood carefully to ensure it is suitable for your desired project. Additionally, consider the size and thickness of the wood, as it should be large enough to accommodate your design while being manageable for carving.
Keep in mind that certain woods, such as exotic hardwoods or reclaimed lumber, may require additional precautions or specialized tools due to their hardness or unique characteristics. Research and understand the specific properties of the wood you are using to ensure a successful carving experience.
Experimenting with different types of wood can inspire creativity and help you discover new possibilities. Each wood species has its own distinct beauty and carving characteristics, so don’t be afraid to explore and find your favorite carving wood.
Basic Safety Precautions
Wood carving is a rewarding and enjoyable activity, but it’s important to prioritize safety to prevent accidents and injuries. Here are some basic safety precautions to follow when carving with hand tools:
- Protective Gear: Always wear appropriate safety gear, including safety glasses or goggles to protect your eyes from flying wood chips or debris. It’s also a good idea to wear a dust mask or respirator to prevent inhaling fine dust particles.
- Sharp Tools: Ensure that your carving tools are sharp and properly maintained. Dull tools can slip and cause accidents. Regularly sharpen your tools and keep them in good condition to ensure clean and safe cuts.
- Secure Workpiece: Secure your workpiece firmly in place before carving. Use clamps or a vise to hold the wood securely, preventing it from moving or slipping during the carving process.
- Carving Technique: Practice proper carving techniques to minimize the risk of injuries. Always carve away from your body and keep your fingers and hands behind the cutting edge of the tool. Take your time and focus on each cut to maintain control and precision.
- Cutting Away from Yourself: Be cautious when making cuts, ensuring that the cutting edge is facing away from you. In case the tool slips or jumps, you will be out of harm’s way.
- Controlled Force: Apply controlled and consistent force when carving to prevent slips and ensure stability. Avoid excessive force or sudden movements that may lead to accidents.
- Proper Grip: Hold your carving tools with a firm grip using three fingers and your thumb. Avoid overextending your fingers or gripping the tool too tightly, as it can cause strain or loss of control.
- Work in a Well-lit Area: Carve in a well-lit area to clearly see the details of your workpiece and the cutting edge of your tools. Good lighting helps you maintain accuracy and reduces the risk of accidental slips.
- Workbench Organization: Keep your workbench organized and free from clutter to minimize distractions and potential accidents. Maintain a cleared workspace to safely maneuver your tools and workpiece.
- Take Breaks: Carving can be a meticulous and time-consuming process. Take regular breaks to rest your hands and avoid fatigue, which can lead to reduced control and increased risk of accidents.
Remember, safety should always be the top priority when carving wood. Taking these precautions will help you enjoy your carving journey while ensuring a safe and accident-free experience.
Basic Carving Techniques
Mastering the basic carving techniques is essential for creating beautiful and intricate wood carvings. These techniques will help you shape, smooth, and add detail to your workpiece. Here are some fundamental carving techniques to get you started:
- Chip Carving: Chip carving involves making small, controlled cuts to remove chips of wood and create intricate patterns or designs. It is commonly used for decorative elements and geometric patterns.
- Relief Carving: Relief carving is the technique of carving a design or figure on a flat surface, creating a three-dimensional effect. It involves carving away the background to leave the raised design intact.
- Whittling: Whittling is the art of carving shapes and figures using only a knife. It typically involves the process of removing larger sections of wood to create basic shapes and then refining them with smaller cuts.
- Incised Carving: Incised carving involves cutting lines into the wood with a v-tool or gouge to create texture, depth, and detailing. It is commonly used to add texture and definition to carved figures or designs.
- Scorching: Scorching is a technique that creates a burnt effect on the wood’s surface using a heated tool. It can add depth and contrast to your carving, enhancing its overall aesthetic.
- Stop Cuts: Stop cuts are shallow cuts made along the outlines of a design to define and separate different areas. These cuts help prevent the wood from splintering or breaking when carving intricate details.
- Shallow Cuts: Begin with shallow cuts and gradually deepen them as you gain control and confidence. This technique allows you to make precise cuts without the risk of removing too much wood at once.
- Curved Cuts: When making curved cuts, use the curve of the blade to guide the direction and flow of the cut. Practice controlling the depth and angle of the cut to achieve smooth and fluid curves.
These basic carving techniques are the foundation for more complex and advanced carving styles. As you gain experience and confidence, you can explore additional techniques and develop your own unique carving style.
Remember, practice is key to honing your carving skills. Take your time, be patient, and enjoy the process of bringing your creative vision to life through the art of wood carving.
Read more: How To Carve A Wooden Bowl With Hand Tools
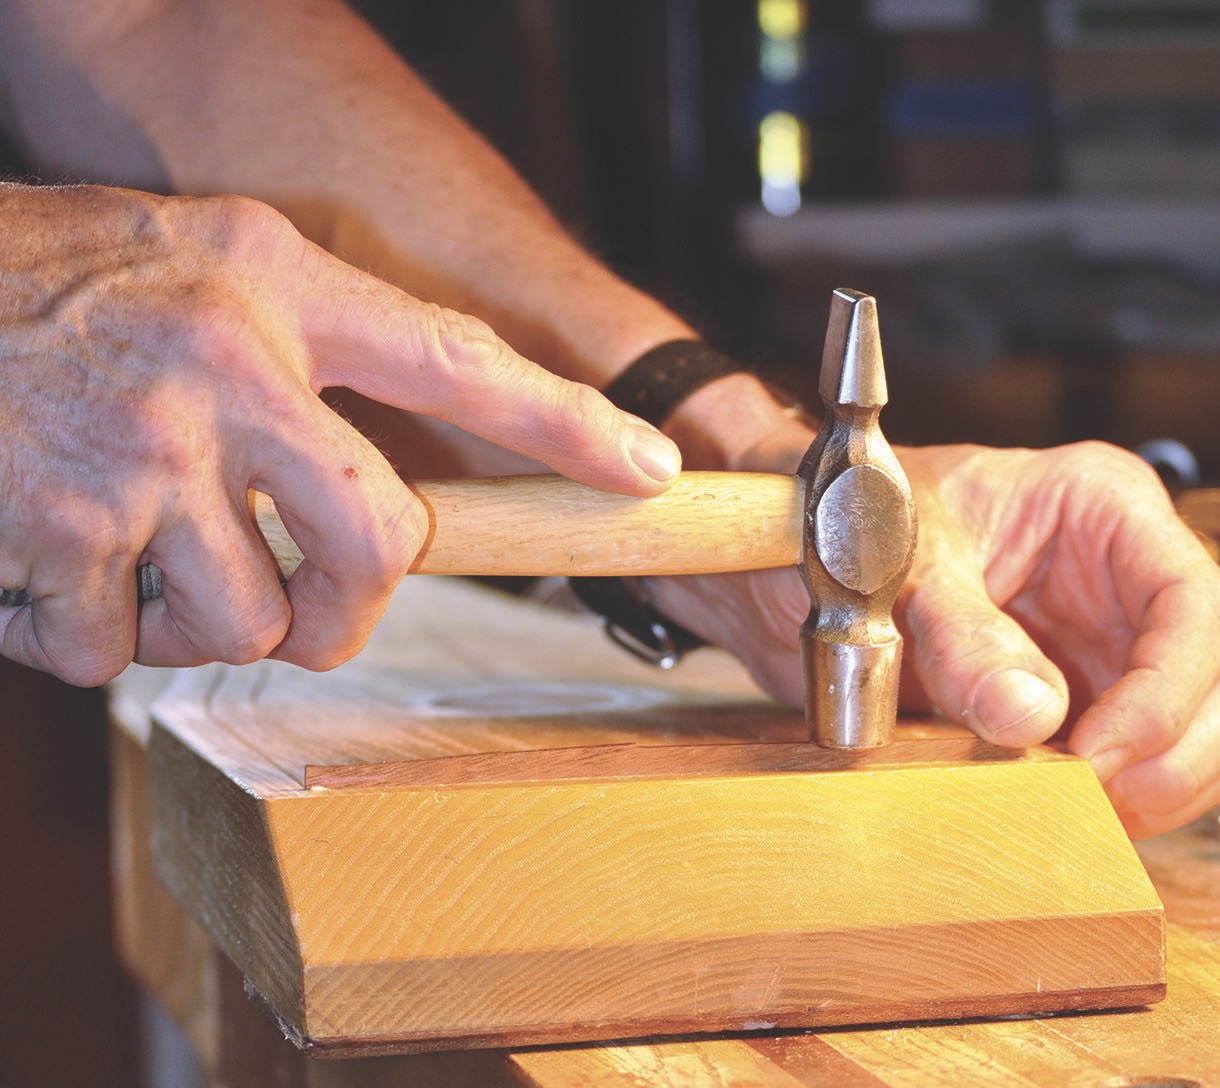
Holding and Gripping the Tools
The way you hold and grip your carving tools plays a significant role in achieving control, precision, and safety while carving. Proper technique ensures that you have the necessary control over the tool, reducing the risk of slips and accidents. Here are some tips for holding and gripping your carving tools:
- Firm Grip: Hold the carving tool with a firm grip, using your thumb and the first three fingers. This grip provides stability and control over the tool while allowing for flexibility and comfortable movement.
- Avoid Gripping Too Tight: While it’s important to have a firm grip, avoid gripping the tool too tightly. Over-gripping can lead to muscle strain, fatigue, and loss of control. Find a balance between a comfortable grip and maintaining control over the tool.
- Hand Positioning: Position your hand behind the cutting edge of the tool. This allows you to apply the necessary force and control the direction of the cut while ensuring your fingers are safe from accidental slips.
- Thumb Placement: Rest your thumb gently on top of the tool’s handle. Your thumb acts as a guide and helps control the tool’s movement.
- Body Positioning: Stand or sit in a comfortable position that allows for proper posture and range of motion. Maintain a stable body position to have better control over the carving tool.
- Tool Angle: Hold the tool at the appropriate angle based on the desired cut. Different carving techniques and tool shapes require varying angles for optimal performance. Experiment with different angles to find what works best for each specific cut.
- Hand Support: When carving larger pieces or making long cuts, support your carving hand with your non-dominant hand. This provides more stability and control, especially when applying force or working on intricate details.
- Safety Awareness: Always be aware of the cutting edge and the direction of the tool. Keep your fingers away from the path of the tool to avoid accidental cuts or injuries.
- Practice and Conditioning: Developing good grip and control over carving tools takes time and practice. Regular practice enhances muscle memory and strengthens your hand muscles, allowing for more precise control and movements.
Remember to take breaks and rest your hands if you start feeling fatigued. Holding tools for extended periods can strain your muscles and affect your control. Stretching exercises before and after carving sessions can help alleviate tension and prevent muscle cramps.
By mastering the proper grip and hand positioning, you’ll be equipped with the control and stability needed to tackle various carving techniques and achieve the best possible results in your wood carving projects.
When carving wood with hand tools, always work with the grain to prevent splintering and ensure a smoother finish.
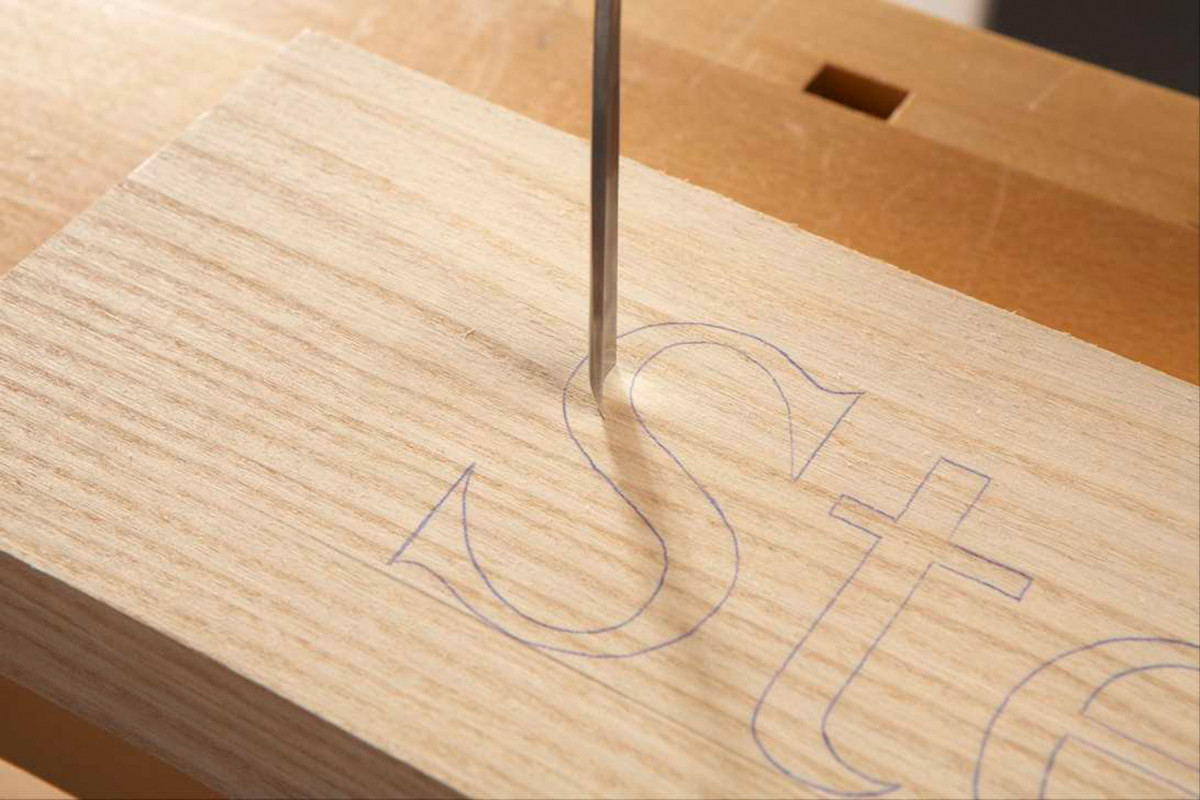
Making Rough Cuts
When starting a wood carving project, it’s essential to begin with rough cuts to shape the basic form of your design. Rough cuts involve removing larger portions of wood to create the initial shape and contours of your carving. Here are some tips for making rough cuts:
- Mark Your Design: Before making any cuts, mark the outline of your design on the wood using a pencil or a carving knife. This serves as a guide and helps you stay on track as you remove excess wood.
- Use the Right Tool: Select a carving tool that is appropriate for the type of cut you want to make. For removing larger sections of wood, consider using a gouge or a chisel with a wider blade. The tool should match the size and shape of the area you’re working on.
- Work in Stages: Carve in stages, removing wood gradually. Start with broader, sweeping cuts to remove bulk material and establish the overall shape of your carving. Refine the shape as you progress, making smaller, more precise cuts.
- Go with the Grain: Pay attention to the grain of the wood when making rough cuts. Working with the grain reduces the risk of splintering or tearing the wood fibers. Follow the natural direction of the grain as you remove material.
- Work from the Outside In: Begin by carving the outer edges and contours of your design, and then work your way inward. This approach allows you to maintain control and proportions as you refine the shape.
- Check Proportions: Regularly step back and assess the proportions of your carving to ensure it aligns with your desired design. Adjust the cuts accordingly to achieve the desired shape and balance.
- Remove Excess Material: Remove excess wood efficiently by making long, controlled cuts. Apply consistent pressure and let the tool do the work, avoiding excessive force that may cause rough or jagged cuts.
- Refine the Surface: While rough cuts focus on shaping the overall form, pay attention to the surface texture. Aim for a relatively smooth surface to make the next stage of carving and detailing easier.
- Take Frequent Breaks: Carving can be a physically demanding task, especially during rough cuts. Take short breaks to rest your hands and evaluate your progress. This will help you maintain focus and prevent fatigue.
Remember, rough cuts are the foundation of your carving. Take your time and work carefully to achieve the desired shape and proportions. Once you’re satisfied with the rough form, you can move on to the next stage of refining and detailing your wood carving.
Smoothing and Shaping the Wood
After making the rough cuts and establishing the basic shape of your wood carving, it’s time to move on to smoothing and shaping the wood. This stage focuses on refining the contours, removing tool marks, and achieving a smooth surface. Here are some techniques to help you smooth and shape the wood:
- Change to Finer Tools: Switch to smaller and finer carving tools to refine the details and contours of your carving. Use gouges, carving knives, and chisels with narrower blades to work on intricate areas.
- Work Against the Grain: When smoothing the wood, it’s best to work against the grain. This helps to eliminate any tear-out or roughness caused by the previous cuts.
- Light and Even Pressure: Apply light and even pressure when making cuts during the smoothing process. This allows you to control the depth of cut and prevents accidental slips that can damage your carving.
- Refine the Surfaces: Pay attention to the surface texture of your carving. Gradually remove any tool marks, uneven surfaces, or rough areas using small, controlled cuts. Smooth out the contours and transitions between different sections of the carving.
- Use Sandpaper or Files: To achieve an even smoother surface, you can employ sandpaper or files. Start with a coarser grit and gradually move to finer grits to remove any remaining tool marks and achieve a polished finish.
- Frequently Assess Proportions: Step back periodically and assess the proportions of your carving. Ensure that the overall shape and balance align with your design. Adjust any areas that need refinement to achieve symmetry and a pleasing aesthetic.
- Pay Attention to Details: Smooth and shape specific areas that require attention, such as facial features, grooves, or intricate patterns. Take your time and work diligently to bring out the desired details and intricacies of your carving.
- Test by Touch: Use your sense of touch to assess the smoothness of the wood. Run your fingers along the surface to feel for any rough spots or inconsistencies. Make necessary adjustments until the entire carving feels smooth and cohesive.
- Remove Dust: Regularly remove dust and wood particles from your work area and carving surface. This allows you to have a clear view of your progress and prevents debris from getting in the way during the smoothing process.
- Take Breaks and Rest: Similar to other stages of carving, take breaks to rest your hands and assess your work. This will help maintain focus, prevent fatigue, and ensure precision and quality in your smoothing and shaping efforts.
Smoothing and shaping the wood requires patience and attention to detail. Take your time during this stage to refine the contours, achieve a smooth finish, and bring out the full potential of your wood carving masterpiece.
Adding Details and Fine Carving
Adding details and fine carving is the stage where your wood carving comes to life. This is where you can showcase your creativity and create intricate, eye-catching elements. Here are some techniques to help you add details and perform fine carving:
- Plan Your Details: Before diving into fine carving, plan and sketch out the details you want to incorporate into your wood carving. This will help you visualize the final result and make more informed decisions during the carving process.
- Refer to References: If you’re carving a specific subject, such as an animal or a human figure, refer to references or photographs to ensure accuracy and capture the essence of the subject.
- Work in Layers: Build up the details gradually, working from larger elements to smaller ones. This allows you to maintain control and ensure that each detail complements the overall composition of the carving.
- Use Smaller Tools: Switch to smaller carving tools, such as gouges, V-tools, and micro carving knives, to add intricate details. These tools allow for precise cuts and delicate carving in tighter areas.
- Controlled Cuts: Make controlled, shallow cuts to add details. Test the depth and angle of each cut before committing to it fully. Patience is key during this stage to achieve the desired level of detail.
- Incised Carving: Utilize incised carving techniques to create texture, depth, and patterns. Use V-tools or gouges to make controlled cuts along the surface of the wood, creating intricate lines or surface designs.
- Texture and Accentuate Surfaces: Add texture to certain areas of your carving by creating small divots, lines, or stippling. This technique can highlight specific features or mimic the texture of the subject you’re carving.
- Gradual Depth: When creating depth in your carving, work in gradual layers. Start with shallow cuts and gradually deepen them, assessing the effect as you go. This allows for more control and prevents any irreversible mistakes.
- Eye and Facial Features: Pay special attention to the eyes and facial features if you’re carving a human or animal figure. These details are crucial for capturing expression and bringing life to your carving.
- Test and Step Back: Regularly step back and observe your carving from a distance to assess the overall effect of the added details. This will help you make necessary adjustments and achieve balance and harmony in your design.
- Reflect Your Style: Feel free to incorporate your own artistic style and flair into the fine carving stage. This is where you can add personal touches and showcase your unique artistic voice.
Adding details and performing fine carving requires a steady hand, attention to detail, and a willingness to invest time and effort. Embrace the process, enjoy the journey, and bring your wood carving to life with intricate and captivating details.
Read also: 10 Best Wood Carving Power Tools for 2025
Finishing and Sanding
Finishing and sanding your wood carving is the final step in the process, where you bring out the natural beauty of the wood and enhance the overall appearance of your masterpiece. This stage involves refining the surface, smoothing any imperfections, and applying a protective finish. Here are some key steps to follow when finishing and sanding your wood carving:
- Clean the Carving: Before applying any finish, ensure that your wood carving is free from dust, debris, and any residual carving residue. Use a brush or compressed air to remove loose particles from the surface.
- Sanding: Start sanding your carving using sandpaper with a coarse grit. Work your way up to finer grits, progressively smoothing the surface and removing any roughness or tool marks. Sand in the direction of the wood grain for the best results.
- Smooth Transitions: Pay attention to the transitions between different areas of your carving. Blend the contours together by smoothing the edges and ensuring a seamless flow from one section to another.
- Remove Sanding Dust: Regularly clean the sanding dust from your carving using a soft bristle brush or a compressed air canister. This will help you assess the surface and prevent dust particles from settling into the finish.
- Choose a Finish: Select an appropriate finish for your wood carving, taking into consideration the type of wood, desired appearance, and level of protection. Common finishes include oils, waxes, varnishes, or lacquers. Test the finish on a small, inconspicuous area of your carving to ensure compatibility and the desired effect.
- Apply the Finish: Apply the selected finish using a brush, cloth, or sponge, following the manufacturer’s instructions. Work in even strokes, applying a thin and even coat on the entire surface of your carving. Allow the finish to dry completely between coats.
- Multiple Finishing Coats: Depending on the desired effect and level of protection, applying multiple coats of finish may be necessary. Sand lightly between each coat to ensure proper adhesion and a smooth surface.
- Buff and Polish: After the final coat of finish has dried, gently buff the surface with a soft cloth or a polishing pad to achieve a smooth and lustrous finish. This will enhance the shine and bring out the natural beauty of the wood.
- Inspect and Make Final Touches: Step back and carefully inspect your finished wood carving. Evaluate the overall appearance and look for any imperfections or areas that require additional attention. Make any necessary final touches to ensure a polished and flawless result.
Finishing and sanding provide the final touch to your wood carving, protecting and enhancing its beauty for years to come. Take your time during this stage, as attention to detail and meticulousness will yield a professional-looking and long-lasting finish.
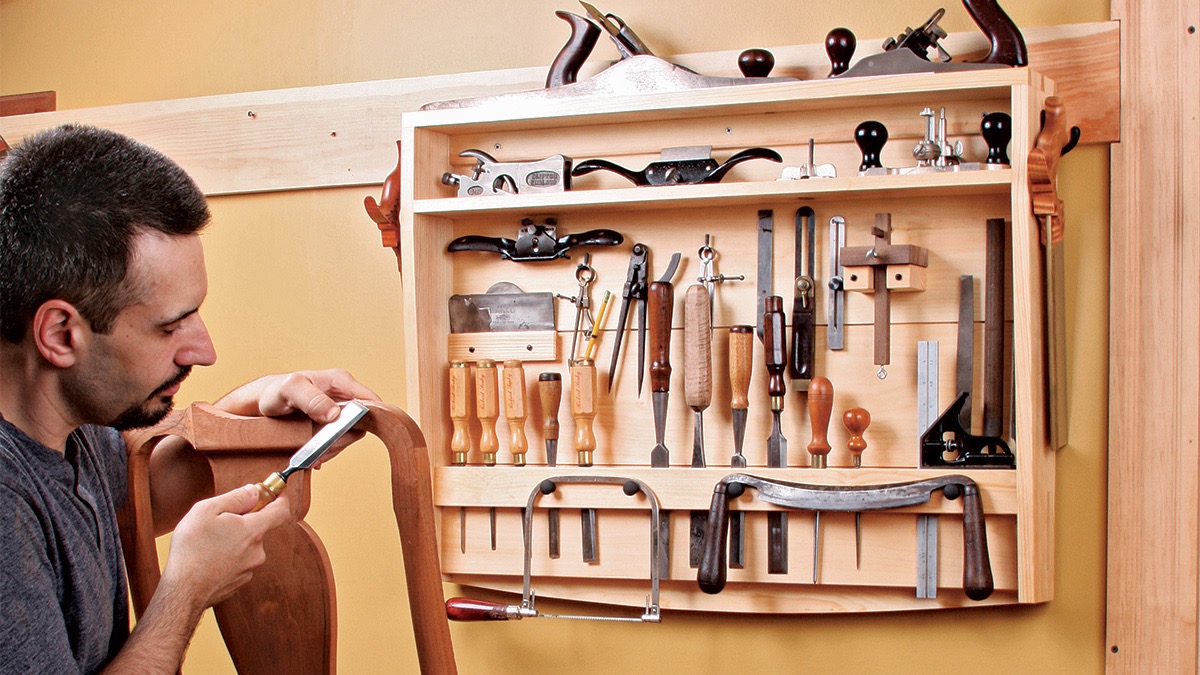
Cleaning and Maintaining Your Tools
Properly cleaning and maintaining your carving tools is crucial for their longevity and optimal performance. Regular maintenance not only ensures that your tools remain sharp and efficient but also prevents rust and other forms of damage. Here are some essential tips for cleaning and maintaining your carving tools:
- Remove Residue Immediately: After each carving session, remove any wood residue, sap, or debris from your tools. Use a soft cloth or brush to wipe away the particles, paying close attention to the blades and handles.
- Wipe with a Clean Cloth: Before storing your tools, wipe them with a clean, dry cloth to remove any moisture. This prevents rust and corrosion, especially if the tools come into contact with water during use.
- Clean with Solvent: For tougher residue, such as dried sap or adhesive, you can use a solvent specifically designed for cleaning woodworking tools. Follow the manufacturer’s instructions and ensure proper ventilation when using solvents.
- Sharpen and Hone Regularly: Keep your carving tools sharp by regularly sharpening and honing them. Invest in a good quality sharpening stone or a honing guide to maintain the blade’s cutting edge. Follow proper techniques and angles to ensure consistent sharpness.
- Protect the Cutting Edge: When not in use, protect the cutting edge of your carving tools by using blade guards or blade covers. This prevents accidental nicks and dings and ensures the longevity of the sharp edge.
- Apply a Protective Coating: To further protect your tools, you can apply a thin layer of oil or wax on the blades and handles. This creates a barrier against moisture and reduces the chances of rust formation.
- Organize and Store Properly: Store your carving tools in a dry and clean environment. Consider using a dedicated toolbox, tool roll, or a wall-mounted rack to keep your tools organized and protected from moisture, dust, and accidental damage.
- Avoid Excessive Force: While carving, avoid applying excessive force or using your tools for tasks they are not intended for. This can damage the blades and compromise their performance.
- Inspect for Damage: Regularly inspect your carving tools for any signs of damage, such as chips, cracks, or loose handles. Address any issues promptly by repairing or replacing the affected tools to prevent further damage or injuries.
- Keep Learning: Stay updated on best practices for tool maintenance and care. Explore different resources, such as books or online tutorials, to learn new techniques and strategies for maintaining your carving tools.
By implementing these cleaning and maintenance practices, you will prolong the life of your carving tools and ensure that they remain in top condition. Remember, proper care and attention to your tools will contribute to enjoyable and successful carving experiences for years to come.
Conclusion
Wood carving is a captivating craft that allows you to tap into your creativity and transform a simple piece of wood into a stunning work of art. By following the techniques and tips outlined in this article, you can embark on your wood carving journey with confidence and skill.
Choosing the right tools, selecting the appropriate wood, and understanding basic safety precautions are essential foundations for successful carving. By holding and gripping your tools correctly, making rough cuts, smoothing and shaping the wood, adding intricate details, and finishing and sanding, you can bring out the true beauty of your carving.
Remember to take your time, practice patience, and embrace the learning process. Wood carving is a skill that improves with time and experience. Don’t be discouraged by mistakes or imperfections – they serve as lessons to refine your techniques and push your creative boundaries.
Additionally, maintaining your tools through regular cleaning, sharpening, and proper storage ensures their longevity and reliable performance. By caring for your tools, you’ll be able to enjoy many years of carving and create countless beautiful pieces.
Wood carving is not only a form of self-expression but also a way to connect with nature and appreciate the beauty of wood. Whether you carve functional objects or intricate sculptures, each piece reflects your unique style and passion for this ancient craft.
So, dive into the world of wood carving, let your imagination take flight, and discover the joy and fulfillment that comes from creating something beautiful with your own hands.
Frequently Asked Questions about How To Carve Wood With Hand Tools
Was this page helpful?
At Storables.com, we guarantee accurate and reliable information. Our content, validated by Expert Board Contributors, is crafted following stringent Editorial Policies. We're committed to providing you with well-researched, expert-backed insights for all your informational needs.


0 thoughts on “How To Carve Wood With Hand Tools”