Articles
How To Install Driveway Pavers
Modified: August 22, 2024
Learn the step-by-step process of installing a stunning pavers driveway with our comprehensive articles. Enhance your curb appeal and increase the value of your home.
(Many of the links in this article redirect to a specific reviewed product. Your purchase of these products through affiliate links helps to generate commission for Storables.com, at no extra cost. Learn more)
Introduction
Welcome to our comprehensive guide on how to install a paver driveway! If you’re looking to enhance the curb appeal of your property and create a durable and attractive driveway, using pavers is a fantastic option. Pavers not only provide a visually appealing surface but also offer versatility and easy maintenance. By following the steps outlined in this guide, you’ll be able to install a paver driveway that will withstand the test of time.
Installing a paver driveway may seem like a daunting task, but with a little planning and preparation, it can be a rewarding DIY project. In this article, we’ll take you through the step-by-step process of installing a paver driveway, from planning and preparation to the finishing touches.
Before we dive into the details, it’s important to understand that the key to a successful paver driveway installation lies in proper planning. Taking the time to measure the area, choose the right pavers, and prepare a solid base will ensure a durable and long-lasting driveway.
Additionally, keep in mind that safety should always be a top priority when working on any home improvement project. Make sure you have the necessary tools and protective gear, and don’t hesitate to seek professional assistance if needed.
Now, let’s get started on transforming your driveway with beautiful and functional pavers!
Key Takeaways:
- Proper planning and preparation are essential for a successful paver driveway installation. Choosing the right pavers, measuring accurately, and creating a solid base will ensure a durable and visually appealing driveway.
- Attention to detail is crucial when setting the pavers, cutting and fitting around curves and obstacles, and adding finishing touches. This will result in a professional, polished, and long-lasting paver driveway.
Read more: How To Clean A Paver Driveway
Step 1: Planning and Preparation
Before you start installing your paver driveway, it’s crucial to spend some time on planning and preparation. This will help ensure that you have all the necessary materials and a clear understanding of the project scope.
The first task in this step is choosing the right pavers for your driveway. Pavers come in various materials, such as concrete, brick, and natural stone. Consider factors such as the style of your home, the climate in your area, and your budget when making your selection. It’s also important to choose pavers that are suitable for driveway applications, as they need to withstand vehicle traffic.
Once you have chosen your pavers, the next step is to measure and mark the area where you’ll be installing them. Use a measuring tape to determine the length and width of your driveway. Remember to take into account any curves or angles that may affect the layout of the pavers.
After measuring, mark the boundaries of the driveway with stakes and string or spray paint. This will provide a clear visual guide during the installation process. It’s also a good idea to consider any additional features you may want to include, such as walkways or parking pads, and mark those areas as well.
Now that you have your measurements and markings, it’s time to prepare the base for your paver driveway. Excavation is often necessary to create a stable foundation. Before you start digging, make sure to check with your local utility companies to ensure there are no underground utility lines in the excavation area.
Start by removing any vegetation or debris from the area. Then, use a shovel or a mini-excavator to dig to the desired depth. The depth will depend on factors such as the type of soil, the expected load on the driveway, and local building codes. Generally, a depth of 8-12 inches is recommended for a paver driveway.
During excavation, it’s important to create a gentle slope to ensure proper drainage. Ideally, the grade of the driveway should slope away from your home or any structures to prevent water from pooling. This will help prevent water damage and ensure the longevity of your driveway.
Once the excavation is complete, use a level and a compactor to ensure the base is even and compacted. This will provide a solid foundation for your pavers and prevent shifting or settling over time. It’s essential to take your time with this step, as a properly prepared base is crucial for a successful paver driveway installation.
In the next step, we’ll take a closer look at adding the base material to further enhance the stability and longevity of your paver driveway.
Step 2: Excavation and Grading
Now that you have completed the planning and preparation phase, it’s time to move on to the excavation and grading step. This step involves clearing the area, digging the necessary depth for your paver driveway, and ensuring proper drainage.
The first task in this step is to clear the area where your paver driveway will be installed. Remove any vegetation, rocks, or debris from the surface. This will provide a clean and level area for the installation process.
Next, you will need to determine the depth at which the pavers will be installed. This depth will depend on the type of pavers you have chosen and the base material you will be using. As a general guideline, the pavers should be installed at a depth of around 2 inches. However, it’s recommended to check the manufacturer’s guidelines for the specific pavers you have chosen.
Using a measuring tape and a level, mark the desired depth on the stakes or string lines you set up in the previous step. This will serve as a guide during the excavation process.
The next task is to dig the necessary depth for your paver driveway. You can use a shovel, a mini-excavator, or a rented mechanical excavator, depending on the size of the project. Start by removing the top layer of soil from the marked area. Take care to dig evenly and maintain the desired depth throughout the excavation process.
While excavating, it’s important to keep proper drainage in mind. Your paver driveway should have a slight slope to allow for water runoff. This will prevent water from pooling and ensure that your driveway remains functional and durable in all weather conditions.
Ensure that the driveway slopes away from any nearby structures, such as your house or garage. This will help direct water away from the building and prevent flooding or water damage.
Once the excavation is complete, use a level to check the slope of the driveway. Make any necessary adjustments by adding or removing soil. It’s crucial to take your time with this step to ensure that the slope is correct for proper drainage.
In the next step, we will move on to adding the base material, which will provide a stable foundation for your paver driveway.
Step 3: Adding the Base Material
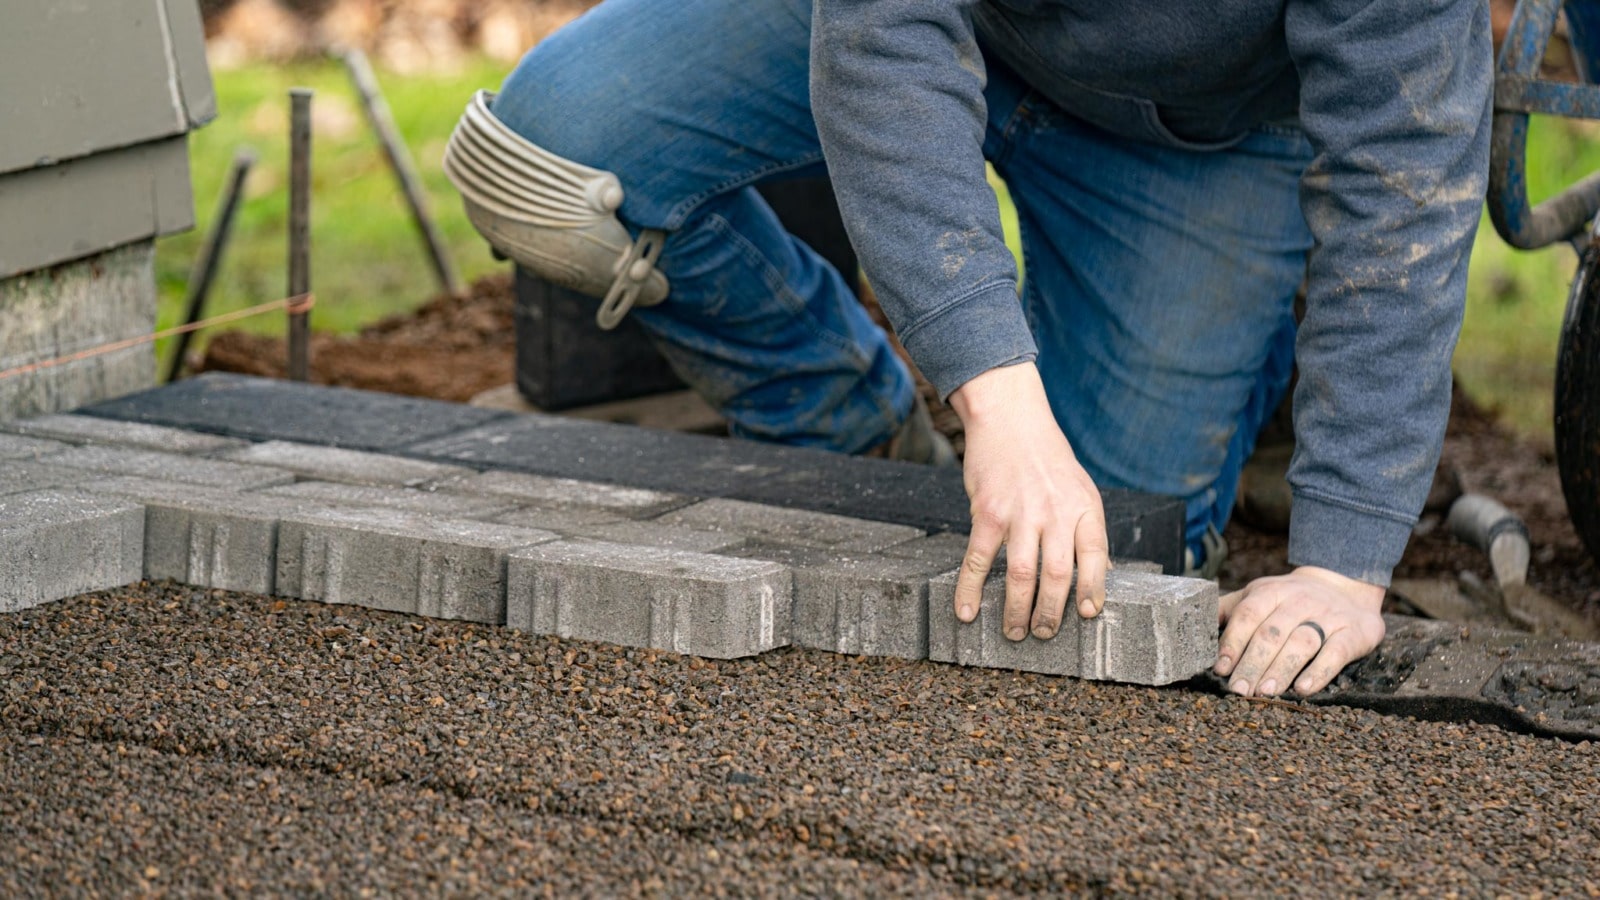
With the excavation and grading complete, it’s time to move on to the next step: adding the base material for your paver driveway. This step involves installing edge restraints, adding a layer of gravel, and properly tamping and leveling the base.
The first task is to install edge restraints along the perimeter of your driveway. Edge restraints are essential to prevent the pavers from shifting or spreading out over time. You can use plastic or metal edging, concrete curbing, or even treated lumber as edge restraints. Place the edge restraints tightly against the outer edges of the driveway and secure them firmly to the ground.
Next, it’s time to add a layer of gravel to provide a stable base for your paver driveway. This layer acts as a foundation and helps with proper drainage. The type of gravel you use will depend on the specific requirements of your project, but crushed stone or decomposed granite are commonly used options. Spread the gravel evenly over the excavated area, aiming for a thickness of about 4-6 inches.
Once the gravel is in place, use a rake or shovel to spread it evenly across the entire area. Make sure the layer is level and compact it with a plate compactor or hand tamper. The compaction process helps to create a solid and stable base that will prevent settling and shifting of the pavers.
After compacting the gravel, use a level to ensure that the entire surface is even. Pay special attention to the slope, ensuring that it is still present and sloping away from any structures. Make any necessary adjustments by adding or removing gravel to achieve the desired levelness and slope.
It’s important to note that proper compaction and leveling of the base material are crucial for the success of your paver driveway. Taking the time to do this step correctly will help prevent future problems such as uneven settling, drainage issues, or paver misalignment.
With the edge restraints installed and the base material in place, your driveway is now ready for the next step: setting the pavers. In the following section, we will dive into the process of choosing the right pattern and laying the pavers.
Before installing pavers for your driveway, make sure to properly prepare the base by excavating and compacting the soil, adding a layer of gravel, and then sand before laying the pavers. This will ensure a stable and long-lasting driveway.
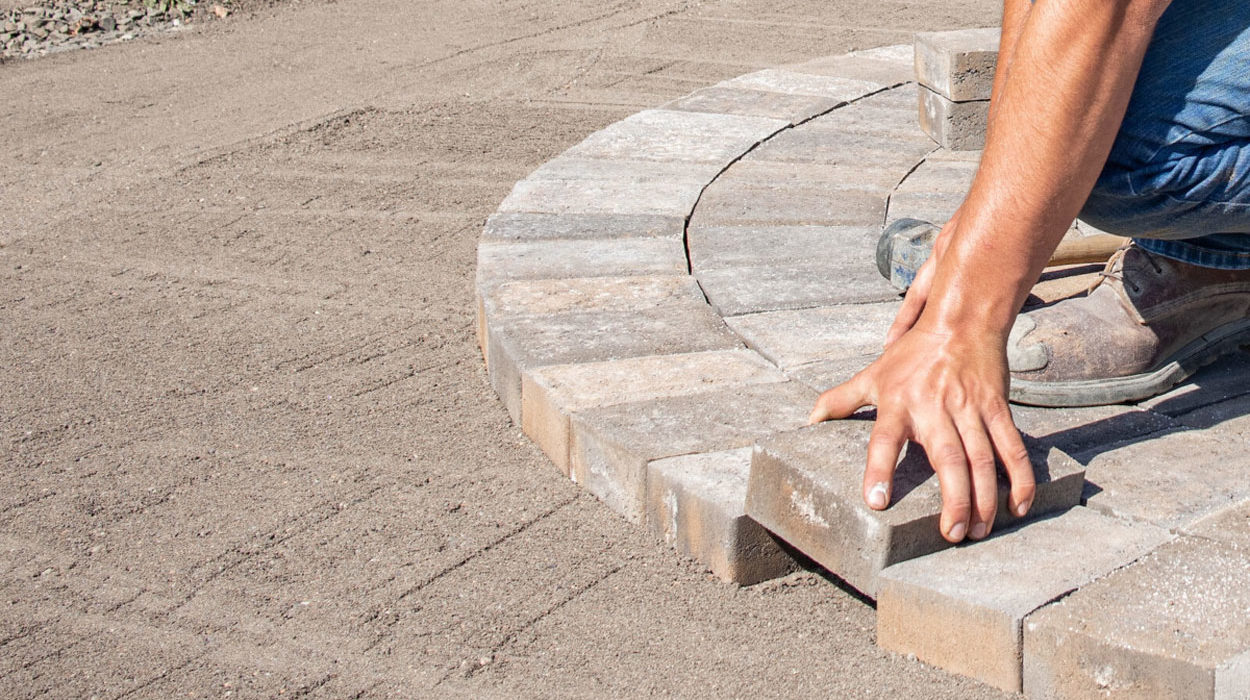
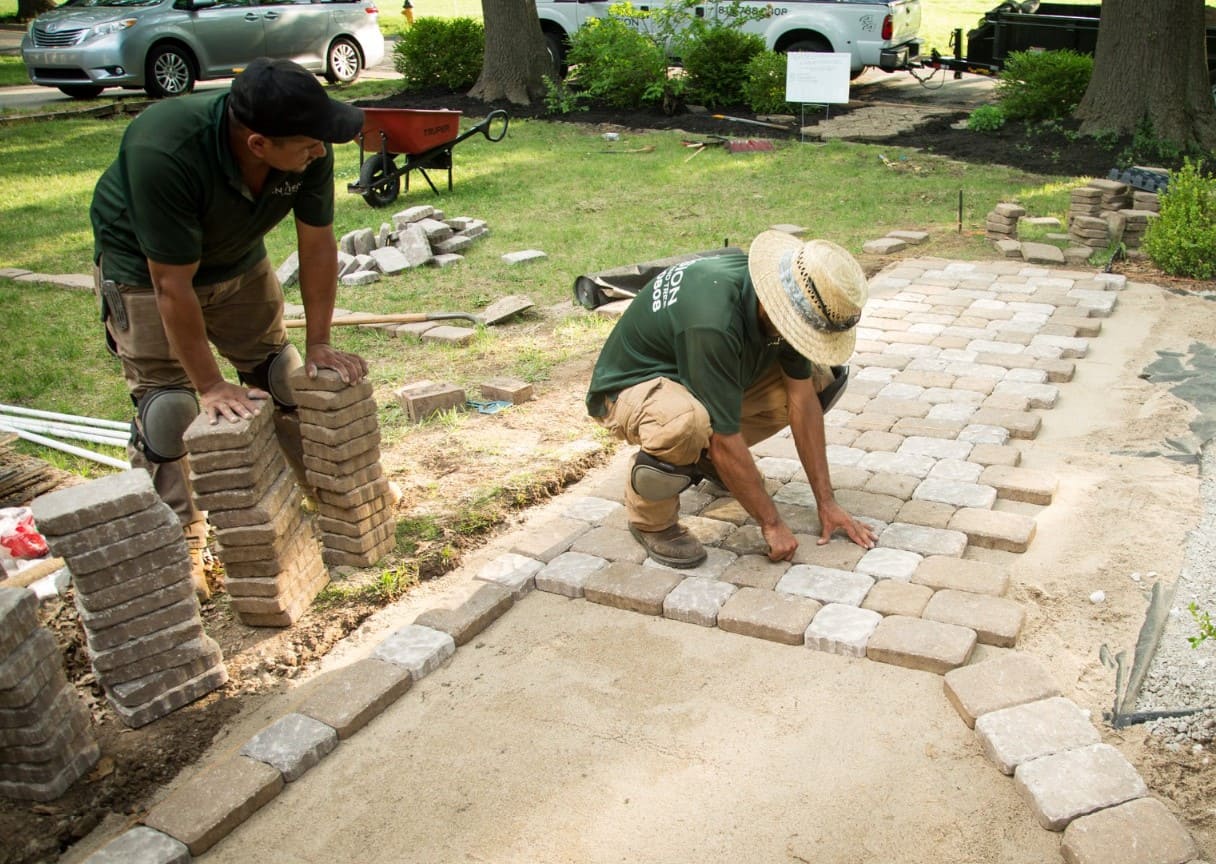
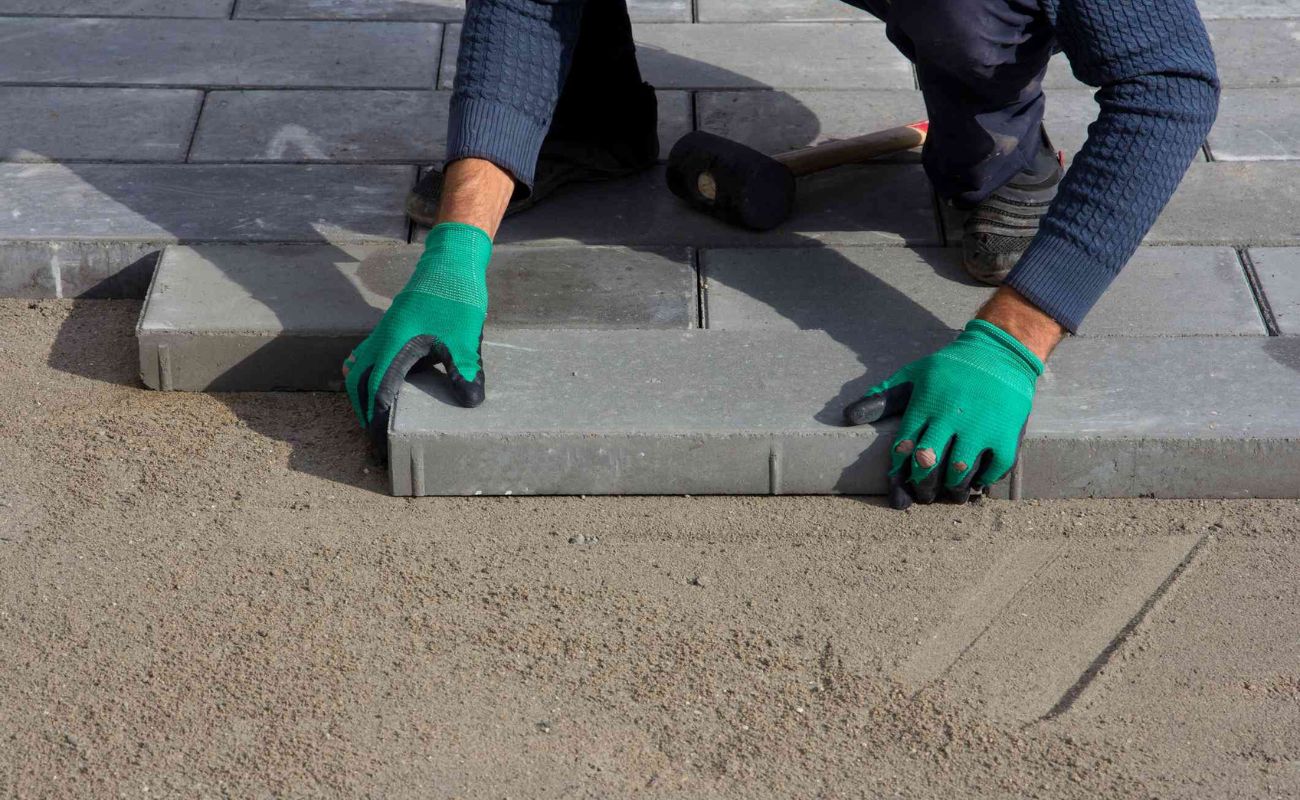
Step 4: Setting the Pavers
Now that you have completed the preparation of the base material, it’s time to move on to the exciting part of installing your paver driveway: setting the pavers themselves. This step involves determining the pattern, starting from a fixed point, and laying the pavers in place.
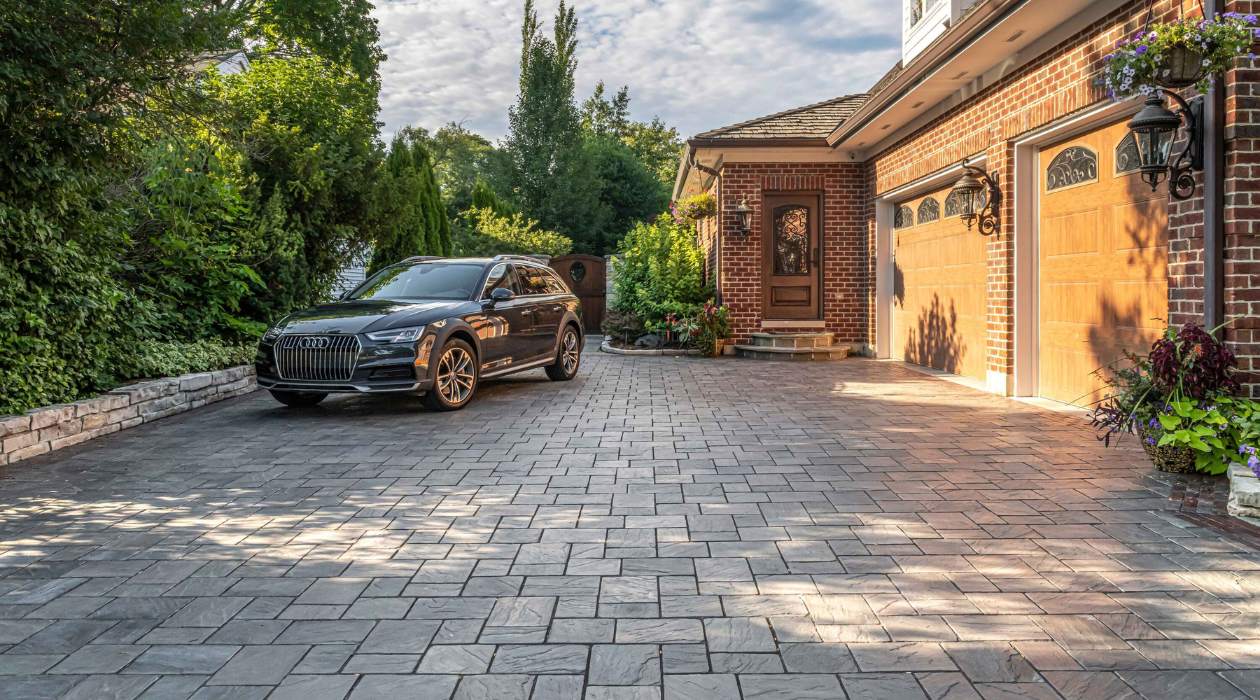
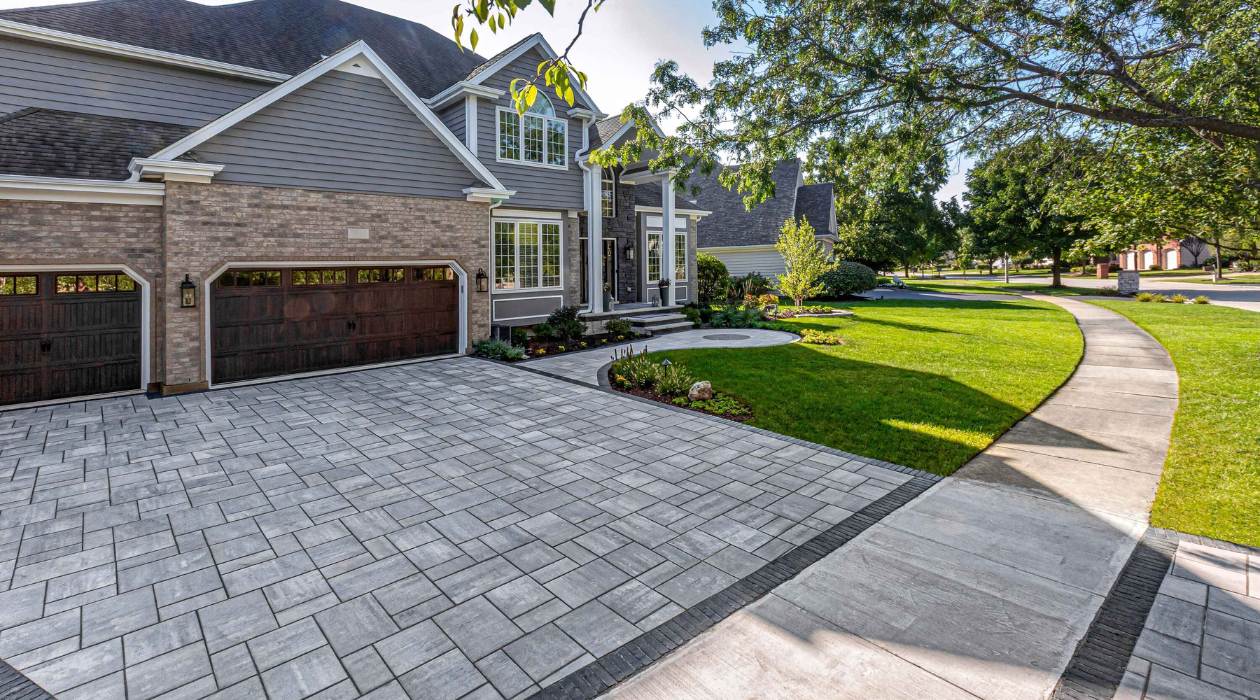
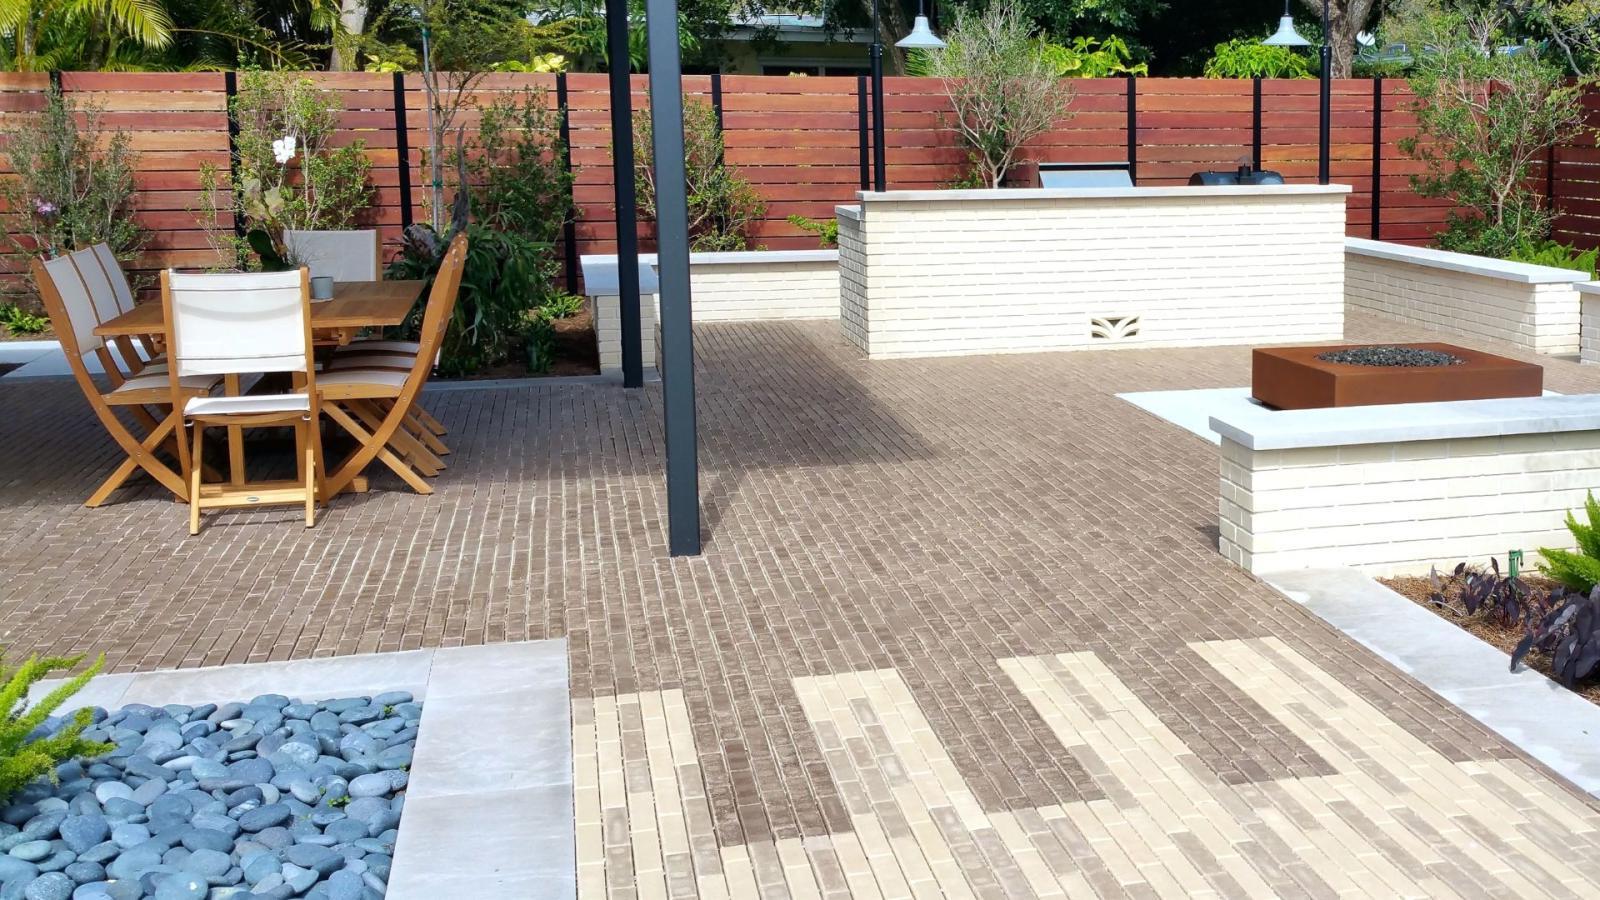
The first task is to determine the pattern in which you will lay the pavers. There are various patterns to choose from, including herringbone, running bond, basketweave, and more. Consider the style of your home and personal preferences when selecting a pattern. You can create visual interest by combining different sizes, colors, or textures of pavers.
Before you start laying the pavers, it’s important to establish a fixed point from where you’ll begin. Typically, this point is located at the entrance of the driveway or at a prominent feature such as a walkway intersection. Starting from a fixed point ensures a consistent and visually appealing layout.
Begin by placing the first paver at the fixed point, aligning it with your chosen pattern. Ensure that it is level and snug against the edge restraints. Use a rubber mallet or a wooden block and a hammer to gently tap the paver into place. This will help lock it into position and create a solid surface.
Continue laying the pavers in the chosen pattern, working in small sections at a time. Insert plastic spacers between the pavers to maintain consistent spacing and allow for proper drainage. Check the levelness frequently to ensure that the pavers are evenly aligned and that the slope is maintained.
If necessary, cut the pavers to fit around curves, corners, or any other obstructions. You can use a wet saw or a chisel and hammer to make precise cuts. Take care to wear safety goggles and gloves when cutting the pavers, and follow all manufacturer instructions for your cutting equipment.
As you progress, periodically step back and evaluate the overall layout and alignment of the pavers. Make any necessary adjustments to maintain a visually pleasing and symmetrical appearance. Remember that attention to detail in this step will greatly contribute to the final aesthetics of your paver driveway.
Once all the pavers have been laid, go over the entire surface with a plate compactor to ensure that they are firmly set in place. This will help to eliminate any gaps or unevenness between the pavers.
In the next step, we will look at cutting and fitting the pavers around curves and obstacles to create a polished and finished look for your driveway.
Read more: How Thick Are Driveway Pavers
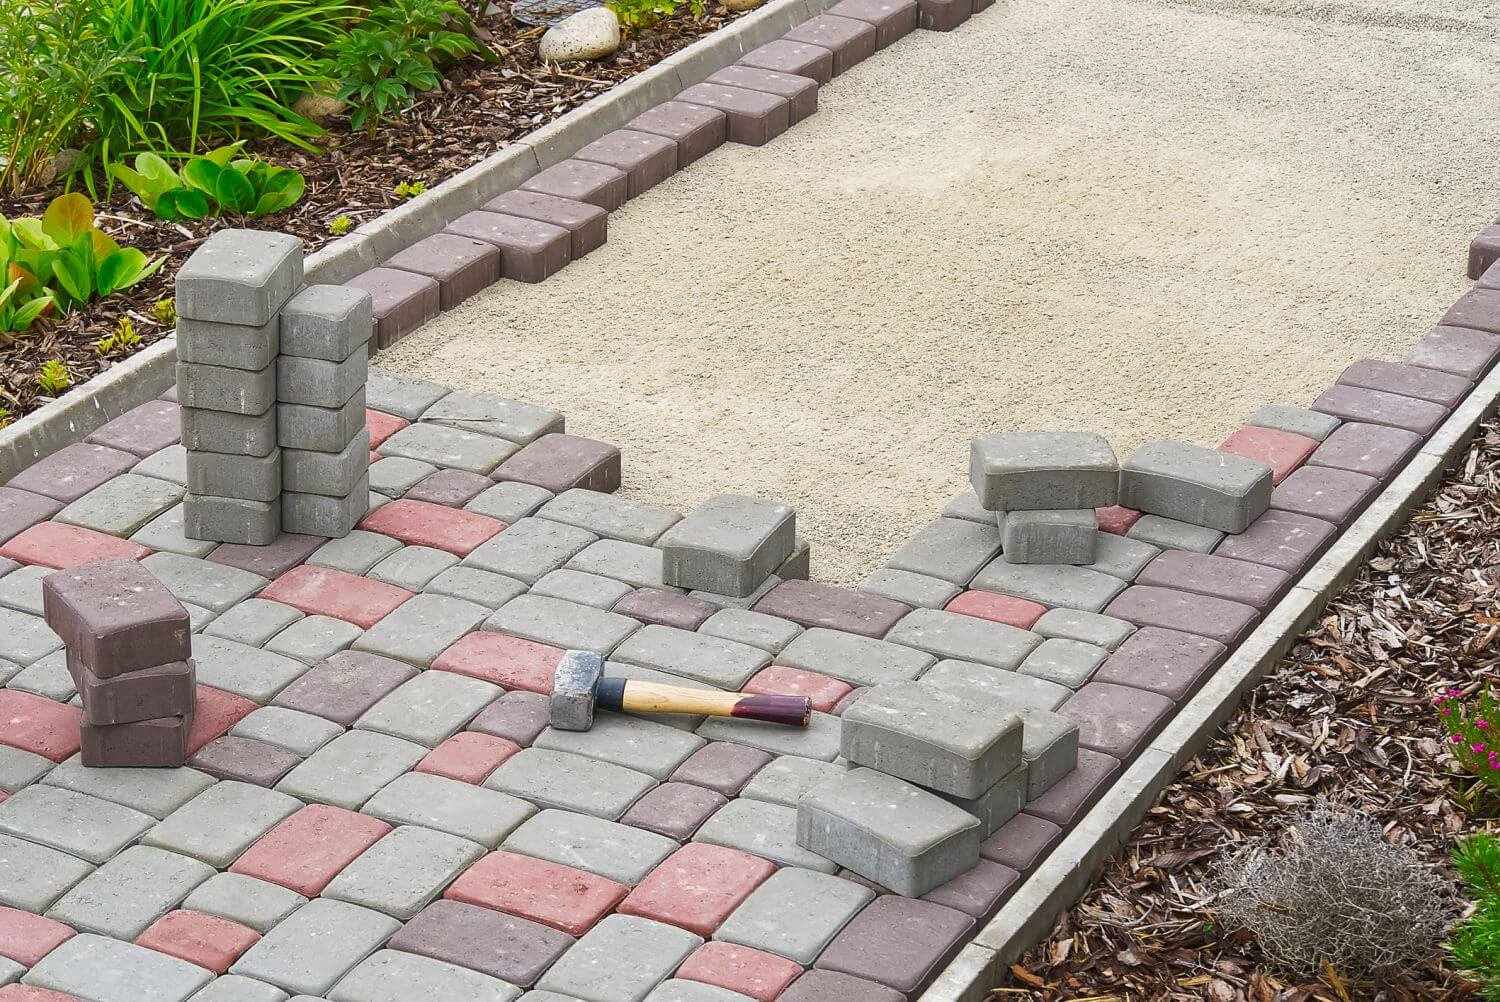
Step 5: Cutting and Fitting
Now that you have laid the majority of the pavers for your driveway, it’s time to move on to the critical step of cutting and fitting the pavers around curves and obstacles. This step will ensure that your paver driveway has a professional and polished finish.
The first task in this step is to make necessary cuts for any pavers that need to be trimmed to fit into smaller spaces. This is common when you reach the edges of the driveway or encounter obstacles such as poles or trees. Measure and mark the pavers that need to be trimmed, ensuring that you leave enough space for joint sand and proper alignment.
You can use a wet saw equipped with a diamond blade to make precise cuts. Wet saws are specifically designed for cutting pavers and other materials, and they provide clean and accurate results. Remember to wear safety goggles and gloves while operating the wet saw, and follow all safety instructions provided by the manufacturer.
If you don’t have access to a wet saw, you can also use a chisel and hammer to make the necessary cuts. Score the paver along the marked line with the chisel, then carefully tap along the score line with the hammer until the paver breaks along the desired cut. This method requires a bit more patience and effort but can still yield satisfactory results.
Once you have made the necessary cuts, it’s time to fit the pavers around curves and other obstacles. This can be a bit more challenging but with careful planning and patience, it can be accomplished successfully.
When fitting pavers around curves, it’s important to take it one step at a time. Start by laying the pavers along the curve, allowing for a slight overlap if needed. This will help create a smooth and uniform curve. Use spacers as necessary to maintain consistent spacing between the pavers.
If the curve is particularly tight, you may need to make smaller cuts or consider using smaller pavers or specialized pavers designed for curves. Flexibility and creativity are key when fitting pavers around curves, so be prepared to make adjustments along the way.
When fitting pavers around obstacles, such as poles or trees, carefully measure and mark the pavers that need to be trimmed to accommodate the obstacle. Make the necessary cuts using a wet saw or a chisel and hammer, ensuring that the trimmed pavers fit tightly against the obstacle.
Take your time during this step to ensure that the cuts and fits are precise and seamless. Careful attention to detail and proper fitting will contribute to the overall appearance and functionality of your paver driveway.
In the final step, we will explore the finishing touches that will complete your paver driveway installation.
Step 6: Finishing Touches
Congratulations! You’re in the final step of the paver driveway installation process. Step 6 involves adding the finishing touches to enhance the overall look and durability of your driveway.
The first task is to sand the joints between the pavers. Joint sand is an essential part of the installation process as it helps stabilize the pavers and prevents them from shifting. Spread fine-grained sand over the surface of the paver driveway. Use a broom or a brush to sweep the sand into the joints, ensuring that all gaps are adequately filled. This process will help lock the pavers in place and prevent weed growth between them.
Once the joints are sanded, it’s time to compact the pavers. Use a plate compactor or a hand tamper and go over the entire surface of the driveway. This will help further settle and stabilize the pavers, ensuring a solid and even surface. Be sure to follow the manufacturer’s instructions for the compactor or tamper and take care not to damage the pavers during this process.
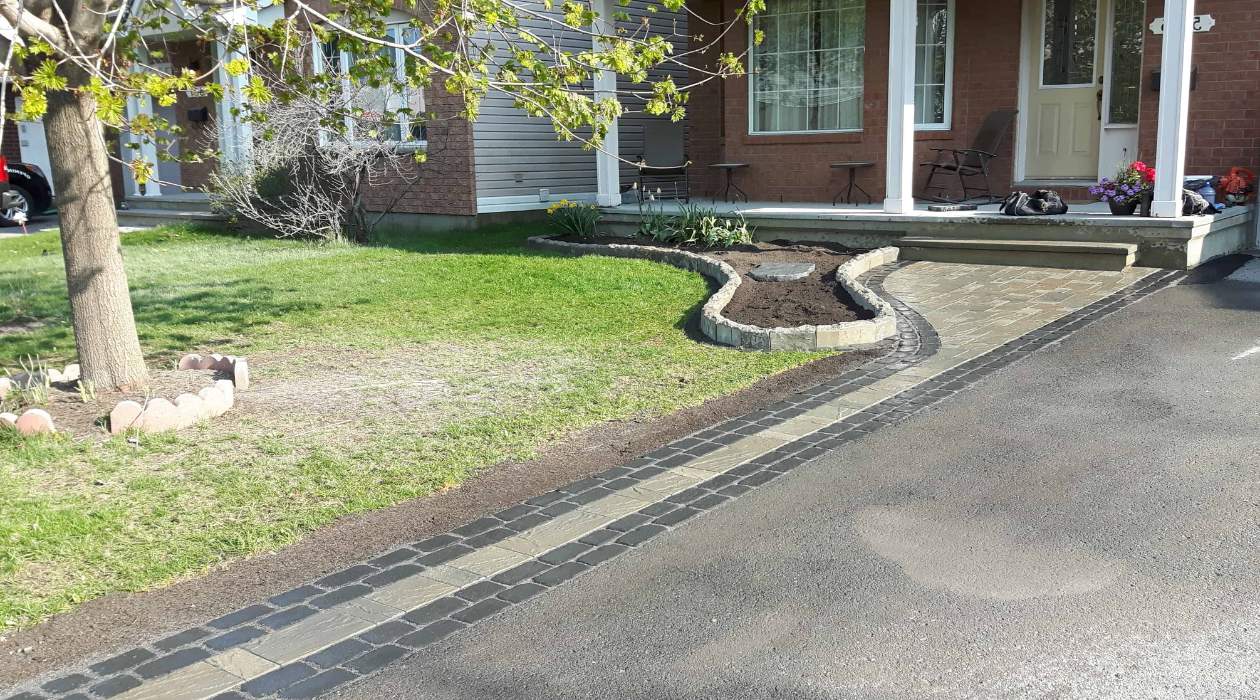
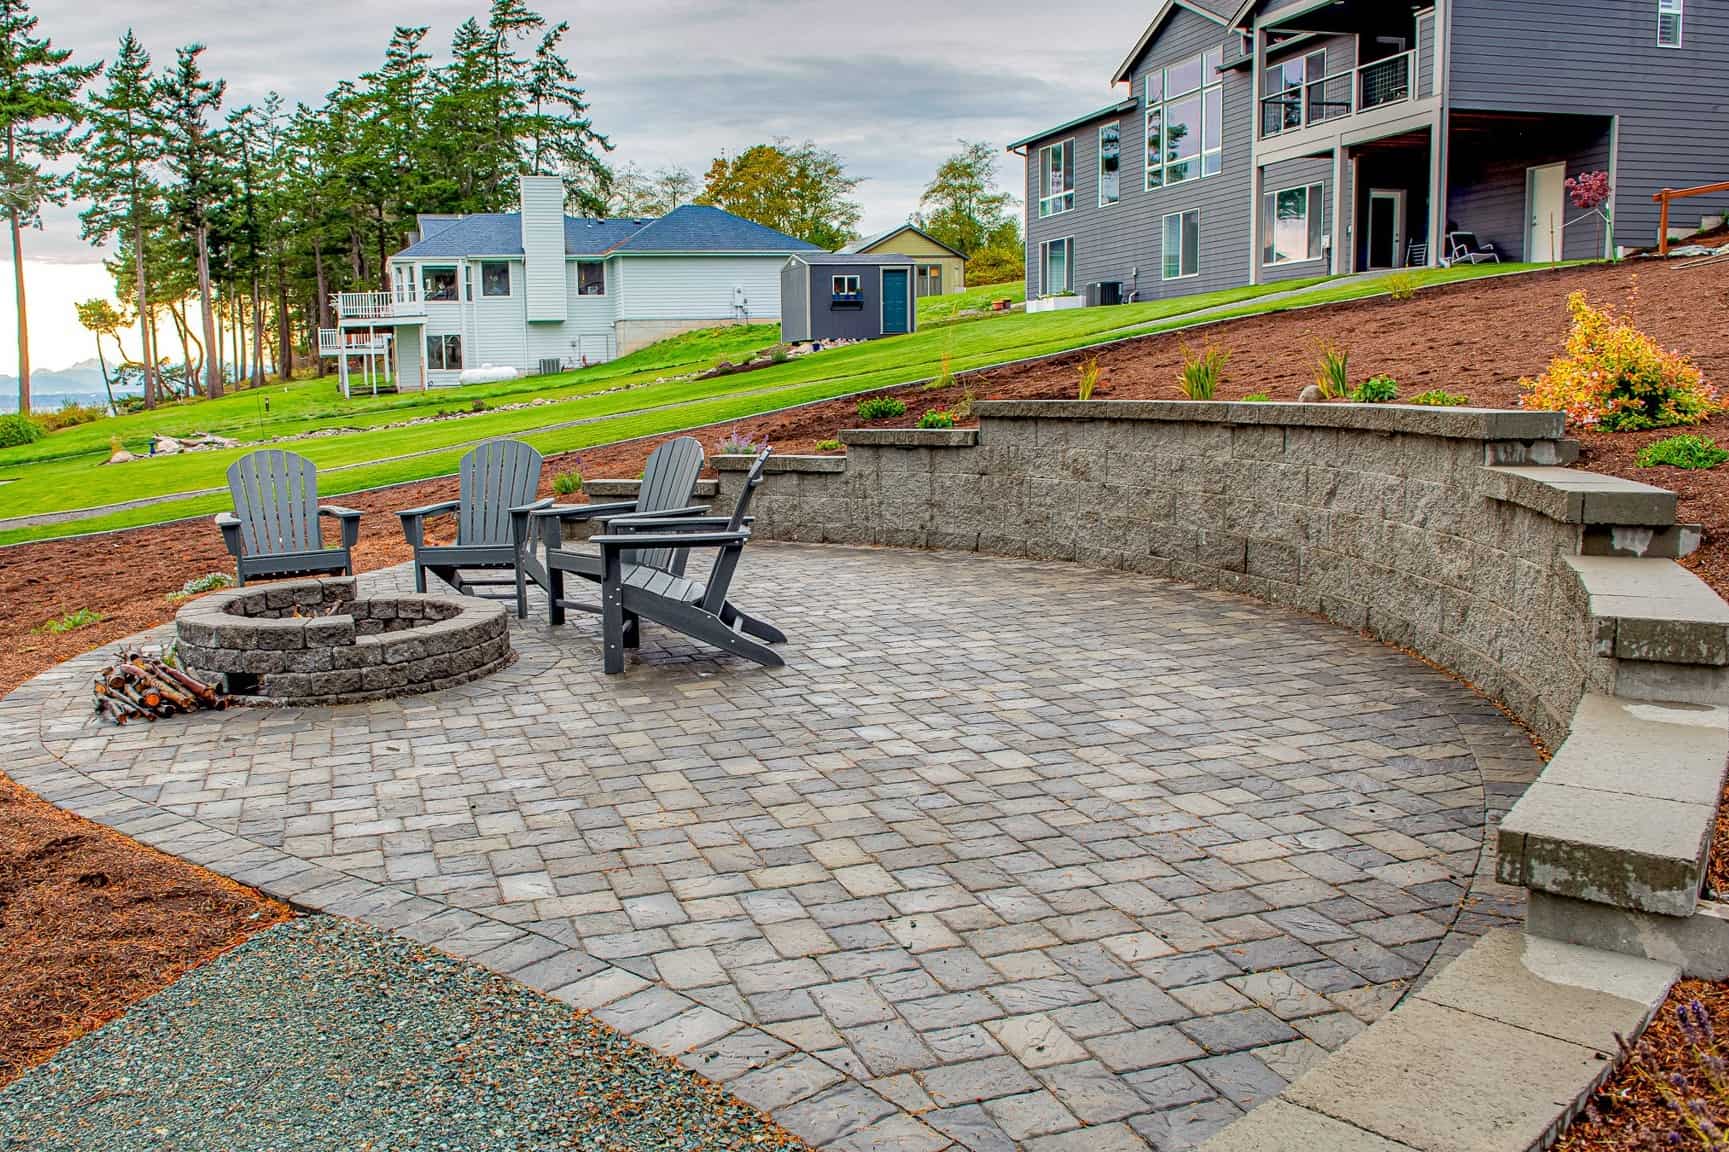
Adding edging and borders is an optional but aesthetically pleasing choice for your paver driveway. Edging adds a finishing touch and helps define the boundaries of the driveway. You can use materials such as metal, plastic, or concrete to create edging. Install the edging securely along the outer edges of the driveway, ensuring a clean and neat appearance.
If you choose to add borders, lay the pavers in a contrasting color or pattern along the sides of the driveway. Borders can create visual interest and add a decorative element to your driveway. Ensure that the border pavers are properly aligned and snug against the edge restraints, and follow the same steps for laying and leveling as mentioned in the previous sections.
Lastly, step back and admire your newly installed paver driveway. Take pride in the hard work and attention to detail that has gone into creating a beautiful and functional addition to your property.
Remember, regular maintenance is crucial for the longevity and appearance of your paver driveway. Sweep or rinse away any debris or dirt that may accumulate on the surface, and periodically re-sand the joints if necessary. By taking proper care of your driveway, you will ensure that it remains an eye-catching and durable feature of your property for years to come.
Thank you for following along this comprehensive guide on how to install a paver driveway. We hope that this step-by-step process has helped you successfully create a stunning and long-lasting addition to your home.
Conclusion
Congratulations! You have reached the end of our comprehensive guide on how to install a paver driveway. By following the step-by-step process outlined in this article, you now have the knowledge and confidence to create a beautiful and durable driveway that will enhance the curb appeal of your property.
Throughout this guide, we have covered various important steps, including planning and preparation, excavation and grading, adding the base material, setting the pavers, cutting and fitting, and adding the finishing touches. Each of these steps plays a crucial role in the successful installation of a paver driveway.
Remember, investing time and effort in the planning and preparation stage will set you up for success. Choose the right pavers, measure and mark the area accurately, and prepare a solid base for your driveway. These initial steps will ensure a strong foundation for your paver driveway.
Proper execution of excavation and grading will ensure that your driveway has the right depth and slope for efficient drainage. Adding the base material and compacting it diligently will create a stable surface for the pavers and prevent shifting or settling over time.
Setting the pavers in the chosen pattern, fitting them around curves and obstacles, and taking care of the finishing touches such as sanding the joints and compacting the surface will provide a professional and polished look to your driveway.
By following these steps and paying attention to detail, you can create a paver driveway that not only adds value and aesthetic appeal to your property but also stands the test of time. Regular maintenance, such as sweeping, rinsing, and re-sanding the joints when necessary, will help preserve the beauty and functionality of your driveway for years to come.
We hope that this guide has been informative and valuable in helping you install your paver driveway. Remember to always prioritize safety and seek professional assistance if needed. Enjoy the satisfaction of a job well done as you admire your new and impressive paver driveway.
Thank you for joining us on this journey, and best of luck with your paver driveway installation!
Frequently Asked Questions about How To Install Driveway Pavers
Was this page helpful?
At Storables.com, we guarantee accurate and reliable information. Our content, validated by Expert Board Contributors, is crafted following stringent Editorial Policies. We're committed to providing you with well-researched, expert-backed insights for all your informational needs.


0 thoughts on “How To Install Driveway Pavers”