Home>Furniture & Design>Interior Design Trends>How To Repair Glass Chip
Interior Design Trends
How To Repair Glass Chip
Published: February 4, 2024
Learn how to repair glass chips and stay updated with the latest interior design trends. Expert tips and techniques for a flawless finish.
(Many of the links in this article redirect to a specific reviewed product. Your purchase of these products through affiliate links helps to generate commission for Storables.com, at no extra cost. Learn more)
Introduction
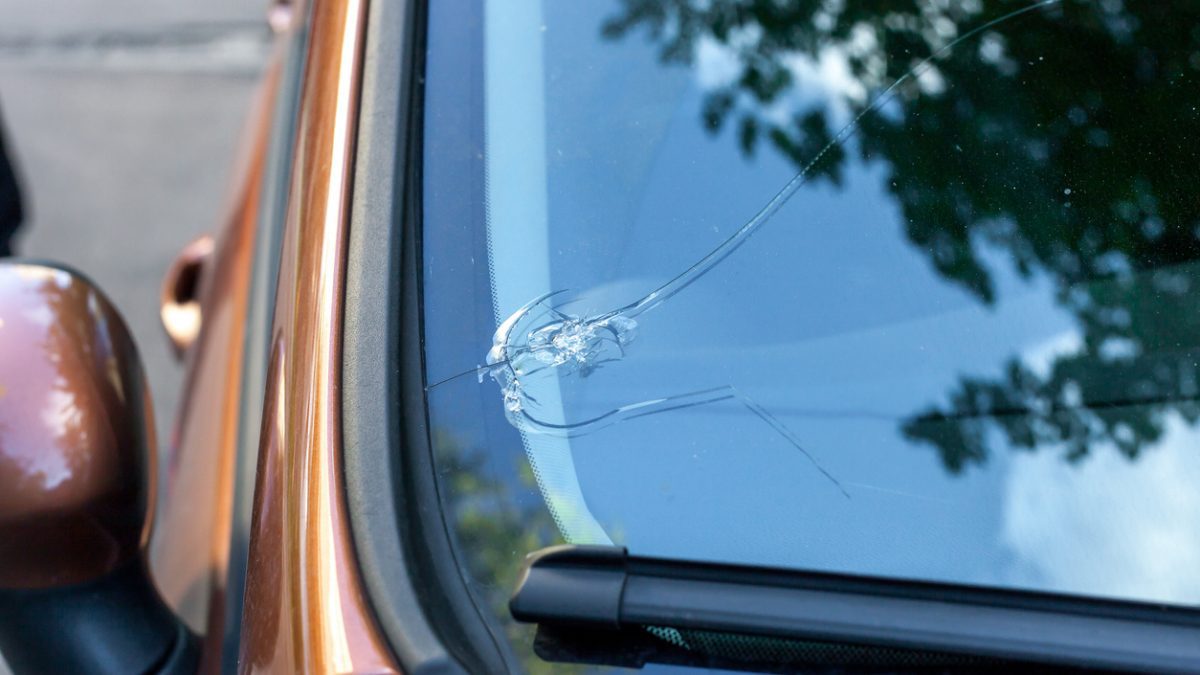
Repairing a glass chip is a common task that many homeowners encounter. Whether it's a small chip on a glass tabletop or a noticeable blemish on a window pane, addressing these imperfections can restore the aesthetic appeal and functionality of the glass surface. By taking the time to understand the process and gather the necessary materials, you can effectively repair the chip and prevent it from spreading further. This guide will walk you through the steps involved in repairing a glass chip, providing you with the knowledge and confidence to tackle this task with ease.
A glass chip not only detracts from the visual appeal of the surface but can also pose safety risks if left unattended. Sharp edges and weakened structural integrity can lead to further damage or potential injuries. Therefore, addressing the chip promptly is essential to maintain the integrity and safety of the glass. With the right approach and attention to detail, you can restore the glass to its former glory and prolong its lifespan.
In the following sections, we will delve into the process of assessing the damage, gathering the necessary materials, and executing the repair with precision. By following these steps, you can effectively address the chip and prevent it from compromising the functionality and aesthetics of the glass surface. Let's embark on this journey to restore the beauty and functionality of your glass items through the art of chip repair.
Key Takeaways:
- Don’t ignore glass chips! Promptly assess and repair them to maintain safety and aesthetics. Gather materials, apply resin, and add finishing touches for a seamless, durable outcome.
- Repairing a glass chip is a meticulous process. Assess damage, gather materials, apply resin, and add finishing touches for a visually appealing and structurally sound outcome.
Read more: How To Fix A Chip In Glass
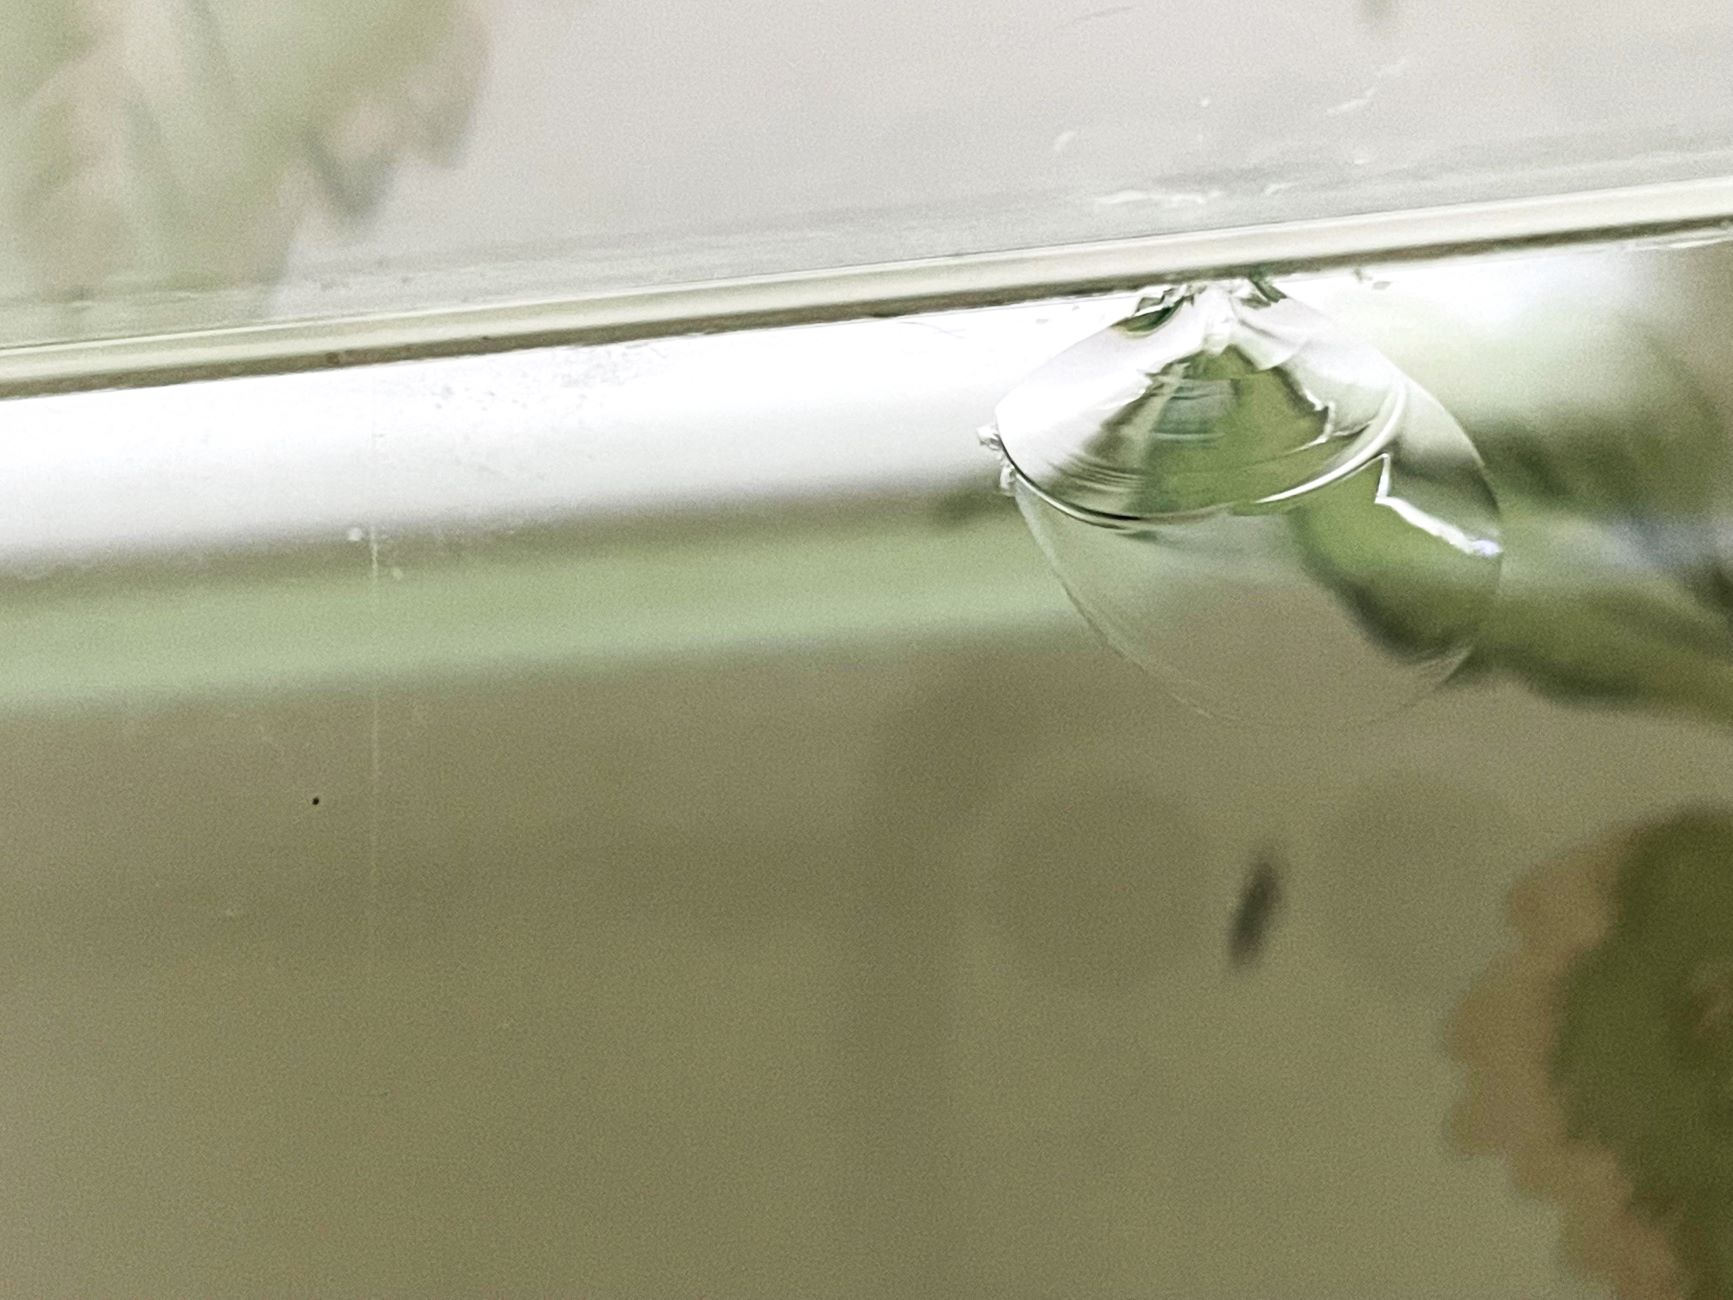
Assessing the Damage
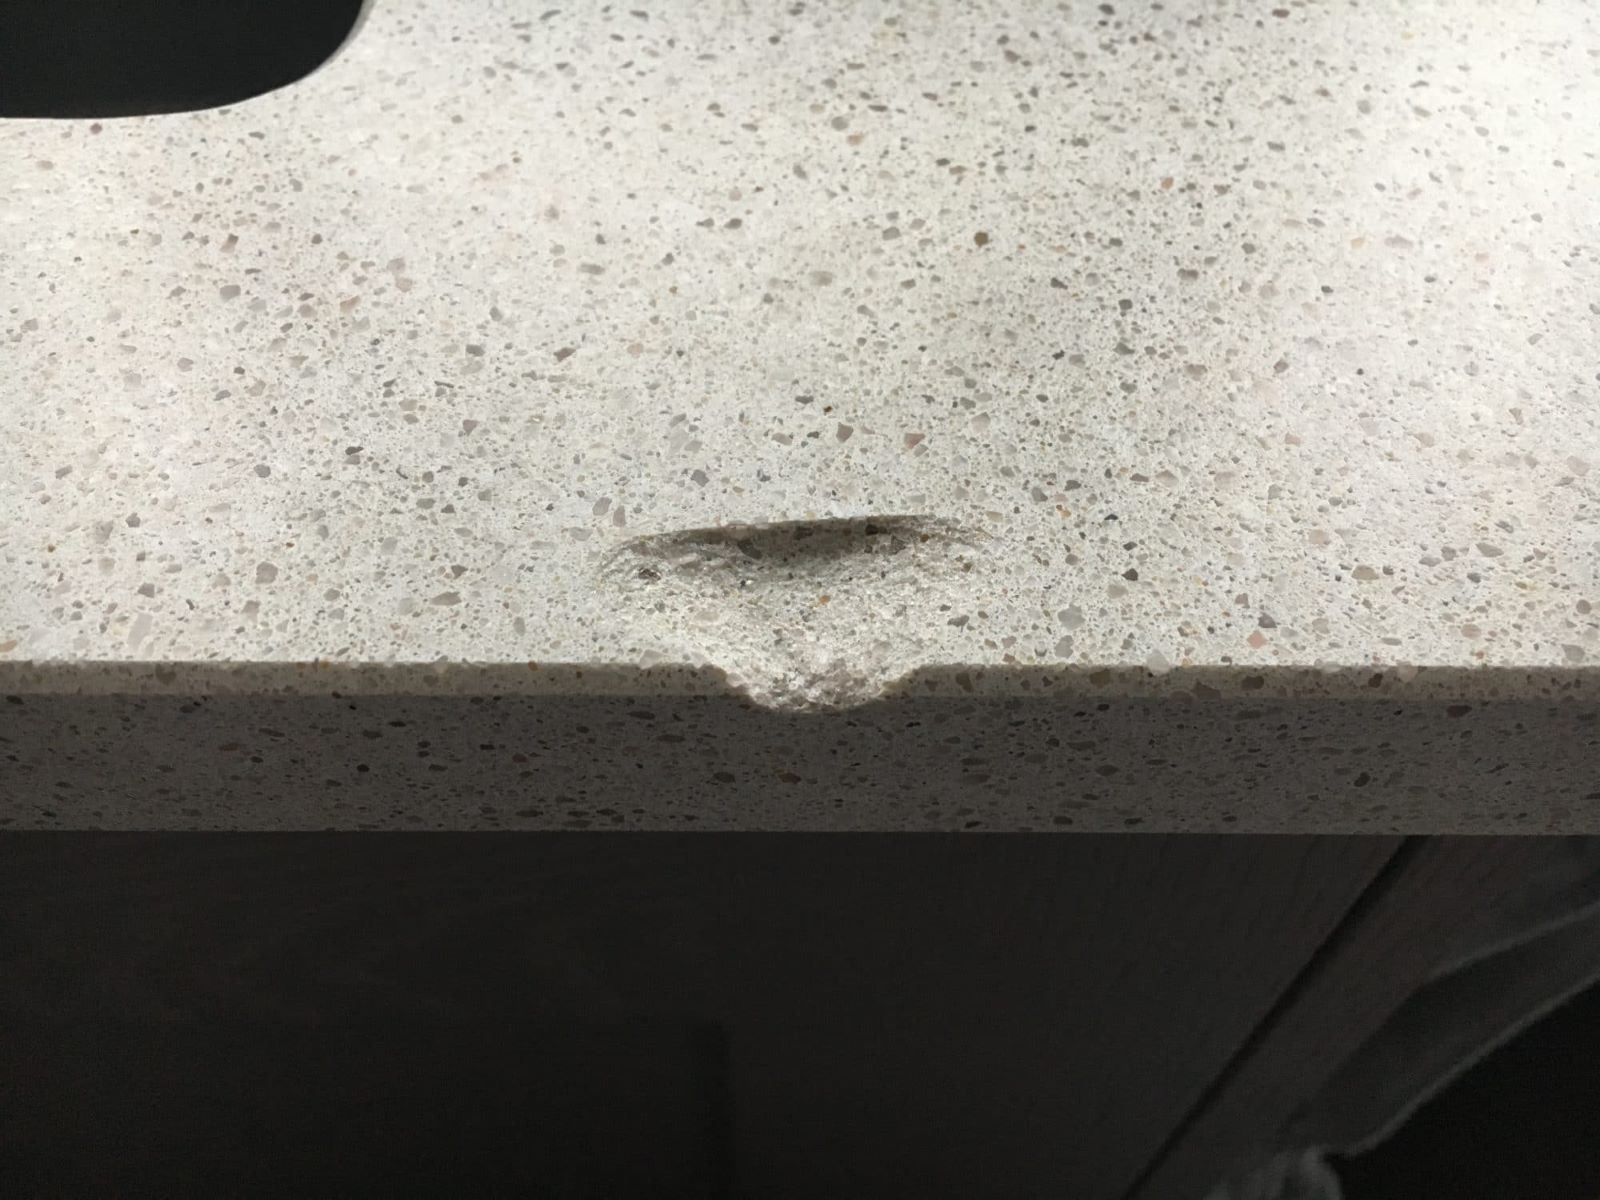
Assessing the extent of the damage is the crucial first step in the glass chip repair process. It involves closely examining the chip to determine its size, depth, and location on the glass surface. By conducting a thorough assessment, you can gain valuable insights into the nature of the damage and formulate an effective repair strategy.
Begin by carefully inspecting the chip to identify its dimensions. Measure the length, width, and depth of the chip using a ruler or measuring tape. This will provide you with precise measurements that are essential for selecting the appropriate repair materials and estimating the extent of the repair area.
Next, evaluate the location of the chip on the glass surface. Is it situated near the edge or in the center? Understanding the chip's position will help determine the level of impact it may have on the structural integrity of the glass. Chips near the edges may propagate more easily and require immediate attention to prevent further spreading.
Additionally, assess the depth of the chip. Is it a shallow surface blemish or a deeper indentation? Understanding the depth of the chip will influence the choice of repair materials and techniques. Deeper chips may require more extensive repair methods to restore the glass to its original smoothness and clarity.
Furthermore, consider the type of glass affected by the chip. Is it a window pane, a glass tabletop, or a decorative glass item? Different types of glass may respond differently to repair methods, and understanding the specific characteristics of the glass will guide your approach to achieving optimal results.
Lastly, take note of any surrounding damage or potential stress points near the chip. Are there hairline cracks radiating from the chip, or signs of previous damage in the vicinity? Identifying these factors will help you address any underlying issues that could compromise the effectiveness of the repair.
By meticulously assessing the damage, you can gain a comprehensive understanding of the chip's characteristics and its impact on the glass surface. This knowledge will serve as the foundation for selecting the appropriate repair materials and executing the subsequent repair process with precision and confidence.
Gathering the Necessary Materials
Gathering the necessary materials is a crucial aspect of preparing for the glass chip repair process. Having the right tools and supplies at your disposal will ensure that you can execute the repair with precision and efficiency. Here's a comprehensive list of materials that you will need to effectively address the glass chip:
-
Safety Gear: Prioritize safety by equipping yourself with protective gear such as safety goggles and gloves. These items will shield your eyes and hands from potential glass shards and ensure a safe working environment.
-
Glass Cleaner: Begin the repair process by thoroughly cleaning the glass surface surrounding the chip. Use a high-quality glass cleaner to remove any dirt, debris, or residues that may interfere with the repair.
-
Microfiber Cloth: A soft microfiber cloth is essential for drying the glass surface after cleaning. It will help ensure that the area around the chip is free from moisture and contaminants, creating an optimal environment for the repair.
-
Magnifying Glass or Loupe: A magnifying glass or loupe can aid in closely examining the chip and assessing its characteristics. This tool will allow you to inspect the chip with enhanced clarity, enabling a more accurate evaluation of its size and depth.
-
Measuring Tools: Accurately measuring the dimensions of the chip is essential for selecting the appropriate repair materials. Utilize a ruler, measuring tape, or calipers to determine the length, width, and depth of the chip.
-
Glass Repair Kit: Invest in a high-quality glass repair kit that contains resin, curing strips, and other essential components. These kits are specifically designed for repairing glass chips and often include detailed instructions for achieving optimal results.
-
UV Lamp or Sunlight: Many glass repair kits utilize UV light to cure the resin and complete the repair process. Ensure that you have access to a UV lamp or natural sunlight to facilitate the curing of the repair resin.
-
Plastic Razor Blade or Scraper: A plastic razor blade or scraper can be used to level the repair resin and remove any excess material after the curing process. This tool will help achieve a smooth and uniform surface on the repaired chip.
-
Protective Tape: Transparent protective tape can be used to cover the repaired chip during the curing process, preventing dust and debris from compromising the repair.
By gathering these essential materials, you will be well-equipped to embark on the glass chip repair process with confidence and precision. Each item plays a crucial role in facilitating the repair, ensuring that you can effectively restore the glass surface to its original condition. With the necessary materials at hand, you are ready to proceed to the next phase of repairing the chip and rejuvenating the beauty of the glass.
Use a windshield repair kit to fix a glass chip. Clean the area, apply resin, and let it dry. Finish by polishing the surface for a smooth finish.
Repairing the Chip
Repairing the chip is a meticulous process that requires attention to detail and precision. By following the steps outlined below, you can effectively address the chip and restore the glass surface to its former glory.
-
Prepare the Repair Area: Begin by ensuring that the glass surface around the chip is clean and free from any contaminants. Use a high-quality glass cleaner and a microfiber cloth to thoroughly clean and dry the area, creating an optimal environment for the repair.
-
Assemble the Repair Kit: Gather the glass repair kit and carefully review the instructions provided. Familiarize yourself with the contents of the kit, including the resin, curing strips, and any additional components required for the repair.
-
Apply the Repair Resin: With the repair area prepared, carefully apply a small amount of the repair resin to the chip. Use a steady hand to ensure that the resin fills the chip completely, covering the entire damaged area.
-
Position the Curing Strips: Place the curing strips over the applied resin, ensuring that they fully cover the repair area. These strips are designed to facilitate the curing process and promote the adhesion of the resin to the glass surface.
-
Initiate the Curing Process: Utilize a UV lamp or natural sunlight to initiate the curing process. Follow the specific guidelines provided in the glass repair kit to ensure that the resin cures thoroughly and forms a strong bond with the glass.
-
Remove Excess Resin: Once the curing process is complete, carefully remove the curing strips and any excess resin using a plastic razor blade or scraper. Gently level the repaired area to achieve a smooth and uniform surface.
-
Inspect the Repair: After removing any excess resin, inspect the repaired chip to ensure that it has been effectively restored. Use a magnifying glass or loupe to closely examine the repaired area and verify that the chip has been adequately addressed.
By following these steps, you can successfully repair the glass chip and rejuvenate the appearance of the glass surface. The meticulous application of the repair resin and the precise execution of the curing process are essential for achieving optimal results. With the chip effectively repaired, the glass surface will regain its clarity and structural integrity, enhancing both its visual appeal and functionality.
Finishing Touches
After completing the meticulous process of repairing the glass chip, it is essential to focus on the finishing touches to ensure that the repaired area seamlessly blends with the surrounding glass surface. Attention to detail during this phase will elevate the overall aesthetic appeal and structural integrity of the glass, leaving behind a flawless finish.
-
Polishing the Repaired Area: Once the excess resin has been removed, consider using a glass polishing compound to refine the repaired area. Apply a small amount of the polishing compound to a soft, lint-free cloth and gently buff the repaired chip. This process will help achieve a smooth and uniform surface, minimizing any visible traces of the repair.
-
Cleaning and Inspecting the Glass Surface: After polishing the repaired area, thoroughly clean the entire glass surface to remove any remaining residues or particles. Utilize a high-quality glass cleaner and a microfiber cloth to ensure that the glass surface is free from streaks and blemishes. Once cleaned, inspect the entire surface to verify that the repaired chip seamlessly integrates with the surrounding glass, achieving a consistent clarity and smoothness.
-
Assessing the Structural Integrity: While the visual appearance of the repaired chip is crucial, it is equally important to assess the structural integrity of the glass. Carefully examine the repaired area to ensure that it exhibits the same strength and durability as the surrounding glass. Gently tap the repaired section with your fingertip to gauge its resilience and stability. A well-executed repair should result in a structurally sound and secure glass surface.
-
Applying a Protective Coating (Optional): For added protection and longevity, consider applying a specialized glass protective coating to the entire surface. These coatings can enhance the resilience of the glass, making it more resistant to scratches, stains, and environmental factors. Follow the manufacturer's instructions for the application of the protective coating, ensuring that it is evenly distributed and thoroughly bonded to the glass surface.
-
Final Inspection and Appreciation: Once the finishing touches are complete, take a moment to conduct a final inspection of the glass surface. Admire the seamless repair and appreciate the restored beauty and functionality of the glass. Run your fingers over the repaired area to confirm its smoothness and uniformity. By paying attention to the finishing touches, you have successfully rejuvenated the glass surface, ensuring that it remains a stunning and durable feature in your home.
By meticulously attending to the finishing touches, you can elevate the quality of the glass chip repair, achieving a result that seamlessly integrates with the surrounding glass surface. This attention to detail not only enhances the visual appeal of the glass but also contributes to its long-term durability and resilience.
Read more: How To Fix Chipped Glass
Conclusion
In conclusion, the process of repairing a glass chip is a rewarding endeavor that allows you to restore the beauty and functionality of glass surfaces within your home. By meticulously assessing the damage, gathering the necessary materials, and executing the repair with precision, you can rejuvenate the glass and prolong its lifespan. The meticulous attention to detail and the seamless integration of the repaired area with the surrounding glass surface result in a visually appealing and structurally sound outcome.
Addressing a glass chip promptly is essential to prevent further damage and maintain the safety of the glass. The assessment phase provides valuable insights into the characteristics of the chip, guiding the selection of appropriate repair materials and techniques. Understanding the size, depth, location, and type of glass affected by the chip forms the foundation for a successful repair process.
Gathering the necessary materials ensures that you are well-equipped to embark on the repair journey with confidence. From safety gear and cleaning supplies to specialized glass repair kits and curing tools, each item plays a crucial role in facilitating a successful repair. The careful assembly of these materials sets the stage for a seamless and effective repair process.
Executing the repair with precision involves applying the repair resin, initiating the curing process, and meticulously removing any excess material. The attention to detail during the repair phase ensures that the chip is effectively addressed, restoring the glass surface to its original clarity and smoothness. The meticulous application of the repair resin and the precise execution of the curing process are essential for achieving optimal results.
The finishing touches, including polishing the repaired area, cleaning the glass surface, and assessing its structural integrity, elevate the overall quality of the repair. Attention to detail during this phase ensures that the repaired area seamlessly integrates with the surrounding glass, leaving behind a flawless finish. By focusing on the finishing touches, you can achieve a visually appealing and structurally sound outcome.
In essence, the process of repairing a glass chip is a testament to the transformative power of attention to detail and precision. By embracing this process, you can breathe new life into glass surfaces, ensuring that they remain stunning and durable features within your home. The art of chip repair empowers you to preserve the beauty and functionality of glass, allowing you to enjoy its elegance for years to come.
Frequently Asked Questions about How To Repair Glass Chip
Was this page helpful?
At Storables.com, we guarantee accurate and reliable information. Our content, validated by Expert Board Contributors, is crafted following stringent Editorial Policies. We're committed to providing you with well-researched, expert-backed insights for all your informational needs.


0 thoughts on “How To Repair Glass Chip”