Articles
How To Clean Black Streaks Off Gutters
Modified: December 7, 2023
Learn how to effectively remove black streaks from your gutters with these informative articles. Discover easy and practical methods to keep your gutters clean and functioning optimally.
(Many of the links in this article redirect to a specific reviewed product. Your purchase of these products through affiliate links helps to generate commission for Storables.com, at no extra cost. Learn more)
Introduction
Gutters play a crucial role in channeling rainwater away from our homes, protecting the foundation, walls, and landscaping. However, over time, gutters can accumulate debris and develop black streaks, which not only diminish their aesthetic appeal but also indicate potential issues with maintenance and drainage. These black streaks are often made up of dirt, algae, mold, or mildew, and can be stubborn to remove.
If you have noticed black streaks marring the appearance of your gutters, it’s essential to address the issue promptly to maintain the functionality and curb appeal of your home. Fortunately, with the right tools and techniques, you can effectively clean black streaks off your gutters and restore them to their former glory.
In this article, we will delve into the reasons behind black streaks on gutters, the tools and materials required for the cleaning process, step-by-step instructions for removing the stains, and tips to prevent them from recurring in the future.
Understanding the root cause of black streaks on gutters is crucial in devising an effective cleaning strategy. One common culprit is a combination of dirt, dust, and organic materials that accumulate on the gutter surface over time. This layer of debris becomes a breeding ground for algae, mold, and mildew, which eventually results in the formation of those unsightly black streaks.
Additionally, factors like humidity, moisture, and the presence of shade can accelerate the growth of these organisms. If left unchecked, the black streaks can continue to spread and even cause damage to the gutter system, leading to clogs, leaks, and potential water damage to your home.
Now that we understand the problem at hand, let’s move on to the tools and materials you will need to clean black streaks off your gutters effectively.
Key Takeaways:
- Regular maintenance, proper cleaning techniques, and preventive measures such as gutter guards and algae-resistant coatings are essential for effectively removing and preventing black streaks on gutters, ensuring their longevity and aesthetic appeal.
- Understanding the causes of black streaks, using the right tools and materials, and following a step-by-step cleaning process can help homeowners restore the beauty of their gutters and prevent the recurrence of unsightly black streaks.
Read more: How To Clean Mold Off Gutters
Understanding black streaks on gutters
Black streaks on gutters are not only an eyesore but also indicate the presence of dirt, algae, mold, or mildew. Understanding the causes behind these black streaks is essential in order to effectively remove them and prevent their recurrence in the future.
One of the primary factors contributing to the formation of black streaks is the accumulation of organic matter on the surface of the gutters. Leaves, twigs, pollen, and other debris can accumulate in the gutters over time, creating a reservoir of nutrients for the growth of algae and mold.
In addition to organic matter, gutters in shaded areas are more susceptible to the growth of algae and mold. Lack of sunlight inhibits natural drying and creates a damp environment that is conducive to the growth of these organisms.
Humidity and moisture are also significant contributors to the formation of black streaks. Gutters located in areas with high humidity levels or frequent rainfall are more likely to develop black streaks due to the constant presence of moisture.
Furthermore, improper gutter maintenance can contribute to the problem. If gutters are not regularly cleaned and cleared of debris, the accumulated dirt and organic matter provide a fertile breeding ground for black streak-causing organisms.
It’s important to address black streaks on gutters as soon as they are noticed. If left untreated, they can spread and cause further damage to the gutter system. Additionally, the presence of black streaks can make your home appear neglected and decrease its overall curb appeal.
Now that we have a better understanding of the causes behind black streaks, let’s move on to the tools and materials needed to effectively clean them off your gutters.
Tools and materials needed
Before you begin the process of cleaning the black streaks off your gutters, gather the necessary tools and materials to ensure a smooth and efficient cleaning experience. Here’s a list of what you’ll need:
- Gloves: To protect your hands from any sharp edges or debris.
- Safety goggles: To shield your eyes from dust, debris, and cleaning solutions.
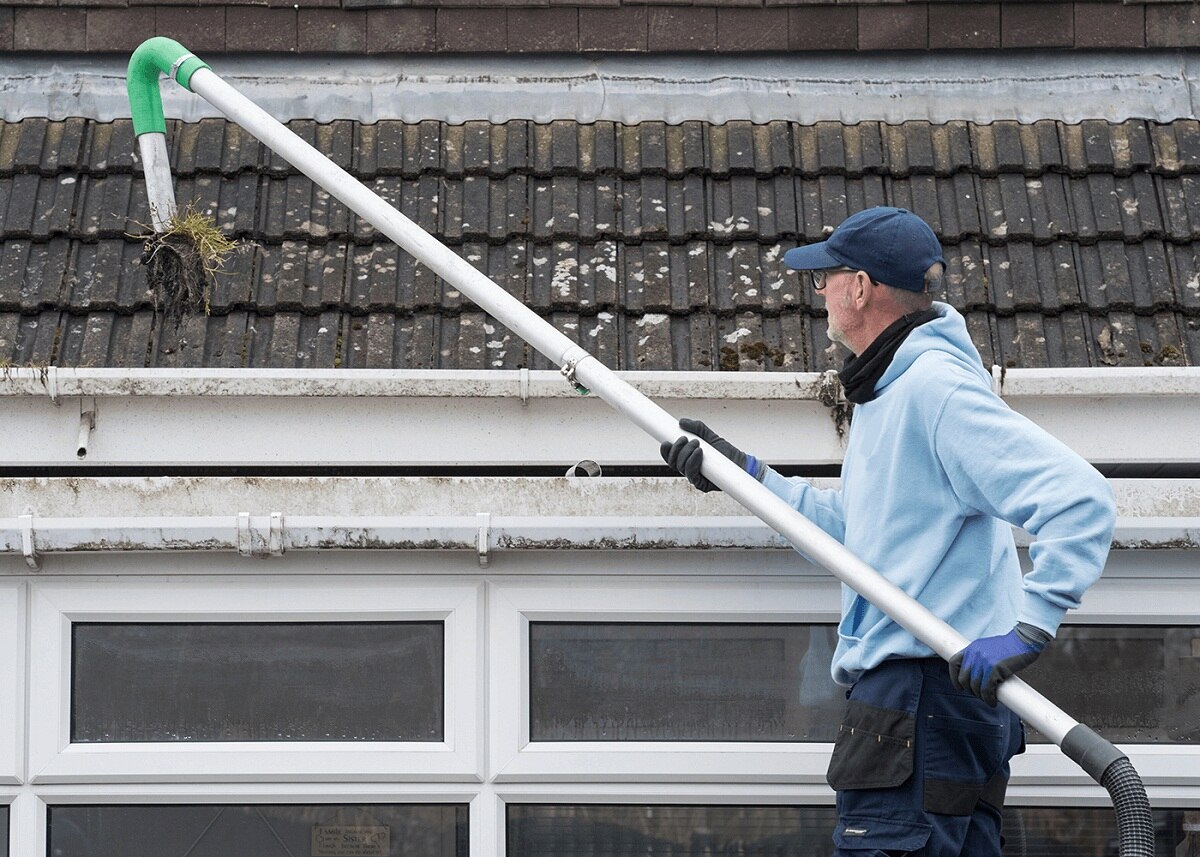
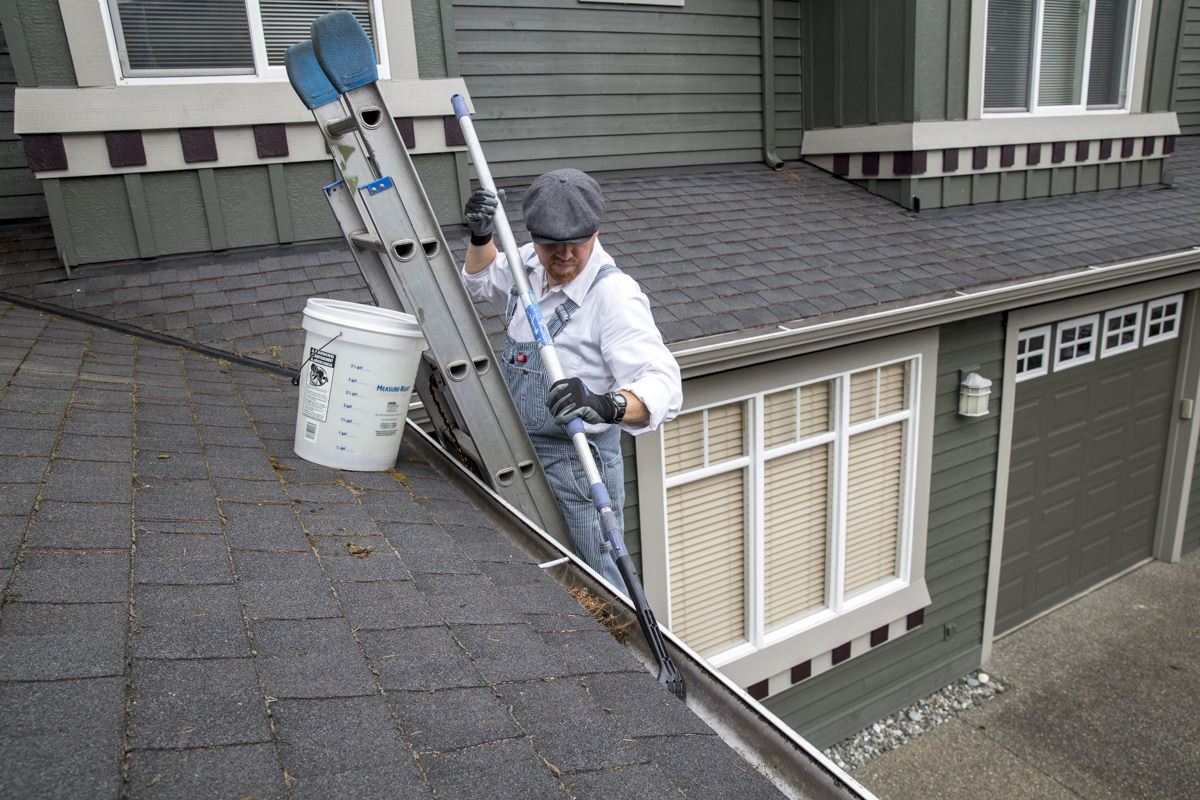
- Ladder: Ensure you have a sturdy ladder that allows you to safely access your gutters.
- Bucket or trash bag: To collect any debris or black streaks that you remove from the gutters.
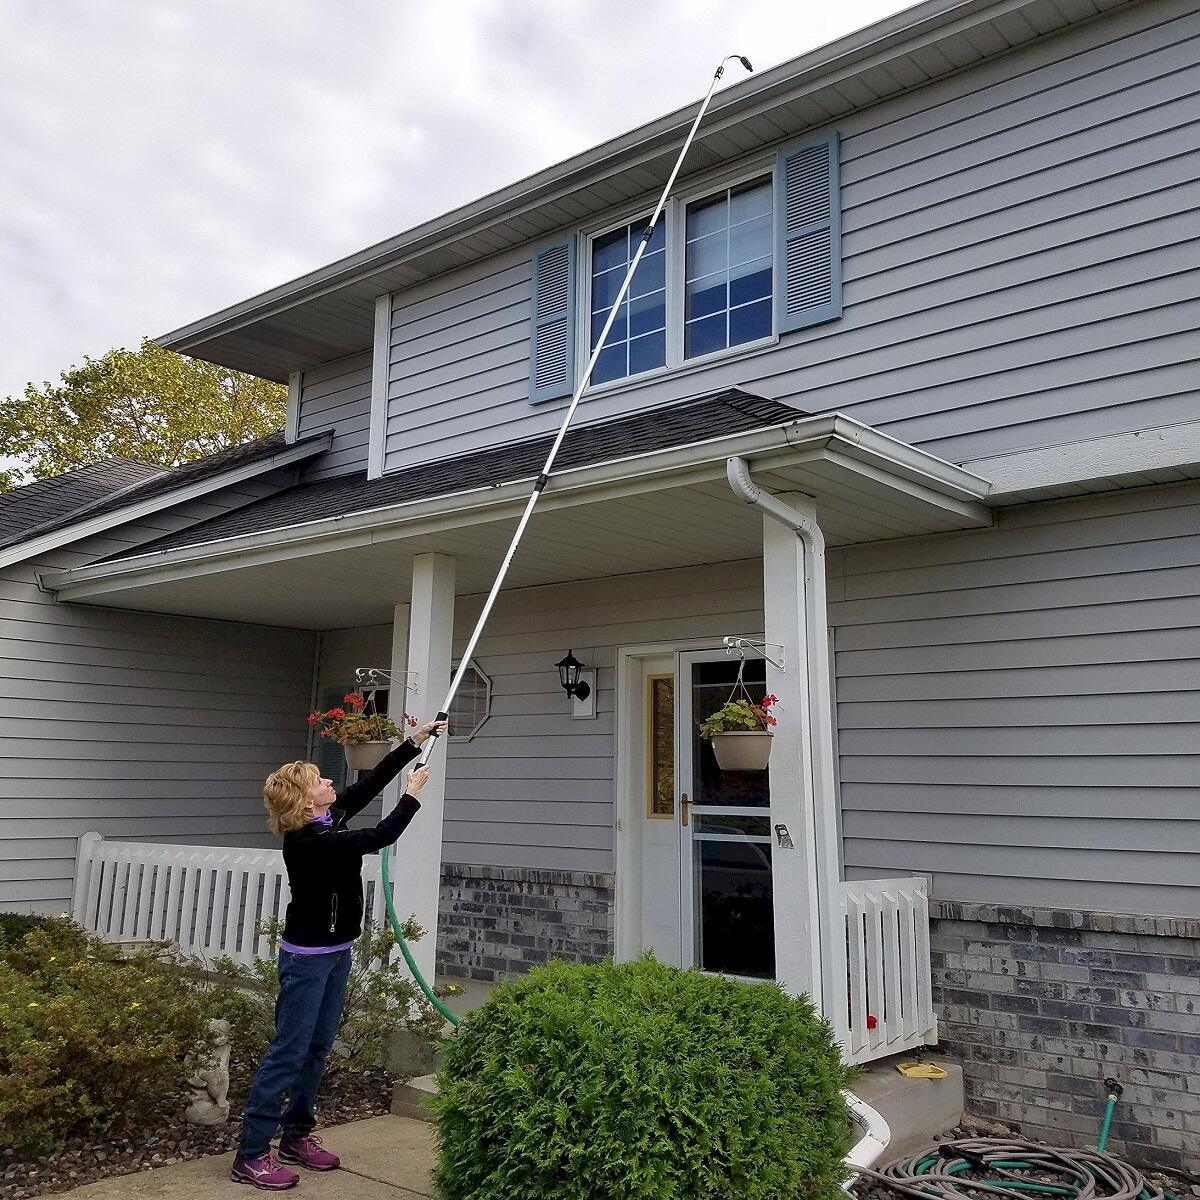
- Garden hose: Use a hose with a spray nozzle attachment to rinse off the gutters.
- Soft-bristle brush or sponge: Choose a brush or sponge that will be gentle on the gutter surface but effective in scrubbing away the black streaks.
- Cleaning solution: There are various options for cleaning solutions, including homemade mixtures or store-bought products specifically designed for removing algae, mold, and mildew from gutters. Choose a solution that is safe for your gutter material and effective in removing black streaks.
- Old towels or rags: To dry the gutters after rinsing.
It’s important to ensure the tools and materials you use are appropriate for the type of gutters you have. For example, if you have aluminum gutters, you’ll want to avoid using abrasive brushes or harsh chemicals that can damage the surface.
Once you have gathered all the necessary tools and materials, you’ll be ready to start the process of cleaning the black streaks off your gutters. In the next section, we’ll discuss how to prepare the area before beginning the cleaning process.
Preparing the area
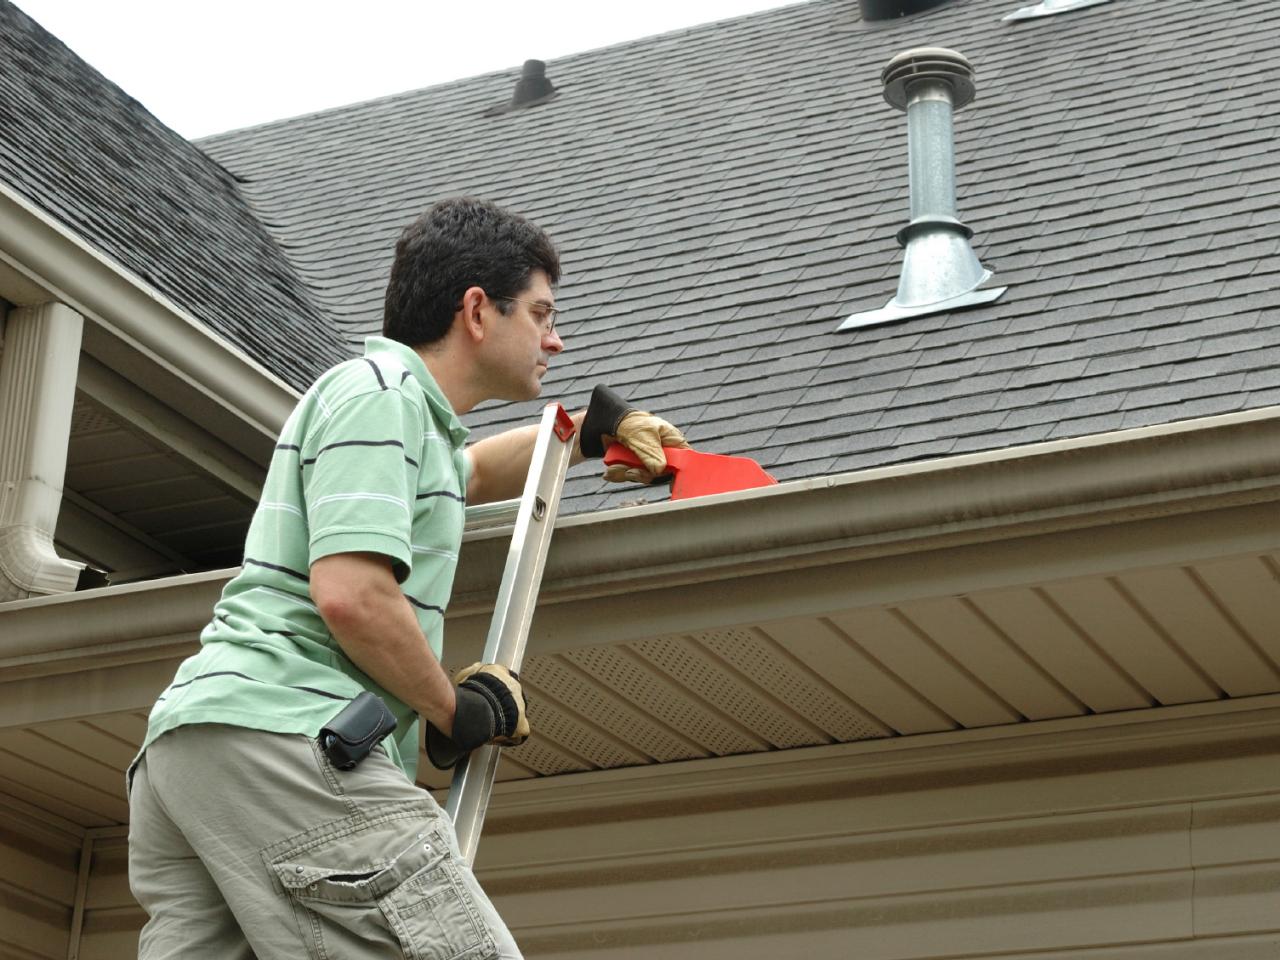
Before you start cleaning the black streaks off your gutters, it’s important to properly prepare the area to ensure safety and a more efficient cleaning process. Here are the steps to follow when preparing the area:
- Safety first: Put on your gloves and safety goggles to protect yourself from any potential hazards, such as sharp edges or debris.
- Clear the surrounding area: Remove any obstacles or items near your gutters that could hinder your access or pose a safety risk. This includes furniture, planters, or any other objects that may be in the way.
- Secure the ladder: Ensure that your ladder is set up on a stable and level surface. If needed, use ladder stabilizers or leg levelers for additional stability.
- Inspect the gutters: Take a close look at your gutters to identify any loose or damaged sections. It’s important to address any necessary repairs before proceeding with the cleaning process.
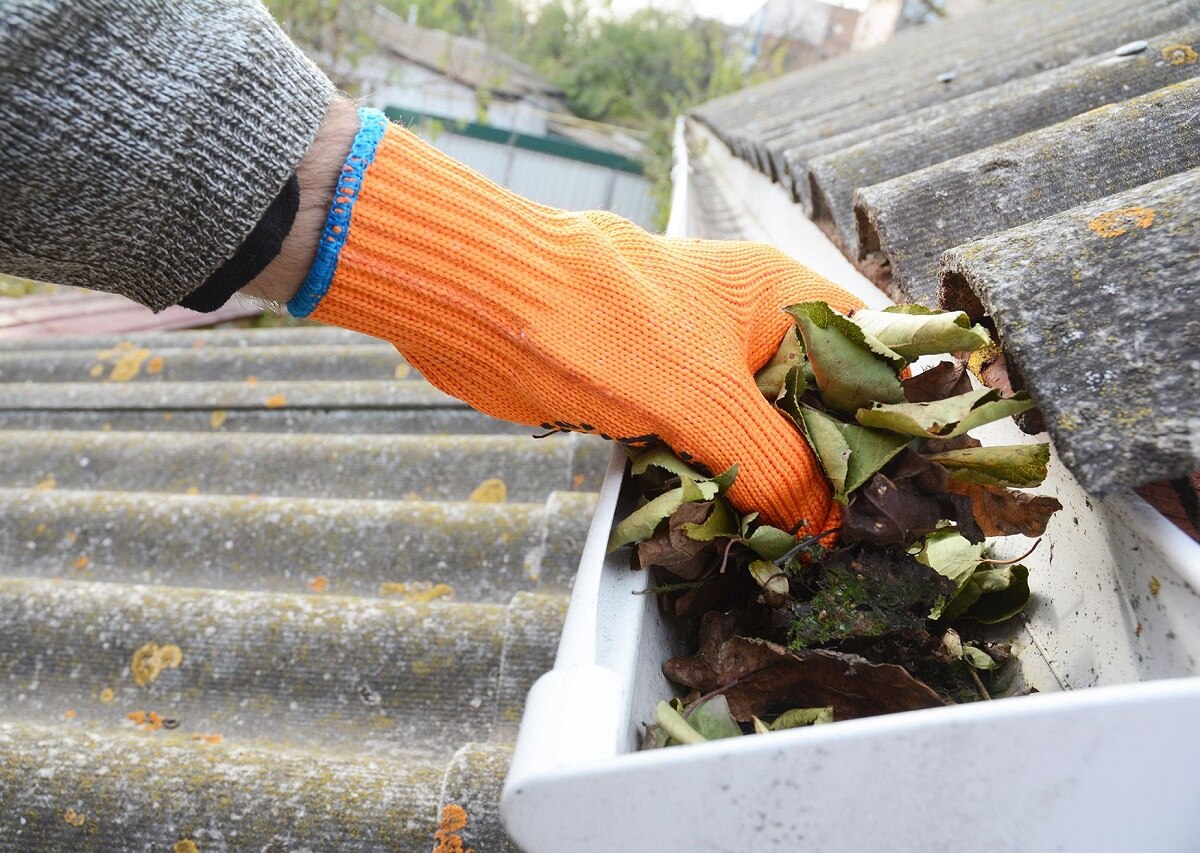
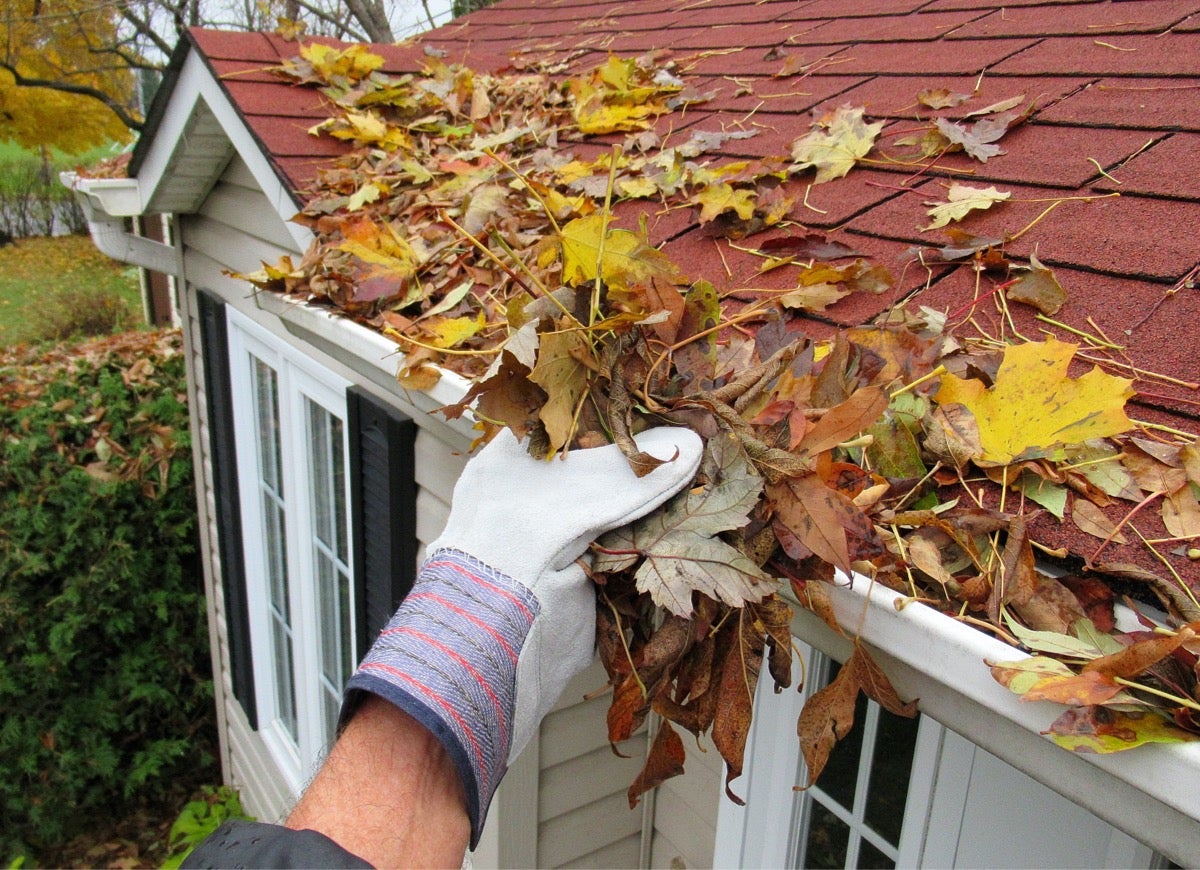
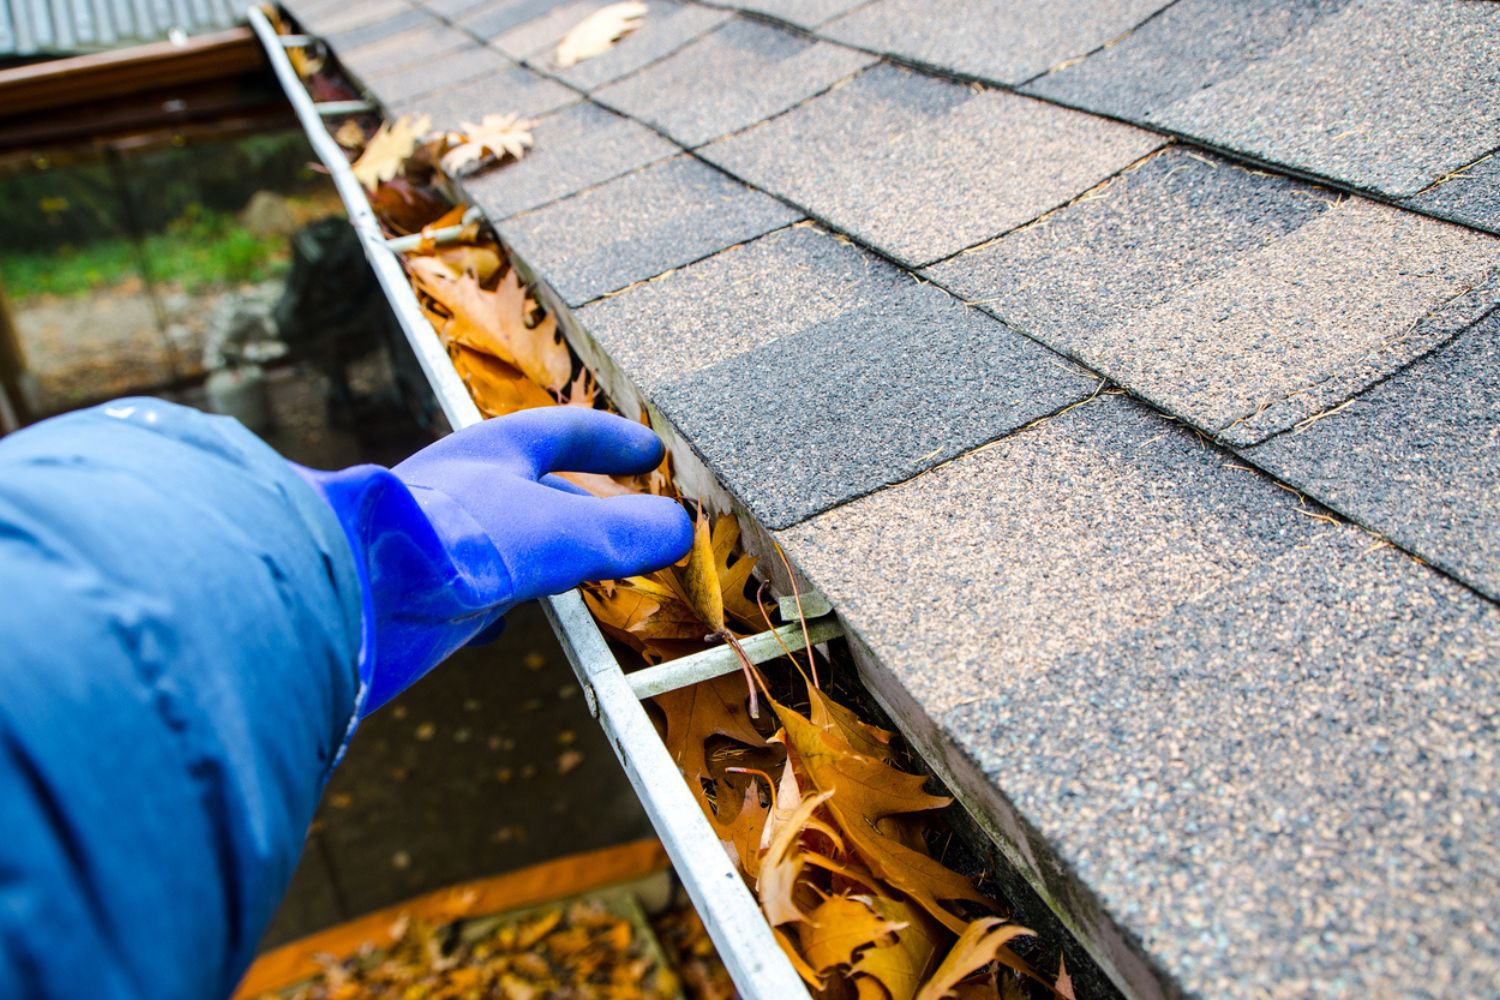
- Remove debris: Use a small hand rake or a gloved hand to remove any leaves, twigs, or other debris that may be blocking the gutters or downspouts. This will help ensure proper water flow during the cleaning process.
By properly preparing the area, you’ll create a safer and more accessible space to clean the black streaks off your gutters. Once you’ve completed these steps, you’re now ready to mix the cleaning solution that will effectively remove the black streaks. We’ll discuss the mixing process in the next section.
Mixing the cleaning solution
Creating the right cleaning solution is crucial to effectively remove the black streaks from your gutters. There are various options available, including homemade mixtures and store-bought products specifically designed for gutter cleaning. Here’s a step-by-step guide on how to mix the cleaning solution:
- Option 1: Homemade solution
- Fill a bucket with warm water. The water should be warm, but not too hot to handle.
- Add a mild detergent or dish soap to the water. Use approximately 1-2 tablespoons of detergent per gallon of water.
- If you’re dealing with tough black streaks, you can add white vinegar to the mixture. Use about 1 cup of vinegar per gallon of water and detergent.
- Stir the mixture until the detergent and vinegar are well combined.
- Option 2: Store-bought product
- Read and follow the instructions on the cleaning product’s packaging. Different products may have specific mixing ratios or application methods.
- Ensure that the cleaning product you choose is suitable for the type of gutters you have to avoid any damage.
Once you have mixed the cleaning solution, you’re one step closer to removing those stubborn black streaks from your gutters. In the next section, we’ll discuss how to apply the cleaning solution to effectively tackle the stains.
Read more: How To Clean Black Residue Off A Trampoline
Applying the cleaning solution
Now that you have prepared the cleaning solution, it’s time to apply it to your gutters and start removing the black streaks. Follow these steps to effectively apply the cleaning solution:
- Choose a starting point: Begin at one end of the gutter and work your way along its length. This ensures that you cover the entire gutter and don’t miss any areas.
- Dip the brush or sponge into the cleaning solution: Make sure the bristles or sponge are well saturated with the solution. However, avoid using excessive amounts of the mixture as it may lead to unnecessary runoff.
- Gently scrub the black streaks: Using a circular motion, apply the cleaning solution to the black streaks on the gutter surface. Focus on one small section at a time, applying light pressure to avoid damaging the gutters.
- Continue along the gutter: Move along the length of the gutter, applying the cleaning solution and scrubbing the black streaks as you go. Take your time and be thorough, ensuring that you cover all areas.
As you apply the cleaning solution and scrub the black streaks, you may notice that some stains are more stubborn than others. In such cases, allow the solution to sit on the stains for a few minutes before scrubbing again. This will help loosen and break down the dirt and algae.
If necessary, you can dip the brush into the cleaning solution again as you work your way along the gutters. Regularly rinse the brush or sponge in a bucket of clean water to remove any debris or buildup.
Once you have applied the cleaning solution and scrubbed the black streaks, it’s time to rinse off the gutters. In the next section, we’ll discuss how to properly rinse the gutters to remove the cleaning solution and remaining residue.
Use a mixture of equal parts water and white vinegar to scrub black streaks off gutters. Apply the solution with a brush or sponge, then rinse with water.
Scrubbing the black streaks
Scrubbing the black streaks on your gutters is an important step in the cleaning process to remove stubborn dirt, algae, mold, or mildew. Follow these steps to effectively scrub the black streaks and restore the appearance of your gutters:
- Select a suitable brush or sponge: Choose a soft-bristle brush or sponge that will be gentle on the gutter surface, but effective in scrubbing away the black streaks. Avoid using abrasive brushes or pads that can cause damage.
- Apply the cleaning solution: Dip the brush or sponge into the cleaning solution, making sure it is well saturated but not dripping excessively.
- Focusing on one small section at a time: Start at one end of the gutter and work your way along its length. Apply the cleaning solution directly to the black streaks and use gentle, circular motions to scrub the area.
- Vary your scrubbing technique: If the black streaks are particularly stubborn, you can vary your scrubbing technique. Try using small back and forth motions or applying slightly more pressure to dislodge the dirt and grime.
- Regularly rinse the brush or sponge: As you scrub, rinse the brush or sponge in a bucket of clean water frequently to remove any debris or buildup. This will help to prevent spreading dirt or contaminants along the gutters.
- Continue along the gutter: Move along the length of the gutter, applying the cleaning solution and scrubbing the black streaks until the entire gutter is clean and free of stains.
It’s important to be patient and thorough while scrubbing the black streaks off your gutters. Take your time and ensure that you cover all areas of the gutters. If necessary, you can reapply the cleaning solution to stubborn stains and scrub again.
Once you have finished scrubbing the black streaks, it’s time to rinse off the gutters to remove the cleaning solution and any remaining residue. In the next section, we’ll discuss how to effectively rinse the gutters.
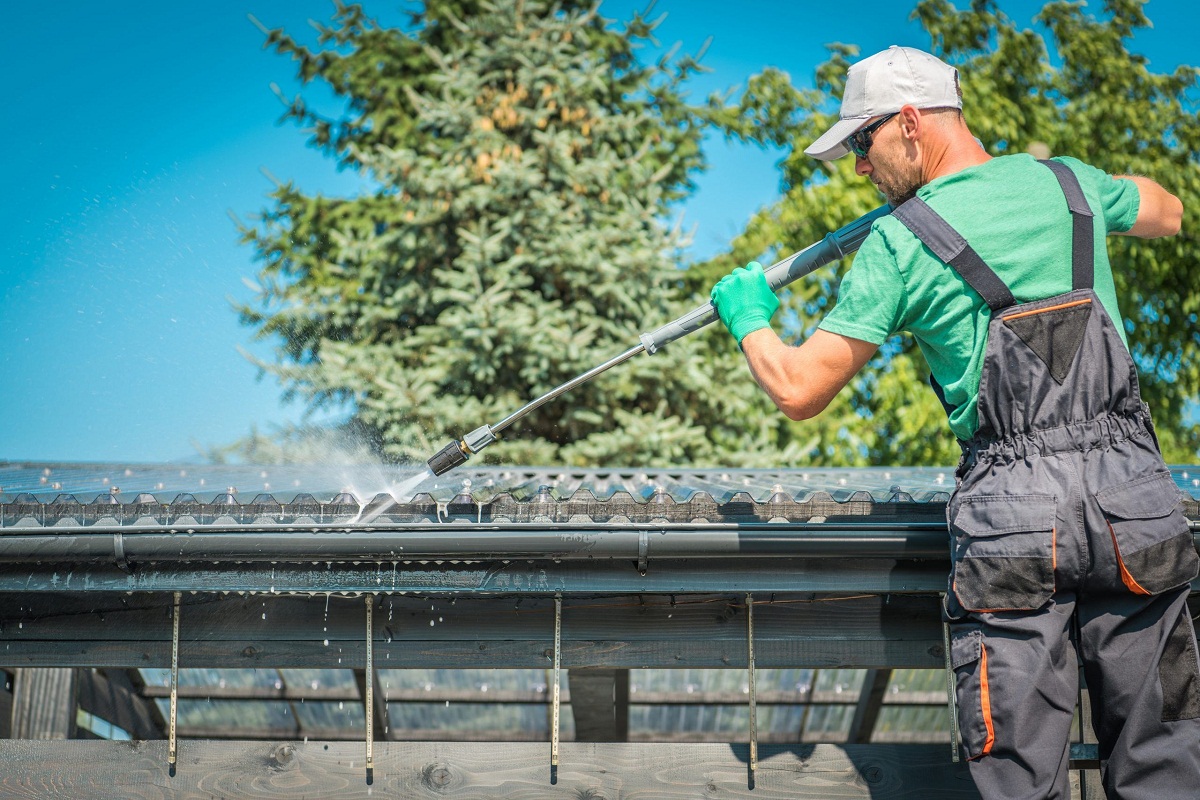
Rinsing the gutters
After scrubbing the black streaks off your gutters, it’s important to thoroughly rinse them to remove any remaining cleaning solution, dirt, and debris. Follow these steps to effectively rinse your gutters:
- Prepare your garden hose: Attach a spray nozzle attachment to your garden hose to create a strong stream of water for rinsing.
- Starting from one end: Begin at one end of the gutter and work your way along its length. This ensures that you cover the entire gutter and rinse off all areas.
- Aim the hose: Direct the stream of water from the hose towards the gutter, aiming it at a 45-degree angle. This angle helps to effectively clean and remove any remaining residue.
- Rinse thoroughly: Move the hose along the gutter, allowing the water to flush away the cleaning solution and any loose dirt or debris. Pay particular attention to the areas where the black streaks were most prominent.
- Check for clogs: As you rinse the gutters, keep an eye out for any signs of clogs or blockages. If you notice any, use the high-pressure spray of the hose to clear them out.
While rinsing the gutters, it’s important to be thorough and ensure that you remove all traces of the cleaning solution. This will help prevent the accumulation of residue and keep your gutters looking clean and well-maintained.
Once you have finished rinsing the gutters, it’s time to dry them and inspect for any remaining black streaks or areas that may require further attention. We’ll discuss these final steps in the next section.
Drying and inspecting the gutters
After rinsing the gutters, it’s important to properly dry them and inspect for any remaining black streaks or areas that may require further attention. Follow these steps to ensure your gutters are clean, dry, and in good condition:
- Remove excess water: Use a dry towel or rag to remove any excess water from the gutters. Pay attention to the corners and seams where water may accumulate.
- Allow air drying: Give your gutters time to air dry naturally. This will ensure that any remaining moisture evaporates and prevents the growth of new black streaks.
- Inspect for remaining black streaks: Once the gutters are dry, carefully inspect them for any remaining black streaks. If you notice any stains that were not completely removed, you can consider spot cleaning those areas using a gentle cleaning solution and a soft brush.
- Check for damage: While inspecting the gutters, also check for any signs of damage such as leaking joints, loose screws, or sagging sections. Address any necessary repairs promptly to maintain the functionality of your gutters.
- Clear debris: Take this opportunity to remove any remaining debris that may have been loosened during the cleaning process. Use a gloved hand or a small hand rake to clear out any leaves, twigs, or other objects that may have accumulated in the gutters.
By thoroughly drying and inspecting your gutters, you ensure that they are clean, free of black streaks, and in good condition. Regular maintenance and inspections will help prolong the lifespan of your gutters and prevent potential issues in the future.
Now that your gutters are clean and in good shape, it’s time to learn how to prevent black streaks from returning. We’ll discuss some preventive measures in the next section.
Preventing black streaks in the future
Now that you’ve successfully cleaned the black streaks off your gutters, you’ll want to take steps to prevent them from returning. Here are some preventive measures you can implement to keep your gutters looking clean and free from black streaks:
- Regular gutter maintenance: Make gutter cleaning a part of your regular maintenance routine. Clear out leaves, twigs, and other debris at least twice a year, or more frequently if you live in an area with heavy foliage.
- Trim nearby trees: Keep tree branches trimmed and away from your gutters. This will help minimize the amount of leaves and debris that can accumulate and contribute to the growth of black streaks.
- Invest in gutter guards: Consider installing gutter guards or screens to prevent debris from entering the gutters. These guards will allow water to flow freely while keeping out leaves, twigs, and other materials that can lead to black streaks.
- Clean your roof: Keep your roof clean and free from leaves, moss, and debris. This will help prevent the transfer of dirt and algae onto your gutters during rainfall.
- Monitor for signs of moisture: Regularly inspect your gutters for signs of moisture or standing water. Address any leaks or drainage issues promptly to prevent the development of black streaks caused by excessive moisture.
- Apply an algae-resistant coating: Consider applying an algae-resistant coating to your gutters. These coatings create a protective barrier and help prevent the growth of algae, mold, and mildew.
- Maintain proper drainage: Ensure that your downspouts are positioned to direct water away from your home’s foundation. This will prevent water from pooling near the gutters and causing moisture-related issues.
By implementing these preventive measures, you can significantly reduce the chances of black streaks appearing on your gutters in the future. Regular maintenance and proactive care will help keep your gutters clean, functional, and aesthetically pleasing.
Congratulations on successfully cleaning your gutters and learning how to prevent black streaks from returning. With these tips, you can maintain the beauty and integrity of your gutters for years to come.
Thank you for reading this comprehensive guide on cleaning black streaks off gutters. Remember, proper maintenance is key to keeping your gutters in optimal condition. Happy gutter cleaning!
Conclusion
Gutters are an essential part of any home’s exterior, and maintaining their cleanliness and functionality is crucial. Black streaks on gutters not only detract from the appearance of your home but also indicate potential maintenance issues and drainage problems. By following the step-by-step process outlined in this guide, you can effectively remove black streaks and restore the beauty of your gutters.
Understanding the causes of black streaks, gathering the necessary tools and materials, and properly preparing the area are key initial steps. Mixing the right cleaning solution and applying it to the black streaks with a gentle scrubbing motion ensures optimal results. Thoroughly rinsing the gutters and inspecting for any remaining stains or damage is essential before drying them and implementing preventive measures.
By taking the time to regularly maintain your gutters and adopt preventive measures, you can significantly reduce the chances of black streaks returning in the future. Clearing debris, trimming nearby trees, installing gutter guards, and maintaining proper drainage are just a few ways to keep your gutters clean and prolong their lifespan. Consider applying an algae-resistant coating to further protect your gutters from future streaking.
Remember, regular maintenance and proactive care is key to keeping your gutters clean, functional, and visually appealing. By following the guidance provided in this article, you can successfully clean black streaks off your gutters and prevent them from reoccurring, ensuring the longevity and efficiency of your gutter system.
Thank you for reading, and here’s to clean and streak-free gutters for years to come!
Frequently Asked Questions about How To Clean Black Streaks Off Gutters
Was this page helpful?
At Storables.com, we guarantee accurate and reliable information. Our content, validated by Expert Board Contributors, is crafted following stringent Editorial Policies. We're committed to providing you with well-researched, expert-backed insights for all your informational needs.

0 thoughts on “How To Clean Black Streaks Off Gutters”