Articles
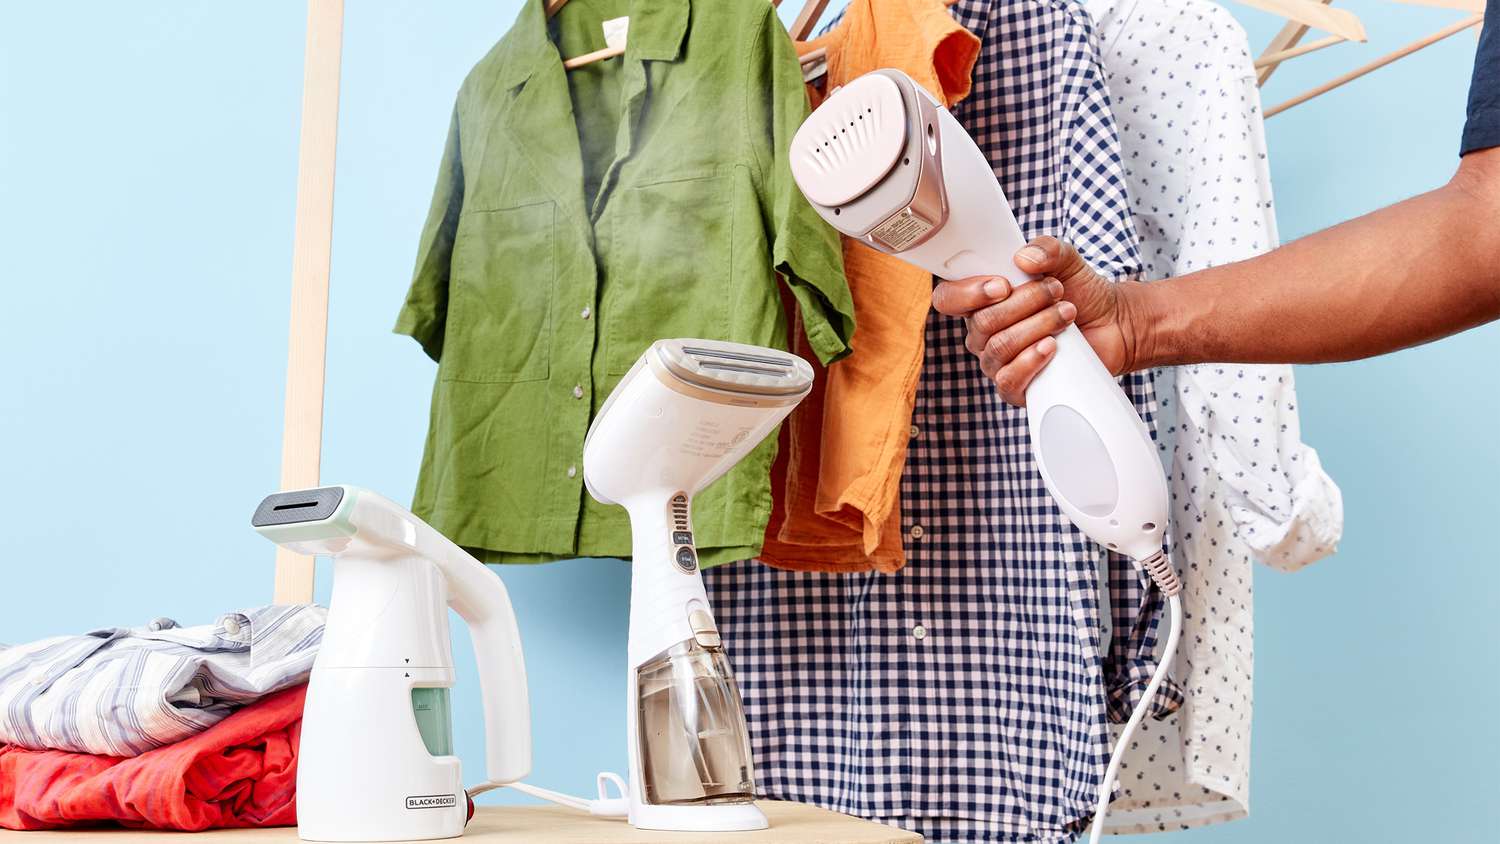
How To Clean Clothes Steamer
Modified: October 20, 2024
Discover the best techniques for cleaning your clothes steamer in this informative article. Keep your steamer in top condition with these step-by-step instructions.
(Many of the links in this article redirect to a specific reviewed product. Your purchase of these products through affiliate links helps to generate commission for Storables.com, at no extra cost. Learn more)
Introduction
A clothes steamer is a convenient and effective tool for removing wrinkles and freshening up your clothes. However, like any other appliance, regular cleaning and maintenance are essential to ensure optimal performance. Cleaning your clothes steamer not only extends its lifespan but also prevents mineral buildup, mold, and bacteria growth, which can affect the steamer’s functionality and, in turn, the quality of your steaming results.
In this article, we will guide you through the process of cleaning your clothes steamer step-by-step, providing you with practical tips and techniques to keep your steamer in excellent condition. Whether you have a handheld steamer or a standing garment steamer, these cleaning instructions will apply to most types and models.
By dedicating a small amount of time to clean your clothes steamer regularly, you’ll ensure that it continues to produce powerful and efficient steam, leaving your clothes wrinkle-free and looking fresh every time.
Key Takeaways:
- Regularly cleaning your clothes steamer is crucial for optimal performance, preventing mold and bacteria growth, and ensuring wrinkle-free, fresh-looking clothes every time.
- By following the step-by-step cleaning process, you can effectively remove mineral deposits, eliminate bacteria, and maintain a well-functioning and hygienic clothes steamer for years to come.
Read more: How To Use A Steamer For Clothes
Why Clean Your Clothes Steamer?
Keeping your clothes steamer clean is crucial for several reasons.
- Optimal Performance: Regular cleaning ensures that your clothes steamer functions at its best. Over time, mineral deposits from water, lint, and fabric fibers can accumulate inside the steamer’s components, such as the water reservoir, nozzle, and steam hose. This buildup can obstruct the flow of steam, leading to decreased steam output and weaker wrinkle-removing capabilities. By cleaning these parts regularly, you can maintain the steamer’s performance and ensure it functions at its full potential.
- Prevent Mold and Bacteria Growth: The warm and moist environment inside a clothes steamer can be a breeding ground for mold and bacteria. If left unchecked, these microorganisms can not only affect the smell and cleanliness of your steamer but can also transfer onto your clothes, potentially causing skin irritations or allergies. Regular cleaning and disinfecting of the steamer’s parts help eliminate these harmful contaminants, promoting a healthier and more hygienic steaming experience.
- Prolonged Lifespan: Like any other appliance, proper maintenance and cleaning can extend the lifespan of your clothes steamer. By regularly removing mineral deposits, preventing clogs, and keeping the internal components clean, you can prevent unnecessary wear and tear on the steamer, reducing the risk of malfunctions and breakdowns. This way, you can enjoy the benefits of a well-functioning clothes steamer for years to come.
- Better Steaming Results: A clean clothes steamer ensures that your garments receive the best treatment. By removing lint, fabric fibers, and mineral deposits, you can prevent these particles from transferring onto your clothes during the steaming process. This helps to avoid any potential staining or discoloration and ensures that your clothes come out looking fresh, clean, and wrinkle-free.
Now that you understand the importance of cleaning your clothes steamer, let’s move on to the steps involved in preparing and cleaning your steamer to maintain its optimal performance and longevity.
Preparing to Clean Your Clothes Steamer
Before you start cleaning your clothes steamer, it’s essential to take a few preparatory steps to ensure a safe and effective cleaning process.
- Unplug the Steamer: Always remember to unplug your clothes steamer from the power source before you begin the cleaning process. This is crucial for your safety and to avoid any accidental damage.
- Let the Steamer Cool Down: Steamers can become hot during use, so allow your clothes steamer to cool down completely before you start cleaning. This will prevent any burns or injuries caused by handling a hot appliance.
- Empty the Water Reservoir: If your clothes steamer has a water reservoir, make sure to empty it completely. This will prevent any water from leaking or spilling during the cleaning process.
- Prepare Cleaning Solutions: Depending on the type of clothes steamer you have, you may need specific cleaning solutions or materials. Prepare a mixture of mild dish soap and water or consult your steamer’s manual for any recommended cleaning solutions.
- Gather Cleaning Tools: To clean your clothes steamer effectively, gather the necessary cleaning tools. Typically, you will need soft microfiber cloths, cotton swabs, a brush with soft bristles, and a small container for soaking small parts.
Now that you have prepared your clothes steamer for cleaning let’s move on to the specific steps involved in cleaning the different parts of your steamer.
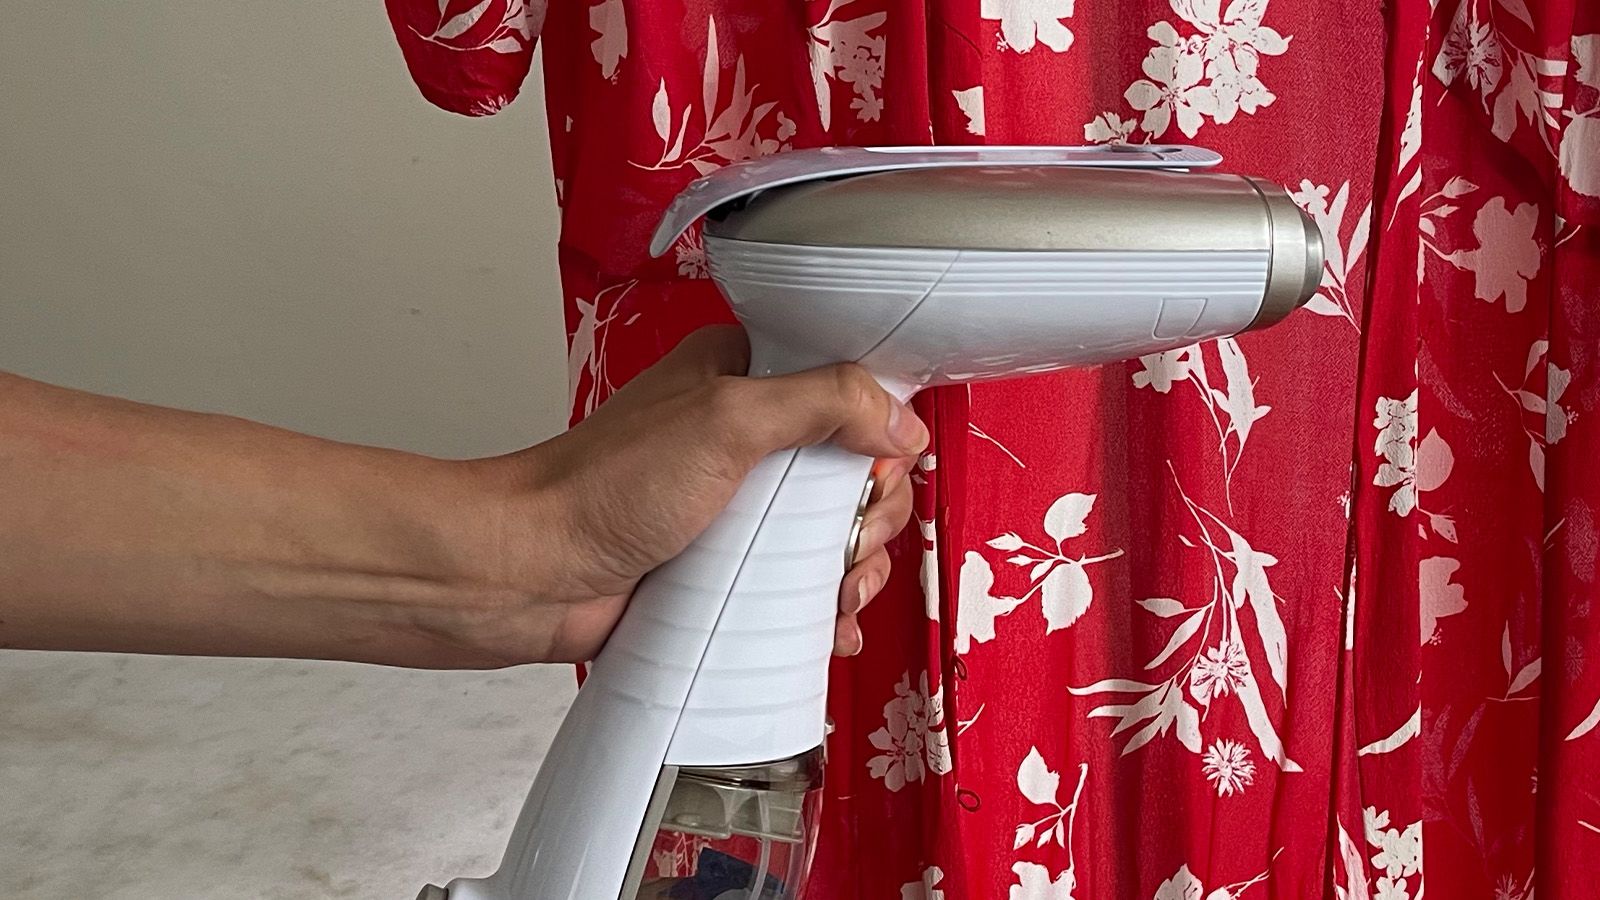
Cleaning the Exterior of Your Clothes Steamer
The exterior of your clothes steamer can accumulate dust, dirt, and other residues over time. Cleaning the exterior not only improves the appearance but also ensures that these contaminants don’t transfer onto your clothes during the steaming process.
- Wipe Down the Surface: Start by using a soft microfiber cloth slightly dampened with water or a mild cleaning solution to wipe down the exterior of the steamer. Gently rub the cloth over the surface, paying attention to any areas with visible dirt or stains. This will remove most surface-level grime and dust.
- Focus on Buttons and Controls: Use a cotton swab dipped in the cleaning solution to clean the buttons and controls of your clothes steamer. These areas can accumulate dirt and oils from handling, so make sure to clean them thoroughly. Be careful not to get the cleaning solution into any openings or electrical components.
- Clean the Cord: The cord of your clothes steamer can also get dirty or tangled. Wipe it down with a damp cloth and gently untangle any knots or kinks. Ensure that the cord is completely dry before plugging the steamer back in.
- Remove Tough Stains: If there are any stubborn stains or residues on the exterior of your steamer, mix a small amount of baking soda with water to form a paste. Apply the paste to the stained areas and gently scrub with a soft brush or cloth. Rinse with water and wipe clean. Be careful not to scrub too hard, as it may damage the surface.
- Dry Thoroughly: Once you have finished cleaning the exterior of your clothes steamer, make sure to dry it thoroughly before use. Use a clean, dry microfiber cloth to remove any excess moisture and allow the steamer to air dry completely.
Now that the exterior of your clothes steamer is clean, it’s time to move on to cleaning the water reservoir, an important component that needs regular cleaning to ensure efficient and effective steaming.
Cleaning the Water Reservoir
The water reservoir of your clothes steamer is where you pour water to generate steam. Over time, mineral deposits and bacteria can accumulate in the reservoir, affecting the performance of your steamer. Cleaning the water reservoir regularly will help maintain the steamer’s efficiency and prevent any unpleasant odors.
- Empty the Reservoir: Start by emptying any remaining water from the reservoir. Make sure the steamer is unplugged and the reservoir has cooled down before proceeding.
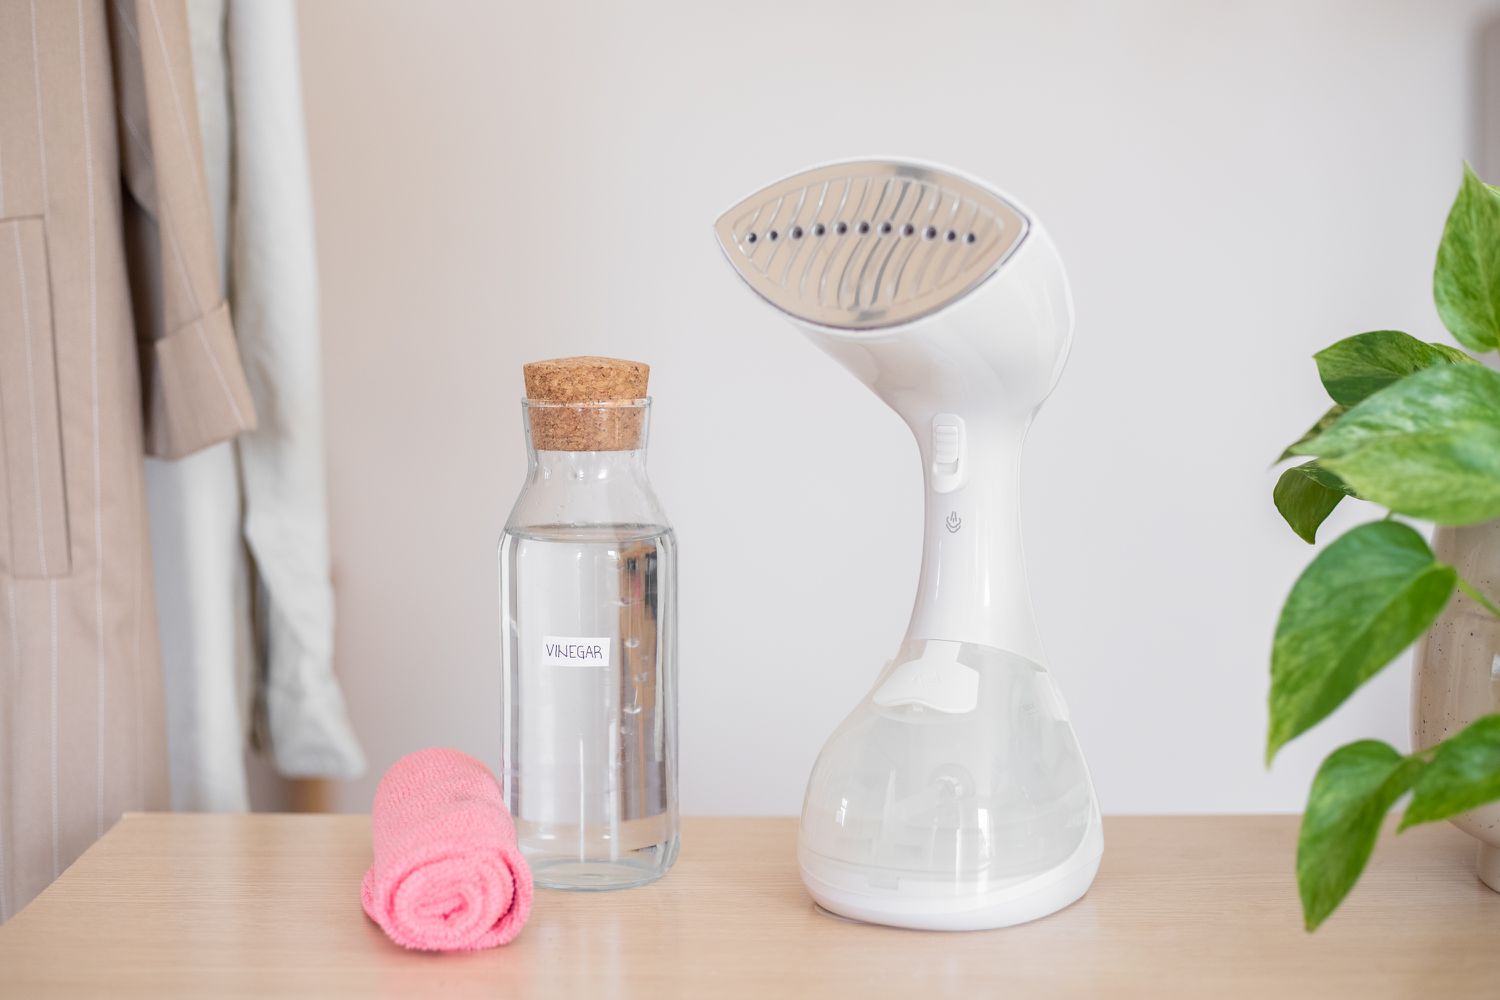
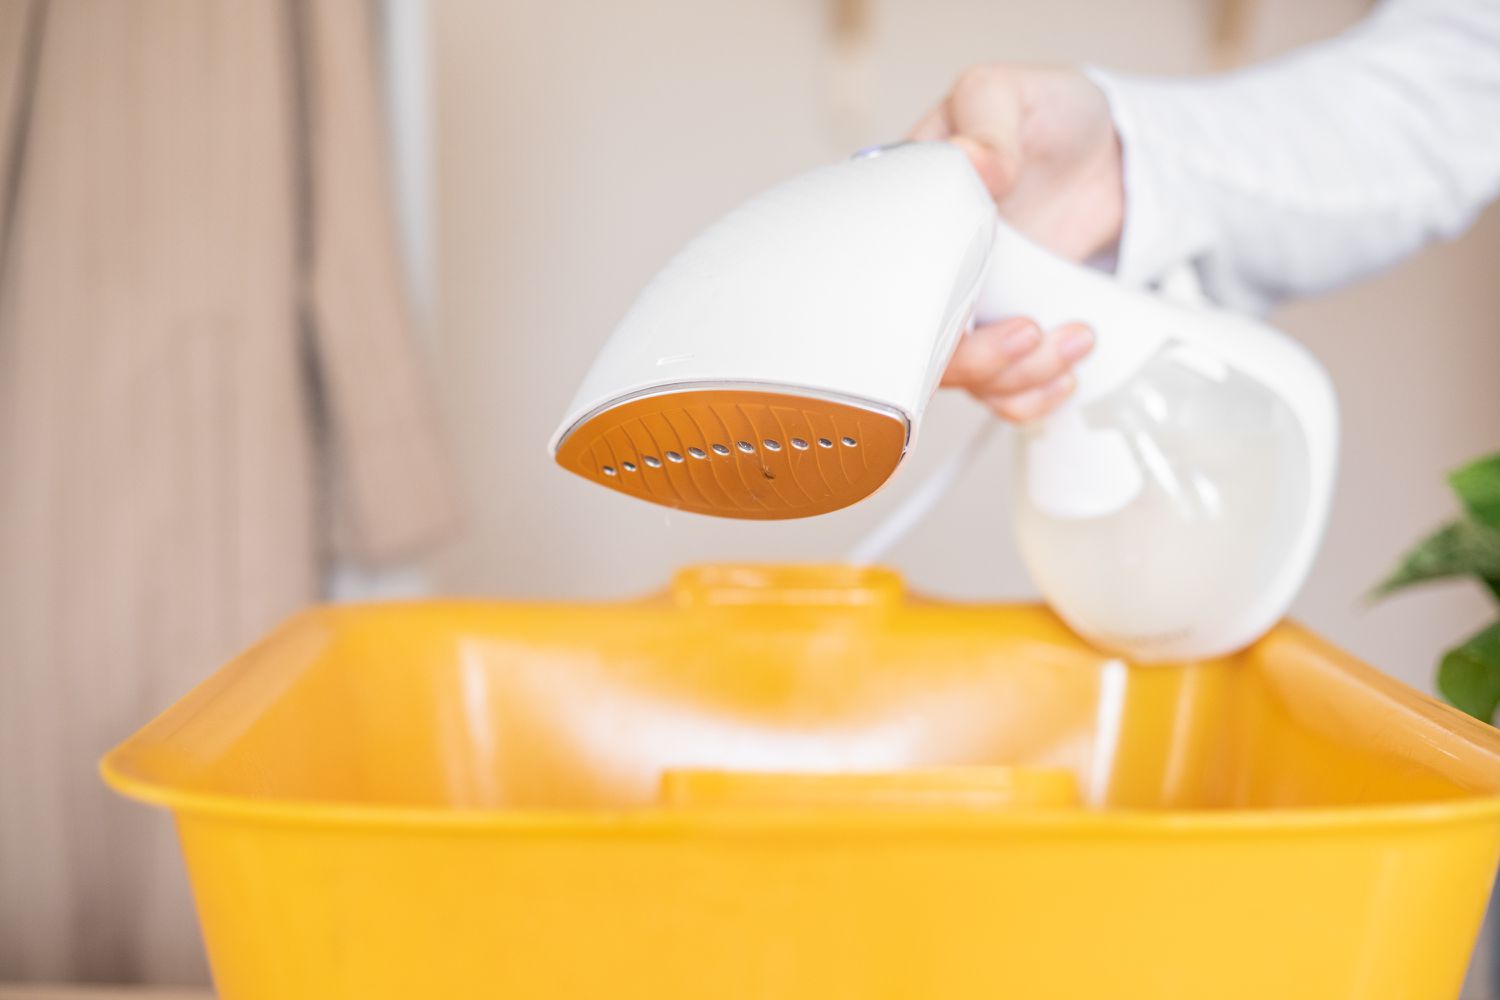
- Mix a Cleaning Solution: Prepare a cleaning solution by mixing equal parts of white vinegar and water. This natural solution helps dissolve mineral deposits and kill bacteria.
- Fill the Reservoir: Pour the cleaning solution into the reservoir, filling it up to at least the maximum fill line. If your steamer does not have a maximum fill line, fill it about halfway.
- Let it Soak: Allow the cleaning solution to sit in the reservoir for about 15-20 minutes. This gives enough time for the solution to break down any mineral deposits or bacteria.
- Scrub and Rinse: After soaking, use a soft brush or cloth to scrub the inside of the reservoir. Pay extra attention to any areas with visible buildup. Once you have scrubbed the reservoir thoroughly, empty the cleaning solution.
- Rinse with Water: Rinse the reservoir with clean water to remove any remaining cleaning solution or residue. Fill it with water, swish it around, and then empty the water. Repeat this process until the water runs clear, indicating that the reservoir is clean and free from any cleaning solution.
- Dry Completely: Once cleaned and rinsed, make sure to dry the reservoir completely before using your clothes steamer again. Wipe it with a clean, dry cloth and leave it open to air dry.
By properly cleaning the water reservoir of your clothes steamer, you maintain its functionality and ensure that the steam generated is clean and free from any impurities. Next, we’ll focus on removing mineral deposits that may have accumulated in your steamer.
To clean a clothes steamer, mix equal parts of white vinegar and water and pour it into the steamer. Let it sit for an hour, then turn on the steamer and let it run until the mixture is gone. Finally, rinse the steamer with clean water.
Read more: How To Clean Glass Cleaning Cloth
Removing Mineral Deposits from Your Clothes Steamer
Mineral deposits from hard water can build up inside your clothes steamer over time, affecting its performance and efficiency. These deposits can clog the steam vents, reducing the steam output and leaving mineral residue on your clothes. Regularly removing these mineral deposits is essential to keep your steamer running smoothly.
- Mix a Descaling Solution: Fill the water reservoir with equal parts of white vinegar and water. The acidic properties of vinegar will help dissolve the mineral deposits.
- Run the Steamer: Turn on the clothes steamer and let it heat up, allowing the descaling solution to circulate through the steamer’s internal components. Allow the solution to sit for about 5-10 minutes, giving enough time for the vinegar to dissolve the mineral deposits.
- Steam Out the Solution: Place a clean towel or cloth under the steam nozzle to catch any drips. Hold the steamer above a sink or basin and activate the steam function. Allow the steam to run for a few minutes until the vinegar solution has been completely steamed out. This process helps remove the loosened mineral deposits from the steamer.
- Flush with Water: After steaming out the descaling solution, fill the water reservoir with clean water. Run the steamer again, allowing the water to flush out any remaining vinegar and mineral residue. Repeat this process with fresh water until the water runs clear.
- Clean the Steam Vents: Use a cotton swab or a small brush to clean the steam vents on the nozzle. Gently remove any mineral buildup that may be blocking the vents, ensuring that steam can flow freely.
- Dry Thoroughly: Once you have removed the mineral deposits and flushed the steamer with clean water, make sure to dry all the components thoroughly. Use a clean, dry cloth to wipe down the exterior and leave the steamer open to air dry completely.
By regularly descaling your clothes steamer, you can prevent mineral buildup and ensure optimal steam output. Next, let’s move on to cleaning the steam nozzle and hose, as well as other attachments that come with your clothes steamer.
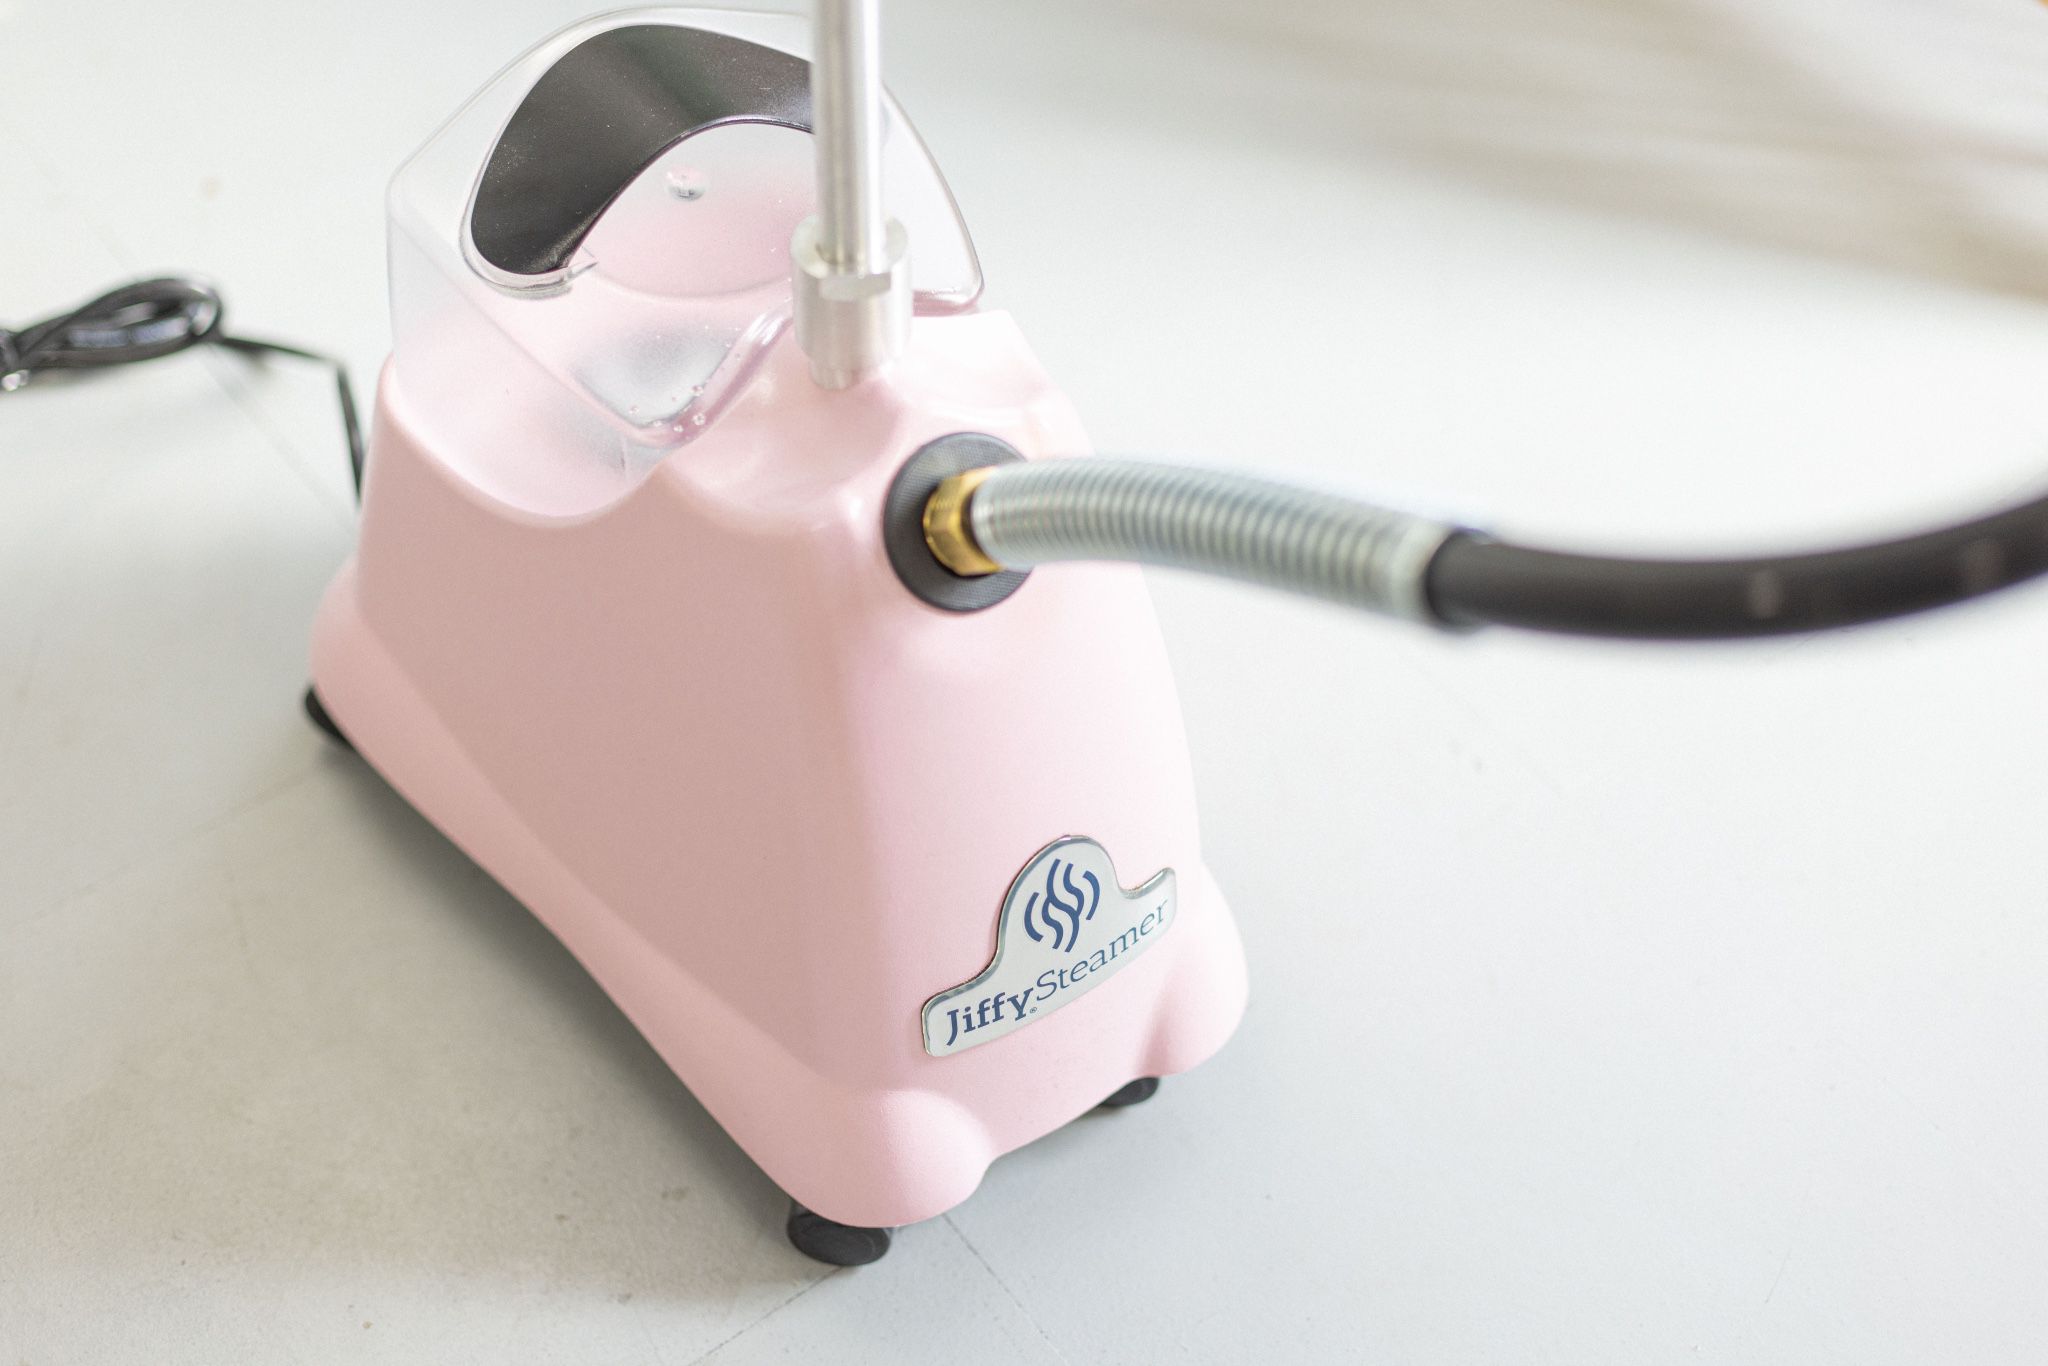
Cleaning the Steam Nozzle and Hose
The steam nozzle and hose are crucial parts of your clothes steamer, as they are responsible for delivering the steam to remove wrinkles from your garments. Over time, these components can accumulate mineral deposits and become clogged, affecting the steam flow. Cleaning the steam nozzle and hose will help maintain optimal performance and ensure that the steam is delivered efficiently.
- Detach the Nozzle and Hose: Depending on your clothes steamer model, you may need to remove the steam nozzle and hose. Consult the user manual for instructions on how to detach these parts properly. Make sure the steamer is unplugged before proceeding.
- Inspect for Buildup: Check the steam nozzle and hose for any visible mineral deposits or debris. If there is buildup, take note of the areas that need cleaning.
- Soak in White Vinegar: Fill a small container with white vinegar and submerge the steam nozzle and hose into it. Let them soak for about 15-20 minutes. The acidic properties of vinegar will help break down the mineral deposits.
- Brush and Rinse: After soaking, use a soft brush or toothbrush to gently scrub the steam nozzle and hose. Pay particular attention to areas with stubborn mineral deposits. Rinse thoroughly with clean water to remove any vinegar or sediment.
- Check for Blockages: Inspect the steam nozzle and hose for any blockages. Use a cotton swab or a pipe cleaner to carefully remove any remaining debris or mineral buildup from the openings. This will ensure that steam can flow freely through these parts.
- Dry Completely: After cleaning, make sure to dry the steam nozzle and hose completely before reattaching them to the steamer. Use a clean, dry cloth to remove excess moisture and leave them to air dry completely.
Once you have cleaned the steam nozzle and hose, it’s time to focus on other attachments that come with your clothes steamer, such as the fabric brush and lint remover.
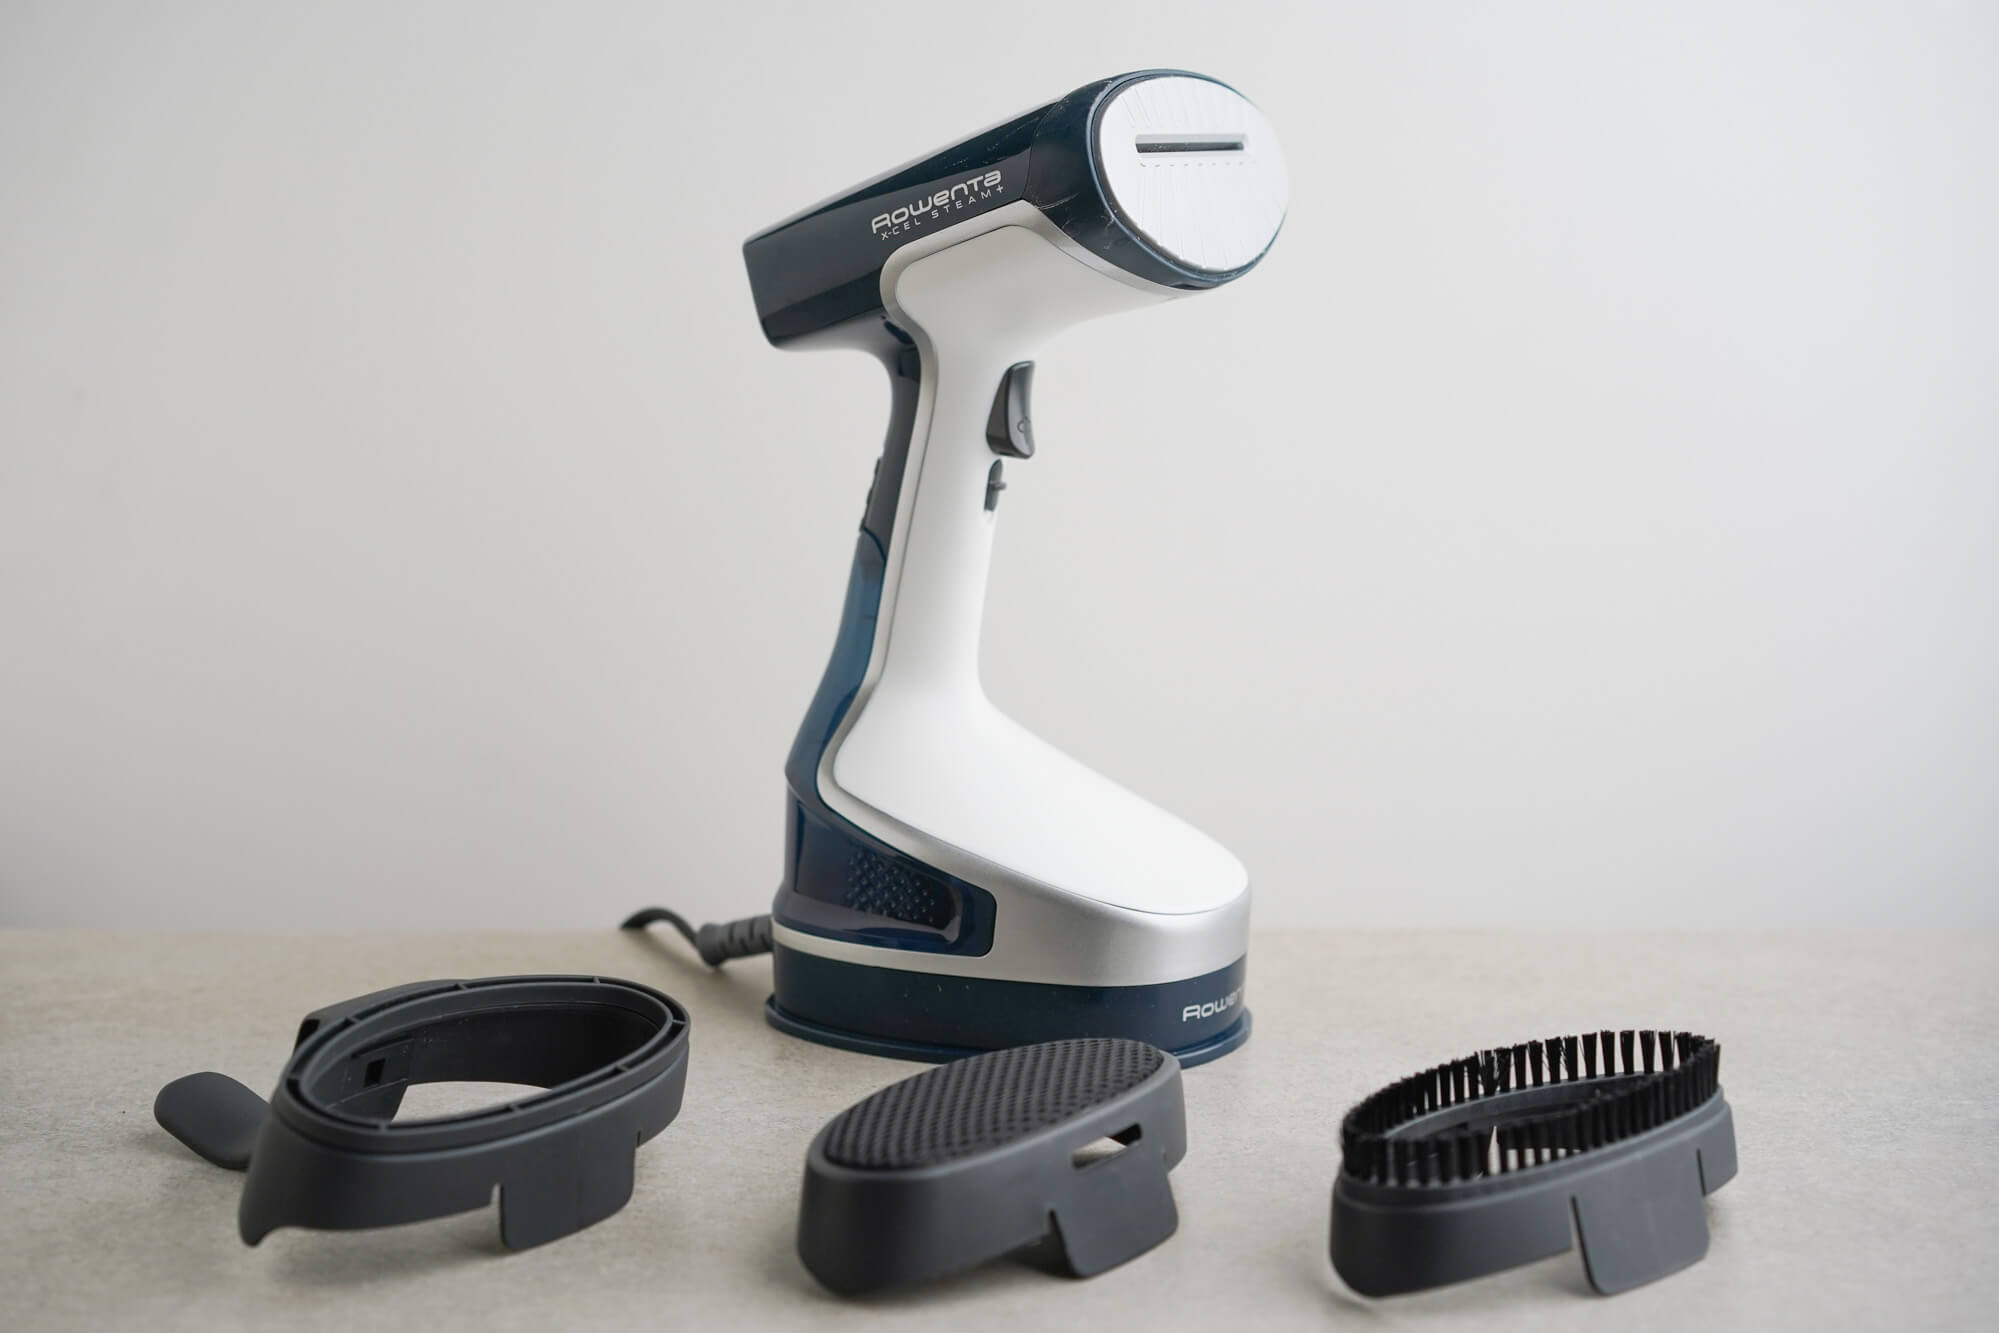
Cleaning the Fabric Brush and Lint Remover
The fabric brush and lint remover attachments are essential accessories that come with many clothes steamers. These attachments help to remove lint, pet hair, and fabric particles from your clothes, leaving them clean and presentable. Cleaning these attachments regularly is necessary to ensure their effectiveness and prevent any transfer of debris onto your garments.
- Remove from the Steamer: Start by detaching the fabric brush and lint remover attachments from the clothes steamer. Refer to your steamer’s manual for instructions on how to remove these accessories properly.
- Remove Loose Debris: Use your fingers or a small brush to remove any loose lint or hair trapped in the fabric brush and lint remover. Shake the attachments gently to dislodge any debris.
- Wash with Mild Soap: Fill a basin or sink with warm water and add a small amount of mild dish soap. Swirl the fabric brush and lint remover in the soapy water, ensuring that every part of the attachments is cleaned. Pay attention to any areas with stubborn debris.
- Rinse Thoroughly: Rinse the fabric brush and lint remover under clean water to remove any soap residue. Gently squeeze them to remove excess water. Repeat the rinsing process until the water runs clear.
- Dry Completely: After rinsing, pat dry the fabric brush and lint remover with a clean towel or cloth. Make sure to remove as much moisture as possible. Leave them to air dry completely before reattaching them to the clothes steamer.
By regularly cleaning the fabric brush and lint remover attachments, you can ensure their optimal performance and maintain the cleanliness of your clothes. Now, it’s time to reassemble your clothes steamer and perform a quick test before using it again.
Reassembling and Testing Your Clothes Steamer
Now that you have thoroughly cleaned the various components of your clothes steamer, it’s time to reassemble the steamer and perform a quick test to ensure that everything is working correctly.
- Reattach the Parts: Start by reattaching the steam nozzle, hose, and any other detached components back onto the clothes steamer. Make sure to follow the manufacturer’s instructions for proper reassembly.
- Secure Connections: Ensure that all connections are secure and tight. Double-check that the steam nozzle is properly attached to the hose, and there are no loose or detached parts.
- Fill the Reservoir: Fill the water reservoir with clean water up to the maximum fill line or the recommended level. Make sure not to overfill the reservoir.
- Plug in the Steamer: Plug the clothes steamer back into a power source. Wait for a few minutes to allow the steamer to heat up and generate steam.
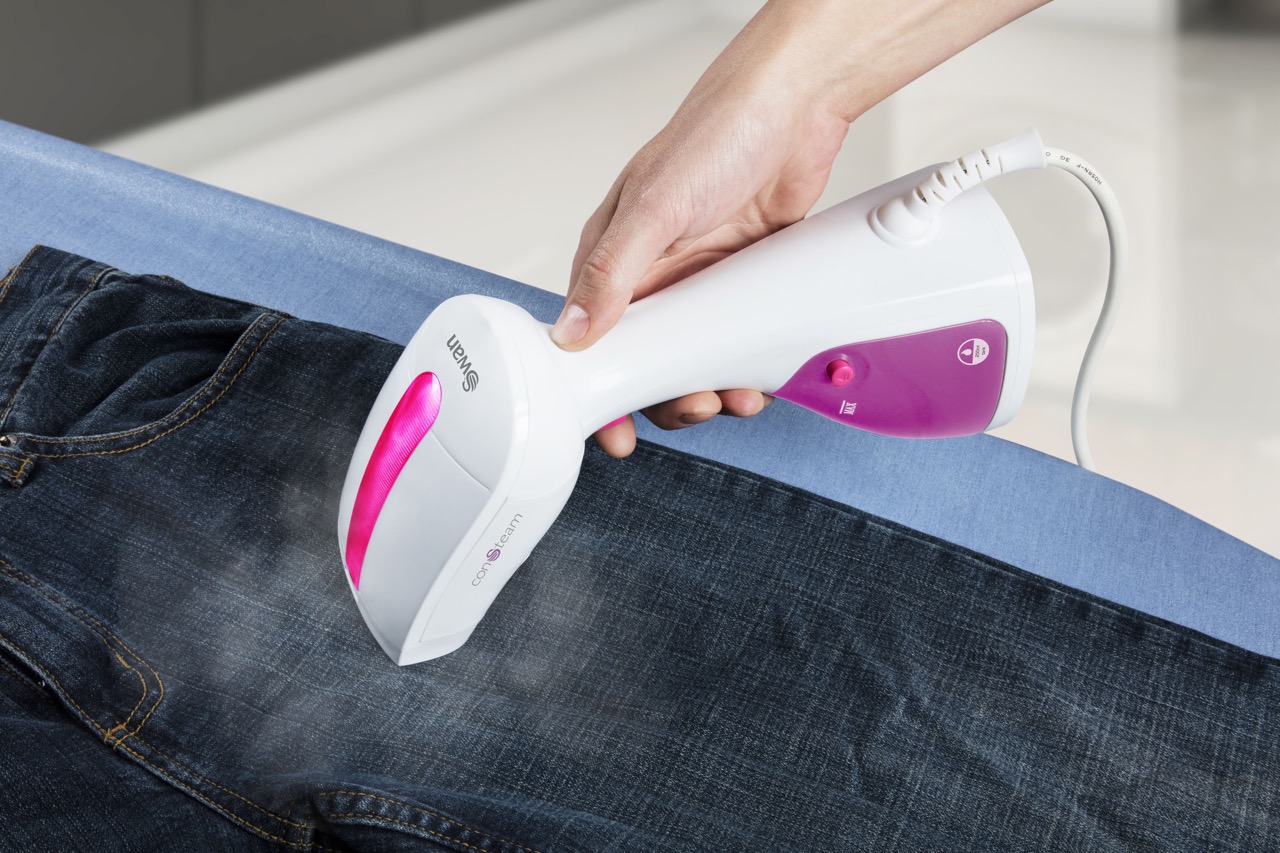
- Testing the Steam: To check if the steamer is working properly after cleaning, hold the steam nozzle over a sink or basin and activate the steam function. Observe if steam is being generated consistently and evenly. Check for any leaks or unusual noises.
- Check for Smooth Operation: Move the steamer around, ensuring that the hose and cord are flexible and not tangled. Test any additional functions or settings of your steamer to ensure they are working correctly.
- Steam on a Fabric Test: Choose a small, inconspicuous area of fabric and test the steamer on it. Check if the steam effectively removes wrinkles and if any water spots or stains are left behind. If everything looks good, you can confidently use your clothes steamer on your garments.
By reassembling and testing your clothes steamer, you can confirm that all the components are working correctly and that the cleaning process has not affected its performance. Now, you can enjoy using your clean and well-maintained clothes steamer to keep your clothes wrinkle-free and looking fresh!
Remember to repeat the cleaning process at regular intervals to maintain the efficiency and longevity of your clothes steamer, ensuring optimal steaming results for years to come.
Read also: 14 Amazing Clothe Steamer for 2025
Conclusion
Cleaning your clothes steamer is an essential task to maintain its performance, ensure hygienic steaming, and prolong its lifespan. By following the step-by-step cleaning process outlined in this article, you can effectively remove mineral deposits, eliminate bacteria, and keep your clothes steamer in excellent condition.
Regularly cleaning the exterior, water reservoir, steam nozzle, hose, fabric brush, and lint remover attachments will prevent clogs, maintain optimal steam output, and provide you with wrinkle-free and fresh-looking clothes every time. Additionally, proper cleaning helps prevent mold and bacteria growth, keeping your steamer and your garments free from any potential allergens or irritants.
Remember to always take the necessary preparatory steps, including unplugging the steamer and allowing it to cool down before cleaning. Use appropriate cleaning solutions and tools to ensure effective and safe cleaning of your clothes steamer.
By incorporating regular cleaning into your steaming routine, you’ll not only improve the performance and longevity of your clothes steamer but also enjoy the benefits of well-maintained and hygienic steaming for your clothes.
So, take the time to clean your clothes steamer, and you’ll be rewarded with wrinkle-free clothes that look fresh and well-maintained, boosting your confidence and leaving you ready to take on the day.
Frequently Asked Questions about How To Clean Clothes Steamer
Was this page helpful?
At Storables.com, we guarantee accurate and reliable information. Our content, validated by Expert Board Contributors, is crafted following stringent Editorial Policies. We're committed to providing you with well-researched, expert-backed insights for all your informational needs.

0 thoughts on “How To Clean Clothes Steamer”